Download ArcHaus™ Shelter
Transcript
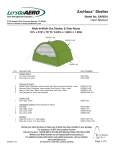
ArcHaus™ Shelter
Model No. SAR024
User Manual
2120 Naegele Road Colorado Springs, CO 80904
Visit our website at www.LetsGoAero.com
Walk-In/Walk-Out Shelter & Side Room
10’L x 6’W x 76”H / 3.04m x 1.82m x 1.93m
PSPAN-F-106
PSADD-F-106
PBASE-106
QTY
DESCRIPTION
PART NUMBER
1
2
FABRIC BODY:
Arc Cover (tent body)
Door Panel w/ mesh
COV-GRN
PANL-GRN
2
5
2
2
POLES & STRAPS:
Saddle Poles, Fiberglass, shock-corded Tent Pole w/connector ferrules - black
Spanner Poles, Fiberglass, shock-corded Tent Pole w/ C-clips - black
Base U-Tube Poles, Steel, chain-corded base Tent Pole - black
Web Strapping w/ quick clips attached
PSADD-F-106
PSPAN-F-106
PBASE-S-106
WEBSTRAP-106
1
CARRY BAG:
Carry bag - green
CBAG-106
1
1
4
2
UNIVERSAL PARTS: (Some attached to fabric)
Pole Bag
Stake Bag; 10.5in
Guy Lines; 2.5M
Guy Lines; 5.0M
PBAG-36IN
SBAG-11IN
GROPE-2.5M
GROPE-5M
1
1
STAKES:
Stake Set of ten, 7 in. steel stakes
Stake Set of four, 12 in steel stake
SSET-10ST-7IN
SSET-T120G-12IN
SAR024 1214
Review your parts list above to make sure all parts have been included in your package.
For assistance, do NOT return product to store.
Call Let’s Go Aero: 719-630-3800 or 877-464-2376 Monday-Friday 8:30-5:00 pm MST.
Mention your Model Number so our Representative may assist you.
For additional product information and related accessories, visit our website:
www.LetsGoAero.com
US Patent No. 8,001,987; patents pending.
Page 1 of 5
ASSEMBLY INSTRUCTIONS
Step 1: Frame Layout
Proper Frame layout is essential to make to sure
the ArcHaus sets up correctly and to prevent
damage.
Parts
(Qty: 2) Base U-Tube Poles (PBASE-S-106) (Steel chained-corded base tent pole).
(Qty: 2) Webbing Straps (WEBSTRAP-106)(Webbing
with quick clips attached, length adjustable)
Adjust Webbing Straps
length for a tensioned fit for
enhance structural strength
and zipper support.
Step 2: Arc Saddle Assembly
Parts
(Qty: 2) Saddle Poles, shock-corded (PSADD-F-106)
(Tent Pole with connector ferrules)
Step 3: Cover Install
Parts
(Qty: 5) Spanner Poles, shock-corded (PSPAN-F-106)
(Tent pole with C-Clips).
(Qty: 1) Arc Cover (Tent Body)
- Unzip both door end panels to remove them from the Arc Cover
- Lay Arc Cover inside Frame perimeter
- Slide Spanner Pole under center of cover, lift cover and
clip center pole onto Saddle tubing.
- Repeat with the remaining four poles.
Step 4: Position Fitted Cover
- Align Cover seams with Saddle tubing to center cover.
- Position ground fabric and bungee cord under and
around U-Tube ends.
- Align U-Tube corner tubing in the cover’s reinforced
corners
- Connect the cord ring and bungee hook in each
corner. The cord ring must be oriented to the
inside of the Saddle Poles as shown in diagram below.
Connect Saddle
Poles to each end of
U-Tubes. Stand on
Webbing Straps while
inserting Saddle Poles.
Page 2 of 5
Step 5: Connect and Engage Tension System
- Clip ground fabric wrap to the Arc Cover.
- Tension bungee on each end to draw Cover
tightly and around the Arc Frame.
Step 6: Attach Modular Door End Panels
Parts
(Qty: 2) Door Panels with mesh.
Zip on and off end panels to inside zipper of Arc Cover at either or both sides. The ArcHaus™ may
be used with or without the end panels. Be sure to stake the ArcHaus™ corners and use guy lines.
Note that the outer zipper may be used for connecting two ArcHauses together with the ZipperMate™ Extension option.
Contact Let’s Go Aero for purchasing information.
Step 7: Stake the Guy Lines & Corners of the ArcHaus™
Locate the Guy Lines on all four sides of the tent. Untie the
Guy Lines and loop it into a stake that is provided. Extend
the Guy Line and drive the stake into the ground securing
the Guy Line.
Locate the loops at tent corners and drive the 12” stakes
supplied at each corner.
In windy conditions, use more heavy-duty stakes for reinforcement.
Available at your local retail outfitter or through Let’s Go Aero.
IMPORTANT NOTICE
Always stake down tent to prevent wind pull. When using on
pavement, use sand bags or comparable objects to anchor.
Page 3 of 5
As a valued customer, your satisfaction is very important to us. We welcome your feedback and await your responses, suggestions, and
recommendations. Email us via our service team: [email protected]
WE ADVISE YOU TO ASSEMBLE THIS PRODUCT AT LEAST ONCE AT HOME BEFORE GOING ON A TRIP. Obtaining a familiarity with the assembly and disassembly processes will help ensure your satisfaction and ease concerns you may have should you find
yourself setting up in the dark or adverse weather conditions.
GET THE MOST ENJOYMENT FROM YOUR PRODUCT BY READING THIS OWNER’S MANUAL THOROUGHLY; THEN FOLLOW
OUR CAMPING SUGGESTIONS OUTLINED BELOW.
IMPORTANT NOTICE: You may compromise the original FIRE RETARDENCY and WATER REPELLENCY
protective coatings when you apply sprays or other chemical treatments to your tent.
This fabric has been factory-treated and is HIGHLY WATER-REPELLANT; however, it is NOT WATERPROOF.
All tents can experience seam leakage during wet weather. If you desire additional moisture protection, use a
seam sealing compound ONLY; be sure to follow the manufacturer’s directions. We recommend sealing your
tent during your initial setup and prior to each camping season. Seam Sealer Compounds can be purchased at
your local camping products retailer.
THIS FABRIC IS NOT WATERPROOF!
Your product‘s fabric is a synthetic material that has been treated and
is not only highly-resistant to the sun’s Ultraviolet (UV) light but also
highly water-repellant in light rain conditions. Insure a successful and
enjoyable camping experience by heeding the following tips:
• Keep objects from touching the inside, as objects will
“draw in” moisture at the point of contact.
• “Prep” your product where necessary with a recommended
seam sealing compound – refer to the seam sealing
information in DO NOT SPRAY section of this owner
manual.
Important: Prolonged exposure to sunlight that causes UV damage
and/or the use of non-recommended foreign substances on synthetic
material may damage the fabric properties and IS NOT COVERED BY
THE LIMITED WARRANTY.
OUR RECREATIONAL PRODUCTS ARE CONSTRUCTED USING
CUSTOM SPECIFICATIONS. However, they are not engineered for
extreme weather, climates or environments. Modification, abuse, and
inclement or “surprise” weather conditions may make additional precautions necessary. Here are some tips should you find yourself preparing
for adverse conditions:
Make sure any guy lines/ropes on your structure are well-secured in
the ground and lines/ropes are sufficiently “taught” between structure
and stake; adjust where needed. Facing periods of heavy winds?
Secure tent loops and guy lines/ropes with extra stakes and/or
heavier-duty ones as necessary.
Check the corners of the roof fabric and make sure roofline is
properly positioned on framing. Use ALL provided methods of securing your fabric to its framing: nylon fastener strips, ties, and guy lines/
ropes where located. Storms or steady rains may collect in water
pockets on the roofline. Water adds weight, and weight weakens the
overall structure. Avoid possible collapse by maintaining a watchful
eye and removing any water accumulation that may occur.
WARNING: KEEP ALL FLAME AND HEAT SOURCES AWAY FROM THIS
PRODUCT FABRIC. THIS FABRIC IS NOT FIREPROOF! It is made with
flame resistant fabric, which meets CPAI-84 specifications. The fabric may
burn if left in continuous contact with any flame source. The application of
any foreign substance to the fabric may render the flame-resistant properties ineffective.
Do NOT ERECT NEAR an open flame. NEVER use any fuel burning, oxygen consuming devices, or any device that produces fumes – including,
but not limited to: cooking stoves, lanterns, candles, hibachis, or heaters
– in or around your product. Inhalation of fumes may result in carbon monoxide poisoning, injury and/or death.
Your product is NOT machine washable. Your product is NOT machine
dryable.
One of the easiest ways to damage your product is storing it while wet. If
you must close camp in the rain, follow these guidelines carefully:
• As Soon As Possible: Open your product and ensure that
every area of fabric is clean and completely dry before roll
ing up for storage.
• If necessary, hang product outside or loosely drape over a
ladder in your garage or spare room for a few days, turning
it inside and out to prevent trapping pockets of water or
debris.
• Use a soft brush to wipe away surface dirt.
To clean your product: Hand wash using a mild dishwashing soap and
softbristle brush, then allow the fabric to completely air dry.
Don’t neglect the frame: Wipe down all parts – steel, plastic, and fiberglass
- before putting away for next season’s use. Salts from ocean air can and
do affect damage if not dealt with as quickly as possible.
Storing a wet fabric for as little as 24 hours in warm weather is likely to
cause fabric to mildew. Once mildew sets in, the stains are permanent.
Stains cannot be removed without potential harm to the fabric’s coatings;
chemicals or cleaning agents used to remove dirt and stains may irreversibly harm the fabric.
Salts, mildew and other causes and subsequent effects are NOT covered
under the limited warranty.
Page 4 of 5
TROUBLESHOOTING GUIDE
PROBLEM
1. CONDENSATION
2. MILDEW
3. REPAIRING A TEAR
4. FAULTY ZIPPER
SOLUTION
THIS IS CAUSED BY LOWER TEMPERATURES ON OUTSIDE OF PRODUCT COMBINED WITH BODY HEAT ON
INSIDE OF PRODUCT. WHEN THIS OCCURS, AVOID TOUCHING WALLS TO REDUCE CONTACT LEAKAGE.
LEAVING DOORS AND WINDOWS OPEN WILL REDUCE CONDENSATION.
TO AVOID MILDEW, NEVER STORE YOUR PRODUCT WET OR DAMP. HOWEVER, IF MILDEW OCCURS, USE
A SOFT BRISTLE BRUSH OR SPONGE WITH MILD SOAP TO CLEAN. LET DRY IN THE SUNLIGHT AND APPLY
SEAM SEALER COMPOUND ON INSIDE SEAMS.
FOR SMALL TEARS USE A SELF-ADHESIVE PATCH KIT OR POLYURETHANE BASED SEALER COMPOUND. WE
RECOMMEND A REPAIR SHOP FOR LARGER TEARS.
ALL OF OUR TENTS COME WITH SELF-REPAIRING NYLON COIL ZIPPERS. IF THE ZIPPER SEPARATES, YOU
CAN MOVE THE SLIDER TO THE BEGINNING OF THE ZIPPER TAPE AND REWORK THE ZIPPER.LOCAL AWNING AND UPHOLSTERY REPAIR SHOPS MAY BE ABLE TO ASSIST YOU.
WARNING
This Tent/Shelter has been developed and is intended to provide protection from sun and light rain. DO NOT use any
gas or flame sources under or near this product. This product is NOT WATERPROOF. Excess water build-up can
cause the frame system to become unstable, and collapse, causing injury. Any personal accessories or modifications
to product should be removed before the onset of inclement weather such as heavy rain, wind, lightning, hail, snow,
etc. This product should be completely dismantled to avoid permanent damage to product components and avoid any
possibility of personal injury. This product is not a toy. This product is not designed for use by children without adult
supervision. Under no circumstances should this product be used as a permanent or temporary storage facility for
children’s toys, garden tools, personal belongings or similar valuables. Consumer-made modifications for extended
use, i.e. permanently securing to platforms and/or Consumer’s failure to follow stated guidelines, will invalidate
any Limited warranty, expressed or implied.
Limited 6 Month Warranty
If your product does not work properly because of a defect in materials or workmanship, Let’s Go Aero Inc. will, for 6 months
from the date of purchase, at its option either (a) repair our product with new or refurbished parts, or (b) replace it with a
new product. The decision to repair or replace will be made by Let’s Go Aero Incorporated. Let’s Go Aero reserves the right
to make substitutions to warranty claims if parts are unavailable or obsolete.
If repair is needed during the limited warranty period, the purchaser will be required to furnish a sales receipt as proof of
purchase indicating date of purchase, amount paid, and place of purchase. Product will not be covered under warranty due
to damages resulting from misuse, excessive or abusive usage, and/or inclement weather conditions (i.e. windstorms, hurricanes, lightening storms, tornadoes). In such events, the consumer assumes cost of needed parts. Let’s Go Aero Inc. is not
responsible for normal wear and tear, zipper exhaustion, or the natural breakdown in materials that occurs with extended
use.
UNDER NO CIRCUMSTANCES SHALL LET’S GO AERO INC BE LIABLE FOR ANY INCIDENTAL OR CONSEQUENTIAL
DAMAGES. Some states do not allow the exclusion or limitation of incidental or consequential damages, so the above
limitation may not apply to you.
LET’S GO AERO INC EXPRESSLY EXCLUDES ALL WARRANTIES, INCLUDING, BUT NOT LIMITED TO, ANY IMPLIED
WARRANTIES OF MERCHANTABILITY AND FITNESS FOR A PARTICULAR PURPOSE. Some states do not allow the
exclusion or limitation or implied warranties, so the above limitation may not apply to you.
HOW TO OBTAIN WARRANTY SERVICE: Call Let’s Go Aero at 719-630-3800 or 877-464-2376 during business hours.
Email [email protected]. You must have a copy of your purchase receipt from an authorized dealer (or Let’s Go
Aero if purchased directly from us) as proof. An RMA (Return Merchandise Authorization is required for warranty services.
No warranty is given for purchases outside of the United States and Canada.
© Copyright 2012 Let’s Go Aero, Inc.
Page 5 of 5


