1
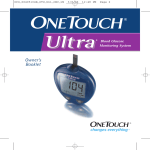
Ultra Owner’s Booklet Blood Glucose Monitoring System Important Safety Information To be sure your meter is working properly, EVERY time you turn it on confirm that: w All segments are visible in the display check display check Example w The unit of measure is correct (mg/dL) w The date and time are correct unit of measure time date Example w The code number on the meter display matches the code number on the test strip vial Example OneTouch® Ultra® System Owner’s Booklet i Read this first Each time you turn on your meter, the unit of measure will appear on the display with the R symbol. The unit of measure will also appear under every test result. You may misunderstand your blood glucose results if your meter is set to the incorrect unit of measure. Your meter’s unit of measure should be set to mg/dL. If your meter is set to the correct unit of measure, “mg/dL” will appear on the display. Your test result will not include a decimal point (Fig. 1). Do Not change this setting – this is the correct unit of measure for the United States. Fig. 1: mg/dL milligrams/deciliter no decimal point ii Fig. 2: mmol/L millimoles/liter decimal point If your meter is set to the other unit of measure, “mmol/L” will appear on the display. The test result will include a decimal point (Fig. 2). Unless your health care professional has told you to use this unit of measure, Do Not test your blood glucose. Call LifeScan Customer Service at 1 800 227-8862 immediately for assistance. Always confirm that the unit of measure is in mg/dL every time you test your blood glucose level. Use of the wrong unit of measure may cause you to misinterpret your blood glucose level, and may lead to incorrect treatment. iii Dear OneTouch® Ultra® System Owner: You have chosen one of the best blood glucose monitoring systems available. This booklet has important information you must know about the OneTouch® Ultra® System. Please read it carefully. Blood glucose monitoring plays an important role in diabetes control. A longterm study showed that keeping blood glucose levels close to normal can reduce the risk of diabetes complications by up to 60%.* The results you get with the OneTouch® Ultra® System can help you and your health care professional monitor and adjust your treatment plan to gain better control of your diabetes. A warranty registration card is included with your system. Please complete and return promptly to receive a gift. You may also complete product registration online at www.OneTouchDiabetes.com. *American Diabetes Association position statement on the Diabetes Control and Complications Trial (1993). iv Table of Contents Downloading Test Results to a About Your New System The Complete OneTouch® Ultra® Blood Glucose Monitoring System OneTouch® Ultra® Blood Glucose Meter OneTouch® Ultra® Meter Display OneTouch® Ultra® Test Strips Before Testing Checking the Meter Display Coding the Meter Checking the System with Control Solution vi Personal Computer Comparing Meter and 4 Laboratory Results 5 6 Meter Set-up 8 10 10 10 13 20 Preparing the Lancing Device 21 Fingertip Blood Sampling 24 Forearm Blood Sampling 25 Step-by-Step Test Procedure 28 Discarding Used Test Strips and Lancets 33 Special Messages 34 Testing Your Blood Using the Meter Memory 38 40 42 Caring for Your OneTouch® Ultra® System 48 Meter Lancing Device Test Strips and Control Solutions Battery 48 48 49 49 Display Messages and Problem-Solving Guide 52 Specifications 62 Guarantee 63 Index 64 36 v About Your New System The OneTouch® Ultra® System uses the latest blood glucose monitoring technology. It measures the glucose content of a blood sample by means of an electrical current produced in the test strip and measured by the meter. Test results are “plasma-calibrated.” This makes it easier for you and your diabetes-care team to compare your meter results with laboratory tests. If you have been using another type of meter–one that provides whole-blood results–you may notice that your test results with the OneTouch® Ultra® System are about 12 % higher. vi The OneTouch® Ultra® Blood Glucose Monitoring System consists of the OneTouch® Ultra® Blood Glucose Meter, OneTouch® Ultra® Test Strips (may be sold separately), and OneTouch® Ultra® Control Solution (may be sold separately). These products have been designed, tested, and proven to work together to produce accurate blood glucose results. Use only OneTouch® Ultra® brand test strips and control solution with your meter. mCAUTION: If you cannot test due to a problem with your testing supplies, contact your health care professional or LifeScan Customer Service at 1 800 227-8862. Failure to test could delay treatment decisions and lead to a serious medical condition. 1 The OneTouch® Ultra® System is intended for use outside the body (in vitro diagnostic use). It should be used only for testing fresh capillary whole blood samples for glucose (sugar). It should not be used for the diagnosis of diabetes or for testing newborns. mCAUTION: Before using any product to test your blood glucose, read all instructions and practice the test. Do all quality control checks as directed and consult with a diabetes health care professional. These recommendations apply to all blood glucose monitoring systems and are supported by the American Association of Diabetes Educators, the American Diabetes Association, the U.S. Food and Drug Administration, and the Advanced Medical Technology Association. Important Information w Dehydration: Severe dehydration resulting from excessive water loss may cause false low results. If you believe you are suffering from severe dehydration, consult a health care professional immediately. 2 w Low glucose results: If your test result is lower than 70 mg/dL or is shown as LO, it may mean hypoglycemia (low blood glucose). This may require immediate treatment according to your health care professional’s recommendations. Although this result could be due to a test error, it is safer to treat first, and then repeat the test. w High glucose results: If your test result is greater than 180 mg/dL or is shown as HI, it may mean hyperglycemia (high blood glucose). If you do not have symptoms, first repeat the test. Your health care professional can work with you to decide what actions, if any, you should take if you continue to get results higher than 180 mg/dL or if you have symptoms. w Repeated unexpected results: If you continue to get unexpected results, check your system with control solution. See Checking the System with Control Solution on pages 13–19. You can also check averages and previous results, including date and time, to determine the validity of your results. If you are experiencing symptoms that are not consistent with your blood glucose results and you have followed all instructions in this booklet, call your health care professional. Never ignore symptoms or make significant changes to your diabetes control program without speaking to your health care professional. w Hematocrit: A hematocrit (percentage of your blood that is red blood cells) that is either very high (above 55%) or very low (below 30%) can cause false results. mWARNING: Keep the meter and testing supplies away from small children. The battery door, test strips, lancets, protective covers on the lancets, and control solution vial cap are choking hazards. 3 The Complete OneTouch® Ultra® Blood Glucose Monitoring System OneTouch® Ultra® Meter Owner’s Booklet Lancing Device If another type of lancing device was included, see the separate instructions that came with that lancing device. Optional Clear Cap 4 Sterile Lancets OneTouch® Ultra® Control Solution (may be sold separately) OneTouch® Ultra® Test Strips (may be sold separately) Carrying Case Warranty Registration Card Logbook OneTouch® Ultra® Blood Glucose Meter DISPLAY Symbols, simple messages, and test results appear here. TEST PORT The meter turns on when you insert the OneTouch® Ultra® Test Strip here. M BUTTON Used to enter into: w set-up mode w memory mode C BUTTON Used to: wchange time, date, and code number wmark control solution tests wreview test results in memory DATA PORT Used to download your test results to a computer. 5 OneTouch® Ultra® Meter Display ctl Indicates a control solution test result. Blood drop Symbol Tells you when to apply the sample. code Appears with the code number of the test strips. Check your code every time you test. Battery Symbol Warns when the battery is low or must be replaced. 6 DAY AVG – displayed when 14- or 30-day average is shown. NOTE: mmol/L and . (decimal point) appear in display but are not used in this meter when displaying glucose results. If your meter is set to the correct unit of measure, “mg/dL” will appear on the display. Your test result will not include a decimal point. You cannot change this setting – this is the correct unit of measure for the United States. ketones? Appears when a test result is above 240 mg/dL to suggest ketone testing. mem Indicates a test result stored in memory. Test Result area Test results are displayed here. mg/dL Month Day Hour Minutes AM/PM Symbol AM/PM displayed when set to 12-hour time format. This is the unit of measure. Be sure this appears with the symbol before applying sample to the test strip. mWARNING: If mg/dL does not appear with the symbol, call LifeScan Customer Service at 1 800 227-8862. 7 OneTouch® Ultra® Test Strips The OneTouch® Ultra® System measures the amount of glucose in whole blood. Blood is applied in the TOP EDGE of the OneTouch® Ultra® Test Strip and is automatically drawn into the reaction cell where the reaction takes place. Top Edge Apply a drop of blood to the narrow channel here in the top edge of the test strip. Confirmation Window Check here to confirm if enough blood has been applied. Contact Bars Insert this end of the test strip, contact bars facing up, into the meter. Push it all the way in until it will go no further. 8 Important Test Strip Information w Store test strip vials in a cool, dry place below 86˚F (30˚C). Keep away from direct sunlight and heat. Do Not refrigerate. w Store test strips in their original vial only. To avoid damage or contamination, Do Not transfer test strips to any other place. w After removing a test strip from the vial, replace the vial cap immediately and close it tightly. w Use each test strip immediately after removing it from the vial. w Do Not use test strips from any vial that is damaged or left open to air. w Write the discard date (6 months after first opening the vial) on the vial label when you first open it. Discard the remaining OneTouch® Ultra® Test Strips on the discard date. w Do Not use test strips beyond the expiration (printed on package) or discard date, whichever comes first, because they may cause inaccurate results. w Avoid getting dirt, food or liquids on the test strip. With clean, dry hands, you may touch the test strip anywhere on its surface. w Do Not bend, cut, or alter a OneTouch® Ultra® Test Strip in any way. w OneTouch® Ultra® Test Strips are for single use only. Never reuse a test strip that has had either blood or control solution applied to it. w Apply only OneTouch® Ultra® Control Solution or a blood sample to the test strip. w Refer to additional information in the OneTouch® Ultra® Test Strip package. mWARNING: Do Not swallow test strips. The test strip vial may contain drying agents that are harmful if inhaled or swallowed and may cause skin or eye irritation. 9 Before Testing Checking the Meter Display Each time you turn on the OneTouch® Ultra® Meter either by inserting a test strip or pressing the button, all segments of the display will appear briefly. This tells you that the system is performing several self-checks to confirm that the meter is working properly. To check that all display segments are working, with the meter off, press the button and immediately hold the button down. Coding the Meter Code numbers are used to calibrate the OneTouch® Ultra® Meter with OneTouch® Ultra® Test Strips for accurate results. You must code the meter before using it for the first time and then every time you change to another vial of test strips. Each time you test, check to be sure that the code number on the meter display matches the code number on the test strip vial. m CAUTION: Matching the code on the meter and the code on the test strip vial is essential to obtain accurate results. Each time you test, check to make sure the code on the meter and the code on the test strip vial match. 10 Step 1 Enter the Code Mode. Insert a test strip to turn on the meter. Push it all the way in until it will go no further. Avoid bending the test strip. The display check will appear. Then the code number is displayed for three seconds. The first time you use the meter, three dashes Q will flash, meaning that there is no code stored in the memory. Follow Step 3 to code the meter. If three dashes appear any other time, see page 56 of Display Messages and Problem-Solving Guide. Example NOTE: Date and time will flash briefly. Step 2 Match the Code Numbers. Compare the code number on the meter display with the code number on the test strip vial. If the two code numbers match, you may begin testing. If they do not match, follow Step 3. mCAUTION: Matching the code on the meter and the code on the test strip vial is essential to obtain accurate results. Each time you test, check to make sure the code numbers match. Example 11 STEP 3 Code the Meter. Immediately press the button, while the code number is displayed on the meter to select the correct code. Each time you press and release the button, the number will increase by one. To move more quickly, press and hold the button. NOTE: If the apply blood symbol is displayed before the meter is coded correctly, remove the test strip and repeat steps 1 through 3. NOTE: If you scrolled past the desired code number, continue to press the button until the correct code number appears. After selecting the correct code number, it will flash for three seconds and then appear solid for three seconds. mCAUTION: Matching the code on the meter and the code on the test strip vial is essential to obtain accurate results. Each time you test, check to make sure the code numbers match. Then the symbol will appear with mg/dL, indicating that the OneTouch® Ultra® System is ready for testing. mWARNING: If mg/dL does not appear with the symbol, call LifeScan Customer Service at 1 800 227-8862. 12 Example Example Checking the System with Control Solution Why you should do a control solution test: w OneTouch® Ultra® Control Solution is used to check that the meter and the test strips are working together as a system and that you are performing the test correctly. w It is very important that you do this simple check routinely to make sure you get an accurate result. When you should do a control solution test: w To practice the test process instead of using blood. w When you open a new vial of test strips. w Once a week. w Whenever you suspect that the meter or test strips are not working properly. w If you have had repeated unexpected blood glucose test results (as described on page 3). w After dropping the meter. NOTE: Refer to additional information in the OneTouch® Ultra® Control Solution Package. 13 Before you begin: w Use only OneTouch® Ultra® Control Solution. w Check the expiration date on the control solution vial. Record the discard date (date opened plus three months) on the vial label. Do Not use after expiration or discard date, whichever comes first. w Control solution, meter, and test strips should be at room temperature (68–77˚F/20–25˚C) before testing with control solution (see Specifications section on page 62 for blood testing temperature ranges). w Shake the vial, discard the first drop of control solution, and wipe off the tip to ensure a good sample and an accurate result. w Store control solution tightly closed at temperatures below 86˚F (30˚C). Do Not refrigerate. mWARNING: w Do Not swallow control solution; it is not for human consumption. w Do Not apply control solution to the skin or eyes as it may cause irritation. 14 STEP 1 Insert a test strip into the meter. mWARNING: If mg/dL does not appear with the R symbol, call LifeScan Customer Service at 1 800 227-8862. Insert a test strip, contact bars end first and facing up, into the test port. Push it all the way in until it will go no further. The meter will turn on and the display check will appear briefly. Then the code number will appear, followed by the R symbol and mg/dL. Be sure the meter and test strip codes match. If they do not, code the meter correctly. (See pages 10 –12.) 15 STEP 2 Mark this test as a control solution test. This marks the test as a control solution test. ➧ Press and release the button so Ë appears on the display. NOTE: Mark all control solution tests with Ë to distinguish them from blood glucose tests in the meter memory. Marked control solution tests will not be included in your averages. 16 STEP 3 Apply control solution to the test strip. To ensure an accurate control solution test, shake the vial, discard the first drop and wipe the dispenser tip before you begin. Narrow channel TOP Edge Apply Drop Here Touch and hold a drop of control solution where the narrow channel meets the TOP EDGE of the test strip. Confirmation WINDOW The control solution will be drawn into the narrow channel. When the confirmation window is full, the meter will count down from 5 to 1. Example The control solution test result will appear on the display. Ë will appear above your result. 17 STEP 4 Compare control solution result to the range printed on the TEST STRIP VIAL. Control range Example mCAUTION: The control solution range printed on the test strip vial is for OneTouch® Ultra® Control Solution only. It is not a recommended range for your blood glucose level. If the results are not within the control range printed on the test strip vial, the meter and test strips may not be working properly. Repeat the control solution test. 18 Control solution out-of-range results may be due to: w Incorrect unit of measure. w Failure to discard the first drop w Error in performing the test. of control solution and wipe the dispenser tip clean. w Expired or contaminated control solution. w The meter, test strips, or control solution are too warm or too cold. w Failure to shake the control solution vial well. w Improper meter coding. w Test strip deterioration. w Meter malfunction. mCAUTION: If you continue to get control solution test results that fall outside of the range printed on the vial, the system may not be working properly. Do Not use the meter. Call LifeScan Customer Service at 1 800 227-8862. 19 Testing Your Blood Read this section and the test strip package insert carefully before testing. Make sure you have all items needed to test. w OneTouch® Ultra® Meter w OneTouch® Ultra® Test Strips w Lancing Device w Sterile Lancets with protective covers 20 Preparing the Lancing Device Depth Adjustment Knob Clear Cap (For Forearm Sampling) Depth Indicator Ejection/Cocking Control Release Button Lancet with Protective Cover Puncture Settings Lancet Point Protective Cover Lancing Device Cap mCAUTION: To reduce the chance of infection: w Never share a lancet or the lancing device with anyone. w Always use a new, sterile lancet. Lancets are for single use only. w Keep the OneTouch® Ultra® Meter and lancing device clean. w Make sure to wash the puncture site with soap and water before testing. 21 STEP 1 Insert a Lancet. Turn the Lancing Device Cap counterclockwise to remove it. Insert the lancet into the lancet holder and push down firmly until it is fully seated. Do Not twist the lancet. Remove the protective cover from the lancet (see instructions for your lancets). Replace the Lancing Device Cap. Turn it clockwise until it is snug. Adjust the puncture depth setting if necessary. Twist the depth adjustment knob toward the smaller bumps for a shallower puncture or toward the larger bumps for a deeper puncture. 22 STEP 2 Cock the Lancing Device. Slide the ejection/cocking control back until it clicks. If it does not click, the lancing device may have been cocked when the lancet was inserted. The lancing device is now ready for use. STEP 3 Wash Your Hands and the Puncture Site. To reduce the chance of infection, use warm, soapy water. Rinse and dry thoroughly. 23 Fingertip Blood Sampling The OneTouch® Ultra® System requires a very small blood drop to perform a test. You may obtain it from a fingertip or forearm. (See page 25 for information on obtaining a blood sample from the forearm.) Choose a different puncture site each time you test. Repeated punctures in the same spot may cause soreness and calluses. STEP 1 Position the Lancing Device. Hold the lancing device firmly against the side of your finger. Press the release button. NOTE: Do Not use the Clear Cap on your finger. STEP 2 24 Massage the Fingertip. Gently squeeze and/or massage your fingertip until a round drop of blood ( sample size) forms on your fingertip. Do Not squeeze excessively on the puncture site. The blood sample must be large enough or you may get an Æ message (see page 59) or an inaccurate test result. Do Not smear the blood sample. Proceed with your blood glucose test. Forearm Blood Sampling The forearm has fewer nerve endings than the fingertip so you may find that obtaining a blood sample from the forearm may be much less painful than using the fingertip. The technique for forearm sampling is different from fingertip sampling. Also there are differences between forearm samples and fingertip samples that you should understand. Please read the important information on page 27 carefully. STEP 1 Install the Clear Cap. To aid in obtaining a blood sample from the forearm, replace the Lancing Device Cap on the lancing device with the Clear Cap. If necessary, set the lancing device for a deeper puncture. STEP 2 Choose the Puncture Site. Select a soft, fleshy area on your forearm that is clean and dry, away from bone, and free of visible veins and hair. 25 STEP 3 Massage the Area. To increase blood flow to the puncture site, massage the area gently. For individuals who experience difficulty in getting sufficient blood for a test, rubbing the area more vigorously or applying heat briefly may be helpful. STEP 4 Position the Lancing Device. Press and hold the lancing device against the forearm for a few seconds. Press the release button. STEP 5 26 Allow Blood Drop to Form. Continue holding the lancing device against the skin for a few seconds until the blood drop forms. Allow enough blood to form under the Clear Cap until you have a blood sample ( sample size) that is sufficient to fill the confirmation window of the test strip. If you must massage the area to obtain more blood, Do Not squeeze the site excessively. If bruising occurs, you may choose to lance a fingertip instead. If you are having difficulty obtaining blood from the forearm, call LifeScan Customer Service at 1 800 227-8862. Important information about forearm testing w Under certain conditions, blood glucose test results obtained using samples taken from your forearm may differ significantly from fingertip samples. w The conditions in which these differences are more likely to occur are when your blood glucose is changing rapidly such as following a meal, an insulin dose, or physical exercise. w When blood glucose is changing rapidly, fingertip samples show these changes more quickly than forearm samples. w When your blood glucose is falling, testing with a fingertip sample may identify a hypoglycemic (low blood sugar) level sooner than a test with a forearm sample. w Use forearm samples only for testing prior to, or more than two hours after meals, insulin doses, or physical exercise. w Testing performed within two hours after meals, insulin doses, or physical exercise, or whenever you feel that your glucose levels may be changing rapidly, should be done with a fingertip sample. w You should also use fingertip testing whenever you have a concern about hypoglycemia (insulin reactions) such as when driving a car, particularly if you suffer from hypoglycemic unawareness (lack of symptoms to indicate an insulin reaction), as forearm testing may fail to detect hypoglycemia. What you should do: w Use forearm or fingertip samples for testing prior to, or more than two hours after meals, insulin doses, or physical exercise. w Routine testing before meals can be done either at the fingertip or the forearm. w Consult your health care professional before you begin using the forearm for testing. 27 Step-by-Step Test Procedure Insert This End STEP 1 Insert Test Strip. Insert a test strip, contact bars end first and facing up, into the test port. Push it in until it will go no further. The meter will turn on and the display check will appear briefly. Then the code number will appear, followed by the symbol with mg/dL. Check to make sure the code number on the meter display matches the code number on the test strip vial. Always confirm that the unit of measure is mg/dL when you test your blood glucose level. mWARNING: If mg/dL does not appear with the symbol, call LifeScan Customer Service at 1 800 227-8862. Use of the wrong unit of measure may cause you to misinterpret your blood glucose level, and may lead to incorrect treatment. Be sure the meter and test strip codes match. If they do not, code the meter correctly. (See pages 10–12.) mCAUTION: Matching the code on the meter and the code on the test strip vial is essential to obtain accurate results. Each time you test, check to make sure the code numbers match. 28 STEP 2 Get a Blood Sample. Obtain a round drop of blood using the lancing device. The blood sample must be large enough ( sample size) to fill the confirmation window. STEP 3 Prepare to Apply Sample. Keeping your finger extended and steady, move the meter and test strip toward the blood drop. Do Not apply blood on the top of the test strip. Do Not hold the meter and test strip underneath the blood drop. This may cause blood to run into the test port and damage the meter. 29 When applying a drop of blood from your forearm, keep your forearm steady and bring the top edge of the test strip to the drop of blood with your other hand. Forearm STEP 4 Apply the Sample. Line up the test strip with the blood drop so that the narrow channel on the edge of the test strip is almost touching the edge of the blood drop. Narrow Channel Gently touch the channel to the edge of the blood drop. 30 Be careful not to push the test strip against your fingertip or the test strip may not fill completely. NOTE: • Do Not smear or scrape the drop of blood with the test strip. • Do Not apply more blood to the test strip after you have moved the drop of blood away. • Do Not move the test strip in the meter during a test. mCAUTION: You may get an Æ message or an inaccurate result if the blood sample does not fill the confirmation window completely. See page 59. Discard the test strip and re-start the test process. STEP 5 Wait for the Confirmation Window to Fill Completely. The blood drop will be drawn into the narrow channel and the confirmation window should fill completely. When the confirmation window is full, this means you have applied enough blood. Now you can move the test strip away from the blood drop and wait for the meter to count down from 5 to 1. Confirmation Window If the confirmation window is not full, you may get an error message or an inaccurate test result. Full Not Full 31 NOTE: If you do not apply a blood sample within two minutes after the symbol appears, the meter will turn itself off. You must remove the test strip and insert it back into the meter to restart the test procedure. STEP 6 Accurate Results in Just 5 Seconds. Your blood glucose test result will appear after the meter counts down from 5 to 1. Blood glucose test results are automatically stored in the meter memory. You may also record them in the logbook provided with your system. Turn the meter off by removing the test strip. Dispose of used test strip in a sealed container. Example Plasma-Calibrated Result mWARNING: If mg/dL does not appear with the test result, call LifeScan Customer Service at 1 800 227-8862. mCAUTION: If you tested at the low end of the operating range (43°F/ 6°C) and your glucose is high (over 180 mg/dL), the reading on your meter may be lower than your actual glucose. In this situation, repeat the test in a warmer environment with a new test strip as soon as possible. 32 Discarding Used Test Strips and Lancets It is important to discard the used lancet carefully after each use to avoid unintended lancet stick injuries. Used test strips and lancets may be considered biohazardous waste in your area. Be sure to follow your health care professional’s recommendations or your local regulations for proper disposal. STEP 1 Remove the Cap from the Lancing Device. Twist the cap counterclockwise. (Optional: Replace the protective cover on the used lancet by placing it on a hard surface and pushing the lancet tip into the cover.) STEP 2 Eject the Lancet. Point the lancing device down and away. Push the release button to ensure that the lancing device is not cocked. Push forward on the ejection/cocking control and eject the lancet directly into a container for sharp objects. Return the ejection/cocking control to the middle position. Replace the cap. 33 Special Messages The OneTouch® Ultra® Meter displays results between 20 and 600 mg/dL. If your blood glucose test result is lower than 20 mg/dL, lo will appear on the meter display. This may mean severe hypoglycemia (low blood glucose) that requires immediate treatment according to your health care professional’s recommendations. Although this message could be due to a test error, it is safer to treat first, and then repeat the test. If your blood glucose test result is above 600 mg/dL, h1 will appear on the meter display. This may mean severe hyperglycemia (high blood glucose). You should recheck your blood glucose level. If h1 again appears on the display, call your health care professional immediately. 34 When your blood glucose test result is above 240 mg/dL or reads h1, “Ç” will appear on the meter display. This message does not mean that the system detected ketones but that testing with a ketone test strip may be advisable. Consult your health care professional about when and how to test for ketones. Example NOTE: Do Not use a ketone strip with the OneTouch® Ultra® Meter. 35 Using the Meter Memory Your OneTouch® Ultra® Meter stores the 150 most recent blood glucose and control solution test results with date and time in its memory. It also provides you with 14- and 30-day averages of your blood glucose test results. If your 14-day and 30-day test result averages are not what you expect, you should not rely on them. Review the test results in memory with these easy steps. STEP 1 Enter the Memory Mode. You may enter the memory mode either with the meter turned off or immediately after completing a test. Press the button. ˘ and the 14-day average will appear with the number of blood glucose tests performed in this period (e.g. 64n means that 64 tests were performed within the period). After three seconds, the 30-day average will appear. (If you are using the meter for the first time, Q indicates there are no test results in memory.) 36 These averages are calculated from the blood glucose results obtained during the last 14 and 30 calendar days. A h1 result will be included in your averages as 600 mg/dL and a lo result as 20 mg/dL. Results marked as control solution tests will not be included in your averages. If your 14-day and 30-day test result averages are not what you expect, you should not rely on them. STEP 2 Recall Test Results. The most recent test result with date and time will appear. Press and release the button and the next most recent test result will appear. The meter will recall up to your last 150 test results in order from the most recent to the oldest. If memory is not full, - - - will appear for memory locations that are empty. When the memory is full, the oldest result is dropped and the newest is added. To move through the tests more quickly, press and hold the button. Marked control solution tests will appear as Ë. STEP 3 Exit the Memory Mode. Press the button to turn off the meter. 37 Downloading Test Results to a Personal Computer Transferring test results with date and time from the meter memory to your personal computer requires OneTouch® Diabetes Management Software with the accompanying OneTouch® Interface Cable. (OneTouch® Diabetes Management Software is available separately.) Note to users of OneTouch® Diabetes Management Software: Do Not transfer data from a meter that has experienced a loss of power. Call LifeScan Customer Service at 1 800 227-8862 for more information. STEP 1 Install OneTouch® Diabetes Management Software. Follow the instructions provided in the OneTouch® Diabetes Management Software User’s Manual. STEP 2 Connect the OneTouch® Interface Cable. Make sure the meter is turned off. Connect the OneTouch® Interface Cable to your computer and (with the meter turned off) to the meter data port. 38 NOTE: While in the communication mode, you will be unable to perform a blood glucose test. If the meter is in either memory or setting mode, it will not respond to computer commands. STEP 3 Transfer Data. Follow the instructions in the OneTouch® Diabetes Management Software User’s Manual to initiate the data transfer command. O will appear on the meter display when the first command is received, indicating that the meter is in the communication mode. If the command is not received within two minutes, the meter will turn itself off. Pressing the button will also turn the meter off. To learn more about OneTouch® Diabetes Management Software or to obtain a OneTouch® Interface Cable separately, call LifeScan Data Management Line at 1 800 382-7226 or visit us at www.OneTouchDiabetes.com. 39 Comparing Meter and Laboratory Results OneTouch® Ultra® Meter test results and laboratory test results are both expressed in plasma-equivalent units. However, your meter result may differ somewhat from your laboratory result due to normal variation. Meter results can be affected by factors and conditions that do not affect laboratory results in the same way. Your OneTouch® Ultra® Meter glucose value should agree with a laboratory measurement within ±20% most of the time under normal conditions. A result within that range is considered accurate when testing with the OneTouch® Ultra® Meter. However, results can differ by more than ±20% in some situations. See the OneTouch® Ultra® Test Strip package insert for typical accuracy and precision data and for important information on Limitations of Procedure. To make an accurate comparison between meter and laboratory results, follow these guidelines: Before going to the lab: w Perform a control solution test to make sure the meter is working properly. w It is best to fast for at least eight hours before doing comparison tests. w Take your meter with you to the lab. 40 While at the lab: w Make sure that the meter test and the lab test are performed within 15 minutes of each other. w Wash your hands before obtaining a blood sample. w Use only fresh capillary blood obtained from the fingertip. You may still have a variation from the laboratory result because blood glucose levels can change significantly over short periods, especially if you have recently eaten, exercised, taken medication, or experienced stress.1 In addition, if you have eaten recently, the blood glucose level from a fingerstick can be up to 70 mg/dL higher than blood drawn from a vein (venous sample) used for a lab test.2 Therefore, it is best to fast for eight hours before doing comparison tests. Factors such as the percentage of red blood cells in the blood (a high or low hematocrit) or the loss of body fluid (severe dehydration) may also cause a meter result to be different from a laboratory result. References 1.Surwit, R.S., and Feinglos, M.N.: Diabetes Forecast (1988), April, p. 49–51. 2.Sacks, D.B.: “Carbohydrates.” Burtis, C.A., and Ashwood, E.R. (ed.), Tietz Textbook of Clinical Chemistry. Philadelphia: W.B. Saunders Company (1994), p. 959. 41 Meter Set-up You may need to update the meter settings when you first receive your meter or when you replace the battery. Follow these instructions. If you need assistance, call LifeScan Customer Service at 1 800 227-8862. STEP 1 Enter the meter set-up. • Start with the meter off. • Press and continue to hold the button until ONLY the time appears on the bottom right of the display. Time • Release the button. Meter on NOTE: You must move through all the settings to save changes. 42 If you use the 12-hour format, the AM or PM will change each time you reach 12:00. Be sure the AM/PM setting is correct when you set the hour. STEP 2 Set the hour. Press and release the button to change the hour. If you go past the desired hour, press and release the button until you scroll through to the desired hour. Flashing indicates setting can be changed To scroll faster, hold the Press and release the to the next step. button down. button to move STEP 3 Set the minutes. Press and release the button to change to the desired minutes. Press and release the to the next step. button to move 43 STEP 4 Set the AM/PM or 24-hour time format. or Press and release the button to choose between AM/PM and 24-hour formats. Press and release the the next step. button to move to STEP 5 Set the year. 44 Press and release the to the desired year. button to change Press and release the the next step. button to move to STEP 6 Set the month. Press and release the to the desired month. button to change Press and release the the next step. button to move to STEP 7 Set the day. Press and release the to the desired day. button to change Press and release the button. Continue to the next page. 45 If your meter has shut off after setting the day, you have completed the meter set-up and saved your changes. If either mg/dL or mmol/L is flashing on the display, continue below. STEP 8 Set the unit of measure to mg/dL. Press and release the button until mg/dL appears on the display. Press and release the button to save your entry, save your changes, and shut the meter off. mWARNING: The mg/dL unit of measure is the standard in the United States. If mg/dL does not appear, call LifeScan Customer Service at 1 800 227-8862. 46 NOTE: The 14- and 30-day averages in the meter memory are calculated from results obtained during the 14 and 30 calendar days preceding the current date and time settings. When the date and time are changed, the averages may change. If your 14-day and 30-day test averages are not what you expect, Do Not rely on them. 47 Caring for Your OneTouch® Ultra® System Meter Your OneTouch® Ultra® Meter does not require special maintenance or cleaning. Take care to avoid getting dirt, dust, blood, control solution, or liquids inside the meter through the test port or data port. LifeScan recommends that you store the meter in its carrying case after each use. A cloth dampened with water and mild detergent can be used to wipe down the outside of the meter. Your OneTouch® Ultra® Meter is a precision instrument. Please handle it with care. Do Not use alcohol or any other solvent to clean your meter. Lancing Device Clean the lancing device and Caps (Lancing Device and Clear Cap) with soap and water. To disinfect the lancing device, prepare a disinfectant solution of one part household bleach to 10 parts water. Dampen a cloth with this solution and wipe the lancing device thoroughly. Soak only the cap or caps for at least 30 minutes in the disinfectant solution. Do Not soak the lancing device in liquid. Rinse the lancing device and caps with water and dry thoroughly. 48 Test Strips and Control Solutions Expiration dates for test strips and control solutions are printed on their vial labels. When you first open a new vial of test strips or control solution, record the discard date on the label. Refer to the test strip vial or control solution vial for instructions on determining the discard date. Battery Your OneTouch® Ultra® Meter comes with a pre-installed 3.0 V (#2032 or equivalent) lithium battery. The battery will provide you with enough power to perform about 1,000 tests. When replacing the battery, use only a 3.0 V (#2032 or equivalent) lithium battery. The meter will alert you when the power is getting low by displaying two different messages: The symbol appears on the display with mg/dL when the meter is turned on and all other display messages are functional. From the time the symbol first appears, there is enough power left for about 50 tests. The test results will be accurate, but it is time to change the battery. 49 When the symbol appears on the display by itself, it means that the battery will not provide enough power for a test. You must change the battery. To replace the battery, make sure that the meter is turned off. Turn the meter over and locate the battery compartment. STEP 1 Open the Battery Compartment. Push up on the tab and pull the battery compartment cover toward you. STEP 2 Remove the Old Battery. Pull upward on the clear plastic tab. Insert one 3.0 V (#2032 or equivalent) lithium battery, making sure the positive “+” side of the battery is facing up. 50 STEP 3 Place the Cover. Place the cover over the battery compartment. Push down until you hear the tab click into place. STEP 4 Check the Time, Date, and Unit of Measure. After replacing the battery, turn the meter on by inserting a test strip or pressing the button. If the meter is in setting mode, confirm that the time, time format and date are set correctly. If they are not, use the and buttons to reset the meter before testing. See Meter Set-up, pages 42–47. Also, be sure to confirm the unit of measure is mg/dL. STEP 5 Dispose of Batteries. This product contains a lithium ion battery(ies), which contains perchlorate material – special handling may apply, see www.dtsc.ca.gov/hazardouswaste/perchlorate. As always, please dispose of battery(ies) according to your local environmental regulations. California Code of Regulations Title 22, Section 67384.4. mWARNING: The mg/dL unit of measure is the standard in the United States. If mg/dL does not appear, call LifeScan Customer Service at 1 800 227-8862. NOTE: Replacing the battery does not affect previous test results stored in memory. However, the time and date settings may need to be updated. Always confirm the unit of measure is mg/dL. 51 Display Messages and Problem-Solving Guide Following is a summary of all display messages. These messages help to identify certain problems but do not appear in all cases when a problem has occurred. Improper use may cause an inaccurate result without producing an error message or a symbol. In the event of a problem, refer to the information under ACTION. Assistance is available from LifeScan Customer Service 7 days a week, 8 a.m. – 10 p.m. Eastern Time. Call LifeScan Customer Service at 1 800 227-8862. MESSAGE WHAT IT MEANS Display check. Appears whenever the meter is turned on. To verify that all segments are present on the display, with the meter off, press the button and immediately hold the button down. Compare the meter display with page 10. 52 ACTION If segments are missing, call LifeScan Customer Service at 1 800 227-8862 for further action. Missing segments can lead to misinterpretation of test results. 1. See Coding the 1. This message appears Meter, pages 10–12. immediately after the display check if your meter 2. Do Not rely on the 14- and 30-day has not been coded. averages. It is 2. If this message appears at important to call any time after the first time LifeScan Customer the meter was coded, the Service at 1 800 code number has been lost. 227-8862. The test results stored in the meter memory may be out of order. MESSAGE WHAT IT MEANS This is the code number stored in the meter. Example ACTION Make sure that this code number matches the code number on the vial of the test strips you are using. mCAUTION: Matching the code on the meter and the code on the test strip vial is essential to obtain accurate results. Each time you test, check to make sure the code numbers match. Y ou may now apply the The system is ready to accept a blood sample. blood sample. mWARNING: If mg/dL does not appear with the symbol, call LifeScan Customer Service at 1 800 227-8862 for assistance. The system is ready to You may now apply the accept a control solution control solution. test sample. Five-second countdown. None required. The meter is calculating the result. After the countdown, the meter will display the test result. 53 MESSAGE WHAT IT MEANS A blood glucose test result in mg/dL. None required. mWARNING: If mg/dL does not appear with the test result, call LifeScan Customer Service at 1 800 227-8862 for assistance. A blood glucose test result with a suggestion to check your ketone levels. Follow the instructions of your health care professional regarding ketone testing. Example Example 54 ACTION MESSAGE WHAT IT MEANS ACTION You may have a very high blood glucose level, exceeding 600 mg/dL. You should retest your glucose level and if S appears again, call your health care professional immediately. You may have a very low blood glucose level, lower than 20 mg/dL. Treat this condition immediately according to your health care professional’s recommendations. Although this message could be due to a test error, it is safer to treat first, and then repeat the test. A blood glucose test result stored in the memory. None required. 55 MESSAGE 56 WHAT IT MEANS ACTION A control solution test result stored in the memory. None required. No result in memory, such as the first time use of the meter. or, Your meter was unable to recall this result. You can still perform a blood glucose test and get an accurate test result. Call LifeScan Customer Service at 1 800 227-8862 to report this occurance if this is not your first time use of the meter. Average of results from the last 14 days (√ means that 64 tests were performed within the period). The 30-day average appears with a © before the on the screen. If your 14-day and 30-day test result averages are not what you expect, you should not rely on them. MESSAGE WHAT IT MEANS ACTION Error message that indicates Do Not use the meter. that there is a problem with Call LifeScan the meter. Customer Service at 1 800 227-8862 for a replacement meter. Error message could be caused either by a used test strip or a problem with the meter. Repeat the test with a new test strip. Refer to pages 8–9 for test strip information. If the error message persists, call LifeScan Customer Service at 1 800 227-8862. Error message that indicates that the blood or control solution sample was applied before the R symbol appeared on the display. Repeat the test with a new test strip. Apply blood or control solution sample only after the R symbol appears on the display. Refer to pages 29–31 for information on sample application. 57 MESSAGE 58 WHAT IT MEANS ACTION Error message that indicates one of the following conditions may be present: 1. You may have high 1. If you tested in a cool glucose and have tested in environment, repeat the an environment near the test in a warmer low end of the system’s environment with a new operating temperature test strip. If the error range (43–111°F / message appears again, 6–44°C). call LifeScan Customer Service at 1 800 227-8862. 2. There may be a problem 2. If you were testing in a with the test strip. For normal or warm example, it may have been environment, repeat the damaged or moved during test with a new test strip. testing. (See pages 8–9 for test strip information.) If the error message appears again, call LifeScan Customer Service at 1 800 227-8862. 3. The sample was 3. If you applied the blood improperly applied. incorrectly, review pages 29–31 on blood application and repeat the test with a new test strip. If the error message appears again, call LifeScan Customer Service at 1 800 227-8862. MESSAGE WHAT IT MEANS ACTION Error 4 continued 4. There may be a problem with the meter. 4. If the error message appears again, call LifeScan Customer Service at 1 800 227-8862. Error message that indicates that the meter has detected a problem with the test strip. Possible causes are test strip damage or an incompletely filled confirmation window. Repeat the test with a new test strip. Refer to pages 29–31 for information on sample application. The É symbol appears on the display with the unit of measure. The power is getting low. It is time to change your battery. Test results will still be accurate, but replace the battery as soon as possible. The É symbol appears on the display by itself. The power is too low to perform a test. Replace the battery at once. The meter will not operate. 59 MESSAGE WHAT IT MEANS Flashing time means the meter has lost power and entered the setting mode. ACTION You must reset the time, time format and date. See Meter Set-up, pages 42–47. Confirm that your meter is set in mg/dL. If not, call LifeScan Customer Service at 1 800 227-8862. Note to users of OneTouch® Diabetes Management Software: Do Not transfer data from a meter that has experienced a loss of power. Call LifeScan Customer Service at 1 800 2278862 for more information. 60 The meter has detected that the temperature is below the system operating range. Do Not perform a test until the meter and test strips reach a temperature within the operating range of 43–111°F (6–44°C). Repeat the test after the meter and test strips have reached a temperature within the operating range. The meter has detected that the temperature is above the system operating range. Do Not perform a test until the meter and test strips reach a temperature within the operating range of 43–111°F (6–44°C). Repeat the test after the meter and test strips have reached a temperature within the operating range. If the meter does not display a message after inserting a test strip: POSSIBLE CAUSE No power WHAT TO DO Replace the battery. No battery or battery Check that the battery is incorrectly installedcorrectly installed with the positive “+” side up. Test strip inserted Insert the test strip correctly incorrectly or incompletely with the contact bars end first and facing up. Push it in until it will go no further. Defective meter or test strip Call LifeScan Customer Service at 1 800 227-8862. If the test does not start after applying the sample: POSSIBLE CAUSE WHAT TO DO Insufficient blood sample Repeat the test with a new test strip and a larger sample, making sure blood is placed to the narrow channel in the top edge of the test strip. Defective test strip Repeat the test with a new test strip. Sample applied after Repeat the test with a new test automatic shutoff (two strip; apply sample only when minutes after last user action) the R symbol appears on the display. Defective meter Call LifeScan Customer Service at 1 800 227-8862. 61 Specifications Result Range: 20 to 600 mg/dL Calibration: Plasma-equivalent Sample: Fresh capillary whole blood Test Time: 5 seconds Assay Method: Glucose oxidase biosensor Power Source: One replaceable 3.0 V (#2032 or equivalent) lithium battery Battery Life: About 1,000 tests (about one year at three tests per day) Glucose Units: mg/dL Memory: 150 blood glucose and control solution tests Automatic Shutoff: Two minutes after last user action Size: 3.12” X 2.25” X 0.85” Approximate Weight: 1.5 ounces with battery Operating Ranges: Temperature 43–111°F/6–44°C Relative Humidity 10–90% Hematocrit 30–55% 62 Guarantee The makers guarantee that the OneTouch® Ultra® Meter shall be free of defects in material and workmanship for a period of three years. This guarantee is valid from the date of purchase. The guarantee extends only to the original purchaser and is not transferable. PRODUCT SAFETY INFORMATION This meter complies with the following Electrical and Safety Standards: This meter complies with CISPR 11: 2003, Class B (Radiated Only). Emissions of the energy used are low and not likely to cause interference in nearby electronic equipment. The meter has been tested for immunity to Level 3 electrostatic discharge as specified in IEC 61000-4-2. This meter has been tested for immunity to radio frequency interference over the frequency range 80MHz to 2.5GHz at 3V/m as specified in IEC 61000-4-3. Degree of protection rating: IP21 CAN/CSA C22.2 61010-1:04, UL 61010-1:04, IEC 61010-1 and IEC 61010-2-101. Updated Symbol Information m Caution, see Instructions for use Direct current In vitro diagnostic medical device Lot number Serial number Expiration date Sterilized by irradiation Do not reuse Manufacturer Additional Operating Ranges and Ratings Information Altitude: Up to 10,000 feet / 3048 meters Equipment rating: 3.0v , 2mA 63 Index 64 Averages, 14- and 30-Day........................................................................... 36, 47, 56 Battery......................................................................................................... 49, 59, 62 Blood Sampling, Fingertip...................................................................................... 24 Blood Sampling, Forearm....................................................................................... 25 C Button.................................................................................................................... 5 Checking the Meter Display.................................................................................... 10 Checking the System with Control Solution............................................................. 13 Coding the Meter.................................................................................................... 10 Control Solution, Before you begin......................................................................... 14 Control Solution, Checking the System with............................................................ 13 Control Solution, OneTouch® Ultra®. ..................................................................... 13 Control Solution, Out-of-range results.................................................................... 19 Data Downloading.................................................................................................. 38 Data Port............................................................................................................. 5, 38 Date, Changing........................................................................................................ 45 Dehydration.............................................................................................................. 2 Discarding Used Test Strips and Lancets................................................................ 33 Display Messages/Problem-Solving Guide............................................................... 52 Fingertip Blood Sampling....................................................................................... 24 Forearm Blood Sampling........................................................................................ 25 Guarantee............................................................................................................... 63 High Glucose....................................................................................................... 3, 34 Hyperglycemia.................................................................................................... 3, 34 Hypoglycemia...................................................................................................... 3, 34 Important Information about Forearm Testing....................................................... 27 Intended Use............................................................................................................. 2 Ketones............................................................................................................. 35, 54 Laboratory Results, Comparing Meter Results with................................................ 40 Lancet............................................................................................................... 21, 22 Lancet Disposal....................................................................................................... 33 Lancing Device, Cleaning........................................................................................ 48 Lancing Device, Preparing...................................................................................... 21 Lancing Device, Using............................................................................................. 22 Low Glucose....................................................................................................... 3, 34 M Button................................................................................................................... 5 Memory, Using..........................................................................................................36 Messages, Special................................................................................................... 34 Meter Display....................................................................................................... 6 - 7 Meter Display, Checking......................................................................................... 10 Meter Maintenance................................................................................................. 48 Meter Memory........................................................................................................ 36 Meter Set-up.............................................................................................................42 Meter Specifications................................................................................................ 62 mg/dL............................................................................................ ii, 7, 28, 46, 53, 54 OneTouch® Diabetes Management Software........................................................... 38 OneTouch® Interface Cable.................................................................................... 38 OneTouch® Ultra® Blood Glucose Meter.................................................................. 5 OneTouch® Ultra® Blood Glucose Monitoring System.............................................. 4 OneTouch® Ultra® Control Solution........................................................................ 13 OneTouch® Ultra® Test Strips................................................................................... 8 OneTouch® Ultra® Test Strips, Code....................................................................... 10 OneTouch® Ultra® Test Strips, Expiration................................................................. 9 Plasma Calibration........................................................................................ vi, 40, 62 Problems, Solving................................................................................................... 52 Reduce Chance of Infection......................................................................................21 Repeated Unexpected Results.....................................................................................3 Set the Unit of Measure to mg/dL........................................................................... 46 Step-by-Step Test Procedure................................................................................... 28 Temperature Range, Blood Testing.................................................................. 14, 62 Temperature Range, Control Solution Testing........................................................ 14 Test Port................................................................................................................... 5 Test Procedure, Step-by-Step.................................................................................. 28 Test Strip Information, Important...............................................................................9 Test Strips, OneTouch® Ultra®.................................................................................. 8 Time, Changing.........................................................................................................43 Unexpected Results............................................................................................. 3, 36 Unit of Measure (mg/dL).............................................................. ii, 7, 28, 46, 53, 54 65 Notes 66 Times of Day Glucose Ranges for people without diabetes, mg/dL Before breakfast 70–105 Before lunch or dinner 70–110 1 hour after meals Less than 160 2 hours after meals Less than 120 Between 2 and 4 am Greater than 70 Your target ranges, mg/dL Source: Krall, L.P., and Beaser, R.S.: Joslin Diabetes Manual. Philadelphia: Lea and Febiger (1989), p. 138. Meter Serial No. ___________________ Important phone numbers: LifeScan Customer Service (7 days a week, 8 a.m. – 10 p.m.): 1 800 227-8862 (English) 1 800 381-7226 (Español) _________________________ _______________________ Health Care Professional Pharmacist _________________________ _______________________ Diabetes Educator Other As your partner in diabetes care, we offer valuable diabetesrelated knowledge, tools and special offers online. www.OneTouchDiabetes.com www.OneTouchEnEspanol.com We welcome you to contact us 7 days a week, 8 a.m. – 10 p.m. Eastern Time. 1 800 227-8862 (English) 1 800 381-7226 (Español) For assistance outside of these hours, please contact your health care professional. The system described herein is covered by one or more of the following U.S. patents: 6,045,567, 6,156,051, 6,197,040, 6,284,125, and D428,150. Use of the monitoring device included herein is protected under one or more of the following U.S. patents: 6,413,410, 6,733,655. Purchase of this device does not act to grant a use license under these patents. Such a license is granted only when the device is used with OneTouch® Ultra® Test Strips. No test strip supplier other than LifeScan is authorized to grant such a license. The accuracy of results generated with LifeScan meters using test strips manufactured by anyone other than LifeScan has not been evaluated by LifeScan. Distributed by: LifeScan, Inc. Milpitas, CA 95035 For: LifeScan Europe Division of Cilag GmbH International 6300 Zug Switzerland Version F © 2008 LifeScan, Inc. Rev. date: 02/2011 AW 06405105B