1
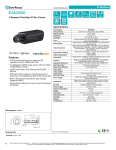
GEMINI INTEGRA RF 80 USER'S MANUAL ver1.2
The RF 80 is an ASCOM microfocusser integrated into a camera rotator that saves you
backfocus and weight. It works under MaximDL.
Phisical dimensions
Barrel inner diameter: 80mm (the barrel is exchangable, smaller diameters available on
request)
Ouside diameter: 155mm
Minimum backfocus: 62mm (with 2” adapter rim added), Travel: 9 mm
Weight: 1700 g
Mounting interface: M6 push-pull screws at 3x120 degree, on R65mm circle
Loading capacity
8kg @ 50mm from focusser end, 5kg @ 100mm from focusser end
At these loads the measured flexture is within the focus depth of an F5 system.
Rotator – 1,5 Nm unbalanced torque.
Focusing/Rotating Precision
Focusser: 2.4 micron resolution at full motor step (1.2 in half step mode)
Rotator: 9/18 arcsec per full motor step (400/200 step motor)
Power and Driver
12-15VDC, Lunatico Armadillo or Platypus http://tienda.lunatico.es/epages/Store.sf/en_GB/?
ObjectPath=/Shops/Store.Lunatico/Categories/Seletek
Installation
In short, before using the RF80 on your scope
1) make sure you have the adapter for the telescope and the camera
2) you have the power supply (12-15VDC 1.5A), cables (motor, USB) for the driver
3) mount the RF80 on the scope and collimate it
4) connect the motor cables
5) install the drivers and control software on the PC
6) connect the PC cable (USB) and power up the driver
7) enter the correct parameters into the setup windows
8) attach the camera
Mounting the RF 80 on the scope
Rotating the coupling with your index finger bring the rotator in a position (one of 3) where the
mark on the side lines up with the larger opening on the top cover:
Now you can insert the 3 pc M6 mounting
screws with a 4mm allen key into the larger
openings and all the way down till you can
see them come out at the bottom.
Keep the RF 80 in vertical position (screws
will stay in) and attach it to the telescope
interface that you have previously mounted
on the scope. Drive the mounting screws in
with the 4mm key (do not tighten firmly yet)
and then collimate the RF80 using both the
4mm and 3mm keys, like you would a lens
cell or a secondary mirror. You can use a
laser and a center mark on the secondary
or any other optical element that is facing
the focusser.
Connecting Cables
Connect the supplied motor cables to the Main
(focusser) and Aux (rotator) ports of the driver as
shown at right...
... then to the RF 80 rotator ….
...and focusser.
Installing Drivers and Software
You need to have the latest ASCOM platform installed before proceeding.
Install the Seletec drivers and software from the CD or the latest from:
http://www.lunatico.es/site/ourproducts/seletek-armadillo-platypus/technicalinformation/firmware-and-software.html
Configuring the Software
Now you can connect the driver to the PC and power up the driver (12-15VDC, 1.5A,
5.5/2mm DC power plug, center positive).
From the program group select SELETEC, then again SELETEC and click “Configuration”.
Please configure according to this screen.
The next step is setting up the configuration of the focusser and the rotator.
Start with the focusser (Main port) by clicking “Go” in the above window.
1) enter the parameters as seen below,
2) exit setup and check if moving OUT really moves the focusser out,
3) if not, reopen the configuration window and click “Reverse button's motion”,
4) take the focusser to the outermost position, where it stalls, return a few steps, reopen
the configuration window and click “Set outermost”, exit setup,
5) take the focusser to the innermost position, where it stalls, return a few steps, reopen
the configuration window and click “Set innermost”, exit setup.
Note: you will need to experiment to get the correct value of backlash. It is normally between
5 -30 steps.
Proceed with the Rotator (Exp port) and enter the parameters. At “A” you have to enter the
step count of the motor (written on the back of it, 200 or 400). At “B” set the voltage in
percentage of the supply to protect the driver from overheating. With 12V enter 70%, with 15V
55%.
Note: the driver is rated for 1A
current. The motor has 6 Ohm
windings. With 12V the current
is 12/6=2A, so you have to
reduce voltage to avoid
overheating during prolonged
rotator operation. On the other
hand reducing the current
reduces motor torque. The
70% setting is a compromise
that works. The maximum
rotation at a time normally
does not exceed 180 deg
which also limits the maximum
operation time to about 40
sec.
Attaching the Camera
You will need an adapter for your camera. The adapter is secured by 3pc M4x5mm
setscrews. The setscrew positions are accessible with the focusser barrel fully OUT.
You will need a 2mm Allen key to insert the
setscrews, as shown at right.
If you are using your own adapter make sure
it has a tapered setscrew recess, otherwise
your camera will not be held in position
correctly. Check the illustration below!
Using the RF 80 with MaximDL
In Maxim click View/Observatory Control/Setup and at the Focusser click Options/Choose.
In the ASCOM chooser select Seletec Focusser (Main port).
You must do the setup of the rotator similarly, clicking the Options at the Rotator setup.
You can see an autofocus
session result at right. It is
important to configure Maxim
autofocus options correctly
(system F No.,central
obstruction, focusser step
size) to get a good result.
Care of your RF 80
Protect the anodised aluminium surfaces with silicone or paraffin oil twice a year. Do not use
solvents to clean the surfaces. Do not oil the focusser drive pinion.
If the adapter gets stuck in the barrel do not force it. Remove the cover plate as shown below
and unscrew the barrel. Now you can use force to separate the parts.
www.geminitelescope.com
Innovation and Service since 1996