1
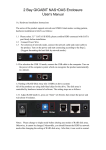
Mac User Manual - 1.8.x Software
For Mac OS X 10.3 (Panther), 10.4 (Tiger), 10.5 (Leopard), and 10.6(Snow Leopard)
Powered by
Technology
User Manual
Network Direct Attached Storage / NDAS®
Software Release Statement
User Manual for Mac OS X 10.3.x, 10.4.x, 10.5.x and 10.6.x Software Version
1.8.x, released 2009, made in the U.S.A.
Trademark Statement
NetDISK® , NDAS® and IOCELL Networks are trademarks of IOCELL
Networks Corp., registered in the U.S.A and other countries. All other
trademarks are the property of their respective owners.
Copyright Statement
Copyright © 2009 IOCELL Networks Corp. All rights reserved. Reproduction,
translation, transformation or adaptation in any manner without prior written
permission of IOCELL Networks is strictly prohibited.
License Statement
The software described in this document is furnished under a license
agreement. The software may be used only in accordance with the terms of
the license agreement
Warranty Statement
IOCELL Networks reserves the right to revise this publication and to make
changes to the content hereof without the obligation of IOCELL Networks to
notify any person of such revision or changes. IOCELL Networks provides this
publication "as is" without warranty of any kind, either expressed or implied,
including but not limited to the implied warranties of merchantability or fitness
for a particular purpose.
2
User Manual
Network Direct Attached Storage / NDAS®
Table of Contents
Chapter 1 Introduction ............................................................................................... 4
1.1 User Manual .................................................................................................................. 4
1.2 System Requirements ................................................................................................... 4
1.3 NDAS device Connection Overview ...............................................................................5
Chapter 2 Cable Installation ....................................................................................... 6
2.1 NDAS Mode ................................................................................................................... 6
2.2 USB Mode ..................................................................................................................... 7
2.3 eSATA Mode .................................................................................................................. 7
Chapter 3 NDAS Software Installation ........................................................................8
3.1 Installing NDAS Utility 1.8 Software ..............................................................................8
Chapter 4 NDAS device Registration ........................................................................11
4.1
4.2
4.3
4.4
Register a New NDAS device Automatically. ...............................................................11
Register a New NDAS device Manually. .......................................................................12
Register a New NDAS device by registration file..........................................................13
Sharing Your NDAS device .......................................................................................... 14
Chapter 5 NDAS Utility ............................................................................................. 15
Chapter 6 NDAS device usage................................................................................... 16
6.1 Read Only and Read / Write Mode ...............................................................................16
6.2 Changing Read Only or Read / Write Mode .................................................................17
Chapter 7 Using NDAS devices in a Mixed Environment ...........................................18
7.1 Mixed Environment with Mac and Windows ................................................................18
Chapter 8 Preventing Auto Registration of the NDAS device ....................................19
8.1 Remove the “Auto Register” Capability of your NDAS Device .....................................19
8.2 Re-Registering a converted DNAS Device....................................................................20
Chapter 9 Saving Registration information of NDAS Device......................................21
Chapter 10 Uninstall ................................................................................................. 22
Chapter 11 FAQ ........................................................................................................ 23
3
User Manual
Network Direct Attached Storage / NDAS®
Chapter 1 Introduction
Congratulations on the purchase of your NDAS device.
Network storage via Ethernet made possible through NDAS technology!
1.1 User Manual
This User Manual is intended to help you install your NDAS device quickly and
easily on your Ethernet Network and begin using it immediately on your
Personal Computer or the LAN.
1.2 System Requirements
•Mac OS 10.3 (Panther) or later
•G4/G5 Power PC, Intel processor Mac
•1GB Memory
•USB 2.0 Port
•100/1000 Base-T full duplex switch for NDAS
Note: NDAS device(s) cannot be used with any type of Network Hub.
4
User Manual
Network Direct Attached Storage / NDAS®
1.3 NDAS device Connection Overview
NDAS Mode
In NDAS Mode, your device is wired directly to the network. Computers
that are connected to the network (wired or wireless) can use the NDAS
device as if it were a local disk drive.
Single Host Modes
You can connect your device directly to a single computer’s USB 2.0
port or by eSATA (if equipped).
eSATA
USB
5
User Manual
Network Direct Attached Storage / NDAS®
Chapter 2 Cable Installation
Warning: Do not connect the USB or eSATA or Ethernet cables at the same time.
2.1 NDAS Mode
Note: NDAS connection software does need to be installed on each
computer in order to use your device in NDAS mode..
1.If your NDAS device has dip switches on the rear panel, flip both dip switches
down.
2.Connect the included Ethernet cable from the Ethernet port on the NDAS device to
a switch.
Wireless users: Connect NDAS device to your wireless router or Airport
with the included Ethernet cable.
3.Make sure the power connector is firmly attached to the NDAS device and connect
the power adapter to a power source.
4.If your NDAS device has an On/Off switch, slide the On/Off Switch to the ON
position.
6
User Manual
Network Direct Attached Storage / NDAS®
2.2 USB Mode
Note: NDAS Utility software does not need to be installed to use in USB
mode.
1.If your NDAS device has dip switches on the rear panel, flip both dip switches up.
2.Connect the included USB cable from USB port on NDAS device to your computer’s
USB port.
3.Make sure the power connector is connected firmly to the NDAS device and
connect the power adaptor to a power source.
4.If your NDAS device has an On/Off switch, slide the On/Off Switch to ON position.
2.3 eSATA Mode
Note: NDAS Utility software does not need to be installed to use in sSATA
mode.
1.Connect the included eSATA cable from eSATA port on NDAS device to your
computer’s eSATA port.
2.Make sure the power connector is connected firmly to the NDAS device and
connect the power adaptor to a power source.
3.Switch the On/Off switch to the ON position.
7
User Manual
Network Direct Attached Storage / NDAS®
Chapter 3 NDAS Software Installation
3.1 Installing NDAS Utility 1.8 Software
Installing NDAS software is simple and easy. If downloading software, please
double click the disk image and click on “NDAS software Installer.mpkg” to
begin installation.
If you are using the Installation CD, insert the CD into your CD-ROM drive and
select “NDAS software Installer.mpkg”.
1.Introduction - NDAS Installer appears. Click the Continue button to continue to
the next step.
2.Read Me - Carefully read the installation notes then click Continue.
3.License - Carefully read the Software License Agreement and click
8
User Manual
Network Direct Attached Storage / NDAS®
Continue when finished.
3.1. Click on Agree to Accept the User License.
4.Install - Click Install to begin installing the NDAS Software.
9
User Manual
Network Direct Attached Storage / NDAS®
5.Please wait while the NDAS Software installs.
6.Finish Up - Click the Restart button to complete the installation.
10
User Manual
Network Direct Attached Storage / NDAS®
Chapter 4 NDAS device Registration
4.1 Register a New NDAS device Automatically.
1.Connect a New NDAS Device following the instructions in section 2.1
2.Click on the NDAS Utility Icon located in your Utilities Folder.
3.Your Auto Registered NDAS Device will appear as in the image below.
Note: NDAS Devices that do not have “auto register” capability will not appear. Also, if
the “Prevent Auto Registration” routine (Chapter 8) has been run on your NDAS device, it
will not appear. Such devices must be registered manually (Chapter 4.2)
.
11
User Manual
Network Direct Attached Storage / NDAS®
4.2 Register a New NDAS device Manually.
1.Click on the NDAS Utility Icon located in your Utilities Folder.
2.Click the Register The New Device icon in the upper left hand corner of the
window.
3.NDAS device Registration sheet will appear.
4.Enter a name for the NDAS device then add your NetDisk’s NDAS ID and Write
Key. The Write Key is needed to write to your NDAS device. Once entered, Click
Register to continue
Note:
•The NetDisk’s NDAS ID and Write Key does not contain the letter O. Please use only
the number 0.
•If your NetDisk’s NDAS ID and Write key are not typed in correctly, The 'Register'
button will not available..
12
User Manual
Network Direct Attached Storage / NDAS®
4.3 Register a New NDAS device by registration file.
You can register the NDAS device by the NDAS registration information file
that saved earlier.(Chapter 9) The extension of the NDAS registration
information file is “ndas”. And appeared like the image below.
There are two ways to register.
1.Double clicking the NDAS registration information file.
When you double clicked the NDAS registration information file,
The NDAS Utility will appear and registering the NDAS Device
automatically.
2.Open the NDAS registration information file with NDAS Utility.
1.Click on the NDAS Utility Icon located in your Utilities Folder.
2.Choose Open NDAS registration information file... menu at
File menu.
3.Choose the NDAS registration information file what you want to
register.
4.The NDAS Device will be registered automatically.
13
User Manual
Network Direct Attached Storage / NDAS®
4.4 Sharing Your NDAS device
Once an NDAS device is connected to your network, it can be accessed from
any computer on your LAN.
The following conditions are required to share an NDAS device:
Mac OS Environment:
•All computers and NDAS device must be on the same LAN.
•The NDAS device must be connected via Ethernet to a switch or Wireless
Router.
•The NDAS software must be installed on each system.
•Only One user can have Read/Write access to the NDAS device at a time.
•All other users must have the device mounted in Read Only Mode.
•The NDAS device must be registered onto each computer.
Warning:
•DO NOT perform disk operations (format, partition) when multiple
systems have the NDAS device mounted.
•The NDAS device can be formatted or partitioned ONLY when one system
is connected.
14
User Manual
Network Direct Attached Storage / NDAS®
Chapter 5 NDAS Utility
The NDAS Utility is the software that allows you to control your NDAS
device(s) and also provides detailed information about the NDAS device that is
registered on your system.
To get to the NDAS Utility open your Mac Hard Drive, then open your
Applications folder, then your Utilities Folder. The NDAS Utility should be
listed in the Utilities folder.
Click the NDAS Utility. All registered NDAS device(s) will be displayed on the
NDAS Utility Menu.
•NDAS Utility - Lists all NDAS devices that are registered.
•Register a New Device – (Disk Icon in top left corner) Registers a NDAS
device to your computer.
•Unregister the Selected Device – (Red Circle with bar in top left corner)
Removes the NDAS device from the software.
•Refresh All Devices – (Blue circular arrow on top left corner) Refreshes the
status of all NDAS Devices.
•NDAS Device List – (Left side white area) Displays all registered NDAS
Devices.
•Device Status Area – (Right side gray area) Shows the type of device
(Single or Multiple Unit Device), the mount status of each unit available
in the NDAS device as well as information regarding the actual disk(s)
inside the NDAS device.
•Configuration - This is where you will change the Mount status of your
NDAS device. Available options will be Mount Read Only and Mount
Read/Write.
15
User Manual
Network Direct Attached Storage / NDAS®
Chapter 6 NDAS device usage
Now that you have successfully installed your NDAS software, it’s time to
familiarize yourself with using the NDAS device. Once the NDAS device is
mounted, it will appear on your Desktop.
Here are a few functions for NDAS devices.
•You can use NDAS devices like any other hard drive on your system.
•Drag and Drop files.
•Copy and paste data to NDAS devices.
•Make and delete files/folders.
•Share files and folders
•Backup files directly to the NDAS device
•Use the NDAS device as Time Machine®1 drive for Mac OS X 10.5.x
Leopard.
6.1 Read Only and Read / Write Mode
NDAS devices provides users with 2 main functions; Read Only and Read /
Write.
Read Only Mode
• Any number of users or applications can read from a NDAS device.
Read / Write Mode
• Only one user can write to a specified NDAS device at a time.
• No other users can have Read /Write Access to the NDAS device until it is
switches to Read Only mode or dismounted.
1
Time Machine® is the trademark of Apple Inc.
16
User Manual
Network Direct Attached Storage / NDAS®
6.2 Changing Read Only or Read / Write Mode
Open your NDAS Utility by clicking on your Macintosh HD icon on your
Desktop, double click on your Applications Folder, then your Utilities folder.
Mount with Read Only Mode
•Select the NDAS device you want to
mount.
•Mouse over the Device Status Area.
•Under Configuration select Mount
Read Only.
•The status will now show Mounted
with Read Only
Mount with Read / Write Mode
•Select the NDAS device you want to
mount.
•Mouse over the Device Status Area.
•Under Configuration select Mount
Read / Write.
•The Status will now show Mounted
with Read / Write
Only when both the Configuration and Status display the mount information is
the NDAS device in that state.
NOTE: The status can be changed by specifying a command, only if no user or
application is using the NDAS device. If a user or application is using the NDAS
device, the status will not change.
17
User Manual
Network Direct Attached Storage / NDAS®
Chapter 7 Using NDAS devices in a Mixed
Environment
7.1 Mixed Environment with Mac and Windows
•All computers must be on the same LAN with the same Subnet.
•The NDAS device must be connected via Ethernet to a Router/Switch.
•To share the NDAS device each computer must have the appropriate NDAS software
driver installed
•On Windows XP/2000, install version 3.xx or higher
•On Windows 98se/ME, install version 1.x
•On Mac OS X, install version 1.8.x or higher
•The NDAS device must be registered on each computer.
•Read / Write access can only be granted to one MAC at a time. The rest of the
computers must connect in Read Only Mode. If mounting Read / Write fails because
another user has the device mounted, you may choose to request the Read /Write
privilege. Once the Read/ Write access is released by the other computers, you can
connect in Read / Write Mode.
NOTE: The NDAS device comes preformatted at NTFS. In order to use the
NDAS device in a Mixed Environment you must format the NDAS device from
the Mac in a MS-DOS File System using Disk Utility. MS-DOS file system (also
known as FAT32) is the only File System that Mac and Windows can both Read
and Write to.
18
User Manual
Network Direct Attached Storage / NDAS®
Chapter 8 Preventing Auto Registration of the
NDAS device
The “Auto Registration” capable NDAS Devices are registered automatically at
and can be used by the all computers on the same LAN. You can prevent Auto
registration to can not be used by the computers that did not register by
typing NetDisk’s NDAS ID(registering manually).
8.1 Remove the “Auto Register” Capability of your NDAS Device
1.Choose Prevent Auto Registration... menu in Management menu.
2.Press Prevent Auto Registration button.
3.Enter a NetDisk’s NDAS ID and Write Key. Once entered, Click Register to
continue
NOTE:
•If you register key, You can‟t revert that NDAS device to "Auto register" capable NDAS
device.
• You have to connect the NDAS device and unmount all unit devices before register
key.
•
It'll takes about 5 seconds to register key.
19
User Manual
Network Direct Attached Storage / NDAS®
8.2 Re-Registering a converted DNAS Device
If the NDAS device that auto registered already was prevented auto
registration by another computer. You have to re-register to use it.
1.Choose Re-Register Device... menu in Management menu.
2.Enter a NetDisk’s NDAS ID and Write Key. Once entered, Click Register to
continue.
3.Press Register button.
NOTE: It'll takes about 5 seconds to complete.
20
User Manual
Network Direct Attached Storage / NDAS®
Chapter 9 Saving Registration information of NDAS
Device
You can save the NDAS Device registration Information of manually
registered(Chapter 4.2 and Chapter 4.3) device to register that NDAS device
easily next time or register at the other computer.
1.Select the NDAS Device to Save information in NDAS Device list.
2.Choose Save NDAS registration file... menu in File Menu.
3.Enter a NetDisk’s NDAS ID and Write Key. The Write Key and Description
are optional. Once entered, Click Save to continue.
4.Choose folder to save file. Click Save button.
21
User Manual
Network Direct Attached Storage / NDAS®
Chapter 10 Uninstall
Insert the included "NDAS Installation CD" into your CD-Rom. There you will find
the NDAS Uninstaller.
Start the Uninstaller by double clicking the NDAS software Uninstaller.app
1.Enter Password.
2.Click Uninstall.
3.Once finished, click Restart.
22
User Manual
Network Direct Attached Storage / NDAS®
Chapter 11 FAQ
For the most recent list of FAQs, please visit http://www.iocellnetworks.com
1. How do I Disconnect NDAS device?
To disconnect NDAS device, we always recommend using the Eject option. If you CONTROL + click on the NDAS device on your Desktop, then you will be given an option to
Eject the NDAS device. You may also drag the NDAS device into your Trashcan. After
that, you can go into NDAS Utility and unmount your NDAS device.
If you are using USB, then Ejecting the NDAS device is all that is needed.
2. I have installed the Mac Drivers and NDAS device will not Enable.
Make sure you have the latest drivers, available at the Download Center.
Please check the following:
Verify that your cables are plugged in correctly and that you have a link on the switch
where NDAS device is plugged into. Make sure that it is formatted to a file system that
your Mac can recognize. You can run Disk Utility (Application > Utilities > Disk Utility).
This will allow you to see the drive and format it to Mac OS Extended or MS-DOS File
System. When plugged in via NDAS (Ethernet), please try enabling Read Only mode and
reboot your Mac. It should show up on your desktop as a Hard Drive. Then use the NDAS
Utility to enable Read/Write mode.
If that still does not work, try plugging it in via USB to see if it is recognized just to make
sure the NDAS device is fine. If that works, then try reinstalling the NDAS device software.
If it still does not mount, then try formatting the NDAS device again via USB and retry
Enabling the drive.
3. How should I format NDAS device?
It is recommended to format NDAS device to Mac OS Extended format using the Disk
Utility (Applications > Utilities > Disk Utility). If you also have a Windows computer as well,
and would like to use it between the two, then you must format it to FAT32 for it to be
recognized on both computers. You may use the "MS-DOS File System" option to format
the disk in FAT32.
23
User Manual
Network Direct Attached Storage / NDAS®
4. The NDAS device mounts up fine and I can see it on my desktop, but it
disappears randomly and reappears. What is going on?
This problem can occur if the connection between your computer and the NDAS device
are a little unstable. Make sure that you are not using any Hubs, and that only Switches
are be- ing used to connect your computers and the NDAS device to each other. If you are
using a wireless connection, make sure your signal strength is strong.
Try to connect the NDAS device directly to your ethernet port on your Mac to see if the
connection is stable. This will ensure that the NDAS device's ethernet port is fine. If your
connection stabilizes, then try replacing your ethernet switch or router.
If the problem persists with any switch or router, a newer software version may fix your
issue.
Check the Download Center for possible updates.
5. Can I access the NDAS device from my Mac in a windows OS network?
Yes you can, but there are limitations writing to the NDAS device with this setup. First it
is best to format the NDAS device to FAT32. Once you register the NDAS device from your
Mac, you will not be able to have write access if another windows OS computer has
mounted read write. However the NDAS device can be used for windows file sharing and
can map from the Mac. This way everyone can get read and write access to the NDAS
device without a problem.
6. Can the NDAS device be left on over night?
Yes your NDAS device can be turn on 24 / 7. Before you turn off your computer we do
recommend that you unmount the NDAS device to limit future problems with your NDAS
device.
7. When adding NDAS device to my computer, it tells me that my ID and Key are
invalid.
What's wrong?
You may not have entered all the alpha-numeric values correctly. There are no letter
"O"s; please verify that you have used the number "0" (zero) for anything resembling an
"O." Also please check your other letters as well; two V's may look like a W. Start by
entering only the NetDisk ID(NDAS ID). The ADD button should not be grayed out if the
correct ID is entered.
Once it is not grayed out, proceed to add the Write Key as well.
Please also make sure that there are 20 characters for the NetDisk ID(NDAS ID), not
including the Write Key.
24
User Manual
Network Direct Attached Storage / NDAS®
8. I cannot enable read/write access on more than one machine.
With our current Mac drivers, only one machine can have read/write access at a time. The
other machines will all have read-only access. We are working on a multi-write driver for
Mac, and is expected to be released sometime in the future.
9. Why can't my computer go into hibernation or standby?
If you want to use your computer in hibernation or standby, you must have NDAS device
disabled before that can occur. You can disable the NDAS through the NDAS Utility.
10. It takes over a minute for the NDAS device to show up on my desktop after enabling.
If you are running your Mac on a wireless connection, this may happen. A wireless
connection may take some time to properly obtain a stable connection with the NDAS
device. If your NDAS device is formatted in FAT32, this may also cause the mount to
take long. If you wish to improve the speed, try reformatting the NDAS device in Mac OS
Extended (only if you have a Mac ONLY environment). Later software releases may
increase speeds, so make sure you have the latest driver release.
25