1
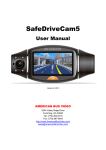
VM-366A USER MANUAL
Thank you for choosing our Tachograph!
Besides the common functions which the Tachograph has, it has three more main
characteristics:
(1)It has internal dual lens, which makes it able to catch and shoot both of the
front and back images.
(2)GPS module has been added to it, which can record the driving/travel track
completely. The driving/travel track can be showed on the map by connecting Google
map through Internet while you can watch the video on the computer by using the
special accompanying software, which can help you to track the driving/travel track of
the vehicle.
(3)It has been equipped with internal G-Sensor i.e. Gravity sensor, which may
record the gravity sensing information and which may judge according to the up and
down deviation, left and right deviation and front and back deviation of the vehicle,
when the deviation approaches a certain value, it will consider that abnormality
occurred to the vehicle and it will automatically give lock protection to the current
video. At the same time of viewing/watching the video on the computer by using the
special accompanying software, you also can watch the changes of the gravity sensing
data which may help you to track the gravity status during the travelling course.
(4)Continuous real time video without even one second of missed video, which
makes your evidence being more reliable.
(5)Special encryption protection function protects your personal privacy.
In order to bring the maximum function of the Tachograph into full play, please read
this handbook before using (please understand that we will not give notice separately
if there’s any change to the design or specification of the Tachograph or its
accessories).
Contents
Product Structure
……………………………
Begin to use the Tachograph
……………………………
Charge the battery
……………………………
Preparation for the memory card
……………………………
Adjust the position of the lens
……………………………
Turn on and off the Tachograph
……………………………
Basic operations of the Tachograph
……………………………
Switch operation modes
……………………………
Set menu
……………………………
Video shooting
……………………………
Using of shortcuts during video shooting
…………………………
Video reading/access and using instructions for AP software
……………
Read and play video files
……………………………
Filing of video documents
……………………………
Delete documents
…………………………
Documents restoring
……………………………
GPS positioning and application
……………………………
Using of tool box
……………………………
Technical Specifications
……………………………
Accessories Table
……………………………
Product Structure
1.Turn on/off button 2.ok button
3. Reset button 4. Downwards button 5.Upwards button
6. Menu button 7. Modes switching button
8. Microphone 9.GPS interface
10.TF card slot 11. Car charger port
12. Indicator 13. Display screen
14. Lock key 15. Optical screen resistor
16. Back lens 17. Speaker hole
18. Triangle nut hole 19. Front lens
Begin to use the Tachograph
Charge the battery
There is a way for you to charge the batteries:
1.Charge the batteries by using the attached vehicle power.
The green charging indicator will be lightened during the course of charging, and the indicator will
to out automatically after the charging finished.
The time for the entire charging is approximately four hours.
Preparation for the memory card (TF)
Requirements on TF card: The Tachograph requires that the card capacity should be and
be more than 4GB, and its speed should be and be more than CLASS6.
Since the Tachograph uses an independent special document system, it will point out that it
should be formatted to establish the special document system when you use memory card in it for
the first time. If you carry out formatting, then all the data on the memory card will be deleted
forever which can not be restored, including the video under protection. Therefore, please copy
and make backup of and for the important data before formatting the memory card.
Note: AP software
for customer using will be generated in the TF card after the
Tachograph has been formatted. Since it have GPS positioning and time service function, it should
be set with the time zone it locates, while the current time zone will be set automatically only by
turn on AP in the TF card. The icon
will be displayed on its screen and the time service can
not be realized by GPS positioning if the aforesaid operation has not been carried out, however,
which will not affect other functions.
Adjust the position of the lens
Its front/back lens can be rotated for 270 degree to the front or back, so as to cooperate with the
fixing position of the Tachograph with better effect to reach a better video shooting effect.
Turn on and off the Tachograph
1. Turn on and off it manually: Press and hold the power button one time, and the red Turning On
indicator will be lightened, then it will be started after the sound Tick and video shooting can be
carried out. You can turn off it by pressing and holding the power button again.
2. Turn it on or off while driving/travelling: Connect with the vehicle power first, then it, when the
vehicle is starting, will be turned on automatically and begin to shoot videos after time delaying.
Note: If the Tachograph uses internal power, in case of low power, the Tachograph will save the
videos and turn off automatically after low power being indicated and displayed.
Reset of the Tachograph
In event of abnormality occurs arising from improper operation to it, it can be started by pressing
RESET button and its normality will be restored.
Basic operations of the Tachograph
Switch operation modes
There are two kinds of operation modes: video and replay modes. The operation mode can be
switched by pressing MODE button.
In video mode, it can begin or stop to shoot videos by pressing OK key.
In Replay mode, the video documents are arranged in time order, you can check them by pressing
upwards and downwards buttons, and the current video can be played by pressing OK button.
Set menu
In preview mode, it will enter system set menu by pressing MENU button, the background color
of menu set is blue. Choose the items which you need to set by pressing upwards and downwards
button and confirm the setting by pressing OK button, then your can exit the menu by pressing
menu button again.
Video shooting mode: Dual- lens /front lens /back lens
Time setting: Adjust the time by pressing upwards and downwards buttons and press OK button to
exit.
Formatting: Enter formatting by pressing OK button to choose YES/NO.
Prompt tone: Turn on/off
Voice recording: Turn on/off
Language: English/Simplified Chinese/Traditional Chinese/Japanese/Russian/German
Screen pre-set: Turn on/off
Protection sensitivity for automatic video shooting: low/general/high/turn off the automatic video
protection function.
(The function set the sensitivity of the automatic video shooting while
the gravity sensor is starting)
Frequency: 50HZ/60HZ.
Default set: Yes/No(Choose to decide whether to restore the default factory parameter setting)
Video shooting
Begin/Stop video shooting: Video shooting will begin automatically when it starts or the TF is
inserted. The video shooting may be stopped during video shooting course by pressing OK button,
which may be re-begin by pressing OK button again.
Using of shortcuts during video shooting
Press downwards button to turn off/on voice recording function.
Press turn on/off button to switch between front and back lens in full screen (which only can take
effect when the DUAL- LENS mode has been chosen).
Press locking button to carry out locking protection to the current video under emergency
circumstances.
Pressing mode button to stop video shooting and save the video, and switch to replay mode. And
press the MODE button again to exit replay mode and begin to shoot a new video.
Video reading/access and using instructions for AP software
It does not support direct reading/access through USB, it needs the equipment which supports TF
card to finish reading/access of the videos shot by it.
When TF card is inserted into it and after the formatting having been finished, the special
software tool
will be generated in the memory card automatically, which must be used for the
computer to access the video documents in it.
Note:
( 1 )In order to make it convenient for using and prevent abnormality occurring to memory
card which will result in damaging software tool, it is suggested to copy/make a backup of the tool
into your computer for saving.
( 2 ) The computer operation system must be the higher level of Windows
2000/XP/Vista/Windows 7and MAC OS x 10.3.6.
Using instructions for AP software
When you open TF disk on PC, there will not be any other video document, but only a J PLAYER
software , which the user needs to use to read/access to video and related applications.
Read and play video files
Click
, and open choosing menu from the occurred documents.
Disk: Read all the contents in the designated TF card.
File: Import and play the designated documents which have been saved into PC.
Route: Import AP for all the video documents which are under the designated PC folders.
Password: If it is TF card and this card has a password, then it only can be read provided that the
password has been input.
After choosing the above mentioned route, click “Apply”, then it will return to AP to play.
The playing status can be controlled by clicking the Control icon
:The
Slow Turning/Stop/Play (pause)/Quick Turning can be realized separately by clicking the icon
from the left to the right.
You can choose to play the video by the way of dual lens by clicking the icon
lens /Front lens /Back lens (It is only apply to dual lens video documents)
When the video is playing, the current frame can be saved as picture by clicking
: Dual
. .
Filing of video documents
Two type of filing: one type is to file and save the entire video document and another type is to file
and save a certain section of the video chose by you.
File and save the entire video document: it is only necessary to tick in the box
which is
in front of the video and then click
, as a result the entire video document will be saved in
the designated place.
Video section saving: The video of it will not be made as sections for approximately every 3
minutes, but the specified section can be filed and saved, so as to decrease the size of the documents.
It
is
unnecessary
to
tick
in
the
box
when the cursor stops at the video document which needs to be saved, instead, you should save the
document by clicking
, and then the below dialog box will appear. You just need to tick in the
corresponding box which is correspondent to the section which you want to save and click “Filing”,
then the document filing/saving will be finished.
Delete documents:
Choose
the video documents that you do not want to save, and click
, then the
options “Confirm/Cancel” will appear, by choosing which you can delete the chosen video
document.
Documents restoring:
Damage
may be occurred to the document which is being shooting currently
arising from card problem or abrupt power failure during the video shooting course, the video
document can be restored by using
.
GPS positioning and application:
Two conditions should be met in case of using this application, i.e.: when video shooting is carried
out, the positioning should have been carried out successfully by GPS and the current PC
computer can be connected with network. After the video having been positioned by GPS
successfully, a notice in respect of latitude, longitude and moving speed will appear at the upper
side of AP:
then you can open or close the map by clicking
.
In this mode, you can switch between map and 3D map by choosing map/satellite options on the
upper right corner. While you can shoot the real lens on the street by dragging
the icon
to the map (this function needs the supports from GOOGLE, please contact GOOGLE for the
details of specific area and country).
KML application of GOOGLE Earth
:
GPS Positioning data can be downloaded and saved
as *.KML document by clicking
.
And then the entire travelling route can
restored by using Google Earth
software (http://www.google.com/earth/index.html).
Using of tool box:
You can enter into tool box by clicking
to realize a series of practical functions such as SD
card formatting, software upload (upload the software into SD card), SD card speed testing, map
selection and user password setting etc.
Password setting: In need of protection, the user can encrypt a password to TF card.
And the video in TF card only can be opened /unfolded by using the password.
Product Characteristics
- Ultra-small size, dual lens with high definition, the front lens can rotate frontwards and
backwards for 270 degree and the back super-periscopic lens can rotate for 270 degree which have
a high resolution, both of the lens are combined perfectly, which facilitates the video shooting
from multi-angles in various occasion to get a video with high resolution.
- 1/4 inch internal photosensitive elements with low noise and high picture quality, which can
capture ultra -clear pictures in relatively dark occasion
- Internal lithium polymer battery, which enables video shooting being carried out while charging.
- Internal microphone / speaker
- Support TF card with high capacity
- Turn it on and start video shooting function automatically as the vehicle starts
- Delay starting function, which can prevent it from damage caused by pulse current occurred at
the moment of vehicle starting.
- GPS scanning and positioning, travelling track restoring, which makes everything is under
control.
- Infrared photosensitive
- Gravity Sensor
- Video encryption protects user s’ privacy by setting password.
Technical Specifications
LCD Screen Size
2.7” High definition screen
140 degree front super-periscopic lens/120 degree back
periscopic lens
English/Simplified
Chinese/Traditional
Language Options
Chinese/Japanese/Russian/German
Video Format
AVI
TF Memory Card Slot Micro TF
Microphone / Speaker Internal
Vehicle Power DC 5V 500MA
Input
Battery
Internal lithium polymer battery
System Requirements Above Windows 2000/XP/Vista/Windows 7,MAC OS x
10.3.6 changing rights of the product are reserved. Any
Note: The designing and specification
change will not be notified separately.
Lens
Accessories Table
1.
Vehicle power, 2. Vehicle bracket, 3.GPS module, 4.Instructions