1
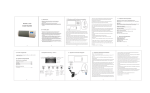
INSTRUCTION MANUAL
DVD HOME THEATER
DC-HT818
Contents
For your Attention..........................................................................2
Features & Package Contents .....................................................3-4
Remote Control..........................................................................5-6
Panel............................................................................................7
Connections.............................................................................8-10
System Setup.........................................................................11-16
Basic Playback........................................................................17-22
Trouble shooting..........................................................................23
Specifications..............................................................................24
-1-
For Your Attention
IMPORTANT NOTES
Please read through this manual before making connections and operating
this product. Retain this manual for future reference.
Don't open the cabinet of this unit. No user-serviceable parts inside. Refer
servicing to qualified personnel only.
Switch off the unit when you don't use it. Switch off the unit and disconnect it
from the AC power supply when it is not being used for a long time. (Plug, as the
disconnected device entirely with power source, should keep in easy-tooperation in daily life.)
Don't install the unit in a place exposed to heating sources or direct sunshine.
Don't install the unit in a place exposed to moisture or rain.
The apparatus shall not be exposed to dripping or splashing and any object
filled with liquids, such as vases shall not be placed on it.
Install the unit on a horizontal, flat and firm surface with good ventilation.
Never block the vents which will cause malfunction resulting from overheating.
Use a soft and clean cloth to clean the outside of the unit . Never clean it with
chemicals or detergent.
This book is only a guide for user's operation, not a criterion for configuration.
Only use attachments/accessories specified by the manufacturer.
WARNING: The batteries shall not be exposed to excessive heat such as
sunshine, fire or the like.
CAUTION: Danger of explosion if battery is incorrectly replaced.Replace only
with the same or equivalent type.
Do not install this apparatus in a confined space,such as a book case or
built-in cabinet.Minimum distance(about 100mm) around the apparatus for
sufficient ventilation.
TO REDUCE THE RISK OF ELECTRIC
SHOCK OR FIRE, DO NOT OPEN THE
COVER. REFER SERVICING TO
QUALIFIED SERVICE PERSONNEL.
The lightning flash is intended to alert the user to the presence of dangerous
voltage within the product's enclosure, and touching the internal components may
result in a risk of electric shock to persons.
The exclamation mark is intended to alert the user to the presence of important
operating instructions.
The following two labels are on the back
of the main unit:
-2-
Features &Package Contents
Thank you for purchasing our product. Please read this manual
carefully before connection and operation and keep it for future
reference.
This DVD player is a new generation home player which can
produce high quality video and audio for your continued enjoyment.
Built in Dolby Digital, LPCM, MPEG etc. digital audio decoder
HiFi, 96kHz/24bit audio digital processor
COAXIAL digital audio output
USB drive port and memory card slot
Compatible with DVD, VCD, CD, MP3, JPEG, Picture CD, etc.
Full function remote control
AM/FM stereo tuning system
High quality amplifier
Playable Disc and Media Types:
Disc types
Contents
Symbol
DVD
Audio + Video
MP3
Video-CD
VCD
Audio
COMPACT
Audio + Video
DIGITAL VIDEO
VIDEO CD
Audio
CD-DA
JPEG Photo CD
Picture CD
-3-
Features &Package Contents
DVD REGION CODES:
DVD discs and players are covered by a worldwide agreement which limits
playback of DVD discs to specific regions as determined by the software
manufacturer. Most DVDs come marked with a region coding. A disc specified
as playable in one region may not play on a player designed for a different
region. A disc specified as universal or with no region coding (Code ALL)may
be played in any region.
The regions are:
Region 1:
Canada, USA
Region 2:
Europe, Japan, Mid. East, South Africa
Region 3:
South-East Asia
Region 4:
Australia, Caribbean, Central & South America, New Zealand
Region 5:
Africa, Former Soviet Union, India,North Korea, Pakistan
Region 6:
China
THIS PLAYER PLAYS REGION 4 DISCS.
Accessories:
User Manual
Remote Control
A/V Cable
FM Antenna
Speaker Cable
Use r man ual
AM Antenna
-4-
Remote Control
Remote Control Operation
Insert the batteries into the remote control. Point the remote control at the remote
sensor on the front panel. The remote control works within a distance of about 7
metres from the sensor and within an angle of about 30 degrees from the left and right
side.
Battery Installation
1
Remove the battery compartment cover
on the back of the remote control.
2
Load two AAA/1.5V batteries into the
battery compartment making sure that
the batteries have been inserted with the
correct polarities matching the symbols +,
- as indicated inside the battery
compartment.
3
Replace the cover.
Battery Installation
NOTE:
Remove the batteries when you do not intend to use the remote control for a
long time.
Do not mix new and used batteries, or different types of batteries.
Weak batteries can leak and severely damage the remote control.
The batteries must not be exposed to excessive heat source, such as
sunshine, fire or any other things like that.
Be environmentally friendly and dispose of batteries according to your
government regulations.
-5-
Remote Control
1
16
2
3
17
4
18
5
19
20
6
7
21
22
8
23
9
24
25
10
11
26
1 STANDBY/ON
2 DIGIT KEYS
3 GOTO
4 SETUP
5 A-MODE
6 PROGRAM
7 VOLUME+/8 FAST FORWARD/REWIND
9 TITLE
10 DIRECTION KEYS
[ ]/[ ]/[ ]/[ ]
11 AUDIO
12 S.EFFECT
13 STEP
14 USB/SD
15 REPEAT
16 OPEN/CLOSE
17 PLAY/ PAUSE
18 MUTE
19 V-MODE
20 ANGLE
21 FUNCTION
22 OSD
23 NEXT/PREVIOUS
24 SUBTITLE
25 ENTER
26 MENU
27 CH-LEVEL
28 TONE
29 ZOOM
30 STOP
31 A-B REPEAT
27
12
13
14
15
28
29
30
31
TUNER:
8 SEARCH+/9 AM/FM
11 MEMORY
-6-
23 RADIO+/24 AUTO
26 MO/ST
Panel
FRONT PANEL:
1. MICROPHONE SOCKETS
2. DISC TRAY
3. MEMORY CARD SLOT
4. USB PORT
5. OPEN/CLOSE ( )
6. PLAY/PAUSE ( )
7. STANDBY/ON ( )
8. STOP (
)
9. VOLUME ADJUSTING KNOB
10. DISPLAY SCREEN
REAR PANEL:
1. POWER SWITCH
6. COAXIAL DIGITAL AUDIO OUTPUT
2. SPEAKER OUTPUT
7. COMPOSITE VIDEO OUTPUT
3. COMPONENT VIDEO OUTPUT
8. FM ANTENNA JACK
4. LINE INPUT
9. AM ANTENNA JACK
5. 2-CH AUDIO OUTPUT
-7-
Connections
1 VIDEO SYSTEM CONNECTION
The following video outputs are available for this unit .
1.1 Composite Video
Use the yellow plug of an AV cable to connect the composite video output of
this unit to the video input of a TV/monitor.
1. 2 Component Video
Use a 3-core AV cable to connect the component outputs of this unit to the
corresponding inputs of a TV/monitor.
TV/Monitor Video Input
Component Video Input
Y
Composite Video Input
Pb/Cb Pr/Cr
VIDEO
Y
Pb/Cb
Pr/Cr
VIDEO
Composite Video Output
Component Video Output
DVD Player Video Output
Notes:
Of the above video outputs, component is better and composite video is standard. Use
the better available video connection.
Don’t make all the connections above at one time, otherwise the produced pictures
will be affected.
Only when the video settings conform to the actual video system connections does the
player produce the corresponding video output. (Please refer to the Video Setup in
System Setup chapter).
-8-
Connections
2 AUDIO SYSTEM CONNECTION
The following audio outputs (2.1 2.3)are available for this unit .
2.1 Stereo Audio
TV/Monitor/Amplifier Audio Input
Use a pair of AV cable (white for
left, red for right) to connect the
stereo audio outputs of this unit to
the stereo inputs of a TV or a
power amplifier.
2CH Audio Input
L
R
L
R
Digital Audio Input
COAXIAL
2.2 Coaxial Digital Audio
Use a coaxial cable to connect
the coaxial output of this unit to
the coaxial input of a power
amplifier.
2.3 Speaker Output
Use speaker cables to connect
the speaker output terminals of
this unit to the corresponding
speakers.
2CH Audio Output
COAXIAL
Digital Audio Output
DVD Audio Output
Notes:
The audio settings should conform to the practical audio system connections.
Please refer to the Audio Setup in System Setup chapter.
-9-
Connections
2.4 Line Input
Audio Output of Extra Devices
This unit has a group of stereo
2-CH AUDIO OUTPUT
audio input terminals, i.e. LINE
L
R
INPUT (on the rear panel). You can
input the analogue stereo audio
signals from extra device such as
DVD, VCD, CD, VCR player, etc by
connecting it via the input terminals.
Use the audio cable (white for left ,
red for right) to connect the stereo
audio output terminals of a DVD,
VCD, CD, VCR player, etc to the
stereo input terminals of this unit.
After the connections have been
correctly made, press [ FUNCTION ]
L
R
to switch to the corresponding
signal source LINE to enjoy the
audio from the connected extra
LINE INPUT
device.
DVD Audio Input
2.5 FM/AM CONNECTIONS
AC POWER CONNECTION
After checking all the connections have been made correctly,plug the AC power lead of
this unit into the wall socket,then switch the power switch to the on position .
NOTE:
Unplug the AC power lead from the wall socket if the unit will not be in use for a
prolonged period of time.
-10-
System Setup
MENU OPERATION
1. Press [SETUP] on the remote control to display the setup menu.
2. Press [ ]/[ ] to select an item. The submenu of the selected item will be displayed
below instantly.
3. Press [ ]/[ ] to select an item you desire to set in the submenu, then press
[ENTER] /[ ]to enter. Use [ ]/[ ] to select an option, then press [ENTER] to confirm
it, or press [ ] to cancel.
4. Then you can press [ ]/[ ] to continue to set other items in the submenu.
5. Press [ ] to go back to the upper menu of the current one.
6. Press [SETUP] again to exit the setup menu. Alternately, move the highlight to' ',
then press [ENTER] to exit the setup menu.
1 GENERAL SETUP PAGE
1.1 TV DISPLAY
If the unit is connected to a conventional TV set, select 4:3 PANSCAN or 4:3
LETTERBOX. The 4:3 image will be displayed in full screen in its native aspect ratio.
4:3 PANSCAN: The wide-screen image will be displayed on the screen in its native
aspect ratio with some part on the left and right cut off.
4:3 LETTERBOX: The wide-screen image will be displayed in its native aspect ratio
with black bands on the upper and lower sections of the screen.
16: 9: If the unit is connected to a wide-screen TV set, select this option. The widescreen image will be displayed in full screen in its native aspect ratio while the 4:3
image will be stretched out horizontally to fit in the screen.
1.2 ANGLE MARK
Set this item to ON. When a disc encoded with multiple camera angles is playing, the
angle mark will display on the screen. Then you can view the video of different camera
angles by pressing [ANGLE] on the remote control.
Set this item to OFF to disable this function.
NOTE: This function only works with those discs encoded with multiple camera angles.
1.3 OSD LANGUAGE (On-Screen Display Language)
Set the on-screen display language with this item.(ENGLISH,DANISH,SWEDISH)
1.4 CLOSED CAPTIONS
Set this item to ON. When a disc encoded with closed captions, the closed captions
will be shown on the screen. Set this item to OFF to hide it.
You can also press [SUBTITLE] on the remote control to show or hide the closed
captions.
NOTE: This function only works with those discs encoded with closed captions.
1.5 SCREEN SAVER
ON: If the image remains motionless on the screen, for example the disc is paused,
stopped etc, for several minutes, a screen saver will appear on the screen. You can
press any key or button except [STANDBY/ON] to wake it up.
OFF: Disable the screen saver function.
-11-
System Setup
1.6 LAST MEMORY
ON: During playback or in the paused/stopped status each time you open the disc tray
or turn off the player, the unit will memorize the last playback time. Next time when you
insert the same disc and close the disc tray to load the disc, the unit will play from the
memorized point.
OFF: Disable the last memory function.
2 AUDIO SETUP PAGE
2.1 ANALOG AUDIO SETUP
2.1.1 DOWNMIX
LT/RT: The 5.1-channel audio is mixed into left channel and right channel and is
output via the FL and FR speakers respectively.
STEREO: The 5.1-channel audio is mixed into stereo signal and is output via the FL
and FR speakers.
3D SURROUND: This mode creates a virtual surround effect from stereo or multichannel audio contents.
5.1CH: Turn off the DOWNMIX mode. If the unit is connected to a 5.1-channel
amplifier, this item should be selected.
NOTE: This function only applies to the Dolby AC -3 encoded 5.1-channel discs.
2.1.2 FRONT, CENTER, REAR SPEAKER and SUBWOOFER
Only when the DOWNMIX mode is turned off (DOWNMIX is set to 5.1CH) are the
CENTER SPEAKER and REAR SPEAKER activated. The FRONT SPEAKER can be
set to LARGE or SMALL. The CENTER SPEAKER, REAR SPEAKER can be set to
LARGE, SMALL or OFF and the SUBWOOFER can be set to ON or OFF.
NOTE:
If the speaker is set to LARGE, the output level will be higher than that of SMALL.
If the speaker is set to SMALL, the output level will be lower than that of LARGE.
If a speaker is set to OFF, no audio is output from it.
2.1.3 DIALOG
When DOWNMIX is set to LT/RT or STEREO, this item is available.
Adjust the value of this item to control the dialog volume.
NOTE: When playing 5.1CH disc, this item can be used to adjust the volume of the
speakers.
2.1.4 D.R.C. (Dynamic Range Control)
You can set this item to AUTO, ON or OFF.
2.2. DIGITAL AUDIO SETUP
2.2.1 DIGITAL OUTPUT
SPDIF/OFF: There will be no digital audio signal output. (Coaxial off)
SPDIF/RAW: The digital audio signal output will be in its raw format. Normally, this
mode is used for DTS & Dolby Digital 5.1 signals.
SPDIF/PCM: The digital audio signal output will be in PCM format. Normally, this
mode is used for audio CD signals.
-12-
System Setup
2.2.2 LPCM OUT
When DIGITAL OUTPUT is set to SPDIF/PCM, this item is available.
Select a sample rating for the digital audio output. There are two options, 48KHz and
96KHz.
NOTE: Some amplifiers don't support 96KHz sampling which will affect the coaxial
output.
2.3 DOLBY DIGITAL SETUP
2.3.1 DUAL MONO
STEREO: The player outputs the left-channel audio and right-channel audio via the
FL and FR speaker respectively.
L-MONO: The player outputs the left-channel audio only via both the FL and FR
speaker.
R- MONO: The player outputs the right-channel audio only via both the FL and FR
speaker.
MIX- MONO: The player outputs the average signal of the left-channel and rightchannel audio via the FL speaker and the FR speaker.
NOTE: This function only applies to the Dolby AC -3 encoded 2-channel discs.
2.3.2 DYNAMIC
When you watch films with large dynamic scope in low volume, for example at night,
you can adjust the dynamic value up to avoid losing sound details resulting from the
low volume.
2.4 CHANNEL DELAY
This item is used to set the delay time for the center, rear speakers and the subwoofer.
The delay is to compensate for the audio propagation time difference caused by the
distance difference of the speakers to the listener.
Use the direction key [ ]/[ ] to select a speaker, center speaker, subwoofer, left
surround speaker or right surround speaker. Then use the direction key [ ]/[ ] to set
the distance difference.
Sub
Woofer
0cm
NOTE:
The unit does not support delays for when the distance
between the center or surround speakers and the listener
are longer than that between the front speakers and the
listener.
In case the channel delay settings cannot match your
speaker configuration, please set all distance difference
to 0cm. If possible, use your receiver/amplifier to set the
channel delay.
2.5 EQUALIZER
2.5.1 SOUND MODE
Select a desired sound mode in this item.
2.5.2 BASS BOOST
Set it to ON to boost the bass sound.
2.5.3 SUPER BASS
Set it to ON to get the super bass sound effect.
2.5.4 TREBLE BOOST
Set it to ON to boost the treble sound.
-13-
System Setup
2.6 3D PROCESSING
3D processing provides a virtual surround sound experience using just two speakers.
2.6.1 PRO LOGIC II
Pro Logic II: This unit allows you to configure Dolby Pro Logic II to expand 2-channel
source audio into full 5.1-channel surround sound.
NOTE: Pro Logic II functionality is effective only when DOWNMIX is set to 5.1CH .
2.6.1.1 PRO LOGIC II
This item is used to turn on or off the Pro Logic II processing.
ON: Pro Logic II processing is always on.
OFF: Pro Logic II processing is disabled
AUTO: Pro Logic II processing is on only when Dolby Pro Logic II encoded content is
detected.
NOTE: When the Pro Logic II processing is turned off, all the following items (MODE,
PANORAMA, DIMENSION and CENTER WIDTH) are unavailable.
2.6.1.2 MODE
This item is used to set the processing mode of Pro Logic II.
MUSIC: The surround experience is tailored for multi-channel music playback.
MOVIE: Emphasis is given to the center channel as two-channel audio is decoded and
played back into your 5.1 system.
PRO LOGIC: This activates decoding and processing of the original Dolby Pro Logic
processing with mono-surround channel. We recommend using the Dolby Pro Logic
Movie mode in lie of this 4-channel surround format.
AUTO: Automatically selects processing mode based on the input format.
2.6.1.3 PANORAMA
This item is used to turn on/off panorama mode and is available only when MODE is
set to MUSIC.
When panorama mode is turned on, the front stereo audio is partially fed into the
surround channels for an enveloping effect.
2.6.1.4 DIMENSION
This item is available only when MODE is set to MUSIC.
This item allows gradual adjustment of the soundfield either towards the front or
towards the rear. This is useful in setting a more even balance from all speakers with
some rooms.
2.6.1.5 CENTER WIDTH
This item is available only when MODE is set to MUSIC.
This item can be used to control the width of the center channel sound effect by
blending the center speaker to the left and right speakers. As the level number
increases, the center channel sound moves toward the left and right speakers.
2.6.2 REVERB MODE
You can select a reverb mode in this item.
-14-
System Setup
2.7 HDCD(High Definition Compatible Digital)
HDCD (High Definition Compatible digital) is a patented encode/decode process for
delivering the full richness and details of the sound from HDCD-encoded CDs.
2.7.1 FILTER
You can set the digital filter to 2x, 1x or off.
2.8 KARAOKE SETUP
2.8.1 MIC SETUP
2.8.1.1 MIC
Set this item to ON/OFF to switch on/off the connected microphone(s).
2.8.1.2 MIC VOL
Enter this item, then use direction key [ ]/[ ] to adjust the microphone volume. Then
press [ENTER] to confirm your adjustment.
2.8.1.3 ECHO LEVEL
Enter this item, then use direction key [ ]/[ ] to adjust the microphone echo level.
Then press [ENTER] to confirm your adjustment.
3 VIDEO SETUP PAGE
3.1 VIDEO OUTPUT
OFF: Set video output to the composite.
YUV: Set video output in analog component video format if the component video
outputs are used.
P_YUV: Set video output as progressive YUV signals if the component video outputs
are used.
NOTE: If the video setting differs from the actual video connection, you may get no
image or very poor image on the TV. In such case, you need reset this setting item for
an appropriate video output mode or press [V-MODE] on the remote control until the
output image becomes normal.
3.2 COLOR SETTING
3.2.1 SHARPNESS
There are three options (HIGH, MEDIUM and LOW) for you to choose in this item.
3.2.2 BRIGHTNESS, CONTRAST, HUE and SATURATION
Enter these items respectively, use direction key [ ]/[ ] to adjust the value, then
press [ENTER] to confirm it.
3.2.3 GAMMA
There are four options (HIGH, MEDIUM, LOW and NONE) for you to choose in this
item.
3.2.4 LUMA DELAY
There are two options (0T and 1T) for you to choose in this item.
4 PREFERENCE PAGE
If there's no disc in the disc tray or the disc tray is open , this item is available.
-15-
System Setup
4.1 TV TYPE
This product supports both NTSC (National Television System Committee) and PAL
(Phase Alternating Line) television broadcasting standards.
PAL : If the connected TV is PAL system, select this mode.The video signal of a NTSC
disc will be output in PAL format.
AUTO: If the connected TV is multi system, select this mode. The output format of
video signal will be in accordance with the video signal of the disc.
NTSC: If the connected TV is NTSC system, select this mode. The video signal of a
PAL disc will be output in NTSC format.
NOTE: If a wrong selection is made, the viewing image will be very poor. In such case,
you are supposed to change the option in this item to fix the error.
4.2 PBC (Play Back Control)
ON: Activate the PBC function. When playing a disc encoded with PBC function such
as VCD 2.0 disc, press [MENU] to return to the PBC menu.
OFF: Disable the PBC function.
NOTE: This function only works with those discs encoded with PBC function .
DVD, VCD1.1, CD-DA and MP3 discs have no PBC menu.
4.3 AUDIO, SUBTITLE and DISC MENU
Select a preferred audio language, subtitle language and disc menu language in these
items.
You can also make selection of the audio language by using the [AUDIO], and the
subtitle language with the [SUBTITLE] on the remote control.
NOTE: If the selected language is not available for the currently playing disc, the
disc's default setting will remain enabled.
4.4 PARENTAL
This item allows the user to set a maximum rating of the movies that can be viewed.
Movies rated higher than the level set for the parental lock can not be viewed without
inputting the correct password. What's more, to key in the correct password is needed
to reset the level. The default password is 136900.
NOTE: This function only works with those discs that have parental rating encoded
into them.
4.5 DEFAULT
Enter to restore all the default settings except the settings in PARENTAL item and
PASSWORD setup page.
5 PASSWORD SETUP PAGE
5.1 PASSWORD MODE
You can switch on/off the password function in this item.
NOTE: You must key in the correct password and press [ENTER] to confirm before
you change the option in this item. The default password is 136900.
5.2 PASSWORD
You can reset the password in this item.
NOTE: The default password (136900) is always active even if the password has been
reset.
-16-
Basic Playback
STANDBY/ON
Press to switch on the unit. Press it again to put the unit in standby mode.
USB/SD
FUNCTION
Press repeatedly to switch to the available extra signal source USB or
SD/CARD, or to return to the DVD mode.
Press repeatedly to switch among TUNER mode, LINE mode and DVD
mode.
Press to open /close the disc tray.
1
4
7
2
5
8
3
6
9
0/10
10+
ENTER
The digit keys can be used to input numbers or make selection of a track
or a chapter, etc.
Press to enter an item in the menu or to confirm and execute a selection.
The direction keys can be used to move the highlight in the menu.
SETUP
Press to enter/exit the setup menu.
GOTO
PROGRAM
This button is used to locate a position on a disc that you want a playback to
begin from. Press this button, then use the direction keys and digit keys to
set a specific track, disc time, track time, chapter, title, chapter time or title
time of a disc to go to directly.
Press this button to enter/exit the program menu with which you can
playback the contents of a disc in your desired order.
In the program menu, use the direction keys and digit keys to make a
program list, then move the highlight to START and press [ENTER] to start
program playback.
During program playback, press [PROG] to enter the program menu. Now,
STOP is highlighted. Press [ENTER] to cancel the current program
playback.
Press to start or pause a playback. Or, press to return to the normal
playback from the fast forward, fast reverse playback, etc.
Press once to pause a playback, then press [ ] to continue the playback;
Press it twice to stop a playback and the disc will be reset to the starting
point.
Press for fast forward playback.
Press for fast reverse playback.
Press to return to the previous chapter/track.
Press to skip to the next chapter/track.
STEP
REPEAT
Press repeatedly to advance the video frame by frame. Press [
resume the normal playback. (Applies to DVD, VCD discs etc)
] to
Press repeatedly to switch the repeat modes. (Note: For VCD2.0 disc, this
function is invalid when PBC function is activated.)
-17-
Basic Playback
A-B
MUTE
You can repeat a specific section of a disc with this button.
During playback, press this button to mark down the starting point (A) and
press it again to mark down the ending point (B). Then, the unit will playback
this section over and over again. Press it for once more to cancel A-B repeat
and resume the normal playback.
Note: Points A and B must be in the same title/ track.
Press this button to switch off the sound temporarily. Press it again to
switch it on.
VOLUME+/-
Press [VOLUME+] to turn up the volume; press [VOLUME-] to turn down
the volume.
S.EFFECT
Press repeatedly to switch the sound effects or switch off the sound effect.
Note: You are recommended to switch off the sound effect when playing a
Dolby 5.1 channel disc so that to obtain the real 5.1 effect.
CH-LEVEL
Press this key repeatedly to select a channel or the overall volume, then
press [VOLUME+]/[ VOLUME-] to adjust its level.
TONE
Press to select BASS or TREBLE, then use [VOLUME+/-] to control the
level of bass or treble.
TITLE
Press to enter the title menu of the playing DVD disc.
MENU
SUBTITLE
Press to return to the root menu.
It works as [PBC] for disc encoded with PBC function such as VCD 2.0
disc. Press it to activate/ disable the PBC function.
Press repeatedly to switch the subtitles or switch off the subtitle function.
(Note: This function only works with those discs encoded with subtitles.)
OSD
Press repeatedly to switch or hide the relative information of the playing
disc.
AUDIO
Press repeatedly to select the available audio languages provided by the
disc (for DVD).
Press repeatedly to switch the available audio channels (LEFT-MONO,
RIGHT-MONO, MIX-MONO and STEREO) provided by the disc (for VCD).
ANGLE
Press to switch the viewing angles.
(Note: This function only works with the discs encoded with multiple camera
angles.)
V-MODE
Press repeatedly to switch the video output modes.
A-MODE
ZOOM
Press repeatedly to switch the audio output modes between 5.1
CHANNELS OUTPUT and STEREO OUTPUT.
Press this button to zoom in/ out the scene. In zoomed-in mode, the
direction keys can be used to move the zooming center.
(Note: Applies to DVD, VCD etc)
-18-
Basic Playback
USB DRIVE AND MEMORY CARD PLAYBACK
Insert a USB drive in the USB port, then press [USB/SD] to enter the
connected USB drive and you can playback the readable files in it. Press
[USB/SD] again to switch back to DVD mode.
Insert an SD card into the memory card slot, then press [USB/SD] to access
the connected memory card and you can playback the readable files in it.
Press [USB/SD] again to return to DVD mode.
NOTE:
In case the player breaks down when you insert a USB drive or a memory
card into the player, turn off the player, disconnect the power cord from the
AC outlet and unplug the USB drive or/and the memory card from the player.
Then, power on the player again. The player will resume the normal status.
For playback operation, please refer to MP3 DISC PLAYBACK in this chapter.
If a USB drive and a memory card are inserted in the player at the same
time, press [USB/SD] once to select USB and press it twice to select the
memory card. Press it for the third time to return to the DVD mode.
The USB and SD function is only available under DVD mode.
USB MEMORY DEVICE OPERATION
IMPORTANT INFORMATIONS
- Copyright protection files cannot be played back.
- Copyright protection files on the USB memory
device are skipped automatically when played
back.
- Recommended use:
Flash memory type USB memory player
- Not recommended:
Hard disc memory type USB player
- Some Flash memory player will not play
successfully with this uint.
SD CARD OPERATION
IMPORTANT INFORMATIONS
- Copyright protection files cannot be
played back.
- Copyright protection files on SD/MMC
card are skipped automatically when
played back.
-19-
Basic Playback
KARAOKE PLAYBACK
Set MIC to ON to enable the connected microphone(s) and set the
microphone volume at a low level in the karaoke setup menu.
Insert two microphones or just one into the microphone socket(s) on the
front panel.
Adjust the microphone volume again, if require, to your desired level in the
karaoke setup menu.
Place a karaoke disc in the disc tray. Press [AUDIO] to include or eliminate
the original singing voice.
Now, enjoy the karaoke singing!
PICTURE PLAYBACK
Place a picture CD in the disc tray, then a content menu will be displayed.
Use [UP]/[DOWN] to select a picture and press [ENTER] to play.
During playback, press [ ] to enter the thumbnail mode to preview the
pictures.
In the thumbnail mode, use the direction keys to select a picture, then press
[ENTER] to start the playback from the selected picture.
In the thumbnail mode, use the direction keys and [ENTER] to make selection
of Slide Show, Menu, Prev or Next at the bottom of the screen.
Slide Show: Start slide show playback.
Menu: Enter the instruction menu for remote key function. In the menu, press
[ENTER] to turn over to the next menu page and again to exit the instruction
menu.
Prev/Next: Turn over to the previous/next page.
Remote key function introduction:
[ ]: Enter the thumbnail mode to preview the pictures.
[PROG]: Press to change the transition mode.
[MENU] :During playback,press to return to the content menu.
-20-
Basic Playback
[ZOOM]: During playback, press [ZOOM], then press [ ]/[ ] to zoom in/out
the picture. When the picture is zoomed in, the direction keys can be used to
move the picture. Press [ZOOM] again to exit the picture-zooming mode.
[ ]/[ ]: Press to skip to the previous/ next picture during playback.
[ ]: Press to pause a playback. Press again to resume the playback.
[ ]/[ ]: Press to rotate the picture counterclockwise/ clockwise during the
playback.
[ ]/[ ]: Press to create a vertical/horizontal mirror image.
MP3 DISC PLAYBACK
Insert an MP3 disc into the player, then a content menu will display on the
screen.
MENU OPERATION:
Use the direction key [ ]/[ ] to select a folder or a file, then press [ENTER]
to enter the selected folder or play the selected file. You can also use the
digit keys to make selection of a folder to enter or a file to play.
In the content menu, press [ ] to return to the upper menu; press [ ]/[ ] to
turn over to the previous/next the menu page.
[PROG]: Press repeatedly to switch between FOLDER playback mode and
FILELIST playback mode.
NOTE:
During playback, [ ], [ ], [ ], [ ](press to stop the playback), [REPEAT],
[A-B], [VOLUME+/-], [MUTE], [CH-LEVEL], [TONE], etc. are valid. Please
refer to the BASIC PLAYBACK chapter for details.
MP3/CD OPERATION
IMPORTANT INFORMATIONS
- Copyright protection files cannot be
played back.
- Copyright protection files on a disc are
skipped automatically when played back.
-21-
Basic Playback
Tuner Operation
The following buttons are used in tuner mode. Press [ FUNCTION ] to select tuner
mode.
AM/FM
Press to switch between AM mode and FM mode.
MO/ST
Press to switch between Mono and Stereo reception of the broadcast
signal in FM mode.
MEMORY
After tuning in a new frequency, press [MEMORY], then select a preferred
station by inputting the corresponding numbers to save it as a preset station.
AUTO
Press to do auto scanning for the broadcasting radio channels.The unit
can store 40 stations for the AM broadcasting and 40 stations for the FM
broadcasting .
During auto scanning, press to stop the process.
1
4
7
2
5
8
3
6
9
0/10
10+
The digit keys can be used to select a preset station.
For example, press[0] and [2] to select channel 2; press [1] and [5] to select
channel 15.
SEARCH+/-
Press to fine tune the frequency of the current station.
RADIO+/-
Press skip to the next/previous preset station.
NOTE:
In tuner mode, [VOLUME+/-], [CH-LEVEL], [MUTE], [TONE] and [S.EFFECT]
buttons are available. For details, please refer to the remote control introduction in
this chapter.
For better FM reception,change the position of FM antenna wire.
For better AM reception,adjust the position of AM external aerial loop .
-22-
Troubleshooting
Before resorting to maintenance service, please kindly check by yourself with the following
chart.
Symptom
Cause(s)
Remedy
The AC power cord is not connected
to the power supply or is not
connected to a power supply securely.
Please check that the AC power
cord is connected securely.
Video input mode of the connected
Picture
There is no TV isn't correctly set.
picture or the Video output mode isn't correctly set.
picture is
distorted.
Set an appropriate video output
mode.
Press [V-MODE] repeatedly
until the picture becomes normal
again.
Connect the video cable
securely.
Sound
The audio cables aren't connected
There is no securely.
sound or the The volume is set at the lowest level.
The sound is switched off.
sound is
distorted.
Connect the audio cables
securely.
Turn up the volume.
Press [MUTE] on the remote
control to switch on the sound.
Press [PLAY/PAUSE].
No Power
The video cable isn't connected
securely.
The disc is in fast forward/rewind
playback.
Unable to
play a disc
Check that the disc is placed in
the disc tray with its label side
upwards.
Reset the settings in the
The rating of the disc is higher than
the rate set in the parental control item. parental control item.
The unit isn't compatible with the
Place the compatible disc.
disc.
Clean the disc.
The disc is dirty.
This disc is placed in the disc tray
in a wrong way.
The buttons
The unit is being interfered with
on the unit
static electricity etc.
doesn't work.
Switch off and unplug the unit.
Then connect the unit to the AC
supply and switch it on again.
There is no battery in remote
The remote
control does control.
not function.
The batteries are out of charge,or
installed incorrectly.
Insert two AAA/1.5V batteries
in it.
Replace the batteries with new
ones or check the battery polarity
(+or-)
Make sure that the remote
control is pointed to the remote
sensor.
Make sure the remote control is
within the operating area.
Switch off the unit and disconnect
it from the AC outlet. Then power on
the unit again.
The remote control isn't pointed to
the remote sensor.
The remote control is out of its
operating area.
The unit is shut down.
The player
The connected USB drive or the
breaks down memory card is probably not a
when a USB certified one.
drive or a
memory card
is inserted
into the
player.
-23-
The player cannot play any
uncertified USB drive and memory
card.
In case the player breaks down, turn
it off, disconnect the power cord from
the AC outlet and unplug the USB
drive or/and the memory card from
the player. Then, power on the player
again. The player will resume the
normal status.
Specification
Power supply
AC ~240V/50Hz
Power consumption
50W
Temperature
Working
environment
Relative humidity
TV System
5~35
Frequency Response
Audio output
S/N(A weight)
Output level
Tuner
5%~90%
PAL/NTSC
20Hz~20KHz
80dB(1KHz)
2.2V(rms)
AM band range
522KHz~1620KHz
FM band range
87.5MHz~108MHz
Power output
15WX5+30W
(Y)
Component Video output
1.2V(P-P),75
(Cb) 1.2V(P-P),75
(Cr) 1V(P-P),75
Composite Video output
1.0V P-P
Laser wave length
DVD:
CD:
Laser power output
180
75
650nm
780nm
W
Line input(sensitivity)
950mv
Dimension of the main unit
430x55x259mm(W x H x D)
Weight of the main unit
2.48Kg
Speaker lmpedance
4
Dimension of the speaker(x5)
75x120x82mm(W x H x D)
Weight of the speaker (x5)
1.9Kg
Subwoofer lmpedance
8
Subwoofer
272x240x160mm(W x H x D)
Weight of the Subwoofer
3.24Kg
-24-
Printed in China