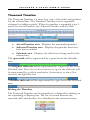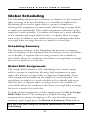
1
Model PC600 User’s Guide THIS EQUIPMENT COMPLIES WITH FCC REQUIREMENTS PURSUANT OF PART-15 This device complies with Part 15 of the FCC Rules. Operation is subject to the following two conditions: (1) this device may not cause harmful interference, and (2) this device must accept any interference received, including interference that may cause undesired operation. WARNING: Changes or modifications to this product not expressly approved by the party responsible for compliance could void the user’s authority to operate this equipment. NOTE: This equipment has been tested and found to comply with the limits, pursuant to Part 15 of the FCC Rules. These limits are designed to provide reasonable protection against harmful interference in a business installation. This equipment generates, uses, and can radiate radio frequency energy and, if not installed and used in accordance with the instructions, may cause harmful interference to radio communications. However, there is no guarantee that interference will not occur in a particular installation. If this equipment does cause harmful interference to radio or television reception, which can be determined by turning the equipment off and on, the user is encouraged to try to correct the interference by one or more of the following measures: - Reorient or relocate the receiving antenna. - Increase the separation between the equipment and receiver. - Connect the equipment into an outlet on a circuit different from that to which the receiver is connected. - Consult the dealer or an experienced radio TV technician for help. This Class A digital apparatus complies with Canadian ICES-003. Cet appariel numerique de la classe A est conforme a la norme NMB-003 du Canada. Lathem Time Corporation 200 Selig Drive, SW Atlanta, Georgia USA 30336 (800) 241-4990 (404) 691-0400 www.lathem.com Copyright © 2010 Lathem Time Corporation. All rights reserved. Revised 11-09-2010 Document Number: USG0092 CONTENTS QUICK START STEPS ..................................................................................IV WELCOME........................................................................................................ 1 PACKAGE CONTENTS ........................................................................... 5 SYSTEM REQUIREMENTS .................................................................... 6 INSTALL THE PC600 ...................................................................................... 7 USING THE PC600 TERMINAL ............................................................. 9 INSTALL THE PAYCLOCK SOFTWARE....................................................... 27 SETTING UP A MULTI-USER SYSTEM............................................. 31 USING THE PAYCLOCK SOFTWARE...................................................... 32 LOGGING INTO PAYCLOCK.............................................................. 34 SETTING UP PAYCLOCK............................................................................ 37 ADDITIONAL SOFTWARE SETUP..................................................... 40 ADD EMPLOYEES AND ASSIGN BADGES ....................................... 42 EDITING TIMECARDS................................................................................. 47 GLOBAL SCHEDULING............................................................................... 62 REPORTS ........................................................................................................ 63 SETTING UP YOUR TERMINAL................................................................ 65 ACTIVATING LIVE SYNC.................................................................... 71 HARDWARE TROUBLESHOOTING ......................................................... 73 SOFTWARE TROUBLESHOOTING........................................................... 75 APPENDIX A - PC600 WAN INSTALLATION .......................................... 76 APPENDIX B - PAYCLOCK CLIENT SOFTWARE WAN INSTALLATION............................................................................................. 79 APPENDIX C - CONNECTING THE PC600 DIRECTLY TO THE COMPUTER’S NIC ........................................................................................ 82 Copyright © 2010 Lathem Time Corporation. All rights reserved. Reproduction of this document in whole or in part is strictly prohibited. This document may contain typographical or copy errors. PayClock, Lathem, the Lathem logo, and all other Lathem product names mentioned in this document are registered trademarks of Lathem Time Corporation. All other products, brand names, or company names mentioned in this document are properties and trademarks or registered trademarks of their respective companies. Quick Start Steps Carefully follow each step of these instructions for a troublefree experience. Note: It is recommended to install and mount the PC600 terminal before installing the PayClock software. With the PC600 terminal powered up and connected to the network (LAN), the software will search for it on the network and automatically configure the terminal. 1 2 Verify the contents of your system. (For more detailed information turn to page 5.) Select a location that will be convenient to employees punching In/Out. Also keep in mind that a 115vAC power outlet should be within 6 feet as well as a connection to the network (LAN). For more detailed information turn to page 7.) 3 Use masking tape to hold the included mounting template onto the wall. Drill the holes using the template as a guide. Note: The bottom of the terminal should be about 45 inches from the floor. Remove the template and install the mounting screws, using the plastic wall anchors if needed. Leaving about 3/16” of the screw exposed. 4 5 Plug the RJ45 network cable into the Ethernet port and the Power Adapter plug into the Power Adapter port which is located in the compartment on back of the terminal. Route the cabling through the available channels to best suit your installation. Hang the terminal on the wall, aligning the three keyholes on the rear of the terminal with the protruding screw heads, and then press downward until the terminal lowers onto the screws. Align the “L” - shaped security bracket into the slot at the bottom-rear of the PC600 and screw it into place. This will fasten the terminal to the wall. Remove the plastic cover from the display and plug the Power Adapter into an AC wall outlet. 6 7 Verify your computer meets the Minimum System Requirements listed in this User Guide, turn to page 6. Install the PayClock Software. (For more detailed instructions turn to page 27.) Important Notes Make sure your screen saver is not showing before inserting the installation CD’s. Open and close the CD-ROM drawer if the CD is not recognized when inserted. 8 9 10 11 Open the PayClock software by clicking on the PayClock Icon. The default password is lathem. (For more detailed instructions turn to page 34.) Click Setup Now from the Get Started window to configure PayClock. (For more detailed instructions turn to page 37.) Add employees as well as create supervisors using the Employees button under the Setup tab. To add a new employee, click New and then enter the employee data. To create a supervisor, select the desired employee and check Allow Supervisor Functions under Options. (For more detailed instructions turn to page 42). After adding the employees click on the Terminal Manager tab. Activate Live Sync and update your terminal(s). (For more detailed instructions turn to page 71). P A Y C L O C K & P C 6 0 0 U S E R ’ S G U I D E Welcome Purpose of this User’s Guide The purpose of this user’s guide is not meant to be a complete manual for the product. It is a quick reference to get you started. Please refer to the PayClock Help for detailed product information, setup guidance, and operation information. Product Overview Reliability, functionality and ease of use are trademarks of the PayClock software and terminals. With the PC600 terminal, employees can use a badge or PIN to punch in and out, view messages or benefit time balances – it’s that simple. The PayClock software and PC600 terminals are the ideal solution for businesses that want to track employee time and automate payroll. The PC600 terminal connects to your network for communications with the PayClock time and attendance software. The terminal utilizes a powerful Windows CE based application and a touch-panel display for inputting data by employees, supervisors or administrators. The PC600 terminal validates that the employee is in the database before recording the transaction. The PC600 can operate in “Live Sync” (online mode). When operating with Live Sync enabled (online mode), communications with the pc are in real-time. For example, when an employee punches at the PC600 it is immediately added to the database and is available for viewing or editing. Another example is if the employee does an inquiry, the PC600 will initiate communications with the database and retrieve the inquiry information and display it on the screen. When operating with Live Sync disabled (offline mode), all transactions are held in the terminals memory until the terminal is polled, and then the data will be added to the database. The PC600 terminal offers a large color LCD touch-panel that displays employee information along with an audio prompt. Upon a 1 P A Y C L O C K & P C 6 0 0 U S E R ’ S G U I D E successful transaction with live sync enabled, the display will show the employee’s name, total worked time, In / Out status and an audio/text prompt. With live sync disabled, the display will only show the employees name. Features and Specifications • Windows CE 6.0 - The power of embedded Windows CE to provide fast and dependable operation. • LCD Color Touch-Panel - Use the large easy to read touchpanel for set up and data entry. • Two Operating Modes - The terminal is functional with Live Sync enabled (online) or Live Sync disabled (offline). When Live Sync is enabled the terminal is real-time with the computer. • User friendly design - Large easy to read touch-panel. • Comprehensive support agreements minimize technical difficulties. • Numerous accessory options to enhance the functionality. Upgrades If you find that you need to accommodate more employees in your system or if you would like enhanced software capabilities, consider purchasing a software upgrade for your system. A number of accessories are offered to further enhance your PayClock system. • Increased employee capacity • Customized export options • Customized reporting options • Multi-user capabilities Upgrading is as easy as visiting http://shop.lathem.com or open PayClock and click on the PayClock orb in the upper left corner and select Upgrade PayClock. Then select the options you would like to purchase and download your software upgrade. Options are instantly activated upon receipt of online payment. 2 P A Y C L O C K & P C 6 0 0 U S E R ’ S G U I D E Accessories A number of accessories are offered to further enhance your PayClock system. Visit http://shop.lathem.com to purchase additional accessories like the ones listed below. • Badges • Badge Racks • Annual Support Agreements Getting Help The purpose of this user’s guide is not meant to be a complete manual for the product. It is a quick reference to get you started. Please refer to the PayClock Help for detailed product information, setup guidance, and operation information. You can access the help desk and answers to your issues in a number of different ways. In addition to resources within the PayClock software, assistance may be accessed online, via email, via telephone, or through your dealer. Don’t forget annual support contracts are also offered. PayClock Help The PayClock Help allows you to search through an index of help topics to locate the answer you need. To launch the Help, click the Help button on the ribbon bar. Troubleshooting For answers to Frequently Asked Questions, refer to the Troubleshooting sections of this User Guide on page 73 and 75. Online and Email Support Lathem.com provides access to numerous support resources that will allow you maximize your use of PayClock. Help may be accessed by visiting the following link: http://support.lathem.com 3 P A Y C L O C K & P C 6 0 0 U S E R ’ S G U I D E On the Support page, you may also submit a question through our online knowledgebase and one of our technicians will respond to your inquiry within 24 hours. Email support is free to all registered users. Telephone Support The help desk is available between the hours of 8am and 7pm Monday through Friday. Please call (800) 241-4990 to speak with our help desk. You will receive free technical support for the first 30 days after your initial call. After that period, you may purchase an Annual Support Agreement which will cover all calls for one year or you may pay a per-call fee. Annual Support Agreements Annual support contracts are designed to keep your terminal and PayClock software working seamlessly. For a single annual fee, your Support Agreement offers the following advantages: • Unlimited toll-free telephone support (versus a per-call fee) and priority status for calls • Unlimited access to the extensive library of web-based tips and FAQs • Free software updates and version upgrades during the Support Period, giving you free access to the most current software features • Quick exchanges for damaged or broken terminal, thereby reducing downtime • Extended parts and labor warranty helps you to save money on repairs needed after the regular product warranty has expired To learn more about annual support contracts and to make a purchase, contact us at (800) 241-4990 or visit http://www.lathem.com/support/support-plans.aspx 4 P A Y C L O C K & P C 6 0 0 U S E R ’ S G U I D E Package Contents Please verify that your package includes ALL of the following items. If your package is missing an item, please call the help desk at 1-800241-4990. Recommended Installation Tools Pencil Tape Measure Philips Head Screw Driver Optional-Power Drill & Drill Bits 5 P A Y C L O C K & P C 6 0 0 U S E R ’ S G U I D E System Requirements You must verify that your system meets ALL of the minimum requirements listed below in order to run PayClock on your computer. Do not install the software if your system does not meet these minimum requirements! Requirements: y Processor: 1 GHz or higher y Operating System: Microsoft Windows 32-Bit or 64-Bit XP - SP2 or later Vista Windows 7 Server 2003 or 2008 (Standard or Enterprise Edition) y Memory: 1 GB of RAM or higher y Hard Disk Drive: Up to 450 MB free disk space; up to 1 GB if the .NET framework is not installed y Display: 1024x768 or higher resolution y CD-ROM Drive: Required y Internet: 56 Kbps (broadband recommended for online features/services) y Printer: Any printer compatible with Windows XP SP2 or later y Network Interface: Network adaptor configured for TCP/IP connected to a switch on LAN network. y Additional Software: Microsoft .Net 3.5 SP1 (included in the installer) Internet Explorer 7.0 or later 6 P A Y C L O C K & P C 6 0 0 U S E R ’ S G U I D E Install the PC600 Step 1: Select a site to install your PC600 terminal that will be convenient to employees clocking in and out. When deciding where the terminal will be installed, keep in mind that an 115vAC power outlet should be within 6 feet of the mounting location as well as a connection to the network (LAN). Note: It is recommended to install and mount the PC600 terminal before installing the PayClock software. With the PC600 terminal powered up and connected to the network (LAN), the software will search for it on the network and automatically configure the terminal. Step 2: After selecting the appropriate installation site, use masking tape to hold the included Mounting Template onto the wall. Drill holes using the template as a guide. Note: the bottom of the terminal should be about 45 inches from the floor. Remove the Template from the wall and install the included mounting screws. Install the three larger screws, leaving approximately 3/16 inch of the screws exposed. Do not tighten all the way. Retain the smaller screw for later. Note: For sheetrock walls, drill a 3/16” diameter hole through each of the four screw locations; each approximately 1-1/2” deep. Install the plastic “anchors” included in the mounting screw packet. 7 P A Y C L O C K & P C 6 0 0 U S E R ’ S G U I D E Step 3: Plug the RJ45 network cable into the Ethernet port and the Power Adapter plug into the Power Adapter port which is located in the compartment on the back of the terminal. Step 4: Insert the small “L”-shaped security bracket into the slot at the bottom-rear of the PC600, so that the tab with the hole points downward, away from the keyhole slot that can be seen immediately above. Hang the terminal on the wall, aligning the three keyholes on the rear of the enclosure with the three protruding screw heads, and then pressing downward on the terminal housing until it lowers onto the screws. Screw the small screw into the hole of the tab from the small “L”shaped bracket at the bottom of the enclosure. This will fasten the PC600 to the wall and keep it from being easily removed. When finished, plug the power adapter into an AC wall outlet and proceed to the software installation. 8 P A Y C L O C K & P C 6 0 0 U S E R ’ S G U I D E Using the PC600 Terminal The PC600 will be ready for use after it is updated. The update will download the employees. The PC600 terminal allows employees, supervisors and administrators to perform certain functions such as punching In and Out. To punch, move the badge over the badge reader symbol below the illuminated oval target area on the front of the PC600. When the badge is in close proximity to the PC600; a confirmation beep will sound, a text message will appear, a custom audio message may be played, and the oval target area will turn either green or red indicating a good or bad transaction. 9 P A Y C L O C K & P C 6 0 0 U S E R ’ S G U I D E The terminal will display an error message if you scan a badge that has not yet been assigned to a specific employee in PayClock. Notice: The PC600 utilizes an internal antenna to read the employee badges. Make sure these badges are stored at least 6” away from the PC600 when not in use to avoid accidental badge reads. Employee Transactions using Badges Employees can record transactions or view total information by presenting a badge. Clocking IN/Out • Move the badge over the badge reader symbol below the illuminated oval target area on the front of the PC600. • When the badge is in close proximity to the PC600; a confirmation beep will sound, a text message will appear, a custom audio message may be played, and the oval target area will turn either green or red indicating a good or bad transaction. Department Transfers • Press the Transfer Depts. button on the touch-pad of the PC600. • Move the badge over the badge reader symbol below the illuminated oval target area on the front of the PC600. • When the badge is in close proximity to the PC600 a confirmation beep will sound and the list of available departments will display. • Press the button for the desired department, a confirmation screen will display showing the department into which the employee transferred. 10 P A Y C L O C K & P C 6 0 0 U S E R ’ S G U I D E Amount Entries • Press the Enter Amounts button on the touch-pad of the PC600. • Move the badge over the badge reader symbol below the illuminated oval target area on the front of the PC600. • When the badge is in close proximity to the PC600 a confirmation beep will sound and the Enter Amt. screen will display. • Using the numeric key pad enter the value for the amount and press Enter. A confirmation screen will display showing the amount entered for the employee. Viewing Totals • Press the View Totals button on the touch-pad of the PC600. • Move the badge over the badge reader symbol below the illuminated oval target area on the front of the PC600. • When the badge is in close proximity to the PC600 a confirmation beep will sound and the employee’s grand totals for the pay period and any benefit time will display. Employee Transactions using a PIN Employees can record transactions or view total information by using the touch-panel on the terminal. Clocking IN/Out • Press the Clock In/Out button on the touch-pad of the PC600. • The Enter PIN screen will display, using the numeric key pad type in the employee’s PIN number and press Enter. 11 P A Y C L O C K • & P C 6 0 0 U S E R ’ S G U I D E A confirmation beep will sound, a text message will appear, a custom audio message may be played, and the oval target area will turn either green or red indicating a good or bad transaction. Department Transfers • Press the Transfer Depts. button on the touch-pad of the PC600. • The Enter PIN screen will display, using the numeric key pad enter the employee’s PIN number and press Enter. • A confirmation beep will sound and the list of available departments will display. • Press the button for the desired department, a confirmation screen will display showing the department into which the employee transferred. Amount Entries • Press the Enter Amounts button on the touch-pad of the PC600. • The Enter PIN screen will display, using the numeric key pad enter the employee’s PIN number and press Enter. • A confirmation beep will sound and the Enter Amt. screen will display. • Using the numeric key pad enter the value for the amount and press Enter. • A confirmation screen will display showing the amount entered for the employee. Viewing Totals • Press the View Totals button on the touch-pad of the PC600. 12 P A Y C L O C K & P C 6 0 0 U S E R ’ S G U I D E • The Enter PIN screen will display, using the numeric key pad enter the employee’s PIN number and press Enter. • A confirmation beep will sound and the employee’s grand totals for the pay period and any benefit time will display. Administrator Functions The PC600 has one administrator. The administrator function allows you review the device information, set up the network communications, set the time / date, review an error log and reset the terminal to the factory defaults. To enter into administrator mode; press the Admin button, the Enter PIN screen will display. • Using the numeric key pad enter the administrator PIN number and press Enter. • The Administrator Main Menu screen will display. Device Information This menu item displays information about the terminal and also allows you to check for updates to the firmware. To check for updates: • At the PC600 press the Admin button and the Enter PIN screen will display • Using the numeric key pad enter the administrator PIN number and press Enter. • The Administrator Main Menu screen will display. • Press Device Information. The Device Information screen will display. • Press the Check for Updates button. Please be patient as this may take a few minutes. 13 P A Y C L O C K • & P C 6 0 0 U S E R ’ S G U I D E When finished, press the center of the screen and then press the back 2 button until you have returned to the default screen. Network Setup - Terminal Settings This menu allows you to manually configure the network communication settings between the PC600 and PayClock software. Note: Typically these settings are determined during the installation of the PayClock software and it isn’t necessary to modify the settings. To enter into administrator mode at the PC600, press the Admin button, the Enter PIN screen will display. • Using the numeric key pad enter the administrator PIN number and press Enter. • The Administrator Main Menu screen will display. • Press Network Settings. The Network Setup screen will display. • If you want to set the terminal’s IP address as a “Static” IP turn off DHCP by pressing the OFF button. The screen will refresh and more buttons will become active. • Press the IP Address button. The IP Address screen will display. • Using the numeric key pad, enter the IP address you want to assign to the terminal and press OK. • Press the Subnet Mask button. The Subnet Mask screen will display. • Using the numeric key pad, enter the address you want to assign to the terminal and press OK. • Press the Gateway button. The Default Gateway screen will display. 14 P A Y C L O C K & P C 6 0 0 U S E R ’ S G U I D E • Using the numeric key pad, enter the address you want to assign to the terminal and press OK. • When finished, press the back 2 button until you have returned to the default screen. Network Setup - Host Settings This menu allows you to manually configure the network communication settings between the PC600 and PayClock software. Note: Typically these settings are determined during the installation of the PayClock software and it isn’t necessary to modify the settings. To enter into administrator mode at the PC600, press the Admin button. The Enter PIN screen will display. • Using the numeric key pad enter the administrator PIN number and press Enter. • The Administrator Main Menu screen will display. • Press Network Settings. The Network Setup screen will display. • If you want to set the Host IP address IP press Define Host and then press the Host IP button. • Using the numeric key pad enter the IP address of the computer where the PayClock database resides and press OK. Network Setup - Time Source Settings This option allows you to select where the PC600 will receive it’s time from; the computer where the PayClock server is running or from the Internet. To enter into administrator mode, at the PC600 press the Admin button. The Enter PIN screen will display. • Using the numeric key pad enter the administrator PIN number and press Enter. 15 P A Y C L O C K & P C 6 0 0 U S E R ’ S G U I D E • The Administrator Main Menu screen will display. • Press Network Settings. The Network Setup screen will display. • Press Define Host. The Define Host screen will display. • Under Select Time Source, press either the Server (the computer where the PayClock server is running) or Internet. • The screen will refresh with the newly selected option. • When finished, press the back 2 button until you have returned to the default screen. Network Setup - Live Sync Settings The PC600 can operate in “Live Sync” (online mode). When operating with Live Sync enabled (online mode), communications with the pc occur in real-time. For example when an employee punches at the PC600 it is immediately added to the database and is available for viewing or editing. To enter into administrator mode, at the PC600 press the Admin button. The Enter PIN screen will display. • Using the numeric key pad enter the administrator PIN number and press Enter. • The Administrator Main Menu screen will display. • Press Network Settings. The Network Setup screen will display. • Press Define Host. The Define Host screen will display. • Under Live Sync, press either the Enable or Disable. • The screen will refresh with the newly selected option. • You can click the Sync Now button and the PC600 will connect to the PayClock software and make any needed updates automatically. 16 P A Y C L O C K • & P C 6 0 0 U S E R ’ S G U I D E When finished, press the back 2 button until you have returned to the default screen. Date/Time Setup - Date This menu allows you to manually configure the date, time, time zone, DST and how the hours will display on the PC600. To enter into administrator mode at the PC600, press the Admin button. The Enter PIN screen will display. • Using the numeric key pad enter the administrator PIN number and press Enter. • The Administrator Main Menu screen will display. • Press Date/Time Setup. The Date Setup screen will display. • Press the Date button. The Date Setup screen will display. • Using the up and down arrow keys set the month, date, year and click OK. • When finished, press the back 2 button until you have returned to the default screen. Date/Time Setup - Time This menu allows you to manually configure the time on the PC600. To enter into administrator mode at the PC600, press the Admin button. The Enter PIN screen will display. • Using the numeric key pad enter the administrator PIN number and press Enter. • The Administrator Main Menu screen will display. • Press Date/Time Setup. The Date Setup screen will display. • Press the Time button. The Time Setup screen will display. • Using the up and down arrow keys set the hour, minute, AM/PM and click OK. 17 P A Y C L O C K • & P C 6 0 0 U S E R ’ S G U I D E When finished, press the back 2 button until you have returned to the default screen. Date/Time Setup - Time Zone This menu allows you to manually configure the time zone on the PC600. To enter into administrator mode at the PC600, press the Admin button. The Enter PIN screen will display. • Using the numeric key pad enter the administrator PIN number and press Enter. • The Administrator Main Menu screen will display. • Press Date/Time Setup. The Date Setup screen will display. • Press the Time Zone button. The Choose Time Zone screen will display. • Using the up and down arrow keys select the desired time zone and click OK. • When finished, press the back 2 button until you have returned to the default screen. Date/Time Setup - Daylight Saving Time This menu allows you to manually configure the DST on the PC600. To enter into administrator mode at the PC600, press the Admin button. The Enter PIN screen will display. • Using the numeric key pad enter the administrator PIN number and press Enter. • The Administrator Main Menu screen will display. • Press Date/Time Setup. The Date Setup screen will display. • Under Daylight Save Time, press either the On or Off. • The screen will refresh with the newly selected option. 18 P A Y C L O C K • & P C 6 0 0 U S E R ’ S G U I D E When finished, press the back 2 button until you have returned to the default screen. Date/Time Setup - Time Display Format This menu allows you to manually configure how the hours will display on the PC600. To enter into administrator mode at the PC600, press the Admin button. The Enter PIN screen will display. • Using the numeric key pad enter the administrator PIN number and press Enter. • The Administrator Main Menu screen will display. • Press Date/Time Setup. The Date Setup screen will display. • Under Time Display Format, press either the 12HR or 24HR. • The screen will refresh with the newly selected option. • When finished, press the back 2 button until you have returned to the default screen. Error Log This menu item displays any errors that the terminal may have experienced. To enter into administrator mode at the PC600, press the Admin button. The Enter PIN screen will display. • Using the numeric key pad enter the administrator PIN number and press Enter. • The Administrator Main Menu screen will display. • Press Error Log. The Event Log Details screen will display. • Use the left or right arrow keys to scroll through any errors. 19 P A Y C L O C K • & P C 6 0 0 U S E R ’ S G U I D E When finished, press the center of the screen and then press the back 2 button until you have returned to the default screen. Reset Use caution when selecting this menu item. This menu item will reset the entire terminal to the manufacturer default settings. All settings, administrators, supervisors, employees and data will be cleared; you can not recover this information. To enter into administrator mode at the PC600, press the Admin button. The Enter PIN screen will display. • Using the numeric key pad enter the administrator PIN number and press Enter. • The Administrator Main Menu screen will display. • Press Reset. The Clock Reset screen will display. • Press the Reset Clock button. • At the confirmation screen press Yes if you are sure you wish to reset and clear the terminal. • The terminal will reboot and restart as if it were a new terminal that had never been used. Use caution when selecting this menu item. This menu item will reset the entire terminal to the manufacturer default settings. All settings, administrators, supervisors, employees and data will be cleared; you can not recover this information WARNING: 20 P A Y C L O C K & P C 6 0 0 U S E R ’ S G U I D E Supervisor Transactions Supervisors have the ability at the PC600 to view and edit employee punches, add new employees, send messages and override shift lockouts. To set up an employee as a supervisor check the Allow Supervisor Functions option for the desired employee at the Employees button under the Setup tab. Note: Some supervisor functions require that the PC600 be running with Live Sync enabled. To enter into supervisor mode at the PC600, press the Supervisor button. The Enter PIN screen will display. • Using the numeric key pad enter the supervisor’s PIN and press Enter. You may also move the supervisor’s badge over the badge reader symbol below the illuminated oval target area on the front of the PC600. • The Select an Employee screen will display. Viewing Punches At the PC600, press the Supervisor button. The Enter PIN screen will display. • Using the numeric key pad enter the supervisor’s PIN and press Enter. You may also move the supervisor’s badge over the badge reader symbol below the illuminated oval target area on the front of the PC600. • At the Select an Employee screen, press the button of the desired employee. • Press View / Edit Punches. The Punches screen will display. • Use the left, right, up or down arrows to scroll through the punch information. • When finished, press the screen. button to return to the default 21 P A Y C L O C K & P C 6 0 0 U S E R ’ S G U I D E Adding Punches (Live Sync required!) At the PC600, press the Supervisor button. The Enter PIN screen will display. • Using the numeric key pad enter the supervisor’s PIN and press Enter. You may also move the supervisor’s badge over the badge reader symbol below the illuminated oval target area on the front of the PC600. • At the Select an Employee screen, press the button of the desired employee. • Press View / Edit Punches. The Punches screen will display. • Use the left or right arrows to select the desired date and press the +Punch button. • Using the up and down arrows set the desired hour and minute and then click OK. • At the confirmation screen, select Yes to add the punch. The added punch will display on the screen and will be added to the timecard. • When finished, press the screen. button to return to the default Viewing Totals At the PC600, press the Supervisor button. The Enter PIN screen will display. • Using the numeric key pad enter the supervisor’s PIN and press Enter. You may also move the supervisor’s badge over the badge reader symbol below the illuminated oval target area on the front of the PC600. • At the Select an Employee screen, press the button of the desired employee. 22 P A Y C L O C K & P C 6 0 0 U S E R ’ S G U I D E • Press View Totals. The employee’s grand totals for the pay period and any benefit time will display. • When finished, press the screen. button to return to the default Send Message At the PC600, press the Supervisor button. The Enter PIN screen will display. • Using the numeric key pad enter the supervisor’s PIN and press Enter. You may also move the supervisor’s badge over the badge reader symbol below the illuminated oval target area on the front of the PC600. • At the Select an Employee screen, press the button of the desired employee. • Press Send Message. Select to send a sound message or a text message. • Using the up and down arrows select the desired sound or text message. • At the confirmation screen select Yes and OK. On the next punch the employee will receive the sound or text message. • When finished, press the screen. button to return to the default Override Lockout At the PC600, press the Supervisor button. The Enter PIN screen will display. • Using the numeric key pad enter the supervisor’s PIN and press Enter. You may also move the supervisor’s badge over the badge reader symbol below the illuminated oval target area on the front of the PC600. 23 P A Y C L O C K & P C 6 0 0 U S E R ’ S G U I D E • At the Select an Employee screen, press the button of the desired employee. • Press Override Lockout. • At the confirmation screen select Yes to have the next punch for the employee ignore the shift lockout. • When finished, press the screen. button to return to the default Settings - Set/Change PIN (Live Sync required!) At the PC600, press the Supervisor button. The Enter PIN screen will display. • Using the numeric key pad enter the supervisor’s PIN and press Enter. You may also move the supervisor’s badge over the badge reader symbol below the illuminated oval target area on the front of the PC600. • At the Select an Employee screen, press the button of the desired employee. • Press Settings. The Change Settings screen will display. • Press the Set/Change PIN button. The PIN Settings screen will display. Change PIN • Press the Change PIN button and using the numeric key pad enter the new PIN for the selected employee and press Enter. • At the confirmation screen, select Yes to change the PIN. • When finished, press the screen. button to return to the default Delete PIN • Press the Delete PIN button. 24 P A Y C L O C K & P C 6 0 0 U S E R ’ S G U I D E • At the confirmation screen select Yes to delete the PIN. • When finished, press the screen. button to return to the default Disable PIN Entry • Press the Disable PIN Entry option. • There will be a check ; in the box when PIN entry has been disabled. • When finished, press the screen. button to return to the default Settings - View/Assign Badge (Live Sync required!) At the PC600, press the Supervisor button. The Enter PIN screen will display. • Using the numeric key pad enter the supervisor’s PIN and press Enter. You may also move the supervisor’s badge over the badge reader symbol below the illuminated oval target area on the front of the PC600. • At the Select an Employee screen, press the button of the desired employee. • Press Settings. The Change Settings screen will display. • Press the View/Assign Badge button. The Badge Settings screen will display. Change Badge • Press the Change Badge button. Present the badge when prompted. • At the confirmation screen select Yes to change the Badge. • When finished, press the screen. button to return to the default 25 P A Y C L O C K & P C 6 0 0 U S E R ’ S G U I D E Disable Badge Entry • Press the Disable Badge Entry option. • There will be a check ; in the box when badge entry has been disabled. • When finished, press the screen. button to return to the default 26 P A Y C L O C K & P C 6 0 0 U S E R ’ S G U I D E Install the PayClock Software The PayClock install loads the client and server application as well as your database. CAUTION: Before proceeding with your PayClock installation, verify that your PC meets ALL of the System Requirements listed on page 6! Standard Install Follow these instructions for these scenarios whether it is a new install or an upgrade: • You want PayClock to only run on one computer. -or• You want to install the PayClock Server in multi-user system (The multi-user license must be activated if you wish to access the PayClock software from different computers on your network. Additional license fees may apply. You will have to register your PayClock software first in order to activate the multi-user license.) Run the PayClock Setup Program • Go to the computer where you want to install PayClock. • Make sure your screen saver is not showing before inserting the PayClock CD. • Insert the PayClock CD into your computer’s CD-ROM drive. Note: If you are installing on Windows Vista or Windows 7 you may have to click Allow or Yes at the User Account Control confirmation window. • The Setup program should run automatically. If not, follow the steps below. ¾ Click Start | My Computer or Computer. 27 P A Y C L O C K & P C 6 0 0 U S E R ’ S G U I D E ¾ Double click on the drive that contains the PayClock installation CD. Follow the Setup Steps • It may take the install a few minutes to start, please be patient. • From the Install PayClock window click on Next. • Read the License Agreement and select I accept the terms of the license agreement and Next to move forward. • The Standard Install (Recommended) will be selected, click Next to continue. • At the Ready to Install screen, click Next. • At the Server Summary screen click the Print button, this data may be needed at a later time. Click Next to move forward. • At the PC600 Clock Setup click Start Discovery, the searching animation will start. When the terminal is found, the searching animation turns green and will stop, click Next. • At the Installation Complete screen click Finished. Open PayClock • After installing, you can run PayClock by clicking its icon. The default log in is Admin with the password ‘lathem’. PayClock Product Registration • From the Getting Started window, register PayClock via the Internet or phone. You must register within 30 days of installing the software. Note: You cannot activate the multiuser license until you register PayClock. 28 P A Y C L O C K & P C 6 0 0 U S E R ’ S G U I D E Purchase Features • Contact the help desk by calling 1-800-241-4990 or visit http://shop.lathem.com to purchase accessories and software modules. • Options include employee capacity upgrades, multi-user, long-reach cables, additional badges, badge racks and more. Client Installation in a Multi-User System Follow these instructions when you want to run PayClock on more then one computer. These client instructions apply whether it is a new install or an upgrade. The PayClock Server must be installed before installing the Client software. Note: The multi-user license must be activated if you wish to access the PayClock software from different computers on your network. Additional license fees may apply. In order to activate the multi-user license, you will have to register your PayClock software first. Run the PayClock Setup Program • Go to the computer where you want to install the PayClock client. • Make sure your screen saver is not showing before inserting the PayClock CD. • Insert the PayClock CD into your computer’s CD-ROM drive. Note: If you are installing on Windows Vista or Windows 7 you may have to click Allow or Yes at the User Account Control confirmation window. • The Setup program should run automatically. If not, follow the steps below. ¾ Click Start | My Computer or Computer. 29 P A Y C L O C K & P C 6 0 0 U S E R ’ S G U I D E ¾ Double click on the drive that contains the PayClock installation CD. Follow the Setup Steps • It may take the install a few minutes to start, please be patient. • From the Install PayClock window click on Next. • Read the License Agreement and select I accept the terms of the license agreement and Next to move forward. • Select the Custom option and click Next to continue. • At the Install Client Only or Client & Server window, select Client Only and click Next to continue. • At the Ready to Install screen, click Next. • At the Installation Complete screen click Finished. Open PayClock • After installing, you can run PayClock by clicking its icon. The default log in is Admin with the password ‘lathem’. 30 P A Y C L O C K & P C 6 0 0 U S E R ’ S G U I D E Setting up a Multi-User System PayClock is by default a single user system. You must purchase and enable the multi-user feature in order to access PayClock from other computers on your network. Note: You must register your PayClock software before enabling the Multi-User feature even if you have already paid for the feature. After registering PayClock, call the help desk for a feature un-lock code. What is the difference between a Single User and Multi-User system? With a single user system users cannot access the PayClock from different computers on the network. With a multi-user system other users can have the PayClock client installed on their computers and access PayClock across the network. Enable the Multi-User Feature • • • • • • • • Open the PayClock software. Click on the PayClock orb in the upper left hand corner and select Upgrade PayClock. The Feature Wizard will open, click Next. At Number of Users select Multi-user. Click Next if you wish to demo the feature, click Finish. This will activate the feature for a 30 day trial. If you wish to purchase the feature select Purchase the selected feature and click Next. Enter your credit card information and click Process Payment. Your system will now be a multi-user system; you can install the PayClock client on other computers and access PayClock across the network. See the PayClock Help for detailed information on setting up additional PayClock users. 31 P A Y C L O C K & P C 6 0 0 U S E R ’ S G U I D E Using the PayClock Software PayClock utilizes a sleek user interface that allows you to get more out of the functions you use most. The interface provides centralized navigation to all parts and functions within the software. Navigation panes allow you to quickly manage payroll rules, employees, payroll data and reports. Simply click on a tab or button to open the pane and associated window. Use the “Quick Action” buttons under Payroll Process or Other Tasks to access routine operations. Using the Ribbon Bar The PayClock Ribbon Bar has replaced the typical menus and toolbars. This new bar allows PayClock to present the functions you need on a set of organized tabs. The tabs are; Home, Timecards, Scheduling, Reports, Terminal Manager and Setup. This new ribbon bar makes using PayClock easier. Because of the way that the tabs are organized, you get to the functions quicker. 32 P A Y C L O C K & P C 6 0 0 U S E R ’ S G U I D E • Home Tab: The Home tab contains information on how to start using PayClock along with quick action buttons in a flow chart of the routine process of use. • Timecards Tab: The Timecards tab contains functions for polling your terminal(s), editing employee timecards, globally editing a group of employees, exporting data for payroll and closing the pay period. • Scheduling Tab: The Scheduling tab presents a summary or snapshot of the estimated labor coverage in hours and dollars in a calendar view. In addition the Scheduling tab is used to apply shifts to groups of employees, allowing shift assignments in mass rather than having to assign shifts to employees individually. • Reports Tab: The Reports tab allows you to run reports on information that is stored in the PayClock database. • Terminal Manager Tab: The Terminal Manager tab allows you to set up terminals and assign your employees to the terminals. You can also update and poll the terminals from this tab. • Setup Tab: The Setup tab contains functions for configuring your company information, pay period rules, departments, employees, shifts, payroll exports, PayClock users and preferences. The PayClock Orb The PayClock Orb, located at the top left corner, allows quick access to a number of important tools. Click on the PayClock orb to access the following critical functions: • Backup/Restore Data • Upgrade PayClock • Check for Updates • Support Assistant • Exit 33 P A Y C L O C K & P C 6 0 0 U S E R ’ S G U I D E Logging into PayClock PayClock is a single user system by default with one user account, Administrator. The Administrator account gives the user full access to PayClock. Open the PayClock software by clicking on the located on your desktop. PayClock Icon Log In To begin using PayClock, you must first Log In to the system at the Log In window. PayClock has one default user; the Administrator. The Administrator has full access to system, information, and functions. NOTE You may upgrade PayClock to a “Multi-User” system. Refer to page 31 of this User’s Guide for information on upgrading to multi-user. 1. From the Log In window, choose Administrator from the User List. 2. Enter the default password: “lathem”. 34 P A Y C L O C K & P C 6 0 0 U S E R ’ S G U I D E 3. Click OK and the software will open. A welcome tone will let you know that PayClock is ready for use. Create and Change Your Password You should create your own unique password to protect sensitive payroll data. 1. At the Log In screen, click the Change button. 2. Type in your Old Password (remember, the default is “lathem”). 3. Type in your New Password (the one you would like to create). 4. Confirm your new password by typing it in. 5. Click OK to finalize the change. NOTE Passwords are case sensitive and may be up to 11 characters Register Your PayClock PC600 System You may register your system anytime within 30 days of installing the software. If after 30 days you haven’t registered your system you will be required to do so before continuing to use the software. 35 P A Y C L O C K & P C 6 0 0 U S E R ’ S G U I D E There are three ways to register your software: • Complete the Registration Wizard by clicking the Register Now button on the Get Started window that appears upon log-in. Fill in the requested information and submit. If you do not have an internet connection, select Print at the end of the wizard to print and fax your information to the help desk at 1-800-252-2208. • Call the help desk at 1-800-241-4990 and select option number 1 from the telephone menu to speak with a representative. • Visit http://www.lathem.com/contact-us/register-yourproduct.aspx and follow the steps outlined. 36 P A Y C L O C K & P C 6 0 0 U S E R ’ S G U I D E Setting up PayClock How does PayClock calculate time? PayClock uses an open shift to define the start of the workday. An employee’s open shift starts with his/her first punch of the day and continues until the day change or for 14 hours if working past the day change. The work day length is set to 14 hours by default. Example 1: • Jane Doe's first punch Monday morning was at 7:30 am. • She didn’t punch out to leave for the day until 10:00 pm. PayClock calculated her time as 14 hours and 30 minutes because she didn’t work past the day change. Example 2: • Jane Doe's first punch on Tuesday was at 1:00 pm. • Using the maximum work day length setting of 14 hours, PayClock defines the expected end of her open shift to be by 3:00 am on Wednesday. • Jane’s time will calculate and no missing registration exception will be generated if she punches out to complete her shift by 3:00 am on Wednesday. • Jane’s time will not calculate and a missing registration exception will be generated if she punches out to complete her shift after 3:00 am on Wednesday. Minimum PayClock Set up After completing the hardware and software installation, you should set up your basic company structure. This includes the pay period, overtime and rounding. 37 P A Y C L O C K & P C 6 0 0 U S E R ’ S G U I D E From the Getting Started window click the Setup Now button or click the Setup tab on the ribbon bar. Use the buttons on the Setup tab to set up your basic company structure. Pay Period Setup • At the Setup tab, click the Pay Class button. • Select the Standard pay class item from the List box on the left side of the window. The Standard pay class will open on the General tab. • Select the Pay Period Type. The available options are Weekly, Bi-Weekly, Semi-Monthly, Monthly and Custom. • Set when the pay period starts under the Current Pay Period date field. Click the Help button is you need assistance setting up the pay period. • Click Save to keep your changes. Overtime Setup • With the Standard pay class item still selected, click on the Overtime tab. • To set up daily overtime, select the pay code and set the limit. 38 P A Y C L O C K • & P C 6 0 0 U S E R ’ S G U I D E To set up weekly overtime, select the pay code and set the limit. Click the Help button is you need assistance setting up the overtime. • Click Save to keep your changes. Rounding Setup • With the Standard pay class item still selected, click on the Advanced tab. • Select the rounding option. Note: The “Not Selected” option will set the rounding to true time or minute to minute. Click the Help button is you need assistance setting up the rounding. • Click Save to keep your changes. Shift Length Setup The Maximum Work Day Length setting allows you to enter how long employees would normally work in one day. Note: Normally, you should leave this field at the default setting of 14 hours. If the setting too large you may see punches from different days linked together. • With the Standard pay class item still selected, click on the Advanced tab. • Enter the amount of time expected to be worked for a day in the Maximum Work Day Length field.. Note: It is recommended to leave the setting at the default 14 hours. Click the Help button is you need assistance setting up the maximum work day length. • Click Save to keep your changes. 39 P A Y C L O C K & P C 6 0 0 U S E R ’ S G U I D E Additional Software Setup The Setup tab of the ribbon bar is used to configure the PayClock software for your company, pay period rules, departments, employees, shifts, payroll exports, PayClock users and preferences. See the PayClock Help for detailed information on the Setup tab. Company Button At the Company button of the Setup tab you define your basic company information. Pay Class Button The Pay Class button of the Setup tab on the ribbon bar allows you set up and maintain your company’s pay policies for handling payroll. You can configure the pay policies your company uses, such as your pay period, overtime, break and other advanced pay class features. The Pay Class set up consists of four tabs; General, Overtime, Break and Advanced. Pay Codes Button Pay Codes are accumulators or categories that collect either time or dollar amounts. You can change the pay rates or set the non-work hours to count toward overtime. Departments Button At the Departments button of the Setup tab you define the departments used by your company. Departments can be used to track time by groups of employees. Additionally you can use departments to filter lists of employees. Also, if your terminal supports employee transfers, you can create departments so employees can transfer from one department to another department. PayClock allows you to set up to 100 departments. Breaks Button At the Breaks button of the Setup tab you define the break and meal rules that will be applied to shifts. Breaks can be punched, 40 P A Y C L O C K & P C 6 0 0 U S E R ’ S G U I D E automatically deducted, or a combination of both. They can also be unpaid or paid. Breaks are applied to shifts. For example, you have a shift that starts at 7:30am and ends at 4:00pm with a 30 minute punched unpaid break that can be taken between 11:30am and 2:00pm. After defining the breaks assign them to shifts. Shifts Button At the Shifts button of the Setup tab you define the work day for employees. Shifts identify when an employee is expected to punch In or Out and how to calculate the punches. For each shift rule you can define the start and end of the shift as well as the break associated with the shift. For example, you have a shift that starts at 7:30am and ends at 4:00pm with a 30 minute punched break. After defining the shift rules you can then assign shifts to the employees. Employees Button The Employees button of the Setup tab on the ribbon bar allows you set up and maintain your employees in the software. You can enter their name, address, pay rate, emergency info, assign their benefit time, etc. Exports Button At the Exports button of the Setup tab you define how PayClock will export data to your payroll service. Users Button The Users button allows you to manage the user accounts for the PayClock software. You can add, edit and delete users and set or change the user passwords. When you click the Users button a list of the users will display. Preferences Button The Preferences button allows you to choose how dates and times display in the software; you also define certain software settings. 41 P A Y C L O C K & P C 6 0 0 U S E R ’ S G U I D E Add Employees and Assign Badges The Employees button under the Setup tab is used to maintain the employees in the PayClock software. This will include adding, editing and terminating employees. The Employees button has nine tabs - General, Overrides, Schedules, Benefit Time, Departments, Personal, Messages, Terminals and Advanced. General Tab - Set up employee’s name, badge and PIN. Overrides Tab - Override global break settings for an employee. Schedules Tab - Assign shifts to an employee. Benefit Time Tab - Track benefit time for an employee. Departments Tab - Assign optional departments to an employee. Personal Tab - Set up employee addresses and contact information. Messages Tab - Assign messages to display at the terminal. Terminals Tab - Maintain employee assignments to terminals. Advanced Tab - Override the maximum work day length and maximum hours out rule for an individual employee. 42 P A Y C L O C K & P C 6 0 0 U S E R ’ S G U I D E Add New Employees General Tab After adding the employees click on the Terminal Manager tab and update your terminal(s). 1. From the Ribbon Bar, click the Setup tab and click on the Employees button. The Employees window will display. 2. Click the New button, the next available blank employee template will display. 3. Type in the employee’s last name, first name and middle initial. 4. In the Badge Number field enter the badge number to use for punching in and out. Each badge contains a unique ten digit badge number on the back (see example below). The number of the badge assigned to an employee must match the number entered in the Badge Number field in that employee’s profile. 43 P A Y C L O C K & P C 6 0 0 U S E R ’ S G U I D E 5. If your company uses an Employee Number, enter it here. Usually, payroll services require an employee number for exports. 6. PayClock automatically fills in the Employee PIN but you can change it if you like. To change the PIN, enter the number in the Employee PIN field. Note: The Employee PIN is used to punch In/Out at the terminal without a badge. 7. Enter the employee’s hourly wage under Hourly Base Pay. 8. If the employee is salaried select the Salaried Hours option and enter how many hours the employee is expected to work during the pay period. Note 1: Reports will use the hours you have entered in this field. Any punches will be ignored in reporting. Note 2: Employees with the Salaried option selected can not be exported. The Do Not Include in Exports option will be checked and will be dimmed. 9. From the list under Type of Employee choose whether this person is Regular, Temporary, Seasonal or Contract. 10. At Pay Class select the pay class to use for the employee. This setting determines which pay period and overtime rules will be applied. 11. At Home Department select the employee’s home department. 12. Check the Allow Supervisor Functions box if this employee can perform supervisor functions at the terminal, such as adding or deleting punches. 13. At Do Not Include in Exports check this box if you do not want to include this employee in the file you export for payroll. 14. Check the Enable Lockouts option if you want to restrict employees from punching In too early or Out too late. 15. Enter the employee’s hire date under Date of Hire. 16. Click Save to keep your changes. 44 P A Y C L O C K & P C 6 0 0 U S E R ’ S G U I D E The next section covers each topic briefly to give you an overview of the system. See the PayClock Help for detailed information on each topic. Overrides Tab You use the Overrides tab to define punched or automatically deducted breaks for individual employees on the open shift. Any defined breaks on this tab will override the global break set up on the Pay Class | Break tab. Schedules Tab The Schedules tab is used to apply shifts to individual employees. The shifts applied to the employee will make up the employees work schedule. You can define the employees work schedule in the calendar and assign shifts by date. The employee’s schedule displays in a calendar view showing the shift details assigned to each date. A labor coverage chart is also available which verifies that there is enough labor coverage but not too much for a work day. 45 P A Y C L O C K & P C 6 0 0 U S E R ’ S G U I D E Benefit Time Tab You use the Benefit Time tab to track an employee's benefits, such as how much sick or vacation time they have or have taken. You can track up to 5 pay codes. The software keeps track of how much time the employee has taken and how much time the employee has left. Departments Tab The Departments tab is used to assign employees to certain departments and also modify the pay rate when working in the department. When an employee transfers to one of these assigned departments their pay rate will reflect what was defined for that particular department. Personal Tab You use the Personal tab to keep track of certain employee information, such as their address, phone number, custom field information and who to contact in an emergency. Messages Tab You use the Messages tab to create messages and assign messages to display on the terminal for individual employees. These settings will override any messages defined at the terminal’s properties Audio tab of the Terminal Manager tab. Terminals Tab The Terminals tab is used to assign or remove an employee's assignment to the terminal(s) you have setup in your PayClock system. Advanced Tab The Advanced tab is used to override the maximum work day length and maximum hours out rule for an employee. Either of these settings will override the Maximum Work Day or Maximum Hours Out to Start a New Shift setting on the Advanced tab of the Pay Class. 46 P A Y C L O C K & P C 6 0 0 U S E R ’ S G U I D E Editing Timecards The Timecards tab is used to manage employee punch data. You can view and edit employee punches as well as non-work time such as vacation time or dollar amounts such as tips. You can view employee data for open or closed pay periods. When you click on the Timecards tab you will see 4 areas, the Timecard Ribbon Bar, the Employee List, the Employee Timecard and the Timecard Timeline. See the PayClock Help for detailed information on using the Timecard Tab. Timecard Ribbon Bar The Timecard Ribbon Bar has the following button groups; Data, Recalculate, Refresh, Global, View, Select Pay Class, Export, Close and Help as well as a status bar. You can poll the terminal(s), recalculate employee data, make adjustments globally to groups of 47 P A Y C L O C K & P C 6 0 0 U S E R ’ S G U I D E employees, select which Pay Class to edit the data for, select the time period for the edits, export payroll data and clock the pay period. The Employee List and Toolbar The Employee List displays employees along with their summary data such as wages, regular time, overtime, vacation, etc. You can filter the employees that display in the list and define which columns display. You can also approve the employee timecards. Data can be viewed for open or closed pay periods. When you highlight or select an employee in the list, the timecard on the right side of the window displays the data associated with the employee selected for the selected Pay Period. Use the Employee List to select an employee and the pay period navigation buttons to select the Pay Period. The Employee List Toolbar allows you to filter and sort the list of employees as well as define the columns that display in the Employee List summary area. You can also approve a timecard after finishing the edits. This will lock the employee’s timecard and will not allow for any more edits. The approved option allows you to quickly see whose timecard edits have been finished and which employee(s) still need attention. Filtering the Employee List button to choose which employees you Click the Filter want to appear in the employee list. When you click the Filter button the Filter Options window will open. You can choose All Employees or departments that you created. You can also include or exclude inactive or terminated employees. 48 P A Y C L O C K & P C 6 0 0 U S E R ’ S G U I D E • Department - From the list select the department or departments that hold the employees you want to display in the summary list. • Show Terminated Employees - Check this option if you want to display employees marked as terminated in the list. If you don’t want terminated employees to display in the list, uncheck the option. • Show Inactive Employees - Check this option if you want to display employees marked as inactive in the list. If you don’t want inactive employees to display in the list, uncheck the option. Using the Quick Search Type a few letters of the desired employees name in the Quick Search field; all employees with those letters will display in the employee list. The full name or just a few letters can be entered in the “Find employee by name…” field. Setting the Columns in the Employee List Click the Columns button at the Employee List area to define the columns that will display in the Employee List. When you click the Columns button the Timecard Options window will open. From the available columns, select what you want to display in the summary list by placing a check in the box. If you don’t want a column to display in the summary list uncheck the box. Note: The Name and Approved columns are fixed and can’t be hidden or moved. Employee Timecard and Toolbar The Employee Timecard is used to view and edit an employees punch and non-work data. Use the Employee List to select an employee and the pay period navigation buttons to the select the pay period. 49 P A Y C L O C K & P C 6 0 0 U S E R ’ S G U I D E When an employee is selected from Employee List their individual timecard will display with their punch data for the selected pay period. The Timecard has 3 areas; the toolbar, the employee information and the timecard table. The Timecard Toolbar allows you to add punches and non-work time, search for exceptions, insert notes and define the columns that display in the Timecard. The Employee Information area displays the selected employee’s name, the start and end of the selected pay period and the employee’s hourly wage rate and gross pay. You can also Approve an employee’s timecard. Note: The Employee Information area only displays when the timecard layout is set to “Side by Side”. The Timecard Table displays punch data and non-work time for the selected employee. You also use the table to edit data much like cells in a spreadsheet. Timecard and List Tabs The Timecard Table has two tabs, Timecard and List. • Timecard tab - This tab is used for the typical editing and viewing of punch data. 50 P A Y C L O C K • & P C 6 0 0 U S E R ’ S G U I D E List tab - This tab is designed specifically to be used to view the photos of employees who punch at the FaceIN terminal. This tab is not used with the PC600 terminal. Timecard Table Color Legend The timecard table can display the rows or cells in colors that are used to identify certain conditions. • Light Blue - A row that is light blue identifies that the row is selected. • Light Red - A light red cell identifies that there is an exception associated with the cell or the day. In this example the employee arrived late for their shift. • Olive Green - Cells that are colored light green identify that the day contains a department transfer. Cells that are light green are disabled and do not allow punches. Setting the Columns in the Timecard Table button at the Timecard toolbar to Click the Columns define the columns that will display in the timecard. When you click the Columns button the Timecard Options window will open. You can define the columns that display in the Employee List or the columns that display in the Timecard or other timecard settings. From the available columns select what you want to display in the summary list by placing a check in the box. If you don’t want a column to display in the summary list uncheck the box. Note: The Date, In, Out, In and Out columns are fixed and can’t be moved. The Date, In, Out, In, Out and Regular columns can’t be disabled. 51 P A Y C L O C K & P C 6 0 0 U S E R ’ S G U I D E Timecard Timeline The Timecard Timeline is a snap-shot view of the shifts and punches for the selected date. The Timecard Timeline can be expanded, collapsed or hidden entirely. When the timeline is expanded it has 3 areas; the Actual Punches, the Adjusted Punches and the Shift. • • Actual Punches area - Displays the unrounded punches. Adjusted Punches area - Displays the punches after they have been rounded. • Schedule area - Displays the shift that is being used for the selected day. The open shift will be represented by a green bar in the Schedule area. An assigned shift rule will be represented by a light blue bar in the Schedule area. Note: In or Out revisions set up on the shift rule will be represented by a yellow area before (In revision) or after (Out revision) the light blue bar. A flexible shift rule will be represented by a gray bar in the Schedule area. Hiding the Timeline The Timecard Timeline can be expanded or collapsed by clicking on the expanding/collapsing bar. The bar is located between the timecard table and timeline. It is identified in the red circle below. 52 P A Y C L O C K & P C 6 0 0 U S E R ’ S G U I D E Maintaining Employee Timecards The Timecards tab is used to manage employee punch data. You can view and edit employee punches as well as non-work time such as vacation time or dollar amounts such as tips. The timecard body contains an area that resembles a spreadsheet for keying in punch data. Note: Manually added punches will show bolded. Use the Employee List to select an employee and the pay period navigation buttons to select the Pay Period. See the PayClock Help for detailed information on using the Timecard Tab. Selecting an Employee To select and open an employee’s timecard click on the desired employee in the list and their timecard will display. Selecting the Pay Period buttons on the Select Pay Period Use the arrow navigation bar of the Timecards tab to move forward or backward through the available pay periods until the desired time period is displayed. You can also click the calendar button which opens a window that allows you to choose from a list of pay periods. Adding Punches - Timecard Table You can add punches from within the timecard table and by using the Insert button on the timecard table toolbar. • Select the Timecards tab on the ribbon bar and click on the desired employee from the Employee List, the employee’s timecard will display. • Click on the In or Out cell for the day when you want to add a punch. The cell will be highlighted when it has been selected. 53 P A Y C L O C K & P C 6 0 0 U S E R ’ S G U I D E • Type in the hour and the cursor will automatically move to the minutes. • Type in the minutes and the cursor will automatically move to AM/PM. • If your time is set to 12-hour format type an 'A' or 'P' to change to AM or PM. • Press enter or tab on the computer keyboard to save the punch. Adding Punches - Insert Button You can use the Insert | Registration button to add a punch when there isn’t an empty cell in the timecard table to key in a time. • Select the Timecards tab on the ribbon bar and click on the desired employee from the Employee List, the employee’s timecard will display. • At the timecard table toolbar click the Insert button and select Registration, the Add Registration window will open. • Type in the hour and the cursor will automatically move to the minutes. • Type in the minutes and the cursor will automatically move to AM/PM. • If your time is set to 12-hour format type an 'A' or 'P' to change to AM or PM. • Enter the date for the punch. • Click the Save and Exit button, the punch will be added to the timecard. Adding Non-Work Time - Timecard Table You can add non-work time from within the timecard table and by using the Insert button on the timecard table toolbar. 54 P A Y C L O C K & P C 6 0 0 U S E R ’ S G U I D E • Select the Timecards tab on the ribbon bar and click on the desired employee from the Employee List, the employee’s timecard will display. • Locate the non-work time column and then click on the cell for the day that you want to add the non-work time. The cell will be highlighted when it has been selected. • Type in the amount of hours and minutes for the non-work time; use the right arrow key to move from hours to minutes. • Press enter or tab on the computer keyboard to save the nonwork time. Adding Non-Work Time - Insert Button You can use the Insert | Non-Work Time button to add a non-work time. • Select the Timecards tab on the ribbon bar and click on the desired employee from the Employee List. The employee’s timecard will display. • At the timecard table toolbar, click the Insert button and select Non-Work Time. The Add Non-Work Time window will open. • Enter the amount of non-work time at the Duration field, for example 8:00 for 8 hours. • Select the pay code to apply the non-work time, for example vacation. • Select the date to apply the non-work time. • Click the Save and Exit button. The non-work time will be added to the timecard. Adding Department Transfers - Timecard Table A department transfer is when an employee stops working in one department and then begins working in another department. 55 P A Y C L O C K & P C 6 0 0 U S E R ’ S G U I D E • Select the Timecards tab on the ribbon bar and click on the desired employee from the Employee List, the employee’s timecard will display. • At the timecard table toolbar click the Insert button and select Transfer. The Add Transfer window will open. • Type in the hour and the cursor will automatically move to the minutes. • Type in the minutes and the cursor will automatically move to AM/PM. • If your time is set to 12-hour format, type an 'A' or 'P' to change to AM or PM. • From the list, select the department for the transfer. • Click the Save and Exit button, the transfer will be added to the timecard. Making a One-Time department change in the Timecard Table You can make a one-time department change in an employee’s timecard for a selected day or for a selected interval and keep all other days at their original department assignments. If the Department column is displaying in the timecard table simply click in the cell for the desired day and from the list select the desired department. The department change will take affect immediately. See the PayClock Help for detailed information on making a one-time department change in the timecard table. Making a One-Time shift change in the Timecard Table You can make a one-time shift change in an employee’s timecard for a selected day and keep all other days at their original shift assignments. 56 P A Y C L O C K & P C 6 0 0 U S E R ’ S G U I D E If the Shift column is displaying in the timecard table simply click in the cell for the desired day and from the list select the desired shift. The shift change will take affect immediately. See the PayClock Help for detailed information on making a one-time department change in the timecard table. Adding Amounts - Insert Button You can use the Insert | Amounts button to add an amount to the timecard. An amount could be considered a dollar value for example $25 in tips. • Select the Timecards tab on the ribbon bar and click on the desired employee from the Employee List. The employee’s timecard will display. • At the timecard table toolbar click the Insert button and select Amounts. The Add Amounts window will open. • Click the New button. • Select the date to apply the amount. • Select the pay code to apply the amount for example Tips. • Enter the amount for example 25.00 for $25 dollars. • Click the Save and Exit button. The amount will be added to the timecard, if you have the Tips column visible the amount will display in the column. Adding a Timecard Note The Timecard notes feature allows you to insert a text note for an employee on a specific day/date. For example, John Doe called in sick on Monday so you might want to attach a note on John’s timecard for Monday that he called in sick. Note: Timecard notes will also display on reports. After a note is added a note symbol will display on the date cell. To see the text of the note move the mouse over the symbol. 57 P A Y C L O C K & P C 6 0 0 U S E R ’ S G U I D E • At the Timecard toolbar click the Notes button, the Note Editor window will open. • Enter the text for the note; up to 500 characters can be entered. • Click the Save button, the note will be added and an icon will display identifying a note is attached. Using the Exception Filter Exceptions are events that occur where PayClock will notify the user. User action may be required to resolve some exceptions, for example a missing punch. Other exceptions may not require any user action. The PayClock software will highlight the timecard cell in red when an exception is found. You can click on the exception symbol and a list of the exceptions will display. It will look like this example. Once an exception is located you can approve or OK the exception if you wish. When an exception is approved you will see a green check in the cell. It will look like this example. To see which exceptions are approved select the cell with the green check and then click Exceptions | View Exceptions… button. Note: You can also remove the approval for an exception from the View Exceptions button. See the PayClock Help for detailed information on using the Exception Filter. 58 P A Y C L O C K & P C 6 0 0 U S E R ’ S G U I D E Selecting the Exceptions • At the timecard toolbar click the Exception button and select Exception Filter, the Exception Filter window will open. • Select the exception(s) you wish to view from the list. To view all exceptions click the Select All option. • Click Save, your exceptions have been chosen. Searching for Exceptions • After selecting the exceptions to track select the first employee in the Employee List. • At the timecard toolbar click the Exception button and select Next Exception. This scans through the timecards moving forward in the employee list looking for exceptions. To scan backwards in the employee list select Previous Exception. • PayClock will highlight the timecard cell in red once an exception is found. You can correct or approve the exception. Then click Next Exception to continue searching for additional exceptions. If none are found PayClock will display the message “No Exceptions Found”. Exporting Data The Export button of the Timecards tab allows you to export your data to payroll. When you click the Export button a window opens with the exporting options you have setup at the Setup tab | Exports button. The export process generates an export file in the format required by your payroll service and makes it available for your payroll software. See the PayClock Help for detailed information on exporting data. 59 P A Y C L O C K & P C 6 0 0 U S E R ’ S G U I D E Creating an export file • Select the Timecards tab and select the pay period by using the Pay Period navigation buttons. • Click the Export button, the Execute Exports… window opens. • Click on the desired payroll export in the list, there will be a check in the box ; when it has been selected. • Click the Run Exports… button. Closing the Pay Period The Close button group contains the button which allows the user to close out the pay period. The close process “locks” the timecard data and no edits can be made. Note: You can not close a pay period if other users are logged into the PayClock software. After you close the pay period you can still run reports and exports but you cannot edit the closed data. Make sure that you have finished making all your changes before closing your pay period. Note: A closed pay period can be re-opened for the purpose of making a forgotten edit but caution should be used. Payroll rules may have changed since the pay period was closed and once a pay period is re-opened it will be recalculated using the rules at the time of the re-open if changes are made to an employee’s timecard data. See the PayClock Help for detailed information on closing or re-opening a pay period. Close the Pay Period • Select the Timecards tab and click the Close button. The Select Pay Period window displays. • Select the desired pay class and click OK. • When the Close Procedures window opens verify that the dates for the pay period being closed are correct. 60 P A Y C L O C K & P C 6 0 0 U S E R ’ S G U I D E 1 WARNING - If you are not sure you want to close the pay period click CANCEL. • Type the word YES in the box and click OK with your mouse. Re-opening a Closed Pay Period A closed pay period can be re-opened for the purpose of making a forgotten edit or change, but caution should be used. Payroll rules may have changed since the pay period was closed and once a pay period is re-opened it will be recalculated using the rules at the time of the re-open if changes are made to an employee’s timecard data. Important Note: When you re-open a closed pay period all other open pay periods will be temporarily closed and will not allow edits. Once the re-opened pay period is closed again the temporarily closed pay periods will go back to their normal open state and will allow edits. • Select the Timecards tab. Using the Pay Period navigation buttons locate the closed pay period to be re-opened. • The Close button will change to a Re-Open button. • Click the Re-Open button. When the Re-Open Procedures window opens verify that the dates for the pay period being re-opened are correct. 1 WARNING - If you are not sure you want to re-open the pay period click CANCEL. • Type the word YES in the box and click the OK button with your mouse. • The Pay Period Status will change to “Open For Edit” and all others will change to Closed. 61 P A Y C L O C K & P C 6 0 0 U S E R ’ S G U I D E Global Scheduling The Scheduling tab presents a summary or snapshot of the estimated labor coverage in hours and dollars on a calendar. In addition the Scheduling tab is used to apply shifts to groups of employees, allowing shift assignments in mass rather than having to assign shifts to employees individually. These shift assignments will make up the employee’s work schedule. You define the employee’s work schedule in the calendar and assign shifts by date. A separate labor coverage chart is also available to view which allows for verification that there is enough labor coverage but not too much for a work day. Scheduling Summary The Summary window of the Scheduling tab presents a summary view or snapshot of the estimated labor coverage in hours and dollars on a calendar. A separate labor coverage chart is also available to view which allows for verification that there is enough labor coverage but not too much for a work day. Global Shift Assignments The Assign Shifts window of the Scheduling tab is used to apply shifts to groups of employees allowing shift assignments in mass rather that having to assign shifts to employees individually. These shift assignments will make up the employee’s work schedule. You can define the employee’s work schedule in the calendar and assign shifts by date. A separate labor coverage chart is also available to view which allows for verification that there is enough labor coverage but not too much for a work day. To make global assignments of shifts simply press the Go to Assign Shifts View button. The workspace will open allowing shift assignments by groups of employees. To view the labor coverage summary again simply press the Return to Summary View button. See the PayClock Help for detailed information on Global Scheduling. 62 P A Y C L O C K & P C 6 0 0 U S E R ’ S G U I D E Reports The Reports tab of the ribbon bar is used to obtain reports on the information that is stored in the database. When you click on the Reports tab you will see 3 areas; the Report Ribbon Bar, the Report Category List and the Report Toolbar with Viewer. Running Reports The Reports tab is used to view reports on employee data. The Reports Ribbon Bar has the following button groups; Export, Print, Settings, Refresh, Navigation, Pay Class, Pay Period, Grouping and Help. You can run reports on the open pay periods, closed pay periods or for a date range. Note: Certain reports allow you to drill down to see more detailed information. The Report Category List area is where you choose which report you want to display in the viewer. The list of available reports is populated when a report category is selected. The available categories are; All Reports, Most Recently Used, My Reports, Payroll Reports, Attendance Reports, List Reports, Schedule Reports, Management Reports and Administrator Reports. 63 P A Y C L O C K & P C 6 0 0 U S E R ’ S G U I D E Including All Employees in the selected report To view a report with all of the employees simply double click on the report in the list. • Click the Reports tab on the ribbon bar and the Reports window will display. • Double click on the report in the list you want to view. • The report will show in the preview area with all employees. Including certain Employees in the selected report To select certain employees to include on a report single click on the desired report in the list and then click the Select Employees button and choose the desired employees. • Click the Reports tab on the ribbon bar and the Reports window will display. • Single click on the report in the list you want to view. • Click the Select Employees button and the Select Employees window will open. • Select the employee(s) to include on the report and click Show Report. • The report will show in the preview area with the selected employee(s). Selecting the Pay Period for the report • Select and preview the desired report. • Choose the pay period for the report by clicking the Pay Period navigation buttons. You can select any open or closed pay period. See the PayClock Help for detailed information on running Reports. 64 P A Y C L O C K & P C 6 0 0 U S E R ’ S G U I D E Setting up your Terminal The Terminal Manager tab of the ribbon bar is used to maintain the terminals used to collect punch data. When you click on the Terminal Manager tab you will see 3 areas; the Terminal Manager Ribbon Bar, the Terminals List and the Terminal Properties and Toolbar. The Terminal Properties and Toolbar The Terminal Properties is used to view and edit the configuration of a terminal using seven tabs; Connection, Employees, Settings, Audio, Info, Update/Poll Schedule and Recovery. Adding a PC600 Terminal Terminals can be added to the system at any time. In the event that the PC600 was not added during the installation of the PayClock software PayClock can discover the terminal for you. Terminal Manager has a feature that allows a broadcast to be sent out over the network (LAN) asking if there are any PC600 terminals out there. 65 P A Y C L O C K & P C 6 0 0 U S E R ’ S G U I D E When a PC600 terminal hears the broadcast it responds and allows you to add the terminal to PayClock. 1. From the Ribbon Bar click the Terminal Manager tab and click on the Find Terminals button. The Terminal Discovery window will display. 2. When the PC600 is detected the terminal’s IP address, serial number and terminal type will display. 3. Highlight the terminal in the list and click the Create button. The terminal will be added to the Terminals list. 4. You are now ready to configure the terminal. Connection tab - PC600 Terminal The Connection tab displays the selected terminals ID, name and IP address read from the terminal and the PayClock server. To access the Device ID on the PC600, log in as the Admin at the PC600 and select the Device Information button. You can also assign a name to the terminal; this can be useful if you have more than one terminal. Activate Live Sync by checking the option and updating the terminal. Device ID: Displays the PC600’s internal ID. (View only) Device Nickname: Allows you to assign a name/identifier to the PC600 terminal. Device IP Address: Enter the IP address for the PC600. Server IP Address: Enter the IP address of the computer where the PayClock server resides. Live Sync Enabled: Select whether to enable the live sync option on the terminal. Note: It is not recommended to enable the live sync option if you are using a wireless network card on the computer where the PayClock server is running because some wireless network cards do not keep a constant network connection. Update Interval Check: Select how often the terminal will check to see if there are any changes in the software that require an update of the terminal. 66 P A Y C L O C K & P C 6 0 0 U S E R ’ S G U I D E Employees tab - PC600 Terminal The Employees tab is used to assign employees to a terminal and to un-assign employees from a terminal. Note: Employees are automatically assigned to the terminal. If you wish to not have new employees automatically assigned to the terminal select the option “Do not automatically assign new employees to this terminal”. Removing Employee Assignments 1. From the Ribbon Bar, click the Terminal Manager tab and select the desired terminal from the list. The Terminal properties window will display. 2. Click on the Employees tab. From the list on the right select the desired employees and click the Remove button. The employees will be removed from the list. Click Save. 3. Click Update Selected Terminal to send the changes to the terminal. Assigning Employee • From the Ribbon Bar, click the Terminal Manager tab and select the desired terminal from the list. The Terminal properties window will display. • Click on the Employees tab. From the list on the left select the desired employees and click the Add button. The employees will be added to the list. Click Save. • Click Update Selected Terminal to send the changes to the terminal. Settings tab - PC600 Terminal The Settings tab is used to set the time and date, Daylight Savings Time (DST), etc. There are six areas; Date and Time, General Settings, Password, Power Save, Feature Settings and Update Settings. 67 P A Y C L O C K & P C 6 0 0 U S E R ’ S G U I D E Date and Time This area is used to send the time to the terminal, set the terminals time zone, enable/disable DST, choose the hour display format and select the terminal’s time source. Set Terminal Date and Time: Click the Set button to send the time and date to the terminal. Time Zone: From the list select the time zone that the terminal will use. The default setting is Eastern Time. Daylight Saving Time: Select whether DST will be turned On or Off. The default setting is On. Time Format: Select whether the hours will display as 12-hour (AM/PM) or 24-Hour (0-23) on the terminal. The default setting is 12-Hour. Time Source: Select whether the terminal will get its time from the internet (NIST) or from the PayClock server computer. The default setting is NIST. General Settings - Supported Validation Types This area is used to configure the terminal to accept PIN entry, Badge entry or both. The default is to have both enabled. PIN Entry: Select this option if you wish employees to be able to use the “Clock In/Out” function on the touch-panel of the terminal. Note: Employees will not be able to enter their PIN if this option is unchecked. Badge Entry: Select this option if you wish employees to be able to present a badge and badge In/Out on the terminal. Note: The badge reader will be disabled if this option is unchecked. Password - Admin Password This password is used to access the Admin functions on the terminal. The default password is 99999. Note: Only one admin is available on the PC600 terminal. 68 P A Y C L O C K & P C 6 0 0 U S E R ’ S G U I D E The Admin functions on the terminal include; Device Information, Network Setup, Date/Time Setup, Error Log and Reset. Power Save - Power Save Mode The power save option dims the PC600’s display after no activity for 30 seconds. Note: This option is enabled by default, it is not recommended to disable this option. Feature Settings This area is used to enable/disable the Amounts and Department Transfers button on the terminal and also how long the registrations are stored on the PC600. Allow Amounts: Select whether the “Enter Amounts” button will display on the terminal’s touchpad. Note: The Enter Amounts button will not display on the terminal’s touchpad if this option is disabled. Decimals: Select how many decimal places will be used if the All Amounts option is enabled. Allow Transfers: Select whether the “Transfer Depts” button will display on the terminal’s touchpad. Note: The Transfer Depts button will not display on the terminal’s touchpad if this option is disabled. Maximum days to store registrations on terminal: Select how many days to store punches in the terminal’s memory. The default setting is 90 days. Update Settings This area is used to enable/disable sending the time/date and worked hours to the terminal. Send Date/Time to terminal when polling or updating: Select whether to send the date/time to the terminal when polling or updating. This option is enabled by default. 69 P A Y C L O C K & P C 6 0 0 U S E R ’ S G U I D E Send worked hours and benefit time after poll: Select whether to send the employees’ total worked hours and benefit time balances after polling the terminal. This option is enabled by default. Audio tab - PC600 Terminal The Audio tab is used to define text and/or audio messages that will display/play when employees punch on the PC600 terminal. Note: The Live Sync option on the Settings tab must be enabled in order to configure the Audio tab. Audio System Enabled Select this option to activate the text and/or audio messages on the PC600 terminal. Audio Volume at Terminal: Use the slider control to set the volume on the terminal. Messages by In/Out Punch Select this option to configure what audio/text message sounds and displays on the terminal for In / Out punches. Audio Volume at Terminal: Use the slider control to set the volume on the terminal. Update/Poll Schedule tab - PC600 Terminal The Update/Poll Schedule tab allows you to set up auto polling of the terminal. Note: Auto polling is not needed if you have live sync option enabled on the terminal. Recover tab - PC600 Terminal The Recovery tab is used to recover punch data from the terminal in the event of data loss at the computer. Recover Terminal (button) - Click this button to initiate a recovery of all data in the terminal. See the PayClock Help for detailed information on the Terminal Manager tab. 70 P A Y C L O C K & P C 6 0 0 U S E R ’ S G U I D E Activating Live Sync The PC600 can operate in “online” or “offline” mode. When operating in online or live sync mode, communications with the PayClock database are in real-time. After enabling the Live Sync option update the PC600 the first time to initialize the clock and enable synchronization with the server software. After the first update the PC600 will update itself from that point forward. The PC600 can be set to check to see if it needs to update itself every 30 seconds, 1 minute, 5 minutes, 10 minutes, 15 minutes or 30 minutes. will show on the PC600 display identifying it is A green icon in live sync mode. NOTE: If need be, you can manually update the PC600 at any time. This allows you to add employees and then immediately send them to the PC600, which will allow the employees to start punching In/Out. 1. From the Ribbon Bar, click the Terminal Manger tab. The Terminal Manager window will open. 2. Select the PC600 from the list. The Connection tab will open. 71 P A Y C L O C K & P C 6 0 0 U S E R ’ S G U I D E 3. Select the “Live Sync:” option and set the Update Interval setting. The default is 5 minutes. 4. Click Save. 5. Click Update Selected Terminal. Live sync will be enabled on the terminal. 6. The employees created in PayClock will be sent to the terminal(s) and they can start punching In/Out. 72 P A Y C L O C K & P C 6 0 0 U S E R ’ S G U I D E Hardware Troubleshooting The following section contains common questions and problems as well as their appropriate resolutions. To view a complete list of common problems and their solutions please visit our knowledge base located online at: http://support.lathem.com Issue Resolution I can’t communicate with the PC600 terminal. -Make sure that all connections are secure and the cables are intact. -Make sure that the network cable is securely connected to the Ethernet port on the terminal. -Make sure that the terminal’s power supply is securely connected to the electrical outlet and back of the terminal. -Make sure the network communication settings are correct at the terminal, to check the settings: • Press the Admin key, enter the admin password and press Enter. • Press the Network Setup button, the Network Setup screen will display. • Verify the settings for the terminal and the host. -Make sure the network communication settings are correct in the PayClock software, to check the settings: • Open PayClock and click on the Terminal Manager tab. • Select the PC600 terminal from the list; verify that the IP address on the Connection tab matches what was configured at the terminal. -If after going through each item above you are still not communicating with the terminal, have the network administrator or IT person make sure there aren’t any issues with the network. 73 P A Y C L O C K & P C 6 0 0 U S E R ’ S G U I D E The PC600 shows “Not Found” when the badge is presented. -Make sure that the number that is printed on the badge matches what was entered in the Badge Number field for the employee in PayClock. A blinking light shows in the small rectangular opening to the left of the illuminated oval on the front of the PC600. What does it mean? This blinking light represents the connection to the network (LAN). If the light is not blinking there isn’t a connection to the network (LAN). What do the double This represents that the PC600 is running in “live sync” mode. See page 71 - Activating Live Sync for more information. on green arrows the display represent? 74 P A Y C L O C K & P C 6 0 0 U S E R ’ S G U I D E Software Troubleshooting The following section contains common questions and problems as well as their appropriate resolutions. To view a complete list of common problems and their solutions please visit our knowledge base located online at: http://support.lathem.com Issue Resolution What is the password to login to the software? The default password is “lathem”. How do I add a missing punch? See page 53 - Maintaining Employee Timecards. How do I export pay period data? See page 59 - Exporting Data. How do I close a pay period? See page 60 - Closing the Pay Period. How do I change PayClock to a multi-user system? See page 31 - Appendix A - Setting up a Multi-User System. If you have changed the default password, and can’t remember your new password, contact the help desk for assistance in resetting your password. 75 P A Y C L O C K & P C 6 0 0 U S E R ’ S G U I D E Appendix A - PC600 WAN Installation These instructions identify the steps to configure the PC600 terminal to communicate with the PayClock database server across the internet. A print out of the “Server Summary” information is required for this set up. If the information was not printed during the PayClock software installation follow these steps to access the information. • At the computer where the PayClock database server resides, open the PayClock software. • Click the PayClock orb on the upper left and from the menu, select Support Assistant. • In the Support Assistant window select Connection Info. • Print the Connection_Info.txt file for use when configuring the PC600. WAN Installation Requirements • There must be a VPN tunnel connecting the local and remote sites. • A static IP address is required on the computer designated as the PayClock database server. • A network administrator may be required to configure the network routers to route the ports used by the PC600 terminals and PayClock database server. Important Port Information - The following ports are used for this type of installation. • 7350 - PC600 Service • 7351 - Auto Poll Service • 2638 - PayClock Database Server 76 P A Y C L O C K & P C 6 0 0 U S E R ’ S G U I D E PC600 WAN Installation • At the remote site install mount and connect the PC600 terminal to the network. • With the PC600 powered up and connected to the network, press the Admin button and enter the administrator PIN (99999). • The Administrator Main Menu will display. Press the Network Setup button. • The Network Setup screen will display. If using a “static” IP address at the terminal select DHCP = Off. Set the terminal’s IP, Subnet Mask and Gateway addresses. If you are using DHCP select DHCP = On. The IP, Subnet Mask and Gateway Address will automatically be set when the DHCP setting is On. • Press the Define Host button, the Define Host screen will display. • Press the Host IP button and enter the IP Address for the computer where the PayClock database server resides and press OK. Note: Use the Server Summary or Connection Info print out for the PayClock database server’s IP address. • Under Live Sync press the Enable button, the Sync Now button will display. • Press the Sync Now button, the screen will turn orange with “Downloading Latest Data From Host. Please Wait…”. • When finished verify the connection. • Press the Admin button and enter the administrator PIN (99999). 77 P A Y C L O C K & P C 6 0 0 U S E R ’ S G U I D E • The Administrator Main Menu will display. Press the Device Information button. • Verify that the correct Company Name shows. • Press the back 2 button until you have returned to the default screen. • will show on the PC600 display identifying A green icon it is in live sync mode. • The PC600 terminal will be operational and ready for use. Note: All communications have to be initiated from the PC600 terminal when running as a WAN installation. For example you can’t poll or update from the PayClock software. The terminal’s Live Sync function will automatically send the punches to the database and also check to see if it needs to update itself. 78 P A Y C L O C K & P C 6 0 0 U S E R ’ S G U I D E Appendix B - PayClock Client Software WAN Installation These instructions identify the steps to configure the PayClock Client software to communicate with the PayClock database server across the internet. Important Notes - WAN Installation Requirements • There must be a VPN tunnel connecting the local and remote sites. • The network administrator may be required to configure the network routers to route the ports used by the PayClock Client and PayClock database server. • A static IP address is required on the computer designated as the PayClock database server. • PayClock must be licensed as a “Multi-User” system, additional license fees may apply. Important Port Information - The following ports are used for this type of installation. • • • 7350 - PC600 Service 7351 - PC600 Auto Poll Service 2638 - PayClock Database Server Step #1 - Computer where the PayClock database server will reside • Install the PayClock Server (Standard Install). • Print out the “Server Summary” information. Note: If the “Server Summary” information was not printed during the installation follow these steps to access the information: • Open the PayClock software. • Click the PayClock orb on the upper left. 79 P A Y C L O C K & P C 6 0 0 U S E R ’ S G U I D E • From the menu select Support Assistant. • In the Support Assistant window, select Connection Info. • Print the Connection_Info.txt file. Step #2 - PayClock Client at the remote site • Run the PayClock Setup Program • Go to the computer where you want to install the PayClock client. • Make sure your screen saver is not showing before inserting the PayClock CD. • Insert the PayClock CD-ROM in the CD-ROM drive. Note: If you are installing on Windows Vista or Windows 7 you may have to click Allow, Continue or Yes at the User Account Control confirmation window. • The Setup program should run automatically. If not follow the steps below. ¾ Click Start | My Computer or Computer. ¾ Double click on the drive that contains the PayClock installation CD. • Follow the Setup Steps • It may take the install a few minutes to start, please be patient. • From the Install PayClock window click on Next. • Read the License Agreement and select I accept the terms of the license agreement and Next to move forward. • Select the Custom option and click Next to continue. 80 P A Y C L O C K • & P C 6 0 0 U S E R ’ S G U I D E • At the Install on Single PC or Network window select I need multiple computers that can run PayClock and click Next to continue. • At the Install Client Only or Client & Server window select Client Only and click Next to continue. Enter the Server Information • The Select Server window will open with the message, “We were unable to locate any PayClock servers on your network. Please enter the server information.”. • Enter the Database Server Name in the field. Note: Use the Server Summary or Connection Info print out for the PayClock database server’s name. • Enter the Database server’s IP address in the field. Note: Use the Server Summary or Connection Info print out for the PayClock database server’s IP address. • Click Next to continue. • At the Ready to Install screen click Next. • At the Installation Complete screen click Finished. Step #3 - Open PayClock at the remote site • Open the PayClock software to verify the connection. 81 P A Y C L O C K & P C 6 0 0 U S E R ’ S G U I D E Appendix C - Connecting the PC600 Directly to the Computer’s NIC This document describes the steps to configure PC600 terminal to communicate with the PayClock database server when connecting directly into the computer’s wired NIC. This would be used when the user doesn’t have a network setup and has a computer that has a wired NIC. Step #1 - At the Computer where PayClock is installed See the More Information section for Windows XP, Vista and Windows 7 directions for accessing the NIC properties. • Open the Properties of the NIC. • Open the Properties of the Internet Protocol item. • Define the IP (10.0.1.1) and Subnet Mask (255.0.0.0). Step #2 - Connect the Ethernet cable to the computer and PC600 • The computer will go through the process of acquiring the IP connection. Step #3 - At the PC600 terminal • Access the Administrator Main Menu. • Press the Network Setup button. • Set the DHCP to Off. • Enter the IP address (using the computer’s IP as reference, i.e. 10.0.1.2). • Enter the Subnet Mask (same as what was entered at the pc, i.e. 255.0.0.0). • Leave the Gateway at the default (0.0.0.0). • Press the Define Host button. 82 P A Y C L O C K & P C 6 0 0 U S E R ’ S G U I D E • Press the Host IP button. • Enter the IP address configured at the computer (i.e. 10.0.1.1). • Press the back 2 button until you have returned to the default screen. Step #4 - At the PayClock software • Open the PayClock software and click on the Terminal Manager tab. (Note: The Auto Discovery will not work for this scenario.) • Click the Add Terminal button and select PC600. • Enter the IP address given to the PC600 in the Device IP Address field. • Enter the IP address given to the computer in the Server IP Address field. • Click Save. • Click the Test Connection button and verify the communications. More Information: To access the NIC settings follow the steps for the appropriate Windows operating system: Windows XP • Click Start > Control Panel > Network Connections. • Right click on the desired connection in the list and select Properties. • Select the Internet Protocol (TCP/IP) item. • Click the Properties button. • Choose Use the following IP address. • Enter the values outlined in this document. • Click OK and then click Close. 83 P A Y C L O C K & P C 6 0 0 U S E R ’ S G U I D E Windows Vista • Click Start > Control Panel > Network and Internet | View Network Status and Task > Manage Network Connections. • Click on Manage Network Connections. • Right click on the desired connection in the list and select Properties. • Click Continue on the User Access Control message. • Select the Internet Protocol Version 4 (TCP/IPv4) item. • Click the Properties button. • Choose Use the following IP address. • Enter the values outlined in this document. • Click OK and then click Close. Windows 7 • Click Start > Control Panel > Network and Internet | View Network Status and Task > Manage Network Connections. • Click on Change Adapter Settings. • Right click on the desired connection in the list and select Properties. • Select the Internet Protocol Version 4 (TCP/IPv4) item. • Click the Properties button. • Choose Use the following IP address. • Enter the values outlined in this document. • Click OK and then click Close. 84 P A Y C L O C K & P C 6 0 0 U S E R ’ S A Accessories, 3 Activating Live Sync, 71 Adding a New Employee, 43 Adding a Note, 57 Adding a PC600, 65 Adding Amounts, 57 Adding Employees, 42 Adding Non-Work Time, 54, 55 Adding Punches, 53, 54 Administrator functions at the PC600, 13 Annual Support Agreements, 4 Audio Tab - PC600, 70 B Badge Number, 43 Benefit Time Tab, 46 C Clocking IN/Out, 10 Closing the Pay Period, 60 Connecting PC600 directly to pc’s NIC, 82 Connection Tab - PC600, 66 D Daylight Savings - PC600, 18 Department Tab, 46 Department Transfers - Adding, 55 Department Transfers at the PC600, 10 G U I D E P A Y C L O C K & P C 6 0 0 E Editing Timecards, 47 Employee PIN, 44 Employee Advanced Tab, 46 Employee Button, 42 Employee List and Toolbar, 48 Employee Number, 44 Employees Tab - PC600, 67 Entering Amounts at the PC600, 11 Exception Filter, 58 Exporting Data, 59 F Features & Specifications, 2 Filtering the Employee List, 48 G Global Scheduling, 62 H Hardware Troubleshooting, 73 Help, 3 Home Department, 44 Home Tab, 33 I Install the PayClock Software, 27 Installing The PC600, 7 L Live Sync, 66 U S E R ’ S G U I D E P A Y C L O C K & P C 6 0 0 U S E R ’ S Logging In, 34 M Maintaining, 53 Messages Tab, 46 Minimum PayClock Set up, 37 O One-Time Department Change, 56 One-Time Shift Change, 56 Overrides Tab, 45 Overtime, 38 P Package Contents, 5 Password, 35, 75 Pay, 38 PayClock Client Installation, 29 PayClock Client Software WAN Installation, 79 PayClock orb, 33 PC600, 68 PC600 WAN Installation, 76 Personal Tab, 46 Product Overview, 1 Punching on the PC600, 9 Purpose of this User’s Guide, 1 R Recovery, 70 Registering PayClock, 35 Re-opening a closed pay period, 61 Reports, 63 Reports Tab, 33 G U I D E P A Y C L O C K & P C 6 0 0 U S E R ’ S Rounding, 39 Running Reports, 63 S Salaried Employees, 44 Schedules Tab, 45 Scheduling Tab, 33 Searching for Exceptions, 59 Selecting an Employee in the Timecard, 53 Selecting Exceptions, 59 Selecting the Pay Period in the Timecard, 53 Setting the columns in the Employee List, 49 Setting the columns in the Timecard, 51 Setting up Multi-User, 31 Setting up PayClock, 37 Setting up your Terminal, 65 Settings Tab - PC600, 67 Setup Tab, 33, 40 Setup the Pay Period, 37 Shift, 39 Software Troubleshooting, 75 Supervisor Functions, 44 Supervisor functions at the PC600, 21 System Requirements, 6 T Telephone Support, 5 Terminal Manager Tab, 33 Terminals Tab, 46 Timecard Color Legend, 51 Timecard Ribbon Bar, 47 Timecard Timeline, 52 Timecard Toolbar, 49 Timecards Tab, 33 G U I D E P A Y C L O C K & P C 6 0 0 Troubleshooting, 3 U Update/Poll, 70 Upgrades, 2 Using a Badge at the PC600, 10 Using a PIN at the PC600, 11 Using PayClock, 34 Using the PayClock Software, 32 Using the PC600, 9 Using the Quick Search, 49 Using the Ribbon Bar, 32 V Viewing Totals at the PC600, 11 U S E R ’ S G U I D E Copyright © 2010 Lathem Time Corporation. PayClock, Lathem and the Lathem logo are registered trademarks of Lathem Time Corporation. All rights reserved. Windows is a registered trademark of Microsoft Corporation. USG0092