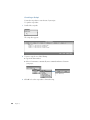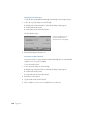
1
DVD Studio Pro User’s Manual Includes instructions for installing and using your software K Apple Computer, Inc © 2001 Apple Computer, Inc. All rights reserved. Under the copyright laws, this manual may not be copied, in whole or in part, without the written consent of Apple. Your rights to the software are governed by the accompanying software license agreement. The Apple logo is a trademark of Apple Computer, Inc., registered in the U.S. and other countries. Use of the “keyboard” Apple logo (Option-Shift-K) for commercial purposes without the prior written consent of Apple may constitute trademark infringement and unfair competition in violation of federal and state laws. Every effort has been made to ensure that the information in this manual is accurate. Apple is not responsible for printing or clerical errors. Apple Computer, Inc. 1 Infinite Loop Cupertino, CA 95014-2084 408-996-1010 http://www.apple.com Apple, the Apple logo, Final Cut Pro, FireWire, Mac, Macintosh, and QuickTime are trademarks of Apple Computer, Inc., registered in the U.S. and other countries. DVD Studio Pro and Finder are trademarks of Apple Computer, Inc. Adobe is a trademark of Adobe Systems Incorporated or its subsidiaries and may be registered in certain jurisdictions. Other company and product names mentioned herein are trademarks of their respective companies. Mention of third-party products is for informational purposes only and constitutes neither an endorsement nor a recommendation. Apple assumes no responsibility with regard to the performance or use of these products. Simultaneously published in the United States and Canada. Contents Preface Getting Started With DVD Studio Pro 9 What Is DVD Studio Pro? 9 System Requirements 10 Hardware Requirements 10 Software Requirements 10 Software Installation and Registration 11 Installing and Registering DVD Studio Pro 11 Installing and Registering QuickTime Pro 11 Overview of the DVD Creation Process 12 Creating Source Material 12 Encoding Video and Audio 12 Authoring With DVD Studio Pro 13 Creating a Disc 13 Resources for Learning About DVD Studio Pro 14 1 DVD Studio Pro Tutorial 15 Getting the Tutorial Files and Starting the Program 16 DVD Studio Pro Building Blocks 17 The DVD Studio Pro Workspace 18 Importing Assets 19 Adding Assets With the Import Command 19 Adding Assets by Dragging 20 Viewing the Properties of an Item 21 Creating a Basic DVD 22 Setting Disc Properties 22 3 Adding a Track 22 Previewing Audio Streams 24 Creating a Multi-Angle Track 24 Adding Angles 25 Previewing Angles 25 Creating a Still Menu 26 Adding Buttons to a Still Menu 29 Naming the Buttons 30 Specifying Button States 30 Previewing Buttons 31 Creating a Motion Menu 32 Previewing a Motion Menu 34 Specifying Button States in Motion Menus 34 Adding Markers 35 Previewing Markers 37 Creating a Slideshow 37 Previewing Slideshows 39 Linking Things Together Using the Action Menus 39 Linking a Button to a Track 40 Jumping Somewhere When a Track Is Finished 41 Setting a Startup Action 41 Setting the Actions of Standard Remote Control Keys 42 Previewing Links and Actions 42 Expanding Your DVD 43 Creating a Story 43 Creating Interactive Markers 45 Specifying the Shape of the Button Area That Changes Color 47 Adding Subtitles 48 Adding Web Links to Your Project 48 Writing a Simple Script 51 Setting a Timeout Action 52 Testing Your Project 52 Building the Finished Project 53 Using the Apple DVD Player 54 4 Contents What’s Next? 55 2 Preparing Source Material 57 Capturing Video and Audio 58 Capturing Video for 16:9 Aspect Ratio 58 Segmenting Your Material 59 Preparing Video Content 59 Encoding Video to MPEG Format 59 The QuickTime MPEG Encoder 59 Encoding Video for Multi-Angle Tracks 62 Preparing Audio Content 62 Encoding Audio 62 The A.Pack Application 63 Creating Material for Menus 63 Creating Graphics for Still Menus 63 Creating Video for Motion Menus 64 Creating Video for Interactive Markers 65 Creating Graphics for Slideshows 65 Preparing Graphics for Use With 16:9 Aspect Ratio 65 Building Menus in Multiple Languages 65 Preparing Subtitles 66 3 Using DVD Studio Pro 67 Setting Preferences for a New Project 68 Setting Disc Properties for a New Project 69 Setting Remote Control Properties for a New Project 70 Views Available in DVD Studio Pro 71 The Graphical View 72 Customizing the Appearance of the Graphical View 73 The Project View 74 The Property Inspector 76 The Editors 82 Preview Mode 82 Troubleshooting Windows 83 The Matrix Views 83 Contents 5 4 Working With Languages and Subtitles 87 Working With Languages 87 Setting Up Multiple Language Audio in Slideshows 89 The Subtitle Editor 89 Preparing Source Material for Subtitles 89 Setting Preferences for the Subtitle Editor 90 Starting a New Subtitle Project 91 Changing the Location and Duration of Subtitles 94 Locking and Unlocking Subtitle Positions 94 Linking Subtitles 94 Selecting Multiple Subtitles 94 Importing Subtitles 95 Compiling a Subtitle Stream 95 Working With Subtitle Streams in DVD Studio Pro 95 Keyboard Shortcuts 96 5 Using Scripts 97 Creating a Script 98 Assigning Scripts 99 Assigning Global Variables for Scripts 100 Viewing Script Properties 101 Scripting Reference 101 About Registers, Parameters, and Variables 101 Limitations of Variables and Registers 102 Script Reference Conventions 102 Numbers 102 Labels 103 Comments 103 Functions and Commands 103 Using NVRAM in DVD Studio Pro 110 Determining Whether NVRAM Is Available 112 6 Previewing, Testing, and Building Your DVD Using Preview Mode 114 Limitations of Preview Mode 115 6 Contents 113 Previewing on an External Video Monitor 115 Debugging 116 Debugging in Preview Mode 116 Using Built-in Error Checking 118 Finding Missing Asset Files 118 Finding Unassigned Asset Files 119 Getting Information About Your Project 119 Using Project Description Files 119 Using the Log Window 120 Building Your Project 121 Tracking the Multiplexing Process 122 Solving Multiplexing Problems 122 Creating Your Disc 123 Appendix A Using A.Pack to Encode AC-3 Sound 125 What Is A.Pack? 125 Creating AC-3: An Overview 125 Using A.Pack for Encoding 127 Opening A.Pack 128 Converting to AC-3 Format Using the Instant Encoder 128 Converting to AC-3 Format in Batches 129 Specifying Encoding Settings 131 Using A.Pack for Playback and Decoding 134 Setting Up Stereo Playback 134 Setting Up Multi-Channel Playback 134 Playing an AC-3 Stream 136 Decoding an AC-3 Stream 136 Getting Information 137 Options for Spatial Mixing 138 Using the Center Channel 138 Using Surround Channels 138 Limitations of the LFE Channel Versus the Subwoofer Signal 138 Accommodating Stereo Playback 139 Contents 7 Appendix B More About DVD 141 DVD in Detail 141 Comparison of DVD and CD 141 Disc Types and Capacities 142 Physical Formats 143 Logical Formats 143 Video in DVD-Video 144 Audio in DVD Video 145 DVD-Audio Compatibility 148 Subtitles in DVD-Video 148 Text in DVD-Video 148 Navigation on a DVD-Video 149 File Structure of a DVD-Video 150 Copy-Protection and Region Coding 150 Specifications for DVD Compliance 152 Video 152 Audio 153 How the Technology Works 154 About Macrovision Copy-Protection 155 Index 8 Contents 157 P R E F A C E Getting Started With DVD Studio Pro What Is DVD Studio Pro? DVD Studio Pro is software for authoring DVD-Video discs. It works with audio, video, graphics, and text materials that you have already created and edited and orchestrates them into a DVD that can be played on a DVD player or a suitably equipped computer. DVD Studio Pro is both powerful and easy to use. If you have used such production tools as Final Cut Pro, Adobe™ Photoshop, Media100, or Media Cleaner, DVD Studio Pro is easy to learn. You can use it to construct sophisticated training material or prepare a motion picture for release on DVD. When you install DVD Studio Pro, you have access to the following tools (in addition to the DVD-authoring software) to help you prepare your material, learn the program, and view your DVD: m QuickTime MPEG Encoder, for encoding video to MPEG-2 streams m Apple A.Pack, for encoding audio in Dolby Digital® (AC-3) format m Subtitle Editor (STE), for creating and importing subtitle streams m Tutorial files, for creating a DVD project with prepared files to help you learn the program m Apple DVD Player, for playing your finished project on the computer as if it were a physical DVD Read this preface for system requirements, a brief overview of the DVD-authoring process, and resources for learning more about the program. Then work through the tutorial in Chapter 1 to learn the basics of DVD Studio Pro. 9 System Requirements You need the following hardware and software to use DVD Studio Pro: Hardware Requirements m m m m Computer with a G4 processor and an Apple-supplied AGP graphics card 128 megabytes (MB) of random-access memory (RAM) DVD drive Display software and hardware capable of 1024 x 768 pixels at thousands or millions of colors m For writing to disc: DVD-R recorder, DVD-RAM drive, or DLT tape drive You should have at least twice as much hard disk storage space as the size of your project. (For DVD-5, for example, you need 5 gigabytes [GB] for the source files, and another 5 GB to hold the multiplexed project.) For best multiplexing performance, dedicate two or three Ultra Wide A/V or FireWire hard disks to your project (make sure they contain only your media and no other programs that might fragment the disk and decrease performance). If you have three disks, use one for video assets, one for audio assets, and the third for the finished files. If you have two disks, use one for source assets and one for final files. Software Requirements m m m m Mac OS 9.0.4 or 9.1 QuickTime Pro 4.1 or later (included on the DVD Studio Pro CD) Apple DVD Player 2.3 or later (installed with the DVD Studio Pro software) Edited video and audio files in MPEG or AC-3 format; or video creation and editing software, such as Final Cut Pro or any video and audio editing programs that support QuickTime and its component technology m MPEG encoding software, such as the QuickTime MPEG Encoder included with DVD Studio Pro. ( You can also use any MPEG encoder, software or hardware based, that produces DVD-compliant streams.) m Adobe Photoshop (version 4.0 or later) for creating menus and buttons 10 Preface Software Installation and Registration When you install DVD Studio Pro, the following items are placed on your hard disk in the DVD Studio Pro folder: m DVD Studio Pro application m Subtitle Editor application m A.Pack application m DVD Studio Pro manual in PDF format m Read Me file for DVD Studio Pro If necessary, Apple DVD Player version 2.3 is also installed. The DVD Studio Pro CD also comes with the latest version of QuickTime Pro, which must be installed separately. You need to install and register DVD Studio Pro and QuickTime Pro before you can use the QuickTime MPEG Encoder. Important Installing and Registering DVD Studio Pro To install the DVD Studio Pro software: 1 Insert the DVD Studio Pro CD into your CD-ROM or DVD-ROM drive. 2 Open and read the Read Me file for late-breaking news. 3 Open the DVD Studio Pro Installer and follow the onscreen instructions. You need to restart your computer when installation is complete. 4 After restarting your computer, open the DVD Studio Pro application and enter your registration information and serial number. The serial number is on the sleeve of the DVD Studio Pro CD. Installing and Registering QuickTime Pro To install QuickTime Pro: 1 Open the QuickTime Installer folder on the DVD Studio Pro CD. 2 Open the QuickTime Installer and follow the onscreen instructions. 3 When Choose Installation Type appears, click Custom, then click Continue. 4 Click Select All, then click Continue. You need to restart your computer when installation is complete. 5 After restarting your computer, follow the instructions in the update titled “Read This Before Installing DVD Studio Pro” that came with your copy of DVD Studio Pro. You need to supply a registration name and the serial number printed on that sheet to unlock QuickTime Pro. Getting Started With DVD Studio Pro 11 Overview of the DVD Creation Process There are four steps to creating a DVD: m Creating your source material m Encoding video and audio in DVD-compatible formats m Authoring (creating the disc’s menus and link structure and verifying navigation) m Multiplexing (creating the final files for the disc) and creating the disc DVD Studio Pro helps you with the last three parts of this process. Creating Source Material Before you use DVD Studio Pro you need to create, edit, and assemble your source material. For example, you can use software such as Final Cut Pro to edit your video and add scene transitions, special effects, and so on. You can design graphics for your project’s buttons and menus using software such as Photoshop. Once your material has been created and edited, you are ready to begin putting it together in DVD Studio Pro. If you are converting an existing program to DVD, you need to gather your original video and audio material and design graphics for the DVD menus. See Chapter 2, “Preparing Source Material,” on page 57 for detailed information on how to prepare your source material to work with DVD Studio Pro. Encoding Video and Audio The video and audio you use in your project needs to be encoded, that is, converted to DVD-compliant formats. The most commonly used formats are MPEG-2 for video and AC-3 for audio. See Appendix B, “More About DVD,” on page 141 for more information about the different formats that you can use and the pros and cons of each. DVD Studio Pro is designed to work easily with files from Final Cut Pro, but you can use any video and audio creation software that can create files compatible with the MPEG encoder that you plan to use. (The encoder must be able to create DVD-compliant streams, with audio and video in separate files.) You will probably find it easiest to save assets as QuickTime movies and use the QuickTime MPEG Encoder that comes with DVD Studio Pro. See “The QuickTime MPEG Encoder” on page 59 for more information. 12 Preface Authoring With DVD Studio Pro The role of DVD Studio Pro is to orchestrate your linear video and audio material and graphics into interactive DVD-Video, complete with menus, buttons, subtitles, and alternate languages or sound tracks. You can script buttons to perform actions, define links between parts of your material, and see a real-time preview of your DVD as you create it. Here are the general steps for authoring your material in DVD Studio Pro: 1 Import your edited video, audio, graphics, and subtitle files into the program. 2 Create one or more tracks (a track is a segment of video, audio, and subtitle information). 3 Create one or more menus to define the structure of your DVD. 4 Add buttons to your menus to allow users to navigate. 5 Create interactivity in the form of scripts, slideshows, and Web links. 6 Link the tracks and interactive material on your DVD to menu buttons and to functions on the remote control. 7 Preview and test as you go, using DVD Studio Pro’s real-time emulator/multiplexer. 8 Build the project as a set of files on your hard disk. 9 Record a DVD-R or DVD-RAM, or format a DLT tape, using DVD Studio Pro’s built-in recording module. Creating a Disc The output of DVD Studio Pro is a folder on your hard disk containing multiplexed files. (Multiplexed means that the contents of several different kinds of files—video, audio, and so forth—have been combined into one file.) You can open and play the contents of this folder as if it were on a DVD, using the Apple DVD Player, or you can use the following methods to put the material on a disc: m DVD-R: If you have a DVD-R drive, you can use the built-in recording module of DVD Studio Pro to write the VIDEO_TS directory directly to a DVD-R recordable disc. The resulting disc can be used in most DVD-Video players. m DVD-RAM, DVD-RW, or DLT tape: You can use the built-in recording module of DVD Studio Pro to write the VIDEO_TS directory to these media. If you want the disc to work in standard DVD-Video players, you can send the disc or tape to a service bureau or replicator. Getting Started With DVD Studio Pro 13 Resources for Learning About DVD Studio Pro The most effective way to learn about DVD Studio Pro is to work through the tutorial in Chapter 1 of this manual. The tutorial will teach you the basic tasks you need to know to work successfully with this program. In addition to this manual, DVD Studio Pro provides other sources of support. See the table below to find the information you need: Where to find more information 14 Preface This manual m Go through Chapter 1, “DVD Studio Pro Tutorial,” to learn how to use the program. m See Chapters 2 and 3 for information on preparing your material and setting preferences. m See Chapters 4, 5, and 6 for information on working with subtitles and scripts and building your disc. m See Appendixes A and B to learn how to use the A.Pack application and to find out more about DVD. DVD Studio Pro Help If you need help working with the software after you have completed the tutorial, look in DVD Studio Pro Help by choosing DVD Studio Pro Help from the Help menu. Read Me file You can find late-breaking information in this file on the DVD Studio Pro CD. Updates Look in the box for other essential information. Apple DVD Studio Pro Web site For general product information and updates, visit the Apple DVD Studio Pro Web site at www.apple.com/dvd C H A P T E R 1 1 DVD Studio Pro Tutorial This tutorial gives you a hands-on introduction to DVD Studio Pro. In the two parts of this step-by-step tutorial, you will create a basic DVD-Video project using many of the key features of DVD Studio Pro, and then you will enhance it using some of the more advanced tools. You will learn how to do the following tasks: m Create a new DVD Studio Pro project and set its properties m Create a multi-angle video track with audio streams and subtitles m Create still and motion menus m Add markers to tracks and set startup actions and links m Add buttons to menus and chapter markers m Assemble a slideshow using still images and audio m Write a simple script m Preview and test your project m Build the finished project on your hard disk m Play the project using the Apple DVD Player The tutorial takes approximately one hour. Note: DVD Studio Pro can create either PAL or NTSC projects. The sample material is in NTSC format. Even if you live in an area where PAL is the standard, you can still complete the tutorial using the supplied sample files. 15 Getting the Tutorial Files and Starting the Program If you haven’t installed DVD Studio Pro yet, follow the instructions in the Preface, “Getting Started With DVD Studio Pro,” on page 9. Be sure to look at the Read Me file for any new information about DVD Studio Pro. You need at least 500 megabytes (MB) of free space on your hard disk to complete the tutorial. The tutorial files require about 300 MB of free space. You need an additional 200 MB to write the finished project. 1 Copy the Tutorial folder from the DVD Studio Pro CD to your hard disk. When you’re finished copying, your hard disk should contain a folder with the following files: 2 Double-click the DVD Studio Pro icon (in the DVD Studio Pro folder) to start the program. The DVD Studio Pro workspace appears. You use the windows in this workspace to build your DVD project. 16 Chapter 1 DVD Studio Pro Building Blocks In DVD Studio Pro, every project is constructed from these basic components: m Assets: Video, audio, graphics, and subtitle files. m Tracks, markers, and stories: Each track has up to 9 video streams, 8 audio streams, and 32 subtitle streams, linked together in a single structure (the DVD specification calls these video title sets). Each track can have up to 99 markers (spots within the track where you can start play). Markers can be arranged in sequences called stories, which can be thought of as “virtual” tracks. m Slideshows: Each slideshow can use up to 99 assets, which can be MPEG video streams or still pictures in PICT format. Up to 8 audio streams can be assigned to each asset. m Menus and buttons: A menu is a graphic backdrop for buttons, which allow the viewer to interact with your program. You can create as many menus as you want. Each menu can have up to 36 buttons. m Scripts: These are simple programs that can add sophisticated interactivity to your DVD. DVD Studio Pro scripts can also use the special memory (NVRAM) in the Philips Professional DVD Player. m Languages: These labels make it easy to construct multi-language titles. You can put up to 16 languages on a disc. DVD Studio Pro Tutorial 17 The DVD Studio Pro Workspace In DVD Studio Pro, you work in four main windows: the Graphical View, the Project View, the Property Inspector, and the Preview window (which you see when you preview an item in your project). When you begin a new project, these windows are empty. Before you can begin creating a project, you need to import the files you want to work with into the Assets container in the Project View. Graphical View window Project View window and tabs 18 Chapter 1 Assets container (“torn out” from the Project View) Property Inspector Importing Assets The various files in your project—video, audio, and graphics files—are collectively called assets. You can import assets individually or in groups, either by using the Import command or by dragging files from the Finder. Adding Assets With the Import Command 1 Choose Import from the File menu. 2 Navigate to the Tutorial folder using the controls in the upper half of the dialog box. 3 Display the contents of the folder called “Graphic files” in the upper half of the dialog box, and click the Add All button to add all the files to the list of items to import. 4 Next, navigate to the “Video files - MPEG2” folder, select Offbeat Scenes.m2v, and click the Add button to add it to the list of items to import. 5 When all the files have been selected, click the Import button to import them into the Assets container. DVD Studio Pro Tutorial 19 Adding Assets by Dragging It’s often faster and easier to add assets by dragging them to a project. 20 Chapter 1 1 In the Finder, select the remaining files (shown below). 2 Drag the selected items to the Assets container. 3 When you’re finished adding assets, make sure the Assets container has the following files: Viewing the Properties of an Item Every item in a DVD project has properties and settings that affect its behavior within the project. You can view and change most properties using the Property Inspector. The Property Inspector always shows the properties of the currently selected item. To see the properties of an item: m Click the item in any of the DVD Studio Pro windows. Note: If you don’t see the Property Inspector, choose it from the Windows menu. To see the properties of the entire disc: m Click an empty area of any DVD Studio Pro window. DVD Studio Pro Tutorial 21 Creating a Basic DVD In this part of the tutorial you will create a simple DVD that you can interact with using the Preview Mode of DVD Studio Pro. In the second part of the tutorial, you will learn how to enhance parts of your project and add additional interactivity to it. Setting Disc Properties After importing the assets for your project, you need to make some basic settings before you begin adding and creating the different disc elements. 1 View the disc properties in the Property Inspector by clicking an empty area of any DVD Studio Pro window. 2 Choose the video standard for your menus. 3 In the Region Code pop-up menu, leave the default setting—All Regions Selected—for now. 4 Now is a good time to save your project. Choose Save As from the File menu and give it a name. Note: It’s a good idea to save your project periodically throughout this tutorial so that you don’t need to repeat sections in case you are interrupted. Adding a Track The pieces of video and audio that make up your DVD are held in tracks. A track is simply a collection of video, audio, and subtitles that play as a unit. A DVD can have anywhere from 1 to 99 tracks. Each track can contain up to 9 video streams (angles), 8 audio streams (different sound tracks), 32 subtitle streams, and 99 chapter markers and stories. Your first track will have one video and two audio streams. 1 Click the Add Track button at the bottom of the Graphical View. 2 In the Track area of the Property Inspector, name the track OffBeat Scenes. ( You can also change the name in the text box on the track tile.) 3 In the Video area of the Property Inspector, choose OffBeat Scenes.m2v from the Asset popup menu. The assets available in this pop-up menu are those that you imported earlier. 22 Chapter 1 4 Click the audio icon on the track tile. The track’s Audio Streams container opens. 5 Choose New Audio Stream from the Item menu. 6 Select the Untitled Audio item in the container. Then locate the Asset pop-up menu in the General area of the Property Inspector and choose OffBeat Scenes - AIFF. 7 Type the name Example 1 in the Name text box in the Audio Stream area of the Property Inspector. 8 In the Language pop-up menu in the General area, choose English. 9 Instead of using the icons on the track tile, you can drag an audio stream directly to a track. Select the asset Heartland – AC-3 in the Assets container (in the Project View) and drag it to the OffBeat Scenes track. Its name appears in the Asset pop-up menu in the Property Inspector. 10 Name the new stream Example 2 and choose German from the Language pop-up menu. The Audio Streams container should look like this: DVD Studio Pro Tutorial 23 Previewing Audio Streams You can preview nearly every aspect of a project at any time. In this section you will preview the audio streams you just added to the OffBeat Scenes track. 1 Select the track. 2 Choose Preview Menu from the Item menu, or click the Preview button in the lower-right corner of the Graphical View. Preview Mode starts. 3 To switch between the two audio streams, click the Audio key at the bottom of the Preview window. Stop key 4 Audio key Click the Stop key to return to the DVD Studio Pro workspace. Creating a Multi-Angle Track A multi-angle track is a track with more than one video stream. Despite their name, multiangle tracks don’t have to contain different angles of the same subject. They can be used whenever you want to be able to switch freely among “parallel” video clips. The viewer can switch between streams using the Angle key on the remote control. A track can contain up to eight alternate video streams, plus its main video stream. All video streams used as alternate angles must be exactly the same length as the main video stream and must be encoded using identical settings. Important For your sample project, you’ll create a short track that has two alternate angles. 24 Chapter 1 1 Create a track by dragging the Angle 1.m2v asset into the Graphical View. 2 Change the track’s name to Views. Note: When you create a video track by dragging an asset into the Graphical View, the Property Inspector shows the video assets by default. Select the track to access the Track area of the Property Inspector. You can name the track here, or use the text box on the track tile. 3 Drag the audio stream Angle 1 - AIFF onto the track tile to add it. Adding Angles 1 Click the track’s angle icon. Angle icon The track’s Angles container opens. 2 Choose New Angle from the Item menu. 3 Select the angle in the Angles container and use the Property Inspector to change its name to Angle 2. 4 In the Property Inspector, set this angle’s General Asset to Angle 2.m2v. 5 Add a third angle named Angle 3 and assign it the Angle 3.m2v asset. Previewing Angles You can preview your multi-angle track. 1 Select the track, then click the Preview button. 2 While the track is playing, click the Angle key in the lower portion of the Preview window to switch to other views. Angle key DVD Studio Pro Tutorial 25 The angle indicator at the top of the Preview window shows the current selection. Note: There may be a short delay before the new angle appears. This is normal. If previewing angles does not work, make sure Show All Angles is selected in the Preview area of the Preferences window. Creating a Still Menu Menus are graphic or video backdrops for buttons. There are two types of menus: still and motion. Still menus use a Photoshop or PICT file for the background. Motion menus use a video clip for the background. In this section you will create a still menu. 1 Click the Add Menu button at the bottom of the Graphical View. If the new menu tile overlaps the existing tile, drag the new tile to another part of the Graphical View. 26 Chapter 1 2 Name the menu Main Menu. (This menu will be the main menu for your project.) Note: If the menu tile doesn’t look like the one below, choose Large from the View Size pop-up menu in the Graphical View to see the large version of item tiles. 3 In the Property Inspector for this menu, make sure the Picture area is expanded. If not, click the triangle next to Picture. 4 Select a Photoshop file to use for this menu by choosing “Still menus.psd” from the Asset pop-up menu. When you use a Photoshop file, you can specify that different layers of the file be used for the background of the menu, as well as for the different states of the buttons that appear on the menu. The layers of the Photoshop file are available in different areas of the Property Inspector. 5 In the Main Menu tile, double-click the rectangle (also called the thumbnail area). A window called the menu editor opens, with one button automatically created. 6 In the Picture area of the Property Inspector, click the underlined property labeled “Layers (always visible).” A box appears that displays the available layers in the Photoshop file you are working with. Note: It’s easiest to work with Photoshop layers if you organize the layers according to the button positions in the containers in the Project View. (First the layers for the background, then the layers for Button 1, then the layers for Button 2, and so on.) If you create empty layers beginning with a hyphen (“-”), they appear as menu dividers in the Property Inspector’s Layers menu. DVD Studio Pro Tutorial 27 28 Chapter 1 7 Drag to select the layers shown here. Bullets indicate the selected items. 8 Click OK. 9 The selected layers now appear in the menu editor. (The untitled button is still present.) Adding Buttons to a Still Menu Buttons allow the user to interact with the DVD. When you create a new menu, one button appears automatically. You can work with this button and add more as needed. All menus must have at least one button, and can have as many as 36. 1 Position the pointer inside the button rectangle and drag it to the graphic labeled OffBeat Action. The button’s rectangle represents its “hot,” or active, area. When the viewer uses your DVD on a computer and clicks inside the hot area, the button is activated (it changes color and the action assigned to it is carried out). 2 Resize the active area of the button by dragging a corner. The active area should be slightly larger than the graphic. 3 To create a button for the graphic labeled OffBeat Crew, drag from the upper-left corner of the graphic to the lower-right corner. 4 Repeat step 3 to create buttons for the rectangles labeled OffBeat Views and OffBeat Online. DVD Studio Pro Tutorial 29 Naming the Buttons Every item in a DVD project has a default name. If you like, you can edit the name in the Property Inspector. m Select each button in turn and give it a new name. (Name the buttons Action, Crew, Views, and Online.) When you’re finished, the names of the buttons appear in the menu editor. Specifying Button States Each button on a menu has three possible states: normal, selected, and activated. (“Selected” means that if the viewer clicks the Enter or OK key on the remote control, the button will be activated and its actions will be carried out.) Each state can use different layers of the source Photoshop file. (This is known as the Photoshop Layer method.) In this way, you can make it easy for the viewer of your disc to determine which button is currently selected. Note: DVD Studio Pro also supports the standard highlighting method used in some other authoring tools. See “Specifying Button States in Motion Menus” on page 34 for more information. 30 Chapter 1 For a still menu, such as the one you’re creating now, you can use the three State pop-up menus in the Display area of the Property Inspector to specify additional layers of the Photoshop file that will appear whenever a button is in a particular state. 1 In the menu editor, click the Action button to select it. 2 In the Display area of the Property Inspector, choose “Action button - selected” from the Selected State pop-up menu. To see the layer, choose Show Selected State from the Buttons menu. This is the way the button will look when a viewer selects it. 3 Next, choose the layer “Action button - activated” from the Activated State pop-up menu. To see how the activated button will look, choose Show Activated State from the Buttons menu. 4 Repeat steps 1–3 for the three remaining buttons. 5 When you’re finished, click the close box to close the menu editor. Previewing Buttons Now that you have set the selected and activated states for the Main Menu buttons, you can preview them to see how they will look in a DVD player. 1 Select the Main Menu in the Graphical View. 2 Click the Preview button. The menu appears with the first button selected. DVD Studio Pro Tutorial 31 3 Use the arrow keys to select the other menu buttons. By default, DVD Studio Pro automatically links buttons according to their order in the menu editor (each button is linked to the next, and the last is linked back to the first). Angle keys 4 Stop key To see how a button will look when it’s activated, select it and then click OK on the remote control. Because these buttons are not yet linked to any actions, nothing happens when you activate them, but you can see how they change color. 5 Click the Stop key to return to the DVD Studio Pro workspace. Creating a Motion Menu Motion menus are similar to still menus except that they use a video clip for the background. They can also include composited video images on the clip so it appears that each button is playing its own small video clip. You create them the same way that you create still menus. 1 Click the Add Menu button at the bottom of the Graphical View. Note: You can drag a still menu asset directly to the Graphical View to create a still menu, but if you use this technique with a video asset you will create a track, not a menu. When you create a motion menu, you need to use the Add Menu button. 2 32 Chapter 1 Name the new menu Scene menu, and set its Picture Asset to OffBeat Menu.m2v. 3 Choose “OffBeat menu - AIFF” from the Audio pop-up menu to add an audio stream to the menu. 4 Choose Edit from the Item menu to open the menu editor (or double-click the thumbnail area). The first frame of the selected video stream and one untitled button are visible. 5 Drag the button into position over the small “video window” in the lower-left corner, and resize it to enclose the entire underwater image. 6 Draw five additional buttons (three for the remaining video windows, and one each for the Main and Next arrows). When you’re finished, your menu should look something like this: You must create and edit the video asset you use for a motion menu (using a program such as Final Cut Pro) before you work with it in DVD Studio Pro. The QuickTime file used to create this motion menu is provided in the tutorial files (in the “Files to encode” folder in the Tutorial folder). You cannot create or edit video files using DVD Studio Pro. Important 7 Using the Property Inspector, name the buttons at the top of the motion menu Main Menu and Next and the buttons at the bottom Waves, Heat, Air, and Chill. DVD Studio Pro Tutorial 33 Looping the Video in a Motion Menu The video for a motion menu can be set to repeat (loop) indefinitely. For this project you will set the menu to loop. 1 Set the Loop property to On in the Timeout area of the Property Inspector. 2 Close the menu editor. Previewing a Motion Menu To see how the motion menu looks so far: 1 Select the Scene menu tile and click Preview. 2 Click the Stop key to return to the DVD Studio Pro workspace. Specifying Button States in Motion Menus When you set the button states in the still menu, you used the Photoshop Layer method to indicate which button had been selected and when a button had been activated. To set this feedback in a motion menu, you specify highlight colors for the selected and activated states of the buttons. 1 If necessary, open the Scene menu in the menu editor by double-clicking its thumbnail area. 2 Open the Buttons menu and make sure Show Selected Hilites is selected. 3 Click the background image in the menu editor to deselect any buttons. 4 In the Button Hilites area of the Property Inspector, set the color for Selected Set 1 to yellow and the transparency to 66 percent. Each button in the menu editor is covered by a yellow rectangle. 5 Set the color for Activated Set 1 to red and its transparency to 66 percent. To see how the buttons will look when activated, choose Show Activated Hilites from the Buttons menu. Each button in the menu editor is now covered by a red rectangle. 34 Chapter 1 When you’re finished, the Property Inspector should look something like this: Adding Markers When you play a track within a DVD project, it starts from the beginning. If you want to be able to start playback at, or jump to, specific spots within a track, you insert chapter markers. Every track has a “Start of track” marker, so the marker you add will be the second marker on the track. 1 Click the marker icon on the OffBeat Scenes track to open the Markers container. 2 Choose New Marker from the Item menu. 3 Select the new marker and choose Edit from the Item menu (or hold down the Option key and double-click the marker). The marker editor opens. 4 In the Marker area of the Property Inspector, name the marker Heat. 5 At the top of the marker editor, click the time code button and enter 30:15. Then click OK. You can also drag the slider at the bottom of the marker editor to move through the track and place your marker. Note: When you type a time code, DVD Studio Pro sets the marker at the closest valid location, which may not be the exact number you entered. DVD Studio Pro Tutorial 35 6 Add two more markers. ( You can follow the steps above, or click the New Marker button at the bottom of the marker editor.) Make sure you set the marker’s location before you name the marker. m Add a marker named Air at 1:00:00. m Add a marker named Chill at 1:31:00. 7 To jump to other markers while in the marker editor, choose them from the marker pop-up menu. 8 When you’re finished, close the marker editor. Your list of markers should look something like this. 36 Chapter 1 Previewing Markers You can see how markers work by previewing the OffBeat Scenes track. 1 Select the OffBeat Scenes track and click Preview. 2 Click the Next Track key (also called the Skip key) on the remote control to jump to the next marker. Next Track key Stop key After you reach the last marker, the video track plays until the end. The Next Track key will not take you from the last marker back to the “Start of track” marker. 3 Click the Stop key to return to the DVD Studio Pro workspace. Creating a Slideshow Besides tracks, which hold video and audio, a DVD can contain slideshows, which hold sequences of still images or video clips, with or without audio. A slideshow can be set to advance automatically or to wait for the viewer to click the Next Track key on the remote control. In this section you’ll add a slideshow to your project: 1 Click the Add Slideshow button in the Graphical View. 2 Name the slideshow Crew. DVD Studio Pro Tutorial 37 3 Double-click the tile’s thumbnail area to open the slideshow editor. The list on the right shows all the assets in your project that are suitable for use in a slideshow. To assemble the slideshow, you drag items from the Assets list on the right to the Slide list on the left. 38 Chapter 1 4 Drag the Slide 1 PICT file into the Slide list. 5 Add audio to the slide by dragging the audio stream Slide 1 - AIFF from the Assets list onto the slide file. 6 Add the remaining three slides (Slide 2, Slide 3, Slide 4) and their matching audio files. 7 Click OK to close the slideshow editor. Previewing Slideshows 1 Select the slideshow tile and click Preview. 2 You can use the Next Track and Previous Track keys on the remote control to jump to different slides. 3 Click the Stop key to return to the DVD Studio Pro workspace. Linking Things Together Using the Action Menus Virtually any item in a DVD project can be connected to any other. A track can jump to a menu, a button can jump to a script, a script can play a track, and so on. This linking is accomplished primarily by setting the item’s “Jump when activated” and “Jump when finished” properties. You can see the choices available for these properties in the Property Inspector’s action menus. These choices are always the same: all menus, tracks, markers, stories, slideshows, slides, and scripts you’ve created in your project. Contents of an action menu DVD Studio Pro Tutorial 39 Linking a Button to a Track 40 Chapter 1 1 Open the Main Menu in the menu editor by double-clicking its thumbnail area. 2 Select each button and set its “Jump when activated” property (in the Action area of the Property Inspector): m Action: Scene menu m Crew: Crew m Views: Views m Online: Leave this as “not set.” 3 Close the menu editor. 4 Open the Scene menu in the menu editor and set the “Jump when activated” actions for its six buttons: m Main Menu: Main Menu m Next: Views m Waves: OffBeat Scenes m Heat: OffBeat Scenes::Heat (a marker) m Air: OffBeat Scenes::Air (a marker) m Chill: OffBeat Scenes::Chill (a marker) 5 Close the menu editor. Jumping Somewhere When a Track Is Finished A DVD often displays a menu after a video has finished playing. In your project you’ll set the three main items to jump back to the main menu when they are finished. 1 Select the OffBeat Scenes track. 2 Using the General area of the Property Inspector, set the “Jump when finished” property to Main Menu. 3 For the Views track and the Crew slideshow, also set the “Jump when finished” property to Main Menu. Setting a Startup Action When you put a DVD-Video disc into a DVD player, you expect something to happen. For example, a video might play, a menu might appear, or a “don’t copy this disc” warning might be displayed. What happens first is called the startup action. The startup action can be any item in your project (a track, marker, story, menu, script, slide, or slideshow). Here you’ll set the startup action for your project: 1 Select the disc by clicking an empty area of the Graphical View. 2 In the General area of the Property Inspector, choose Main Menu from the Startup Action pop-up menu. Now, when this disc is inserted into a DVD player, it will begin by displaying the main menu. DVD Studio Pro Tutorial 41 Setting the Actions of Standard Remote Control Keys All DVD players are required to have certain keys on their remote controls. Besides the arrow and OK keys, the required controls include Menu, Title (or Disc), Audio, Subtitles, and Return. DVD Studio Pro gives you complete flexibility to determine what these keys do within your project. For this tutorial, you’ll program the Title and Menu keys to display the main menu. 1 Select the disc by clicking an empty area of the Graphical View. 2 In the Remote-Control area of the Property Inspector, choose Main Menu from the Title pop-up menu and the Menu pop-up menu. Note: In the Apple DVD Player, the Title key is called the Disc key. For more information about setting remote control keys, see “Setting Remote Control Properties for a New Project” on page 70. Previewing Links and Actions Now that you have created links, set actions, and specified remote control keys, you can use Preview Mode and interact with your project much as you would if you were playing it in a DVD player. Note: You can see how all your tiles are linked together by choosing Always from the Lines menu in the Graphical View. Follow these steps to preview your project: 42 Chapter 1 1 Select the Main Menu and click the Preview button. 2 Use the onscreen remote control keys at the bottom of the window to control your project. m Use the arrow keys to move from one button to another. m To activate a button (jump to the item that the button is linked to), select the button and click OK in the remote control. m Use the Next Track and Previous Track keys to move through slides or to jump between markers. m To return to the previously active track, click the Return key. m Click the Menu or Disc key to jump to the Main Menu at any time. m Use the Audio and Angle keys to switch to alternate audio streams or angles. 3 Click the Stop key when you want to exit Preview Mode. Arrow keys Stop key You have now completed the first part of this tutorial. To learn more about the features of DVD Studio Pro, continue with “Expanding Your DVD,” next. Expanding Your DVD In this section of the tutorial you will continue working on the basic DVD project you created in the first part of this chapter. If you prefer to start a new project, close the project you currently have open, then choose New from the File menu. Creating a Story A story is a collection of markers that play in a particular order. To create a story, you first create the markers you want to use in the story. Then you move the markers that indicate the beginning of each clip that you want to use to the Stories Folder. The markers that indicate the ending point of the clip need to be created in the track, but they are not included in the Stories Folder. (Unlike a standalone marker, a marker in a story plays only until the next marker in a track is reached, even if that marker is not used in the story.) For this project, you will create a story using the OffBeat Scenes track. The OffBeat Scenes track already contains four markers. You will add four new markers to this track that will mark the end of each clip. You will then move the four original markers to the track’s Stories Folder to create the story. Creating New Markers 1 Open the OffBeat Scenes track in the marker editor by double-clicking its thumbnail area. The track appears at the “Start of track” marker. 2 Click the New Marker button and name the marker End of start in the Property Inspector. 3 Click the time code button and set the new marker at 10:15. 4 Create three more new markers: m Add a marker named End of heat at 40:15. m Add a marker named End of air at 1:08:15. m Add a marker named End of chill at 1:42:15. 5 Close the marker editor. DVD Studio Pro Tutorial 43 Moving Markers to the Stories Folder 1 Click the story icon on the OffBeat Scenes track to open the Stories Folder. 2 Choose New Story from the Item menu and name the story Highlights. 3 It is easiest to work with multiple containers within one track using the Tracks container in the Project View. In the Project View, click the Tracks tab to access the Tracks container, and click the triangle next to OffBeat Scenes to see the contents of the track. You can pull the Tracks container away from the Project View and expand it to make it easier to work in. 4 Open the Markers folder. 5 Drag the following markers from the Markers container to the Highlights story: Start of track, Heat, Air, and Chill. Hold down the Command key to select noncontiguous items. 44 Chapter 1 6 You will link the story to the Next button on the Scene menu. Double-click the thumbnail area on the Scene menu to open it in the menu editor. 7 Select the Next button and choose OffBeat Scenes•Highlights from the “Jump when activated” pop-up menu in the Property Inspector. 8 Open the Scene menu in Preview Mode and activate the Next button to preview your story. Creating Interactive Markers You can place buttons on top of tracks (or parts of tracks) that are assigned a video stream. Buttons on tracks are called interactive markers. Like the buttons on menus, they allow the viewer to choose various actions. Because the video stream won’t usually include button graphics, you need to apply an overlay image to define the shape and position of the buttons and their highlights. An overlay image is a black-and-white graphic file (a PICT file or a layer of a Photoshop file). You can apply an overlay to buttons and interactive markers. Overlay image defining button shapes and highlights Interactive markers are created using the subtitle feature of DVD players, so you cannot combine subtitles and interactive markers within one track. Important Note: To use an overlay image you must have already created one and added it to the Assets container. The tutorial files include overlay images for you to use. For your project you will add buttons to the second and third markers in your story, Heat and Air. (These are actually the third and fifth markers in the track.) 1 Double-click the thumbnail area on the OffBeat Scenes track to open the marker editor, and choose Heat from the marker pop-up menu. 2 In the Buttons area of the Property Inspector, choose “Overlay for track buttons” from the Overlay Picture pop-up menu. 3 For the Normal state of the button, choose the medium gray in the pop-up menu, and set its transparency to 80 percent. DVD Studio Pro Tutorial 45 4 For Selected Set 1, choose light brown at 66 percent. For the Activated Set 1, choose yellow at 100 percent. 5 Draw buttons enclosing the two button images and their text. Because you are using an overlay image that contains button graphics, the shape of the buttons will reflect the overlay image, instead of being a solid rectangle. You should now see the highlights outlining the button images in the video. 46 Chapter 1 6 In the Property Inspector, name the button enclosing the left-pointing arrow Action Menu, and name the button enclosing the right-pointing arrow Main Menu. 7 Set the “Jump when activated” properties for the two buttons: m Action Menu: Scene menu m Main Menu: Main Menu m For this track, you will use the same buttons in both markers. The Use Buttons Of property lets one marker inherit the settings of another. 8 Jump to the next marker that you want to create buttons for, Air. 9 In the Property Inspector, set the Use Buttons Of property to Heat. You do not need to re-create the buttons on the Air marker if you set the Use Buttons Of property. Specifying the Shape of the Button Area That Changes Color As you saw in the last section, you can use an overlay image to specify the button shapes in interactive markers. You can also use overlay images to specify button highlights in buttons that are created by dragging over a previously created button image in a menu (an overlay image masks the color change). In this section you will modify the button highlights in the Scene menu. 1 Select the Scene menu. 2 In the Button Hilites area of the Property Inspector, choose “Overlay for OffBeat menu” from the Overlay Picture pop-up menu. 3 Double-click the thumbnail area to open the menu editor. The appearance of the buttons should change to display highlighting only in the areas defined within the overlay graphic. In this case, the buttons are outlined with the highlighted color, instead of being completely covered by it. Without overlay 4 With overlay Close the menu editor. DVD Studio Pro Tutorial 47 Adding Subtitles You can create subtitle streams for your video streams and position them at precise points using the Subtitle Editor. For this project you will use two streams that are already prepared. For more information on creating subtitles, see Chapter 4, “Working With Languages and Subtitles,” on page 87. Interactive markers are created using the subtitle feature of DVD players, so you cannot combine subtitles and interactive markers within one track. Important 1 Click the subtitle icon on the Views track. 2 Choose New Subtitle from the Item menu. 3 Using the Property Inspector, change the subtitle’s name to English subtitle. 4 In the General area, choose English.spu from the Asset pop-up menu. 5 Choose English from the Language pop-up menu. 6 Make a second subtitle, named German subtitle, and set its asset to German.spu and its language to German. When you play your DVD and click the Subtitle key on the remote control, you can switch back and forth between English and German subtitles. Adding Web Links to Your Project DVD Studio Pro allows you to add Web links to a DVD project. Web links work when a DVD is played on a computer. This feature, called DVD@CCESS, can be “attached” to any track, menu, or slideshow. Although you can’t directly attach a link to a button, you can achieve the same effect by linking the button to a menu with its @ccess (Access) property set. Note: If you use DVD@CCESS links in your DVD, installers for those links are included on the final disc when you build it. Depending on the kind of computer you are using to play your DVD, you may need to install the installers for the Web links to work. 48 Chapter 1 For this project, you’ll create a menu that lets the viewer know that the Web browser is opening and loading the specified URL. You’ll link this menu to a button on the main menu. 1 Add a new menu to your project by dragging the asset “Still menus.psd” from the Assets container to the Graphical View. 2 Name the menu Online. 3 Double-click the thumbnail area to open the menu editor. 4 In the Picture area, click “Layers (always visible)” and select the layers shown below. Hold down the Command key to select noncontiguous files. 5 In the menu editor, move and resize the default button to enclose the Back graphic. 6 Select the button. Name the button Back. In the Display area of the Property Inspector set the selected state of the button to “Back Button - selected” and the activated state to “Back Button - activated.” DVD Studio Pro Tutorial 49 7 In the Action area of the Property Inspector, choose Main Menu from the “Jump when activated” pop-up menu. The menu and button should like this: 8 Select the background image of the menu to access the menu’s properties. In the @ccess area of the Property Inspector, set the @ccess Type to URL. 9 Type Web Site as the @ccess name and http://www.apple.com/dvd/offbeat as the @ccess URL. 10 Close the menu editor. Linking the Web Link to the Main Menu 1 Open the Main Menu in the menu editor and select the Online button. 2 Choose Online as its “Jump when activated” property. ( You left this property as “not set” when you assigned the other button properties in the first part of the tutorial.) 3 Close the menu editor, then open the Main Menu in Preview Mode to see if the Web link works. 4 Use the arrow keys to select the OffBeat Online button and click OK on the remote control. Your browser software should open. 5 50 Chapter 1 Close the browser window to return to Preview Mode. Writing a Simple Script DVD Studio Pro supports the DVD-Video scripting language, which allows you to construct sophisticated interactivity that works on all DVD players. In this section you’ll add a short script to your project that randomly plays one of four tracks or slideshows. This script has two parts. The first part generates a random number between 1 and 4. The second part plays a particular item in your project depending on which number is generated. 1 Click the Add Script button in the Graphical View. 2 Name the script RandomPlay. 3 Double-click the orange script tile to open the script editor. 4 Type this script exactly as shown (if you used different names for your items, type the names you used). A ?= if A if A if A if A 5 4 == == == == 1 2 3 4 then then then then play play play play track “OffBeat Scenes” track “Views” slideshow “Crew” story “Highlights” Of track “OffBeat Scenes” Click OK when you’re finished. DVD Studio Pro Tutorial 51 Setting a Timeout Action Any menu can have a timeout action assigned to it, something that happens if the viewer doesn’t make a choice on the remote control for a specified period of time. This feature allows you to automate a DVD title, create self-running demos, sales presentations, and so on. 1 Select the Main Menu. 2 In the Timeout area of the Property Inspector, set the Action property to the script you just created, RandomPlay. 3 In the Timeout area, enter 30 for the Duration property. Whenever the Main Menu is displayed, if no remote control keys are pressed for 30 seconds, the script will run. Use the preview function to see how it works. Testing Your Project At this point, the navigation for your project should be complete. Use Preview Mode to try it. If you set up everything correctly, you’ll be able to jump back to the main menu at any time using the Menu or Disc key on the remote control, and the buttons should all jump to their intended menus, tracks, slides, slideshows, markers, stories, or Web sites. 52 Chapter 1 Building the Finished Project You have now completed both sections of the tutorial project. All that remains is to get it onto the desired output media. DVD Studio Pro can write directly to DVD-R, DVD-RAM, or DLT. It can also save completed projects to your hard disk. The process of formatting the project data so that it’s ready for a DVD is called building the disc or multiplexing (muxing for short). Follow these steps to build the tutorial project: 1 Choose Build Disc from the File menu. 2 Choose a location. As the disc is being built, a Progress window shows data about the multiplexing process. When building is finished, the Log window opens, showing a completion message and listing any errors that have occurred. The end result is a folder called VIDEO_TS, which contains the complete DVD-Video structure. s DVD Studio Pro Tutorial 53 Using the Apple DVD Player Once the project is built you can play it from your hard disk using the Apple DVD Player, exactly as if it were a physical DVD. By playing the completed project from your hard disk, you can verify that everything works the way you intended before investing the time and money to make copies. 54 Chapter 1 1 Open the Apple DVD Player (available in the Apple menu). 2 Open the player’s Preferences window. 3 Turn on the options labeled “Enable DVD@ccess web links” and “Add ‘Open VIDEO_TS’ menu item to File Menu.” 4 Choose Open VIDEO_TS from the File menu. 5 Navigate to the VIDEO_TS folder and click Choose. 6 Click the Play button to start playback. The project should play as if it were on a DVD disc. What’s Next? Congratulations! You’ve successfully made your first DVD project. Read the rest of this manual to learn about preparing source material; using the QuickTime MPEG Encoder and A.Pack application to prepare DVD-compliant files; working with languages and the Subtitle Editor; and writing projects to DVD-R, DVD-RAM, or DLT. DVD Studio Pro Tutorial 55 C H A P T E R 2 2 Preparing Source Material Before you can begin building a DVD project, you must have correctly prepared source material: edited video and audio, subtitles, and graphics or video for menus. After you have captured and edited your source material, you need to encode it to make it DVD-compliant. DVD Studio Pro includes two encoders to help you format your material: m The QuickTime MPEG Encoder, for encoding video to MPEG-2 streams (The QuickTime MPEG Encoder also outputs elementary PCM audio.) m The Apple A.Pack application, for encoding audio in Dolby Digital (AC-3) format This chapter describes how to prepare source material for use in DVD Studio Pro and how to use the QuickTime MPEG Encoder. For detailed information on using the A.Pack application, see Appendix A, “Using A.Pack to Encode AC-3 Sound,” on page 125. For more information on DVD-compliant material, see “Specifications for DVD Compliance” beginning on page 152. 57 Capturing Video and Audio For best results, you should create and capture your video and audio using the settings required for DVD: m Frame size: 720 x 480 pixels (NTSC); 720 x 576 pixels (PAL) m Frame rate: 29.97 frames per second (NTSC); 25 frames per second (PAL) m Aspect ratio: 4:3 or 16:9 m Audio resolution: 16 or 24 bits m Audio sample rate: 48 kHz or 96 kHz If you are unable to capture and edit using these settings, most MPEG encoders can convert from other resolutions and sizes. Capturing Video for 16:9 Aspect Ratio Standard NTSC and PAL monitors have a picture aspect ratio of 4:3 or 1.33. (The aspect ratio is the ratio of the width of the visible area to the height of the visible area.) High Definition Television (HDTV ) uses formats that have a picture aspect ratio of 16:9 or 1.78. If a program recorded with an aspect ratio of 16:9 and 480 active lines (as in NTSC-DV ) is displayed on a device with an aspect ratio of 4:3, only 360 lines, or 75 percent of the image, is shown. To show the whole image, you can use anamorphic transfer—a process that stretches the active area of the 16:9 program vertically to fill all 480 lines. To show this material correctly, the display device needs to shrink the vertical dimension to cancel the stretch performed during recording. About Anamorphic Transfer You can use Final Cut Pro 1.2.5 or later to capture, import, edit, and export 16:9 anamorphic media for NTSC and PAL. When you capture or import, you need to specify that the material is 16:9 anamorphic. Note: 16:9 anamorphic is different from letterbox (4:3 aspect ratio). Although both are sometimes called widescreen, to a DVD-Video player they are different formats. 16:9 anamorphic is squeezed horizontally and looks unnaturally tall and skinny on a 4:3 screen. With letterbox, the widescreen effect is accomplished by placing the widescreen image in a field of 4:3 black. The width of the image determines its vertical size. This leaves bands of black across the top and the bottom of the 4:3 screen. You have two options for anamorphic transfer. In both cases the recorded image requires an NTSC or PAL monitor with a 16:9 setting to look correct. m If you use a camera with an anamorphic lens adapter, the image appears stretched in the camera’s viewfinder. m If you use a DV camera set to 16:9 mode, the image looks correct in the viewfinder. 58 Chapter 2 Segmenting Your Material If you plan to divide your project into multiple tracks, your source material must be divided in the same way. It’s easiest to segment the material when preparing it for encoding. If your encoder works with QuickTime movies, you can segment your tracks once they are digitized into the computer. Usually you work with your primary video and audio tracks together as a single file until they are encoded. At that point they need to be separated into audio and video “elementary” streams. The end result of this phase of the production is m edited video material either on tape or in digital format, such as QuickTime m edited audio material either on tape or in digital format, such as SoundDesigner, AIFF, or WAVE Preparing Video Content Encoding Video to MPEG Format Before it can be imported into DVD Studio Pro, video material must be encoded in a DVD-compatible format, usually MPEG-2. You can encode material using software (if your video is in the form of QuickTime movies, you can use the QuickTime MPEG Encoder) or hardware (a hardware encoder usually requires the material on tape). Make sure the tool you use produces separate DVD-compliant audio and video streams. (DVD Studio Pro cannot use multiplexed MPEG streams such as System, Program, or Transport streams.) The QuickTime MPEG Encoder When you install DVD Studio Pro, a new MPEG-2 exporting option becomes available to the QuickTime Player and Final Cut Pro (and other applications that support the QuickTime Export feature). (DVD Studio Pro installs a new extension in the QuickTime Extensions folder inside the Extensions folder in the System Folder.) Note: To use the QuickTime MPEG Export feature, your computer needs at least 25 MB of available RAM. DVD Studio Pro must be installed and must have a valid serial number. The QuickTime MPEG Encoder outputs an MPEG-2 video stream at a variable bit rate ( VBR), with a closed GOP (Group of Pictures) pattern and a fixed GOP size. The exported MPEG video stream can be used for multi-angle tracks. The file type is m2v. Preparing Source Material 59 To export files prepared in Final Cut Pro or the QuickTime Player to MPEG-2: 1 Choose Export from the File menu and QuickTime from the submenu. 2 In the dialog box that appears, choose “Movie to MPEG 2” from the Export pop-up menu, then choose a location and name for the file. 3 In the settings dialog box, set options appropriate for your material. m Select Save Audio if you want to encode both audio and video. (The QuickTime MPEG Encoder outputs PCM audio only.) m Select Write Protocol File to create a detailed encoding log in the destination folder. The estimated size for the quality level you chose appears in the Info area. If you are working with streams other than DV streams, you may need to change their field order using the Field Dominance pop-up menu, even if the encoder always tries to predict the correct order. When you’re finished, click OK. 60 Chapter 2 A progress window shows you information during the MPEG-2 export. Click the expansion triangle to see the currently encoding frame. Note: Previewing during encoding reduces performance by approximately 20 percent. For faster encoding, click the triangle to hide the preview image. Preparing Source Material 61 Encoding Video for Multi-Angle Tracks DVD Studio Pro supports multi-angle video, a track with up to eight alternate video streams (for a total of nine video streams per track). The viewer can switch among angles using the Angle key on the remote control. Requirements for MPEG Streams for Multi-Angle Video The QuickTime MPEG Encoder produces streams that meet the criteria for multi-angle use: m All streams must be the same length. m All streams must have the same resolution and frame rate. m The length and pattern of GOPs (Group of Pictures) must be the same on all tracks (angles). (Use an encoder that allows you to turn scene detection off.) m All GOPs must be closed. You cannot create angles for a track that has open GOPs. Maximum Bit Rates for Multi-Angle Tracks The maximum bit rate for a multi-angle track is different from other tracks. It is calculated by adding the bit rate for each video stream to the bit rate for all of the track’s audio streams. m 5 angles or fewer: 8 Mbps maximum for each angle stream m 6–8 angles: 7.5 Mbps maximum for each angle stream m 9 angles: 7 Mbps maximum for each angle stream Preparing Audio Content Encoding Audio DVD Studio Pro accepts audio streams in these formats: m PCM audio (AIFF, SoundDesigner, or WAVE format, 16- or 24-bit resolution, 48 or 96 kHz sample rate, stereo or mono files) m MPEG audio (MPEG-1, layer 2 audio, 48 kHz resolution, 32–384 Kbps data rate. MPEG-2 audio is not supported.) m Dolby AC-3 audio The QuickTime MPEG Encoder outputs PCM audio only. Note: All audio streams used within one slideshow must have the same format (for example, MPEG or PCM). All audio tracks for motion menus must have the same format. For more information on the different audio formats, see “Audio in DVD Video” beginning on page 145. 62 Chapter 2 The A.Pack Application The preferred audio format for DVD-Video discs is Dolby Digital (also known as AC-3). To encode AC-3 audio, you can use the A.Pack application supplied with DVD Studio Pro. For more information, see Appendix A, “Using A.Pack to Encode AC-3 Sound,” on page 125. Creating Material for Menus Creating Graphics for Still Menus DVD Studio Pro uses the Photoshop (psd) format for still menu graphics. Layers are used to specify images for the background and the selected and activated states of buttons. If you like, you can keep the graphics for all your menus in one Photoshop file (more than one menu can reference a Photoshop file), or you can use a separate file for each menu. The maximum number of layers in a Photoshop file is 100. Note: Photoshop’s effects layers do not work with DVD Studio Pro. Be sure to flatten any effects layers before using them in DVD Studio Pro. (Flattening a layer is not the same as flattening a file. Flattened files do not work with DVD Studio Pro.) Keep in mind the following menu graphic tips: m Set the size of the Photoshop file to match the resolution of your project. m Remember that graphics created in Photoshop will be slightly squeezed (horizontally for NTSC and vertically for PAL) when viewed on a TV, because TV formats are based on non-square pixels. To compensate for this in NTSC, create your graphics at 720 x 540, then resize them to 720 x 480. m Name layers according to their function. Preparing Source Material 63 m Use empty layers named with a hyphen (“-”) as dividers to organize the Layers palette. They appear as menu dividers in the DVD Studio Pro Layer menu. Empty layers named with a hyphen in the Photoshop file appear as dividers in the Layer menu. m Make horizontal lines taller than 1 pixel so they won’t flicker on TV screens. m Consider various shapes for your highlighted buttons—they don’t have to be rectangles. Sample button highlights m Normal-state buttons that are always visible can be merged with the background layer. That way, you’ll only need a separate layer for the highlighted and activated state of each button. m If you link a Photoshop file to a DVD Studio Pro project and then later reorder or add layers to the file, DVD Studio Pro can relink layers to their assigned buttons or menu, as long as the layer names are the same. Creating Video for Motion Menus In a motion menu, each button may appear to include a segment of video. In fact, a motion menu is made up of a single video segment. To create an illusion in which some parts of the menu appear still while other parts appear to move, you need to create a composited video clip. If you want the clip to loop, make sure to create a smooth transition between the beginning and end of the video. 64 Chapter 2 Creating Video for Interactive Markers Interactive markers are buttons that appear “on top of ” tracks, using the subtitle feature. If you want buttons in a track, you need to create video that includes button images and an overlay graphic (PICT or Photoshop) for defining the button highlights. You can create composites using a standard video editing tool like Final Cut Pro. Creating Graphics for Slideshows m Still images for slideshows can be in PICT or Photoshop format (but only the first layer of a Photoshop file is shown). m Still images must match the resolution of your project. m All audio streams used within one slideshow must have the same format. Preparing Graphics for Use With 16:9 Aspect Ratio To ensure that widescreen menu graphics don’t look stretched, edit in widescreen resolution (854 x 480 for NTSC or 1024 x 576 for PAL), then resize graphics down to normal resolution (720 x 480 NTSC, 720 x 576 PAL) just before use. The results may look squeezed in DVD Studio Pro, but they will look correct on a DVD player. Use these settings in Photoshop to resize menus for use with NTSC. Building Menus in Multiple Languages With DVD Studio Pro your project can offer menus in multiple languages. The viewer selects a language using the player’s setup menu, and the player automatically displays the menus for that language. DVD Studio Pro creates a menu for each language you create in the project. If you are using still menus, you need a separate Photoshop file for each language, and all files must have the identical layer structure and layer names. If you are using motion menus, you can assign the same video stream for each language or different streams for different languages. Preparing Source Material 65 Preparing Subtitles Each track on a DVD-Video disc can contain up to 32 subtitle streams, each of which can be associated with a language or used to present supplemental material. With the DVD Studio Pro Subtitle Editor application, you can enter, format, and synchronize your subtitles with the video material, then save them as subtitle streams. The Subtitle Editor uses QuickTime video or audio streams as source material. For complete instructions on creating and editing subtitles, see Chapter 4, “Working With Languages and Subtitles.” 66 Chapter 2 C H A P T E R 3 3 Using DVD Studio Pro When you start a new DVD project, you need to set certain preferences and disc properties before you begin working with your assets. After you have set those preferences and imported your assets, you are ready to build your project. DVD Studio Pro includes a number of views and windows that you use while building your DVD. This chapter explains the initial settings you need to make and then describes the specific features of the different views that you work in. For information not covered in this chapter, see Chapter 1, “DVD Studio Pro Tutorial,” on page 15 or look in DVD Studio Pro Help. 67 Setting Preferences for a New Project You use the Preferences window to configure certain settings for new projects. To set preferences: 1 Choose Preferences from the File menu. 2 Specify the default TV system (NTSC or PAL). This setting affects the size of menus. It applies to new projects only. You can change the format for a current project in the disc properties in the Property Inspector. 3 Specify how you will preview projects. m Use @ccess: If you want DVD Studio Pro to open your Web browser to check Web links, turn this option on. If you are checking other aspects of your disc structure, turn this option off so that DVD Studio Pro does not open your Web browser every time it encounters a URL. ( You can still add Web links if this option is turned off.) m Show All Angles: Previewing alternate angles on multi-angle tracks may slow down preview. To preview only the base video stream, turn this option off. m Enable NVRAM: If you are authoring a disc to be used on a Philips Professional DVD Player, which has an additional register allowing enhanced scripting, make sure this option is on. 4 Specify which region code to use during preview. For more information, see “CopyProtection and Region Coding” on page 150. 5 Specify a multiplexing option. You can increase the speed of multiplexing by about 20 percent by selecting “Slow-Down Background Tasks.” This may decrease the performance of other programs while you’re building the disc. 68 Chapter 3 Setting Disc Properties for a New Project Creating your project proceeds more smoothly if you set certain properties for the disc at the outset. To set disc properties: 1 Select the disc by clicking an empty area of the DVD Studio Pro workspace. 2 If it’s not already open, choose Property Inspector from the Windows menu. Click the triangles to expand and collapse the various areas. 3 Choose specific properties from the pop-up menus. Some property names, such as Region Code, are underlined. You can click underlined items to assign properties using a list window instead of a pop-up menu. Note: It is especially important to specify settings in the Disc Menu Settings area and Disc Media and Number Of Sides in the General area at the beginning, because these properties work together to alert you if your project may be getting too big to fit on your disc. A bar in the Graphical View shows you how much space is remaining. 4 After you have created the item that will appear when the disc starts up, specify the Startup Action property in the General area. A startup action is needed to use the Preview Mode of DVD Studio Pro. Using DVD Studio Pro 69 Setting Remote Control Properties for a New Project A DVD player has six standard remote control keys that are programmed to act in default ways. However, you can set up your DVD so that these keys perform different functions. To do so, you assign actions to the keys using the Remote-Control area of the Property Inspector. An action can be any item on a disc: track, marker, story, menu, script, slideshow, or single slide. If you do not specify actions for the remote control keys, the default programming applies. Note: The programming of some set-top player models may override the settings you make for your disc. On those models, navigation may not work the way you specify. The standard remote control keys and their default assignments are listed here: m Title: Goes to the main menu of the DVD-Video project. A disc is required to have one and only one title menu. m Root (called Menu in the Property Inspector): Goes to the main menu for a single title set of a disc. A title set is required to have one and only one root menu. m Track: Displays a selection of the individual clips in a title set. (Optional) m Audio: Allows viewers to change to another audio stream; for example, from English to German. (Optional) m Subtitle: Allows viewers to choose subtitles. (Optional) m Return: Usually goes back to the item that was playing before the viewer displayed a menu. 70 Chapter 3 Views Available in DVD Studio Pro The DVD Studio Pro workspace has several views and windows to represent the facets of your project. The workspace is flexible: you can open as many or as few windows as you like, and move the windows anywhere on your screen. Items in the DVD Studio Pro workspace are color-coded: menus and their assets are blue, tracks are green, slideshows are gray, and scripts are orange. m The Graphical View: Represents your project as tiles and shows the links among items. m The Project View windows: Hold the pieces of your project in folder-like containers, accessible by tabs. m The Property Inspector: Shows the information and settings belonging to a selected item. m Editors: Special windows for creating menus, markers, slideshows, and scripts. m Matrix Views: Allow you to link items together efficiently. m Preview Mode: Shows you how your project looks and works. m Troubleshooting windows: Alert you to potential problems in your project. Property Inspector Graphical View Project View Using DVD Studio Pro 71 The Graphical View The Graphical View provides a direct visual representation of the way components of your project are linked together. You can specify whether these links are visible in the Lines pop-up menu. Choose Configure to show or hide specific kinds of links. In the Graphical View: m Menu, slideshow, and track tiles have thumbnail images indicating their contents. m Types of assets you can assign to an item (for example, buttons, video, and audio streams) appear as icons inside the item tiles. Links among items are represented by colored lines and arrows: m Blue line: A link you’ve explicitly set. m Grey line: Remote control buttons. m Black line: Jumps from scripts, menu timeouts, and any other automatic action. m Red arrow: The start of a link. m Blue arrow: The end of a link. 72 Chapter 3 If you specified a disc medium in the Property Inspector for the disc, the bar next to the disc icon estimates the size of the finished project. If the size is larger than the selected medium for the disc, the bar appears red. Customizing the Appearance of the Graphical View To switch between a large and small view of item tiles: m Choose a size from the View Size pop-up menu. Smaller tiles do not have buttons or thumbnails but they allow you to see more in the window. To select a thumbnail image for an item tile (tracks, menus, or slideshows): m Choose Change Thumbnail from the Item menu. Note: Only specific frames of a track (technically speaking, the first I-frame in a GOP) can be selected as thumbnails. Thumbnail area Navigating in the Graphical View To jump to an item tile: m Choose the item tile’s name from the GoTo pop-up menu. To jump to the container for an asset: m Click the asset’s icon (works in large view only). Using DVD Studio Pro 73 The Project View The Project View represents your DVD project as icons inside containers accessible by tabs. Items in tabs are not actual files, but links to files (like Finder aliases). There are six tabs: Assets, Menus, Tracks, Slideshows, Scripts, and Languages. Some item types (for example, tracks) have subcontainers. m A number in parentheses after an item name indicates how many items are assigned to that item. m An arrow (“->”) followed by a name represents something an item is linked to. m An item listed in italics is incomplete (some of its properties still must be set). Working With Items in the Project View The following methods work in the Project View. To select an item so that its properties appear in the Property Inspector: m Click the item. To add a new, untitled item to a container: m Click the tab, open the Item menu, and choose the command for the new item. To reorder items: m Drag them to new positions in the container. Most items are written on the disc in the order specified. 74 Chapter 3 To open a container in a separate window: m Drag the container’s tab. Note: If you close a container that is in a separate window, that container does not reappear in the Project View window. To make the container and its tab reappear, close the Project View window and then re-open it by choosing Project View from the Windows menu. To see labels and comments in the Project View: m Drag the size box to expand the window horizontally. You can set labels and comments in the Property Inspector. To assign or link an item: m Drag it to another container or to an item within another container. For example, to assign a sound file to a track, drag the sound file from the Assets container to the track’s icon in the Tracks container. Note: When you assign an item, DVD Studio Pro creates a link to the item. The item itself is not moved or copied. Using DVD Studio Pro 75 The Property Inspector The Property Inspector displays the settings and properties of a selected item. m Properties are organized into areas that can be expanded or collapsed. m Different items have different sets of properties. m Only valid items appear in pop-up menus. For example, if you’re working with an item that requires an asset in a particular format, only assets in that format appear in the menu. m Underlined properties and those with pop-up menus or text boxes can be assigned or edited. m Properties with no underlining or menu are for information only. 76 Chapter 3 There are three ways to edit or assign a property, depending on the kind of property it is. m Text properties: The property itself (for example, the item’s name) is in a text box to indicate it can be changed. To change it, select it and type in the text box. Click a property in a text box to edit it. m Properties with menus: Choose an item from the pop-up menu. Using DVD Studio Pro 77 m Properties that allow multiple assignments: These properties are underlined and also have a pop-up menu. You can assign these properties by making multiple choices from the pop-up menu, or by clicking the name and choosing properties in the list that appears. Drag or Shift-click to select contiguous items. Command-click to select separate items. To see an item’s properties: m Select the item. (If necessary, choose Property Inspector from the Windows menu to see the Property Inspector.) To see the disc properties: m Click an empty area of the workspace. To collapse or expand all the properties of all the items of a selected type (for example, all menus): m Select an item and choose “Collapse all Properties” or “Expand all Properties” from the Item menu. To copy and paste properties to another item: 1 Select the item whose properties you want to copy, then choose Copy Properties from the Edit menu. 2 Select the target item and choose Paste Properties from the Edit menu. 3 In the list that appears, choose the properties to paste and click OK. Only properties that can be pasted appear in the list. 78 Chapter 3 The individual sections of the Property Inspector in which you specify item settings are known as areas. The following sections describe some of these in detail. Disc area m Name: This name is for your use. It does not have to match the filename of the project on your hard disk, and it is not included on the final DVD. m Label: You can assign a Finder label to the disc. m Comment: You can enter information or reminders here. m Estimated Size: DVD Studio Pro estimates the size of the completed disc based on the assets you have assigned so far. General area m Disc Media: Choose a type of disc from this pop-up menu. If you specify a single- or double-sided disc, DVD Studio Pro keeps a running estimate of the size of your project and alerts you if your project may be getting too big to fit on your disc. A bar in the Graphical View shows you how much space is remaining. m Region Code: Region codes are areas of the world where your disc can play (if the player has a matching region code). You can choose items from the pop-up menu or click the underlined text and choose items in the list that appears. (For more information, see “Copy-Protection and Region Coding” on page 150.) m Number Of Sides: Specify a single- or double-sided disc. DVD Studio Pro indicates which side of the disc you are working on. Using DVD Studio Pro 79 m CSS: Specifies whether to copy-protect the disc using the industry-standard Content Scramble System. (For more information, see “Copy-Protection and Region Coding” on page 150.) m Startup Action: Determines what happens when your disc is inserted in a DVD player. You can choose any track, marker, story, menu, script, slideshow, or single slide. Note: If you do not choose a startup action, nothing happens when the disc is inserted, and the Preview Mode of DVD Studio Pro does not work. Disc Menu Settings area Settings in this area specify the size of menus (720 x 480 for NTSC, 720 x 576 for PAL) and the aspect ratio (4:3 full screen or 16:9 widescreen). If you assign a video or picture asset to a menu, these settings automatically match those of the asset. Variable Names area You can create and name up to eight global variables (also called GPRMs), which store data used by scripts. Variable names can be changed at any time. For more information, see “Assigning Global Variables for Scripts” on page 100. Remote-Control area See “Setting Remote Control Properties for a New Project” on page 70 for information about this area of the Property Inspector. Time Search / Time Play Some DVD players can access material on a disc using time values. DVD players reset the content of all variables (GPRMs) whenever Time Search or Time Play is used. If your project depends on maintaining variable values, you can turn off this option. 80 Chapter 3 Important Properties You can assign any property using the Property Inspector, but the Property Inspector is especially useful for assigning particular types of properties. Some of these are described in the following sections. Action / Jump Action Action menus list all menus, tracks, markers, scripts, slideshows, slides, and stories in your project. Depending on the item selected, the menu may include other predefined actions. Actions you can specify include m startup action (when a disc is inserted) m jump action (when a button is activated or an item finishes playing) m remote control key assignments (when the viewer clicks a remote control key) m timeout action (when the viewer does not make a choice within a set time) Button Link This button property specifies which button is selected next if the viewer presses an arrow key. You can link to a button’s name, or you can use relative options (previous, next) based on button positions in the containers in the Project View. By default, DVD Studio Pro sets button links using a wraparound strategy (each button is linked to the next, and the last is linked back to the first). Default Button This menu property lists all the buttons defined on the active menu and specifies which button is selected when the menu appears. You can select “1st button” (based on the button positions in the containers in the Project View), or you can select a button by name. Picture, Layer, and Hilite These properties specify the appearance of menus and buttons in their activated and selected states. Layer properties list all the layers in a Photoshop file. You specify layers to use for the background of a menu and the normal, selected, and activated states of each button. Selected layers are indicated with the • symbol. Photoshop layers that have names beginning with “-” appear as dividers in the Layer menu. Pre-Script This property allows you to specify a script to run before an item begins playing. Using DVD Studio Pro 81 Remote-Control Specifies the actions of remote control keys when the item is playing. Actions you choose for markers override actions you choose for tracks, which in turn override actions you choose for the disc as a whole. Selection Condition Highlights the selected button (instead of the default one) if a chosen track, audio stream, or subtitle stream was playing just before this button’s menu appeared. In the menu, tracks are specified by name and audio or subtitle streams by number, based on the item order in the container. The Editors Besides the main workspace windows in DVD Studio Pro, smaller, more task-specific windows are available when you are working with menus, markers, scripts, and slideshows. The appearance of the editor depends on the kind of asset you are working with. The menu editor To open an item’s editor: m Double-click the item (or its thumbnail area). Preview Mode You can preview your project at any time without waiting for it to be multiplexed. See Chapter 6, “Previewing, Testing, and Building Your DVD,” on page 113 for more information about Preview Mode. 82 Chapter 3 Troubleshooting Windows DVD Studio Pro includes several features that check your material, making sure that all links are valid and all necessary settings have been made. m The Asset Files window shows the name and location of every asset file used in your project. You can use it to locate missing files or to change the source files assigned to particular assets. m A project description file contains a specially formatted description of every aspect of a DVD Studio Pro project, including absolute paths specifying the location of each file. m The Log window displays status messages, copy-protection details, and disc build errors. It opens automatically if you try to import assets with invalid formats. For more information on these views, see Chapter 6, “Previewing, Testing, and Building Your DVD,” on page 113. The Matrix Views The Matrix Views help you work with connections between elements of your project in the following ways: m You can edit many settings in one place. m You can crosscheck settings made elsewhere. m You can see at a glance the dependencies between many related items. m You can easily assign replacement assets. After some practice, you’ll be able to see patterns in the matrix, which can help you spot errors. There are three Matrix Views: m Asset Matrix: For assigning assets to tracks. m Jump Matrix: For assigning jumps and links to menus and buttons. m Layer Matrix: For assigning Photoshop layers to menus and buttons. Getting Around in the Matrix Views The Matrix Views show assets, jumps, or layers across the top and containers along the left. A right-pointing arrow indicates a collapsed container; a downward-pointing arrow indicates an expanded one. Gray dots indicate assignments within a collapsed container. Black dots indicate assignments within an open one. A container must be open to change its assignments. To open a Matrix View: m Select a disc or menu and choose a command from the Matrix menu. The commands in the menu change depending on what you’ve selected. Using DVD Studio Pro 83 To expand or collapse a container: m Click the arrow to the left of the container. To assign an asset to a menu or track: 1 Make sure the container is expanded (the arrow to the left points down). 2 Click to place a dot at the intersection of the asset column and the container row. To uncouple an asset from a menu or track: 1 Make sure the container is expanded (the arrow to the left points down). 2 Click to remove the dot at the intersection of the asset column and the container row. Asset Matrix The Asset Matrix shows assets (video, audio, and subtitle streams) across the top and containers (menus and tracks) down the side. 84 Chapter 3 Jump Matrix The Jump Matrix shows possible jump actions along the top and containers (disc, menus, buttons, tracks and so on) along the side. Using DVD Studio Pro 85 Layer Matrix The Layer Matrix shows the layers of a Photoshop file along the top and the button states (normal, selected, and activated) along the side. Note: If you arrange the layers in your Photoshop files in a logical order, you will see patterns in the Layer Matrix that can help you spot mistakes. 86 Chapter 3 C H A P T E R 4 4 Working With Languages and Subtitles Working With Languages DVD Studio Pro automatically creates one untitled language in a new project. The Languages container includes a container for this language and for each additional language you define in your project. You can assign up to 16 languages. Languages can be added at any point in the creation of a project, but it’s most convenient to assign them at the beginning. To assign a new language: 1 Click the Languages tab. 2 Choose New Language from the Item menu. 3 Select the language you’ve just assigned. 4 In the Property Inspector, name the language and choose one of the DVD standard languages from the Language pop-up menu. 87 Each language on a disc must have its own menu assets. DVD Studio Pro automatically adds a container for the new language to each menu item and adds a property for the language to the Pictures and Audio areas of the menu properties. Language choices are available only if you have added additional languages to your project. The assets used for alternate-language versions of a menu must have the same format and structure (in the case of Photoshop files). If you assign a Photoshop file, the files assigned to the other languages must have the same number of layers, the layers must be in the same order, and they must have the same names as those in the first file assigned. If you assign a video stream to a menu, the streams assigned to the other languages must be exactly the same length. Important To assign assets to menus for different languages: m In the Property Inspector for the menu, expand the Pictures area and choose assets from the pop-up menu for each language. If you’re using sound in menus, choose assets in the Audios area also. m With the menu for a particular language open in the menu editor, choose a language from the Language menu. m Select the menu in the Graphical View or Project View, then select the alternate version in the Property Inspector. 88 Chapter 4 Setting Up Multiple Language Audio in Slideshows If you assign multiple language audio streams to each slide, make sure that they are always in the same order. For example, add English first, then German, and then French. Then in the Property Inspector for the slideshow, set Audio Language 1 to English, Audio Language 2 to German, and Audio Language 3 to French. The Subtitle Editor The Subtitle Editor (STE for short) is an easy way to create subtitle streams for your video streams. With the Subtitle Editor, you can navigate through a source movie, listen to its dialog, and precisely position subtitles. You can also import previously prepared subtitle text generated by an editing system or a subtitling service bureau. Preparing Source Material for Subtitles Before you can create subtitles, you need a movie in a QuickTime-compatible format for each segment of video and audio that you want to create subtitles for. Your project won’t use the movie itself, so you can save storage space by preparing a lowresolution version. If you are just transcribing dialog into subtitles, for example, you can use an audio track or convert a PCM audio stream to QuickTime. Working With Languages and Subtitles 89 Setting Preferences for the Subtitle Editor You can specify the default actions of the Subtitle Editor by choosing Preferences from the File menu. To edit the names and colors that appear in the color menu of the subtitle editor: 1 Click Color Menu Settings. 2 In the Color Menu Settings dialog box, select and change the names of any colors. 3 Click a color, then use the color picker to choose a new color. The color picker is described in the onscreen help for your operating system. 90 Chapter 4 Starting a New Subtitle Project 1 Open the STE. Several windows appear. You can show or hide any window using the Windows menu. 2 In the Project Settings dialog box, click Select Project Movie and choose a source movie. Working With Languages and Subtitles 91 3 Choose NTSC or PAL from the DVD-Videosize pop-up menu. 4 Set margins in the Subtitle Settings area. Margins restrict subtitles to a defined area. If you set the margins to zero, subtitles can be positioned anywhere in the movie frame. Use the following settings for typical subtitles, which appear in one or two lines at the bottom of a frame: 5 Margin NTSC PAL Top 400 450 Left 25 35 Right 25 35 Bottom 25 35 Click Rendering Options to select the appearance of your subtitles when rendered. This window shows the effects of your choices. You can specify border and shadow options (color and offset) for subtitles. These settings are used when the finished project is complied into a subtitle stream. Click OK when you’re finished. 6 Click Preview Window Color to specify a color for the background of the Preview window. This color does not influence how subtitles are rendered. 92 Chapter 4 7 Navigate to the spot in the movie where you want to begin your subtitle by doing one of the following: m Use the controls in the QuickTime Preview window. m Enter a new time code in the time code box in the upper-left corner of the Preview window. m Select a marker’s name in the Marker window or the Markers menu. m Choose the Find command from the Markers menu to search for a marker by name. m Choose “GoTo in Movie” from the Edit menu and enter a time code. 8 In the Subtitles window, click New. 9 Click the triangle next to the subtitle, or double-click the line containing the subtitle, to open it for editing. 10 Type the subtitle text. 11 Style the text using the buttons along the top of the Subtitles window. The results appear in the Preview window. Don’t use more than four text colors within a subtitle stream. If you are using more than one subtitle within one track, use no more than two colors (including black and white). Because of the technical limitations of the DVD-Video standard (and the small amount of memory available on consumer DVD players), using more colors may cause subtitles to display incorrectly during play. Important Working With Languages and Subtitles 93 Changing the Location and Duration of Subtitles To change the In point, Out point, or duration of the current subtitle, do one of the following: m In the Subtitles window, type a new time code in the In or Out box. m Choose Set In Point or Set Out Point from the Subtitle menu. Locking and Unlocking Subtitle Positions You can lock the In point or Out point of a subtitle (the point in the track where it appears or disappears). If you do so, the subtitle will always begin or end at that point, even if it is linked to other subtitles whose In or Out points subsequently change. To lock a subtitle, do one of the following: m In the Subtitles window, select the subtitle and click the lock icon next to the In time code or Out time code. m Select the subtitle’s In point or Out point and choose Lock or Unlock from the Subtitle menu. Linking Subtitles When linking is turned on, the Out points of the linked subtitles change dynamically to keep the subtitles linked. You can still edit the In points. To link a subtitle to the next subtitle: 1 Select a subtitle. 2 Click the magnet icon next to the Out time code, or choose Link from the Subtitle menu. Selecting Multiple Subtitles To select all the subtitles that occur between two time codes that you specify: m Choose Select from the Edit menu and Subtitles from the submenu, then enter a time code range. To select a contiguous set of subtitles: m Select a subtitle at the beginning or end of the set, then hold down the Shift key and click the subtitle at the other end. To select noncontiguous subtitles: m Hold down the Command key while you click subtitles. 94 Chapter 4 Importing Subtitles You can import subtitles from a plain text file, such as a script or EDL. The text file must contain three fields for each entry: m start time code for the subtitle m end time code for the subtitle m subtitle text ( You can specify line breaks within a single screen of subtitles by inserting the HTML paragraph tag <P> into the text to be imported.) To import subtitles: 1 Choose Import from the File menu, then choose Subtitles from the submenu. 2 Select the file you want to open. Compiling a Subtitle Stream When you’re finished creating subtitles, you need to compile them into a subtitle stream that can be used in DVD Studio Pro. To compile a subtitle stream: 1 Choose Compile Project from the File menu. 2 Select a location for the file. Working With Subtitle Streams in DVD Studio Pro To import a subtitle stream: m Drag the stream to the Assets container. To add a subtitle stream to a track: m In the Project View or Graphical View, drag the subtitle stream to the container of the track or track item. To create a new subtitle: m Choose New Subtitle from the Item menu. Note: When working with a subtitle asset, be sure it is assigned a language in the Property Inspector for the subtitle. Working With Languages and Subtitles 95 Keyboard Shortcuts Many of the STE commands can be accessed using the keyboard. In addition to the standard commands visible in the menus, the STE has these keyboard shortcuts: Key command Function Keys on the numeric keypad 0 Rewind movie to start , or . Stop 7, 9 Previous marker, next marker 4, 6 Previous subtitle, next subtitle 1, 3 Previous frame, next frame Arrow keys Left Previous frame Right Next frame Up Start of movie Down End of movie Miscellaneous Space bar 96 Chapter 4 Start/stop movie play C H A P T E R 5 5 Using Scripts The DVD-Video specification includes a simple yet powerful scripting language. DVD Studio Pro gives you full access to this capability. You can add sophisticated interactivity and control to a project with only a few simple scripts. Scripts in DVD Studio Pro are created as separate items within a project, so they can be assigned easily to any item that supports a script. Scripts can be assigned to buttons or attached to the start or end of any track, story, menu, or marker. With scripts you can m allow viewers choices that affect what buttons, menus, and tracks they see m add random play to your project m allow viewers to create a playlist of favorite tracks 97 Creating a Script You use the script editor to enter the text of your scripts. To open the script editor: 1 Double-click a script tile. The script editor appears. 98 Chapter 5 2 To enter a script, do one of the following: m Type in the editor window. m Choose from menus to automatically enter commands and names of items in your project. 3 Click OK or close the script editor to format the script. Assigning Scripts Once you create a script, you can assign it as the action for a button, track, menu, marker, story, slideshow, or remote control key. To assign a script: 1 Create the script. 2 Select the item to which you want to assign the script. 3 In the Property Inspector, choose the script from the appropriate pop-up menu. You can assign scripts to control the following types of actions: m A pre-script runs before its assigned item is displayed. m A timeout action runs if the viewer does not choose an option within a preset period of time. m A script assigned to a remote control key runs if the viewer clicks that key. m An action runs when an item (such as a button or menu) is displayed or activated. Using Scripts 99 Assigning Global Variables for Scripts You can create and name up to eight global variables (also called GPRMs) for scripts. The variables store data used by scripts. To create a variable, you use it in a script or name it in the Property Inspector. The variables are stored as properties of the disc. DVD players reset the content of all variables whenever the viewer uses the Time Search or Time Play functions of the remote control. If your project depends on maintaining variable values, you should prohibit use of these functions. To do so, view the disc in the Property Inspector, open the Remote-Control area, and choose Prohibited from the Time Search / Time Play pop-up menu. Important To view global script variables: m Select the disc to see its properties in the Property Inspector. Click to edit variable names. 100 Chapter 5 Viewing Script Properties To view or change information about a script: 1 Select a script. 2 In the Property Inspector, make the changes you want. The DVD-Video standard limits the number of commands in a script to 128. One line of a script is roughly equivalent to one command. The Commands Used and Commands Free values give an indication of the size of the script. Scripting Reference About Registers, Parameters, and Variables Variables are called registers or parameters in the parlance of DVD-Video players. Each player has several registers or parameters. Each register can hold a positive, whole-number value between 0 and 65535. There are two kinds of registers: m System parameters: Hold information about languages, tracks, and subtitle and audio streams. You can use system parameter information through routines built into the scripting language. m General-purpose parameters: Can be used by an application created with DVD Studio Pro for such features as auto-selection of buttons. There are eight generalpurpose parameters. Registers work like global variables. You can use them in any script. Any change to a register is reflected at once in all scripts. When a disc starts, the registers are set to zero. The values of the registers are lost if the viewer ejects or stops the disc or turns off the player. In this manual, the values of registers or parameters are called variables. Using Scripts 101 Limitations of Variables and Registers m DVD-Video players don’t support recursion or local variables. m Registers have no overflow or underflow flags. m If the script tries to store a value smaller than 0 or larger than 65535, no error message is given; instead, the value “wraps around.” For example, if you subtract 7 from 3, you would normally get –4. But if you do this in a script, 65532 will be stored. If you add 6 to 65534 in a script, 4 is stored instead of 65540. Depending on the application design, plausibility checks may be necessary. You cannot create compound statements. For example,: The first line must be written as: B = getAudioStream() if A == B then nop The second line must be stated as: A = B A += C This code is not allowed: if A == getAudioStream() then nop A = B + C Script Reference Conventions In this scripting reference, the eight registers available for scripting are called variables. “Variable” stands for one of your variables. “Constant” stands for an integer value between 0 and 65535. “Function” stands for any of the built-in functions. Items enclosed in square brackets are options. For example, the following code means that you can either use a variable or a constant after the = sign: variable = [variable|constant] Numbers There are three ways to enter numbers in scripts: 102 Chapter 5 Decimal numbers are written directly in the script. A = 10 Hexadecimal numbers must begin with a dollar ($) sign. A = $FFE3 Binary numbers have a leading percentage (%) sign. A = %00011101 Labels Any line in a script can have a label associated with it. You can jump to a label with the gotoLabel command. A label must begin with a letter. Example label: A= 5 Comments A line with a # sign at the beginning is not executed. You can use these lines to write notes about the script or to disable certain lines of the script. Example # This is a comment. Functions and Commands Operators Assignment Assigns the value on the right to the variable on the left. The value can come from another variable, a constant, or a built-in function. Syntax variable = [variable|constant|function] Examples A = B A = 5 A = getAudioStream() Operators With Assignment Addition Adds the value from the right to the variable on the left. Syntax variable += [variable|constant] Examples A += B A += 7 Using Scripts 103 Subtraction Subtracts the value on the right from the variable on the left. Syntax variable -= [variable|constant] Examples A -= B A -= 3 Multiplication Multiplies the variable on the left by the value on the right; stores the result in the variable on the left. Syntax variable *= [variable|constant] Examples A *= B A *= 8 Division Divides the variable on the left by the value on the right; stores the result in the variable on the left. The result is truncated to an integer. A division by zero results in $FFFF or 65535. Syntax variable /= [variable|constant] Examples A /= B A /= 19 Modulo Divides the variable on the left by the value on the right; stores what’s left over (modulo) in the variable on the left. 104 Chapter 5 Syntax variable %= [variable|constant] Examples A %= B A %= 20 Bit-wise And Does a “bit-wise and” operation with the two operands. Syntax variable &= [variable|constant] Examples A &= B A &= 6532 Bit-wise Or Does a “bit-wise or” operation with the two operands. Syntax variable |= [variable|constant] Examples A |= B A |= 456 Bit-wise Exclusive Or Does a “bit-wise exclusive or” operation with the two operands. Syntax variable ^= [variable|constant] Examples A ^= B A ^= 21 Random Number Generates a random number between 1 and the value on the right. Syntax variable ?= [variable|constant] Examples A ?= B A ?= 34 Functions getAudioStream() Yields the current audio stream number (between 1 and 8). Syntax variable = getAudioStream() Example A = getAudioStream() Using Scripts 105 getSubtitleStream() Yields the current subtitle stream number (between 1 and 32). Syntax variable = getSubtitleStream() Example A = getSubtitleStream() getRegionCode() Yields the region code of the player. This is a binary value. Bit 0 means region 1, bit 1 means region 2, and so on. Syntax variable = getRegionCode() Example A = getRegionCode() getCurrentItem() Yields the current item (usually the item the script is attached to: a script, if the script was called directly, or a menu or track, if the script was assigned as a pre-script). Syntax variable = getCurrentItem() Example A = getCurrentItem() getLastItem() Yields the last item played. Syntax variable = getLastItem() Examples A = getLastItem() if A == Track “drehung shell.dvd.mpv Track” then nop getCurrentTrack() Yields the track currently playing or the track that was playing before a jump to a menu. 106 Chapter 5 Syntax variable = getCurrentTrack() Example A = getCurrentTrack() Procedures setAudioStream Sets the number of the audio stream to be played. Syntax setAudioStream [constant] Example setAudioStream 5 setSubtitleStream Sets the number of the subtitle stream to be displayed. Syntax setSubtitleStream [constant] Example setSubtitleStream 19 Commands nop This command does nothing. It serves as a placeholder. Syntax nop Example if A == 5 then nop stop This command is equivalent to clicking the Stop key on the remote control. Syntax stop Example stop exitScript This command, which only works with pre-scripts, exits from the running script immediately. The player goes to the next item to which the pre-script is assigned. Syntax exitScript Example exitScript Using Scripts 107 gotoLabel This command jumps to another position in the script. Syntax gotoLabel [label] Example gotoLabel here_next return This command returns from a menu to the player’s position before the jump to the menu. (The player continues playing the track as if nothing happened.) Syntax return Example return play This command plays an object. Objects are tracks, markers, menus, buttons, and scripts. 108 Chapter 5 play Track Plays the track from the start. play Marker “myMarker” of Track “myTrack” Plays the track starting from the marker. play Menu Evaluates all the selection conditions. play Button When this menu appears, this button is selected. Overrides selection conditions normally assigned to the button. play Script Calls that script, stopping the execution of the current script. Syntax play [object] Examples play Track “myTrack” play Marker “myMarker” of Track “myTrack” play Menu “MyMenu” play Button “myButton” of Menu “myMenu” play Script “myScript” A = getLastItem() if A == Menu “shell step 01 Menu” then play Button “1step” of Menu “5T84” Control Structures if then Syntax if variable [operator] [variable|constant] then [assignment|procedure|command] The “if ” clause enables comparisons and the execution of commands based on the result of comparisons. Several operators are available for the if clause: Equal This operator compares the values on both sides of the operator and executes the “then” condition if they are equal. Syntax variable == [variable|constant] Example if A == B then nop Not Equal This operator compares the values on both sides of the operator and executes the “then” condition if they are not equal. Syntax variable != [variable|constant] Example if A != B then play Track “myTrack” Using Scripts 109 Using NVRAM in DVD Studio Pro DVD Studio Pro supports the Philips Professional DVD Player 170. This player has NVRAM, or non-volatile memory, which means variables remain stored when the player is turned off. To use the NVRAM feature with DVD Studio Pro, the player must have firmware version 9.25 or later installed. Upgrade information is available from Philips. The NVRAM has 256 addresses from 0 to 255. Every address has a size of 16 bits. When Use NVRAM is turned on in the Preferences and you use NVRAM commands in your project, DVD Studio Pro creates a folder called PROF containing a file named INFO.ID. This file contains the NVRAM information for the disc. Do not edit this file. When you multiplex your disc, make sure the folder is stored in the same folder as the VIDEO_TS directory. When you choose Build & Format Disc from the File menu, DVD Studio Pro automatically includes the PROF folder in the proper place on the disc. When you preview your project, the debugging window shows all current values stored in the NVRAM. (See “Debugging in Preview Mode” on page 116.) To store information in or read information from the NVRAM, you use four simple commands in your scripts. (Using NVRAM commands on a player without installed NVRAM has no effect.) poke This command stores the value of the first global variable (by default, this variable is named A; you can change the name in the disc properties) in the NVRAM at the address specified. 110 Chapter 5 Syntax poke [address] Example poke 33 pokeAll This command stores the values of all global variables (by default, these variables are named A through H; you can change the name in the disc properties) in the NVRAM. A is stored in the address specified, B is stored in the next address, and so on. Syntax pokeAll [address] Example pokeAll 33 peek This command retrieves the value from the NVRAM address specified and writes it to the corresponding global variable. For example, if you store variables A–H in addresses 33–40 and you use the command peek 34, the command retrieves the value of address 34 and writes it to variable B. Syntax peek [address] Example peek 33 peekAll This command retrieves the contents of eight sequential addresses beginning with the address specified and writes the contents in the same order in the global variables A–H. Syntax peekAll [address] Example peekAll 33 To avoid loss of information, after using the poke or pokeAll command, instruct the player to wait at least one second before using it again. The player needs this time to store the information safely. Important Using Scripts 111 Determining Whether NVRAM Is Available You can use this simple test procedure to find out whether NVRAM is active. Script 1 writes the value 5 into the NVRAM at address 33. Script 2 sets variable A to 0 and then reads the value in address 33 and stores it in variable A. If the value remains at 0, then NVRAM is not available. 1 Create two simple menu graphics and name them NVRAM installed and NVRAM not installed. 2 Create two scripts: Script 1: #storing A in the NVRAM A = 5 Poke 33 Script 2: #retrieving value of location 33 and storing it in variable A: A = 0 Peek 33 if A==0 then play menu "NVRAM not installed" play menu "NVRAM installed" 112 Chapter 5 3 Assign the scripts to a menu. 4 Preview the menu. C H A P T E R 6 6 Previewing, Testing, and Building Your DVD As you create your DVD you may find it useful to check your work. DVD Studio Pro includes technology that lets you see, hear, and interact with your DVD project before you spend time building it. A debugging feature helps you locate any linking mistakes. DVD Studio Pro uses a special real-time multiplexing technique that makes it possible to preview without waiting for the project to be multiplexed. This method of previewing uses no simulation, so what you see is exactly what will appear on your final DVD, with one exception: because of the overhead involved, you may notice slight glitches during previewing. These glitches will not appear in the finished DVD. When you’re finished putting together and testing your project, you build it by combining the files in a process called multiplexing. The finished product is a folder called VIDEO_TS that contains all the information needed to write a DVD. You can create an image file of this folder or copy your project onto a disc or DLT tape. 113 Using Preview Mode 1 Select an item. You can select the disc, a track, angle, marker, story, menu, audio stream, video stream, or slideshow. Selecting the disc previews its startup behavior. 2 Choose Preview from the Item menu, or click the Preview button in the Graphical View. Other windows close, the Preview window opens, and you see or hear the selected item. Note: Preview does not work if any of the following are missing: m assigned picture assets for the menus for all languages you’ve created m one basic asset assigned for each track and slideshow m the startup action for the disc 3 Use the onscreen remote control to navigate through your project. The remote control keys (except for the Stop key) will perform whatever actions you previously assigned to them in the Property Inspector of the item you’re previewing. These are typical actions assigned to the keys: m Return key: Goes back to the previously active item. m Next Track/Previous Track (Skip) keys: Jump to the previous or next point defined by a marker. If no markers are assigned to a track, nothing happens. m Arrow keys: Select menu buttons. m OK key (also known as Enter key): Activates the selected menu button. Return key 114 Chapter 6 Previous Track key Arrow keys Next Track key 4 To rotate through alternate audio streams, subtitle streams, or angle streams, click the Audio, Subtitle, or Angle key in the lower-right portion of the remote control. 5 When you’re finished, click the Stop key on the remote control or press the Esc key on the keyboard. Limitations of Preview Mode m Depending on the speed of your processor, you may be able to preview only a limited number of angles in Preview Mode. To see all angles, you may need to build the disc. m Some set-top player models may be programmed slightly differently from Preview Mode. Navigation may not work exactly the same way on those models. Previewing on an External Video Monitor You can preview on a different monitor if you have one attached to your computer. To preview using a different monitor: 1 Choose the monitor from the pop-up menu marked with the monitor icon. 2 To specify the shape of pixels, choose an item from the pop-up menu marked with arrows inside a square. Choose square pixels to see how your project will look on a computer screen. Choose rectangular pixels to preview the look of your project on a TV monitor. 3 For best results, stop and restart Preview Mode after specifying a different monitor. Previewing, Testing, and Building Your DVD 115 Debugging You can use the DVD Studio Pro debugging feature to locate linking mistakes. Debugging in Preview Mode To view debugging information while you are previewing: m Click the button shown below (in the upper-right corner of the Preview window). The debugging window shows the following information: m last item played m current item playing m current track m value of each variable used in a script m log of each action 116 Chapter 6 If you are authoring a disc for use on a Philips Professional DVD Player and you turn on Use NVRAM in the Preferences dialog box, the debugging window also shows the values assigned to its registers and buttons that allow you to clear, load, and save the contents of the registers. By paying attention to this information while stepping through your project with the remote control, you can find errors in your action assignments, button links, and scripts. Previewing, Testing, and Building Your DVD 117 Using Built-in Error Checking Error-Checking When Adding Assets When you import or add assets to a project, DVD Studio Pro checks whether they are valid. If you try to import a video stream with an inappropriate frame rate or an audio stream with an incorrect frequency, the Log window displays an error message. DVD Studio Pro keeps track of which items on your DVD are not complete. Incomplete items appear in italics. To see what’s missing, select the item and view it in the Property Inspector. If you try to delete an item that is linked to other items, you see a message explaining the error and listing the links. Click Show Item to view the item so you can unlink it from other items. (Show Item is not available if the item is not assigned as a property of the disc.) Finding Missing Asset Files The Asset Files window shows the name and location of every asset file used in your project. You can use it to locate missing files or to change the source files assigned to particular assets. If you open a saved project and DVD Studio Pro cannot locate one or more asset files, the Asset Files window shows a list of the missing files. 118 Chapter 6 To open the Asset Files window: m Choose Asset Files from the Item menu. To locate a file assigned to an asset: m Select an asset and click the Locate button. Locate and select the file in the dialog box that appears. If you select a file in a folder that contains other missing asset files, you can reassign the other assets in that folder as well. To assign a new file to an asset: m Select an asset and click Assign, then assign a new file in the dialog box that appears. Finding Unassigned Asset Files To find asset files that haven’t yet been assigned to any items: 1 Click the Assets tab. 2 Open the Item menu and choose By Usage from the Sort Assets submenu. Any assets not currently used in your project appear at the top of the Asset list. Getting Information About Your Project Using Project Description Files A description is a text file containing a specially formatted description of every aspect of a DVD Studio Pro project, including absolute paths specifying the location of each file. With a description file you can m make global changes in your project using the search and replace functions of a text editor m use the file as a template from which to create new projects m set up a database or other custom application to create description files, opening the possibility of semi-automated custom DVD production (advanced) To create a description of your current project: m Choose Save Description from the File menu and select a location and name. To start a new project using a description: m Choose Load Description from the File menu and locate the file you want. To edit a description file: m Open and change the file in a text editor. Previewing, Testing, and Building Your DVD 119 Using the Log Window The Log window displays useful information about the workings of DVD Studio Pro, including m status messages m copy-protection details m disc build errors: If an error occurs while you’re building your disc, the Log window opens. For more information about error messages, see “Solving Multiplexing Problems” on page 122. m asset import errors: If you try to import assets with invalid formats, the Log window explains the error. m item descriptions: You can see a text description of any selected item in your project. This information is in the same format as the project description file. You can copy the information to the Clipboard for use in a project description file. To open the Log window: m Choose Log from the Windows menu. To see item description information: m Select the item and choose Show Description from the Item menu. 120 Chapter 6 Building Your Project When you’re finished putting together and testing your project, it’s time to build it. Building combines the files in a process called multiplexing. The finished product is a folder called VIDEO_TS containing all the information needed to write a DVD. To build your project: 1 Choose Build Disc from the File menu. If the command is not available, there are missing or incorrect settings in your project. Items with incomplete settings appear in italics in the Project View. To see what’s missing, select the item and view it in the Property Inspector. If you have selected a disc medium in the disc properties, and DVD Studio Pro estimates that the project will take more space than is available on that medium, you see an error message. Important 2 Select the location where you want the VIDEO_TS folder created. For fastest results, select a different hard disk from the one containing your files. 3 If you specify a location that already contains a VIDEO_TS folder, choose whether to reuse material that has not changed. Warning If you choose not to reuse material in the folder, DVD Studio Pro deletes the folder and all its data. If you aren’t sure whether the folder contains material you need, choose a different location to build your disc. Depending on the bit rates of your tracks and the speed of your computer and hard disks, building takes from 1/4 to 1/2 the length of all your tracks combined. If you have an hour of material in your project, it will take between 15 and 30 minutes to multiplex it. Previewing, Testing, and Building Your DVD 121 Tracking the Multiplexing Process As the disc is built, the Progress window displays the name and bit rate of the track being processed and the current multiplexing speed. To display the memory available to DVD Studio Pro and the memory currently being used: m Press the Caps Lock key on the keyboard. The Log window also displays a status message when the disc has been successfully built, such as “Disc complies to DVD Video standard 1.0 or 1.1.” This final confirmation depends on the audio formats used. Standard 1.0 uses PCM or AC-3 audio; standard 1.1 allows MPEG audio or a mixture of AC-3, PCM, and MPEG. Solving Multiplexing Problems If an error occurs while you are building your disc, the Log window opens automatically and displays an error message in red text. The following are some error messages you may encounter and solutions to the problems they describe: Data rate too high Multiplexing stops and this error appears if one of the following is true: m The total data rate for the video content of a track exceeds 9.8 Mbps. m The total data rate for all assets used in a track exceeds 10.085 Mbps. To solve this problem, use fewer audio or subtitle streams, or re-encode the video content at a lower data rate. Found VOBU error m “Found VOBU longer than 1.0 seconds at sector xxxxx” (any GOP in a VOBU) m “Found VOBU longer than 1.2 seconds at sector xxxxx” (last GOP in a VOBU only) m “Found VOBU shorter than 0.4 seconds at sector xxxxx” (any GOP in a VOBU) These messages mean the GOP pattern of an underlying video stream is out of range. Multiplexing does not stop. Depending on the tolerance of the decoder, VOBU errors can cause audio and video to go out of sync. To solve this problem, re-encode the MPEG stream. 122 Chapter 6 Bad encoded video Multiplexing stops. This message means the encoding did not work properly—frames inside a GOP may be missing, too long, or too short; the temporal reference that defines the order of the I, P, and B frames in a GOP may be incorrect. To solve this problem, re-encode the MPEG stream. Creating Your Disc After multiplexing is finished, you can create an image file or copy your project onto a disc or DLT tape. Note: If you used DVD@CCESS links in your DVD, installers for those links are included on the final disc when you build it. Depending on the kind of computer you are using to play your DVD, you may need to install the installers for the Web links to work. To create the disc: 1 If you want to copy your project onto a disc or DLT tape, connect a recording device to your computer (following the instructions that came with the device). 2 Choose Build & Format Disc from the File menu. 3 In the Format Disc window, choose whether to save the project as an image file or record it to a device. 4 If you want to simulate the build disc operation to check for errors before creating a disc, select the DVD-R Simulation Mode checkbox. Previewing, Testing, and Building Your DVD 123 5 If you choose Record To Device, select the device from the list and make settings for the device. If a device appears not to be ready, check that it’s connected properly and has power. m DVD recorder: Select a DVD recorder from the list and insert a recordable DVD-R. m DLT tape drive: Select a DLT device from the list. Choose the format that works with your replicator. (DDP 2.0 is an old mastering format. CMF is the new standard as of April 1999.) Insert a tape. m DVD-RAM drive: Select a DVD-RAM drive from the list and insert a DVD-RAM disc. Before creating a disc, you can simulate the build disc operation to check for errors. 6 Click OK. If you’re recording onto DLT tape and you’ve specified a dual-layer disc (in the disc properties), the formatter asks you for a second tape when ready. 124 Chapter 6 A P P E N D I X A A Using A.Pack to Encode AC-3 Sound What Is A.Pack? Apple A.Pack is software for encoding audio in the Dolby Digital format (also known as AC-3). Dolby Digital is the preferred audio format for DVD-Video discs. A.Pack accepts your multi-channel sound files in a variety of formats and gives you complete control over the encoding process. Using A.Pack you can monitor your AC-3 files as a stereo downmix using your computer’s sound system. A.Pack is Dolby-certified, so you can be sure it will produce high-quality, compatible output. Creating AC-3: An Overview A.Pack is not a sound editing or mixing tool. To give your listeners a “surrounding” audio experience, your sound must be created with that goal in mind. For example, if you want the sound of an explosion coming from behind the listener, you need to put the sound in the rear channels during recording and mixing. 125 Step 1: Recording Sound As with any audio track, the first step is finding and recording the sound that you want. Keep your end result in mind. If you want to position particular sounds in the surround sound environment, you should record them separately. Step 2: Mixing Sound The second step is mixing the audio. You need a separate audio file for each channel. If you want to create Dolby Digital 5.1 sound, you need a file for each of the six source channels— left front, right front, center front, left rear, right rear, and Low Frequency Effects (LFE). To create files for channels, you assign your sounds to channels using a recording/mixing system that supports six-track playback. When mixing, you can enhance the video action by dynamically moving the sounds within the surround field. The following are some common approaches to multi-channel sound: m Use the surround channels for effects only. Create a stereo mix, then add “sweetening” sound effects in the surround channels. m Create special sounds for the rear and low-frequency channels (the rumble of an earthquake, the pounding of drums, an airplane buzzing overhead, and so on) and add them to a standard stereo mix. (To create sound for the LFE channel, you can extract low frequencies from the rest of your sound using band-pass filters.) m Position instruments, effects, and voices anywhere in the sound field. m Use the center channel for voice-over, leaving it out of the left and right channels. (This is called stereo plus center.) See “Options for Spatial Mixing” beginning on page 138 for further information. Step 3: Digitizing Sound Once your sound is mixed, save the resulting channels as sound files in one of these formats: m AIFF m SoundDesigner II m QuickTime m WAVE Depending on the format, a file can contain a single channel (mono), dual channels (stereo), or multiple channels. A.Pack supports all these formats. 126 Appendix A Your sound files must also conform to the following rules: m All source files should be the same length (if not, A.Pack sets the length of the AC-3 stream to match the length of the longest file). m All files must have the same sample rate—for DVD, 48 kHz (although A.Pack also supports 32 and 44.1 kHz). m AC-3 streams must have a multiple of 1536 samples. If the selected input files do not, A.Pack adds digital silence to the end of the files. If you label your files with the suffixes listed below, A.Pack automatically assigns each file to the correct surround position when you drag multiple files to the Instant Encoder. Position File Extension Left front .L Right front .R Center front .C Left rear .Ls Right rear .Rs Subwoofer .LFE or .SUB Step 4: Encoding Sound Files In the final step, encoding to AC-3 format, you select the sound files and assign them to positions in the sound field. A.Pack does the rest, giving you an AC-3 audio stream ready to include on a DVD. Using A.Pack for Encoding With A.Pack, you can do the following: m Convert sound files to Dolby AC-3 format using settings that you specify. m Play AC-3 files using the Mac OS Sound Manager or an ASIO sound system connected to your computer. m Convert AC-3 files to individual channel files or to a downmixed stereo file. Converting files is called an encoding job. Two or more jobs can be combined into batches, which can run unattended. The result of encoding is a single AC-3 stream. On a 400 MHz computer system, encoding takes approximately as long as the length of your sound files (a 10-minute track takes about 10 minutes to encode). Using A.Pack to Encode AC-3 Sound 127 Opening A.Pack Before you can use A.Pack you need to install, register, and supply the serial number for DVD Studio Pro. Converting to AC-3 Format Using the Instant Encoder When you first open A.Pack, the Instant Encoder appears. ( You can specify what happens when you open A.Pack using the Preferences command in the Edit menu.) You use the Instant Encoder to encode one AC-3 stream at a time. To encode multiple streams, see “Converting to AC-3 Format in Batches” beginning on page 129. To encode a single AC-3 stream: 128 Appendix A 1 Drag a sound file to an input channel button, or click a button and choose a sound file in the dialog box that appears. 2 If you assign a sound file that has more than one channel, choose the channel you want to assign in the Channel pop-up menu and click OK. The name of the file appears on the input channel button. 3 Repeat steps 1 and 2 until all input channels are assigned. 4 If you want to specify encoding settings, click the expansion triangle in the upper-right corner of the Instant Encoder. For information about settings, see “Specifying Encoding Settings” beginning on page 131. 5 Click Encode. 6 Specify a name and location for the file. To change the assigned channel of a multiple-channel sound file: m Hold down the Control key and click the input channel button, then choose a new channel in the pop-up menu. Converting to AC-3 Format in Batches If you have more than one job to process, you can set them up as a batch and encode them all at once. To create an encoding batch: 1 Choose New Batch List from the File menu. 2 Select the source file for each channel by doing one of the following: m Click Select and choose a file in the dialog box that appears. m Drag an individual file to a channel. m Drag a set of files (with the proper suffixes) to the channel selection area. Using A.Pack to Encode AC-3 Sound 129 If you label your files with the suffixes listed here, A.Pack automatically assigns each file to the correct surround position when you drag multiple files to the Instant Encoder: m .L (left front) m .R (right front) m .C (center front) m .Ls (left rear) m .Rs (right rear) m .LFE or .SUB (subwoofer) 3 If you assign any source files with multiple channels, use the pop-up menu to select the channels you want. 4 Click Set Output and specify a name for the AC-3 stream (for this job only). 5 If you want, specify encoding settings for this job. For information about settings, see “Specifying Encoding Settings” beginning on page 131. 6 To reduce workspace clutter, click the triangle to collapse the settings for this job. 7 To add the next job, click New and repeat steps 2–6. 8 When you’re finished, click Encode. 9 Select a folder for the encoded streams. A status window appears while the batch is being processed. To change the order of jobs in a batch: m Drag a job to a new position in the window. To set parameters for several jobs at once: m Select the jobs and set encoding parameters. Your settings will apply to all selected jobs. To import settings for jobs in a batch: m Select the jobs and choose Import Settings from the File menu. 130 Appendix A To export settings of a job in a batch: m Select a job and choose Export Settings from the File menu. When you create a new job for encoding or change the settings for a job, a red checkmark appears to the right of the Set Output button. When encoding is finished, the checkmark disappears. To manually flag or unflag a job, do one of the following: m Click the flag column. (To change all jobs in the list, hold down the Option key and click.) Click the flag column to flag or unflag a job. m Select the job and choose Mark Done or Mark Not Done from the Batch menu. To encode several batches at once: m Choose Encode Multiple from the Batch menu to encode all currently open batch lists. Specifying Encoding Settings A.Pack uses default settings to encode files. Most of the time these settings should be adequate for your needs, but you can change them in the settings panels. To view and specify settings in the Instant Encoder: m Click the downward-pointing triangle in the upper-right corner of the window. To specify settings in batch mode: m Select a job or jobs and change settings in the panel to the right. Using A.Pack to Encode AC-3 Sound 131 Audio Settings m Target System: A.Pack limits available settings to those appropriate for the target system. If you’re encoding for use with DVD Studio Pro, choose DVD-Video. m Audio Coding Mode: Specifies audio channels of the encoded stream. For example, “3/1 (L, C, R, S)” means three front channels (left, center, right), and one rear channel (surround). Affects settings such as the available bandwidth and surround channel preprocessing. m Enable Low Frequency Effects: Includes the LFE channel in the encoded stream. (Not available for mono or stereo.) m Data Rate: Choices depend on coding mode and target system. The higher the rate, the better the quality. AC-3 streams have a constant data rate. At 448 Kbps, which is the default for 5.1 encoding, one minute of AC-3 audio takes about 3.3 MB of storage space. m Dialog Normalization: Specifies the average volume of the dialog in your sound files relative to full modulation. The playback device uses this information to maintain similar volume among different AC-3 streams. m Bit Stream Mode: Defines the purpose of the encoded audio material. The information is included in the finished stream and can be read by some decoding systems. Options in the Bit Stream Mode menu Bit Stream Settings These settings are stored in the finished stream for use by the playback device. Leave them at their default values unless you have a specific technical reason for changing them. m Center Downmix, Surround Downmix: If your encoded audio has these channels, but the player does not, the channels are mixed into the stereo output at the specified level. m Dolby Surround Mode: When encoding in 2/0 (stereo) mode, specifies whether the signal uses Dolby Surround (Pro Logic). m Audio Production Information: Check this box to specify how the encoded audio content was mixed. Playback devices may use this information to adjust output settings. 132 Appendix A m Peak Mixing Level: Specifies peak sound pressure level (SPL) (between 80 dB and 111 dB) in the production environment when this mix was mastered. m Room Type: Specifies information about the mixing studio. Preprocessing Settings Preprocessing options are applied to the audio data before encoding. Leave them at their default values unless you have a specific technical reason for changing them. m Compression Preset: Specifies one of the dynamic range processing modes built into AC-3. m RF Overmodulation Protection: Determines whether to use an RF preemphasis filter in the clip protection algorithm to prevent RF overmodulation in set-top-box decoders. m Apply Digital Deemphasis: Specifies whether input audio data is preemphasized and needs to be deemphasized before encoding. m Full Bandwidth Channels m Apply Low-Pass Filter: Turns on a low-pass filter with a cut-off near the available audio bandwidth that is applied to the main input channels. If the digital signal fed to the main input channels does not contain information above the available audio bandwidth, you can turn off this filter. A.Pack will automatically determine the available bandwidth. m Apply DC Filter: Turns on a DC high-pass filter for all input channels as a simple way to remove DC offsets. Most mixed audio material is already free of DC offsets. m LFE Channel—Apply Low-Pass Filter: Activates a 120 Hz low-pass filter to the Low Frequency Effects channel. Turn off this filter if the digital signal fed to the LFE’s input does not contain information above 120 Hz. m Surround Channels m Apply 90° Phase-Shift: Generates multi-channel AC-3 streams that can be downmixed in an external 2-channel decoder to create true Dolby Surround–compatible output. m Apply 3 dB Attenuation: Applies a 3 dB cut to the surround channels of a multichannel film soundtrack being transferred to a consumer home theater format. Cinema surround channels are mixed 3 dB “hot” (higher) relative to the front channels to account for cinema amplifier gains. Using A.Pack to Encode AC-3 Sound 133 Using A.Pack for Playback and Decoding Once your job has been encoded, you can use the AC-3 Monitor to listen to the completed AC-3 stream. Setting Up Stereo Playback You can use the Mac OS Sound Manager to listen to an AC-3 stream in stereo. A.Pack automatically downmixes the file to stereo. To set up stereo playback: 1 Choose Preferences from the Edit menu. 2 Choose Sound Manager in the Output System pop-up menu. Note: If you have an audio card installed, you may have more routing options for stereo output. Make sure a Sound Manager driver for the card is installed and selected in the Sound control panel. Then choose Sound Manager in the Output System pop-up menu. Setting Up Multi-Channel Playback If you have ASIO playback hardware in your computer, you can hear the AC-3 stream in multi-channel format. To set up multi-channel playback: 134 Appendix A 1 Create a folder named ASIO Drivers in the same folder as A.Pack. 2 Copy your ASIO drivers into the ASIO Drivers folder. 3 Open A.Pack and choose Preferences from the Edit menu. 4 Choose ASIO in the Output System pop-up menu. 5 To have A.Pack create a stereo mix of the output, click the Stereo Downmix checkbox. 6 Click Options to open the ASIO Setup window. 7 Choose the settings for your ASIO system. The settings vary depending on the system you have installed. See the documentation that came with your sound system for further details. ASIO Compatibility Notes m A.Pack allocates surround sound channels to a driver’s output channels in the following order: Left, Right, Center, LFE (subwoofer), Left Surround, Right Surround. m If you’re using a Korg 1212io card, all ASIO data is sent to ADAT outputs 1–6 in the order specified in the ASIO Setup window. To use the Analog or S/PDIF outputs of the Korg 1212io card, install and turn on the K1212io Sound Manager driver, and choose Sound Manager as the output system in the Preferences dialog box. m The Apple DAV and Apple Sound Manager ASIO drivers do not support playback at 48 kHz. To use these, choose Sound Manager as the output system in the Preferences dialog box. Using A.Pack to Encode AC-3 Sound 135 Playing an AC-3 Stream To play an AC-3 stream within A.Pack through your currently selected output system: 1 Select a file to play by doing one of the following: m Click the Select button and choose a file from the dialog box that appears. m Double-click an AC-3 stream. m Drag an AC-3 stream to the AC-3 Monitor. The AC-3 Monitor opens. Hold down the Option key and click the Play/Stop button to rewind the track to the beginning. 2 Click the Play button in the Player area. Decoding an AC-3 Stream You can use A.Pack to separate an AC-3 stream into PCM audio files for each individual channel or to create a stereo downmix. To decode an AC-3 stream: 136 Appendix A 1 Select a stream by doing one of the following: m Click the Select button and choose a file from the dialog box that appears. m Double-click an AC-3 stream. m Drag an AC-3 stream to the AC-3 Monitor. 2 Click the Decode As button. 3 Specify a name and location for the file. 4 Choose whether to create a stereo downmix before you click Save. Getting Information To get information about a stream: 1 Open the stream in the AC-3 Monitor. 2 Click the Get Info button. To get information about operations, results, and errors: You use the Log window to see information about operations, results, and errors that occur while using A.Pack. To open the Log window: m Choose Log Window from the Window menu. Using A.Pack to Encode AC-3 Sound 137 Options for Spatial Mixing This section offers some additional insights and suggestions for using the channels in a Dolby Digital program. Using the Center Channel In a multi-channel system, there are three ways to achieve a centrally placed sound image. Each approach offers advantages and drawbacks. m Create a phantom center (mix sound to the left and right equally, as with stereo). Well understood, but assumes the listener is seated exactly between the speakers (not possible in automobiles and not always the case in homes). The timbre of sound is not the same as from a direct speaker because of cross-cancellation effects. m Use the center channel alone. Creates a stable center image for listeners in any location. (To prevent it from sounding too focused or narrow, its reverb can be spread to the L/R channels.) m Use all three front channels equally or in various proportions. Allows greater control of the range of spatial depth and width. The phantom center can be reinforced by additional signals in the center channel. The center channel can be enhanced by signal spread into the L/R pair. The disadvantage is that sound from all three speakers may not blend well or may not arrive at the listener all at the same time, causing side effects such as comb filtering, shifts in tone color, or smearing. To counteract these side effects, the additional signals can first be processed to change their spatial character, timbre, or prominence relative to the main center signal. Using Surround Channels Subtle surround effects can greatly enhance the listener’s sense of depth compared to conventional stereo. Popular music often benefits from creative use of surround. But don’t overdo it. The film industry guideline—don’t use the surrounds to distract the listeners from the story—also works well for music. Limitations of the LFE Channel Versus the Subwoofer Signal The LFE channel is a separate, limited frequency range signal created by the mixing engineer and delivered alongside the main channels in the mix. A “brickwall” filter at 120 Hz in the Dolby Digital encoder limits its use to the bottom two audible octaves. Dolby recommends limiting the signal to 80 Hz in the console to ensure uniformity. In most music productions (with such exceptions as the famous cannon shots in the 1812 Overture), the LFE channel is not necessary. The LFE signal is also discarded in the Dolby Digital downmix process, so intense bass signals do not stress small stereo systems. Be sure not to include vital information in the LFE channel that would be missed in mono, stereo, or Pro Logic playback. 138 Appendix A Because LFE is separate from other channels, its ability to blend with higher frequencies can be affected by filters used to generate the LFE signal. To ensure a cohesive audio signal, keep the entire signal together in the main channel or channels. Avoid creating an LFE channel for material originally produced without one. Dolby Digital’s five main channels are all full-range, and the LFE channel does not extend frequency response. Dolby Digital decoders offer bass management, directing low frequencies to a subwoofer or other suitable speakers. An LFE track may interfere with bass management. Accommodating Stereo Playback Even with the popularity of 5.1 systems, there will always be a need to address stereo reproduction. There are three basic ways to do this. m Prepare a new stereo mix from the original multi-track elements (using today’s conventional stereo-mixing sessions). m Prepare a studio-adjusted downmix from the multi-channel mix. This takes advantage of the work that has gone into the mixing of the 5.1 channel version. It retains flexibility in the exact proportions of each channel represented in the final stereo mix. m Let the decoder derive a stereo downmix, based on preset formulas in the decoder. Downmix options and dynamic range control effects can be previewed and adjusted in the production studio, and a range of adjustments are possible. Always check the mix on a “budget” surround system to evaluate how well it sounds on modest playback systems. Note: For more information about Dolby Digital, see “Frequently Asked Questions about Dolby Digital” by Dolby Laboratories Inc., available at the Web site www.dolby.com Using A.Pack to Encode AC-3 Sound 139 A P P E N D I X B B More About DVD Philips and Sony defined the first CD format with the Red Book in 1980. Sixteen years later, a new standard was launched, which promises to have an even more significant impact—DVD. DVD’s popularity is based primarily on its superior sound and picture quality, but also on its ability to deliver a richer entertainment experience. New DVD-based technologies promise to deliver previously unheard-of performance and value in areas such as interactivity, storage, and more. DVD in Detail DVD technology is similar to CD technology, but uses a different recording method that allows a disc to store considerably more material (up to 17 gigabytes [GB] per disc). Comparison of DVD and CD Specifications DVD CD Diameter 120 mm 120 mm Track distance 0.74 microns 1.6 microns “Pit” length 0.4 microns .834 microns Laser wavelength 635–650 nm 780–790 nm Speed 3.49 m/s 1.2–1.4 m/s Maximum data speed 11.08 Mbps 1.536 Mbps 141 The basic bit rate of a DVD is 1200 kilobits per second (Kbps), 8 times that of a 1x CD-ROM at 150 Kbps. A single-sided, single-layered DVD has a maximum storage capacity of 66.8 minutes. A typical 2x DVD-ROM drive performs at levels comparable to the fastest standard CD drives. DVD speed Bit rate (Kbps) CD speed 1x 1200 8x 2x 2450 16x A DVD has the same physical dimensions as a CD, but unlike a CD it has two sides—two 0.6 mm thick discs glued together back-to-back. Also, each side of a DVD can contain two layers of data, one on top of the other. By refocusing the read laser to a lower depth, a DVD player can read “through” the top layer to retrieve the data from the lower layer. Disc Types and Capacities To achieve a high data capacity, DVD packs many digital “pits” on its surface. The pits are smaller and closer together than on a CD, and the space between “rings” of pits is also smaller. The DVD player uses shorter wavelength lasers for reading. Accuracy is also enhanced because the laser has to penetrate only half the thickness of plastic to read the data. On a dual-layer disc, one layer is semi-transparent, which reduces the reflectivity and readability of both layers. Therefore, dual-layer discs are recorded less densely than singlelayer discs. A dual-layer disc stores 8.5 GB; a single-layer disc stores 4.7 GB. Dual-sided DVDs must be turned over during play. A DVD can be produced in four configurations: Type Abbreviation Name Storage capacity 12 cm DVD (GB) Single side/ single layer ss/sl DVD-5 4.7 Single side/ dual layer ss/dl DVD-9 8.54 Dual side/ single layer ds/sl DVD-10 9.4 Dual side/ dual layer ds/dl DVD-18 17.08 Unlike CDs, which are recorded with several incompatible formats, all DVD data is written in the same logical format—Universal Disk Format (UDF). This standardization eliminates the format confusion that has plagued the CD authoring process. 142 Appendix B Physical Formats There are four physical DVD formats: Physical format ss/sl ss/dl ds/sl ds/dl Conceptually similar to DVD-ROM x x x x CD-ROM DVD-R x – – – CD-R DVD-RW x – – – CD-RW Can be rewritten a number of times DVD-RAM – – x – PD Caddy; 2 sides at 2.6 GB and 4.7 GB Comment Logical Formats DVD-ROM Contains a UDF file system with any type of data. No multi-session ability intended. DVD-Video Contains a UDF file system and an ISO directory; intended for such video content as movies and training material. The contents of the ISO directory have been defined precisely and are readable by standardized set-top players. DVD-Video provides picture and audio quality far surpassing that of VHS tape and laserdisc. DVD-Video titles can have up to 8 sound tracks, up to 32 subtitle tracks, and up to 9 views or angles. Menu structures allow the creation of flexible content using simple building blocks. DVD Audio Replaces the current Red Book audio CD standard, delivering higher sound quality and including the flexibility of adding video or other data. Supports audio sampling rates up to 192 kHz. Hybrid DVD A type of DVD-Video or audio disc that includes additional files that do not comply with the DVD-Video and audio standards. More About DVD 143 Video in DVD-Video The DVD standard supports video material encoded in either MPEG-1 or MPEG-2 format. MPEG-2 video can be displayed on a full, wide, or 16:9 screen. MPEG (Motion Picture Expert Group) is a group that came together in 1980 under the auspices of the International Standards Organization (ISO) to define a standard for the compression of digital video and audio data. The format it developed is based on the H.261 standard and includes some algorithms and experience derived from JPEG ( Joint Photographic Experts Group). MPEG-1 MPEG-1 is used when picture quality is less important. It allows a maximum data rate of 1.8 megabits per second (Mbps) and is always encoded at a constant bit rate (CBR), so simple and complex scenes require the same amount of data per second. With suitable source material, this yields quality roughly equivalent to VHS tape. Video standard Resolution Frequency (Hz) Aspect ratio PAL 352 x 288 25 4:3 NTSC 352 x 240 29.97 4:3 MPEG-2 MPEG-2 gives higher picture quality by allowing data rates up to 9.8 Mbps. DVD-Video can display the picture in a 16:9 aspect ratio, but the number of pixels used doesn’t increase. MPEG-2 can be encoded with a variable bit rate ( VBR), which means that simple scenes use less space on the disc than complex scenes. This decreases storage requirements while increasing quality in complex scenes. With most video material, VBR encoding makes it possible to record considerably more than the minimum hour’s worth of playing time on a DVD. Video standard Resolution Frequency (Hz) Aspect ratio PAL 720 x 576 251 4:3 or 16:9 NTSC 720 x 480 29.971 4:3 or 16.9 1 144 Appendix B In contrast to MPEG-1, MPEG-2 makes it possible for both fields of a video frame to be encoded (PAL: 50 Hz, NTSC: 59.94 Hz). The MPEG standard for video defines three frame types: I-, P- and B-Frames. Each is compressed in a different way. Specific sequences of these frame types make up a Group of Pictures (GOP). The result of stringing together GOPs is an MPEG video stream. Playback of an MPEG video stream can only start from the beginning of a GOP. I-Frames (Intra Frames) I-Frames are encoded independently of other frames. They are equivalent to key frames in other video compression processes. The complete frame is divided into macro blocks, using a technique similar to that of JPEG. The blocks are transformed mathematically using discrete cosine transformation (DCT). The results are quantified and compressed using simple statistical procedures. P-Frames (Predicted Frames) P-Frames take advantage of the fact that successive frames of a video are often very similar. But instead of simply calculating the difference between two pictures and then compressing what has been changed, the system also checks whether the macro blocks have been displaced. Therefore a displacement vector can be calculated for each macro block that has moved. The rest of the picture is encoded like an I-Frame, but quantification uses different parameters. Since a P-Frame only contains the data that has changed, it can’t be played on its own. B-Frames (Bidirectional Predicted Frames) These frames are encoded like P-Frames, except that the displacement vectors are calculated based on both the previous and subsequent frames. This allows additional redundancies to be removed from the picture data. B-Frames need to be placed in the stream according to their time stamp, because the subsequent frame (in time) must be loaded and decompressed first in order to display the B-Frame. This is why B-Frames can’t be displayed on their own. Audio in DVD Video The DVD standard allows audio material in three formats: PCM, AC-3, and MPEG audio. It also supports variations such as DTS and SDDS. Multiple sound tracks can be linked, and multi-channel support is built in. Playback systems automatically downsample multi-channel tracks for play on normal stereo equipment. Audio formats for PAL and NTSC differ slightly: Video standard Stream type PAL (625/50) Linear PCM, MPEG audio, or AC-3 NTSC (525/60) Linear PCM or AC-3 More About DVD 145 Thus a DVD must use PCM or AC-3 audio to be playable worldwide. Linear PCM Dolby AC-3 MPEG-1 audio MPEG-2 audio DTS SDDS Sample frequency (kHz) 48/96 32/44.1/48 48 48 48 48 Resolution (bits) 16/20/24 compr. compr. compr. compr. compr. Maximum bit rate (bps) 6144 448 384 912 1536 1280 Maximum number of channels 8 5.11 2 7.11 5.11 7.11 1 “.1” describes the additional subwoofer channel, which usually has a smaller bandwidth than the other channels. Linear PCM Linear PCM audio is the same as that used on audio CDs. The analog signal is scanned using a particular sampling frequency, and the values determined are entered into a grid (quantification). The quantification of these values results in a small loss of quality compared to the analog signal. No compression is built into the system, so PCM achieves high fidelity at the cost of high storage space. The sampling rate of 96 kHz on a DVD-Video can only be used with linear PCM. Dolby Digital (AC-3) AC-3 is a sophisticated compression procedure using knowledge about how people hear to remove certain proportions from the frequency spectrum of an audio signal. This reduces the size of the data stream without affecting the sound. Dolby AC-3 compression results in the loss of information—decompressed audio data is no longer identical to the original data. However, this difference is hardly noticeable to the human ear. The sampling rates are 32, 44.1, and 48 kHz. The system supports up to 5 channels plus a narrower subwoofer channel, also called LFE (Low Frequency Effects). AC-3 ranges from 64 to 448 Mbps; typical rates are 192 Mbps for stereo and 384 Mbps for 5.1 channels. 146 Appendix B MPEG Audio MPEG audio is a compression scheme providing up to 8 channels of sound. The two additional channels are called Left-Center and Right-Center and are used in the 7.1 channel configuration. Possible channel combinations are 1/0, 2/0, 2/1, 2/2, 3/0, 3/1, 3/2, and 5/2. The subwoofer is optional in each case. The difference between MPEG audio and AC-3 lies in the encoding algorithm; the sound quality results are similar. For compatibility, the additional channels in MPEG-2 audio are included as extensions of an MPEG-1 audio stream, allowing MPEG-1 decoders to play the two stereo channels. The bit rates for MPEG audio are between 32 and 384 Mbps (MPEG-1) and up to 912 Mbps (MPEG-2). Typically, 384 Mbps is used. The MPEG audio portion of a DVD-Video requires a sampling rate of 48 kHz instead of the 44.1 kHz used on Video-CDs and CD-i. MPEG-2 layer III, also known as MP3, and MPEG-2 AAC are not supported by DVD-Video. DTS (Digital Theatre System) This optional audio format was originally developed for theatres. It provides 5.1 channels at a sampling rate of 48 kHz with 20-bit resolution. The data rate can range from 64 to 1536 Mbps. Possible channel combinations are 1/0, 2/0, 3/0, 2/1, 2/2, and 3/2, plus the subwoofer. DTS playback requires special hardware. Further information on DTS is available at this Web site: www.dtstech.com SDDS (Sony Dynamic Digital Sound) This format is based on the ATRAC compression algorithm. It provides 5.1 or 7.1 channels and was developed for theatres. The sampling rate is 48 kHz and the maximum data rate is 1280 Mbps. No current DVD systems use SDDS for DVD-Video. Comparison of DVD Audio Formats Linear PCM Dolby AC-3 MPEG-1 audio MPEG-2 audio DTS SDDS Sample frequency (kHz) 48/96 32/44.1/48 48 48 48 48 Resolution (bits) 16/20/24 compr. compr. compr. compr. compr. Maximum bit rate (bps) 6144 448 384 912 1536 1280 Maximum number of channels 8 5.11 2 7.11 5.11 7.11 1 “.1” describes the additional subwoofer channel, which usually has a smaller bandwidth than the other channels. More About DVD 147 DVD-Audio Compatibility DVD-Audio players can access the audio data of a DVD-Video. You can create a DVD-Video that is also compatible with DVD-Audio players. Subtitles in DVD-Video DVD-Video supports up to 32 subtitle streams per video track. This feature is used primarily for displaying the text of the movie in alternate languages, or for closed captioning for the hearing impaired. Subtitles can be created in any color or font. They are encoded as bitmapped graphics to ensure uniform appearance on all players. The bitmapped data “floats” above the video or still picture and can be modified during playback through color changes or movements. Subtitle graphics (also known as sub-pictures) are limited to four colors and every pixel has one of 16 possible transparency values. Sub-pictures can be used for the following: Karaoke The current word of a song’s lyrics can be highlighted by changing pixel values so that the text to be sung appears in a different color. Rolling Titles The graphic used must be higher than the screen (576 lines for PAL, 480 for NTSC). The width is always 720 pixels. It is possible to “skip” a number of lines before displaying 576 or 480 lines of the sub-picture. By increasing or decreasing this skip counter, the sub-picture appears to roll upwards or downwards. Menus You can generate complete menus with the subtitle graphics. While a video is running or a still picture is displayed, all other elements (buttons and so on) are defined with subtitle graphics or changes to these graphics. Text in DVD-Video According to the standard, a DVD-Video can also contain text data that has not been saved as a graphic. This can include titles or information on actors, authors, editing information, and so on. DVD-Video players are not required to be able to display text, so currently this type of data is not used. 148 Appendix B Navigation on a DVD-Video The viewer navigates through a DVD-Video with a remote control. According to the standard, the remote control must provide certain basic functions: Basic functions of a DVD remote control The user can stop (pause) the video at any time and call up menus to change the current selection. Menus can also lead directly to specific chapters, to an index, and so on. There are two distinct types of menus on a DVD-Video: system menus and in-title menus. These types have no design differences. System Menus System menus are required for every language supported by the DVD-Video title. They define the basic structure of the DVD-Video. The player tries to display the menu corresponding to the language the player has been set to use. If it does not find a corresponding menu, it displays the “first” menu. Several types of menus can be accessed directly with a remote control key: m Title: The main menus of the DVD-Video disc. Exactly one title menu is mandatory for both the disc and the player. m Root: Every title set of a disc has a set of submenus. The root menu is the main menu for one of these title sets. Like the title menu, it is mandatory both for the player and the disc. m Track: This optional menu displays a selection of the individual clips in a title set. m Audio: This optional menu allows the viewer to switch to another audio stream—for example, from English to German. m Subtitle: This optional menu allows the viewer to choose subtitles. “Optional” means the disc does not need to contain the menu even if the player has a remote control key for it. If the player is not able to access the menu because the key has not been linked to anything on the disc, then the disc must provide another way of accessing the menu—for example, through a link from a mandatory menu. More About DVD 149 In-Title Menus These are “soft” menus that the content creator can define within the DVD-Video. Since there are no dedicated keys on the remote to access these menus, the author must provide links or other ways to display them. Buttons Menus consist of a still frame or a video that contains buttons (using subtitle graphics). Every menu button has three states: normal, selected, and activated. There is always one button selected on a menu. The viewer uses the arrow keys to select a different button. If the viewer clicks the OK key, the selected button is activated. A button can also be set to activate immediately upon selection. File Structure of a DVD-Video A DVD-Video is a DVD-ROM with precisely specified contents. This includes the file structure (name and arrangement on the disc) and the formats of the individual files. A folder called VIDEO_TS at the top directory level contains all files for the DVD-Video. If there are other files on the DVD-ROM, it is referred to as a “hybrid DVD.” The VIDEO_TS folder contains two types of files—presentation files (.VOB) containing video, audio, and subtitles; and navigation files (.IFO) containing jumps, programs, button definitions, and so on. The separate files allow the player to access the structural data of the DVD-Video more quickly. To avoid data being lost through scratches, the IFO files are written onto disc twice, once on the inside for quick access and once on the outside as BUP (backup) files. Copy-Protection and Region Coding To help ensure the full participation of major movie studios, the DVD standard includes sophisticated copy-protection and regionalization controls. This means, in general, that commercial DVDs cannot be copied and can only be played in the regions of the world the publisher intends. A DVD-Video with a region code can be played anywhere in the world, whether it is in PAL or NTSC format (assuming that its region code allows playback on the particular player). 150 Appendix B The DVD copyright protection technology has three parts: Region Code: The world is divided into eight regions. The producers of a DVD determine which parts of their DVD can be played in which parts of the world. Each disc or portion thereof is marked to indicate where it should be playable. Each DVD player also has a region code. If a disc’s region code doesn’t match that of the player, the disc won’t play. m m m m m m m Region 1: Canada, USA Region 2: Europe, Japan, the Near East, Egypt, and South Africa Region 3: East Asia, Hong Kong, and South Asia Region 4: Australia, the Caribbean, Central and South America, New Zealand Region 5: Africa, India, Mongolia, Pakistan, North Korea, the states of the former USSR Region 6: China Region 8: Special Purpose (newly approved for in-flight entertainment; only playable on Region 8 players installed in airplanes) Each sector of the disc contains one region code byte, which consists of eight flags—one per region. It’s possible to create a disc on which some material is restricted and other material is not. Scrambling: To prevent copying of the data on a DVD-Video, the author has the option of using the Contents Scrambling System (CSS) to encrypt the data. Each sector of a DVD can be scrambled. The data can only be unscrambled when a licensed DVD reader is connected to a licensed DVD decoder card. CSS requires an individual encryption key, which can be provided by most mastering plants. For more information about licensing CSS, contact the Motion Picture Association of America (MPAA) or the DVD Copy Control Association (DVDCCA). Macrovision copy-protection: To deter analog copying of DVD-Videos (to videotape, for example), DVD incorporates Macrovision copy-protection, which causes extreme degradation of the image quality if a copy is attempted. Macrovision protection is assigned directly to tracks and markers. There are two levels of Macrovision. For more information, see “About Macrovision Copy-Protection” on page 155. More About DVD 151 Specifications for DVD Compliance This section gives the detailed specifications that each type of source file must meet to be DVD-compliant and usable in DVD Studio Pro. All MPEG streams must be elementary. No transport, program, or system streams are accepted. Video MPEG-1 The MPEG-1 encoding has to be ISO 11172-2 compliant. The maximum bit rate of the MPEG-1 video is 1856000 bps. Constraints: Parameter NTSC PAL Picture size 352 x 240 352 x 288 Number of frames in a GOP ≤18 ≤15 Picture rate (Hz) 29.97 25 Aspect ratio 1.095 0.9157 Constraint parameters flag: m 1: Constant bit rate m 0: Variable bit rate (The bit rate field in the stream has to be 0x3FFFF.) MPEG-2 The MPEG-2 encoding has to be ISO 13818-2 compliant. The encoding profile has to be MP@ML (main profile at main level) or SP@ML (simple profile at main level). Bit rates are as follows: m Constant bit rate (CBR): ≤9.8 Mbps m Variable bit rate ( VBR): ≤9.8 Mbps (vbv_delay = 0xFFFF and lo_delay = 0x0) Constraints: Parameter NTSC PAL Picture size 720 x 480 720 x 576 Number of frames in a GOP ≤36 ≤30 Frame rate 29.97 25 H The aspect ratio can be 4:3 or 16:9. 152 Appendix B Audio PCM The audio data has to be stored in one of the following file formats: AIFF, WAVE, or SoundDesigner II. Requirements for PCM audio are m Quantization: two’s complementary code, 16 or 24 bits/sample m Sampling phase: simultaneous for all channels m Sampling frequency: 48 Hz (optional 50/15 µs emphasis) or 96 Hz (no emphasis / emphasis off ) The following table shows the maximum number of audio channels depending on bit depth and sample rate: 48 kHz 96 kHz 16 bits/sample 8 4 24 bits/sample 5 2 AC-3 (Dolby Digital) The encoding has to comply with the Dolby AC-3 Standard (ATSC STANDARD “DIGITAL AUDIO COMPRESSION AC-3” Doc. A/52 20 Dec. 1995). m Bit rate: 64–448 Kbps (constant bit rate) m Sampling frequency: 48 Hz m Allowed audio coding modes: 1/0, 2/0, 3/0, 2/1, 3/1, 2/2, and 3/2 (including modes with LFE) MPEG The MPEG-1 audio encoding has to be ISO 11172-3 compliant. The MPEG-2 audio encoding has to be ISO 11172-3 and ISO 13818-3 compliant. The MPEG audio layer is always layer 2. Setting Value Protection Always on Sampling frequency 48 kHz Private bit Always 0 Mode Anything except dual channel Emphasis Anything except dual channel Surround 0, 1, 2, or 3 More About DVD 153 Setting Value Dematrix procedure Always 3 Number of multi-lingual channels Always 0 mc_prediction_on Always 0 Number of bits reserved for Always 16 dynamic_range_control In ancillary data m MPEG-1 Mono: 64–192 Kbps, CBR or VBR (bit_rate_index always ≠ 0) m MPEG-1 Stereo: 64–384 Kbps, CBR or VBR (bit_rate_index always ≠ 0) m MPEG-2: For the main stream, apply the same restrictions as for MPEG-1. The extension stream may have a bit rate of up to 528 Kbps. Main and extension streams combined should not exceed 912 Kbps. How the Technology Works Macrovision DVD copy-protection is activated during authoring. A menu allows you to set Analog Protection System (APS) activation bits to “on.” These activation bits remain a part of the program through replication. When a protected disc is played back in any DVD player or DVD-ROM drive with video out, the activation bits instruct a chip in the playback device to add Macrovision copy-protection to the outgoing analog video. The original is not affected. The DVD copy protection waveform is made up of two key elements: Automatic Gain Control and Colorstripe. The Automatic Gain Control technology, virtually identical to the technology used on over two billion videocassettes over the past ten years, consists of pulses in the vertical interval that televisions do not detect. When a copy is attempted, the pulses confuse a recording VCR’s AGC circuitry, causing copies to display characteristics such as dim or noisy pictures, loss of color, loss of video, and so on. The Colorstripe Process consists of changes to colorburst information that produce lines across the picture when an unauthorized copy is played. Almost all copy-protected NTSC titles currently being released utilize both AGC and Colorstripe. Only AGC is available in PAL. The technology works on all analog outputs, including baseband, S-Video, and YUV. 154 Appendix B About Macrovision Copy-Protection Macrovision DVD copy-protection, also known as the Analog Protection System (APS), thwarts attempts to copy DVD programming onto videotape. Used on the majority of DVD-Video discs currently being produced, the technology degrades unauthorized copies made on consumer VCRs. Almost all Hollywood studios, as well as many special interest and corporate rights owners, are using the technology to protect their content from unauthorized copying. Note: Use of analog copy-protection for DVD applications is subject to the proprietary intellectual property rights of Macrovision Corporation, of Sunnyvale, California, U.S.A., and users require a usage agreement with Macrovision Corporation before the analog protection system activation bits are set to “on.” For further information, contact Macrovision: m Telephone: (408) 743-8600 m Fax: (408) 743-8610 m Email: [email protected] m Web site: www.macrovision.com More About DVD 155 Index # (number sign) 103 $ (dollar sign) 102 % (percent sign) 102 = (equal sign) 102 [] (square brackets) 102 4:3 aspect ratio 58 16:9 aspect ratio 58, 65 A A.Pack 9, 57125–139 audio settings 132 creating AC-3 format 125–127 described 63, 125 digitizing sound 126–127 mixing sound 126 playback 134–136 recording sound 126 AC-3 format audio streams 62 batch jobs 129–131 comparison 147 converting to 128–129 creating 125–127 described 146 DVD Audio 145, 146 encoding 153 AC-3 Monitor 134–137 AC-3 streams decoding 136 encoding 128–129 getting information about 137 listening to 134–137 playing 136 action menus 81 Action property 81 actions assigning scripts as 99 button actions 39–40 disc actions 82 finding errors in 117 jump actions 39, 81, 85 remote control key actions 42, 82 specifying 81 startup actions 41, 81 timeout actions 52, 81, 99 track actions 82 addition operator 103 Adobe Photoshop. See Photoshop AGC (Automatic Gain Control) technology 154 AIFF format 62, 126, 153 Analog Protection System (APS) 154, 155 anamorphic transfer 58 angle icon 25 Angle key 62 angles adding 25 previewing 25, 68 switching among 62 Apple DVD Player 9 playing projects with 54–55 preferences 54 software requirements 10 version of 11 Apple DVD Studio Pro Web site 14 APS (Analog Protection System) 154, 155 arrow keys 42, 81, 96, 114, 150 157 ASIO drivers 134, 135 ASIO playback hardware 134–135 ASIO Setup window 135 aspect ratio 4:3 aspect ratio 58 16:9 aspect ratio 58, 65 audio/video capture 58 constraints and 152 settings for 80 asset files 118–119 Asset Files window 83118–119 Asset Matrix 83, 84 assets adding by dragging 20 adding with Import command 19 assigning to menus 84 assigning to tracks 84 described 17 displaying in Asset Matrix 84 error-checking 118 files assigned to 119 import errors 120 importing 19–20 jumping to asset containers 73 Preview Mode and 114 uncoupling from menus 84 uncoupling from tracks 84 Assets container 20 illustrated 18 assignment operator 103 ATRAC compression algorithm 147 audio A.Pack software 125–139 capturing 58 compression 146 creating tracks for 22–24 Dolby Digital 5.1 126 DVD audio 145–148 encoding 12, 62 formats 62153–154 mixing 126 NTSC formats 145 PAL formats 145 PCM audio 62, 146, 153 preparing content 62 158 Index recording 126 resolution 58 sample rate 58 settings 132 specifications 153–154 stereo plus center 126 surround sound 126, 135, 138, 139 audio “elementary” streams 59 audio icon 24 Audio key 70 Audio Language properties 89 audio menus 149 audio streams changing 70 current number 105 multiple language 89 number of 107 slideshows and 62 switching between 24 Audio Streams container 23–24 audio tracks. See tracks Automatic Gain Control (AGC) technology 154 B “bad encoded video” error 123 batches, converting to AC-3 format 129–131 B-Frames (Bidirectional Predicted Frames) 145 Bidirectional Predicted Frames (B-Frames) 145 bit stream settings 132–133 “bit-wise and” operator 105 “bit-wise exclusive or” operator 105 “bit-wise or” operator 105 Build & Format Disc command 110, 123 Build Disc command 53, 121 build errors 120 building projects 53123–124 BUP files 150 Button Link property 81 Buttons 29 buttons See also specific buttons actions for 39–40 adding to still menus 29 appearance of 30–31, 81 defined on active menu 81 described 17 highlight colors 34–35 highlight shapes 47, 64 interactive markers 65 linking to tracks 40 links to 81 on menus 64, 150 naming 30 previewing 31 states 30–31, 64 tips for 64 on tracks 45 C capturing audio 58 capturing video 58 CD technology 141–142 center channel 138 channels AC-3 streams and 128–129 audio settings 132 center channel 138 creating files for 126 Dolby Digital programs 138–139 driver output channels 135 full bandwidth channels 133 LFE channel 138–139 subwoofer signal and 138–139 surround channels 138 chapter markers. See markers clips, video 64 CMF standard 124 “Collapse all Properties” command 78 color button highlights 34–35 highlight shapes 47 links 72 Preview window background 92 subtitles 90, 92, 93 Color Menu Settings box 90 Colorstripe process 154 commands "Collapse all Properties" 78 "Expand all Properties" 78 Build & Format Disc 110, 123 Build Disc 53, 121 Copy Properties 78 exitScript 107 Find 93 GoTo in Movie 93 gotoLabel 108 Import 19 Load Description 119 maximum number in script 101 New Batch List 129 nop 107 NVRAM commands 110 Paste Properties 78 peek 111 peekAll 111 play 108 poke 110 pokeAll 111 return 108 Save As 22 Save Description 119 scripting commands 107–108 Set In Point 94 Set Out Point 94 STE commands 96 stop 107 Commands Free value 101 Commands Used value 101 Comment property 79 comments 75, 79, 103 composited video clips 64, 65 compound statements 102 compression audio 146 constants 102 containers adding items to 74 Assets container 20 Audio Streams container 23–24 collapsing 84 displaying in Asset Matrix 84 expanding 84 jumping to 73 Languages container 87 opening in separate window 75 Index 159 Contents Scrambling System (CSS) 80, 151 control structures 109 Copy Generation Management System. See CGMS Copy Properties command 78 copy-protection CSS 80, 151 Macrovision 151, ??–154155 region codes 151 technology for 150–151 CSS (Contents Scrambling System) 151 CSS property 80 D data scrambling 80, 151 “data rate too high” error 122 DAV drivers 135 DCT (discrete cosine transformation) 145 debugging 116–119 debugging window 110116–117 decoders VOBU errors and 122 decoding AC-3 streams 136 Default Button property 81 description files 83, 119 Digital Theatre System (DTS) format 147 digitizing sound 126–127 Disc area, Property Inspector 79 Disc Media property 69, 79 Disc Menu Settings area, Property Inspector 80 Disc Menu Settings property 69 discrete cosine transformation (DCT) 145 discs actions for 82 assigning Finder label to 79 build errors 120 building 53123–124 comments 79 copy-protecting 80 creating 13123–124 dual-layer 124, 142 errors while building 122 naming 79 properties 2269–80 160 Index region codes 79 size of 79 writing to 10 display. See monitors division operator 104 DLT tape 13, 123 DLT tape drives 10, 124 Dolby AC-3. See AC-3 Dolby Digital 5.1 126 Dolby Digital programs 138–139 dollar sign ($) 102 drivers ASIO drivers 134, 135 DAV drivers 135 K1212io drivers 135 Sound Manager drivers 134 DTS (Digital Theatre System) format 147 DVD 9, 62, 83 DVD@CCESS feature described 48 DVD audio format 143145–148 DVD-Audio players 148 DVDCCA (DVD Copy Control Association) 151 DVD compliance 152–154 DVD Copy Control Association (DVDCCA) 151 DVD Player. See Apple DVD Player DVD players Apple DVD Player 10, 1154–55 color use and 93 DVD-Audio players 148 DVD-Video players 102, 148 Philips Professional DVD Player 17, 68, 110, 117 startup actions 80 time values 80 DVD-RAM drives 10, 124 DVD-RAM format 13, 143 DVD-R drives 13 DVD recorders 124 DVD-R format 143 DVD-ROM format 143, 150 DVD-R recorders 10 DVD-RW format 13, 143 DVDs capacity of 142 configurations for 142 creation process 12–13 formats for 143 hybrid DVDs 143, 150 incomplete items on 118 types of 142 DVD Studio Pro authoring with 13 described 9 getting started with 9–13 information on 14 installing 11 preferences for 68 starting program 16 system requirements 10 tutorial 15–55 workspace 18 DVD Studio Pro Help 14 DVD technology 141–154 benefits of 141 copy-protection 150–151 history of 141 region coding 150–151 specifications 141152–154 vs. CD technology 141–142 DVD-Video 144–145 copy-protecting 151 described 143 file structure 150 navigating 149–150 standard for 101 subtitles in 148 text in 148 DVD-Video players 102, 148 E editors See also specific editors 82 Enable NVRAM option 68 encoders hardware encoders 59 Instant Encoder 127128–129, 131 MPEG encoders 10, 12 software encoders 59 encoding A.Pack 127–133 audio 12127–133 problems with 123 video 1259–62 Enter key 114 equal operator 109 equal sign (=) 102 errors asset import errors 120 “bad encoded video” 123 while building discs 122 “data rate too high” 122 disc build errors 120 finding 117 “Found VOBU” 122 insufficient space 121 in Log window 118 multiplexing 122–123 Estimated Size property 79 exitScript command 107 “Expand all Properties” command 78 exporting files 60–61 F field dominance 60 files See also Photoshop files asset files 83, 118 assigned to assets 119 BUP files 150 creating for channels 126 description files 83, 119 exporting 60–61 flattening 63 IFO files 150 importing 95 INFO.ID file 110 multiplexed files 13 Read Me file 11, 14 VOB files 150 Final Cut Pro 12, 5860–61 Find command 93 finding items 83118–119 flattened files 63 flattened layers 63 Index 161 Format Disc window 123 formats AC-3 62125–131 audio 153–154 audio streams 62 DVD 143 DVD audio 143145–148 MPEG 59–62 PCM 62 PICT 65 psd 63 TV 63 video 58 “Found VOBU” error 122 4:3 aspect ratio 58 frame rate 58 frames 58, 145 functions 102103–111 slideshows 65 still menus 63 subtitles 148 tips for menus 63–64 Group of Pictures (GOP) 59, 62, 145 G “if ” clause 109 IFO files 150 I-Frames (intra frames) 145 images See also graphics anamorphic transfer 58 overlay images 47 thumbnail images 72, 73 Import command 19 importing items asset import errors 120 assets 19–20 files 95 subtitles 95 subtitle streams 95 In 94 INFO.ID file 110 In points 94 installing DVD Studio Pro 11 installing QuickTime Pro 11 Instant Encoder 127128–129, 131 interactive markers 65 creating 45–47 International Standards Organization (ISO) 144 in-title menus 150 intra frames (I-Frames) 145 General area, Property Inspector 79–80 getAudioStream() function 105 getCurrentItem() function 106 getCurrentTrack() function 106 Get Info button 137 getLastItem() function 106 getRegionCode() operator 106 getSubtitleStream() function 106 global variables assigning for scripts 100 creating 80 storing value in NVRAM 110–111 viewing 100 writing information to 111 GOP (Group of Pictures) 59, 62, 145 “GoTo in Movie” command 93 gotoLabel command 103, 108 GPRMs. See global variables Graphical View 18, 7172–73 graphics See also images aspect ratio and 65 created in Photoshop 63–64 layers and 63 resolution 65 162 Index H hardware encoders 59 hardware requirements 10 HDTV (High Definition Television) 58 High Definition Television (HDTV ) 58 highlights color of 34 shape of 47, 64 Hilite property 81 hybrid DVDs 143, 150 I ISO (International Standards Organization) 144 items adding to containers 74 assigning 75 assigning scripts to 99 copying properties to 78 deleting 118 descriptions 120 displaying properties 74 importing 95 incomplete items 118, 121 linking 39–40, 72, 75 opening editor for 82 pasting properties to 78 previewing 114–115 reordering 74 viewing properties 21, 78 working with 74 item tiles 73 J Joint Photographic Experts Group ( JPEG) 144 JPEG ( Joint Photographic Experts Group) 144 Jump Action property 81 jump actions 81, 85 jumping to labels 103 to markers 36 in scripts 108 when track is finished 41 Jump Matrix 83, 85 K K1212io Sound Manager drivers 135 karaoke 148 keyboard shortcuts 96 Korg 1212io cards 135 L Label property 79 labels 75, 103 languages assigning new language 87–88 changing 70 described 17 maximum number allowed 87 motion menus and 65 multiple 17, 65, 89 working with 87–88 Languages container 87 layer 2 audio format 62 Layer Matrix 83, 86 Layer menu 64 Layer property 81 layers Effects layers 63 flattening 63 Photoshop files 63, 81, 86 selecting 28 still-menu graphics 63 tips for using 63 letterbox format 58 LFE (Low Frequency Effects) 126 LFE channel 138–139 linear PCM format 145, 146, 147 links appearance of 72 to buttons 81 color of 72 deleting and 118 to items 39, 75 Photoshop files to projects 64 project component links 72 to subtitles 94 Web links 48–50 Load Description command 119 local variables 102 locking subtitles 94 logical DVD formats 143 Log window building projects 53 error messages 118, 120 status messages 122 using 120 viewing information in 137 looping video 34, 64 Low Frequency Effects (LFE) 126 Index 163 M Macrovision copy-protection 151, ??–154155 manual, contents of 14 margins, subtitles 92 marker editor 36 markers actions for 82 adding 35–36 adding buttons to 45–46 described 17 interactive markers 65 jumping to 36 navigating through movies with 93 playing tracks from 108 previewing 37 Markers menu 93 Marker window 93 Matrix Views 7183–86 memory displaying 122 NVRAM 17110–112 system requirements for 10 menu 82 menu editor adding Web links 49 creating still menus 27 Menu key 70 menus action 39 action menus 81 adding buttons to 29 appearance of 81 aspect ratio 80 assigning assets to 84 audio menus 149 buttons on 81, 150 calling with remote control keys 149 creating material for 64–66 described 17 generating with subtitle graphics 148 graphic tips for 63–64 in-title menus 150 mandatory menus 149 motion menus 32–33 multiple languages 65 164 Index optional menus 149 properties with 77 root menus 149 selecting thumbnail images for 73 size of 80 still menus 26–28, 63 subtitle menus 149 system menus 149 timeout actions for 52 title menus 149 track menus 149 types of 149 uncoupling assets from 84 mixing, spatial 138–139 mixing sound 126 modulo operator 104 monitors 16:9 aspect ratio 58 hardware requirements for 10 NTSC monitors 58 PAL monitors 58 previewing on external monitor 115 motion menus 32–33 audio tracks and 62 looping video for 34 multiple languages and 65 previewing 34 Motion Picture Association of America (MPAA) 151 Motion Picture Expert Group. See MPEG movies QuickTime movies 59, 89 subtitles for 89–96 MP3 format 147 MPAA (Motion Picture Association of America) 151 MPEG (Motion Picture Expert Group) 144 MPEG-1 audio format 62, 147 MPEG-1 encoding 152, 153 MPEG-1 video format 144 MPEG-2 AAC format 147 MPEG-2 audio format 147 MPEG-2 encoding 152 MPEG-2 exporting option 59 MPEG-2 layer III format 147 MPEG-2 video format 144 MPEG audio format 62, 145, 147 MPEG encoders 10, 12, 59 MPEG Export feature 59–61 MPEG format 59–62 multi-angle tracks 24–26, 62, 68 multi-angle video 62 multiplexed files 13 multiplexed MPEG streams 59 multiplexing described 113, 121 increasing speed of 68 options for 68 performance 10 real-time multiplexing 113 solving problems 122–123 tracking process 122–123 multiplication operator 104 numbers, entering in scripts 102 number sign (#) 103 NVRAM 110–112 debugging and 117 retrieving information from 111 scripts and 17 storing information in 110–111 NVRAM commands 110 N PAL audio formats for 145 copy-protection and 154 graphics and 65 MPEG-1 video and 144 MPEG-2 video and 144 Photoshop graphics and 63 specifying default TV system 68 subtitle margins 92 PAL monitors 58 parameters 101 Paste Properties command 78 PCM audio files 136 PCM audio format 153 PCM format 62, 146, 147, 153 peekAll command 111 peek command 111 percent sign (%) 102 performance, multiplexing speed 68 P-Frames (Predicted Frames) 145 Philips Professional DVD Player 17, 68, 110, 117 Photoshop (psd) format 63 Photoshop files layers 63, 81, 86 linking to projects 64 resolution and 63 Name property 79 navigation DVD-Video 149–150 Graphical View 82 Matrix Views 83–84 projects 114–115 remote control keys 70 with time codes 93 New Batch List command 129 New Marker button 36 Next Track key 114 nop command 107 not equal operator 109 NTSC audio formats for 145 copy-protection and 154 graphics and 65 MPEG-1 video and 144 MPEG-2 video and 144 Photoshop graphics and 63 specifying default TV system 68 subtitle margins and 92 NTSC-DV format 58 NTSC monitors 58 Number Of Sides property 69, 79 O objects, playing 108 OK key 114 operators 103–105 Out 94 Out points 94 overlay image 45, 47 P Index 165 size of 63 slides and 65 still menus and 63–64 Photoshop Layer method 30 Photoshop program 10 physical DVD formats 143 PICT format 65 Picture property 81 Pictures area, Property Inspector 88 pixels 115 playback A.Pack 134–136 multi-channel playback 134–135 stereo playback 134, 139 Play button 55 play command 108 playing items AC-3 streams 136 objects 108 projects 54–55 tracks 108 pokeAll command 111 poke command 110 preferences Apple DVD Player 54 setting 68 subtitles 90 Preferences dialog box 68 preprocessing settings 133 pre-script 99, 107 Pre-Script property 81 previewing items angles 25, 68 on external monitor 115 procedure for 114–115 projects 24–43, 52, 68 real-time multiplexing technique 113 region codes and 68 Preview Mode debugging in 116–117 described 71 limitations of 115 problems with 114 starting 24 startup actions and 80 166 Index using 113–115 Preview window 92, 114 Previous Track key 114 problems. See troubleshooting procedures 107 PROF folder 110 Progress window 53, 122 projects adding assets to 19–20 adding Web links to 48–50 basic components of 17 building 53123–124 component links in 72 connections between elements in 83 description files 83, 119 dividing into multiple tracks 59 getting information about 83119–120 linking items in 39–41 linking Photoshop files to 64 navigating through 114–115 playing 54–55 previewing 24–43, 52, 68 saving 22 size of 69, 73, 79 starting new subtitle project 91–93 testing 5254–55 Project View 74–75 illustrated 18 incomplete items in 121 working with items 74 working with languages 87–88 Project View windows 71 properties See also specific properties assigning 77–82 changing 21 copying to other items 78 discs 2269–80 displaying for items 74 editing 77–78 listed 81–82 with menus 77 multiple assignments 78 pasting to other items 78 in Property Inspector 76–82 scripts 101 text 77 viewing 21, 22, 78 Property Inspector assigning properties 81–82 button appearance 30–31 button highlighting colors 34 changing properties 21 choosing scripts 99 described 71 displaying item properties 74 illustrated 18 overlays 47 setting disc properties 69–80 using 76–82 viewing global script variables 100 viewing incomplete items 118, 121 viewing properties 21, 22 viewing scripts 101 psd (Photoshop) format 63 pulse code modulation. See PCM Q QuickTime format 89, 126 QuickTime movies 59, 89 QuickTime MPEG Encoder 9, 10, 12, 57, 59, 62 using 59–61 QuickTime MPEG Export feature 59–61 QuickTime Player 59 QuickTime Preview window 93 QuickTime Pro 1011 R RAM. See memory random number operator 105 Read Me file 11, 14 recording audio 126 Record To Device option 124 recursion 102 Red Book 141, 143 Region Code property 79 region codes 68, 79, 106150–151 registers 101–102, 117 registration information 11 remote control Angle key 62 navigating through DVD-Video 149–150 navigating through projects 114–115 Stop key 24, 107 variables and 100 Remote-Control area, Property Inspector 70, 80 remote control keys actions of 42, 82 assignments 81 calling menus with 149 controlling projects with 42 default assignments 70 navigating with 114 scripts assigned to 99 Remote-Control property 82 rendering options, subtitles 92 resolution audio 58 graphics 65 Photoshop files 63 widescreen resolution mode 65 return command 108 Return key 70, 114 rolling titles 148 Root key 70 root menus 149 S sample rates 58 Save As command 22 Save Description command 119 scrambling data 80, 151 script editor 51, 98 scripting commands 103–111 enhanced 68 functions 103–111 reference 101–109 scripts 97–112 actions for 99 assigning 99 changing information about 101 choosing 99 current item attached to 106 Index 167 described 17 disabling lines of 103 entering 98 exiting 107 finding errors in 117 global variables for 100 jumping to another position in 108 labels in 103 maximum number of commands in 101 numbers in 102 properties 101 size of 101 specifying 81 uses for 97 viewing 101 writing 51–52 Script window 98 SDDS (Sony Dynamic Digital Sound) 147 segments 59 Selection Condition property 82 serial number DVD Studio Pro software 11 QuickTime Pro software 11 Set In Point command 94 Set Out Point command 94 setSubtitleStream function 107 settings audio capture settings 58 audio settings 132 bit stream settings 132–133 preprocessing settings 133 video capture settings 58 shortcuts 96 Show All Angles option 26, 68 16:9 aspect ratio 58, 65 Skip keys 114 slideshow editor 38–39 slideshows audio format and 62 creating 37–39 described 17 graphics 65 multiple languages in 89 Photoshop format 65 PICT format 65 168 Index previewing 39 selecting thumbnail images for 73 Slow-Down Background Tasks option 68 software encoders 59 software requirements 10 Sony Dynamic Digital Sound (SDDS) 147 sound. See audio Sound control panel 134 SoundDesigner format 62 SoundDesigner II format 126, 153 sound files, encoding with A.Pack 127–133 Sound Manager 134, 135 Sound Manager driver 134 source material gathering 12 multiple tracks 59 preparing 57–66 segmenting 59 subtitles 89 types of 12, 57 spatial mixing 138–139 specifications audio 153–154 DVD 141152–154 video 152 square brackets [] 102 Startup Action property 69, 80 startup actions 41, 81 STE. See Subtitle Editor stereo playback 134, 139 stereo plus center 126 still menus creating 26–28 creating graphics for 63 stop command 107 Stop key 24, 43, 107, 114, 115 stories creating 43–44 described 17 Stories Folder 43 story icon 44 streams AC-3 streams 128–129, 134–137 audio streams 59, 62, 70 getting information about 137 multiplexed MPEG streams 59 subtitle streams 95 video “elementary” streams 59 sub-pictures 148 Subtitle Editor (STE) 989–96 Subtitle key 70 subtitle menus 149 subtitles 89–96 adding 48 allowing viewers to choose 70 appearance of 92 changing duration 94 changing location 94 color in 93 compiling streams 95 creating 93, 95 DVD-Video 148 importing 95 interactive markers and 45, 48, 65 linking 94 locking position 94 margins for 92 preferences 90 preparing 66, 89 previewing 25 rendering options 92 selecting multiple 94 source material for 89 starting new project 91–93 unlocking position 94 subtitle streams 95, 106, 107 subtraction operator 104 subwoofer signal 138–139 surround channels 138 surround sound 126, 135, 138, 139 system menus 149 system requirements 10 T testing items projects 5254–55 text DVD-Video 148 properties 77 “then” condition 109 thumbnail images 72, 73 time code button 35 time codes importing subtitles and 95 navigating with 93 selecting subtitles between 94 timeout actions 52, 81, 99 time play function 100 Time Search/Time Play option 80 time search function 100 time values 80 Title key 70 title menus 70, 149 title set 70 Track key 70 track menus 149 tracks actions for 82 adding a 22–24 adding angles 25 adding markers 35–36 adding subtitles 48 adding subtitle streams 95 assigning assets 84 buttons on 45 current track 106 described 17, 22 dividing projects into multiple tracks 59 linking buttons to 40 motion menus and 62 multi-angle tracks 24–26, 62, 68 playing 108 segmenting 59 thumbnail images 73 uncoupling assets from 84 troubleshooting See also errors encoding problems 123 multiplexing problems 122–123 Preview Mode 114 troubleshooting windows 83 tutorial 15–55 tutorial files 9, 16 TV formats 63 TV system, specifying default 68 Index 169 U W, X, Y, Z UDF (Universal Disk Format) 142 UDF file system 143 Universal Disk Format (UDF) 142 unlocking subtitles 94 Use @ccess option 68 Use Buttons Of property 47 WAVE format 62, 126, 153 Web browsers 68 Web links adding to projects 48–50 opening with Web browser 68 Web sites Apple DVD Studio Pro 14 Digital Theatre System 147 Dolby Digital 139 Windows menu 91 workspace 18 V variable bit rate ( VBR) 59, 144 Variable Names area, Property Inspector 80 variables conventions 102 creating 100 global variables 80100 limitations of 102 local variables 102 VBR (variable bit rate) 59, 144 video 16:9 aspect ratio 58 capturing 58 creating for interactive markers 65 creating tracks for 22–24 DVD-Video 144–145 encoding 12, 62 letterbox format 58 looping 34 multi-angle video 62 specifications 152 VIDEO_TS folder 53, 55, 110, 113, 121, 150 video clips 64 video “elementary” streams 59 video streams alternate angles and 24 subtitles for 89–96 video title sets 17 video tracks. See tracks views described 18, 71 Graphical View 72–73 Matrix Views 83–86 Project View 74–75 Property Inspector 76–82 VOB files 150 170 Index