1
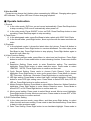
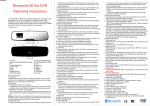
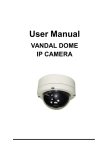
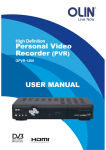
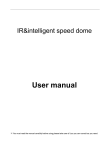
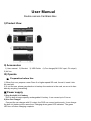
User Manual
Double camera Car Black Box
I) Product View
II) Accessories
1) User manual
5) AV line
2) Bracket
3) USB Cable 4) Car charger(24V/12V input, 5V output)
III) Operate
※ Preparation before Use
1) When first use, prepare a new Class 6 or higher speed SD card, format it, insert it into
the card slot.
2) If not first use, please pay attention to backup the contents in the card, so as not to lose
data by recycling overwriting.
※ Power supply
1) Use the built-in Li battery
DVR is built-in large capacity rechargeable LI battery. It can record up to 2 hours.
2) Use Car Charger
Connect the car charger with 5V output, the DVR can rocord continuously. It can charge
the built-in li-battery at the same time. Charging when green LED indicates. The green
LED turn off when charging complete.
3) Use the USB
Computer can charge the li-battery when connecting by USB port. Charging when green
LED indicates. The green LED turn off when charging complete.
※ Operate Instruction
1) Record
◎ In the video mode, DVR turn on and record automatically. Press Rec/Snap button
to stop recording. DVR turn off automatically when power off.
◎ In the video mode, Press ON/OFF to turn on DVR. Press Rec/Snap button to start
recording. Press Rec/Snap again to stop recording.
2) Take Photo
◎ In the photograph mode, press Rec/Snap to take a photo with 2592*1944 Pixels
◎ In the record mode, press Right button, shoot a picture with the same resolution as
video.
3) Playback
◎ In the playback mode, it shows the latest video clip/ picture. Press Left button to
overview forward. Press Right button to overview backward. For video clips, press
Rec/Snap to play. Press Right button to stop playing. Press Right button again to
show the next video clip.
4) Video Function Setting
◎ In the video preview mode, press Menu to select and set functions. Press Right
button to confirm. Press mode button to start choosing function. Press menu button
to exit.
◎ Resolution Setting: Press mode to enter Resolution setting. The resolution
highlights. Press Right button to show resolution menu. Press mode to select
1280*960 30FPS,. Press Right button to confirm and then exit.
◎ Cyclic Record Setting: Press mode to choose Cyclic Record. Cyclic record
highlights. Press Right button to enter cyclic record menu. Press Mode to choose
OFF, 5minutes, 10minutes, 15minutes. Press Right button to confirm and exit.
◎ LED light setting: Press Mode to select Led Light. Led light highlights. Press Right
button to enter LED light setting menu. Press Mode to select LED Auto, LED off,
LED on. Press Right button to confirm and exit.
◎ Motion Detection Setting: Press Mode to select Motion Detection. Motion Detection
hightlights. Press Right button to enter Motion Detection menu. Press Mode to
choose OFF or ON. Press Right button to confirm and exit.
◎ Movie sound setting: Press mode to select Movie sound. Movie sound highlights.
Press Right button to enter Movie sound menu. Press mode to choose OFF or ON.
Press Right button to confirm and exit.
5) DVR Preferences Setting
◎ In the video previous mode, press Menu, and then press Right button, to select
Video function and menu setting. Press mode to start functions setting. Press Menu
to back to video previous mode.
◎ Date/ Time Setting: Press Right button to see time/date highlight. Press mode to
choose date/time. Press Right button to set date/ time format, year, month, day,
hour, minute, second. Press menu to be up. Press mode to be down. Press Right
button to confirm and exit.
◎ Auto Power Off Setting: Press mode to select Auto Power Off. Auto Power Off
highlights. Press Right button to enter Auto Power Off setting. Press mode to select
Off, 2minutes, 5minutes and 10minutes. Press Right button to confirm and exit.
◎ Beep Sound Setting: Press mode to select Beep Sound with highlight. Press Right
button to enter Beep Sound Setting. Press Mode to choose Off or On. Press Right
button to confirm and exit.
◎ Language setting: Press mode to select Language with highlight. Press Right
button to see different languages. Press Mode to select one kind language, then
press Right button to confirm and exit.
◎ Frequency Setting: Press mode to select Frequency with highlight. Press Right
button to see 50Hz and 60Hz. Press mode to choose, then press Right button to
confirm and exit.
◎ Default setting: Press mode to select Default Setting in highlight. Press Right
button to see Return menu setting to defaults, cancel, OK. Press mode to choose,
then press Right button to confirm and exit.
◎ Version Setting: Press mode to select version in highlight. Press Right button to
view the current version. Press Right button to confirm and exit.
6) Playback Setting
◎ In the playback mode, press Mode to enter playback menu. Press Rec/Snap to
playback the video. Press Left and Right button to choose video or picture clips.
◎ In the playback mode, press Menu button to delete and format. Press Mode to see
Delete or Format highlight. Press Right button to confirm.
7) Connect to PC
◎ In the non-recording status, insert SD card, connect DVR to PC by USB cable. The
computer recognizes it as mobile hardisk. The content can be read and stored directy
in the computer.
8) IR LED’s shortcut key
◎ In the recording or snapping mode, press Left button to open or close LED.
◎ In the recording mode, press Record Written Protection key, to store the video clip
forever.
9) Display on TV by Connecting HDMI port
◎ The operation is the same as playback on the DVR itself. It turns off automatically
when pulling up the HDMI cable.
IV) Specification
1) Full HD 1280*960, 30fps
2) HD 480p(1280*960) 30fps; WVGA(848*480) 30fps; VGA(640*480) 60fps
3) 5.0M Pixels 1/4 HD Sensor
4) Support SD card max to 32GB
5) Still Image: JPG format,1280*960
6) 2.0” TFT LCD
7) Motion Detection
8) Shoot the present picture when recording
9) It turns on automatically when connecting car charger with electricity.
10) Internal CODEC
11) Record Written Protection key to store files forever.
12) Easy operation and settings.
13) Real-time time and date watermark.
14) 16 IR LED or 16 White Lights
15) USB 2.0 port
16) Built-in 650mhA LI-battery and high-performance charging management.
17) Built-in Microphone
18) Built-in 0.5W speaker.
V) Notes
1) Avoid working in the sun at long time.
2) Charge up to 4 hours at the first charging.
3) It doesn’t have waterproof function. Do not let it damp inside.
4) Please backup important data in the SD card before usage.