1
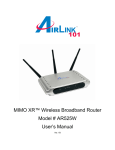
300N Draft 802.11n Wireless Router
Model # AR625W
User’s Manual
Rev. 1.1
Table of Contents
1. Introduction................................................................................................................................. 3
1.1 Package Contents .................................................................................................................. 3
1.2 Features ................................................................................................................................. 3
2. Connecting the Router ................................................................................................................ 4
3. Configuring the Router ............................................................................................................... 5
Cable Modem.............................................................................................................................. 6
DSL ............................................................................................................................................. 7
4. Connecting to the Router Wirelessly .......................................................................................... 8
5. Verifying Connection.................................................................................................................. 9
6. Web Configuration Utility ........................................................................................................ 10
6.1 Setup ................................................................................................................................... 10
6.1.1 Basic Setup................................................................................................................... 10
6.1.2 DDNS........................................................................................................................... 12
6.1.3 MAC Address Clone.................................................................................................... 13
6.1.4 Advanced Routing ....................................................................................................... 14
6.2. Wireless.............................................................................................................................. 15
6.2.1 Basic Wireless Settings................................................................................................ 15
6.2.2 Wireless Security ......................................................................................................... 16
6.2.3 Wireless MAC Filter.................................................................................................... 19
6.2.4 Advanced Wireless Settings ........................................................................................ 20
6.3 Security ............................................................................................................................... 21
6.3.1 Firewall ........................................................................................................................ 21
6.3.2 VPN Passthrough ......................................................................................................... 22
6.4 Access Restrictions ............................................................................................................. 23
6.4.1 Internet Access Policy.................................................................................................. 23
6.5 Applications & Gaming ...................................................................................................... 26
6.5.1 Single Port Forwarding ................................................................................................ 26
6.5.2 Port Range Forwarding ................................................................................................ 27
6.5.3 Port Range Triggering.................................................................................................. 28
6.5.4 DMZ............................................................................................................................. 29
6.5.5 QoS .............................................................................................................................. 30
6.6 Administration .................................................................................................................... 31
6.6.1 Management................................................................................................................. 31
6.6.2 Log ............................................................................................................................... 32
6.6.3 Diagnostics................................................................................................................... 33
6.6.4 Factory Defaults........................................................................................................... 34
6.6.5 Firmware Upgrade ....................................................................................................... 35
6.7 Status................................................................................................................................... 36
6.7.1 Router........................................................................................................................... 36
6.7.2 Local Network ............................................................................................................. 37
6.7.3 Wireless Network......................................................................................................... 38
7. Specifications............................................................................................................................ 39
Appendix – Information................................................................................................................ 40
Technical Support ......................................................................................................................... 42
2
1. Introduction
Congratulations on your purchase of the 300N Wireless Router. The 300N Wireless
Router provides wireless data rate of up to 300 Mbps* when used with other
AirLink101™ 300N wireless products. The high bandwidth combined with extended
wireless coverage delivers fast and reliable connection for all of your networking
applications.
A full range of security features such as WEP, WPA-PSK, and WPA2-PSK provide the
highest level of wireless network security. The built-in Web Configuration Utility allows
you to set up the router with an easy-to-use user interface. Best of all the 300N Wireless
Router works with 802.11g and 802.11b network devices ensuring compatibility with
your existing wireless products.
1.1 Package Contents
Before you begin the installation, please check the items of your package:
•
•
•
•
•
300N Wireless Router
RJ-45 Cable
Power Adapter
Quick Installation Guide
Manual CD
If any item contained is damaged or missing, please contact your local dealer
immediately. Also, keep the box and packaging materials in case you need to ship the
unit in the future.
1.2 Features
•
•
•
•
•
•
•
Industry’s highest wireless data rate of up to 300 Mbps* with IEEE 802.11n draft
specification version 1.0.
3 antennas for wider coverage and stronger signal strength to eliminate dead
spots
64-bit/128-bit WEP encryption, Pre-shared Key (PSK), and Wi-Fi Protected
Access (WPA2) and WPA support provide full protection for your wireless
connection
Higher data rate increases the reliability and stability of wireless connections
Great for environments with higher wireless data traffic requirements
Fully backward-compatible with 802.11b/g devices
Works best with AirLink101™ 300N Wireless Adapters
3
2. Connecting the Router
Note: Prior to connecting the router, be sure to power off your computer, DSL/Cable
modem, and the router. To achieve maximum wireless coverage, tilt the router’s
antennas outward at 45° angle.
Step 1 Connect one end of a network cable to the WAN port of the router and connect
the other end of the cable to the DSL/Cable modem.
Step 2 With another network cable, connect one end of the cable to your computer’s
network card and connect the other end to one of the LAN ports of the router.
Step 3 Power on the DSL/Cable modem and wait for the lights on the modem to settle
down.
Step 4 Power on the router by connecting one end of the supplied power adapter to the
power jack of the router and connecting the other end to an electrical outlet.
Step 5 Power on your computer.
Step 6 Make sure the WAN, WLAN, and the LAN ports that the computer is connected
to are lit. If not, try the above steps again.
4
3. Configuring the Router
Step 1 Open the web browser (Internet Explorer or Netscape), type 192.168.1.1 in the
Address bar and press Enter.
Step 2 Enter admin for both the username and password fields and click OK.
5
Cable Modem
For most cable modem users, you should be able to connect to the Internet without any
configuration. If your ISP has provided you with a host name, enter it in the optional
Host Name field. Click Apply to save the setting.
If your ISP requires a registered MAC Address, click on the MAC Address Clone tab,
select Enabled, and click on the Clone My PC’s MAC button. Click Apply to save the
setting.
If you have trouble connecting to the Internet, please refer to Section 5, Verifying
Connection.
6
DSL
For DSL users, follow the steps below to configure the router.
Step 1 Select PPPoE from the drop-down menu.
Step 2 Enter your username and password provided by your ISP.
Note: Depending on the ISP, you may need to include the domain name with your
username.
Example:
[email protected]
Step 3 Click Apply to save the setting.
If you have trouble connecting to the Internet, please refer to Section 5, Verifying
Connection.
7
4. Connecting to the Router Wirelessly
Below are the default wireless settings of the router. You must configure your wireless
network card to the same settings in order to establish a wireless connection to the
router. Please refer to your wireless network card’s manual on how to configure these
settings.
SSID (Network Name): default
Operating Mode: Infrastructure
Authentication: Auto
Channel #: 6
Encryption: Disabled
If you want to change the router’s wireless settings, log in to the router and select the
Wireless tab. Be sure to click Apply to save the setting.
8
5. Verifying Connection
If you have trouble connecting to the Internet, try the following steps.
Step 1 Power off the Cable/DSL modem, router, and computer and wait for 5 minutes.
Step 2 Turn on the Cable/DSL modem and wait for the lights on the modem to settle
down.
Step 3 Turn on the router and wait for the lights on the router to settle down.
Step 4 Turn on the computer.
Step 5 Reconfigure the router as described in Section 3.
Step 6 Log in to the router and select the Status tab.
Step 7 Verify that the Internet IP Address, Default Gateway, and at least one of the
DNS fields have valid numbers assigned to them (instead of all 0’s).
If you see all 0’s, click on the IP Address Renew button (for Cable Modem users) or the
Connect button (for DSL users).
If each field has a valid number assigned, the router is connected to the Internet.
9
6. Web Configuration Utility
This router has a built-in web configuration utility that you can use to configure the
router’s settings. Simply log in to the router using your computer’s web browser.
6.1 Setup
6.1.1 Basic Setup
This is the default screen when you log in to the router’s web configuration utility. You
can setup your Internet connection here as well as configuring the DHCP settings and
selecting your Time Zone.
Remember to click Apply to save your changes.
10
Assigning Static IP Address
If you want to assign a static IP Address to one of the computers in your network, click
on the Static DHCP button.
Step 1 Enter the Static IP Address in the Assign this IP field.
Step 2 Enter the MAC address of the corresponding computer in the To this MAC field.
Step 3 Check the Enabled box.
Step 4 Click Save Settings.
11
6.1.2 DDNS
Dynamic DNS (DDNS) allows any user who wishes to access your server to reach it by
a registered DNS name instead of an IP address. Before you enable DDNS, you need
to register an account with one of the DDNS providers listed in the drop-down menu.
To Enable DDNS, select the DDNS provider you have registered with and enter the
required fields. Click Apply to save the setting.
12
6.1.3 MAC Address Clone
Some ISPs require a registered MAC address to access the Internet. You can use the
following steps to clone your PC’s registered MAC address to access the Internet.
Step 1 Select Enabled from the drop-down menu.
Step 2 Click the Clone My PC’s MAC button.
Step 3 Click Apply to save the setting.
13
6.1.4 Advanced Routing
You can configure your own static routing table using the Advanced Routing function.
To see the current routing table, click on Show Routing Table button.
Be sure to click Apply to save each entry.
14
6.2. Wireless
6.2.1 Basic Wireless Settings
You can configure the router’s basic wireless settings on this screen.
Wireless: Select to Enable or Disable the wireless feature of the router.
Network Mode: Choose the applicable network mode for your wireless network.
Network Name (SSID): You can change the router’s SSID in this field. Once you have
changed the SSID, your network clients need to re-connect themselves using the new
SSID.
Channel: Select the desired channel. All the network clients need to use the same
channel.
SSID Broadcast: Choose to enable or disable the broadcast of your SSID.
15
6.2.2 Wireless Security
You can configure wireless security such as WEP or WPA encryption on this screen.
Note: It is recommended that you use WPA-PSK encryption over WEP if your wireless
clients support WPA-PSK. All of the wireless clients must use the same security settings
in order to connect to the router.
WEP
To enable WEP, select WEP from the Security Mode.
Encryption: Choose from 64 bits or 128 bits
Passphrase: You can enter a passphrase and click on the Generate button and the
router will automatically generate four WEP keys for you.
WEP Key 1 – 4: Manually assign a passphrase for each key. If you selected 64 bits
encryption, enter 10 HEX characters (0-F) for each key. If you selected 128 bits
encryption, enter 26 HEX characters (0-F) for each key.
TX Key: Select a key to be the active key.
Click Apply to save the setting.
16
WPA-PSK
To enable WPA, select WPA-PSK or WPA2-PSK from the Security Mode.
Encryption: Select either TKIP or AES as the encryption method.
Passphrase: Enter a passphrase between 8 to 63 characters long.
Key Renewal: Enter the desired key renewal time in seconds.
Click Apply to save the setting.
17
WPA with RADIUS
If you want to use WPA in conjunction with a RADIUS server in your network for
authentication, you may choose WPA or WPA2 from the Security Mode.
Encryption Methods: Select either TKIP or AES as the encryption method. (WPA2
uses AES only).
RADIUS Server: Enter the IP Address of your RADIUS server.
RADIUS Port: Enter the port number of your RADIUS server.
Shared Secret: Enter the shared key.
Key Renewal: Enter the desired key renewal time in seconds.
Click Apply to save the setting.
18
6.2.3 Wireless MAC Filter
You can restrict certain wireless clients from accessing the router by specifying their
MAC address and enabling access restriction.
Select Enabled and choose whether the specified wireless clients will be prevented or
permitted to access the wireless network. Enter their MAC address in the fields below
and click Apply to save the setting.
19
6.2.4 Advanced Wireless Settings
You can configure various advanced wireless settings on this screen.
Click Apply to save the setting.
20
6.3 Security
6.3.1 Firewall
SPI Firewall Protection: Select to enable or disable Stateful Packet Inspection.
Internet Filter: Place a check to enable various Internet filter including Anonymous
Internet Requests, Multicast packets, NAT Redirection, and IDNT port.
Web Filters: You can select to filter Proxy, Java, ActiveX, and/or Cookies.
Click Apply to save the setting.
21
6.3.2 VPN Passthrough
You can select to enable or disable the pass-through of IPSec, PPTP, and/or L2TP.
Click Apply to save the setting.
22
6.4 Access Restrictions
6.4.1 Internet Access Policy
You can setup policies that deny or allow specific clients to access the Internet.
Enter Policy Name: Enter a name for the policy.
Status: Choose to enable or disable the selected policy.
23
PCs: Click on the Edit List button to specify the network clients. Policy only applies to
the PCs that are in the list.
You can specify each client by its MAC Address or IP Address. You can also specify a
group of clients by entering their IP Address Range. Once you have specified all the
clients, click Save Settings.
Access Restrictions: Select to Deny or Allow the specified clients to access the
Internet by Day and Time.
24
Blocked Application Port
Select which application port to block, if any, when the specified PCs have Internet
access.
For your convenience, nine preset applications and their ports are listed. If you have a
custom application, manually enter its name, port range, protocol and click Add.
Website Blocking
You can block the specified clients from accessing certain websites by URL or Keyword.
Enter the URL or the Keyword you wish to block.
Click Apply to save the setting.
To view all the policies, click the Summary button.
25
6.5 Applications & Gaming
6.5.1 Single Port Forwarding
If you want to host ftp server or online gaming, you must open up ports on the router.
This page allows you to setup single port forwarding for the specified applications.
Before using forwarding, you should assign static IP addresses to the designated PCs.
Click Apply to save the setting.
26
6.5.2 Port Range Forwarding
If you want to host ftp server or online gaming, you must open up ports on the router.
This page allows you to setup port range forwarding for the specified applications.
Before using forwarding, you should assign static IP addresses to the designated PCs.
Click Apply to save the setting.
27
6.5.3 Port Range Triggering
Port triggering allows the router to keep track of outgoing data for specific port numbers.
The router remembers which computer sends out what data, so when the requested
data returns through the router, the data is sent back to the proper computer by way of
IP address and port mapping rules.
Click Apply to save the setting.
28
6.5.4 DMZ
DMZ (De-Militarized Zone) Host is a host without the protection of the router’s firewall. It
allows a computer to be exposed to unrestricted two-way communication with the
Internet. You should only use this feature when the Port Forwarding function fails to
make an application work.
Warning: Setting your computer as a DMZ host exposes it to various security
vulnerabilities. This feature should be used only when needed.
DMZ: Select to enable or disable DMZ.
Source IP Address: Select any source IP address or specify a source IP address.
Destination: Specify the Destination by its IP Address or MAC Address.
Note: Any DMZ host should have a new static IP address assigned to it because its IP
address may change when using the DHCP function.
Click Apply to save the setting.
29
6.5.5 QoS
QoS (Quality of Service) manages information as it is transmitted and received. It
ensures better service to those applications with a higher priority.
Click Apply to save the setting.
30
6.6 Administration
6.6.1 Management
The Management screen allows you to change the router’s log in password as well as
other administrative settings.
Router Password: Set the router’s log in password.
Web Access: Select to enable or disable HTTPs and Wireless access for the Web
Configuration Utility.
Remote Router Access: Select to enable or disable remote management/upgrade of
the router. You can allow remote management from any IP Address or a specified IP
Address as well as the port number.
Backup and Restore: You can choose to backup the router’s settings so that you don’t
have to manually configure the settings again if you reset the router to factory default.
31
UPnP: Universal Plug and Play (UPnP) allows Windows Me and XP to automatically
configure the router for various Internet applications, such as gaming and
videoconferencing.
6.6.2 Log
You can choose to enable or disable logging of your network activity on this screen.
Click Apply and to save the setting.
32
6.6.3 Diagnostics
The Diagnostics screen allows you to perform Ping and Traceroute tests.
Ping Test: Enter the IP or URL Address you wish to ping and click Start to Ping.
Traceroute: Enter the IP or URL Address you wish to trace and click Start to
Traceroute.
33
6.6.4 Factory Defaults
The Factory Defaults screen allows you to set all the router’s settings to the factory
default.
Click on the Restore Factory Defaults button to restore all the settings to default.
34
6.6.5 Firmware Upgrade
The Firmware Upgrade screen allows you to upgrade the router’s firmware.
You must download and unzip the new firmware first from www.airlink101.com
Click on Browse to browse to the new firmware, and click Start to Upgrade.
35
6.7 Status
6.7.1 Router
The Router screen displays various status of the router including the firmware version.
Click on the Refresh button to reload the screen.
36
6.7.2 Local Network
The Local Network screen displays various status about your Local Area Network.
Click on the DHCP Client Table to display a list of all the DHCP clients in your network.
37
6.7.3 Wireless Network
The Wireless Network screen displays various status about your wireless network.
38
7. Specifications
System requirement
• Windows®, Mac®, or Linux®
operating system
• Installed Ethernet adapter
Frequency Band
• 2.412~2.4835GHz
Standards
• IEEE 802.11b / 802.11g
• Draft 802.11n
Power
• 12VDC 600mA
Host Interface
• RJ-45 connectors
Weight
• 1 lb (with 3 antennas)
Ports
• 1 x WAN port
• 4 x 10/100mbps LAN port
Dimensions
• 200 x 160 x 35 mm
Temperature
• Operating: 0ºC to 45ºC
• Storage: -20ºC to 75ºC
Antenna type
• 3 External 2dBi antennas
Security
• WEP 64-bit/128-bit
• WPA2-PSK (AES) and WPA-PSK
Humidity
• 10% to 90% Non-Condensing
Warranty
• Limited 1-year warranty
Data Rate
• 300* Mbps
• 54, 48, 36, 24, 18, 12, 11, 9, 6,
5.5, 2, 1Mbps auto fallback
Safety Approvals
• FCC, CE
UPC Code
• 6 58729 08 141 3
39
Appendix – Information
Federal Communication Commission Interference Statement
This equipment has been tested and found to comply with the limits for a Class B digital
device, pursuant to Part 15 of the FCC Rules. These limits are designed to provide
reasonable protection against harmful interference in a residential installation. This
equipment generates, uses and can radiate radio frequency energy and, if not installed
and used in accordance with the instructions, may cause harmful interference to radio
communications. However, there is no guarantee that interference will not occur in a
particular installation. If this equipment does cause harmful interference to radio or
television reception, which can be determined by turning the equipment off and on, the
user is encouraged to try to correct the interference by one of the following measures:
z Reorient or relocate the receiving antenna.
z Increase the separation between the equipment and receiver.
z Connect the equipment into an outlet on a circuit different from that to which the
receiver is connected.
z Consult the dealer or an experienced radio/TV technician for help.
FCC Caution: Any changes or modifications not expressly approved by the party
responsible for compliance could void the user's authority to operate this equipment.
This device complies with Part 15 of the FCC Rules. Operation is subject to the
following two conditions: (1) This device may not cause harmful interference, and (2)
this device must accept any interference received, including interference that may
cause undesired operation.
IMPORTANT NOTE:
FCC Radiation Exposure Statement:
This equipment complies with FCC radiation exposure limits set forth for an uncontrolled
environment. This equipment should be installed and operated with minimum distance
20cm between the radiator & your body.
This transmitter must not be co-located or operating in conjunction with any other
antenna or transmitter.
The availability of some specific channels and/or operational frequency bands are country
dependent and are firmware programmed at the factory to match the intended destination. The
firmware setting is not accessible by the end user.
40
European Union Notice:
Radio products with the CE marking comply with the R&TTE Directive (1999/5/EC), the
EMC Directive (89/336/EEC) and the Low Voltage Directive (73/23/EEC) issued by the
Commission of the European Community.
Compliance with these directives implies conformity to the following European Norms:
z EN 60950 Product Safety
z EN 300 328 Technical requirement for radio equipment
z EN 301 489-1/-17 General EMC requirements for radio equipment
41
Technical Support
E-mail: [email protected]
Toll Free: 1-888-746-3238
Web Site: www.airlink101.com
*Theoretical maximum wireless signal rate derived from IEEE 802.11g standard and IEEE 802.11n draft specification version 1.0.
Actual data throughput will vary. Network conditions and environmental factors, including volume of network traffic, building
materials and construction, mix of wireless products used, radio frequency interference (e.g., cordless telephones and microwaves)
as well as network overhead lower actual data throughput rate. Specifications are subject to change without notice. All products and
trademarks are the property of their respective owners. Copyright ©2006 AirLink101™
42