1
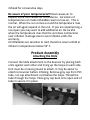
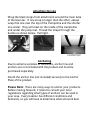
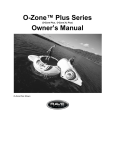
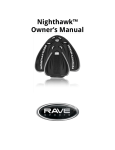
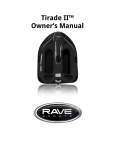
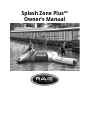
Splash Zone Plus™
Owner’s Manual
Introduction
Thank you for purchasing the Splash Zone Plus.
Water sports can be safe and fun for all levels of enthusiasts. This
Owner’s Manual is presented to enhance your enjoyment of the
sport. It is intended to alert you to some of the potentially
dangerous conditions that can arise in all water sports.
Please take a few minutes to read this manual before assembling and
using the product. Although the product is simple to use, this manual
contains important safety information that you and all users must
understand to safely enjoy the Splash Zone Plus.
If you have any questions regarding this product, please call RAVE
Sports at 1-800-659-0790. Please have your serial number available.
!
WARNING
UNSAFE USE OF THE SPLASH ZONE PLUS CAN
RESULT IN PERSONAL INJURY OR DEATH.
To reduce the risk of injury, read and
follow all instructions and warnings in
this manual. Do not use this product
unless you understand and accept the risk
Safety Rules and Information
• Read and understand all of the information contained in this
owner’s manual before assembling and using your product.
• Make sure that everyone who uses the product is provided with
and understands these safety rules and information.
• The Splash Zone Plus is designed to be used only in large bodies of
water with depths of at least 8 feet. Do not use or allow anyone
else to use the product on land or any other hard surface, in
swimming pools or shallow water.
• Consider the height and weight of the users of the Splash Zone
Plus, as well as the activities performed on the product when you
are selecting a safe location.
• Always maintain a safe distance between the Splash Zone Plus and
any dock, platform, boat or pier.
• Choose a location for your product that is most protected from
wind, of sufficient water depth, and free of obstructions above and
below the water.
• Always anchor the Splash Zone Plus securely before it is used.
• Always wear a U.S. Coast Guard approved Type III (PFD) vest when
using the product.
• Never use the product after sunset, before dawn, or any other
time in poor lighting conditions.
• Never use the product in rough surface water conditions, during
storms, or when there is lightning. If an unexpected storm arises
while using the product, seek shelter on shore. Do not stay on the
product.
• Never use the product under the influence of alcohol or drugs.
• Always stay under control while using the product. Jump or bounce
in the center of the trampoline surface and away from edges.
• Never dive off of the Splash Zone Plus head first. If you jump off
the product, always enter the water feet first.
• Never use the product while tired or fatigued. Use extreme caution
while swimming between the shore and the product. Do not
attempt to swim this distance if you are tired or fatigued.
• Never swim or play under or around the Splash Zone Plus.
• Always inspect the areas around and under the product before
each use to ensure the water is deep enough and free of all rocks,
logs, sand bars, and underwater obstructions and that the product
is a safe distance from hard objects above water. Ask about local
water conditions before using the product in unfamiliar water.
• When not in use, secure the product against unauthorized or
unsupervised use.
• Never use the Splash Zone Plus unless the safety pad is in place and
securely fastened.
• Inspect your product for any worn, defective, or missing parts.
• Do not attempt flips, somersaults or other acrobatic maneuvers on
the product. Most debilitating spinal cord injuries that occur
during trampoline use involve somersaults. Improper landing
during a somersault produces serious risk of broken bones, cuts,
nerve damage, spinal cord or brain injury, or death.
• Use only under mature, knowledgeable adult supervision.
• Not recommended for children under the age of six.
• DO NOT OVER-INFLATE. Over inflation can cause seam rupture.
• Keep objects that could interfere with jumping away from the jump
surface.
• Stop your bounce by flexing your knees as your feet come in contact
with the jump surface. Learn this skill before you attempt others.
• Learn fundamental bounces and body positions thoroughly before
trying other jumps.
• Avoid bouncing too high. Stay low until you can control your bounce
and repeatedly land in the center of the jumping surface.
• Focus your eyes on the jump surface to help control your bounce.
• Do not use the jump surface as a springboard on to other objects.
Liability
While every attempt is made to embody the highest degree of
protection in all equipment, we cannot guarantee freedom
from injury. The user assumes all risk of injury due to use. All
merchandise is sold on this condition, which no
representative of the company can waiver or change.
Inflation
RAVE recommends inflating your Splash Zone Plus with the
High Speed Inflator/Deflator (Item #01083) for maximum
performance. High Speed Inflator/Deflator is not included.
Package Contents
1 – 12’ Water Bouncer
1 – Slide
1 – Log
1 – EZ-Up Platform
1 - Repair Kit consisting of: 2 oz of Glue, 5 – 3” round
patches in White and Blue
1- Owner’s manual
Recommended Maximum Weight
When Jumping: 250 lbs.
When Lounging: 700 lbs.
Recommended Number of People
2 Adults or 3 Children
Recommended Water Depth & Clearance
8 Feet Minimum
There should also be a minimum of 16 feet clearance all
around the unit.
Recommended Ages
6+
INFLATION
SET UP AND SUPERVISION MUST BE DONE BY A MATURE
AND KNOWLEDGEABLE ADULT!
You can use the following devices to inflate the Product:
• High Speed Inflator/Deflator (Item #01083). Not included
• Inflator/Deflator that plugs into a DC outlet in your
vehicle
• Any other inflator designed for inflatable boats, rafts,
pool floats, air beds, camping mattresses, and other low
pressure inflatables.
• Foot/hand pump – Some RAVE products are too large for
Foot/hand pumps to inflate. We do recommend using
them to “top off” the air in the Product.
• RAVE does not recommend inflating their products by
mouth.
Please note: Size your inflation connection to the
approximate size of the valve. Do not use bicycle connections
or pumps.
CAUTION: Use extreme care when using an electric inflator
anywhere near water. Beware of the dangers of electrocution
when using electric powered inflators. Precautions should be
observed during use and handling to prevent shock.
DO NOT inflate with an air compressor or other high
pressure pump!! This unit is designed to be inflated with a
high volume of air but at a low pressure. Use of an air
compressor or other high pressure pump will void your
warranty!
DO NOT allow children to play with the product until it is
fully inflated!!
Insert the appropriate attachment of your inflation
device and inflate until firm, but allow a small
depression when pushed with our hand.
Inflate the main body of the inflatable first unless noted
otherwise on Product Page.
Please Note: Keep in mind the temperature of the air going
into the product and the outside air. If your inflator is hot and
sending warm air into the product, when it cools, it will seem
like your Product is losing air. This is normal.
The product should be firm when completely inflated, but
allow a small depression when pushed on with your hand
while in use. This is a good evaluation of proper inflation.
Proper inflation should be checked often if the product is left
inflated for consecutive days.
Be aware of your temperatures!!! Heat causes air to
expand while cold causes air to condense. Variations of
temperatures can make inflatables seem to lose air. This is
normal. When the sun comes out and the temperature rises
the air will again expand in the unit. If you are experiencing a
cool span you may want to add additional air. Be careful
when the temperature rises that the unit does not become
over-inflated. Damage due to over-inflation voids the
warranty.
All inflatables are sensitive to cold, therefore never unfold or
inflate in temperatures below 50° F.
Product Assembly
Attaching the Slide
Connect the Slide attachment to the bouncer by placing both
units against each other and lining up the loops on each side.
Unit must be on level ground to attach. It may be easier to
attach to bouncer before inflating. Remove grey cap from PVC
tube, run cap attachment cord below the loops. Thread the
tube through the loops. Place grey cap back onto open end of
tube to secure it in place.
Attaching the Log
Wrap the black straps from attachment around the main tube
of the bouncer. If one strap is longer than the other, always
wrap that one over the top of the trampoline and the shorter
one under. They will meet on the inside of the trampoline
and under the jump mat. Thread the straps through the
buckle as shown below. Pull tight.
Anchoring
Due to extreme varieties of conditions, anchor line and
anchors are not included with the product and must be
purchased separately.
Attach the anchor line (not included) securely to the Anchor
Plate of the product.
Please Note: There are many ways to anchor your products.
Before moving forward, it is best to consult your local
regulations regarding what types of anchors can be used in
your area. Every location has different conditions and
demands, so you will have to determine what will work best
for your situation. Here are a few anchoring tips to get you
started.
• Choose a location that is most protected from the wind, of
sufficient water depth ( 8 feet minimum) and free of
obstructions a safe distance in all directions.
• A minimum of 150-200 lbs. of anchor weight is recommended
for most applications; however larger bodies of water may
require more.
• Bell anchors are not typically recommended since they are
easily dragged, especially on flat, sandy bottoms. Screw-type or
more permanent toggle-type anchors may be necessary in more
extreme conditions.
• Attaching a heavy duty shock cord to the anchor line is
recommended to help absorb vertical movements.
• Please consult with local authorities regarding any specific
anchoring restrictions in your area.
• All Units: Adjust length of anchor line so that it is approximately
1-2 ft. longer than the depth of the water. To help prevent
flipping of your product in high wind conditions, do not exceed
3 ft. of total slack in the anchor line.
NOTE: More slack will improve anchor holding performance, but too
much slack may allow the product to stand on edge and flip over in
strong winds. For best results, maximize your anchor holding power
via more weight or a different type of anchor and minimize your
anchor line length.
Types of Anchors
Deflation
Use one of the Inflator/Deflator devices recommended in the
“Inflation” Section for faster deflation.
Unscrew the cap by twisting counterclockwise to expose the
air valve stem. Open the air valve by pushing in the stem and
rotating counterclockwise. Allow air to escape. Pushing on the
stem and rotating clockwise will seal the valve. Replace cap
making sure it is tightened securely.
Completely Dry Unit. Wipe the product off with a terry cloth
towel and allow to dry completely. Store for next use. See
Storage Section for details.
Maintenance
Maintenance is essential to increase the life of your product.
Please follow all maintenance and repairs according to this
manual. If you are unsure please contact your local dealer,
service center or RAVE Sports directly.
• Inspect product regularly for potentially unsafe
conditions, particularly after storms, and suspected
misuse of product.
• Do not use product if repair is needed!
• Clean product regularly per the Cleaning section of
manual.
• Check storage area. Make sure it is rodent free and dry.
• Black rubber portion of Valves and Plugs should be
lightly coated with a petroleum based product before
storage to prevent drying and cracking.
• When disposing of product do so in such a manner that
no hazardous conditions exist at the time the product is
discarded.
• To extend the life of your product – keep out of sunlight
when not in use. For additional protection, we
recommend using UV protectant.
Cleaning
If your inflatable is used intensively, then it should be cleaned
on a weekly basis. It is also important to clean and dry the
product before it is packed away.
•
•
•
•
•
•
•
When cleaning your product never use strong detergents
or silicone-based products.
NEVER use high pressure cleaning equipment such as a
“pressure washer”. This will result in damage to your
product, and void your warranty.
Clean the outside surface only with mild soap and fresh
water and check that the valves are clean and not
damaged.
U.V. protectant may be used to prolong the life of your
inflatable.
To remove algae and other hazards from the ocean, you
can use a special cleaning agent from your local marina.
Following the directions carefully.
All hardware (O-rings, springs, and such) should be
rinsed with fresh water weekly.
Although normal wear and tear is unavoidable, this will
increase the life of your product.
Storage
When storing your inflatable, keep it in a clean and dry place
that is not affected by major variations in temperatures and
other damaging factors. You can store your inflatable
deflated and rolled up or lightly inflated. Be careful never to
stack anything on top of inflatable. It is recommended that
you allow the unit to completely dry before storage. It is
recommended to lubricate the rubber on the valves with a
petroleum based product to increase the life of the valve.
Please note: rodents, such as mice, chew on fabric, including
inflatable material. As a precaution you can place moth balls
or fabric softener sheets around the products during storage
to deter them.
Repair
All of the inflatable products include a repair kit. You can
easily repair minor punctures and cuts and even anchor
plates or handles.
Conditions necessary for a successful repair are:
• Relative humidity less than 65%.
• Temperature Range between 62° - 77° F.
• Avoid performing repairs in direct sunlight or rain.
Step 1 - Locate the damaged area. The easiest way is to
fully inflate the product and listen for the leak, or to spray
with soapy water and look for bubbles. Mark the damaged
area with a crayon or wax pencil and deflate the product.
Step 2 – Cut out a patch approximately 2 inches larger
than the leak. Clean the damaged part of the product and
patch and allow to dry thoroughly.
TIP – It is a good idea to always use a circle or rectangle
patch with rounded corners. Pointed corners tend to pull
off.
Step 3 – Next clean the area and patch with alcohol,
grease remover, or fingernail polish remover and allow
to dry thoroughly.
Step 4 - Apply glue in a very thin layer to the patch and
then to the area of the leak. Let the glue stand until tacky,
usually 30 seconds – 1 minute.
TIP – Place glue on the dull side of the patch and to the
shinny side of the unit. Then when you apply the patch it
will match.
TIP – Use a short brush (just cut the length off) as this
digs into the material better to spread the glue. Also try
to use a brush with real hair instead of synthetic.
Step 5 – Place the patch over the leak
Step 6 – Press out the air pockets which may have formed
under the patch. You can use any round object, such as a
spoon, starting in the center and then working outwards
towards the edges. You can keep the repair “tight” by
clamping together with spring pliers.
Step 7 – Allow repair to cure for 24 hours before reinflating.
Step 8 – Inflate the repaired product.
TIP – It is a good idea to check again for leaks. If you
have multiple leaks, the air will rush out of a larger hole
before a smaller one.
CAUTION: When using glue, remove unused glue from
threads of tube and cap and carefully replace the cap on the
tube. If properly sealed it will keep perfectly.
Do not leave the tube in the sun or next to heat sources or
direct flames.
• Check that the room is properly ventilated, avoid inhaling
or ingesting the glue and avoid contact with skin.
DO NOT RETURN YOUR PRODUCT TO THE RETAILER.
CONTACT RAVE SPORTS FOR WARRANTY, REPAIR, AND
RETURN INFORMATION.
RAVE Sports Raft
Water Sports