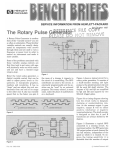
1
STP 9-94K13-SM-TG Soldier's Manual and Trainer’s Guide MOS 94K APACHE Attack Helicopter Systems Repairer Skill Levels 1, 2, and 3 December 2007 DISTRIBUTION RESTRICTION: Approved for public release; distribution is unlimited. HEADQUARTERS DEPARTMENT OF THE ARMY This publication is available at Army Knowledge Online (www.us.army.mil) and the General Dennis J. Reimer Training and Doctrine Digital Library at (www.train.army.mil) *STP 9-94K13-SM-TG SOLDIER TRAINING PUBLICATION No. 9-94K13-SM-TG HEADQUARTERS DEPARTMENT OF THE ARMY Washington, D.C., 7 December 2007 SOLDIER'S MANUAL and TRAINER'S GUIDE MOS 94K APACHE Attack Helicopter Systems Repairer Skill Levels 1, 2, and 3 CONTENTS PAGE Preface ........................................................................................................................................................ iv Chapter 1. Introduction........................................................................................................................... 1-1 1-1. General........................................................................................................................... 1-1 1-2. Task Summaries ............................................................................................................ 1-1 1-3. Soldier’s Responsibilities................................................................................................ 1-2 1-4. NCO Self-Development and the STP............................................................................. 1-2 1-5. Commander’s Responsibilities....................................................................................... 1-3 1-6. Trainer’s Responsibilities ...............................................................................................1-3 1-7. Training Support............................................................................................................. 1-3 Chapter 2. Trainer's Guide ..................................................................................................................... 2-1 2-1. General........................................................................................................................... 2-1 2-2. Subject Area Codes .......................................................................................................2-2 2-3. Duty Position Training Requirements............................................................................. 2-2 2-4. Critical Tasks List ........................................................................................................... 2-3 DISTRIBUTION RESTRICTION: Approved for public release; distribution is unlimited. *This publication supersedes STP 9-39B13-SM-TG, 25 July 2000. 7 December 2007 i STP 9-94K13-SM-TG PAGE Chapter 3. MOS/Skill Level Tasks ......................................................................................................... 3-1 Skill Level 1 Subject Area 1: EETF Operation & Maintenance 093-94K-1002 Perform Preventive Maintenance Checks and Services on 60-kw Power Generator Set.......................................................................................................... 3-1 093-94K-1012 Operate Computer Control Group............................................................................ 3-4 093-94K-1016 Perform AN/USM-410 Self-Test (ILSST) ................................................................. 3-6 093-94K-1017 Perform AN/USM-410 Alignment (SYSCAL) ........................................................... 3-7 093-94K-1018 Rebuild System Software......................................................................................... 3-8 093-94K-1024 Power Up/Down the Test System ..........................................................................3-10 093-94K-1109 Repair the EETF Power Distribution System .........................................................3-13 093-94K-1110 Perform Test System Self-Test (AHST/EOBST) ...................................................3-15 093-94K-1112 Perform Test System Alignment (AHCAL).............................................................3-17 093-94K-1116 Perform Preventive Maintenance Checks and Services (PMCS) on the EETF .....................................................................................................................3-18 093-94K-1120 Prepare the EETF for Operation/Movement ..........................................................3-20 093-94K-1003 093-94K-1004 093-94K-1006 093-94K-1007 093-94K-1008 093-94K-1009 093-94K-1010 093-94K-1011 093-94K-1014 093-94K-1015 093-94K-1019 093-94K-1025 093-94K-1026 093-94K-1027 093-94K-1101 093-94K-1102 093-94K-1103 093-94K-1104 093-94K-1105 093-94K-1106 093-94K-1107 093-94K-1108 093-94K-1130 Subject Area 2: EETF Manual Repair Repair the Test Operator's Panel...........................................................................3-44 Repair the AC Control Assembly ...........................................................................3-45 Repair the DC Station ............................................................................................3-46 Repair the Waveform Generator (WFG) ................................................................3-47 Repair the Pulse Generator (PG)...........................................................................3-48 Repair the Low-Speed Voltage Sampling Unit (LSVSU) .......................................3-49 Repair the High-Speed Voltage Sampling Unit (HSVSU)......................................3-50 Repair the Frequency Sampling Unit (FSU) ..........................................................3-51 Repair the System Clock SubSystem ....................................................................3-52 Repair the RFB Synthesizer ..................................................................................3-53 Repair the Power Protection Kit MK-2046A/MSM .................................................3-54 Repair the Programmable Interface Unit (PIU)......................................................3-55 Repair the Dedicated Interface Unit (DIU) .............................................................3-56 Repair the Interconnect Wiring Harness ................................................................3-57 Repair the Electronics Station................................................................................3-59 Repair the Test Console ........................................................................................3-60 Repair the Dayside Test Bench .............................................................................3-61 Repair the Nightside Test Bench ...........................................................................3-62 Repair the Interface System ..................................................................................3-63 Repair the AC Station/Stimulus Subsystem...........................................................3-64 Repair the Video Subsystem .................................................................................3-65 Repair the Pneumatic Subsystem..........................................................................3-66 Repair the Computer Control Group ......................................................................3-67 Subject Area 3: LRU and Flight Hardware Testing 093-94K-1013 Test AN/USM-410 Line Replaceable Unit (LRU)...................................................3-68 093-94K-1113 Perform UUT Testing .............................................................................................3-69 ii 7 December 2007 STP 9-94K13-SM-TG PAGE Skill Level 3 093-SSG-3004 093-SSG-3006 093-SSG-3008 093-SSG-3009 093-SSG-3010 093-SSG-3012 093-SSG-3015 093-SSG-3001 093-SSG-3002 093-SSG-3003 093-SSG-3005 093-SSG-3007 093-SSG-3011 093-SSG-3013 093-SSG-3014 093-SSG-3016 093-SSG-3017 093-SSG-3019 093-SSG-3020 093-SSG-3021 Subject Area 4: Maintenance Operations Submit a Quality Deficiency Report (QDR)...........................................................3-70 Plan Work Flow.....................................................................................................3-74 Provide Technical Assistance to Repairers ..........................................................3-75 Perform Initial Inspections.....................................................................................3-77 Perform Final Inspections .....................................................................................3-79 Perform In-Process Inspections............................................................................3-80 Manage Demand Supported Repair Parts Listed on the Prescribed Load List (PLL)...............................................................................................................3-81 Subject Area 5: Maintenance Management Inspect Section/Shop Safety.................................................................................3-83 Manage Section/Shop Security ............................................................................3-86 Maintain Section/Shop Calibration Program.........................................................3-88 Submit Equipment Improvement Recommendation (EIR)....................................3-90 Direct Performance of Preventive Maintenance ...................................................3-92 Write a Standing Operating Procedure (SOP)......................................................3-94 Maintain Property Accountability ..........................................................................3-96 Assess Battlefield Damage...................................................................................3-98 Monitor Bench Stock Operations ........................................................................3-100 Monitor Shop Stock Operations..........................................................................3-101 Inspect Maintenance Support Team Operations ................................................3-103 Inspect Maintenance Reporting and Management Data ....................................3-104 Review SAMS-1 Reports ....................................................................................3-106 Appendix A .............................................................................................................................................. A-1 Appendix B .............................................................................................................................................. B-1 Glossary ...................................................................................................................................... Glossary-1 References.............................................................................................................................. References-1 7 December 2007 iii STP 9-94K13-SM-TG PREFACE This Soldier training publication (STP) is intended for Soldiers holding military occupational specialty (MOS) 94K, Skill Levels (SLs) 1, 2, and 3, their supervisors, trainers, and commanders. It contains a MOS Training Plan providing information needed to plan, conduct, and evaluate unit training, one of the most important jobs of military leaders. It includes standardized training objectives in the form of task summaries that can be used to train and evaluate Soldiers on critical tasks supporting unit missions during wartime. Soldiers holding MOS 94K should have access to this publication. Trainers and first-line supervisors should actively plan for Soldiers’ access, making it available in work areas, unit learning centers, and unit libraries. However, it is not intended for an individual copy to be provided to each MOS holder. All tasks in this publication are trained to peacetime/wartime conditions and apply to the Active Army, the Army National Guard (ARNG)/Army National Guard of the United States (ARNGUS), and the United States Army Reserve (USAR) unless otherwise stated. The proponent of this publication is the United States Army Training and Doctrine Command (USATRADOC). Prepare comments and recommendations using DA Form 2028 (Recommended Changes to Publications and Blank Forms) and forward them directly to— Department of the Army Training Directorate, Fix/Arm Division ATTN: ATCL-TDF 401 First Street Fort Lee, Virginia 23801-1511 iv 7 December 2007 STP 9-94K13-SM-TG CHAPTER 1 Introduction 1-1. General. This Soldier training publication (STP) identifies individual military occupational specialty (MOS) training requirements for Soldiers holding MOS 94K. Commanders, trainers, and Soldiers should use it to plan, conduct, and evaluate individual training in units. The STP is the primary MOS reference for supporting self-development, evaluating MOS proficiency, and training of 94K Soldiers. Commanders employ two primary methods to evaluate Soldiers' proficiency: • Commander's evaluation. Commander’s evaluations are local tests or assessments of Soldiers' performance of MOS-specific and common tasks critical to the unit mission. They may be conducted year-round. • Common task test (CTT). CTT are hands-on tests used to evaluate proficiency on common tasks. Alternate written tests are provided if equipment is not available for hands-on testing. This publication is the Soldier's primary reference to prepare for a commander's evaluation of MOSspecific tasks. It contains task summaries for all critical tasks specific to the MOS and skill level (SL). Commanders and trainers will use this Soldier's manual/trainer's guide (SM/TG) to plan and conduct training and commander's evaluations. Chapter 2, Trainer’s Guide, contains information needed to plan training requirements for this MOS. The trainer's guide • Identifies subject areas in which Soldiers must be trained. • Identifies critical tasks for each subject area. • Specifies where Soldiers are initially trained on each task. • Recommends how often each task should be trained to sustain proficiency. • Recommends a strategy for cross-training Soldiers. • Recommends a strategy for training Soldiers to perform higher-level tasks. Use this STP along with STP 21-1-SMCT (Soldier’s Manual of Common Tasks, Skill Level 1), STP 21-24-SMCT (Soldier’s Manual of Common Tasks, Skill Levels 2-4), Army training and evaluation programs (ARTEPs), FM 25-4 (How to Conduct Training Exercises), FM 25-5 (Training for Mobilization and War), FM 7-0 (Training the Force), and FM 7-1 (Battle Focused Training) to establish effective training plans and programs that integrate Soldier, leader, and collective tasks. 1-2. Task Summaries. Task summaries outline wartime performance requirements for each critical task in the STP. They provide both Soldier and trainer with the information necessary to prepare, conduct, and evaluate critical task training. As a minimum, task summaries include information Soldiers must know and skills they must perform to standard for each task. Following is the task summary format: • Task number. The task number is a 10-digit number that identifies the task and skill level. Include the task number and title in any correspondence relating to the task. • Task title. The task title identifies the action to be performed. 7 December 2007 1-1 STP 9-94K13-SM-TG • Conditions. The task conditions statement describes the field or garrison conditions under which the task will be performed and identifies the equipment, tools, references, job aids, and supporting personnel that the Soldier needs to perform the task in wartime. • Standards. The task standards describe how well and to what level of proficiency the Soldier must perform the task under wartime conditions. Standards are typically expressed in terms of accuracy, completeness, duration, sequence, speed, and tolerance. • Performance steps. This section provides, in detail, what is required on how to perform the task. • Performance measures. This section identifies specific actions that the Soldier must accomplish to complete the task successfully. Performance measures appear in a GO/NO-GO rating format for easy evaluation. Some tasks may also include detailed training information in a Training Information Outline and an Evaluation Preparation Section. The Evaluation Preparation Section indicates necessary modifications to task performance in order to train and evaluate a task that can not be trained to the wartime standard under wartime conditions. It may also include special training and evaluation preparation instructions to accommodate these modifications and any instructions that should be given to the Soldier before evaluation. • References. This section identifies references that provide more detailed explanations of task performance requirements than are given in the task summary. • Warnings. Warnings alert users to the possibility of immediate personal injury or equipment damage. • Notes. Notes provide additional supportive explanations or tips relating to task performance. 1-3. Soldier’s Responsibilities. Each Soldier is responsible for performing individual tasks identified by the first-line supervisor based on the unit’s mission-essential task list (METL). Soldiers must perform tasks to the standards included in the task summary. If Soldiers have questions about tasks or which tasks in this manual they must perform, they are responsible for asking their first-line supervisor for clarification. First-line supervisors know how to perform each task or can direct Soldiers to appropriate training materials, including current field manuals, technical manuals, and Army regulations. Soldiers are responsible for using these materials to maintain performance. They are also responsible for maintaining performance of all common tasks listed in the SMCT at their current skill level and below. Periodically, Soldiers should ask their supervisor or another solder to check their performance to ensure that they can perform the tasks. 1-4. NCO Self-Development and the STP. Self-development is a key component of leader development. Leaders follow planned, progressive, sequential self-development programs developed by the individual noncommissioned officer (NCO) and his or her first-line supervisor to enhance and sustain military competencies. Self-development consists of individual study, research, professional reading, practice, and self-assessment. The self-development concept requires NCOs, as Army professionals, to take responsibility for remaining current in all phases of their MOS. The STP is the NCO’s primary source for maintaining MOS proficiency. In addition, each task contains an evaluation guide (training/evaluation section), which can be used to determine if you can perform the task. Periodically, you should ask your supervisor or another Soldier to evaluate your performance to ensure that you can perform the task to standard. If you have a question about how to do a task or which tasks in this manual you must be able to perform, it is your responsibility to ask the first-line supervisor for clarification. The first-line supervisor knows how to perform each task or can direct you to the appropriate training materials. These include field manuals (FMs) and technical manuals (TMs). It is your responsibility to use these materials to maintain proficiency. Another important resource for self-development is the Army Correspondence Course Program (ACCP). For enrollment information in this program, visit on line through the Army Institute for Professional Development (AIPD) website at http://www.atsc.army.mil/accp/aipdnew.asp. 1-2 7 December 2007 STP 9-94K13-SM-TG 1-5. Commander’s Responsibilities. Commanders must ensure that their unit training plans prepare the unit for war by enabling Soldiers to develop and sustain proficiency in their MOS and skill level tasks. Commanders should design unit training programs to provide individual training for all Soldiers assigned to the unit and to evaluate Soldier proficiency routinely as part of the commander’s evaluation program. The unit training program should also integrate individual training with crew drills and other collective training. The MOS Training Plan provides information on which to base integration, cross-train, train-up, and sustainment training programs. Commanders should use the MOS Training Plan when developing unit training plans. 1-6. Trainer’s Responsibilities. Training is the business of all unit leaders. First-line leaders are the principal trainers in the unit because they directly supervise Soldiers and lead crews, squads, sections, and teams. a. Trainers can use the MOS Training Plan to determine the critical tasks each Soldier is responsible for. They should tell each Soldier which tasks he or she must be able to perform. Trainers should evaluate task performance to determine which tasks each Soldier can or cannot perform to standard. Soldiers who cannot perform a task to standard need further training. This STP helps the trainer do what trainers get paid to do, train. Developing effective training is explained in detail in FM 7-0 and FM 7-1. b. Every task summary in this STP includes performance measures, which trainers may use year-round to determine if Soldiers can perform critical tasks to the specified standards. The performance measures identify what the trainer needs to observe to score a Soldier’s performance. A blank space is provided for the trainer to check either the GO or NO-GO column for each performance measure. Some tasks require the trainer to watch the Soldier perform them (evaluate the process). Other tasks call for the trainer to focus on the results of the Soldier’s performance (evaluate the product). Comments should not be written on the task summary. c. Trainers can monitor the progress of their Soldiers by recording task go/no-go results. Trainers may use Department of the Army (DA) Form 5164-R (Hands-On Evaluation) to record the performance measures a Soldier passed or failed. The form, which may be locally reproduced, applies to all tasks in this STP. Trainers may have DA Form 5164-R overprinted with information unique to their training requirements before reproducing it. See Appendix A of this STP for a sample DA Form 5164-R with instructions. d. Trainers may use DA Form 5165-R (Field Expedient Squad Book) to record hands-on go/no-go results for a group of Soldiers (for example, a crew, section, or squad) having the same MOS and skill level. This form supports conduct of commander’s evaluations, and can be used to record training results gathered in the field during slack time for all MOSs and skill levels. Use of this form is optional. See Appendix B for a sample DA Form 5165-R with instructions. Trainers should work with each Soldier until tasks can be performed to specific task summary standards. 1-7. Training Support. References have been identified for each task to assist in planning and conducting training. A consolidated list of references identified by type, publication number, and title and a comprehensive glossary of acronyms, abbreviations, and definitions are included in this STP. 7 December 2007 1-3 This page intentionally left blank. STP 9-94K13-SM-TG CHAPTER 2 Trainer's Guide 2-1. General. The MOS Training Plan identifies the essential components of a unit training plan for individual training. Units have different training needs and requirements based on differences in environment, location, equipment, dispersion, and similar factors. Therefore, the MOS Training Plan should be used as a guide for conducting unit training and not a rigid standard. The MOS Training Plan consists of two parts. Each part is designed to assist the commander in preparing a unit training plan which satisfies integration, cross training, training up, and sustainment training requirements for Soldiers in this MOS. Part One of the MOS Training Plan shows the relationship of an MOS skill level between duty position and critical tasks. These critical tasks are grouped by task commonality into subject areas. Section I lists subject area numbers and titles used throughout the MOS Training Plan. These subject areas are used to define the training requirements for each duty position within an MOS. Section II identifies the total training requirement for each duty position within an MOS and provides a recommendation for cross training and train-up/merger training. • Duty Position Column. This column lists the duty positions of the MOS, by skill level, which have different training requirements. • Subject Area Column. This column lists, by numerical key (see Section I), the subject areas a Soldier must be proficient in to perform in that duty position. • Cross-Train Column. This column lists the recommended duty position for which Soldiers should be cross-trained. • Train-Up/Merger Column. This column lists the corresponding duty position for the next higher skill level or MOSC the Soldier will merge into on promotion. Part Two lists, by general subject areas, the critical tasks to be trained in an MOS and the type of training required (resident, integration, or sustainment). • Subject Area Column. This column lists the subject area number and title in the same order as Section I, Part One of the MOS Training Plan. • Task Number Column. This column lists the task numbers for all tasks included in the subject area. • Title Column. This column lists the task title for each task in the subject area. • Training Location Column. This column identifies the training location where the task is first trained to Soldier training publications standards. If the task is first trained to standard in the unit, the word “Unit” will be in this column. If the task is first trained to standard in the training base, it will identify, by brevity code (ANCOC, BNCOC, and so on), the resident course where the task was taught. Figure 2-1 contains a list of training locations and their corresponding brevity codes. AIT UNIT ANCOC BNCOC Advanced Individual Training Trained in the Unit Advanced Noncommissioned Officer Course Basic Noncommissioned Officer Course Figure 2-1. Training Locations 7 December 2007 2-1 STP 9-94K13-SM-TG • Sustainment Training Frequency Column. This column indicates the recommended frequency at which the tasks should be trained to ensure Soldiers maintain task proficiency. Figure 2-2 identifies the frequency codes used in this column. DA - daily QT - quarterly WK - weekly Figure 2-2. Sustainment Training Frequency Codes • Sustainment Training Skill Level Column. This column lists the skill levels of the MOS for which Soldiers must receive sustainment training to ensure they maintain proficiency to Soldier’s manual standards. 2-2. Subject Area Codes. Skill Levels 1, 2, and 3 1 EETF Operation & Maintenance 2 EETF Manual Repair 3 LRU and Flight Hardware Testing 4 Maintenance Operations 5 Maintenance Management 2-3. Duty Position Training Requirements. MOS TRAINING PLAN 94K13 PART ONE Duty Position SL 1 APACHE Attack Helicopter Systems Repairer SL 3 APACHE Attack Helicopter Systems Repairer 2-2 Subject Areas 1, 2, and 3 Cross Train N/A Train-up/Merger 4 and 5 N/A N/A N/A 7 December 2007 STP 9-94K13-SM-TG 2-4. Critical Tasks List. MOS TRAINING PLAN 94K13 PART TWO CRITICAL TASKS Task Number Title Training Location Sust Tng Freq Sust Tng SL UNIT WK 1-3 Skill Level 1 Subject Area 1. EETF Operation & Maintenance 093-94K-1002 Perform Preventive Maintenance Checks and Services on 60-kw Power Generator Set 093-94K-1012 Operate Computer Control Group AIT DA 1-3 093-94K-1016 Perform AN/USM-410 Self-Test (ILSST) AIT WK 1-3 093-94K-1017 Perform AN/USM-410 Alignment (SYSCAL) AIT WK 1-3 093-94K-1018 Rebuild System Software AIT QT 1-3 093-94K-1024 Power Up/Down the Test System AIT DA 1-3 093-94K-1109 Repair the EETF Power Distribution System AIT QT 1-3 093-94K-1110 Perform Test System Self-Test (AHST/EOBST) AIT QT 1-3 093-94K-1112 Perform Test System Alignment (AHCAL) AIT QT 1-3 093-94K-1116 Perform Preventive Maintenance Checks and Services (PMCS) on the EETF AIT QT 1-3 093-94K-1120 Prepare the EETF for Operation/Movement AIT QT 1-3 Subject Area 2. EETF Manual Repair 093-94K-1003 Repair the Test Operator's Panel AIT QT 1-3 093-94K-1004 Repair the AC Control Assembly AIT QT 1-3 093-94K-1006 Repair the DC Station AIT QT 1-3 093-94K-1007 Repair the Waveform Generator (WFG) AIT QT 1-3 093-94K-1008 Repair the Pulse Generator (PG) AIT QT 1-3 093-94K-1009 Repair the Low-Speed Voltage Sampling Unit (LSVSU) AIT QT 1-3 093-94K-1010 Repair the High-Speed Voltage Sampling Unit (HSVSU) AIT QT 1-3 093-94K-1011 Repair the Frequency Sampling Unit (FSU) AIT QT 1-3 093-94K-1014 Repair the System Clock SubSystem AIT QT 1-3 093-94K-1015 Repair the RFB Synthesizer AIT QT 1-3 093-94K-1019 Repair the Power Protection Kit MK-2046A/MSM AIT QT 1-3 093-94K-1025 Repair the Programmable Interface Unit (PIU) AIT QT 1-3 093-94K-1026 Repair the Dedicated Interface Unit (DIU) AIT QT 1-3 093-94K-1027 Repair the Interconnect Wiring Harness AIT QT 1-3 093-94K-1101 Repair the Electronics Station AIT QT 1-3 093-94K-1102 Repair the Test Console AIT QT 1-3 093-94K-1103 Repair the Dayside Test Bench AIT QT 1-3 093-94K-1104 Repair the Nightside Test Bench AIT QT 1-3 093-94K-1105 Repair the Interface System AIT QT 1-3 093-94K-1106 Repair the AC Station/Stimulus Subsystem AIT QT 1-3 7 December 2007 2-3 STP 9-94K13-SM-TG CRITICAL TASKS Task Number Title Training Location 093-94K-1107 Repair the Video Subsystem AIT Sust Tng Freq QT Sust Tng SL 093-94K-1108 Repair the Pneumatic Subsystem AIT QT 1-3 093-94K-1130 Repair the Computer Control Group AIT QT 1-3 1-3 Subject Area 3. LRU and Flight Hardware Testing 093-94K-1013 Test AN/USM-410 Line Replaceable Unit (LRU) AIT QT 1-3 093-94K-1113 Perform UUT Testing AIT QT 1-3 Skill Level 3 Subject Area 4. Maintenance Operations 093-SSG-3004 Submit a Quality Deficiency Report (QDR) BNCOC QT 3 093-SSG-3006 Plan Work Flow BNCOC QT 3 093-SSG-3008 Provide Technical Assistance to Repairers BNCOC QT 3 093-SSG-3009 Perform Initial Inspections BNCOC QT 3 093-SSG-3010 Perform Final Inspections BNCOC QT 3 093-SSG-3012 Perform In-Process Inspections BNCOC QT 3 093-SSG-3015 Manage Demand Supported Repair Parts Listed on the Prescribed Load List (PLL) BNCOC QT 3 Subject Area 5. Maintenance Management 093-SSG-3001 Inspect Section/Shop Safety BNCOC QT 3 093-SSG-3002 Manage Section/Shop Security BNCOC QT 3 093-SSG-3003 Maintain Section/Shop Calibration Program BNCOC QT 3 093-SSG-3005 Submit Equipment Improvement Recommendation (EIR) BNCOC QT 3 093-SSG-3007 Direct Performance of Preventive Maintenance BNCOC QT 3 093-SSG-3011 Write a Standing Operating Procedure (SOP) BNCOC QT 3 093-SSG-3013 Maintain Property Accountability BNCOC QT 3 093-SSG-3014 Assess Battlefield Damage BNCOC QT 3 093-SSG-3016 Monitor Bench Stock Operations BNCOC QT 3 093-SSG-3017 Monitor Shop Stock Operations BNCOC QT 3 093-SSG-3019 Inspect Maintenance Support Team Operations BNCOC QT 3 093-SSG-3020 Inspect Maintenance Reporting and Management Data BNCOC QT 3 093-SSG-3021 Review SAMS-1 Reports BNCOC QT 3 2-4 7 December 2007 STP 9-94K13-SM-TG CHAPTER 3 MOS/Skill Level Tasks Skill Level 1 Subject Area 1: EETF Operation & Maintenance Perform Preventive Maintenance Checks and Services on 60-kw Power Generator Set 093-94K-1002 Conditions: Perform this task in a contemporary operational environment given a 94K, a 60-kw power generator set, an oil sample kit, basic issue items, troop-installed items, and items authorized by TM 5-6115-545-12, Appendix B, DA Form 2404 (Equipment Inspection and Maintenance Worksheet), DA Form 2407, (Maintenance Request), DA Form 2407-1 (Maintenance Request Continuation Sheet), and DA Pamphlet 750-8. Standards: Operator/crew performs a PMCS on the 60-kw power generator set two hours. All safety precautions are observed. Performance Steps DANGER: High voltage is produced when the 60-kw generator set is operated. Death or severe burns may result if caution is not observed. Do not operate the generator until the ground terminal stud has been connected to a suitable ground. 1. Perform before-operations maintenance. (Reference TM 5-6115-545-12) a. Log all actions/deficiencies on DA Form 2404. b. Give form to supervisor at the end of each shift. 2. Set the controls for operation in accordance with TM 5-6115-545-12. a. Close DS control circuit breaker. b. Check fuel level on fuel level gauge by placing START-RUN-STOP switch in RUN position and BATTLE SHORT switch in ON position. c. Check that low oil pressure under volt and under frequency fault indicators light. d. Press test or reset switch and check that all fault indicators light. e. Release test or reset switch and check that step (c) indication remains in effect. f. Return both switches to the STOP and OFF position, respectively. g. Make sure shutters on radiator end of the engine generator set are not manually locked open, and check that shutters open and close freely when actuated by shutter manual control handle. h. Close all doors except those on control cubicle end of engine generator set. i. Fasten control cubicle doors and doors below control cubicle in open position using door latches. j. Connect battery terminal minus (-) to the ground. 3. Start the generator. a. Crank engine by placing START-RUN-STOP switch in START position. CAUTION: Do not crank more than 15 seconds at a time. Allow at least 15 seconds to elapse between crankings. b. When air temperature is below plus 40 degrees F, engine ether primer may be required. To use ether primer, momentarily place engine primer switch in the ON position and release while cranking the engine. Each time the switch is cycled; one metered shot of ether is injected into engine air intake system. c. After engine starts, continue to hold START-RUN-STOP switch in START position until oil pressure gauge reading is above 20 pounds per square inch (psi) and main generator voltage is normal. AC voltmeter should indicate 208/416 volts if amps-volts selector switch is set at L1 L2, L2-L3, or L1-L3. 7 December 2007 3-1 STP 9-94K13-SM-TG Performance Steps d. Position voltage adjust rheostat as required to obtain proper voltage output (440VAC). e. Adjust manual throttle control to obtain 60 Hz on frequency meter. f. Allow engine to warm up to normal operating temperature (100 to 150 degrees F) with no load applied. CAUTION: To prevent engine carbon deposits, do not run engine-generator sets for more than five minutes at governed speed without load. g. Reset fault indicator lights by pressing test or reset switch. If fault indicators are extinguished after being reset, proceed with step (h). If any fault indicator lights up, the indicated fault must be corrected before proceeding. h. Close main AC contactor by momentarily placing CKT BKR switch in CLOSE position. Momentarily placing CKT BKR switch in OPEN position will open the AC contactor. 4. Perform during-operations maintenance. (Reference TM 5-6115-545-12) a. Log all actions/deficiencies on DA Form 2404. b. Give form to supervisor at the end of each shift. 5. Operate the generator. a. Observe engine for normal indications. b. Observe generator instruments for normal indications. c. Refuel and add oil to generator as required; annotate on DA Form 2404. 6. Shutdown the generator. a. Open main AC contactor by momentarily placing CKT BRK switch in OPEN position. b. Allow three minutes to elapse after performing step (a), and place START-RUN-STOP switch in STOP position. c. After engine stops, remove DC control power by opening DC CONTROL CIRCUIT BREAKER. 7. Perform after-operations maintenance. (Reference TM 5-6115-545-12) a. Log all actions/deficiencies on DA Form 2404. b. Give form to supervisor at the end of each shift. Performance Measures DANGER: High voltage is produced when the 60-kw generator set is operated. Death or severe burns may result if caution is not observed. Did not operate the generator until the ground terminal stud had been connected to a suitable ground. GO NO-GO 1. Performed before-operations maintenance. (Reference TM 5-6115-545-12) —— —— 2. Set the controls for operation in accordance with TM 5-6115-545-12. —— —— 3. Started the generator. —— —— 4. Performed during-operations maintenance. (Reference TM 5-6115-545-12) —— —— 5. Operated the generator. —— —— 6. Shutdown the generator. —— —— 7. Performed after-operations maintenance. (Reference TM 5-6115-545-12) —— —— Evaluation Guidance: Score the Soldier GO if all performance measures are passed (P). Score the Soldier NO-GO if any performance measure is failed (F). If the Soldier fails any performance measure, show what was done wrong and how to do it correctly. 3-2 7 December 2007 STP 9-94K13-SM-TG References Required DA FORM 2404 DA FORM 2407 DA PAM 750-8 TM 5-6115-545-12 7 December 2007 Related DA FORM 2407-1 3-3 STP 9-94K13-SM-TG Operate Computer Control Group 093-94K-1012 Conditions: Perform this task in a contemporary operational environment given a 94K, an Electronic Equipment Test Facility (EETF), TM 11-6625-3085-12-1, and a generator set or commercial power. Standards: Start the computer from disk, set and read the time of day in accordance to TM 11-6625-3085-12-1. All safety precautions are observed. Performance Steps 1. Ensure power up to full power had been accomplished in accordance with TM 11-6625-3085-12-1. NOTE: OBSERVE ALL WARNING STATEMENTS AND NOTES a. On DC station, set controls and indicators. b. At Power Station A12, set circuit breakers and switches. c. Set the Peculiar Equipment circuit breakers and switch settings. d. Power-up E/O Subsystem. 2. Follow procedures in accordance with TM 11-6625-3085-12-1, paragraphs 2-3-88, 2-3-89, and 2-3-90 or as directed by NCOIC. a. Operational procedures cover use of the Test Station in testing a UUT. b. Check that computer start from disk (paragraph 2-3-86) has been performed. c. Log On. d. Familiarize yourself with the Virtual Test Operator's Control Panel (VTOCP) and Run Time System (RTS) Status Header. e. Warm-up. (1) You must wait at least two hours after turning on AC and DC standards before you go ahead with warm-up. (2) You must also wait at least 15 minutes after turning on UUT station. (3) If a WARNING appears on VDT and says that alignment modules require realignment, do all of the warm up program and then align modules. After aligning modules, run warm-up program again starting with step 4. (4) Do warm up self test program by entering "TEST WARM-UP" and pressing Return on keyboard. f. UUT Test Procedures. (1) You must obtain a Test Program Set (TPS) to test a UUT. This contains: (a) A test program on magnetic tape. An interconnection device (ICD) that mounts on PIU Station and accepts UUT. UUT to Test Station interconnection cables. Correct technical manual (TM) for UUT. (b) An interconnection device (ICD) that mounts on PIU Station and accepts UUT. (c) UUT to Test Station interconnection cables. (d) Correct technical manual (TM) for UUT. (2) Once you complete UUT Testing enter "Bye" to log off as operator. 3. Perform proper data handling procedures. a. Load AOS/VS Dump files from Tape to Disk. b. Dump files from Disk to Tape in AOS/AV format. CAUTION: When a tape file number is entered, it becomes the last file on the tape. Previous data at that file number and after will be lost. c. Load RDOS Dump files from Tape to Disk. (1) After mounting tape, ensure you are logged on to the system. Then choose proper directory following in accordance with TM 11-6625-3085-12-1. d. Dump files from disk to Tape in RDOS format. CAUTION: When a tape file number is entered in following steps, that file becomes the last file on tape. Previous data at that file number and before it will be lost. 3-4 7 December 2007 STP 9-94K13-SM-TG Performance Steps 4. Perform Command Line Interpreter (CLI) Command Descriptions in accordance with TM 11-6625-3085-12-1. a. Review CLI commands before operating system in accordance with TM 11-6625-3085-12-1. b. CLI subprogram is a system that allows the operator to "talk" with the computer. An error message is shown on the VDT if the command is not correct. After each command is entered, you must press Return on the keyboard. Commands are entered on the keyboard and must agree with certain rules. Some commands are put in alone, while others have one or more "arguments" following them. These added letters or numbers modify the command. Besides arguments, commands may contain "global" or "local" switches. Depending on the command you use, you may be allowed to insert global and/or local switches. CLI will not act on switches that are not allowed. Switches always have a slash (/) before them. 5. Apply composite risk management and ensure all safety procedures and precautions are observed during any and all EETF operations Performance Measures GO NO-GO 1. Ensured power up to full power had been accomplished in accordance with TM 11-6625-3085-12-1. —— —— 2. Followed procedures in accordance with TM 11-6625-3085-12-1, paragraphs 2-3-88, 2-3-89, and 2-3-90 or as directed by NCOIC. —— —— 3. Performed proper data handling procedures. a. Loaded AOS/VS Dump files from Tape to Disk. b. Dumped files from Disk to Tape in AOS/AV format. c. Loaded RDOS Dump files from Tape to Disk. d. Dumped files from Disk to Tape in RDOS format. —— —— 4. Performed Command Line Interpreter (CLI) Command Descriptions in accordance with TM 11-6625-3085-12-1. —— —— 5. Applied composite risk management and ensured all safety procedures and precautions were observed during any and all EETF operations. —— —— Evaluation Guidance: Score the Soldier GO if all performance measures are passed (P). Score the Soldier NO-GO if any performance measure is failed (F). If the Soldier fails any performance measure, show what was done wrong and how to do it correctly. References Required DA PAM 750-8 TM 11-6625-3085-12-1 7 December 2007 Related 3-5 STP 9-94K13-SM-TG Perform AN/USM-410 Self-Test (ILSST) 093-94K-1016 Conditions: Perform this task in a contemporary operational environment given a 94K, an Electronic Equipment Test Facility (EETF), TM 11-6625-3085-12-1, and a generator set or commercial power. Standards: A complete self-test of the AN/USM-410 is performed in accordance with TM 11-6625-3085-12-1. All safety precautions are observed. Performance Steps 1. Ensure power up to full power has been accomplished in accordance with TM 11-6625-3085-12-1. 2. Perform selected procedures in accordance with TM 11-6625-3085-12-1. 3. Select Selftest Program and follow self-test procedures as shown on the VDT. 4. Perform appropriate manual troubleshooting tasks as necessary. 5. Perform UUT tests in accordance with TM 11-6625-3085-12-1 as necessary. 6. Re-run self-test as necessary (repeat steps 2 thru 5) until test station is fully operational. 7. Complete Selftest Sequence. 8. Observe all safety precautions. Performance Measures GO NO-GO 1. Ensured power up to full power had been accomplished in accordance with TM 11-6625-3085-12-1. —— —— 2. Performed selected procedures in accordance with TM 11-6625-3085-12-1. —— —— 3. Selected Selftest Program, and followed self-test procedures as shown on the system VDT. —— —— 4. Performed appropriate manual troubleshooting tasks as necessary. —— —— 5. Performed UUT tests in accordance with TM 11-6625-3085-12-1. —— —— 6. Re-ran self-test as necessary (repeated steps 2 thru 5) until test station was fully operational. —— —— 7. Completed Selftest Sequence. —— —— 8. Observed all safety precautions. —— —— Evaluation Guidance: Score the Soldier GO if all performance measures are passed (P). Score the Soldier NO-GO if any performance measure is failed (F). If the Soldier fails any performance measure, show what was done wrong and how to do it correctly. References Required DA PAM 750-8 TM 11-6625-3085-12-1 3-6 Related 7 December 2007 STP 9-94K13-SM-TG Perform AN/USM-410 Alignment (SYSCAL) 093-94K-1017 Conditions: Perform this task in a contemporary operational environment given a 94K, an Electronic Equipment Test Facility (EETF), TM 11-6625-3085-12-1, TB 11-6625-2773-35, and a generator set or commercial power. Standards: The EETF is aligned within the time required by the SYSCAL software. Performance Steps 1. Ensure power up to full power is accomplished in accordance with TM 11-6625-3085-12-1, paragraph 2-3-74. 2. Follow procedures in accordance with TB 11-6625-2773-35, Section IV or as directed by NCOIC to align the EETF AN/USM-410. 3. Execute the alignment module as indicated on system VDT or as directed by NCOIC. 4. Repeat step 3 for each module requiring alignment. 5. Perform back-up procedures in accordance with TB 11-6625-2773-35. 6. Observe all safety precautions. Performance Measures GO NO-GO 1. Ensured power up to full power had been accomplished in accordance with TM 11-6625-3085-12-1, paragraph 2-3-74. —— —— 2. Followed procedures in accordance with TB 11-6625-2773-35, Section IV or as directed by NCOIC. —— —— 3. Executed the alignment module as indicated on VDT or as directed by NCOIC. —— —— 4. Repeated step 3 for each module requiring alignment. —— —— 5. Performed back-up procedures. —— —— 6. Observed all safety precautions. —— —— Evaluation Guidance: Score the Soldier GO if all performance measures are passed (P). Score the Soldier NO-GO if any performance measure is failed (F). If the Soldier fails any performance measure, show what was done wrong and how to do it correctly. References Required DA PAM 750-8 TB 11-6625-2773-35 TM 11-6625-3085-12-1 7 December 2007 Related 3-7 STP 9-94K13-SM-TG Rebuild System Software 093-94K-1018 Conditions: Perform this task in a contemporary operational environment given a 94K, an Electronic Equipment Test Facility (EETF), TM 11-6625-3085-12-1, a generator set or commercial power, and system software tapes. Standards: System software is rebuilt and system disk is prepared for operation in accordance with TM 11-6625-3085-12-1. Performance Steps NOTE: Perform this task only under the following conditions: a. When a new system software tape is received. b. When told to rebuild DPJO as a result of troubleshooting. c. When a new disk drive is installed as a replacement for a disk with a suspected problem. 1. Perform procedures in accordance with TM 11-6625-3085-12-1 or as directed by special instructions attached to new system software tapes. 2. Format the disk. 3. Load the microcode. 4. Install the Advanced Operating System/Virtual Storage (AOSNS) system software. 5. Load the system utilities and files. 6. Perform Equipment Setup. NOTE: Ensure BACKUP CAL and ABACKUP CAL have been performed and user files have been backed up, if required (TB 11-6625-3085-50). 7. Ensure that the Test Station is in the Power-up to Computer Control On condition and the computer is initialized to enable an automatic program load (boot) procedure. 8. Follow Disk Preparation Procedure in accordance with TM 11-6625-3085-12-1. 9. Restore System Calibration Files upon completion of task. NOTE: After bringing up the operating system, a USERA account must be authorized by the operator in order to restore calibration files. 10. Observe all safety precautions. 3-8 7 December 2007 STP 9-94K13-SM-TG GO NO-GO 1. Performed procedures in accordance with TM 11-6625-3085-12-1, or as directed by special instructions attached to new system software tapes. —— —— 2. Formatted the disk. —— —— 3. Loaded the microcode. —— —— 4. Installed the Advanced Operating System/Virtual Storage (AOSNS) system software. —— —— 5. Loaded the system utilities and files. —— —— 6. Performed Equipment Setup. —— —— 7. Ensured that the Test Station was in the Power-up to Computer Control On condition and the computer was initialized to enable an automatic program load (boot) procedure. —— —— 8. Followed Disk Preparation Procedure in accordance with TM 11-6625-3085-12-1. —— —— 9. Restored System Calibration Files upon completion of task. —— —— —— —— Performance Measures 10. Observed all safety precautions. Evaluation Guidance: Score the Soldier GO if all performance measures are passed (P). Score the Soldier NO-GO if any performance measure is failed (F). If the Soldier fails any performance measure, show what was done wrong and how to do it correctly. References Required DA PAM 750-8 TM 11-6625-3085-12-1 7 December 2007 Related 3-9 STP 9-94K13-SM-TG Power Up/Down the Test System 093-94K-1024 Conditions: Perform this task in a contemporary operational environment given a 94K, an Electronic Equipment Test Facility (EETF), TM 11-6625-3085-12-1, TM 11-6625-3081-23-1, and a generator set or commercial power. Standards: The EETF test system is powered up/down in accordance with TM 11-6625-3085-12-1. All safety precautions are observed. Performance Steps 1. Perform initial switch setting procedures in accordance with TM 11-6625-3085-12-1. NOTE: Set the Electronic Station initial switch settings. (E/O SUBSYSTEM) 2. Perform power-up to fans-on procedures in accordance with TM 11-6625-3085-12-1. NOTE: Verify System Power-up initial switch settings have been completed. a. At test van Power Distribution Panel, verify circuit breakers are set. b. Set the Core Subsystem circuit breakers and switches. c. Set the Peculiar subsystem switches. 3. Perform power-up to standby power procedures in accordance with TM 11-6625-3085-12-1. a. Observe Van Temperature indicator on Facility Control panel for correct temperature. b. Verify Core Subsystem circuit breaker and switch settings. c. Verify E/O Pneumatic System is deflated. NOTE: OBSERVE ALL WARNINGS. d. Set the E/O Equipment circuit breakers and preliminary switches. 4. Perform power-up to computer control-on procedures in accordance with TM 11-6625-3085-12-1. NOTE: Verify that Power-up to Stand-by Power procedure has been completed. a. Set switch and controls on VDT. b. Set controls and indicators on LINE PRINTER. c. Set controls and indicators on control station - tape transport. d. Set the Control Station - Disk Drive power- "on-off to "on". e. On control station - computer, move the Lock 0-1 (off/on) switch to 0. NOTE: If powering up after disk replacement or a new system tape has been received, proceed to step 6, otherwise proceed to step 7. f. Perform PREPARATION OF SYSTEM DISK. g. Perform COMPUTER START-UP FROM DISK. 5. Perform computer start-up from disk procedures in accordance with TM 11-6625-3085-12-1. a. General: T he following paragraphs describe computer system start up with both the computer powered down and the computer powered up. b. Equipment Setup: Be sure that the test station is in the computer control group power on condition. c. Complete computer start up procedure from computer powered down. d. Complete computer start up procedure from computer power on. 6. Perform power-up to full power procedures in accordance with TM 11-6625-3085-12-1. NOTE: Verify that POWER UP TO COMPUTER CONTROL ON procedures has been completed. a. On DC station, set controls and indicators. b. At POWER STATION A12, set circuit breakers and switches. c. Verify and set Peculiar Equipment Circuit Breaker and Switches. d. Power-up the E/O Subsystem. NOTE: Allow equipment to warm up for 30 minutes before use. If the PMT controller 1A7 is to be used, let equipment warm up for an additional 90 minutes. 3-10 7 December 2007 STP 9-94K13-SM-TG Performance Steps 7. Perform power-down to computer control-on procedures in accordance with TM 11-6625-3085-12-1. a. Set CORE subsystem circuit breakers. NOTE: Disconnect all devices that may be connected to power supplies. b. Power down computer. NOTE: If in a MENU mode, power down using step 2b. If steps 2a (l) thru 2a (4) cannot be performed, proceed to step 2a (5). c. At power station A12, set switches and circuit breakers. d. Set E/O equipment circuit breakers and switches. e. At AC station All; set power switches to OFF in the sequence listed. f. On AC station - AC POWER CONTROL panel, set circuit breakers. 8. Perform power-down to stand-by power procedures in accordance with TM 11-6625-3085-12-1. NOTE: At control station, set controls and indicators. 9. Perform power-down to full power-off procedures in accordance with TM 11-6625-3085-12-1. NOTE: Verify that POWER DOWN TO STANDBY POWER procedure has been completed. a. Set CORE subsystem circuit breaker and switches. b. At POWER DISTRIBUTION PANEL, set circuit breakers. 10. Observe all safety precautions. Performance Measures GO NO-GO 1. Performed initial switch setting procedures in accordance with TM 11-6625-3085- 12-1, paragraph 2-3-69. —— —— 2. Performed Power-up to Fans-on procedures in accordance with TM 11-6625- 3085-12-1, paragraph 2-3-70. —— —— 3. Performed power-up to standby power procedures in accordance with TM 11-6625-3085-12-1, paragraph 2-3-71. —— —— 4. Performed power-up to computer control-on procedures in accordance with TM 11-6625-3085-12-1, paragraph 2-3-72. —— —— 5. Performed Computer Start-up from Disk procedures in accordance with TM 11-6625-3085-12-1, paragraph 2-3-86. —— —— 6. Performed power-up to full power procedures in accordance with TM 11-6625- 3085-12-1, paragraph 2-3-74. —— —— 7. Performed power-down to computer control-on procedures in accordance with TM 11-6625-3085-12-1, paragraph 2-3-76. —— —— 8. Performed power-down to stand-by power procedures in accordance with TM 11-6625-3085-12-1, paragraph 2-3-77. —— —— 9. Performed power-down to full power-off procedures in accordance with TM 11-6625-3085-12-1, paragraph 2-3-78 —— —— —— —— 10. Observed all safety precautions. Evaluation Guidance: Score the Soldier GO if all performance measures are passed (P). Score the Soldier NO-GO if any performance measure is failed (F). If the Soldier fails any performance measure, show what was done wrong and how to do it correctly. 7 December 2007 3-11 STP 9-94K13-SM-TG References Required DA PAM 750-8 TM 11-6625-3081-23-1 TM 11-6625-3085-12-1 3-12 Related 7 December 2007 STP 9-94K13-SM-TG Repair the EETF Power Distribution System 093-94K-1109 Conditions: Perform this task in a contemporary operational environment given a 94K, an EETF with a faulty power distribution system, a generator set or commercial power, tools, materials, personnel, TM 11-6625-3085-12-1, TM 11-6625-3085-30-3, and TM 11-6625-3085-30-4. Standards: The fault in the EETF's power distribution system is located and corrected in accordance with TM 11-6625-3085-30-3 and TM 11-6625-3085-30-4. All safety precautions are observed. Performance Steps 1. Perform test van maintenance power-down/power-up procedures in accordance with TM 11-6625 3085-30-3, Chapter 9, Section 1. a. Perform Power Down procedures. (1) Lift weather cover from entry panel by turning 18 twist fasteners. Roll cover to top of panel and secure with hook and loop straps. (2) Open covers on ECS MAIN and TECH MAIN circuit breakers (2) and (3) and set to OFF. Attach maintenance tags to circuit breakers. (3) Set ECS MAIN CONTROL and TECH MAIN CONTROL circuit breakers (4 and 5) to OFF. Attach maintenance tags to circuit breakers. b. Perform Power Up procedures. (1) Set ECS MAIN CONTROL and TECH MAIN CONTROL circuit beakers, (4 and 5) to ON. Remove maintenance tags. (2) Open covers on ECS MAIN and TECH MAIN circuit breakers (2) and (3) and set to ON. To set these breakers to ON first press fully down into OFF position and then up to ON position. Remove maintenance tags. (3) Secure weather cover if necessary. (4) Perform system power up procedure (TM 11-6625-3085-12-1). 2. Perform support van maintenance power-down/power-up procedures in accordance with TM 11-6625-3085-30-4, Chapter 10, Section 1. a. Perform Power Down procedures. (1) Raise cover (1) on support van POWER ENTRY PANEL (2). (a) Release and fold back self fastening strip (3) at left side of panel. (b) Release two latches (4) securing POWER ENTRY PANEL cover. (2) Set MAIN circuit breaker (5) to OFF (down). NOTE: If Test Van and Support Van are deployed in normal EETF configuration, follow steps 3 and 4. If Support Van is deployed alone, follow steps 5 and 6. (3) Release weather cover (6) on Test Van power entry panel. Turn 18 twists - turn fasteners (7) and lift cover off. Roll up cover to top of panel and secure with Velcro strips. (4) Set SUPPORT VAN POWER - GENERATOR NO. 1 (8) and SUPPORT VAN POWER GENERATOR NO. 2 (9) circuit breakers to OFF (down). Attach tags to prevent turn-on during maintenance. (5) Set ECU #3 circuit breaker and ECU #4 circuit breaker to OFF. (6) Power down generator (refer to TM 5-6115-545-12). b. Perform Power Up procedures. NOTE: If Test Van and Support Van are deployed as EETF, follow step 1 thru 6. If Support Van is deployed alone follow steps and 8. (1) On test van power entry panel, set SUPPORT VAN POWER - GENERATOR NO. 1 (8) AND SUPPORT VAN POWER - GENERATOR NO. 2 (9) circuit breakers to ON (UP). Remove maintenance tags. (2) Secure weather cover (6) on panel if required. Release self-fastening strips, roll down cover and secure with twist-turn fasteners (7). (3) At support van power entry panel (2), verify that CONTROL circuit breaker is ON (up). Then set MAIN circuit breaker (5) to ON. 7 December 2007 3-13 STP 9-94K13-SM-TG Performance Steps (4) At support van power entry panel, set ECU #3 circuit breaker and ECU #4 circuit breaker to ON. (5) Close panel cover (1) and secure with two latches (4). (6) Secure self-fastening strip (3) at left of panel. (7) Power up generator (refer to TM 5-6115-545-12). (8) Perform steps 4, 5, 6 and 7. 3. Select the appropriate fault isolation procedures for observed malfunction from Section 2 of TM 11-6625-3085-30-3, Chapter 9 or TM 11-6625-3085-30-4, Chapter 10. 4. Follow fault isolation flow chart procedures for observed malfunction. 5. Repair or replace faulty component(s) in accordance with TM 11-6625-3085-30-3 or TM 11-6625-3085-30-4. 6. Restore EETF for operation under usual conditions. 7. Observe all safety precautions. Performance Measures GO NO-GO 1. Performed test van maintenance power-down/power-up procedures in accordance with TM 11-6625-3085-30-3, Chapter 9, Section 1. a. Performed Power Down procedures. b. Performed Power Up procedures. —— —— 2. Performed support van maintenance power-down/power-up procedures in accordance with TM 11-6625-3085-30-4, Chapter 10, Section 1. a. Performed Power Down procedures. b. Performed Power Up procedures. —— —— 3. Selected the appropriate fault isolation procedures for observed malfunction from Section 2 of TM 11-6625-3085-30-3, Chapter 9, or TM 11-6625-3085-30-4, Chapter 10. —— —— 4. Followed fault isolation Flow chart procedures for observed malfunction. —— —— 5. Repaired or replaced faulty component(s) in accordance with TM 11-6625-3085 30-3 or TM 11-6625-3085-30-4. —— —— 6. Restored EETF for operation under usual conditions. —— —— 7. Observed all safety precautions. —— —— Evaluation Guidance: Score the Soldier GO if all performance measures are passed (P). Score the Soldier NO-GO if any performance measure is failed (F). If the Soldier fails any performance measure, show what was done wrong and how to do it correctly. References Required DA PAM 750-8 TM 11-6625-3085-30-3 TM 11-6625-3085-30-4 3-14 Related TM 11-6625-3085-12-1 7 December 2007 STP 9-94K13-SM-TG Perform Test System Self-Test (AHST/EOBST) 093-94K-1110 Conditions: Perform this task in a contemporary operational environment given a 94K an EETF, a generator set or commercial power, TM 11-6625-3085-12-1, and TM 11-6625-3081-23-1. Standards: A complete self-test of the Peculiar/Electro-Optical Bench is performed in accordance with TM 11-6625-3085-12-1 and TM 11-6625-3081-23-1. All safety precautions are observed. Performance Steps 1. Ensure power up to full power has been accomplished in accordance with TM 11-6625-3085-12-1, paragraph 2-3-74. 2. Perform selected procedures in accordance with TM 11-6625-3085-12-1. a. Select Selftest Program. b. Run Selftest Programs, as necessary. c. Run AHST (Peculiar) Selftest. d. Complete Selftest Sequence. 3. Follow self-test procedures as shown on the VDT. 4. Perform appropriate manual troubleshooting tasks as necessary. 5. Perform UUT tests in accordance with TM 11-6625-3085-12-1, paragraph 3-1-2 as necessary. a. Isolate Interface CCAs. b. Use the Core Accessories (Test Kit 1) Selftest. 6. Re-run self-test as necessary (repeated steps 2 thru 5) until test station was fully operational. 7. Observe all safety precautions. Performance Measures GO NO-GO 1. Ensured power-up to full power was accomplished in accordance with TM 11-6625-3085-12-1. —— —— 2. Performed selected procedures in accordance with TM 11-6625-3085-12-1. a. Selected Selftest Program. b. Ran Selftest Programs, as necessary. c. Ran AHST (Peculiar) Selftest. d. Completed Selftest Sequence. —— —— 3. Followed self-test procedures as shown on the VDT. —— —— 4. Performed appropriate manual troubleshooting tasks as necessary. —— —— 5. Performed UUT tests in accordance with TM 11-6625-3085-12-1. a. Isolated Interface CCAs. b. Used the Core Accessories (Test Kit 1) Selftest. —— —— 6. Re-ran self-test as necessary (repeated steps 2 thru 5) until test station was fully operational. —— —— 7. Observed all safety precautions. —— —— Evaluation Guidance: Score the Soldier GO if all performance measures are passed (P). Score the Soldier NO-GO if any performance measure is failed (F). If the Soldier fails any performance measure, show what was done wrong and how to do it correctly. 7 December 2007 3-15 STP 9-94K13-SM-TG References Required TM 11-6625-3081-23-1 TM 11-6625-3085-12-1 3-16 Related DA PAM 750-8 7 December 2007 STP 9-94K13-SM-TG Perform Test System Alignment (AHCAL) 093-94K-1112 Conditions: Perform this task in a contemporary operational environment given a 94K, an EETF, a generator set or commercial power, TM 11-6625-3085-12-1, TB 11-6625-2773-35, and TB 11-6625-3085-50. Standards: The EETF is aligned within the time required by the AHCAL software. Performance Steps 1. Ensure power up to full power has been accomplished in accordance with TM 11-6625-3085-12-1, paragraph 2-3-74. 2. Follow procedures in accordance with TB 11-6625-3085-50, paragraph 4-1, or as directed by NCOIC. 3. Execute the alignment module as directed by NCOIC. 4. Repeat step 3 for each module requiring alignment. 5. Perform back-up procedures in accordance with TB 11-6625-3085-50, paragraph 4-9-d. 6. Observe all safety precautions. Performance Measures GO NO-GO 1. Ensured power up to full power was accomplished in accordance with TM 11-6625-3085-12-1, paragraph 2-3-74. —— —— 2. Followed procedures in accordance with TB 11-6625-3085-50, paragraph 4-1 or as directed by NCOIC. —— —— 3. Executed the alignment module as directed by NCOIC. —— —— 4. Repeated step 3 for each module requiring alignment. —— —— 5. Performed back-up procedures in accordance with TB 11-6625-3085-50, paragraph 4-9-d. —— —— 6. Observed all safety precautions. —— —— Evaluation Guidance: Score the Soldier GO if all performance measures are passed (P). Score the Soldier NO-GO if any performance measure is failed (F). If the Soldier fails any performance measure, show what was done wrong and how to do it correctly. References Required DA PAM 750-8 TB 11-6625-3085-50 TM 11-6625-3085-12-1 7 December 2007 Related TB 11-6625-2773-35 3-17 STP 9-94K13-SM-TG Perform Preventive Maintenance Checks and Services (PMCS) on the EETF 093-94K-1116 Conditions: Perform this task in a contemporary operational environment given a 94K, an EETF, a generator set or commercial power, tools, cleaning materials, and references as listed in TM 11-6625 3085-12-1, DA Form 2404 (Equipment Inspection and Maintenance Worksheet), DA Form 2407 (Maintenance Request), and DA Pamphlet 750-8. Standards: Perform PMCS procedures of the EETF in accordance with TM 11-6625-3085-12-1. All safety precautions are observed. Performance Steps 1. Observe all Warnings and Safety Precautions in accordance with TM 11-6625-3085-12-1, PMCS Table. 2. Perform (B/D/A) PMCS on a daily basis before, during, and after operations. a. Perform the following before operation (B) checks: (1) Item # 23 Printer A11 (Self Test). (2) Item #24 VDT A8 (Self Test). (3) Item #29 Run ILSSURVEY, PTEST, and AHSURVEY self test programs. b. Perform the following during operation (D) checks: (1) Item # 9 Van Leveling (Test Van, Support Van). (2) Item # 10 Tarpaulin Straps (Test Van). (3) Item # 11 Passageway Velcro Fasteners (Support Van). (4) Item # 15 Tape Transport A3A1. c. Perform after operation (A) check on item #22 PIU Station. 3. Perform (W) PMCS on a weekly basis or as needed to ensure proper operation of the EETF. a. Perform the following Weekly checks: (1) Item # 14 ECU Filters and Moisture Drainage (Test Van, Support Van). (2) Item # 16 Core Test Subsystem Fans. (3) Item # 17 Printer A11 (Air Filters). (4) Item # 18 Test Accessories (Torque Wrenches). (5) Item # 25 Core Test Subsystem (Self Test). 4. Perform (M) PMCS on a monthly basis or as needed to ensure proper operation of the EETF. a. Perform the following Monthly checks: (1) Item # 1 Cleaning Equipment. (2) Item # 2 Switch, Knobs, Plugs, Cables, Indicators (Test Van, Support Van). (3) Item # 3 AC Station A11 (Service Air Filters). (4) Item # 6 Service Neutral Density Filters (Part of Photometer). (5) Item # 7 AC Station A11 (Operation of Air Indicators). (6) Item # 8 Interface Station A13. (7) Item # 12 Emergency Lights Battery Chargers (Test Van, Support Van). (8) Item # 19 AC Standards A2A10 (Service Air Filters). (9) Item # 20 Core Test Subsystem (Fan Filters). (10) Item # 21 Emergency Off Switch. (11) Item # 26 Storage Container Desiccants (Support Van). (12) Item # 27 Apply thin coat of silicone lubricant (E-13) to expansible sides, rubber seals and door seals. (13) Item # 28 Smoke Detectors (Both Vans). 5. Follow all procedures in accordance with TM 11-6625-3085-12-1, PMCS Table. 6. Complete DA Form 2404 and DA Form 2407, if needed, in accordance with TM 11-6625-3085-12-1. 3-18 7 December 2007 STP 9-94K13-SM-TG Performance Measures GO NO-GO 1. Observed all Warnings and Safety Precautions in accordance with TM 11-6625-3085-12-1, PMCS Table. —— —— 2. Performed (B/D/A) PMCS on a daily basis before, during, and after operations. —— —— 3. Performed (W) PMCS on a weekly basis or as needed to ensure proper operation of the EETF. —— —— 4. Performed (M) PMCS on a Monthly basis or as needed to ensure proper operation of the EETF. —— —— 5. Followed all procedures in accordance with TM 11-6625-3085-12-1 PMCS Table. —— —— 6. Completed DA Form 2404 and DA Form 2407, if needed in accordance with TM 11-6625-3085-12-1. —— —— Evaluation Guidance: Score the Soldier GO if all performance measures are passed (P). Score the Soldier NO-GO if any performance measure is failed (F). If the Soldier fails any performance measure, show what was done wrong and how to do it correctly. References Required DA PAM 750-8 TM 11-6625-3085-12-1 7 December 2007 Related 3-19 STP 9-94K13-SM-TG Prepare the EETF for Operation/Movement 093-94K-1120 Conditions: Perform this task in a contemporary operational environment given a 94K, an EETF, a generator set or commercial power, tools, materials, personnel, and references as listed in TM 11-6625 3085-12-1. NOTE: This is a team task. Standards: Complete deployment/teardown procedures of the EETF in accordance with TM 11-6625-3085-12-1. All safety precautions are observed. Performance Steps 1. Deploy the EETF. a. Follow the "Deployment of EETF" procedures and review the "Preparation for Deployment" section in TM 11-6625-3085-12-1, paragraph 2-3-1. b. Position the Support Van. (1) Drive the test van into position. (a) Position the test van so the door on the roadside is facing the rear of the support van. (b) The test van must be positioned so the roadside is approximately 90 degrees to the sides of the support van. (c) The sides of the support van must line up with the two black lines on the roadside of the test van. (d) One van cannot be more than 3 inches higher than the other. (2) Measure the distance between the two vans. (a) Measure the distance from the rear of the support van to the side of the test van. This distance must be not less than 117 inches and not more than 129 inches. Be sure to measure from the rear of the support van, not from the support van rear bumper. (b) If necessary, reposition the vans to get them into proper position. (3) Remove the four chock blocks from the hangers under the van. (a) Place two in front of the front tires on each side of the van. (b) Place the other two behind the rear tires on each side of the van. c. Position the Test Van. (1) Position the support van on firm, level ground. (2) Allow at least 40 feet for positioning the test van in back of the support van. d. Detach the Test Van tractor. (1) Lower front landing gear. (2) Detach two air line hoses and electrical cable from the front of the test van. The tractor may now be driven away. e. Detach the Support Van tractor. (1) Remove the two chock blocks from the hangers under the support van. Place one in front and one in back of a rear tire. (2) Remove the two forward landing gear pads from stowed position under the support van. Place one under each forward landing gear. (3) Remove the landing gear crank handles from stowed position under the front of the support van. Attach handles to forward landing gear crankshafts. (4) Push the crank handles in and turn them clockwise. Lower the front landing gear until they touch the surface. Pull the handles out and continue turning until the front of the support van is raised from the tractor. (5) Detach two air line hoses and electrical cable from the front of the support van. The tractor may now be driven away. 3-20 7 December 2007 STP 9-94K13-SM-TG Performance Steps f. Deploy the Generators. (1) Position the two power generators in a convenient location. They must not be more than 100 feet from the POWER ENTRY PANEL on the test van. (2) Remove the ground rod from each generator. Drive each rod at least 4 feet into the ground. (3) Attach ground strap between grounding lug on each generator and ground rod. g. Deploy the Van Ground and Power Cables. (1) Install test van and support van ground rods. (2) Install two ground cables (W407). (3) Attach crane assembly to curbside of support van. (4) Remove cable reels W404 and W405 from belly compartment shelf. (5) Remove crane assembly from curbside of support van. (6) Install crane assembly on roadside of support van. (7) Remove cable reel W401 from ROADSIDE MIDDLE belly compartment shelf. (8) Remove cable reels W402 and W403 from ROADSIDE REAR belly compartment shelf. (9) Stow crane assembly. (10) Set up cable reel stand for deployment of cables. (11) Insert roller into reel and mount cable reel containing cable W402 on cable reel holder spindle. (12) Unreel cable W402 with pigtail end at generator No.1. Place cable so connector P1 is nearest test van POWER ENTRY PANEL. Remove cable reel from stand. (13) Mount cable reel containing cable W401 on cable reel stand. (14) Unreel cable W401. Route cable so connector P1 is at test van POWER ENTRY PANEL and connector P2 is near W402-P1. Remove cable reel from stand. (15) Mount cable reel containing cable W404 on cable reel stand. (16) Unreel cable W404 with pigtail end at generator No. 2. Route cable so connector P1 is towards test van POWER ENTRY PANEL. Remove cable reel. (17) Mount cable reel containing cable W403 on cable reel stand. (18) Unreel cable W403. Route cable so connector P1 is at test van POWER ENTRY PANEL and connector P2 is at W404-P1. Remove cable reel. (19) Place four empty cable reels in REAR belly compartment. (20) Mount cable reel containing cable W405 on cable reel stand. h. Connect the Power Cables to the Generators. (1) Connect power cables W402 and W404 to generators No.1 and No.2. (2) Remove protective caps from cable W402-P1, W401-P2, W404-P1 and W403-P2. Connect W402-P1 to W401-P2 and connect W404-P1 to W403-P2. i. Deploy the Van Ladders. (1) Deploy hanging access ladder on support van. (2) Deploy adjustable ladder on test van. j. Connect the Power Cables to the Test Van. (1) Roll up test van power entry panel protective cover. (2) Connect W401-P1 to J1 and W403-1 to J2 on POWER ENTRY PANEL. k. Start the Generators. (1) Start generators No. 1 and No. 2. Check for proper operation. (2) At test van POWER ENTRY PANEL set the following circuit breakers to ON: (a) ECS MAIN CONTROL - Verify ON indicator lights. (b) TECH MAIN CONTORL - Verify ON indicator lights. (3) Set E.C.S. MAIN (GENERATOR NO. 1) and TECH MAIN (GENERATOR NO. 2) circuit breakers to ON. (4) Verify that both OK indicators light and that both WRONG indicators do not light. (5) At test van POWER ENTRY PANEL, set the following circuit breakers to ON: (a) ECS MONITOR - Verify ON indicator lights. (b) TECH MONITOR - Verify ON indicator lights. (c) EXP SIDES & WINCHES - Verify ON indicator lights. 7 December 2007 3-21 STP 9-94K13-SM-TG Performance Steps (d) EXTERIOR LIGHTS - Verify ON indicator lights. (e) AUXILIARY LIGHTS - Verify ON indicator lights. (f) 120 V PANEL OUTLET - Verify ON indicator lights. l. Deploy the Support Van Power Cables. (1) Unreel cable W405. (2) Attach W405-P2 to support van INPUT POWER connector. (3) Attach W405-P1 to test van power input connector J3. (4) At test van power entry panel, set following circuit breakers to ON: (a) SUPPORT VAN POWER GENERATOR NO. 1 - Verify ON indicator lights. (b) SUPPORT VAN POWER GENERATOR NO. 2 - Verify ON indicator lights. (5) Close protective cover on POWER ENTRY PANEL. (6) At support van POWER ENTRY PANEL, verify the following indicators light: (a) INPUT POWER GENERATOR NO. 1. (b) INPUT POWER GENERATOR NO. 2. (7) At support van POWER ENTRY PANEL, set CONTROL circuit breaker to ON. Verify PHASE SEQUENCE-OK indicator lights. (8) At support van POWER ENTRY PANEL, set circuit breakers as follows: (a) Main circuit breaker to ON. (b) ECU NO. 3 circuit breaker to ON. (c) ECU NO. 4 circuit breaker to ON. (d) AUXILIARY LIGHTS circuit breaker to ON. (e) EXTERIOR LIGHTS circuit breaker to ON. (f) EXTERIOR OUTLETS circuit breaker to ON. (9) Close POWER ENTRY PANEL door. (10) Turn on support van interior lights. m. Lower the Test Van Rear Landing Gear. n. Level the Test Van. (1) Check that test van is ready to be leveled. (a) Inspect surface under landing gear. (b) Verify chock blocks are in front and back of wheels on both sides of test van. (c) Verify that tractor is not attached to test van. (2) Check that test van weight is on four landing gears and not on wheels. (3) Observe all four inclinometers for indication that van is level. The bubble is in center when inclinometer is level. (4) Raise or lower landing gear until all four inclinometers indicates that the van is level. o. Release the Folding Roof Panels. (1) Disengage folding roof latches. (2) If high wind conditions are expected during the time when the van folding roof panels are not secured, install the four folding roof restraints. p. Expand the Van Sides. (1) At EXPANDING SIDES CONTROL panel, set LIGHTS-INTERIOR switch to ON. (2) Verify BLACKOUT LIGHTING - ENABLE DISABLE switch is set to DISABLE. (3) Inspect van floor near expansible sides for objects which may prevent movement of the sides. (4) At EXPANDING SIDES CONTROL panel, verify PHASE SEQ OK indicator, E/O BENCH DOWN indicator, CURBSIDE IN and ROADSIDE IN indicators are lighted. (5) Expand sides. (a) At EXPANDING SIDES CONTROL panel, set EXPANDING SIDES AND FLOOR CONTROLS - DIRECTION OUT/DOWN switch to OUT/DOWN position. (b) Hold DRIVE switch in ON position. Expansion drive system will move van sides while switch is held in this position. When the limit is reached either CURBSIDE OUT or ROADSIDE OUT indicator will light. Release DRIVE switch to OFF position. (c) Remove crank handle from rear landing gear and attach to side expansion crankshaft. 3-22 7 December 2007 STP 9-94K13-SM-TG Performance Steps (d) Rotate crank counterclockwise (out) until it is very hard to turn. Verify that both CURBSIDE OUT and ROADSIDE OUT indicators light. (e) Release two latches securing curbside folding floor to van expanding side wall. Be sure both latches are secured in UP position. (f) Inspect both curbside floor latches to be sure they are securely positioned in the retracted position. (g) Release two latches securing roadside folding floor to van expanding side wall. Be sure the latches are secured in UP position. (h) Inspect both roadside floor latches to be sure they are securely positioned in the retracted position. (i) At EXPANDING SIDES CONTROL panel, hold EXPANDING SIDES AND FLOOR CONTROLS - DRIVE switch to ON position. Floor sections will continue to come down as long as switch is held in this position. When both floor sections are lowered in place, release DRIVE switch to OFF position. (j) Set DIRECTION switch to OFF position. (k) On roadside floor section, release winch cable by sliding latch bolt into keeper. If bolt and mating hole in keeper do not line up, rotate expanding sides crank counterclockwise to align mating parts. (l) Stow roadside winch cable in bridle ring on van roadside wall. (m) On curbside floor section, release winch cable by sliding bolt into keeper. (n) Stow curbside winch cable in bridle ring on van curbside wall. (o) Slide four floor latches into position to lock floor sections in place. (p) Secure the six roof latches located along top of interior expanding side walls of van by inserting ball in slotted hole and pulling down on the lever. (q) Check that test van has remained level. (r) Return hand cranks to stowed location. (s) Remove two removable floor sections from stowed position on floor of support van. (t) Move them to test van. (u) Place two floor sections in floor openings as indicated by markings on floor sections. (v) Secure floor sections by tightening attached hardware. (w) Install four corner plugs to seal openings at folding roof corners. One plug is used in each of the four van interior corners. (6) If four folding roof restraints were installed, remove them. q. Prepare the Test Van ECUs for operation. (1) Deploy second ladder on front of test van. (2) Position bottom ECU lockout plates for ECU operation. (a) Remove eight screws and washers securing lockout plates to both ECUs. (b) Move lockout plates upwards so bottom mounting holes line up with upper tapped holes. (c) Install four screws and washers in bottom holes of lockout plates. (d) Install remaining four screws and washers in bottom tapped holes. (3) At front of support van, remove roof access ladder from stowed location. (4) Attach roof access ladder to rear of test van. (5) Position top ECU lockout plates for ECU operation. (a) Unzip the protective cover on each of the two ECUs on the Test Van. Roll up covers to the top edge of each ECU and place to the rear so that the lockout plates are uncovered. (b) Remove four screws and lock washers which attach the fixed and floating portions of the ECUs at their rear top edges. Remove lockout plates which are located between fixed and floating parts of the ECUs. (c) Place lockout plates over tapped holes at top of ECUs and secure in place with screws and lock washers. (d) Loosen four screws and turn them about eight turns. 7 December 2007 3-23 STP 9-94K13-SM-TG Performance Steps (e) Roll protective covers down front of ECU about 4 inches. Zip covers closed as much as possible. (f) Rotate FRESH AIR DOOR control knob to OPEN position. (g) Unzip two fan protective covers at lower part of ECUs. Roll covers all the way up and secure with straps and fasteners provided. (h) Using allen wrench, remove two drain plugs. Store drain plugs on shelf under POWER ENTRY PANEL. r. Power up the Test Van. (1) At FACILITIES CONTROL panel, set controls as follows: (a) Position VOLTS & FREQ SELECT switch to TECH PWR A-N. (b) Observe AC VOLTMETER reading and FREQUENCY METER reading. AC VOLTMETER reading should be between 111 and 121 AC VOLTS. FREQUENCY METER reading should be between 59.5 and 60.5 HERTZ. (c) Position VOLT & FREQ SELECT switch to TECH PWR B-N. (d) Observe AC VOLTMETER reading and FREQUENCY METER reading. AC VOLTMETER reading should be between 111 and 121 AC VOLTS. FREQUENCY METER reading should be between 59.5 and 60.5 HERTZ. (e) Position VOLT & FREQ SELECT switch to TECH PWR C-N. (f) Observe AC VOLTMETER reading and FREQUENCY METER reading. AC VOLTMETER reading should be between 111 and 121 AC VOLTS. FREQUENCY METER reading should be between 59.5 and 60.5 HERTZ. (g) When all AC VOLTMETER and FREQUENCY METER readings are correct, position VOLT & FREQ. SELECT switch to OFF. (2) At POWER DISTRIBUTION panel, set following circuit breakers as indicated: (a) LRU COOLING: POWER - set to OFF, CONTROL - set to OFF. (b) E/O BENCH: AIR - set to OFF, POWER - set to OFF. (c) CONVENIENCE OUTLET: CKT NO.1 ATE - set to OFF, CKT NO.2 - set to OFF, CKT NO.3 - set to OFF. (d) HP-IB - set to OFF. (e) ATE: POWER PROTECT - set to OFF, AC STATION - set to OFF, POWER STATION - set to OFF. (f) ATE MAIN - set to OFF. (g) FLUORESCENT LIGHTS: CONTROL - set to ON, ROADSIDE - set to ON, FRONT CURBSIDE - set to ON, REAR CURBSIDE - set to ON. (3) At FACILITIES CONTROL panel, set following circuit breakers and switches as indicated: (a) FLUORESCENT LIGHTING AREA CONTROL: CURBSIDE FRONT - set to ON, CURBSIDE REAR - set to ON, ROADSIDE - set to ON. (b) DC LIGHTING CIRCUIT BREAKERS: EMERGENCY POWER - set to ON (pressed in), BATTERY MONITOR NO.1 - set to ON (pressed in), BATTERY MONITOR NO.2 - set to ON (pressed in), AUXILIARY POWER - set to ON (pressed in), FRONT EXTERIOR - set to ON (pressed in), REAR EXTERIOR - set to ON (pressed in), CURBSIDE EXTERIOR - set to ON (pressed in), ROADSIDE EXTERIOR - set to ON (pressed in). (c) LRU COOLING LOSS: ALARM ENABLE-DISABLE - set to DISABLE. (d) VOLTMETER SELECT - set to OFF. (e) AMMETER SELECT - set to OFF. (f) VOLT & FREQ SELECT - set to OFF. (g) ECU NO.1 MAIN - set to ON. (h) ECU NO.2 MAIN - set to ON. (i) ECS CONTROL rotary switch - set to OFF. (j) ECS CONTROL circuit breaker - set to OFF. (k) HUMIDIFIER - set to OFF. (l) HUMIDIFIER WATER DUMP - set to OFF. (m) ECU NO.1 MANUAL CONTROLS - set to OFF. 3-24 7 December 2007 STP 9-94K13-SM-TG Performance Steps (n) ECU NO.2 MANUAL CONTROLS - set to OFF. (o) ALARM ENABLE-DISABLE: LOW TEMP - set to DISABLE, HIGH TEMP - set to DISABLE, VENT 1 LOSS - set to DISABLE, VENT 2 LOSS - set to DISABLE, COOL CUT-OFF - set to DISABLE, ECS PWR LOSS - set to DISABLE. (4) At POWER DISTRIBUTION panel, set following circuit breakers as indicated: (a) ATE MAIN - set to ON, verify ON indicator lights. (b) ATE: POWER PROTECT - set to ON, verify ON indicator lights, AC STATION - set to ON, verify ON indicator lights, POWER STATION - set to ON, verify ON indicator lights. (c) HP-IB - set to ON, verify ON indicator lights. s. Power up the ECUs. (1) At FACILITIES CONTROL panel, observe reading on VAN TEMPERATURE INDICATOR. (a) If reading is below +10° F, set switches as indicated: ECS CONTROL selector switch - set to MAN. ECU NO.1 MANUAL CONTROLS: selector switch - set to HI HEAT, INCREASE DECREASE control - set to midrange position. ECU NO.2 MANUAL CONTROLS: selector switch - set to HI HEAT, INCREASE DECREASE control - set to midrange position. ECS CONTROL circuit breaker - set to ON. (b) If reading is +10° F or above, set switch as indicated: ECS CONTROL selector switch - set to ON. ECS CONTROL circuit breaker - set to AUTO. (2) Prepare Humidity Control System For Operation. (a) On FACILITIES CONTROL panel, verify following control settings: HUMIDIFICATION SETPOINT - set to 20. DEHUMIDIFICATION SETPOINT - set to 80. TEMPERATURE SETPOINT - Loosen screw and open cover. Verify temperature set points (HI and LO) are set to set point calibration sticker located next to set point unit. VAN TEMPERATURE INDICATOR - Verify van temperature indicator limits (HI and LO) are set to temperature calibration sticker located next to indicator. HUMIDIFIER WATER DUMP - set to OFF. (b) Replace temperature set point cover and tighten screw. (c) Reset any controls, if necessary. (3) At FACILITIES control panel, observe reading on VAN TEMPERATURE INDICATOR. (a) If the reading is +32° F or above, proceed to step "d". (b) If the reading is less than +32° F, proceed to step "f". When the temperature rises above +32° F, perform step "d". (4) Fill humidifier water containers. (5) At FACILITY CONTROL panel, set HUMIDIFIER POWER circuit breaker to ON. (6) Note position of ECS CONTROL. If set to MAN, observe VAN TEMPERATURE INDICATOR. (a) If reading is +10° F or higher, set ECS CONTROL switch to AUTO. (b) If reading is less than +10° F repeat the reading at least once per hour. When the reading is +10° F or higher, set ECS CONTROL switch to AUTO. (7) Be sure to fill humidifier water containers when the van interior temperature rises above +32° F. (8) Notify personnel to use test van roadside door. t. Turn on Fans and install Tarpaulin. (1) Uncover all ATE equipment. (a) Remove dustcovers from all ATE cabinets by detaching Velcro strips from equipment cabinets and van ceiling. (b) Fold dustcovers and place on test van floor forward of roadside door on roadside aisle. (2) Power up ATE to fans on (TM 11-6625-3085-12-1, paragraph 2-3-70). 7 December 2007 3-25 STP 9-94K13-SM-TG Performance Steps (3) At FACILITIES CONTROL panel, observe VAN TEMPERATURE INDICATOR. (a) If reading is +70° F or higher, turn off lights and close van door. (b) If reading is less than +70° F, leave lights on and close van door. (4) At support van, remove eight roof bows from van floor. Position them next to test van. (5) At test van, install eight roof bows in fittings on van roof. (6) Place dust covers in storage bag and stow in support van CURBSIDE MIDDLE belly compartment. (7) Install tarpaulin roof shield on test van roof. (a) Remove tarpaulin from middle of the floor in the support van. (b) Unfold tarpaulin with stenciled markings up. (c) Roll curbside flap into centerline. (d) Roll roadside flap into centerline. (e) Carry tarpaulin to rear of test van. Position the tarpaulin with forward end nearest to rear of van. (f) Feed rolled tarpaulin onto van roof. Position tarpaulin on top of roof bows so FORWARD stencil is at front of van. (g) Align centerline of tarpaulin with centerline of roof bows so overhang on sides is equal. (h) Start at front of van and unroll flaps outward towards van sides. (i) Pull corners at front over end hooks. (j) Start at front of van and attach tarpaulin straps to sides of van. (k) Allow two long straps at corners of passageway flap to hang free. Use long straps to pull tarpaulin towards rear of van. Try to keep tarpaulin tight as straps are being fastened along van sides. (l) Pull corners at rear over roof latch ends. (m) Last strap to be fastened is at rear of van centerline. Use ratchet device on straps to adjust tarpaulin and keep it straight and square on van. u. Connect Communication Lines to the Vans. (1) If required, connect communications and external detector lines to terminals on test van POWER ENTRY PANEL. (2) If required, connect communications and external detector lines to support van POWER ENTRY PANEL. v. Lower Support Van Rear Landing Gear. w. Level the Support Van. (1) Verify that forward and rear landing gear have been lowered. Be sure the support van weight is not on the tires. (2) Note the positions of eight inclinometers on the support van. (3) Adjust landing gear so support van is level. (4) Remove rod from rear tool landing gear and stow in tool storage compartment built into support van curbside forward wall. (5) Remove cranks from front landing gear and stow under front of van. x. Prepare the Support Van ECUs for operation (use same procedure as with Test Van ECU preparation in step 17). y. Power up the Support Van ECUs. (1) At support van POWER DISTRIBUTION PANEL, set following circuit breakers and switches as indicated: LIGHT CONTROLS: FLUORESCENT - set to ON, EMERGENCY - set to ON, AUXILIARY - set to ON. LIGHTS: EMERGENCY - set to ON, AUXILIARY - set to ON, EXTERIOR - set to ON, CURBSIDE FLUORESCENT - set to ON, ROADSIDE FLUORESCENT - set to ON. 120 VAC OUTLETS - set to ON. BLACKOUT LIGHTING: ENABLE-DISABLE - set to DISABLE. METER SELECT - set to OFF. 3-26 7 December 2007 STP 9-94K13-SM-TG Performance Steps (2) Determine support van interior temperature. (a) If temperature is cooler than 70°F, set following switch and controls as indicated: CURBSIDE ECU #3 CONTROL: Selector switch - set to HI HEAT, INCREASE DECREASE control - set to midrange position. CURBSIDE ECU #4 CONTROL: Selector switch - set to HI HEAT, INCREASE DECREASE control - set to midrange position. (b) If temperature is much warmer than 70°F, set following switches and controls as indicated: CURBSIDE ECU #3 CONTROL: Selector switch - set to COOL, INCREASE DECREASE control - set to midrange position. CURBSIDE ECU #4 CONTROL: Selector switch - set to COOL, INCREASE DECREASE control - set to midrange position. z. Remove the Support Van Rear Cover. (1) Place roof access ladder against roadside rear side of support van. (2) Use ladder to reach rear van cover. Release all Velcro strips securing rear van cover to van body. Fold down attached cover flap over Velcro strip. (3) Move roof access ladder to curbside and fold down other side of cover. (4) Climb to roof of support van. (5) Pull rear cover up and onto roof. Lay it flat on roof. (6) Fold two side portions of rear cover inward and lay it flat. (7) Roll cover towards rear so it forms a tight roll on rear edge of support van roof. aa. Deploy the Support Van Rear Platform. (1) Crank rear platform down to horizontal position. (a) Set winch ratchet lock so winch can be unwound. (b) Remove two pins from brackets securing two rear platform legs in transit position. (c) Remove two pins securing two latch bars in transit position. Swing latch bars out and reinstall pins. (d) Remove winch crank handle from stored location near roadside front corner of support van. Attach crank handle to crankshaft. (e) Rotate crank handle counterclockwise until rear platform is about 3/4 of the way down. (f) Secure two leg struts to legs with pins. (g) Crank rear platform down into horizontal position. (h) Rotate leveling screws to level rear platform. Proper level is indicated when bubble in inclinometer is centered. (i) Rotate crank handle to remove any tension in winch cable. (j) Remove two bumper legs from rear platform and place in V formed by rear platform legs and struts. (k) Remove hanging stairs from support van roadside and attach to rear platform. (l) Detach winch cable hook from ring at top of van. Route winch cable over rear edge of platform. Go under the rear platform and attach winch cable hook to edge of support van undercarriage. (2) Install passageway ramp. (a) Rotate two handles counterclockwise to release J-hooks securing ramp to rear platform. (b) Slide ramp towards test van and lower four hangers on ramp into four hanger straps under test van side door. (c) Check position of ramp. It must be firmly in place and not covering round mounting roles at outer edge of rear platform. 7 December 2007 3-27 STP 9-94K13-SM-TG Performance Steps (3) Place floor fixture assembly on rear platform. (a) At forward curbside interior wall of support van, release web strap securing floor fixture to wall. (b) Move floor fixture to rear platform. ab. Deploy the Passageway Cover. (1) Install three tubular arches. (a) Check that all Velcro fastener strips on passageway cover are unfastened. (b) Remove six pins from round flanges on roadside and curbside of rear platform. (c) Remove outer tubular arch from holes in support van tailgate. Move arch out onto rear platform about 1 foot. (d) Remove center tubular arch from holes in support van tailgate. Move arch out onto rear platform next to outer arch. (e) Remove inner arch from holes in support van tailgate. Move it out onto rear platform and insert it into inner pair of round flanges. Be sure arch firmly seats in round flanges. (f) Move outer arch further out on rear platform so it is past center pair of round flanges on rear platform. (g) Move center arch further out and insert it into center pair of round flanges on rear platform. Be sure arch firmly seats in round flanges. (h) Move outer arch further out and insert it into outer pair of round flanges on rear platform. Be sure arch firmly seats in round flanges. (i) Insert six pins through round flanges. Secure in place with spring latches. (2) Install passageway cover. (a) Check to see that top part of passageway cover is not pulled tight. If necessary, release straps that provide tension to passageway cover. (b) Remove three pins in overhead tubular mounting brackets in each arch. (c) Swing center brace upwards so it engages three brackets. Start at inner arch and insert pins into three brackets. Secure pins in place with spring latches. (d) Swing roadside brace upwards so it engages three brackets. Start at inner arch and insert pins into three brackets. Secure pins in place with spring latches. (e) Swing curbside brace upwards so it engages three brackets. Start at inner arch and insert pins into three brackets. Secure pins in place with spring latches. (f) At roadside passageway, open zipper on both sides of awning. (g) Use ladder to reach Velcro strip on roadside of support van. Position passageway cover cutouts around pin fittings on side of support van and fold Velcro flap over edge of passageway cover. (h) Move ladder to curbside of support van and secure other Velcro strip. (3) Deploy passageway awning. (a) Remove pin from bracket on center tubular arch. (b) Swing passageway awning top brace upwards so it engages bracket. Insert pin through bracket. Secure in place with spring latch. (c) Position top of awning around top brace and close zipper. (d) Remove awning end pole from stowed position on rear platform. (e) Remove four pins from end pole. (f) Position zippered awning sleeve around end pole and close zipper. Be sure end pole is centered in sleeve. (g) Insert ends of long awning roof poles into end pole fittings. (h) Position lower support poles into fittings on end pole. (i) Turn lower support poles so tabs at rear platform face downward. (j) Check at four locations to ensure that flange holes and pole holes are lined up. (k) Insert four pins in end pole flange holes. Secure pins with spring latches. (l) Remove two pins from platform fittings. (m) Slide support pole tabs down into fittings. Insert pins in holes in fittings and secure spring latches. 3-28 7 December 2007 STP 9-94K13-SM-TG Performance Steps (n) Unfold awning sides and close zipper. (o) Secure bottom edge of passageway cover to sides of rear platform with attached Velcro strips. ac. Deploy the Passageway Stairs. (1) Remove hanging stairs from rear platform and attach to fittings under roadside door of support van. (2) Deploy passageway stairs. (a) Remove passageway stairs from stowed location against rear door of support van. (b) Remove two railing assemblies from stowed location on rear platform. (c) Insert tabs on front of passageway stairs into brackets on rear platform. (d) Release lock on adjustable legs. Adjust legs so ladder is steady. Tighten lock. (e) Insert two railing assemblies in mounting holes on stairs. ad. Adjust the Passageway Cover. (1) Deploy passageway cover rear flap. (a) Loosen three web straps. (b) Release two tarpaulin straps at roadside door of test van. (c) Place ladder against roadside wall of test van. (d) Climb ladder and extend passageway cover rear flap onto roof of test van. (e) Slide edge of passageway cover rear flap under tarpaulin on test van roof. Engage three hooks on latching bracket. (f) Tighten three web straps so passageway cover rear flap is securely fastened in place. (g) Adjust four ratchet devices on straps to tighten passageway cover. (h) Pull test van tarpaulin over passageway cover rear flap. (i) Fasten two tarpaulin straps released in step (2) above. (j) Position two long tarpaulin straps down side of passageway and attach to bottom of rear platform. (k) Check all straps. Adjust if necessary to pull tarpaulin on test van and passageway cover tight. (l) Attach rear edges of passageway cover to Velcro strip on side of test van. Fold Velcro weather-strip over and secure in place. (m) Zip up corner zippers. (n) Zip up roof-to-floor zippers in outer corners of passageway. (o) Place ladder against support van. (p) Climb ladder and roll rear cover towards rear so it is a tight roll at rear of support van roof. (2) Remove floor fixture from rear platform and return to stowed location in support van. Secure in place with straps. ae. Deploy the Augmentation Air Ducts. (1) Obtain two augmentation air duct assemblies from stowed position on floor at forward end of support van. (2) Remove four AUX ECU PORTS from vans. (a) Remove 20 screws securing two AUX ECU PORTS next to roadside door of test van. Remove AUX ECU PORTS. (b) Open two air ports on rear of support van. (3) Attach two augmentation air duct assemblies. (a) Attach augmentation air duct assemblies to van air ports and secure with fittings. (b) Position top augmentation air duct assembly so that AIR FLOW marker points towards test van. (c) Position bottom augmentation air duct assembly so that AIR FLOW marker points towards support van. (4) Stow removed covers and hardware. (5) If augmentation heating is required, proceed as follows: (a) Set ECU #3 selector switch to HI HEAT position. (b) Set ECU #3 INCREASE-DECREASE control to midpoint position. 7 December 2007 3-29 STP 9-94K13-SM-TG Performance Steps (6) If augmentation cooling is required, proceed as follows: (a) Set ECU #3 selector switch to COOL position. (b) Set ECU #3 INCREASE-DECREASE control to midpoint position. af. Remove Transit Restraints. (1) Remove transit restraint bars from equipment racks. (a) Loosen knurled fittings at top of restraint bars. (b) Lift restraint bars from fitting at bottom of equipment racks. (2) If desired, remove horizontal restraint bar above UUT station. (3) Stow transit restraint bars and horizontal restraint bar in REAR CURBSIDE belly compartment. ag. Detach E/O Bench Retainer Brackets. (1) Release four E/O bench retainer brackets. (a) Remove 24 screws and washers from E/O bench retainer brackets. (b) Remove eight screws, lock washers, washers and four cups. (c) Remove four studs. (d) Loosen 12 screws. Position flat side of washers towards E/O bench and slide retainer bracket away from E/O bench as far as possible. (2) Secure four E/O bench retainer brackets in place. (a) Torque 12 screws to 50 FOOT-POUNDS. (b) Install four studs. (c) Install four cups and secure with eight screws, lock washers, and washers. ah. Deploy E/O Test Cable. (1) Remove E/O test cable from stowed position. (a) Release straps securing cable to vertical support. (b) Release wing nut and open clamp. (c) Release straps from cable support bracket. (2) Position E/O test cable in deployed position. (a) Place cable in cable support bracket, clamp and support over E/O bench. (b) Close clamp and tighten wing nut. (c) Secure straps over cable. (d) Release straps securing test cable on top of UUT station. ai. Deploy Work Table and Chairs. (1) Deploy two work tables. (a) In support van, remove two work tables from stowed position. Move them to test van. (b) Insert table flanges into wall brackets at desired location at either of two positions on roadside or curbside. (c) Fold work table legs down and lock with leg latches. (d) Repeat steps (2) and (3) for second work table. (2) Deploy two chairs. (a) In support van, remove two chairs from stowed position on floor. (b) In test van, position chairs at UUT station and near E/O bench. aj. Deploy Video Display Terminal and Work Cart. (1) Remove video display terminal (VDT) from stowed position. (a) Turn retainer stud mounted to table two turns clockwise to release retainer. (b) Turn floor retainer screws to OPEN position. (c) Turn retainer stud clockwise until bottom of stud is about 1/4 inch above floor. (d) Turn floor retainer screw to PLUG position. (e) Move VDT to operator’s position. (f) Unbuckle strap securing VDT to table. Lay strap on table in back of pedestal. (2) Verify VDT power cable is connected to outlet (J4) at vertical support next to PIU station and signal cable (W17) is connected. Wind excess cable around reel on back of VDT. (3) At support van, remove work cart from stowed position. Move work cart to test van. (4) At support van, remove two waste cans from ROADSIDE MIDDLE belly compartment. Attach waste cans to wall brackets in test van. (5) Stow tools and loose items. Stow loose web straps. 3-30 7 December 2007 STP 9-94K13-SM-TG Performance Steps (6) Close and latch all storage van belly compartment doors. (7) Proceed to System Power Up - Initial Switch Settings. 2. Teardown the EETF. a. Follow the "Teardown of EETF" procedures and review the "Preparation for Teardown" section in TM 11-6625-3085-12-1, paragraph 2-3-38. b. Power Down Test Van ECUs. (1) If powered up, power down test system to full power off. (2) At FACILITIES CONTROL panel, set following circuit breakers and switches as indicated: (a) ALARM ENABLE-DISABLE: LOW TEMP - set to DISABLE. HIGH TEMP - set to DISABLE. VENT 1 LOSS - set to DISABLE. VENT 2 LOSS - set to DISABLE. COOL CUT-OFF - set to DISABLE. ECS PWR LOSS - set to DISABLE. (b) ECU NO.1 MANUAL CONTROLS: Selector switch - set to OFF. (c) ECU NO.2 MANUAL CONTROLS: Selector switch - set to OFF. (d) ECS CONTROL: Rotary switch - set to OFF. (e) ECS CONTROL: Circuit breaker - set to OFF. c. Dump Humidifier Water. (1) At test van FACILITIES CONTROL panel, set following circuit breakers and switches as indicated: (a) HUMIDIFIER set to ON. (b) HUMIDIFIER WATER DUMP set to ON and wait until WATER SUPPLY LOW indicator lights. Then set HUMIDIFIER WATER DUMP to OFF. Set HUMIDIFIER to OFF. (2) Empty humidifier water containers. (a) Release six captive fasteners on cover and remove cover. (b) Disconnect three hose fittings and remove water container. (c) Empty water containers. Return containers to rack and close cover. Secure fasteners. d. Power Down Support Van ECUs. At support van, set following ECU controls as indicated: (1) CURBSIDE ECU #3 CONTROL: Selector switch - set to OFF. (2) ROADSIDE ECU #4 CONTROL: Selector switch - set to OFF. e. Stow the E/O Test Cable. (1) Remove E/O test cable from deployed position. (a) Release straps securing test cable in cable support bracket. (b) Release wing nut and open clamp. (2) Position test cable in stowed position. (a) Lift cable from support, clamp and support bracket. (b) Route cable along vertical support and secure in place with straps. Position cable connectors to avoid damage during transit. (c) Close clamp and tighten wing nut. (d) Position other end of test cable on top of UUT station. Secure with straps. 7 December 2007 3-31 STP 9-94K13-SM-TG Performance Steps f. Attach E/O Bench Retainer Brackets. (1) Deflate E/O bench pneumatic system. (a) On nightside test bench, rotate turn lock fasteners 1/4 turn counterclockwise and open door. (b) On pneumatic control panel assembly flip toggle valve up (off). (c) Using flat side of screwdriver tip, press and hold bleed/drain valve. System should deflate. (d) Release bleed/drain valve. (e) On nightside test bench, close door, then push and rotate turn lock fasteners 1/4 turn clockwise. (2) Release four E/O bench retainer brackets. (a) Remove 24 screws and washers from E/O bench retainer brackets. (b) Remove eight screws, lock washers, washers and four cups. (c) Remove studs. (d) Loosen 12 screws. Position flat side of washers towards E/O bench and slide retainer bracket against E/O bench. (3) Secure four E/O bench retainer brackets in place. (a) Install and torque 12 screws to 50 FOOT-POUNDS. (b) Install and torque 24 screws to 35 FOOT POUNDS. (c) Install stud. (d) Install four cups and secure with eight screws, lock washers, and washers. g. Install Transit Restraints. (1) Remove transit restraint bars and horizontal restraint bar, if removed, from front curbside belly compartment. (2) Install horizontal bar over UUT station. Tighten two bolts. (3) Attach transit restraint bars to stations marked on bars. (a) Insert bottom of transit restraint bar into cleat at bottom of each station. (b) Secure transit restraint bar to top bracket with knurled screws. (c) Torque knurled screws to 15 FOOT-POUNDS. h. Secure Work Carts, Chairs and Work Table for Transit. (1) Secure work cart for transit. (a) Move work cart to support van. (b) Place in transit position on raised floor at forward end of van. (c) Secure work cart with restraints. (2) Secure four chairs for transit. (a) Move four chairs to support van. (b) Place in transit position on raised floor at forward end of van. The chair backs must face the van side walls. (c) Secure three chairs in place with restraints. (3) Remove two waste cans from test van. (a) Empty the cans and place them in ROADSIDE MIDDLE belly compartment. (b) Secure in place with restraints. (4) Secure two work tables for transit. (a) Remove two work tables from wall brackets at each side of test van at forward end. (b) Fold up work table legs so they snap into clips. (c) Move tables to support van aisle. (d) Stand work tables on end against rack at forward side of roadside door and secure using webbing straps. (5) Ensure that both work shelves on curbside of Nightside and Test Console test benches are folded down and secured for transit. 3-32 7 December 2007 STP 9-94K13-SM-TG Performance Steps i. Remove Augmentation Air Duct. (1) Remove two augmentation air duct assemblies from van AUX ECU PORTS. (2) Close and secure van air ports. Install 20 screws securing two AUX AIR PORTS to test van. (3) Stow two augmentation air duct assemblies in ECU air compartment at forward end of support van. j. Secure Video Display Terminal (VDT) for Transit. (1) Secure VDT power cable for transit. (a) Do not detach VDT power cord from outlet (J4) at vertical support next to PIU Station. (b) Wind power cord and cable W17 around reel on back of VDT, as necessary. (2) Secure VDT in transit position. (a) Move VDT to transit position above floor mounting brackets in van center aisle. (b) Turn floor retainer screws from plug to OPEN position to expose retainer holes. (c) Position retainer stud over retainer holes. (d) Turn retainer stud clockwise until grooved end drops into retainer hole and is down as far as it will go. (e) Turn floor retainer screws to LOCK position. (f) Turn retainer stud counterclockwise by hand until tight. (g) Secure table to rearmost vertical support post with strap. (h) Turn display unit so it faces front of table and tighten pedestal clamp. (i) Tilt display unit up as far as it will go. (j) Secure display unit to table with strap. k. Secure Panel Doors and E/O Bench Turrets for Transit. (1) Open door on Air Supply Assembly and verify that transit retaining screws are engaged. Close and secure door. (2) Inspect inside test van to be sure all control panel doors and covers are closed and secured in place. (3) At E/O bench, move turret levers so they are pointing inwards (towards center of van). They must not be left in operating position or they will interfere with the retraction of the van sides. l. Install Equipment Dust Covers. (1) Remove equipment dustcovers from support van ROADSIDE and CURBSIDE MIDDLE belly compartments. Bring dustcovers to test van. (2) Install E/O bench dustcover. (a) Start at rear of E/O bench, place cover over E/O bench and pull down sides and front to van floor. (b) Secure E/O bench dustcover in place by attaching Velcro strips to each other. (3) Install power station dustcover. (a) Place dustcover over line printer and power station and wrap side flaps around power station. (b) Attach mating Velcro strips at left rear cover. (c) Pull sides down and attach to Velcro strips at base of power station cabinet. (4) Install dustcovers on remaining equipment. (a) Attach tops of roadside and curbside dustcovers to Velcro strips on angle brackets on van ceiling. (b) Attach forward and rear dustcover panels to ceiling mounted Velcro strips. (c) Attach all corners to each other with Velcro strips. Attach bottoms of panels to Velcro strips at base of equipment. 7 December 2007 3-33 STP 9-94K13-SM-TG Performance Steps m. Remove Test Van Tarpaulin. (1) If necessary, deploy portable lighting fixture. (2) Remove test van tarpaulin roof shield. (a) Unhook seven tie down straps on each side of test van. Remove short strap sections attached to bottom of long straps and set them aside. (b) Detach four long straps under front and rear of test van. (c) Using ladder, climb to test van roof. (d) Release and pull up the four corners of the tarpaulin. (e) Raise and fold sides of tarpaulin into center of roof. Pull all straps in towards center. (f) Roll sides of tarpaulin towards center of roof so the tarpaulin is completely rolled up. (g) Route rolled up tarpaulin over rear of test van to ground. (h) Spread tarpaulin out on ground so markings are on top. (i) Fold tie down straps into center of tarpaulin. (j) Fold front, rear, and passageway flaps into center of tarpaulin. The tarpaulin should now be in a square shape. (k) Fold both sides of tarpaulin towards center. Overlap center 6 inches when each side is folded in. (l) Fold one half of tarpaulin over other half. (m) Fold front and back of tarpaulin to center. (n) Fold one half of tarpaulin over other half. (o) Place tarpaulin and web straps in storage bags. (p) Place storage bag on lower shelf of support van curbside center belly compartment. (q) Secure two web straps. (r) Remove eight roof bows from test van roof. (s) Place roof bows in temporary position under forward end of support van. (t) Secure retainers. (u) Remove ladder and place on ground. n. Detach Passageway Rear Platform from Test Van. (1) Remove two removable floor sections from test van. (a) Release captive hex screws securing forward and rear removable floor sections in place. (b) Remove two floor sections. (c) Take two removable floor sections to support van. Temporarily store floor inserts on ground under forward end of support van. (2) Open test van rear door. Latch open if weather permits. (3) Detach passageway from test van. (a) Separate Velcro straps attaching passageway sides to test van. Protect van mounted Velcro straps by folding cover strips over them. (b) If necessary to reach overhead components, move floor fixture from forward curbside wall of support van to rear platform. (c) Unzip zippers which attach top and side sections at rear of passageway cover. (d) Release ratchets on four overhead web straps to loosen rear of passageway cover. (e) Press latches and loosen three roof flap tensioning straps. (f) Lift up on passageway ramp so four mounting tabs slide out of hanger straps on side of test van. (g) Place passageway ramp on rear platform about 1 foot from rear end. Secure in place by hooking J-hooks into rear platform. Tighten J-hook by rotating handle. 3-34 7 December 2007 STP 9-94K13-SM-TG Performance Steps o. Retract Test Van Sides. (1) At test van POWER DISTRIBUTION panel, set following circuit breakers and switches as indicated: (a) LRU COOLING: CONTROL - verify set to OFF. POWER - verify set to OFF. (b) E/O BENCH: AIR - verify set to OFF. POWER - set to OFF. (c) CONVENIENCE OUTLETS: CKT NO.1 ATE - set to OFF. CKT NO.2 - set to OFF. CKT NO.3 - set to OFF. (d) HP-IB - set to OFF. (e) ATE: POWER PROTECT - set to OFF. AC STATION - set to OFF. POWER STATION - set to OFF. (f) ATE MAIN - set to OFF. (2) At test van FACILITIES CONTROL panel, set following circuit breakers and switches as indicated: (a) FLUORESCENT LIGHTING AREA CONTROL: CURBSIDE FRONT - verify set to ON. CURBSIDE REAR - verify set to ON. ROADSIDE - verify set to ON. (b) DC LIGHTING CIRCUIT BREAKERS: EMERGENCY POWER - verify set to ON. BATTERY MONITOR NO.1 - verify set to ON. BATTERY MONITOR NO.2 - verify set to ON. AUXILIARY POWER - verify set to ON. FRONT EXTERIOR - verify set to ON. REAR EXTERIOR - verify set to ON. CURBSIDE EXTERIOR - verify set to ON. ROADSIDE EXTERIOR - verify set to ON. (c) LRU COOLING LOSS: ALARM ENABLE-DISABLE - verify set to DISABLE. (d) VOLTMETER SELECT - set to OFF. (e) AMMETER SELECT - set to OFF. (f) VOLT AND FREQ SELECT - set to OFF. (g) ECU NO.1 MAIN - set to ON. (h) ECU NO.2 MAIN - set to ON. (i) ECS CONTROL rotary switch - set to OFF. (j) ECS CONTROL circuit breaker - set to OFF. (k) HUMIDIFIER - set to OFF. (l) HUMIDIFIER WATER DUMP - set to OFF. (m) ECU NO.1 MANUAL CONTROLS - set to OFF. (n) ECU NO.2 MANUAL CONTROLS - set to OFF. (o) ALARM ENABLE-DISABLE: LOW TEMP - set to DISABLE. HIGH TEMP - set to DISABLE. VENT 1 LOSS - set to DISABLE. VENT 2 LOSS - set to DISABLE. COOL CUT-OFF - set to DISABLE. ECS PWR LOSS - set to DISABLE. 7 December 2007 3-35 STP 9-94K13-SM-TG Performance Steps (3) At both side doors of test van, set EXT LIGHTS to OFF. (4) Verify that both side doors on test van are closed and securely latched. (5) Verify that ladders have been detached from both sides of test van. (6) Lift four floor latches on test van walls to up position. Be sure latches are secured in up position. (7) Remove four corner plugs from openings at folding roof hinge corners. Two are at front of van and two at rear. Let the plugs hang on lanyards. (8) Check inclinometers and verify that test van is level. If test van is not level, perform leveling procedure. (9) If high wind conditions may occur during retraction of sides, install roof restraints before releasing roof panels. (10) Release six roof latches located along top of interior wall of van. (a) Lift up on latch lever. (b) Remove latching rod from slotted hole in roof section. (c) Swing latch down. Be sure the six roof latches are completely unlatched. (11) Attach crank handle to side expansion crankshaft. (a) Rotate crankshaft counterclockwise (OUT) until it is very hard to turn crank handle. (b) Do not remove crank handle from crankshaft. (12) Release four floor latches (one at each end of folding floors). (a) Slide floor latches back to unlock floor sections. (b) Check four floor latches to be sure they are fully disengaged. (13) Attach winch cables to barrel bolts on each floor section. (a) Remove winch cables from bridle rings on van side walls. (b) Place end of winch cable into opening in barrel bolt assembly. Slide bolt to secure winch cable and disengage from keeper. (c) Check barrel bolts to be sure they are securely latched. (14) Check for loose items near the floor section hinges. Be sure the area is clear of anything that may interfere with the folding of floor sections. (15) At power entry panel, verify EXPANDING SIDES & WINCHES circuit breaker is set to ON. Verify ON indicator lights. (16) At test van EXPANDING SIDES CONTROL panel, set switches to raise folding floors. (a) DIRECTION -set to UP/IN. (b) DRIVE -Set and hold to ON. • Floor sections will continue to move up as long as DRIVE switch is in ON position. • When floor sections are in fully raised position, release DRIVE switch to OFF. (17) Secure folding floor sections to van walls. Press wall sections against van wall and slide four wall latches down. Be sure latches are fastened. (18) At EXPANDING SIDES CONTROL panel, observe and verify that E/O BENCH DOWN indicator is lighted. (19) At test van EXPANDING SIDES CONTROL panel, set and hold DRIVE switch to ON. • Both van sides will move in as long as DRIVE switch is in ON position. • When sides are completely in, release DRIVE switch to OFF. • Verify that CURBSIDE IN and ROADSIDE IN indicators light. • Set DIRECTION switch to OFF. (20) If four folding roof restraints are installed remove them. (21) Attach crank handle to side expansion crankshaft. (a) Rotate side expansion crankshaft clockwise (IN) until crank is very hard to turn. The van sides are now completely retracted. (b) Remove crank handle from crankshaft. Return to stowed location. (22) At test van EXPANDING SIDES CONTROL panel, set switches as follows: (a) LIGHTS-INTERIOR set to turn interior lights OFF. (b) If exterior lights will not be required, set REAR EXTERIOR and FRONT EXTERIOR switches to OFF position. (23) Close and latch test van rear door. 3-36 7 December 2007 STP 9-94K13-SM-TG Performance Steps p. Secure Folding Roof Panels. (1) Engage folding roof latches. (a) Remove roof latch handle extension tool from stowed position under rear of test van. (b) Attach ladder to brackets below side door on curbside of test van. Adjust ladder feet so ladder is firmly in place. (c) Stand on ladder and rotate handle on latch bar as far as possible. (d) Attach roof latch handle extension tool to handle. Rotate extension tool down and to right so latch bar engages fitting below hinged panel. (e) Remove roof latch handle extension tool and return to stowed location under test van. (f) Remove ladder from curbside of test van. (g) Attach ladder to roadside of test van. (h) Latch roadside latch bar as you latch curbside latch bar. (i) Remove ladder from roadside of test van. (2) Attach roof latch handle extension tool to underside of test van. Secure with mounting hardware. q. Turn Off Support Van Lights. (1) Turn off support van lights. At support van POWER DISTRIBUTION PANEL, set following switches and circuit breakers as indicated: (a) LIGHT CONTROL: EMERGENCY - set to OFF. (b) LIGHTS: EMERGENCY - set to OFF. (c) BLACKOUT LIGHTING - set to DISABLE. (d) METER SELECT - Set to OFF. (e) LIGHTS CONTROL: FLUORESCENT - set to ON. AUXILIARY - set to ON. (f) LIGHTS: AUXILIARY - set to ON. EXTERIOR - set to ON. CURBSIDE FLUORESCENT - set to ON. ROADSIDE FLUORESCENT - set to ON. 120 VAC OUTLETS - set to ON. (2) Open support van side door. Latch door open if weather permits. (3) Close and lock support van rear door. r. Teardown Passageway. (1) Move support van rear cover to top of support van. (a) Place roof access ladder at side of support van. (b) Climb to support van roof. (c) Move support van rear cover to top of support van. (d) Climb down from support van roof. (2) Remove passageway railings and stairs. (a) Remove two railings from passageway stairs. Place them on rear platform. (b) Remove passageway stairs from fittings at side of rear platform. (c) Release lock on adjustable legs. Push adjustable legs in and tighten lock. (d) Place stairs on rear platform. (3) Remove hanging stairs from fittings at roadside door of support van. (a) Rotate latches inward. (b) Lift stairs out of mounting holes. (4) Attach hanging stairs on rear platform. (a) Insert pins into mounting holes in side of rear platform. (b) Rotate handles outwards to lock in position. 7 December 2007 3-37 STP 9-94K13-SM-TG Performance Steps (5) Secure stairs and railings against support van rear door. (a) Position stairs against support van rear door. (b) Secure in place with two web straps. (c) Fold two railings and place them against stairs. (6) Remove passageway awning. (a) Unzip diagonal zippers on both sides of awning. (b) Remove pins from fitting holding awning support poles. (c) Lift awning support poles from fittings and allow poles to hang free. (d) Reinstall pin in rear fitting. Secure in place with spring latch. (e) Slide other pin down into front fitting. Do not insert into mounting hole. (f) Remove pins securing awning support poles to end pole (g) Remove awning support poles and place them on rear platform. (h) Remove pins securing awning side poles to end pole. (i) Unzip zipper around end pole and remove pole. Close zipper. (j) Reinstall end pole pins. Secure in place with spring latch. (k) Place end pole on rear platform. (l) Stow end pole and two support poles against stairs. (m) Unzip zipper around awning top pole. (n) Remove pin from roof arch fitting. Rotate top pole inward and swing it down. Reinstall top pole pin. Secure in place with spring latch and close zipper. (o) Zip both diagonal zippers on sides of awning. (7) Stow passageway cover. (a) Release all Velcro strips on bottom edge of passageway cover. (b) Detach Velcro strips which attach passageway cover sides to support van. Fold protective flaps over Velcro on support van. (c) Remove nine pins which secure three overhead supports to tubular arches. (d) Swing three overhead supports down. (e) Reinstall nine pins. Secure in place with spring latch. (f) Remove six pins which secure three tubular arches to round flanges on rear platform. (g) Lift outer tubular arch from outer pair of round flanges on rear platform. (h) Move outer tubular arch towards center tubular arch. (i) Lift center tubular arch from center pair of round flanges on rear platform. (j) Move center tubular arch towards inner tubular arch. (k) Lift inner tubular arch from inner pair of round flanges on rear platform. (l) Insert both ends of inner tubular arch into inner pair of round holes on support van tailgate. (m) Insert both ends of center tubular arch into center pair of round holes on support van tailgate. (n) Insert both ends of outer tubular arch into center pair of round holes on support van tailgate. (o) Check to be sure three tubular arches are firmly inserted into round holes on support van tailgate. (p) Reinstall six pins in round flanges on rear platform. Secure in place with spring latches. (q) Pull loose passageway cover material down between tubular arches so it does not protrude outside arches. s. Raise Support Van Rear Platform. (1) Install bumper legs. (a) Remove two bumper legs from stowed location under rear platform. (b) Place two bumper legs into mounting holes in rear platform. (2) Remove hanging stairs from fittings at rear platform. (a) Rotate latches inward. (b) Lift stairs out of mounting. 3-38 7 December 2007 STP 9-94K13-SM-TG Performance Steps (3) Attach hanging stairs to fittings at support van roadside door. (a) Insert pins into mounting holes in side of support van. (b) Rotate handles outward to lock in position. (4) Remove and stow floor fixture. (a) Remove floor fixture from rear platform. (b) Move to support van. (c) Stow in transit position opposite roadside door. (d) Secure floor fixture and other stowed items with web straps. (5) Attach winch hook to fitting above support van rear door. (a) Detach winch hook from stowed location under rear platform. (b) Route winch hook and attached cables over rear of platform and attach to hook above support van rear door. (c) Be sure winch cables are not caught on bumper legs. (6) Crank rear platform up to raised position. (a) Set winch ratchet lock so winch can be wound. (b) Remove winch crank handle from tool compartment at roadside front corner of support van. Attach crank handle to crankshaft. (c) Rotate crank handle clockwise until rear platform is raised up slightly (about 1 foot). (d) Remove pins from rear platform landing gear struts. Move landing gear brackets so landing gear will swing into transit position under rear platform and secure with hanging bracket. (e) Crank platform to fully raised position. (f) Secure platform retaining bar on each side of rear platform. (g) Remove winch crank handle. Return to tool compartment at roadside front corner of support van. t. Deploy Rear Platform Cover. (1) Climb to support roof. (2) Release and deploy rear cover. (a) Drop rear cover down over stowed rear platform. (b) Be sure cover is pulled down over rear platform. (c) Be sure cover is pulled fully to rear of platform, is pulled all the way down, and is tight. (d) Separate Velcro strips that are nearest to rear edge of support van. (e) Attach inside edge of rear cover to Velcro strip nearest to rear edge of support van. (f) Fold Velcro flap over and secure it to outside edges of rear cover. (g) Climb down from support van roof. (h) Attach bottom of rear cover with Velcro strips. u. Secure ECUs for Transit - Both Vans. (1) Secure test van ECUs for transit. (2) Attach stairs to fittings at front of van. Adjust legs, if necessary. (3) Rotate FRESH AIR DOOR control knob to CLOSED position. (4) Unfasten straps holding the fan protective covers. (5) Zip covers closed over each ECU unit at lower half of ECUs. (6) Install drain plugs. (7) Unzip large ECU covers all the way up to rear top edge of ECUs. (8) Climb to roof of van. (9) Tighten four screws. (10) Install top ECU lockout plates. (a) Remove four screws and lock washers securing both curbside and roadside top lockout plates in stowed location at top of ECUs. (b) Move lockout plates into transit position between fixed and floating parts of ECUs. (c) Install four screws and lock washers to secure top lockout plates in transit position. 7 December 2007 3-39 STP 9-94K13-SM-TG Performance Steps (11) Install bottom ECU lockout plates. (a) Remove four bolts, lock washers, and flat washers securing two bottom lockout plates in stowed location on bottom of ECUs. (b) Remove four screws and lock washers in tapped holes under bottom lockout plates. (c) Move bottom lockout plates down so they are positioned over tapped holes. (d) Install eight bolts, lock washers, and flat washers to secure bottom lockout plates in transit position. (12) Zip ECU covers forward and all the way down. (13) Climb down from van roof. (14) Remove stairs from front of van. (15) Move stairs to front of support van and hang on fittings below ECUs. Adjust legs for stability if necessary. (16) Secure support van ECUs for transit. Repeat steps 3 through 14. v. Secure Stairs, Floor Inserts and Roof Bows for Transit. (1) Remove stairs from front of vans, if attached. (2) Attach one stair assembly to rearmost pair of fittings at test van power entry panel. (3) Place other stair assembly in support van on floor. Position stairs assembly halfway between van rear door and roadside door. (4) Remove two removable floor sections from temporary location under forward end of support van. Place floor sections on stair assembly. (5) Remove eight roof bows from temporary location under forward end of support van. Place roof bows on floor sections. (6) Place rear passageway poles beside roof bows. (7) Secure stairs assembly, floor sections, roof bows, and rear poles with web straps. w. Detach Communications Lines from Vans. (1) If connected, detach communications and external detector lines from terminals on test van power entry panel. (2) If connected, detach communications and external detector lines from terminals on support van POWER ENTRY panel. x. Raise Landing Gear - Both Vans. (1) Raise test van rear landing gear. (a) If 30 pounds per square inch (psi) leveler pads were deployed, remove pads. (b) Stow 30 psi leveler pads in support van ROADSIDE MIDDLE belly compartment. (2) Raise support van rear landing gear. (a) Rotate steel rods in bottom of landing gear to raise landing gear. (b) Remove steel rods and place in storage compartment built into support van curbside forward exterior wall. (c) Remove rear landing gear pads. (d) Stow pads on fittings at underside of support van near rear landing gear. Rotate attaching handles clockwise to secure pads in transit position. (e) Remove pins at both ends of landing gear struts. Detach vertical landing gear struts from rear landing gear. (f) Stow struts by pinning them to the pairs of storage fittings on sides of landing gear legs. (g) Detach diagonal landing gear struts from bottom of support van. (h) Swing landing gear and pins up to transit position and secure in place with the pins. y. Perform Final Power Down of Vans and Store Cables. (1) Remove five cable reels from support van center and rear belly compartments. (2) Remove cable reel roller fixture from support van roadside center belly compartment. (3) Attach crane assembly to curbside of support van. (a) Remove crane assembly from curbside rear belly compartment. (b) Slide the crane assembly attaching plates down into fittings on support van. (c) Rotate crank handle on crane assembly while assistant pulls out about 3 feet of cable. 3-40 7 December 2007 STP 9-94K13-SM-TG Performance Steps (4) Verify that test van front and rear exterior lights are not on. If on, enter test van rear door and turn lights off. (5) Verify test van rear door is closed and locked. (6) In support van, turn off interior and exterior lights. (7) At support van POWER ENTRY PANEL, set following circuit breakers as indicated: MAIN - set to OFF. ECU NO.3 - set to OFF. ECU NO.4 - set to OFF. CONTROL - set to OFF. AUXILIARY LIGHTS - set to OFF. EXTERIOR LIGHTS - set to OFF. EXTERIOR OUTLETS - set to OFF. (8) At test van power entry panel, set following circuit breakers as indicated: GEN NO.1 - set to OFF. GEN NO.2 - set to OFF. (9) At support van POWER ENTRY PANEL, verify all indicators are off. (10) At support van POWER ENTRY PANEL, detach power cable from INPUT POWER connector. (a) Attach protective cap to INPUT POWER connectors. (b) Attach protective cap to W405-P2. (c) If W408 is used, attach protective covers and stow W408 on top shelf in middle belly compartment. (11) Detach W407 ground cable from support van GROUND terminal. Reinstall mounting hardware. (12) Close and secure cover on support van POWER ENTRY PANEL. Attach flap of rear cover to Velcro strip near POWER ENTRY PANEL cover. (13) At test van power entry panel, detach W405-P1 from connector J3. (a) Attach protective cap to connector J3. (b) Attach protective cap to W405-P1. (14) Insert cable reel roller into an empty cable reel. Place reel and roller into reel stand and set stand upright. (15) Attach one end of W405 into fitting on cable reel. Roll W405 onto reel. (16) Secure free end of cable to reel. Roll cable reel to curbside of support van. (17) Position reel with W405 under crane assembly. (18) Stow reel with W405. (a) Attach cable end fitting into cable reel hub. Rotate fitting clockwise to secure to reel. (b) Rotate crank handle to raise reel from roller fixture. (c) Swing reel into position over belly compartment shelf. (d) Lower reel onto shelf and detach fitting from reel. (e) Secure reel to shelf with four web straps. (f) Push shelf all the way in and close belly compartment door. (19) At test van power entry panel, roll cover up and secure with two quarter-turn fasteners. (20) If a portable lighting fixture has been deployed, detach it from CONVENIENCE OUTLET. Stow lighting fixture. 7 December 2007 3-41 STP 9-94K13-SM-TG Performance Steps (21) At test van power entry panel, set following circuit breakers and switches as indicated: SUPPORT VAN POWER: GENERATOR NO.1-verify set to OFF. GENERATOR NO.2-verify set to OFF. 120 V PANEL OUTLET set to OFF. AUXILIARY LIGHTS set to OFF. EXTERIOR LIGHTS set to OFF. EXP SIDES AND WINCHES set to OFF. TECH MONITOR set to OFF. ECS MONITOR set to OFF. TECH MAIN CONTROL set to OFF. ECS MAIN CONTROL set to OFF. TECH MAIN set to OFF. ECS MAIN set to OFF. (22) Power down both generators. (23) At test van forward roadside, attach ladder to bracket straps located just below J1 on the power entry panel. (24) At test van power entry panel, detach W401 and W403. (a) Detach W401-P1 from J1. (b) Detach W403-P1 from J3. (c) Attach protective caps on cable connectors and power entry panel connectors. (25) Detach ground cable W407 from GROUND terminal. Reinstall mounting hardware. (26) Close protective cover over power entry panel. Secure in place with 20 fasteners. (27) Remove ladder from brackets at power entry panel. (a) Loosen locking knob and retract legs. (b) Tighten locking knob. (28) Stow ladder under test van. (a) Remove screws, washers and brackets. (b) Loosen screws securing tabs to test van. (c) Hold ladder in position under test van. Rotate tabs inward to hold ladder. (d) Install brackets with screws and lock washers over tabs on end of ladder. Tighten screws. (e) Tighten screws on tabs. (29) Detach W401-P2 from W402-P1. Attach protective covers to both connectors. (30) Detach W403-P2 from W404-P1. Attach protective covers to both connectors. (31) Detach W402 and W404 from generators 1 and 2. (a) Raise generator access cover. (b) Remove four screws and washers securing safety cover in place. (c) Loosen four terminal lugs securing eight cable leads and remove W402 and W404. (d) Install cover with four screws and washers. (e) Close access cover and secure in closed position. (f) Tighten weather boot. (g) Pull generator ground rods up and stow on generators. (32) Roll each of the power cables W401, W402, W403 and W404 onto separate cable reels. (33) Secure the free end of each cable to its reel. Roll each cable reel to belly compartment storage area. (34) Use crane assembly to stow cables in belly boxes as shown. Secure reels with web straps. (35) Detach crane assembly from side of support van. Stow in CURBSIDE REAR belly compartment and secure with web straps. (36) Stow cable reel roller assembly on upper shelf of ROADSIDE MIDDLE belly compartment. (37) Disconnect both W407 cables from the two ground rods. (38) Pull up two ground rods. (39) Stow both W407 cables in CURBSIDE REAR belly compartment. (40) Stow ground rods in CURBSIDE FRONT belly compartment. 3-42 7 December 2007 STP 9-94K13-SM-TG Performance Steps z. Complete the Teardown Procedure. (1) Stow all loose tools In support van. (a) Place all tools in tool boxes. (b) Place tool boxes in rack forward of roadside door. (c) Secure with web straps. (2) Secure remaining chair with web straps in support van. (3) Remove hanging ladder from fittings at support van roadside door. (a) Rotate handles inwards and remove hanging ladder from mounting holes. (b) Stow ladder on floor at support van entrance. (c) Secure with web straps. (4) Attach tractor to test van. (a) If necessary, rotate hand-crank on test van forward landing gear to raise van. (b) Back tractor up and couple to test van. (c) Attach electric and air lines. (d) Rotate hand-crank on test van forward landing gear to raise landing gear to full UP position. (e) Remove test van chock blocks from wheels and stow on hooks under test van. (f) Stow test van landing gear crank handles. Clamp tightly under clamping bar on undercarriage shelf above spare tire. (5) Attach tractor to support van. (a) If necessary, rotate hand-crank on support van forward landing gear to full UP position. (b) Stow landing gear pads on brackets under van near the landing gear. Secure in place with pin provided. (c) Stow support van landing gear cranks in fittings near landing gear. (d) Remove support van chock blocks from wheels and stow on hooks under support van. (6) Verify all belly compartment doors are closed and locked. 3. Observe all safety precautions. Performance Measures GO NO-GO 1. Deployed the EETF. —— —— 2. Tore Down the EETF. —— —— 3. Observed all safety precautions. —— —— Evaluation Guidance: Score the Soldier GO if all performance measures are passed (P). Score the Soldier NO-GO if any performance measure is failed (F). If the Soldier fails any performance measure, show what was done wrong and how to do it correctly. References Required TM 11-6625-3085-12-1 7 December 2007 Related 3-43 STP 9-94K13-SM-TG Subject Area 2: EETF Manual Repair Repair the Test Operator's Panel 093-94K-1003 Conditions: Perform this task in a contemporary operational environment given an Electronic Equipment Test Facility (EETF) with a faulty test operator's panel, TM 11-6625-3085-12-1, TM 11-6625-2773-20, TM 11-6625-2773-30-1, TM 11-6625-3085-30-5, TM 11-6625-2773-30-1-1, a generator set or commercial power, tools, materials, references, and personnel as listed in references. Standards: The task is complete when the fault is located, corrected, and the system passes self-test. All safety precautions are observed. Performance Steps 1. Ensure full power-up has been accomplished in accordance with TM 11-6625-3085-12-1, paragraph 2-3-74. 2. Run ILSST self-test program to determine faulty component(s). a. At the VDT, enter: TEST ILSST. b. Follow self-test procedures as shown on the VDT. 3. Perform manual troubleshooting procedures using TM 11-6625-2773-30-1-1 as required. 4. Restore the test station to its normal operating condition. a. Re-run self-test program as necessary. b. Perform manual troubleshooting procedures as necessary. 5. Observe all safety precautions. Performance Measures GO NO-GO 1. Ensured full power-up had been accomplished in accordance with TM 11-6625 3085-12-1, paragraph 2-3-74. —— —— 2. Ran ILSST self-test program to determine faulty component(s). —— —— 3. Performed manual troubleshooting procedures using TM 11-6625-2773-30-1-1 as required. —— —— 4. Restored the test station to its normal operating condition. —— —— 5. Observed all safety precautions. —— —— Evaluation Guidance: Score the Soldier GO if all performance measures are passed (P). Score the Soldier NO-GO if any performance measure is failed (F). If the Soldier fails any performance measure, show what was done wrong and how to do it correctly. References Required TM 11-6625-2773-20 TM 11-6625-2773-30-1 TM 11-6625-2773-30-1-1 TM 11-6625-3085-12-1 TM 11-6625-3085-30-5 3-44 Related TM 11-6625-2773-20P TM 11-6625-2773-30P TM 11-6625-2773-40 TM 11-6625-2773-40P TM 11-6625-3085-23P 7 December 2007 STP 9-94K13-SM-TG Repair the AC Control Assembly 093-94K-1004 Conditions: Perform this task in a contemporary operational environment given an Electronic Equipment Test Facility (EETF) with a faulty AC Control Assembly, TM 11-6625-3085-12-1, TM 11-6625-3085-12-3, a generator set or commercial power, tools, materials, references, and personnel as listed in references. Standards: The fault in the AC Control Panel Assembly is located and corrected in accordance with TM 11-6625-3085-12-3. All safety precautions are observed. Performance Steps 1. Attempt full power-up in accordance with TM 11-6625-3085-12-1, paragraph 2-3-74. 2. Run ILSST self-test program to determine faulty component(s). a. At the VDT, enter: TEST ILSST. b. Follow self-test procedures as shown on the VDT. 3. Perform manual troubleshooting procedures using TM 11-6625-2773-20, TM 11-6625-2773-30-1-1, and TM 11-6625-2773-30-4 as required. 4. Restore the test station to its normal operating condition. a. Re-run self-test program as necessary. b. Perform manual troubleshooting procedures as necessary. 5. Observe all safety precautions. Performance Measures GO NO-GO 1. Attempted full power-up in accordance with TM 11-6625-3085-12-1, paragraph 2 3-74. —— —— 2. Ran ILSST self-test program to determine faulty component(s). —— —— 3. Performed manual troubleshooting procedures using TM 11-6625-2773-20, TM 11-6625-2773-30-1-1, and TM 11-6625-2773-30-4 as required. —— —— 4. Restored the test station to its normal operating condition. —— —— 5. Observed all safety precautions. —— —— Evaluation Guidance: Score the Soldier GO if all performance measures are passed (P). Score the Soldier NO-GO if any performance measure is failed (F). If the Soldier fails any performance measure, show what was done wrong and how to do it correctly. References Required TM 11-6625-2773-20 TM 11-6625-2773-30-1-1 TM 11-6625-2773-30-4 TM 11-6625-3085-12-1 7 December 2007 Related TM 11-6625-2773-30-1 3-45 STP 9-94K13-SM-TG Repair the DC Station 093-94K-1006 Conditions: Perform this task in a contemporary operational environment given an Electronic Equipment Test Facility (EETF) with a faulty DC station, TM 11-6625-3085-12-1, TM 11-6625-2773-20, TM 11-6625 2773-30-1, TM 11-6625-2773-30-4, TM 11-6625-2773-30-1-1, TM 11-6625-2773-40, a generator set or commercial power, tools, materials, references, and personnel as listed in references. Standards: The task is complete when the fault is located, corrected, and the system passes self-test. All safety precautions are observed. Performance Steps 1. Ensure full power-up has been accomplished in accordance with TM 11-6625-3085-12-1, paragraph 2-3-74. 2. Run ILSST self-test program to determine faulty component(s). a. At the VDT, enter: TEST ILSST. b. Follow self-test procedures as shown on the VDT. 3. Perform manual troubleshooting procedures using TM 11-6625-2773-20, TM 11-6625-2773-30-1-1 and TM 11-6625-2773-30-4 as required. 4. Restore the test station to its normal operating condition. a. Re-run self-test program as necessary. b. Perform manual troubleshooting procedures as necessary. 5. Observe all safety precautions. Performance Measures GO NO-GO 1. Ensured full power-up had been accomplished in accordance with TM 11-6625 3085-12-1, paragraph 2-3-74. —— —— 2. Ran ILSST self-test program to determine faulty component(s). —— —— 3. Performed manual troubleshooting procedures using TM 11-6625-2773-20, TM 11-6625-2773-30-1-1, and TM 11-6625-2773-30-4 as required. —— —— 4. Restored the test station to its normal operating condition. —— —— 5. Observed all safety precautions. —— —— Evaluation Guidance: Score the Soldier GO if all performance measures are passed (P). Score the Soldier NO-GO if any performance measure is failed (F). If the Soldier fails any performance measure, show what was done wrong and how to do it correctly. References Required TM 11-6625-2773-20 TM 11-6625-2773-30-1-1 TM 11-6625-2773-30-4 TM 11-6625-2773-40 TM 11-6625-3085-12-1 3-46 Related TM 11-6625-2773-20P TM 11-6625-2773-30-1 TM 11-6625-2773-30P TM 11-6625-2773-40P TM 11-6625-3085-23P 7 December 2007 STP 9-94K13-SM-TG Repair the Waveform Generator (WFG) 093-94K-1007 Conditions: Perform this task in a contemporary operational environment given an Electronic Equipment Test Facility (EETF) with a faulty WFG, TM 11-6625-3085-12-1, TM 11-6625-2773-20, TM 11-6625-2773 30-1, TM 11-6625-2773-30-6, TM 11-6625-2773-30-1-1, TM 11-6625-2773-40, a generator set or commercial power, tools, materials, references, and personnel as listed in references. Standards: The task is complete when the fault is located, corrected, and the system passes self-test. All safety precautions are observed. Performance Steps 1. Ensure full power-up has been accomplished in accordance with TM 11-6625-3085-12-1, paragraph 2-3-74. 2. Run ILSST self-test program to determine faulty component(s). a. At the VDT, enter: TEST ILSST. b. Follow self-test procedures as shown on the VDT. 3. Perform manual troubleshooting procedures using TM 11-6625-2773-20, TM 11-6625-2773-30-1-1, and TM 11-6625-2773-30-6 as required. 4. Restore the test station to its normal operating condition. a. Re-run self-test program as necessary. b. Perform manual troubleshooting procedures as necessary. 5. Observe all safety precautions. Performance Measures GO NO-GO 1. Ensured full power-up had been accomplished in accordance with TM 11-6625 3085-12-1, paragraph 2-3-74. —— —— 2. Ran ILSST self-test program to determine faulty component(s). —— —— 3. Performed manual troubleshooting procedures using TM 11-6625-2773-20, TM 11-6625-2773-30-1-1 and TM 11-6625-2773-30-6 as required. —— —— 4. Restored the test station to its normal operating condition. —— —— 5. Observed all safety precautions. —— —— Evaluation Guidance: Score the Soldier GO if all performance measures are passed (P). Score the Soldier NO-GO if any performance measure is failed (F). If the Soldier fails any performance measure, show what was done wrong and how to do it correctly. References Required TM 11-6625-2773-20 TM 11-6625-2773-30-1-1 TM 11-6625-2773-30-6 TM 11-6625-3085-12-1 7 December 2007 Related TM 11-6625-2773-20P TM 11-6625-2773-30-1 TM 11-6625-2773-30P TM 11-6625-2773-40 TM 11-6625-2773-40P TM 11-6625-3085-23P 3-47 STP 9-94K13-SM-TG Repair the Pulse Generator (PG) 093-94K-1008 Conditions: Perform this task in a contemporary operational environment given an Electronic Equipment Test Facility (EETF) with a faulty PG, TM 11-6625-3085-12-1, TM 11-6625-2773-20, TM 11-6625-2773 30-1, TM 11-6625-2773-30-6, TM 11-6625-2773-30-1-1, a generator set or commercial power, tools, materials, references, and personnel as listed in references. Standards: The task is complete when the fault is located, corrected, and the system passes self-test. All safety precautions are observed. Performance Steps 1. Ensure full power-up has been accomplished in accordance with TM 11-6625-3085-12-1, paragraph 2-3-74. 2. Run ILSST self-test program to determine faulty component(s). a. At the VDT, enter: TEST ILSST. b. Follow self-test procedures as shown on the VDT. 3. Perform manual troubleshooting procedures using TM 11-6625-2773-20, TM 11-6625-2773-30-1-1, and TM 11-6625-2773-30-6 as required. 4. Restore the test station to its normal operating condition. a. Re-run self-test program as necessary. b. Perform manual troubleshooting procedures as necessary. 5. Observe all safety precautions. Performance Measures GO NO-GO 1. Ensured full power-up had been accomplished in accordance with TM 11-6625 3085-12-1, paragraph 2-3-74. —— —— 2. Ran ILSST self-test program to determine faulty component(s). —— —— 3. Performed manual troubleshooting procedures using TM 11-6625-2773-20, TM 11-6625-2773-30-1-1, and TM 11-6625-2773-30-6 as required. —— —— 4. Restored the test station to its normal operating condition. —— —— 5. Observed all safety precautions. —— —— Evaluation Guidance: Score the Soldier GO if all performance measures are passed (P). Score the Soldier NO-GO if any performance measure is failed (F). If the Soldier fails any performance measure, show what was done wrong and how to do it correctly. References Required TM 11-6625-2773-20 TM 11-6625-2773-30-1-1 TM 11-6625-2773-30-6 TM 11-6625-3085-12-1 3-48 Related TM 11-6625-2773-20P TM 11-6625-2773-30-1 TM 11-6625-2773-30P TM 11-6625-2773-40 TM 11-6625-2773-40P TM 11-6625-3085-23P 7 December 2007 STP 9-94K13-SM-TG Repair the Low-Speed Voltage Sampling Unit (LSVSU) 093-94K-1009 Conditions: Perform this task in a contemporary operational environment given an Electronic Equipment Test Facility (EETF) with a faulty LSVSU, TM 11-6625-3085-12-1, TM 11-6625-2773-20, TM 11-6625 2773-30-1, TM 11-6625-2773-30-6, TM 11-6625-2773-30-1-1, a generator set or commercial power, tools, materials, references, and personnel as listed in references. Standards: The task is complete when the fault is located, corrected, and the system passes self-test. All safety precautions are observed. Performance Steps 1. Ensure full power-up has been accomplished in accordance with TM 11-6625-3085-12-1, paragraph 2-3-74. 2. Run ILSST self-test program to determine faulty component(s). a. At the VDT, enter: TEST ILSST. b. Follow self-test procedures as shown on the VDT. 3. Perform manual troubleshooting procedures using TM 11-6625-2773-20, TM 11-6625-2773-30-1-1, and TM 11-6625-2773-30-6 as required. 4. Restore the test station to its normal operating condition. a. Re-run self-test program as necessary. b. Perform manual troubleshooting procedures as necessary. 5. Observe all safety precautions. Performance Measures GO NO-GO 1. Ensured full power-up had been accomplished in accordance with TM 11-6625 3085-12-1, paragraph 2-3-74. —— —— 2. Ran ILSST self-test program to determine faulty component(s). —— —— 3. Performed manual troubleshooting procedures using TM 11-6625-2773-20, TM 11-6625-2773-30-1-1, and TM 11-6625-2773-30-6 as required. —— —— 4. Restored the test station to its normal operating condition. —— —— 5. Observed all safety precautions. —— —— Evaluation Guidance: Score the Soldier GO if all performance measures are passed (P). Score the Soldier NO-GO if any performance measure is failed (F). If the Soldier fails any performance measure, show what was done wrong and how to do it correctly. References Required TM 11-6625-2773-20 TM 11-6625-2773-30-1-1 TM 11-6625-2773-30-6 TM 11-6625-3085-12-1 7 December 2007 Related TM 11-6625-2773-20P TM 11-6625-2773-30-1 TM 11-6625-2773-30P TM 11-6625-2773-40 TM 11-6625-2773-40P TM 11-6625-3085-23P 3-49 STP 9-94K13-SM-TG Repair the High-Speed Voltage Sampling Unit (HSVSU) 093-94K-1010 Conditions: Perform this task in a contemporary operational environment given an Electronic Equipment Test Facility (EETF) with a faulty HSVSU, TM 11-6625-3085-12-1, TM 11-6625-2773-20, TM 11-6625 2773-30-1, TM 11-6625-2773-30-6, TM 11-6625-2773-30-1-1, a generator set or commercial power, tools, materials, references, and personnel as listed in references. Standards: The task is complete when the fault is located, corrected, the system passes self-test. All safety precautions are observed. Performance Steps 1. Ensure full power-up has been accomplished in accordance with TM 11-6625-3085-12-1, paragraph 2-3-74. 2. Run ILSST self-test program to determine faulty component(s). a. At the VDT, enter: TEST ILSST. b. Follow self-test procedures as shown on the VDT. 3. Perform manual troubleshooting procedures using TM 11-6625-2773-20, TM 11-6625-2773-30-1-1, and TM 11-6625-2773-30-6 as required. 4. Restore the test station to its normal operating condition. a. Re-run self-test program as necessary. b. Perform manual troubleshooting procedures as necessary. 5. Observe all safety precautions. Performance Measures GO NO-GO 1. Ensured full power-up had been accomplished in accordance with TM 11-6625 3085-12-1, paragraph 2-3-74. —— —— 2. Ran ILSST self-test program to determine faulty component(s). —— —— 3. Performed manual troubleshooting procedures using TM 11-6625-2773-20, TM 11-6625-2773-30-1-1 and TM 11-6625-2773-30-6 as required. —— —— 4. Restored the test station to its normal operating condition. —— —— 5. Observed all safety precautions. —— —— Evaluation Guidance: Score the Soldier GO if all performance measures are passed (P). Score the Soldier NO-GO if any performance measure is failed (F). If the Soldier fails any performance measure, show what was done wrong and how to do it correctly. References Required TM 11-6625-2773-20 TM 11-6625-2773-30-1-1 TM 11-6625-2773-30-6 TM 11-6625-3085-12-1 3-50 Related TM 11-6625-2773-20P TM 11-6625-2773-30-1 TM 11-6625-2773-30P TM 11-6625-2773-40 TM 11-6625-2773-40P TM 11-6625-3085-23P 7 December 2007 STP 9-94K13-SM-TG Repair the Frequency Sampling Unit (FSU) 093-94K-1011 Conditions: Perform this task in a contemporary operational environment given an Electronic Equipment Test Facility (EETF) with a faulty FSU, TM 11-6625-3085-12-1, TM 11-6625-2773-20, TM 11-6625-2773 30-1, TM 11-6625-2773-30-6, TM 11-6625-2773-30-1-1, a generator set or commercial power, tools, materials, references, and personnel as listed in references. Standards: The task is complete when the fault is located and corrected and the system passes the selftest. All safety precautions are observed. Performance Steps 1. Ensure full power-up has been accomplished in accordance with TM 11-6625-3085-12-1, paragraph 2-3-74. 2. Run ILSST self-test program to determine faulty component(s). a. At the VDT, enter: TEST ILSST. b. Follow self-test procedures as shown on the VDT. 3. Perform manual troubleshooting procedures using TM 11-6625-2773-20, TM 11-6625-2773-30-1-1, and TM 11-6625-2773-30-6 as required. 4. Restore the test station to its normal operating condition. a. Re-run self-test program as necessary. b. Perform manual troubleshooting procedures as necessary. 5. Observe all safety precautions. Performance Measures GO NO-GO 1. Ensured full power-up had been accomplished in accordance with TM 11-6625 3085-12-1, paragraph 2-3-74. —— —— 2. Ran ILSST self-test program to determine faulty component(s). —— —— 3. Performed manual troubleshooting procedures using TM 11-6625-2773-20, TM 11-6625-2773-30-1-1, and TM 11-6625-2773-30-6 as required. —— —— 4. Restored the test station to its normal operating condition. —— —— 5. Observed all safety precautions. —— —— Evaluation Guidance: Score the Soldier GO if all performance measures are passed (P). Score the Soldier NO-GO if any performance measure is failed (F). If the Soldier fails any performance measure, show what was done wrong and how to do it correctly. References Required TM 11-6625-2773-20 TM 11-6625-2773-30-1-1 TM 11-6625-2773-30-6 TM 11-6625-3085-12-1 7 December 2007 Related TM 11-6625-2773-20P TM 11-6625-2773-30-1 TM 11-6625-2773-30P TM 11-6625-2773-40 TM 11-6625-2773-40P TM 11-6625-3085-23P 3-51 STP 9-94K13-SM-TG Repair the System Clock SubSystem 093-94K-1014 Conditions: Perform this task in a contemporary operational environment given an Electronic Equipment Test Facility (EETF) with a faulty System Clock, TM 11-6625-3085-12-1, TM 11-6625-2773-20, TM 11-6625-2773-30-1, TM 11-6625-2773-30-6, TM 11-6625-2773-30-1-1, a generator set or commercial power, tools, materials, references, and personnel as listed in references. Standards: The task is complete when the fault is located, corrected, and the system passes self-test. All safety precautions are observed. Performance Steps 1. Ensure full power-up has been accomplished in accordance with TM 11-6625-3085-12-1, paragraph 2-3-74. 2. Run ILSST self-test program to determine faulty component(s). a. At the VDT, enter: TEST ILSST. b. Follow self-test procedures as shown on the VDT. 3. Perform manual troubleshooting procedures using TM 11-6625-2773-20, TM 11-6625-2773-30-1-1, and TM 11-6625-2773-30-6 as required. 4. Restore the test station to its normal operating condition. a. Re-run self-test program as necessary. b. Perform manual troubleshooting procedures as necessary. 5. Observe all safety precautions. Performance Measures GO NO-GO 1. Ensured full power-up had been accomplished in accordance with TM 11-6625-3085-12-1, paragraph 2-3-74. —— —— 2. Ran ILSST self-test program to determine faulty component(s). —— —— 3. Performed manual troubleshooting procedures using TM 11-6625-2773-20, TM 11-6625-2773-30-1-1, and TM 11-6625-2773-30-6 as required. —— —— 4. Restored the test station to its normal operating condition. —— —— 5. Observed all safety precautions. —— —— Evaluation Guidance: Score the Soldier GO if all performance measures are passed (P). Score the Soldier NO-GO if any performance measure is failed (F). If the Soldier fails any performance measure, show what was done wrong and how to do it correctly. References Required TM 11-6625-2773-20 TM 11-6625-2773-30-1-1 TM 11-6625-2773-30-6 TM 11-6625-3085-12-1 3-52 Related TM 11-6625-2773-20P TM 11-6625-2773-30-1 TM 11-6625-2773-30P TM 11-6625-2773-40 TM 11-6625-2773-40P TM 11-6625-3085-23P 7 December 2007 STP 9-94K13-SM-TG Repair the RFB Synthesizer 093-94K-1015 Conditions: Perform this task in a contemporary operational environment given an Electronic Equipment Test Facility (EETF) with a faulty RFB, TM 11-6625-3085-12-1, TM 11-6625-2773-20, TM 11-6625-2773 30-1, TM 11-6625-2773-30-6, TM 11-6625-2773-30-1-1, a generator set or commercial power, tools, materials, references, and personnel as listed in references. Standards: The task is complete when the fault is located, corrected, and the system passes self-test. All safety precautions are observed. Performance Steps 1. Ensure full power-up has been accomplished in accordance with TM 11-6625-3085-12-1, paragraph 2-3-74. 2. Run ILSST self-test program to determine faulty component(s). a. At the VDT, enter: TEST ILSST. b. Follow self-test procedures as shown on the VDT. 3. Perform manual troubleshooting procedures using TM 11-6625-2773-20, TM 11-6625-2773-30-1-1, and TM 11-6625-2773-30-6 as required. 4. Restore the test station to its normal operating condition. a. Re-run self-test program as necessary. b. Perform manual troubleshooting procedures as necessary. 5. Observe all safety precautions. Performance Measures GO NO-GO 1. Ensured full power-up had been accomplished in accordance with TM 11-6625 3085-12-1, paragraph 2-3-74. —— —— 2. Ran ILSST self-test program to determine faulty component(s). —— —— 3. Performed manual troubleshooting procedures using TM 11-6625-2773-20, TM 11-6625-2773-30-1-1, and TM 11-6625-2773-30-6 as required. —— —— 4. Restored the test station to its normal operating condition. —— —— 5. Observed all safety precautions. —— —— Evaluation Guidance: Score the Soldier GO if all performance measures are passed (P). Score the Soldier NO-GO if any performance measure is failed (F). If the Soldier fails any performance measure, show what was done wrong and how to do it correctly. References Required TM 11-6625-2773-20 TM 11-6625-2773-30-1-1 TM 11-6625-2773-30-6 TM 11-6625-3085-12-1 7 December 2007 Related TM 11-6625-2773-20P TM 11-6625-2773-30-1 TM 11-6625-2773-30P TM 11-6625-2773-40 TM 11-6625-2773-40P TM 11-6625-3085-23P 3-53 STP 9-94K13-SM-TG Repair the Power Protection Kit MK-2046A/MSM 093-94K-1019 Conditions: Perform this task in a contemporary operational environment given an Electronic Equipment Test Facility (EETF) with a faulty MK-2046A/MSM power protection kit, TM 11-6130-415-14, a generator set or commercial power, tools, materials, references, and personnel as listed in references. Standards: The task is complete when the fault is located, corrected, and the power protection kit passes self-test. All safety precautions are observed. Performance Steps 1. Perform preliminary operating procedures and normal operating in accordance with TM 11-6130-415-14. 2. Perform fault location procedures in accordance with TM 11-6130-415-14, Section 2. 3. Perform replacement procedures in accordance with TM 11-6130-415-14, Section 3. 4. Restore the power protection kit to normal operating condition. a. Re-run self-test as necessary. b. Perform troubleshooting and replacement procedures as necessary. 5. Observe all safety precautions. Performance Measures GO NO-GO 1. Performed preliminary operating procedures and normal operating mode in accordance with TM 11-6130-415-14. —— —— 2. Performed fault location procedures in accordance with TM 11-6130-415-14, Section 2. —— —— 3. Performed replacement procedures in accordance with TM 11-6130-415-14, Section 3. —— —— 4. Restored the power protection kit to its normal operating condition. —— —— 5. Observed all safety precautions. —— —— Evaluation Guidance: Score the Soldier GO if all performance measures are passed (P). Score the Soldier NO-GO if any performance measure is failed (F). If the Soldier fails any performance measure, show what was done wrong and how to do it correctly. References Required TM 11-6130-415-14 3-54 Related 7 December 2007 STP 9-94K13-SM-TG Repair the Programmable Interface Unit (PIU) 093-94K-1025 Conditions: Perform this task in a contemporary operational environment given an Electronic Equipment Test Facility (EETF) with a faulty PIU, TM 11-6625-3085-12-1, TM 11-6625-2773-20, TM 11-6625-2773 30-1, TM 11-6625-2773-30-5, TM 11-6625-2773-30-1-1, a generator set or commercial power, tools, materials, references, and personnel as listed in references. Standards: The task is complete when the fault is located, corrected, and the system passes self-test. All safety precautions are observed. Performance Steps 1. Ensure full power-up has been accomplished in accordance with TM 11-6625-3085-12-1, paragraph 2-3-74. 2. Run ILSST self-test program to determine faulty component(s). a. At the VDT, enter: TEST ILSST. b. Follow self-test procedures as shown on the VDT. 3. Perform manual troubleshooting procedures using TM 11-6625-2773-20, TM 11-6625-2773-30-1-1, and TM 11-6625-2773-30-5 as required. 4. Restore the test station to its normal operating condition. a. Re-run self-test program as necessary. b. Perform manual troubleshooting procedures as necessary. 5. Observe all safety precautions. Performance Measures GO NO-GO 1. Ensured full power-up had been accomplished in accordance with TM 11-6625 3085-12-1, paragraph 2-3-74. —— —— 2. Ran ILSST self-test program to determine faulty component(s). —— —— 3. Performed manual troubleshooting procedures using TM 11-6625-2773-20, TM 11-6625-2773-30-1-1, and TM 11-6625-2773-30-5 as required. —— —— 4. Restored the test station to its normal operating condition. —— —— 5. Observed all safety precautions. —— —— Evaluation Guidance: Score the Soldier GO if all performance measures are passed (P). Score the Soldier NO-GO if any performance measure is failed (F). If the Soldier fails any performance measure, show what was done wrong and how to do it correctly. References Required TM 11-6625-2773-20 TM 11-6625-2773-30-1-1 TM 11-6625-2773-30-5 TM 11-6625-3085-12-1 7 December 2007 Related TM 11-6625-2773-20P TM 11-6625-2773-30-1 TM 11-6625-2773-30P TM 11-6625-2773-40 TM 11-6625-2773-40P TM 11-6625-3085-23P 3-55 STP 9-94K13-SM-TG Repair the Dedicated Interface Unit (DIU) 093-94K-1026 Conditions: Perform this task in a contemporary operational environment given an Electronic Equipment Test Facility (EETF) with a faulty DIU, TM 11-6625-3085-12-1, TM 11-6625-2773-20, TM 11-6625-2773 30-1, TM 11-6625-2773-30-6, TM 11-6625-2773-30-1-1, a generator set or commercial power, tools, materials, references, and personnel as listed in references. Standards: The task is complete when the fault is located, corrected, and the system passes self-test. All safety precautions are observed. Performance Steps 1. Ensure full power-up has been accomplished in accordance with TM 11-6625-3085-12-1, paragraph 2-3-74. 2. Run ILSST self-test program to determine faulty component(s). a. At the VDT, enter: TEST ILSST. b. Follow self-test procedures as shown on the VDT. 3. Perform manual troubleshooting procedures using TM 11-6625-2773-20, TM 11-6625-2773-30-1-1, and TM 11-6625-2773-30-6 as required. 4. Restore the test station to its normal operating condition. a. Re-run self-test program as necessary. b. Perform manual troubleshooting procedures as necessary. 5. Observe all safety precautions. Performance Measures GO NO-GO 1. Ensured full power-up had been accomplished in accordance with TM 11-6625 3085-12-1, paragraph 2-3-74. —— —— 2. Ran ILSST self-test program to determine faulty component(s). —— —— 3. Performed manual troubleshooting procedures using TM 11-6625-2773-20, TM 11-6625-2773-30-1-1, and TM 11-6625-2773-30-6 as required. —— —— 4. Restored the test station to its normal operating condition. —— —— 5. Observed all safety precautions. —— —— Evaluation Guidance: Score the Soldier GO if all performance measures are passed (P). Score the Soldier NO-GO if any performance measure is failed (F). If the Soldier fails any performance measure, show what was done wrong and how to do it correctly. References Required TM 11-6625-2773-20 TM 11-6625-2773-30-1 TM 11-6625-2773-30-1-1 TM 11-6625-2773-30-6 TM 11-6625-3085-12-1 3-56 Related TM 11-6625-2773-20P TM 11-6625-2773-30P TM 11-6625-2773-40 TM 11-6625-2773-40P TM 11-6625-3085-23P 7 December 2007 STP 9-94K13-SM-TG Repair the Interconnect Wiring Harness 093-94K-1027 Conditions: Perform this task in a contemporary operational environment given an Electronic Equipment Test Facility (EETF) with a faulty wiring harness in the Test System, technical manuals (TMs) as listed in references, a generator set or commercial power, tools, materials, and personnel as listed in appropriate reference. Standards: A defective wire in the Test System wiring harness is located and repaired in accordance with appropriate TM. All safety precautions are observed. Performance Steps 1. Ensure full power-up has been accomplished in accordance with TM 11-6625-3085-12-1, paragraph 2-3-74. 2. Run ILSST, AHST, and EOBST self-test programs to determine the faulty wiring harness(es). a. At the VDT, enter: TEST ILSST. b. Follow procedures and note failures as shown on the VDT. c. At the VDT, enter: TEST AHST. d. Follow procedures and note failures as shown on the VDT. e. At the VDT, enter: TEST EOBST. f. Follow procedures and note failures as shown on the VDT. 3. Perform manual troubleshooting procedures using TM 11-6625-2773-30-1, TM 11-6625-2773-30-1 1, TM 11-6625-2773-30-4, TM 11-6625-2773-30-5, TM 11-6625-2773-30-6, TM 11-6625-3081-23-1, TM 11-6625-3081-23-2, TM 11-6625-3081-23-4, TM 11-6625-3085-30-3, and TM 11-6625-3085-30 5 as required. 4. Restore the test station to its normal operating condition. a. Re-run self-test program(s) as necessary. b. Perform manual troubleshooting procedures as necessary. 5. Observe all safety precautions. Performance Measures GO NO-GO 1. Ensured full power-up had been accomplished in accordance with TM 11-6625 3085-12-1, paragraph 2-3-74. —— —— 2. Ran ILSST, AHST, and EOBST self-test programs to determine the faulty wiring harness(es). —— —— 3. Performed manual troubleshooting procedures using TM 11-6625-2773-30-1, TM 11-6625-2773-30-1-1, TM 11-6625-2773-30-4, TM 11-6625-2773-30-5, TM 11-6625-2773-30-6, TM 11-6625-3081-23-1, TM 11-6625-3081-23-2, TM 11-6625-3081-23-4, TM 11-6625-3085-30-3, and TM 11-6625-3085-30-5 as required. —— —— 4. Restored the test station to its normal operating condition. —— —— 5. Observed all safety precautions. —— —— Evaluation Guidance: Score the Soldier GO if all performance measures are passed (P). Score the Soldier NO-GO if any performance measure is failed (F). If the Soldier fails any performance measure, show what was done wrong and how to do it correctly. 7 December 2007 3-57 STP 9-94K13-SM-TG References Required TM 11-6625-2773-30-1 TM 11-6625-2773-30-1-1 TM 11-6625-2773-30-4 TM 11-6625-2773-30-5 TM 11-6625-2773-30-6 TM 11-6625-3081-23-1 TM 11-6625-3081-23-2 TM 11-6625-3081-23-4 TM 11-6625-3085-12-1 TM 11-6625-3085-30-1 TM 11-6625-3085-30-3 TM 11-6625-3085-30-5 3-58 Related TM 11-6625-2773-30P TM 11-6625-2773-40P TM 11-6625-3081-23-3 TM 11-6625-3081-23-5 TM 11-6625-3085-12-3 TM 11-6625-3085-23P 7 December 2007 STP 9-94K13-SM-TG Repair the Electronics Station 093-94K-1101 Conditions: Perform this task in a contemporary operational environment given an Electronic Equipment Test Facility (EETF) with a faulty Electronics Station, TM 11-6625-3085-12-1, TM 11-6625-3081-23-1, TM 11-6625-3081-23-2, TM 11-6625-3081-23-3, TM 11-6625-3081-23-4, TM 11-6625-3081-23-5, a generator set or commercial power, tools, materials, references, and personnel as listed in references. Standards: The task is complete when the fault is located, corrected, and the system passes self-test. All safety precautions are observed. Performance Steps 1. Ensure full power-up has been accomplished in accordance with TM 11-6625-3085-12-1, paragraph 2-3-74. 2. Run EOBST self-test program to determine faulty component(s). a. At the VDT, enter: TEST EOBST. b. Follow self-test procedures as shown on the VDT. 3. Perform manual troubleshooting procedures using TM 11-6625-3081-23-1, TM 11-6625-3081-23-5, and the EOB Student Handout as required. 4. Restore the test station to its normal operating condition. a. Re-run self-test program as necessary. b. Perform manual troubleshooting procedures as necessary. 5. Observe all safety precautions. Performance Measures GO NO-GO 1. Ensured full power-up had been accomplished in accordance with TM 11-6625 3085-12-1, paragraph 2-3-74. —— —— 2. Ran EOBST self-test program to determine faulty component(s). —— —— 3. Performed manual troubleshooting procedures using TM 11-6625-3081-23-1, TM 11-6625-3081-23-5, and the EOB Student Handout as required. —— —— 4. Restored the test station to its normal operating condition. —— —— 5. Observed all safety precautions. —— —— Evaluation Guidance: Score the Soldier GO if all performance measures are passed (P). Score the Soldier NO-GO if any performance measure is failed (F). If the Soldier fails any performance measure, show what was done wrong and how to do it correctly. References Required TM 11-6625-3081-23-1 TM 11-6625-3081-23-2 TM 11-6625-3081-23-3 TM 11-6625-3081-23-4 TM 11-6625-3081-23-5 TM 11-6625-3085-12-1 7 December 2007 Related TM 1-6625-3081-30P 3-59 STP 9-94K13-SM-TG Repair the Test Console 093-94K-1102 Conditions: Perform this task in a contemporary operational environment given an Electronic Equipment Test Facility (EETF) with a faulty Test Console, TM 11-6625-3085-12-1, TM 11-6625-3081-23-1, TM 11 6625-3081-23-2, TM 11-6625-3081-23-3, TM 11-6625-3081-23-4, TM 11-6625-3081-23-5, a generator set or commercial power, tools, materials, references, and personnel as listed in references. Standards: The task is complete when the fault is located, corrected, and the system passes self-test. All safety precautions are observed. Performance Steps 1. Ensure full power-up has been accomplished in accordance with TM 11-6625-3085-12-1, paragraph 2-3-74. 2. Run EOBST self-test program to determine faulty component(s). a. At the VDT, enter: TEST EOBST. b. Follow self-test procedures as shown on the VDT. 3. Perform manual troubleshooting procedures using TM 11-6625-3081-23-1, TM 11-6625-3081-23-5, and the EOB Student Handout as required. 4. Restore the test station to its normal operating condition. a. Re-run self-test program as necessary. b. Perform manual troubleshooting procedures as necessary. 5. Observe all safety precautions. Performance Measures GO NO-GO 1. Ensured full power-up had been accomplished in accordance with TM 11-6625 3085-12-1, paragraph 2-3-74. —— —— 2. Ran EOBST self-test program to determine faulty component(s). —— —— 3. Performed manual troubleshooting procedures using TM 11-6625-3081-23-1, TM 11-6625-3081-23-5, and the EOB Student Handout as required. —— —— 4. Restored the test station to its normal operating condition. —— —— 5. Observed all safety precautions. —— —— Evaluation Guidance: Score the Soldier GO if all performance measures are passed (P). Score the Soldier NO-GO if any performance measure is failed (F). If the Soldier fails any performance measure, show what was done wrong and how to do it correctly. References Required TM 11-6625-3081-23-1 TM 11-6625-3081-23-2 TM 11-6625-3081-23-3 TM 11-6625-3081-23-4 TM 11-6625-3081-23-5 TM 11-6625-3085-12-1 3-60 Related TM 1-6625-3081-30P 7 December 2007 STP 9-94K13-SM-TG Repair the Dayside Test Bench 093-94K-1103 Conditions: Perform this task in a contemporary operational environment given an Electronic Equipment Test Facility (EETF) with a faulty Dayside Test Bench, TM 11-6625-3085-12-1, TM 11-6625-3081-23-1, TM 11-6625-3081-23-2, TM 11-6625-3081-23-3, TM 11-6625-3081-23-4, TM 11-6625-3081-23-5, a generator set or commercial power, tools, materials, references, and personnel as listed in references. Standards: The task is complete when the fault is located, corrected, and the system passes self-test. All safety precautions are observed. Performance Steps 1. Ensure full power-up has been accomplished in accordance with TM 11-6625-3085-12-1, paragraph 2-3-74. 2. Run EOBST self-test program to determine faulty component(s). a. At the VDT, enter: TEST EOBST. b. Follow self-test procedures as shown on the VDT. 3. Perform manual troubleshooting procedures using TM 11-6625-3081-23-1, TM 11-6625-3081-23-5, and the EOB Student Handout as required. 4. Restore the test station to its normal operating condition. a. Re-run self-test program as necessary. b. Perform manual troubleshooting procedures as necessary. 5. Observe all safety precautions. Performance Measures GO NO-GO 1. Ensured full power-up had been accomplished in accordance with TM 11-6625 3085-12-1, paragraph 2-3-74. —— —— 2. Ran EOBST self-test program to determine faulty component(s). —— —— 3. Performed manual troubleshooting procedures using TM 11-6625-3081-23-1, TM 11-6625-3081-23-5, and the EOB Student Handout as required. —— —— 4. Restored the test station to its normal operating condition. —— —— 5. Observed all safety precautions. —— —— Evaluation Guidance: Score the Soldier GO if all performance measures are passed (P). Score the Soldier NO-GO if any performance measure is failed (F). If the Soldier fails any performance measure, show what was done wrong and how to do it correctly. References Required TM 11-6625-3081-23-1 TM 11-6625-3081-23-2 TM 11-6625-3081-23-3 TM 11-6625-3081-23-4 TM 11-6625-3081-23-5 TM 11-6625-3085-12-1 7 December 2007 Related TM 1-6625-3081-30P 3-61 STP 9-94K13-SM-TG Repair the Nightside Test Bench 093-94K-1104 Conditions: Perform this task in a contemporary operational environment given an Electronic Equipment Test Facility (EETF) with a faulty Nightside Test Bench, TM 11-6625-3085-12-1, TM 11-6625-3081-23-1, TM 11-6625-3081-23-2, TM 11-6625-3081-23-3, TM 11-6625-3081-23-4, TM 11-6625-3081-23-5, a generator set or commercial power, tools, materials, references, and personnel as listed in references. Standards: The task is complete when the fault is located, corrected, and the system passes self-test. All safety precautions are observed. Performance Steps 1. Ensure full power-up has been accomplished in accordance with TM 11-6625-3085-12-1, paragraph 2-3-74. 2. Run EOBST self-test program to determine faulty component(s). a. At the VDT, enter: TEST EOBST. b. Follow self-test procedures as shown on the VDT. 3. Perform manual troubleshooting procedures using TM 11-6625-3085-12-1, TM 11-6625-3085-12-5, and the EOB Student Handout as required. 4. Restore the test station to its normal operating condition. a. Re-run self-test program as necessary. b. Perform manual troubleshooting procedures as necessary. 5. Observe all safety precautions. Performance Measures GO NO-GO 1. Ensured full power-up had been accomplished in accordance with TM 11-6625 3085-12-1, paragraph 2-3-74. —— —— 2. Ran EOBST self-test program to determine faulty component(s). —— —— 3. Performed manual troubleshooting procedures using TM 11-6625-3085-12-1, TM 11-6625-3085-12-5, and the EOB Student Handout as required. —— —— 4. Restored the test station to its normal operating condition. —— —— 5. Observed all safety precautions. —— —— Evaluation Guidance: Score the Soldier GO if all performance measures are passed (P). Score the Soldier NO-GO if any performance measure is failed (F). If the Soldier fails any performance measure, show what was done wrong and how to do it correctly. References Required TM 11-6625-3081-23-1 TM 11-6625-3081-23-2 TM 11-6625-3081-23-3 TM 11-6625-3081-23-4 TM 11-6625-3081-23-5 TM 11-6625-3085-12-1 3-62 Related TM 1-6625-3081-30P 7 December 2007 STP 9-94K13-SM-TG Repair the Interface System 093-94K-1105 Conditions: Perform this task in a contemporary operational environment given an Electronic Equipment Test Facility (EETF) with a faulty Interface Station, TM 11-6625-3085-12-1, TM 11-6625-3085-12-3, TM 11-6625-3085-30-2, TM 11-6625-2773-30-1-1, a generator set or commercial power, tools, materials, references, and personnel as listed in references. Standards: The task is complete when the fault is located, corrected, and the system passes self-test. All safety precautions are observed. Performance Steps 1. Ensure full power-up has been accomplished in accordance with TM 11-6625-3085-12-1, paragraph 2-3-74. 2. Run AHST self-test program to determine faulty component(s). a. At the VDT, enter: TEST AHST. b. Follow self-test procedures as shown on the VDT. 3. Perform manual troubleshooting procedures using TM 11-6625-3085-12-3, TM 11-6625-3085-30-1-1, and TM 11-6625-3085-30-2 as required. 4. Restore the test station to its normal operating condition. a. Re-run self-test program as necessary. b. Perform manual troubleshooting procedures as necessary. 5. Observe all safety precautions. Performance Measures GO NO-GO 1. Ensured full power-up had been accomplished in accordance with TM 11-6625 3085-12-1, paragraph 2-3-74. —— —— 2. Ran AHST self-test program to determine faulty component(s). —— —— 3. Performed manual troubleshooting procedures using TM 11-6625-3085-12-3, TM 11-6625-3085-30-1-1, and TM 11-6625-3085-30-2 as required. —— —— 4. Restored the test station to its normal operating condition. —— —— 5. Observed all safety precautions. —— —— Evaluation Guidance: Score the Soldier GO if all performance measures are passed (P). Score the Soldier NO-GO if any performance measure is failed (F). If the Soldier fails any performance measure, show what was done wrong and how to do it correctly. References Required TM 11-6625-2773-30-1-1 TM 11-6625-3085-12-1 TM 11-6625-3085-12-3 TM 11-6625-3085-30-2 7 December 2007 Related TM 11-6625-3085-12-2 TM 11-6625-3085-23P 3-63 STP 9-94K13-SM-TG Repair the AC Station/Stimulus Subsystem 093-94K-1106 Conditions: Perform this task in a contemporary operational environment given an Electronic Equipment Test Facility (EETF) with a faulty AC Station/Stimulus Subsystem, TM 11-6625-3085-12-1, TM 11-6625 3085-12-3, TM 11-6625-3085-30-1, TM 11-6625-2773-30-1-1, a generator set or commercial power, tools, materials, references, and personnel as listed in references. Standards: The task is complete when the fault is located, corrected, and the system passes self-test. All safety precautions are observed. Performance Steps 1. Ensure full power-up has been accomplished in accordance with TM 11-6625-3085-12-1, paragraph 2-3-74. 2. Run AHST self-test program to determine faulty component(s). a. At the VDT, enter: TEST AHST. b. Follow self-test procedures as shown on the VDT. 3. Perform manual troubleshooting procedures using TM 11-6625-3085-12-3, TM 11-6625-3085-30-1, TM 11-6625-3085-30-1-1, and TM 11-6625-3085-30-2 as required. 4. Restore the test station to its normal operating condition. a. Re-run self-test program as necessary. b. Perform manual troubleshooting procedures as necessary. 5. Observe all safety precautions. Performance Measures GO NO-GO 1. Ensured full power-up had been accomplished in accordance with TM 11-6625-3085-12-1, paragraph 2-3-74. —— —— 2. Ran AHST self-test program to determine faulty component(s). —— —— 3. Performed manual troubleshooting procedures using TM 11-6625-3085-12-3, TM 11-6625-3085-30-1, TM 11-6625-3085-30-1-1, and TM 11-6625-3085-30-2 as required. —— —— 4. Restored the test station to its normal operating condition. —— —— 5. Observed all safety precautions. —— —— Evaluation Guidance: Score the Soldier GO if all performance measures are passed (P). Score the Soldier NO-GO if any performance measure is failed (F). If the Soldier fails any performance measure, show what was done wrong and how to do it correctly. References Required TM 11-6625-2773-30-1-1 TM 11-6625-3085-12-1 TM 11-6625-3085-12-3 TM 11-6625-3085-30-1 TM 11-6625-3085-30-2 3-64 Related TM 11-6625-3085-12-2 TM 11-6625-3085-23P 7 December 2007 STP 9-94K13-SM-TG Repair the Video Subsystem 093-94K-1107 Conditions: Perform this task in a contemporary operational environment given an Electronic Equipment Test Facility (EETF) with a faulty Video Subsystem, TM 11-6625-3085-12-1, TM 11-6625-3085-12-3, TM 11-6625-3085-30-2, TM 11-6625-2773-30-1-1, a generator set or commercial power, tools, materials, references, and personnel as listed in references. Standards: The task is complete when the fault is located, corrected, and the system passes self-test. All safety precautions are observed. Performance Steps 1. Ensure full power-up has been accomplished in accordance with TM 11-6625-3085-12-1, paragraph 2-3-74. 2. Run AHST self-test program to determine faulty component(s). a. At the VDT, enter: TEST AHST. b. Follow self-test procedures as shown on the VDT. 3. Perform manual troubleshooting procedures using TM 11-6625-3085-12-3, TM 11-6625-3085-30-1 1, and TM 11-6625-3085-30-2 as required. 4. Restore the test station to its normal operating condition. a. Re-run self-test program as necessary. b. Perform manual troubleshooting procedures as necessary. 5. Observe all safety precautions. Performance Measures GO NO-GO 1. Ensured full power-up had been accomplished in accordance with TM 11-6625 3085-12-1, paragraph 2-3-74. —— —— 2. Ran AHST self-test program to determine faulty component(s). —— —— 3. Performed manual troubleshooting procedures using TM 11-6625-3085-12-3, TM 11-6625-3085-30-1-1, and TM 11-6625-3085-30-2 as required. —— —— 4. Restored the test station to its normal operating condition. —— —— 5. Observed all safety precautions. —— —— Evaluation Guidance: Score the Soldier GO if all performance measures are passed (P). Score the Soldier NO-GO if any performance measure is failed (F). If the Soldier fails any performance measure, show what was done wrong and how to do it correctly. References Required TM 11-6625-2773-30-1-1 TM 11-6625-3085-12-1 TM 11-6625-3085-12-3 TM 11-6625-3085-30-2 7 December 2007 Related TM 11-6625-3085-12-2 TM 11-6625-3085-23P 3-65 STP 9-94K13-SM-TG Repair the Pneumatic Subsystem 093-94K-1108 Conditions: Perform this task in a contemporary operational environment given an Electronic Equipment Test Facility (EETF) with a faulty Pneumatic Subsystem, TM 11-6625-3085-12-1, TM 11-6625-3085-12-3, TM 11-6625-3085-30-1, TM 11-6625-2773-30-1-1, a generator set or commercial power, tools, materials, references, and personnel as listed in references. Standards: The task is complete when the fault is located, corrected, and the system passes self-test. All safety precautions are observed. Performance Steps 1. Ensure full power-up has been accomplished in accordance with TM 11-6625-3085-12-1, paragraph 2-3-74. 2. Run AHST self-test program to determine faulty component(s). a. At the VDT, enter: TEST AHST. b. Follow self-test procedures as shown on the VDT. 3. Perform manual troubleshooting procedures using TM 11-6625-3085-12-3, TM 11-6625-3085-30-1, TM 11-6625-3085-30-1-1, and TM 11-6625-3085-30-2 as required. 4. Restore the test station to its normal operating condition. a. Re-run self-test program as necessary. b. Perform manual troubleshooting procedures as necessary. 5. Observe all safety precautions. Performance Measures GO NO-GO 1. Ensured full power-up had been accomplished in accordance with TM 11-6625 3085-12-1, paragraph 2-3-74. —— —— 2. Ran AHST self-test program to determine faulty component(s). —— —— 3. Performed manual troubleshooting procedures using TM 11-6625-3085-12-3, TM 11-6625-3085-30-1, TM 11-6625-3085-30-1-1, and TM 11-6625-3085-30-2 as required. —— —— 4. Restored the test station to its normal operating condition. —— —— 5. Observed all safety precautions. —— —— Evaluation Guidance: Score the Soldier GO if all performance measures are passed (P). Score the Soldier NO-GO if any performance measure is failed (F). If the Soldier fails any performance measure, show what was done wrong and how to do it correctly. References Required TM 11-6625-2773-30-1-1 TM 11-6625-3085-12-1 TM 11-6625-3085-12-3 TM 11-6625-3085-30-1 TM 11-6625-3085-30-2 3-66 Related TM 11-6625-3085-12-2 TM 11-6625-3085-23P 7 December 2007 STP 9-94K13-SM-TG Repair the Computer Control Group 093-94K-1130 Conditions: Perform this task in a contemporary operational environment given an Electronic Equipment Test Facility (EETF) with a faulty Computer Control Group, TM 11-6625-3085-12-1, TM 11-6625-3085-12 3, a generator set or commercial power, tools, materials, references, and personnel as listed in references. Standards: The fault in the Computer Control Group is located and corrected in accordance with TM 11-6625-3085-12-1. All safety precautions are observed. Performance Steps 1. Attempt full power-up procedures in accordance with TM 11-6625-3085-12-1, paragraph 2-3-74. 2. Perform troubleshooting procedures using TM 11-6625-3085-12-1 and TM 11-6625-3085-12-3 as required. 3. Restore the Computer Control Group to its normal operating condition. a. Run computer diagnostics program as necessary. b. Perform manual troubleshooting procedures as necessary. 4. Continue with full power-up procedures in accordance with TM 11-6625-3085-12-1, paragraph 2-3-74. 5. Observe all safety precautions. Performance Measures GO NO-GO 1. Attempted full power-up procedures in accordance with TM 11-6625-3085-12-1, paragraph 2-3-74. —— —— 2. Performed computer diagnostic and troubleshooting procedures in accordance with TM 11-6625-3085-12-1 and TM 11-6625-3085-12-3. —— —— 3. Restored the Computer Control Group to its normal operating condition. —— —— 4. Continued with full power-up procedures in accordance with TM 11-6625-3085 12-1, paragraph 2-3-74. —— —— 5. Observed all safety precautions. —— —— Evaluation Guidance: Score the Soldier GO if all performance measures are passed (P). Score the Soldier NO-GO if any performance measure is failed (F). If the Soldier fails any performance measure, show what was done wrong and how to do it correctly. References Required TM 11-6625-3085-12-1 TM 11-6625-3085-12-3 7 December 2007 Related 3-67 STP 9-94K13-SM-TG Subject Area 3: LRU and Flight Hardware Testing Test AN/USM-410 Line Replaceable Unit (LRU) 093-94K-1013 Conditions: Perform this task in a contemporary operational environment given an operational Electronic Equipment Test Facility (EETF), a LRU, TM 11-6625-2773-40, TM 11-6625-3085-12-1, a generator set or commercial power, tools, materials, references, and personnel as listed in references. Standards: The LRU is tested and repaired in accordance with TM 11-6625-2773-40. All safety precautions are observed. Performance Steps 1. Ensure full power-up has been accomplished in accordance with TM 11-6625-3085-12-1, paragraph 2-3-74. 2. Perform testing procedures in accordance with TM 11-6625-2773-40 for appropriate LRU. a. At the VDT, enter appropriate test program for LRU being tested. b. Follow procedures as shown on the VDT. 3. Repair the LRU as necessary. 4. Observe all safety precautions. Performance Measures GO NO-GO 1. Ensured full power-up had been accomplished in accordance with TM 11-6625 3085-12-1, paragraph 2-3-74. —— —— 2. Performed testing procedures in accordance with TM 11-6625-2773-40 for appropriate LRU. —— —— 3. Repaired LRU as necessary. —— —— 4. Observed all safety precautions. —— —— Evaluation Guidance: Score the Soldier GO if all performance measures are passed (P). Score the Soldier NO-GO if any performance measure is failed (F). If the Soldier fails any performance measure, show what was done wrong and how to do it correctly. References Required TM 11-6625-2773-40 TM 11-6625-3085-12-1 3-68 Related TM 11-6625-2773-20P TM 11-6625-2773-30P TM 11-6625-2773-40P 7 December 2007 STP 9-94K13-SM-TG Perform UUT Testing 093-94K-1113 Conditions: Perform this task in a contemporary operational environment given an AH-64A EETF OQ 290(V)2/MSM, TM 11-6625-3085-12-1, TM 11-6625-3085-12-3, TM 11-6625-3085-12-4, an AH-64A UUT (LRU), a generator set or commercial power, tools, materials, and personnel as listed in references. Standards: The UUT is tested in accordance with TPS and TM instructions. All safety precautions are observed. Performance Steps 1. Ensure full power-up has been accomplished in accordance with TM 11-6625-3085-12-1, paragraph 2-3-74. 2. Test the UUT in accordance with TM 11-6625-3085-12-1, 11-6625-3085-12-4, and UUT specific TMs as appropriate. a. Locate the UUT number in the UUT/TEST SETUP INSTRUCTION LIST. b. Determine the UUT/TEST SETUP INSTRUCTION paragraph number. c. Turn to the paragraph indicated. d. Gather the required Interconnect Devices and cables from the support van. e. Start the test. f. Follow the instructions shown on the VDT screen. g. Run all tests with the printer on. When testing is complete, attach the printout to the UUT. 3. Observe all safety precautions. Performance Measures GO NO-GO 1. Ensured full power-up had been accomplished in accordance with TM 11-6625-3085-12-1, paragraph 2-3-74. —— —— 2. Tested the UUT in accordance with TM 11-6625-3085-12-1, 11-6625-3085-12-4, and UUT specific TMs as appropriate. —— —— 3. Observed all safety precautions. —— —— Evaluation Guidance: Score the Soldier GO if all performance measures are passed (P). Score the Soldier NO-GO if any performance measure is failed (F). If the Soldier fails any performance measure, show what was done wrong and how to do it correctly. References Required TM 11-6625-3085-12-1 TM 11-6625-3085-12-3 TM 11-6625-3085-12-4 7 December 2007 Related 3-69 STP 9-94K13-SM-TG Skill Level 3 Subject Area 4: Maintenance Operations Submit a Quality Deficiency Report (QDR) 093-SSG-3004 Conditions: In a contemporary operational environment, given the requirement to submit a QDR for a serious or recurring maintenance problem and given Army regulation (AR) 95-1, AR 725-50, Department of the Army (DA) Form 2404 (Equipment Inspection and Maintenance Worksheet), DA Form 2407 (Maintenance Request), Department of Defense (DD) Form 1575 (Suspended Tag-Materiel), DD Form 2332 (Product Quality Deficiency Report Exhibit), DA Pamphlet 750-8, DA Pamphlet 738-751, and Standard Form (SF) Form 368 (Product Quality Deficiency Report). Standards: Identify conditions that indicate a quality deficiency exists, prepare the appropriate report form, and identify and retain QDR exhibits that had been disposed of. Performance Steps NOTE: Follow steps 1 through 10 for all equipment except aviation equipment. For aviation equipment, follow steps 11 through 18. 1. Identify one or more conditions that indicate a quality deficiency existed. a. A condition in or with the equipment dangerous to people, other equipment, or the mission. b. An item or equipment that does not work right or lasts as long as it should have because of bad design or materials. c. Items that are not within the approved equipment specifications. d. Low-quality workmanship. e. Dangerous situations due to incorrect or missing data. f. Maintenance problems. g. Conditions that prevents use of the equipment. h. Repeat problems that take a lot of time with no solutions in sight. i. Problems requested to be reported by the national maintenance point (NMP). j. Corrosion problems in or on parts, components, assemblies, weapon systems, and/or equipment. 2. Identify defect as a Category I or Category II deficiency. a. Identify as a Category 1 deficiency any defect that-(1) May have caused death, injury, or severe job illness. (2) Would have caused loss or major damage to a weapon system. (3) Would have critically restricted the combat readiness capabilities of the unit. b. Identify any defect as Category II deficiency that does not meet the criteria for a Category I deficiency. 3. Prepare appropriate QDR for Category I or Category II. a. Prepare Category I report in message format copy of SF Form 368 in accordance with DA Pamphlet 750-8. b. Prepare Category II report on SF Form 368 in accordance with DA Pamphlet 750-8. 4. Forward SF Form 368 to the major subordinate command (MSC) within 48 hours (Category I deficiencies) or 5 working days (Category II deficiencies) after the defect or problem was found. NOTE: Category I reports may be phoned in or brought in for immediate assistance, with message following within the 48-hour time frame. 5. The MSC acknowledges receipt and begins screening stocks within 24 hours of the report. 6. Files one copy of the SF Form 368 until the Army screening point closes the case. 3-70 7 December 2007 STP 9-94K13-SM-TG Performance Steps 7. Sends one copy of the SF Form 368 to the support maintenance activity. NOTE: Sent SF Form 368 even if-a. Correspondence indicates the problem is known to exist. b. Other units send in a QDR on the same problem. 8. Identify defective equipment as exhibits. 9. Retain QDR exhibits in accordance with DA Pamphlet 750-8. 10. Follow disposition instructions received from the MSC action office responsible for the exhibits. NOTE: Follow steps 11 through 18 for preparation of QDRs on aviation equipment. 11. Identify any of the following conditions that indicate an aviation quality deficiency exists in accordance with DA Pamphlet 738-751, Chapter 3. a. A condition involving personnel safety or safety of flight (SOF) as defined in AR 95-1. b. Suspected or confirmed materiel failure that causes a Class A, B, C, D, or E aircraft mishap. c. Materiel failure or fault that would cause a hazard to personnel or equipment or hinder safe completion of the mission. d. Equipment did not work properly because of bad design and/or materiel or low-quality workmanship during manufacture, modification, conversion, repair, overhaul, or rebuild. e. Environmental conditions that cause the failure of aircraft or aviation associated equipment, to include mission related equipment, components and modules, repair parts, systems, and/or subsystems. f. During initial test or use, found a defective stock funding of depot level repairables (SFDLR) item, and such defect was not caused by user accident, misuse, improper installation, and/or operation, unauthorized repair, or alteration. 12. Identify deficiencies as Category I or Category II. a. Identify any of the following as a Category I deficiency. (1) An unsafe condition, operation, or maintenance procedure for aircraft, mission related equipment, component and module, or repair part whose use was critical to airworthiness. (2) Any failure that could be expected to cause loss of the aircraft and/or serious injuries to the aircrew or ground personnel. (3) The reason for failure, identified or suspected, did not provide enough warning for the aircrew to complete a safe landing, and it was reasonable to assume that the problem could be present in other aircraft of the mission, design, and series (MDS). (4) Incorrect or missing data in technical publications that may have caused a hazardous operational or maintenance problem. b. Identify as a Category II deficiency any defect that did not meet the criteria for a Category I deficiency. 13. Prepare SF Form 368 for Category I or Category II deficiency in accordance with DA Pamphlet 738-751, Chapter 3. 14. Submit a Category I or Category II report in accordance with DA Pamphlet 738-751. 15. Distribute file copies of the SF Form 368 in accordance with DA Pamphlet 738-751. NOTE: Sent SF Form 368 even if -a. Manufacturer representatives have shown that they are aware of the problem. b. Another unit within your command has already sent a deficiency report on the same problem. 16. Identify defective equipment as exhibits. 17. Receive acknowledgment of receipt of Category I report within 48 hours or Category II report within 7 days from Aviation and Missile Command (AMCOM). The acknowledgement included the disposition instructions for exhibits. 18. Follow disposition instructions received from the AMCOM action office for the exhibits. 7 December 2007 3-71 STP 9-94K13-SM-TG Performance Measures NOTE: Follow steps 1 through 10 for all equipment except aviation equipment. For aviation equipment, follow steps 11 through 18. GO NO-GO 1. Identified one or more conditions that indicated a quality deficiency existed. —— —— 2. Identified defect as a Category I or Category II deficiency. —— —— 3. Prepared appropriate QDR for Category I or Category II. —— —— 4. Forwarded SF Form 368 to the major subordinate command (MSC) within 48 hours (Category I deficiencies) or 5 working days (Category II deficiencies) after the defect or problem was found. —— —— 5. The MSC acknowledged receipt and began screening stocks within 24 hours of the report. —— —— 6. Kept one copy of the SF Form 368 until the Army screening point closed the case. —— —— 7. Sent one copy of the SF Form 368 to the support maintenance activity. —— —— 8. Identified defective equipment as exhibits. —— —— 9. Retained QDR exhibits in accordance with DA Pamphlet 750-8. —— —— —— —— 11. Identified any of the following conditions that indicated an aviation quality deficiency existed in accordance with DA Pamphlet 738-751, Chapter 3. —— —— 12. Identified deficiencies as Category I or Category II. —— —— 13. Prepared SF Form 368 for Category I or Category II deficiency in accordance with DA Pamphlet 738-751, Chapter 3. —— —— 14. Submitted a Category I or Category II report in accordance with DA Pamphlet 738-751. —— —— 15. Distributed file copies of the SF Form 368 in accordance with DA Pamphlet 738-751. —— —— 16. Identified defective equipment as exhibits. —— —— 17. Received acknowledgment of receipt of Category I report within 48 hours or Category II report within 7 days from Aviation and Missile Command (AMCOM). The acknowledgement included the disposition instructions for exhibits. —— —— 18. Followed disposition instructions received from the AMCOM action office for the exhibits. —— —— 10. Followed disposition instructions received from the MSC action office responsible for the exhibits. NOTE: Follow steps 11 through 18 for preparation of QDRs on aviation equipment. Evaluation Guidance: Score the Soldier GO if all performance measures are passed (P). Score the Soldier NO-GO if any performance measure is failed (F). If the Soldier fails any performance measure, show what was done wrong and how to do it correctly. References Required AR 725-50 AR 95-1 3-72 Related AR 702-7 AR 702-7-1 7 December 2007 STP 9-94K13-SM-TG References Required DA FORM 2404 DA FORM 2407 DA PAM 750-8 DD FORM 1575 DD FORM 2332 SF FORM 368 7 December 2007 Related DA PAM 738-751 3-73 STP 9-94K13-SM-TG Plan Work Flow 093-SSG-3006 Conditions: In a contemporary operational environment (COE), given Department of the Army (DA) Form 2407s (Maintenance Request) or DA Form 5990-Es (Maintenance Request [EGA])/job packets with various issue priority designators, a visible index file showing the shop workload summary, and Technical Manual (TM) 38-L09-11. This task can be performed in a field or garrison environment. Standards: Distribute all DA Form 2407s or DA Form 5990-Es/job packets by issue priority designators, highest priorities first. Ensure the visible index file was up to date, legible, and complete in accordance with TM 38-L09-11. Performance Steps 1. Arrange the DA Form 2407s/DA Form 5990-Es/job packets by issue priority designators, highest priorities first. 2. Use the DA Form 2407s/DA Form 5990-Es/job packets in the same order to assign jobs to repairers. 3. Monitor work as the jobs went through the repair process. 4. Assign new jobs to the repairers as they completed those assigned. 5. Review all paperwork within the job packets for completeness. 6. Update the visible index file. Performance Measures GO NO-GO 1. Arranged the DA Form 2407s/DA Form 5990-Es/job packets by issue priority designators, highest priorities first. —— —— 2. Used the DA Form 2407s/DA Form 5990-Es/job packets in the same order to assign jobs to repairers. —— —— 3. Monitored work as the jobs went through the repair process. —— —— 4. Assigned new jobs to the repairers as they completed those assigned. —— —— 5. Reviewed all paperwork within the job packets for completeness. —— —— 6. Updated the visible index file. —— —— Evaluation Guidance: Score the Soldier GO if all performance measures are passed (P). Score the Soldier NO-GO if any performance measure is failed (F). If the Soldier fails any performance measure, show what was done wrong and how to do it correctly. References Required DA FORM 2407 DA FORM 5990-E TM 38-L09-11 3-74 Related DA FORM 2407-1 DA PAM 738-751 DA PAM 750-8 FM 4-30.3 7 December 2007 STP 9-94K13-SM-TG Provide Technical Assistance to Repairers 093-SSG-3008 Conditions: A repairer in the electronics/avionics maintenance shop requires technical assistance. In a contemporary operational environment (COE), given Department of the Army (DA) Form 2404 (Equipment Inspection and Maintenance Worksheet) or DA Form 5988-E (Equipment Inspection Maintenance Worksheet [EGA]), DA Form 2407 (Maintenance Request) or DA Form 5990-E (Maintenance Request [EGA]), DA Pamphlet 750-8, DA Pamphlet 738-751, and Technical Bulletin (TB) 385-4, provide needed assistance to the repairer. This task can be performed in a field or garrison environment. Standards: Provide technical assistance that will enable the repairer to perform repair procedures correctly. Performance Steps 1. Determine the type of assistance needed by the repairer, such as isolating the malfunction, repairing the malfunction, or making proper entries on the paperwork. 2. Review DA Form 2404 or DA Form 5988-E and DA Form 2407 or DA Form 5990-E to determine reason for maintenance or repair. 3. Verify repairer observes WARNING, CAUTION, and NOTE statements in applicable references and observed all safety precautions. 4. Review the repair procedures performed by the repairer. 5. Provide technical assistance to the repairer. 6. Counsel repairer on areas of technical weakness. 7. Recommend technical material and training to increase repairer's expertise. Performance Measures GO NO-GO 1. Determined the type of assistance needed by the repairer, such as isolating the malfunction, repairing the malfunction, or making proper entries on the paperwork. —— —— 2. Reviewed DA Form 2404 or DA Form 5988-E and DA Form 2407 or DA Form 5990-E to determine reason for maintenance or repair. —— —— 3. Verified repairer observed WARNING, CAUTION, and NOTE statements in applicable references and observed all safety precautions. —— —— 4. Reviewed the repair procedures performed by the repairer. —— —— 5. Provided technical assistance to the repairer. —— —— 6. Counseled repairer on areas of technical weakness. —— —— 7. Recommended technical material and training to increase repairer's expertise. —— —— Evaluation Guidance: Score the Soldier GO if all performance measures are passed (P). Score the Soldier NO-GO if any performance measure is failed (F). If the Soldier fails any performance measure, show what was done wrong and how to do it correctly. 7 December 2007 3-75 STP 9-94K13-SM-TG References Required DA FORM 2404 DA FORM 2407 DA FORM 5988-E DA FORM 5990-E DA PAM 738-751 DA PAM 750-8 TB 385-4 3-76 Related 7 December 2007 STP 9-94K13-SM-TG Perform Initial Inspections 093-SSG-3009 Conditions: In a contemporary operational environment (COE), given applicable technical manuals (TMs), the equipment to be inspected, Department of the Army (DA) Form 2404 (Equipment Inspection and Maintenance Worksheet) or DA Form 5988-E (Equipment Inspection Maintenance Worksheet [EGA]), DA Form 2407 (Maintenance Request) or DA Form 5990-E (Maintenance Request [EGA]), DA Pamphlet 750-8, and DA Pamphlet 738-751. This task can be performed in a field or garrison environment. Standards: Perform the initial inspection, ensuring that the equipment was repairable according to the applicable TMs; identify all defects, and complete all maintenance forms according to DA Pamphlet 750-8 or DA Pamphlet 738-751. Performance Steps 1. Check submitted paperwork for completeness and accuracy. 2. Inspect the equipment for physical damage and determined if it is feasible to repair the equipment. 3. Ensure that operator maintenance have been performed on the equipment. 4. Inventory the equipment to ensure that it is complete. 5. Ensure that all modification work orders (MWOs) are complete. 6. Perform self-tests or checks on the equipment, if necessary. 7. Record all defects or reasons for rejection the equipment on DA Form 2404 or DA Form 5988-E. Performance Measures GO NO-GO 1. Checked submitted paperwork for completeness and accuracy. —— —— 2. Inspected the equipment for physical damage and determined if it was feasible to repair the equipment. —— —— 3. Ensured that operator maintenance had been performed on the equipment. —— —— 4. Inventoried the equipment to ensure that it was complete. —— —— 5. Ensured that all modification work orders (MWOs) had been completed. —— —— 6. Performed self-tests or checks on the equipment, if necessary. —— —— 7. Recorded all defects or reasons for rejecting the equipment on DA Form 2404 or DA Form 5988-E. —— —— Evaluation Guidance: Score the Soldier GO if all performance measures are passed (P). Score the Soldier NO-GO if any performance measure is failed (F). If the Soldier fails any performance measure, show what was done wrong and how to do it correctly. 7 December 2007 3-77 STP 9-94K13-SM-TG References Required DA FORM 2404 DA FORM 2407 DA FORM 5988-E DA FORM 5990-E DA PAM 738-751 DA PAM 750-8 3-78 Related DA PAM 750-1 FM 4-30.3 TM 750-245-4 7 December 2007 STP 9-94K13-SM-TG Perform Final Inspections 093-SSG-3010 Conditions: In a contemporary operational environment (COE), given applicable technical manuals (TMs), equipment to be inspected, Department of the Army (DA) Form 2404 (Equipment Inspection and Maintenance Worksheet) or DA Form 5988-E (Equipment Inspection Maintenance Worksheet [EGA]), DA Form 2407 (Maintenance Request) or DA Form 5990-E (Maintenance Request [EGA]), DA Pamphlet 750-8, and DA Pamphlet 738-751. This task can be performed in a field or garrison environment. Standards: Perform final inspection. Ensure that equipment was complete according to applicable TMs, all defects identified in previous inspections had been corrected, any additional defects had been recorded on DA Form 2404 or DA Form 5988-E, and all forms had been completed according to DA Pamphlet 750-8 or DA Pamphlet 738-751. Performance Steps 1. Check the equipment to determine if it is complete and that all defects found on the initial and inprocess inspections are complete. 2. Ensure that all forms and records are complete and correct. 3. Record any additional defects on DA Form 2404 or DA Form 5988-E and return the equipment to production control. 4. Sign and date the DA Form 2407 or DA Form 5990-E when the equipment passes it final inspection. Performance Measures GO NO-GO 1. Checked the equipment to determine if it was complete and that all defects found on the initial and in-process inspections had been corrected. —— —— 2. Ensured that all forms and records were complete and correct. —— —— 3. Recorded any additional defects on DA Form 2404 or DA Form 5988-E and returned the equipment to production control. —— —— 4. Signed and dated DA Form 2407 or DA Form 5990-E when the equipment passed inspection. —— —— Evaluation Guidance: Score the Soldier GO if all performance measures are passed (P). Score the Soldier NO-GO if any performance measure is failed (F). If the Soldier fails any performance measure, show what was done wrong and how to do it correctly. References Required DA FORM 2404 DA FORM 2407 DA FORM 5988-E DA FORM 5990-E DA PAM 738-751 DA PAM 750-8 7 December 2007 Related DA PAM 750-1 FM 4-30.3 TM 750-245-4 3-79 STP 9-94K13-SM-TG Perform In-Process Inspections 093-SSG-3012 Conditions: In a contemporary operational environment, given applicable inspection forms and technical manuals (TMs), DA Pamphlet 750-8, and DA Pamphlet 738-751, conducts in-process inspection of a repairer performing repairs on equipment. This task can be performed in a field or garrison environment. Standards: Perform in-process inspection. Ensure that the proper tools and equipment were being used and all safety rules and warnings were being followed according to applicable TMs. Complete all forms according to DA Pamphlet 750-8 or DA Pamphlet 738-751 and report inspection results. Performance Steps 1. Use the proper tools and equipment during in-process inspection. 2. Use the proper technical manual repair procedures during in-process inspection. 3. Ensure that authorized repair parts and supplies are available. 4. Ensure that only authorize repairs are performed on the equipment. 5. Ensure that only authorize personnel make the repairs. 6. Ensure that all safety rules and warnings are used. 7. Ensure that all forms are filled out correctly. 8. Make an oral or written report of the inspection to the repair section chief and the quality control section supervisor. Performance Measures GO NO-GO 1. Ensured that the proper tools and equipment were used. —— —— 2. Ensured that the proper repair procedures were followed. —— —— 3. Ensured that only authorized repair parts and supplies were used. —— —— 4. Ensured that only authorized repairs were performed on the equipment. —— —— 5. Ensured that only authorized personnel made the repairs. —— —— 6. Ensured that all safety rules and warnings were followed. —— —— 7. Ensured that all forms were filled out correctly. —— —— 8. Made an oral or written report of the inspection to the repair section chief and the quality control section supervisor. —— —— Evaluation Guidance: Score the Soldier GO if all performance measures are passed (P). Score the Soldier NO-GO if any performance measure is failed (F). If the Soldier fails any performance measure, show what was done wrong and how to do it correctly. References Required DA PAM 738-751 DA PAM 750-8 3-80 Related FM 4-30.3 TM 750-245-4 7 December 2007 STP 9-94K13-SM-TG Manage Demand Supported Repair Parts Listed on the Prescribed Load List (PLL) 093-SSG-3015 Conditions: In a contemporary operational environment (COE), conduct this task during the normal performance of your daily duties within an electronics/avionics maintenance shop. Manage demand supported repair parts for an electronics/avionics maintenance shop given Army regulation (AR) 710-2, Department of the Army (DA) Pamphlet 710-2-1, DA Form 2063-R (Prescribed Load List), DA Form 2064 (Document Register for Supply Actions), DA Form 3318 (Records of Demands-Title Insert), copy of Federal Logistics (FEDLOG) discs, unit's initial mandatory parts list (IMPL), unit's prescribed load list (PLL), and technical parts manuals. This task can be performed in a field or garrison environment. Standards: Complete review and correct the prescribed load list (PLL) in accordance with the equipment technical parts manual, AR 710-2, and DA Pamphlet 710-2-1 for the electronics/avionics repair parts listed on the PLL. Performance Steps 1. Review the unit's PLL for electronics/avionics maintenance shop's repair parts. 2. Verify that the electronics/avionics shop's repair parts qualify to be on the PLL list. 3. Review demand supported unit maintenance repair parts documents and ensure they meet the following: a. Three demands made within the control period of 180 days for Active Army. b. Parts were essential and had a maintenance use code of "O" (except for non-tactical telecommunications systems, air traffic control, or lifesaving systems). 4. Review non-demand supported unit maintenance repair parts documents and ensure they meet the following: a. Approval by the first general officer staff level in the chain of command required in order to stock. b. Parts essential, with a maintenance use code of "O" (except for non-tactical telecommunications systems, air traffic control, or lifesaving systems). 5. Review the initial stockage of repair parts for newly introduced end items as identified by the support list allowance card (SLAC) deck. a. The stockage level will not be reduced the first year. b. If the end item is under warranty, the first year (as stipulated above) will begin upon expiration of warranty. 6. Review the mandatory stockage of repair parts as identified in the IMPL. Performance Measures GO NO-GO 1. Reviewed the unit's PLL for electronics/avionics maintenance shop's repair parts. —— —— 2. Verified that the electronics/avionics shop's repair parts qualify to be on the PLL list. —— —— 3. Reviewed demand supported unit maintenance repair parts documents and ensured they met the following: —— —— 4. Reviewed non-demand supported unit maintenance repair parts documents and ensured they met the following: —— —— 5. Reviewed the initial stockage of repair parts for newly introduced end items as identified by the support list allowance card (SLAC) deck. —— —— 6. Reviewed the mandatory stockage of repair parts as identified in the IMPL. —— —— 7 December 2007 3-81 STP 9-94K13-SM-TG Evaluation Guidance: Score the Soldier GO if all performance measures are passed (P). Score the Soldier NO-GO if any performance measure is failed (F). If the Soldier fails any performance measure, show what was done wrong and how to do it correctly. References Required AR 710-2 DA FORM 2063-R DA FORM 2064 DA FORM 3318 DA PAM 710-2-1 FEDLOG 3-82 Related FM 4-30.3 7 December 2007 STP 9-94K13-SM-TG Subject Area 5: Maintenance Management Inspect Section/Shop Safety 093-SSG-3001 Conditions: In a contemporary operational environment (COE), given a requirement to inspect an electronics or avionics maintenance shop area and given Army regulation (AR) 40-5, AR 385-10, Department of the Army (DA) Pamphlet 40-501, DA Pamphlet 385-1, Technical Bulletin (TB) 385-3, TB 385-4, TB Medical (MED) 523, unit and local standing operating procedures (SOPs), and unit safety checklist. This task can be performed in a field or garrison environment. Standards: Conduct inspection to ensure that all Army, company, and maintenance shop safety policies, regulations, and local SOPs were followed; all safety hazards were identified; environmental risk assessment to determine high risks areas was performed; and all deficiencies were corrected. Establish an inspection schedule covering what to inspect and how frequently. Record deficiencies and recommended corrective actions and retained these reports to check progress. Follow up to ensure deficiencies had been corrected. Performance Steps 1. Review the Army, company, and maintenance shop safety policies, regulations, and local SOPs. 2. Ensure that all of the Army safety references and company and maintenance shop SOPs are being followed. 3. Plan periodic safety inspections for all section/shop work areas. a. Identify hazards to the environment prior to the inspection process. b. Assess the probability of environmental damage/violations using environmental risk assessment matrices before the inspection process. 4. Schedule the inspection so that disruptions to normal operations are as little as possible. 5. Inspect areas with the greatest potential for accident severity and those having the highest accident frequency more frequently. 6. Develop a suitable checklist of items to be inspected in accordance with AR 385-10, AR 40-5, Pamphlet 40-501, DA Pamphlet 385-1, TB 385-3, TB 385-4, TB MED 523, and maintenance section/shop SOPs. 7. Inspect the maintenance section/shop to ensure that all test equipment calibration dates are current. 8. Inspect all of the equipment and benches for proper grounding within the maintenance section/shop areas. 9. Inspect the maintenance section/shop to ensure that a mounted safety board is present. 10. Inspect the maintenance section/shop to ensure that rubber floor mats or similar insulating materials are available for each repair position. 11. Inspect the maintenance section/shop to ensure that all power attachments, plugs, and connectors are serviceable with no exposed parts carrying electric current except the prongs. 12. Inspect and identify all of the physical and high-voltage hazards within the maintenance section/shop areas. 13. Inspect the maintenance section/shop to ensure it complies with host nation, local, state, and federal environmental laws and regulations. 7 December 2007 3-83 STP 9-94K13-SM-TG Performance Steps 14. Brief the chain of command on the results, potential high-risk areas, and recommendations from the safety inspection. 15. Identify all safety hazards and took corrective action. 16. Ensure all deficiencies found during inspection have proper corrective action scheduled. Performance Measures GO NO-GO 1. Reviewed the Army, company, and maintenance shop safety policies, regulations, and local SOPs. —— —— 2. Ensured that all of the Army safety references and company and maintenance shop SOPs were being followed. —— —— 3. Planned inspections so that all areas were covered periodically. —— —— 4. Scheduled the inspection so that normal operations were disrupted as little as possible. —— —— 5. Inspected areas with the greatest potential for accident severity and those having the highest accident frequency more frequently. —— —— 6. Developed a suitable checklist of items to be inspected in accordance with AR 385-10, AR 40-5, DA Pamphlet 40-501, DA Pamphlet 385-1, TB 385-3, TB 385-4, TB MED 523, and maintenance section/shop SOPs. —— —— 7. Inspected the maintenance section/shop to ensure that all test equipment calibration dates were current. —— —— 8. Inspected the maintenance section/shop to ensure that all equipment and benches were properly grounded. —— —— 9. Inspected the maintenance section/shop to ensure that a mounted safety board was present. —— —— 10. Inspected the maintenance section/shop to ensure that rubber floor mats or similar insulating materials were provided for each repair position. —— —— 11. Inspected the maintenance section/shop to ensure that all power attachments, plugs, and connectors were serviceable with no exposed parts carrying electric current except the prongs. —— —— 12. Inspected the maintenance section/shop to ensure that all physical and highvoltage hazards had been identified. —— —— 13. Inspected the maintenance section/shop to ensure it was complying with host nation, local, state, and federal environmental laws and regulations. —— —— 14. Briefed the chain of command on the results, potential high-risk areas, and recommendations from the safety inspection. —— —— 15. Identified all safety hazards and took corrective action. —— —— 16. Ensured that any deficiencies found were corrected. —— —— Evaluation Guidance: Score the Soldier GO if all performance measures are passed (P). Score the Soldier NO-GO if any performance measure is failed (F). If the Soldier fails any performance measure, show what was done wrong and how to do it correctly. 3-84 7 December 2007 STP 9-94K13-SM-TG References Required AR 385-10 AR 40-5 DA PAM 385-1 DA PAM 40-501 TB 385-3 TB 385-4 TB MED 523 7 December 2007 Related AR 200-1 DA PAM 200-1 FM 3-04.500 FM 4-30.3 TB 43-0129 TC 3-34.489 3-85 STP 9-94K13-SM-TG Manage Section/Shop Security 093-SSG-3002 Conditions: In a contemporary operational environment, given AR 25-2, AR 190-13, AR 380-5, AR 380-40, DA Pamphlet 190-51, FM 3-19.30, and local and unit standing operating procedures (SOPs). This task can be performed in a field or garrison environment. Standards: Ensure that all Army security policies and regulations and the maintenance shop and local SOPs were followed. Identify and report all security deficiencies and ensured that all deficiencies were corrected. Performance Steps 1. Review all of the Army security policies and regulations and the maintenance shop and local SOPs. 2. Ensure a work place risk analysis is performed. 3. Ensure that physical security policies, regulations, and SOPs are followed. 4. Ensure that classification and marking policies are followed. 5. Ensure that all security control policies and regulations are followed. 6. Ensure that personnel security and signal training policies are followed. a. Initial security training and briefing for newly assigned personnel. b. Refresher security training for assigned personnel. c. Procedures for identifying and reporting insecurities. 7. Ensure that signal security (SIGSEC) policies and regulations are followed. a. Ensure subordinates follow all Army and unit policies and regulations covering communications security (COMSEC) procedures. b. Ensure subordinates follow all Army and unit policies and regulations covering electronics security (ELSEC) procedures. 8. Identify and report all security deficiencies and ensure that all deficiencies are corrected. Performance Measures GO NO-GO 1. Reviewed all of the Army security policies and regulations and the maintenance shop and local SOPs. —— —— 2. Ensured a work place risk analysis was performed. —— —— 3. Ensured that physical security policies, regulations, and SOPs were followed. —— —— 4. Ensured that classification and marking policies were followed. —— —— 5. Ensured that all security control policies and regulations were followed. —— —— 6. Ensured that personnel security and signal training policies were followed. —— —— 7. Ensured that signal security (SIGSEC) policies and regulations were followed. —— —— 8. Identified and reported all security deficiencies and ensured that all deficiencies were corrected. —— —— Evaluation Guidance: Score the Soldier GO if all performance measures are passed (P). Score the Soldier NO-GO if any performance measure is failed (F). If the Soldier fails any performance measure, show what was done wrong and how to do it correctly. 3-86 7 December 2007 STP 9-94K13-SM-TG References Required AR 190-13 AR 25-2 AR 380-40 AR 380-5 DA PAM 190-51 FM 3-19.30 7 December 2007 Related AR 5-12 DA PAM 25-380-2 FM 34-60 FM 4-30.3 3-87 STP 9-94K13-SM-TG Maintain Section/Shop Calibration Program 093-SSG-3003 Conditions: In a contemporary operational environment, given the maintenance section/shop calibration program, to include test, measurement, and diagnostic equipment (TMDE) master listing for the program; DA Form 3758-R (Calibration and Repair Requirements Worksheet); DA Label 80 (US Army Calibrated Instrument); TB 43-180; TB 750-25; and company standing operating procedures (SOPs). This task can be performed in a field or garrison environment. Standards: Maintain a master listing for all calibrated equipment assigned to the maintenance section/shop in accordance with TB 43-180, TB 750-25, and company SOPs. Review the section/shop calibration listing for equipment due calibration on a monthly basis and update status of all calibration equipment still turned in to the calibration support unit. Performance Steps 1. Identify all equipment listed on section/shop hand receipts that might require a calibration label. a. Test equipment. b. Equipment modules. c. Dummy loads. d. Voltage test probes. e. Radiation detection, indication, and computation (RADIAC) equipment. f. Motor pool equipment. g. Power supplies. 2. Determine which equipment identified was listed in TB 43-180. a. Equipment that requires calibration. b. Calibration not required (CNR) equipment. 3. Prepare DA Form 3758-R if any new equipment not listed in TB 43-180 required calibration. 4. Maintain a master listing for all calibrated items in the maintenance section/shop. 5. Schedule equipment for calibration a. Stagger like equipment, when possible, so that equipment is always available on site. b. Assign a higher priority for critical TMDE, when necessary. c. Schedule plug-in modules and accessories for calibration with the major piece of equipment. d. Review signature cards and orders, as required locally, to update customer files and for the first appointment. 6. Prepare CNR labels for remaining equipment, as required. 7. Turn in/pick up equipment from the calibration facility. a. Turn in equipment with a minimum of accessories and covers. b. Obtain signed and dated receipt for equipment. c. Inspect equipment for damage and accessories before signing. d. Obtain calibration listings when available. 8. Update calibration listing. a. Verify calibration due dates. b. Delete entries. c. Add entries. d. correct serial number, calibration date, and due date errors. 3-88 7 December 2007 STP 9-94K13-SM-TG Performance Steps 9. Maintain a temporary storage area for calibrate before use (CBU) equipment. a. Identify CBU equipment as appropriate. b. Identify a limited access storage area. c. Prepare DA Label 80 for CBU. d. Update calibration listing for CBU items. e. Store equipment until required. f. Submit equipment for calibration prior to use. Performance Measures GO NO-GO 1. Identified all equipment listed on section/shop hand receipts that might require a calibration label. —— —— 2. Determined which equipment identified was listed in TB 43-180. —— —— 3. Prepared DA Form 3758-R if any new equipment not listed in TB 43-180 required calibration. —— —— 4. Maintained a master listing for all calibrated items in the maintenance section/shop. —— —— 5. Scheduled equipment for calibration. —— —— 6. Prepared CNR labels for remaining equipment, as required. —— —— 7. Turned in/picked up equipment from the calibration facility. —— —— 8. Updated calibration listing. —— —— 9. Maintained a temporary storage area for calibrate before use (CBU) equipment. —— —— Evaluation Guidance: Score the Soldier GO if all performance measures are passed (P). Score the Soldier NO-GO if any performance measure is failed (F). If the Soldier fails any performance measure, show what was done wrong and how to do it correctly. References Required DA FORM 3758-R DA LABEL 80 TB 43-180 TB 750-25 7 December 2007 Related DA PAM 750-3 3-89 STP 9-94K13-SM-TG Submit Equipment Improvement Recommendation (EIR) 093-SSG-3005 Conditions: You have found a better way to repair a piece of electronic equipment. In a contemporary operational environment (COE), submit an equipment improvement recommendation (EIR) given the following: Army regulation (AR) 672-20, Department of the Army (DA) Pamphlet 750-8, and Standard Form (SF) Form 368 (Product Quality Deficiency Report). This task can be performed in a field or garrison environment. Standards: Prepare the appropriate report forms for a recommended equipment improvement and check AR 672-20 to see if the EIR qualified as a suggestion. Performance Steps 1. Identify conditions that indicate a need to improve the performance and/or maintenance of equipment. a. A condition in or with the equipment that was dangerous to people, other equipment, or the mission. b. An item or piece of equipment that did not work right or last as long as it should because of bad design or materials. c. Items that were not within the approved equipment specifications. d. Low quality workmanship. e. Dangerous situations due to incorrect or missing data. f. Maintenance problems. g. Conditions that prevented using the equipment. h. Repeated problems that took a lot of time with no solutions in sight. i. Problems requested to be reported by the national maintenance point (NMP). 2. Report Category I or Category II recommendations for improvements. a. Reports Category I recommendations for any of the following improvements. (1) Improvements that prevent death, injury, or severe job illness. (2) Improvements that prevent loss or major damage to equipment. (3) Improvements that will affect the combat readiness capabilities of the unit. b. Reports as a Category II recommendation any recommendation that does not meet the criteria of a Category I equipment improvement recommendation. 3. Send in a Category I or Category II equipment improvement recommendation. a. Prepares SF Form 368 in accordance with DA Pamphlet 750-8, Chapter 10. b. Sends a message within 48 hours (Category I recommendation) or 5 days (Category II recommendation) after defect or problem was found. c. Keeps one copy of the SF Form 368 until the Army screening point closed the case. d. Sends one copy of the SF Form 368 to the support maintenance activity. 4. Check AR 672-20 to see if the EIR qualified as a suggestion. Performance Measures GO NO-GO 1. Identified conditions that indicated a need to improve the performance and/or maintenance of equipment. —— —— 2. Reported Category I or Category II recommendations for improvements. —— —— 3. Sent in a Category I or Category II equipment improvement recommendation. —— —— 4. Checked AR 672-20 to see if the EIR qualified as a suggestion. —— —— 3-90 7 December 2007 STP 9-94K13-SM-TG Evaluation Guidance: Score the Soldier GO if all performance measures are passed (P). Score the Soldier NO-GO if any performance measure is failed (F). If the Soldier fails any performance measure, show what was done wrong and how to do it correctly. References Required AR 672-20 DA PAM 750-8 SF FORM 368 7 December 2007 Related DA PAM 738-751 3-91 STP 9-94K13-SM-TG Direct Performance of Preventive Maintenance 093-SSG-3007 Conditions: In a contemporary operational environment (COE), given personnel to perform preventive maintenance checks and services (PMCS), Department of the Army (DA) Form 2408-14 (Uncorrected Fault Record), DA Form 2404 (Equipment Inspection and Maintenance Worksheet) or DA Form 5988-E (Equipment Inspection Maintenance Worksheet [EGA]), Department of Defense (DD) Form 314 (Preventive Maintenance Schedule and Record), DA Pamphlet 750-8, DA Pamphlet 738-751, equipment, and vehicle -10 series technical manuals (TMs). This task can be performed in a field or garrison under normal, extreme heat, and extreme cold environment conditions. NOTE: All the information from DA Form 2408-14 is now included in DA Form 5988-E. Standards: Perform all PMCS according to the applicable -10 series TMs. Complete DA Form 2404 or DA Form 5988-E and DA Form 2408-14 and DD Form 314 according to DA Pamphlet 750-8 or DA Pamphlet 738-751. Performance Steps 1. Coordinate with the motor pool section prior to performing section/shop vehicle PMCS. 2. Review the DD Form 314 and the applicable -10 series TMs to conduct weekly vehicle PMCS. a. Identify which PMCS service operation must be performed. b. Identify each piece of equipment for which operation under conditions inspection must be performed. (1) Operation under usual conditions. (2) Operation under unusual conditions. (a) Operation in extreme cold weather. (b) Operation in extreme heat weather. (c) Operation in dusty or sandy areas. (d) Operation under rainy or humid conditions. 3. Identify hazards to the environment before starting PMCS. 4. Assign jobs and ensure that repairers know what PMCS must be performed. 5. Spot-check the work being performed and ensure that the repairers are using the applicable TMs. 6. Assess the probability of environmental damage/violations using environmental risk assessment matrices during PMCS. 7. Spot-check corrective actions taken for all defects listed on DA Form 2404. 8. Coordinate with the maintenance sergeant to repair vehicles requiring services beyond the driver's responsibility. a. Ensure the repairer placed a drip pan under any equipment leaking fluids onto the ground. b. Make sure parts needed for repair that are not available are entered on DA Form 5988-E or DA Form 2408-14. 9. Check the DD Form 314 for correctness. 10. Report vehicle status to section/shop supervisor. 11. Brief the chain of command on any observed environmental potentially high-risk areas during PMCS. 3-92 7 December 2007 STP 9-94K13-SM-TG Performance Measures GO NO-GO 1. Coordinated with the motor pool section prior to performing section/shop vehicle PMCS. —— —— 2. Reviewed the DD Form 314 and the applicable -10 series TMs to conduct weekly vehicle PMCS. —— —— 3. Identified hazards to the environment before starting PMCS. —— —— 4. Assigned jobs and ensured that repairers knew what PMCS must be performed. —— —— 5. Spot-checked the work being performed and ensured that the repairers were using the applicable TMs. —— —— 6. Assessed the probability of environmental damage/violations using environmental risk assessment matrices during PMCS. —— —— 7. Spot-checked corrective actions taken for all defects listed on DA Form 2404. —— —— 8. Coordinated with the maintenance sergeant to repair vehicles requiring services beyond the driver's responsibility. —— —— 9. Checked the DD Form 314 for correctness. —— —— 10. Reported vehicle status to section/shop supervisor. —— —— 11. Briefed the chain of command on any observed environmental potentially highrisk areas during PMCS. —— —— Evaluation Guidance: Score the Soldier GO if all performance measures are passed (P). Score the Soldier NO-GO if any performance measure is failed (F). If the Soldier fails any performance measure, show what was done wrong and how to do it correctly. References Required DA FORM 2404 DA FORM 2408-14 DA FORM 5988-E DA PAM 738-751 DA PAM 750-8 DD FORM 314 7 December 2007 Related AR 200-1 DA PAM 200-1 FM 4-30.3 TC 3-34.489 3-93 STP 9-94K13-SM-TG Write a Standing Operating Procedure (SOP) 093-SSG-3011 Conditions: In a contemporary operational environment (COE), given the unit's old SOP, Army regulation (AR) 750-1, Department of the Army (DA) Pamphlet 600-67, DA Pamphlet 750-3, Field Manual (FM) 4-30.3, FM 5-0, and Training Circular (TC) 43-4. This task can be performed in a field or garrison environment. Standards: Write a new SOP that is reviewed and approved by the supervisor/commander. Implement all recommended changes. Performance Steps 1. Develop a basic SOP format to ensure it meets organization/element specific needs and/or requirements for the maintenance facility. a. Purpose statement. b. Scope statement. c. Organization statement. d. Conformity statement. e. References. f. Annexes. 2. Include guidance in the SOP on the following as they pertain only to the maintenance facility. a. Personnel administration. b. Security. c. Security and intelligence. d. Area security. e. Physical security of weapons and property. f. Safety program. g. Maintenance operations. h. Management of hand receipts. i. Standard warnings. j. Alert procedures. k. Chemical, biological, radiological, nuclear (CBRN) warfare. l. Defense against nuclear attack. m. Logistics. n. Motor pool operations. o. Motor movement and traffic control. p. Tactical operations. 3. Ensure that all references used are current. 4. Staff the draft through the supervisor/commander. 5. Implement any approved SOP changes. 6. Obtain supervisor/commander signature on final version of SOP. 3-94 7 December 2007 STP 9-94K13-SM-TG GO NO-GO 1. Developed a basic SOP format to ensure it met organization/element specific needs and/or requirements for the maintenance facility. —— —— 2. Included guidance in the SOP on the following as they pertained only to the maintenance facility. —— —— 3. Ensured that all references used were current. —— —— 4. Staffed the draft through the supervisor/commander. —— —— 5. Implemented any approved SOP changes. —— —— 6. Obtained supervisor/commander signature on final version of SOP. —— —— Performance Measures Evaluation Guidance: Score the Soldier GO if all performance measures are passed (P). Score the Soldier NO-GO if any performance measure is failed (F). If the Soldier fails any performance measure, show what was done wrong and how to do it correctly. References Required AR 750-1 DA PAM 600-67 DA PAM 750-3 FM 4-30.3 FM 5-0 TC 43-4 7 December 2007 Related 3-95 STP 9-94K13-SM-TG Maintain Property Accountability 093-SSG-3013 Conditions: In a contemporary operational environment (COE), perform this task given a quarterly review of all hand receipts with hand receipt holders in the maintenance section/shop, issued new equipment, and tagged unserviceable equipment for turn-in, Army regulation (AR) 25-400-2, AR 710-2, Department of the Army (DA) Form 2062 (Hand Receipt/Annex Number), DA Pamphlet 710-2-1, hand receipts, applicable equipment, and applicable technical manuals (TMs). This task can be performed in a field or garrison environment. Standards: Issue supplies and equipment to hand receipt holders while maintaining property and supply accountability. Performance Steps 1. Notify hand receipt holders of quarterly inventory. 2. Review file copies of all hand receipts and signature cards for each maintenance section/shop. 3. Assembly all new equipment to be issued out into separate groups for issuing to hand receipt holders during the quarterly inventory. 4. Issue new equipment to hand receipt holders before inventorying. 5. Inventory hand receipts. 6. Update each hand receipt holder's equipment shortage list, as required. 7. Ensure that only authorized personnel on the hand receipt holder signature card signs the hand receipt. 8. Ensure that all forms were filled out correctly. 9. File hand receipts in appropriate hand receipt holder files. Performance Measures GO NO-GO 1. Notified hand receipt holders of quarterly inventory. —— —— 2. Reviewed file copies of all hand receipts and signature cards for each maintenance section/shop. —— —— 3. Assembled all new equipment to be issued into separate groups for issuing to hand receipt holders during the quarterly inventory. —— —— 4. Issued new equipment to hand receipt holders before inventorying. —— —— 5. Inventoried hand receipts. —— —— 6. Updated each hand receipt holder's equipment shortage list, as needed. —— —— 7. Ensured that only authorized personnel on the hand receipt holder signature card signed the hand receipt. —— —— 8. Ensured that all forms were filled out correctly. —— —— 9. Filed hand receipts in appropriate hand receipt holder files. —— —— Evaluation Guidance: Score the Soldier GO if all performance measures are passed (P). Score the Soldier NO-GO if any performance measure is failed (F). If the Soldier fails any performance measure, show what was done wrong and how to do it correctly. 3-96 7 December 2007 STP 9-94K13-SM-TG References Required AR 25-400-2 AR 710-2 DA FORM 2062 DA PAM 710-2-1 7 December 2007 Related 3-97 STP 9-94K13-SM-TG Assess Battlefield Damage 093-SSG-3014 Conditions: In a contemporary operational environment (COE), supervise the performance of an organizational maintenance team or a direct support (DS) maintenance support team (MST) performing battlefield assessment. Given a disabled vehicle or equipment; repairers to assess the equipment; applicable technical manuals (TMs) -10, -20, -30, repair parts manuals, and tool kits; Department of the Army (DA) Form 2404 (Equipment Inspection and Maintenance Worksheet) or DA Form 5988-E (Equipment Inspection Maintenance Worksheet [EGA]), DA Form 2407 (Maintenance Request) or DA Form 5990-E (Maintenance Request [EGA]), DA Pamphlet 750-8, DA Pamphlet 738-751, Department of Defense (DD) Form 1577 (Unserviceable (Condemned) Tag - Materiel), DD Form 1577-1 (Unserviceable (Condemned) Label - Materiel), DD Form 1577-2 (Unserviceable (Repairable) Tag Materiel), DD Form 1577-3 (Unserviceable (Reparable) Label - Materiel), Field Manual (FM) 4-30.3, and FM 4-30.31. Standards: Supervise the organizational maintenance team or DS MST that identified and performed repairs needed to restore a disabled piece of equipment to the minimum essential combat capabilities necessary to support a specific combat mission or to enable the equipment to self-recover. Complete all required paperwork according to DA Pamphlet 750-8, DA Pamphlet 738-751, FM 4-30.3, and FM 4-30.31. Performance Steps 1. Brief the organizational maintenance team or DS MST on the upcoming mission to assess battlefield damage. (FM 4-30.3) a. Identify point of contact at unit/site. b. Identify the equipment to be assessed for battlefield damage. c. Identify the equipment needed for the upcoming mission. d. Explain logistics support. e. Plan primary and secondary routes to unit. f. Ensure team receives a copy of supported units' radio frequencies and call signs. 2. Monitor assigned personnel to the team according to their qualifications and availability to meet the mission needs. 3. Arrange for transportation to the site. 4. Ensure that the proper battlefield assessment procedures are followed. a. Review the operator/crew assessment and the safety checks made. b. Interview the operator/crew, if available. c. Conduct visual inspection. d. Perform self-test. e. Test equipment with the organizational/DS maintenance equipment. 5. Ensure the MST provides technical assistance to the organizational maintenance team as required. 6. Ensure the MST prioritizes repairs according to battlefield damage time guidelines. 7. Ensure that all required maintenance forms are completed in accordance with DA Pamphlet 750-8 and DA Pamphlet 738-751. a. DA Form 2404 or DA Form 5988-E. b. DA Form 2407 or DA Form 5990-E. c. DD Form 1577. d. DD Form 1577-1. e. DD Form 1577-2. f. DD Form 1577-3. 8. Ensure a system assessment summary is completed and submitted properly. 3-98 7 December 2007 STP 9-94K13-SM-TG Performance Measures GO NO-GO 1. Briefed the organizational maintenance team or DS MST on the upcoming mission to assess battlefield damage. —— —— 2. Monitored assigned personnel to the team according to their qualifications and availability to meet the mission needs. —— —— 3. Arranged for transportation to the site. —— —— 4. Ensured that the proper battlefield assessment procedures were followed. —— —— 5. Ensured the MST provided technical assistance to the organizational maintenance team, as required. —— —— 6. Ensured the MST prioritized repairs according to battlefield damage time guidelines. —— —— 7. Ensured that all required maintenance forms were filled out correctly in accordance with DA Pamphlet 750-8 and DA Pamphlet 738-751. —— —— 8. Ensured a system assessment summary was completed correctly and submitted. —— —— Evaluation Guidance: Score the Soldier GO if all performance measures are passed (P). Score the Soldier NO-GO if any performance measure is failed (F). If the Soldier fails any performance measure, show what was done wrong and how to do it correctly. References Required DA FORM 2404 DA FORM 2407 DA FORM 5988-E DA FORM 5990-E DA PAM 738-751 DA PAM 750-8 DD FORM 1577 DD FORM 1577-1 DD FORM 1577-2 DD FORM 1577-3 FM 4-30.3 FM 4-30.31 7 December 2007 Related TM 750-245-4 3-99 STP 9-94K13-SM-TG Monitor Bench Stock Operations 093-SSG-3016 Conditions: In a contemporary operational environment (COE), perform this task given Army regulation (AR) 710-2, Department of the Army (DA) Pamphlet 710-2-2, and a copy of Federal Logistics (FEDLOG) discs. This task can be performed in a field or garrison environment. Standards: Maintain bench stock in accordance with AR 710-2 and DA Pamphlet 710-2-2. Performance Steps 1. Ensure that the bench stock items are made up of low-cost expendable items. 2. Ensure the bench stock is stored near the work area. 3. Ensure that bench stock replenishment tags and lists are maintain with the bench stock. 4. Ensure that bench stock orders are on a prescribed schedule or as needed. 5. Ensure that the bench stock items are ordered under the correct urgency of need designator (UND). 6. Review the bench stock items list semiannually. Performance Measures GO NO-GO 1. Ensured that the bench stock was made up of low-cost expendable items. —— —— 2. Ensured that the bench stock was stored near the work area. —— —— 3. Ensured that bench stock replenishment tags and lists were maintained with the bench stock. —— —— 4. Ensured that bench stock was ordered on a prescribed schedule or as needed. —— —— 5. Ensured that the bench stock was ordered under the correct urgency of need designator (UND). —— —— 6. Ensured that the bench stock was reviewed semiannually. —— —— Evaluation Guidance: Score the Soldier GO if all performance measures are passed (P). Score the Soldier NO-GO if any performance measure is failed (F). If the Soldier fails any performance measure, show what was done wrong and how to do it correctly. References Required AR 710-2 DA PAM 710-2-2 FEDLOG 3-100 Related 7 December 2007 STP 9-94K13-SM-TG Monitor Shop Stock Operations 093-SSG-3017 Conditions: In a contemporary operational environment (COE), perform this task given a current copy of the shop stock list, Army regulation AR 710-2, Department of the Army (DA) Pamphlet 710-2-2, and a copy of Federal Logistics (FEDLOG) discs. This task can be performed in a field or garrison environment. Standards: Maintain the shop stock according to AR 710-2 and DA Pamphlet 710-2-2. Performance Steps 1. Ensure all repair parts and consumables listed on the shop stock meet the criteria listed in AR 710-2 and DA Pamphlet 710-2-2. 2. Ensure each item is demand supported. 3. Ensure each items' stockage level is developed in accordance with DA Pamphlet 710-2-2. 4. Ensure that excess stocks are turned in within 10 days of review. 5. Ensure that replenishment of stocks' is based on the reorder point (ROP). 6. Ensure a temporary hand-receipted is issued for the controlled cryptographic item (CCI) repair parts required by the communications security (COMSEC) maintenance activities for diagnostic purpose. 7. Ensure an inventory of the shop stock items are scheduled for the review during the correct reviewing period. 8. Review the supply support activity (SSA) shop stock list to see if the unit commander has signed it. Performance Measures GO NO-GO 1. Ensured repair parts and consumables listed on the shop stock met the criteria listed in AR 710-2 and DA Pamphlet 710-2-2. —— —— 2. Ensured each item was demand supported. —— —— 3. Ensured stockage levels were developed in accordance with DA Pamphlet 710-2-2. —— —— 4. Ensured excess stocks were turned in within 10 days of review. —— —— 5. Ensured replenishment of stock was based on the reorder point (ROP). —— —— 6. Ensured controlled cryptographic item (CCI) repair parts required by communications security (COMSEC) maintenance activities for diagnostic purpose were hand-receipted on temporary loan. —— —— 7. Ensured the shop stock was inventoried during the scheduled review period. —— —— 8. Ensured the shop stock list was signed by the unit commander and submitted to the supply support activity (SSA). —— —— Evaluation Guidance: Score the Soldier GO if all performance measures are passed (P). Score the Soldier NO-GO if any performance measure is failed (F). If the Soldier fails any performance measure, show what was done wrong and how to do it correctly. 7 December 2007 3-101 STP 9-94K13-SM-TG References Required AR 710-2 DA PAM 710-2-2 FEDLOG 3-102 Related 7 December 2007 STP 9-94K13-SM-TG Inspect Maintenance Support Team Operations 093-SSG-3019 Conditions: In a contemporary operational environment (COE), perform this task given the necessary personnel to perform an electronics/avionics maintenance support team (MST) operation, Department of the Army (DA) Pamphlet 611-21, DA Pamphlet 750-8, DA Pamphlet 738-751, and Field Manual (FM) 4 30.3. This task can be performed in a field or garrison environment. Standards: Ensure the correct military occupational specialty holders were assigned to a support team, briefed, and provided with transportation. Performance Steps 1. Monitor assigned personnel according to their qualifications and availability. 2. Arrange for transportation to the site. 3. Brief the support team on mission requirements. a. Identify point of contact at unit. b. Identify equipment needed for the support mission. c. Explain logistics support. d. Plan primary and secondary routes to unit. e. Ensure team received a copy of supported units' radio frequencies and call signs. 4. Provide technical assistance to the support team as required. 5. Ensure that all maintenance forms are filled out correctly. Performance Measures GO NO-GO 1. Monitored assigned personnel according to their qualifications and availability. —— —— 2. Arranged for transportation to the site. —— —— 3. Briefed the support team on mission requirements. —— —— 4. Provided technical assistance to the support team as required. —— —— 5. Ensured that all maintenance forms were filled out correctly. —— —— Evaluation Guidance: Score the Soldier GO if all performance measures are passed (P). Score the Soldier NO-GO if any performance measure is failed (F). If the Soldier fails any performance measure, show what was done wrong and how to do it correctly. References Required DA PAM 611-21 DA PAM 738-751 DA PAM 750-8 FM 4-30.3 7 December 2007 Related FM 3-25.26 3-103 STP 9-94K13-SM-TG Inspect Maintenance Reporting and Management Data 093-SSG-3020 Conditions: As a senior repairer, one of your responsibilities is to inspect the paperwork used in an electronics / avionics maintenance facility. In a contemporary operational environment (COE), you must inspect and manage all of the maintenance forms and records used in reporting the maintenance status of equipment repaired in the maintenance facility. If needed, the following forms, records, and publications will be available for each piece of equipment job-ordered: Department of the Army (DA) Form 2402 (Maintenance Tag), DA Form 2404 (Equipment Inspection and Maintenance Worksheet), DA Form 2405 (Maintenance Request Register), DA Form 2407 (Maintenance Request), DA Form 2407-1 (Maintenance Request Continuation Sheet), DA Form 2408-12 (Army Aviator's Flight Record), DA Form 2408-13 (Aircraft Status Information Record), DA Form 2408-13-1 (Aircraft Maintenance and Inspection Record), DA Form 2410 (Component Removal and Repair/Overhaul Record), Department of Defense (DD) Form 1574 (Serviceable Tag - Materiel), DD Form 1574-1 (Serviceable Label - Materiel), DD Form 1575 (Suspended Tag - Materiel), DD Form 1575-1 (Suspended Label - Materiel), DD Form 1576 (Test/Modification Tag - Materiel), DD Form 1576-1 (Test/Modification Label - Materiel), DD Form 1577 (Unserviceable (Condemned) Tag - Materiel), DD Form 1577-1 (Unserviceable (Condemned) Label Materiel), DD Form 1577-2 (Unserviceable (Reparable) Tag - Materiel), DD Form 1577-3 (Unserviceable (Reparable) Label - Materiel), DA Pamphlet 750-8, and DA Pamphlet 738-751. Standards: Inspect the electronics/avionics maintenance forms and records for errors and forms missing from the job packets. Performance Steps 1. Locate closed-out and active job order packets within the electronics / avionics maintenance facility. 2. Match all job-ordered equipment serial numbers with closed-out and active job packets within the electronics / avionics maintenance facility. 3. Ensure that all required forms and records are inside the job order packets. 4. Verify that all forms and records within the job packets are properly completed. 5. Ensure that all listed discrepancies been corrected. 6. Ensure that all forms and reports are distributed or filed in accordance with DA pamphlets and Army regulations. Performance Measures GO NO-GO 1. Located closed-out and active job order packets within the electronics/avionics maintenance facility. —— —— 2. Matched all job-ordered equipment serial numbers with closed-out and active job packets within the electronics/avionics maintenance facility. —— —— 3. Ensured that all required forms and records were in the job order packets. —— —— 4. Verified that all forms and records within the job packets were properly completed. —— —— 5. Ensured that all discrepancies had been corrected. —— —— 6. Ensured that all forms and reports were distributed or filed in accordance with DA pamphlets and Army regulations. —— —— 3-104 7 December 2007 STP 9-94K13-SM-TG Evaluation Guidance: Score the Soldier GO if all performance measures are passed (P). Score the Soldier NO-GO if any performance measure is failed (F). If the Soldier fails any performance measure, show what was done wrong and how to do it correctly. References Required DA FORM 2402 DA FORM 2404 DA FORM 2405 DA FORM 2407 DA FORM 2407-1 DA FORM 2408-12 DA FORM 2408-13 DA FORM 2408-13-1 DA FORM 2410 DA PAM 738-751 DA PAM 750-8 DD FORM 1574 DD FORM 1574-1 DD FORM 1575 DD FORM 1575-1 DD FORM 1576 DD FORM 1576-1 DD FORM 1577 DD FORM 1577-1 DD FORM 1577-2 DD FORM 1577-3 7 December 2007 Related FM 4-30.3 TM 38-L09-11 3-105 STP 9-94K13-SM-TG Review SAMS-1 Reports 093-SSG-3021 Conditions: In a contemporary operational environment (COE), perform this task given Standard Army Maintenance System-Level 1 (SAMS-1) installed, completed set of required SAMS-1 reports and forms, Automated Information System Manual (AISM) 25-L21-AHN-ZZZ-EM, Department of the Army (DA) Pamphlet 750-8, DA Pamphlet 738-751, and Field Manual (FM) 4-30.3. NOTE: This task may be performed in a chemical, biological, radiological, and nuclear (CBRN) environment. Standards: Review all required SAMS-1 reports and forms and correct discrepancies according to AISM 25-L21-AHN-ZZZ-EM and DA Pamphlet 750-8 or DA Pamphlet 738-751. File all reports properly and forward copies, as required. Performance Steps 1. Ensure that the electronics/avionics maintenance operations are using all of the required SAMS-1 reports and forms. 2. Review all of the new copies of all SAMS-1 reports and forms needed to run the electronics/avionics maintenance operations. 3. Compare previous and newly printed SAMS-1 reports and forms for discrepancies. 4. Review the new SAMS-1 reports and forms for discrepancies. 5. Correct all identified discrepancies. 6. Ensure that all SAMS-1 reports and forms are distributed or filed in accordance with Army regulations. Performance Measures GO NO-GO 1. Ensured that all required SAMS-1 reports and forms required for electronics/avionics maintenance operations were being used. —— —— 2. Reviewed new copies of all SAMS-1 reports and forms needed to run the electronics/avionics maintenance operations. —— —— 3. Compared the previous SAMS-1 reports and forms with the newly printed reports and forms for discrepancies. —— —— 4. Reviewed the new SAMS-1 reports and forms for discrepancies. —— —— 5. Ensured that all discrepancies were corrected. —— —— 6. Ensured that all SAMS-1 reports and forms were distributed or filed in accordance with Army regulations. —— —— Evaluation Guidance: Score the Soldier GO if all performance measures are passed (P). Score the Soldier NO-GO if any performance measure is failed (F). If the Soldier fails any performance measure, show what was done wrong and how to do it correctly. 3-106 7 December 2007 STP 9-94K13-SM-TG References Required AISM 25-L21-AHN-ZZZ-EM DA PAM 738-751 DA PAM 750-8 FM 4-30.3 7 December 2007 Related 3-107 This page intentionally left blank. STP 9-94K13-SM-TG APPENDIX A Sample DA Form 5164-R (Hands-On Evaluation) This appendix provides a sample of DA Form 5164-R (see Figure A-1) for the tasks in this STP. The DA Form 5164-R allows the trainer to keep a record of the performance measures a Soldier passes or fails on each task. Trainers should use the following instructions when completing DA Form 5164-R: Prior to Evaluating the Soldier • Obtain a blank copy of DA Form 5164-R, which you may locally reproduce on 8 x 11-inch paper. The form also can be downloaded from the U.S. Army Publishing Directorate web site (www.apd.army.mil/forms). • Enter the task title and 10-digit number for the task from the evaluation guide of the SM task summary. • In column (a), enter the number of each performance measure from the evaluation guide. • In column (b), enter the performance measure corresponding to the performance measure number in column (a). (You may abbreviate this information if necessary.) • Enter the feedback statement from the evaluation guide just below the last performance measure. • Locally reproduce the partially completed form if you are evaluating more than one Soldier on the task or the same Soldier on more than one task. During the Evaluation • Enter the date just before evaluating the Soldier's task performance. • Enter the evaluator's name and the Soldier's name and unit. • For each performance measure in column (b), enter a check in column (c) PASS or column (d) FAIL as appropriate. • Compare the number of performance measures the Soldier passes (and if applicable, which ones) against the task standard shown in the feedback statement. If the standard is met or exceeded, check the GO block under STATUS; otherwise, check the NO-GO block. 7 December 2007 A-1 STP 9-94K13-SM-TG Figure A-1. Sample of a Completed DA Form 5164-R A-2 7 December 2007 STP 9-94K13-SM-TG APPENDIX B Sample DA Form 5165-R (Field Expedient Squad Book) This appendix provides a sample of DA Form 5165-R (see Figure B-1) for the tasks in this STP. The DA Form 5165-R allows the trainer to keep a record of task proficiency for a group of Soldiers. Trainers should use the following instructions when completing DA Form 5165-R: Prior to Evaluating the Soldier • Obtain a blank copy of DA Form 5165-R, which you may locally reproduce on 8 x 11 paper. The form also can be downloaded from the U.S. Army Publishing Directorate (www.apd.army.mil/forms). • Enter the SM task number and abbreviated task title for the evaluated tasks in the appropriate column. Use additional sheets as necessary. Locally reproduce the partially completed form if you are evaluating more than nine Soldiers. During the Evaluation • Enter the names of the Soldiers you are evaluating, one name per column, at the top of the form. You may add the names of newly assigned Soldiers if there are blank columns. • Under STATUS, record (in pencil) the date in the GO block if the Soldier demonstrated task proficiency to Soldier's manual standards. Keep this information current by always recording the most recent date on which the Soldier demonstrated task proficiency. • Record the date in the NO-GO block if the Soldier failed to demonstrate task proficiency to Soldier's manual standards. Soldiers who failed to perform the task should be retrained and reevaluated until they can meet the standards. When that occurs, enter the date in the appropriate GO block and erase the previous entry from the NO-GO block. After the Evaluation • Read down each column (GO/NO-GO) to determine the training status of that individual. This will give you a quick indication on which tasks a Soldier needs training. • Read across the rows for each task to determine the training status of all Soldiers. You can readily see on which tasks to focus training. Line through the training status column of any Soldier who departs from the unit. 7 December 2007 B-1 STP 9-94K13-SM-TG Figure B-1. Sample of a Completed DA Form 5165-R B-2 7 December 2007 STP 9-94K13-SM-TG GLOSSARY Section I Acronyms & Abbreviations AC alternating current ACCP Army Correspondence Course Program AHCAL Apache helicopter calibration AHST Apache helicopter self-test AIPD Army Institute for Professional Development AISM Automated Information Systems Manual AIT advanced individual training AMCOM Aviation and Missile Command ANCOC Advanced Noncommissioned Officer Course AOSNS Advanced Operating System/Virtual Storage AR Army regulation ARTEP Army Training and Evaluation Program ATE automatic test equipment B/D/A before-, during-, after-operations BNCOC Basic Noncommissioned Officer Course CBRN chemical, biological, radiological, and nuclear CBU calibrate before use CCI controlled cryptographic item CLI Command Line Interpreter CNR calibration not required COE contemporary operating environment COMSEC Communications Security CTT common task test 7 December 2007 Glossary-1 STP 9-94K13-SM-TG DA Department of the Army; daily D.C. District of Columbia DC direct current DD Department of Defense DIU dedicated interface unit DS direct support E/O electro-optical EETF Electronic Equipment Test Facility EIR equipment improvement recommendation ELSEC electronic security EOBST electro-optical bench self-test F Fahrenheit; failed FEDLOG Federal Logistics FM field manual FSU frequency sampling unit HI high HSVSU high-speed voltage sampling unit Hz hertz ICD interconnection device ILSST integrated logistics support self-test IMPL initial mandatory parts list kw Kilowatt LO low LRA local reproduction authorized LRU line replaceable unit LSVSU low-speed voltage sampling unit Glossary-2 7 December 2007 STP 9-94K13-SM-TG M monthly operations MDS mission, design, and series MED medical METL mission-essential task list MOS Military Occupational Specialty MOSC Military Occupational Specialty Code MSC major subordinate command MST maintenance support team MTP mission training plan MWO modification work order N/A not applicable NCO noncommissioned officer NCOIC noncommissioned officer in charge NMP national maintenance point No. number NSN national stock number P passed PAM pamphlet PG pulse generator PIU programmable interface unit PLL Prescribed Load List PMCS preventive maintenance checks and services PNVS Pilot Night Vision Sensor psi pounds per square inch QDR Quality Deficiency Report QT quarterly 7 December 2007 Glossary-3 STP 9-94K13-SM-TG RADIAC radiation detection, indication, and computation RFB radio frequency--B core ROP reorder point RTS Run Time System SAMS-1 Standard Army Maintenance System-Level 1 SF standard form SFDLR stock funding of depot level repairables SIGSEC signal security SL skill level SLAC Support List Allowance Card SM Soldier's manual SMCT Soldier's manual of common tasks SOF safety of flight SOP standing operating procedure SSA supply support activity STP Soldier training publication Sust Tng Freq sustainment training frequency Sust Tng SL sustainment training skill level SYSCAL system calibration TADS Target acquisition and designation sight TAMMS The Army Maintenance Management System TB technical bulletin TC training circular TG trainer's guide TM technical manual TMDE test, measurement, and diagnostic equipment TPS Test Program Set TRADOC Training and Doctrine Command Glossary-4 7 December 2007 STP 9-94K13-SM-TG UND urgency of need designator UNIT Trained in the Unit U.S. United States USATRADOC United States Army Training and Doctrine Command UUT unit under test V volt(s) VDT video display terminal VTOCP Virtual Test Operator’s Control Panel W weekly operations WFG waveform generator WK weekly Section II Terms advanced individual training Training given to enlisted personnel upon completion of basic training that will qualify them for award of a military occupational specialty (MOS). Army Training and Evaluation Program The cornerstone of unit training. It is the umbrella program used by the trainer and training manager in the training evaluation of units. The ARTEP is a complete program that enables commanders to evaluate and develop collective training based on unit weaknesses, then train the unit to overcome those weaknesses and reevaluate. Success on the battlefield depends on the coordinated performance of collective and individual skills that are taught through the ARTEP mission training plan (MTP). basic noncommissioned officer course Training designed for Soldiers in grade E5 to learn the duties of grade E6. Soldiers receive specialized training in their MOS and in related subjects that prepare them to perform duties in a supervisory capacity. collective training Training, either in institutions or units, that prepares cohesive teams and units to accomplish their missions on the battlefield and in operations other than war. common task A task every Soldier in the Army must learn and perform at some skill level. common task test (CTT) A formal hands-on test administered by the unit that measures a Soldier's proficiency on common critical tasks from the Soldiers manual of common tasks. Critical task See "task," critical collective task," and "critical individual task." 7 December 2007 Glossary-5 STP 9-94K13-SM-TG cross training The systematic training of Soldiers on tasks related to another duty position. FEDLOG The logistics information system published by the Defense Logistics Information Service (DLIS). FEDLOG contains information on more than 7 million stock numbers and 12 million part numbers. Updated monthly, FEDLOG is available in CD-ROM or DVD format. GO/NO-GO This is a pass/fail evaluation whereby the Soldier (student) cannot be partially correct. Either he meets the standard or he does not meet the standard. Hertz cycles per second Individual training Training which prepares the Soldier to perform specified duties or tasks related to the assigned duty position or subsequent duty positions and skill levels. Individual Training Evaluation Program The Army's formal system of individual training evaluation, consisting of commander's evaluations, the self-development test, and the common task test integration training Initial entry training in Skill Level 1 tasks for an individual newly arrived in a unit. In all cases this training is supported by the TRADOC school proponent. merger training Training that prepares an NCO to supervise one or more different MOSs at lower skill levels when the Soldier advances in skill level in his career management field. performance measure Action or resulting product that determines if the Soldier has performed a task correctly. Refresher training Training that reinforces previous training and/or helps to sustain or regain previously acquired skills and knowledge. Refresher training is related to course-specific training objectives, performed under prescribed conditions, and meets prescribed performance standards. Training may take place in a course during or outside of POI time. It usually takes place in the unit to sustain or retrain a previously required proficiency level or it may be used to prepare an individual for institutional training (such as, to meet prerequisite training requirements). SAMS-1 Software package designed to manage maintenance operations, including work order registration, repair parts, stockage and requisition, manpower utilization, and readiness reporting. Shared task See "task." Skill level Identifies task proficiency, or ability typically required for successful performance at the grade with which the skill level is associated. The skill levels by grade are shown as follows: Skill levels => 1 2 3 4 5; Enlisted - E 1/2, 3/4, 5, 6, 7, 8/9; Warrant - W 1/2, 3, 4, 5; Officers - O 1/2, 3, 4, 5, 6. Glossary-6 7 December 2007 STP 9-94K13-SM-TG Soldier Manual of Common Tasks (SMCT) A publication listing the critical tasks for each skill level of an MOS. It provides the performance steps (measures), the condition under which the tasks are performed, the standards that must be met, and an instrument for evaluating task performance. sustainment training The provision of training required to maintain the minimum acceptable level of proficiency required to accomplish a critical task. task conditions The specific circumstances or situations under which a job is done. It lists the people, tools, equipment, environment, and other items necessary to perform the job. task standards A description of how well, how completely, how accurately, or how quickly a task must be performed in wartime. Combined standards, such as how well and how quickly a task must be performed, may also be used. Task summary A listing in the Soldiers Training Publications of the conditions, standards, and performance measures, references, and proponent for each individual critical task. Information is extracted from the individual critical task analysis. See "Task performance specifications." Reference dependent task summary--A summary written for those tasks that require the trained Soldier to refer to one or more publications while performing all or part of a task in wartime conditions. Reference independent task summary--A summary written for those tasks that require the trained Soldier to perform the task in wartime conditions from memory, without reference to any publication. train up Process of increasing the skills and knowledges of an individual to a higher skill level in the appropriate MOS. It may involve certification. Trainer's guide A publication that covers the information needed by your commander, training manager, and trainer to plan, conduct, and evaluate training in your MOS. There is a trainer's guide for each MOS. Unit training Training (individual, collective, and joint or combined) that takes place outside the Army's institutional base. 7 December 2007 Glossary-7 This page intentionally left blank. STP 9-94K13-SM-TG REFERENCES Required Publications Required publications are sources that users must read in order to understand or to comply with this publication. Army Regulations AR 25-2 AR 25-400-2 AR 40-5 AR 95-1 AR 190-13 AR 380-5 AR 380-40 AR 385-10 AR 672-20 AR 710-2 AR 725-50 AR 750-1 Information Assurance 24 October 2007 The Army Records Information Management System (ARIMS) 2 October 2007 Preventive Medicine 25 May 2007 Flight Regulations 3 February 2006 The Army Physical Security Program 30 September 1993 Department of the Army Information Security Program 29 September 2000 (O) Policy for Safeguarding and Controlling Communications Security (COMSEC) Material (U) 30 June 2000 The Army Safety Program 23 August 2007 Incentive Awards 29 January 1999 Supply Policy Below the National Level 8 July 2005 Requisition, Receipt, and Issue System 15 November 1995 Army Materiel Maintenance Policy 20 September 2007 Department of Army Forms Unless otherwise indicated, DA forms are available on the APD web site at http://www.apd.army.mil/. DA FORM 2062 DA FORM 2063-R DA FORM 2064 DA FORM 2402 DA FORM 2404 DA FORM 2405 DA FORM 2407 DA FORM 2407-1 DA FORM 2408-12 DA FORM 2408-13 DA FORM 2408-13-1 DA FORM 2408-14 DA FORM 2410 DA FORM 3318 DA FORM 3758-R DA FORM 5164-R DA FORM 5165-R DA FORM 5988-E DA FORM 5990-E SF FORM 368 7 December 2007 Hand Receipt/Annex Number Prescribed Load List (LRA) Document Register for Supply Actions Maintenance Tag Equipment Inspection and Maintenance Worksheet Maintenance Request Register Maintenance Request Maintenance Request Continuation Sheet Army Aviator's Flight Record Aircraft Status Information Record Aircraft Maintenance and Inspection Record Uncorrected Fault Record Component Removal and Repair/Overhaul Record Records of Demands-Title Insert Calibration and Repair Requirements Worksheet (LRA) Hands-On Evaluation (LRA) Field Expedient Squad Book Equipment Inspection Maintenance Worksheet (EGA) Maintenance Request (EGA) Product Quality Deficiency Report References-1 STP 9-94K13-SM-TG Department of Army Pamphlets DA PAM 40-501 DA PAM 190-51 DA PAM 385-1 DA PAM 600-67 DA PAM 611-21 DA PAM 710-2-1 DA PAM 710-2-2 DA PAM 738-751 DA PAM 750-3 DA PAM 750-8 Hearing Conservation Program 10 December 1998 Risk Analysis for Army Property 30 September 1993 Small Unit Safety Officer/NCO Guide 29 November 2001 Effective Writing for Army Leaders 2 June 1986 Military Occupational Classification and Structure 22 January 2007 Using Unit Supply System (Manual Procedures) 31 December 1997 Supply Support Activity Supply System: Manual Procedures 30 September 1998 Functional Users Manual for the Army Maintenance Management System-Aviation (TAMMS-A) 15 March 1999 Soldier's Guide for Field Maintenance Operations 29 September 2006 The Army Maintenance Management System (TAMMS) Users Manual 22 August 2005 Department of Defense Forms DD Forms are available from the OSD Web site at www.dior.whs.mil/ICDHOME/DDEFORMS.HTM. DD FORM 314 DD FORM 1574 DD FORM 1574-1 DD FORM 1575 DD FORM 1575-1 DD FORM 1576 DD FORM 1576-1 DD FORM 1577 DD FORM 1577-1 DD FORM 1577-2 DD FORM 1577-3 DD FORM 2332 Preventive Maintenance Schedule and Record Serviceable Tag - Materiel Serviceable Label - Materiel Suspended Tag - Materiel Suspended Label - Materiel Test/Modification Tag - Materiel Test/Modification Label - Materiel Unserviceable (Condemned) Tag - Materiel Unserviceable (Condemned) Label - Materiel Unserviceable (Reparable) Tag - Materiel Unserviceable (Reparable) Label - Materiel Product Quality Deficiency Report Exhibit Field Manuals FM 3-19.30 FM 4-30.3 FM 4-30.31 FM 5-0 FM 7-0 FM 7-1 FM 25-4 FM 25-5 Physical Security 8 January 2001 Maintenance Operations and Procedures 28 July 2004 Recovery and Battlefield Damage Assessment and Repair 19 September 2006 Army Planning and Orders Production 20 January 2005 Training the Force 22 October 2002 Battle Focused Training 15 September 2003 How to Conduct Training Exercises 10 September 1984 Training for Mobilization and War 25 January 1985 Other Product Types AISM 25-L21-AHN-ZZZ-EM References-2 Standard Army Maintenance System Level 1(SAMS-1E) L21-10-00 End User Manual 15 August 2005 7 December 2007 STP 9-94K13-SM-TG DA LABEL 80 FEDLOG US Army Calibrated Instrument Federal Logistics information system (Updated Monthly CD-ROM/DVD) Defense Logistics Information Service (DLIS), Defense Logistics Agency (DLA) Technical Bulletins TB 11-6625-2773-35 TB 11-6625-3085-50 TB 43-180 TB 385-3 TB 385-4 TB 750-25 TB MED 523 Alignment Procedures for Test Station, Electronic Equipment, AN/USM 410(V)2 (NSN 6625-01-069-4223)(EIC:N/A) 1 September 1994 Alignment Procedures for Aviation Intermediate Maintenance (AVIM) AH 64A Electronic Equipment Test Facility (EETF) Peculiar Subsystem OQ 290(V)2/MSM 15 July 1987 Interactive Electronic Technical Manual (IETM) for Calibration and Repair Requirements for the Maintenance of Army Materiel 7 August 2006 Fire Prevention and Protection: Military Gasoline Cans 7 June 1968 Safety Requirements for Maintenance of Electrical and Electronic Equipment 1 August 1992 Maintenance of Supplies and Equipment: Army Test, Measurement and Diagnostic Equipment (TMDE) Calibration and Repair Support (C&RS) Program 1 March 1997 Control of Hazards to Health From Microwave and Radio Frequency Radiation and Ultrasound 15 July 1980 Technical Manuals TM 5-6115-545-12 TM 11-6130-415-14 TM 11-6625-2773-20 TM 11-6625-2773-30-1 TM 11-6625-2773-30-1-1 TM 11-6625-2773-30-4 TM 11-6625-2773-30-5 7 December 2007 Operator's and Organizational Maintenance Manual for Generator Set, Diesel Engine Driven, Tactical Skid Mtd, 60 Kw, 3 Phase, 4 Wire, 120/208 and 240/416 Volts, DOD Model MEP-006A, Utility Class, 50/60 Hz (NSN 6115-00-118-1243) DOD Model MEP-105A, Precise Class, 50/60 Hz (6115-00-118-1252) DOD Model MEP-115A, Precise Class, 400 Hz (6115-00-118-1253) Including Optional Kits, DOD Model MEP006AWF, Winterization Kit, Fuel Burning (6115-00-407-8314) DOD Model MEP006AWE, Winterization Kit, Electric (6115-00-455-7693) DOD Model MEP006ALM, Load Bank Kit (6115-00-407-8322) DOD Model MEP006AWM, Wheel Mounting Kit (6115-00-463-9092) 10 June 1973 Operator's, Organizational, Direct Support and General Support Maintenance Manual for Kit, Power Protection, MK-2046A/MSM 1 June 1986 Organizational Maintenance Manual for Test Station, Electronic Equipment, AN/USM-410(V)2 (NSN 6625-01-069-4223) 1 September 1986 Direct Support Maintenance Manual for Test Station, Electronic Equipment, AN/USM-410(V)2 (NSN 6625-01-069-4223) 1 June 1986 Direct Support Maintenance Manual for Test Station, Electronic Equipment, AN/USM-410(V)2 (NSN 6625-01-069-4223) (EIC:HYG) 15 November 1993 Direct Support Maintenance for Power Supply Group, OP 123/USM410(V)(NSN 6625-01-057-6259) (EIC:N/A) 1 June 1986 Direct Support Maintenance Manual for Interconnect-Interface Group, ON-180/USM-410(V) (NSN 6625-01-068-8566) 1 June 1986 References-3 STP 9-94K13-SM-TG TM 11-6625-2773-30-6 TM 11-6625-2773-40 TM 11-6625-3081-23-1 TM 11-6625-3081-23-2 TM 11-6625-3081-23-3 TM 11-6625-3081-23-4 TM 11-6625-3081-23-5 TM 11-6625-3085-12-1 TM 11-6625-3085-12-3 TM 11-6625-3085-12-4 TM 11-6625-3085-30-1 TM 11-6625-3085-30-2 TM 11-6625-3085-30-3 TM 11-6625-3085-30-4 TM 11-6625-3085-30-5 TM 38-L09-11 References-4 Direct Support Maintenance Manual for Measurements-Stimulus Test Station Group, OQ-249/USM-410(V) (NSN 6625-01-066-4493) (EIC:N/A) 1 June 1986 General Support Maintenance Manual for Test Station, Electronic Equipment, AN/USM-410(V)2 (NSN 6625-01-069-4223) 1 June 1986 Organizational and Direct Support Maintenance Manual for Electronic Equipment Test Facility TADS/PNVS Augmentation Equipment 13082808-39, 13231600, 13231650 and 13231800 1 February 1986 Organizational and Direct Support Maintenance Manual for Electronic Test Facility TADS/PNVS Augmentation Equipment 13082808-39, 13231600, 13231650 and 13231800 1 February 1986 Organizational and Direct Support Maintenance Manual for Electronic Equipment Test Facility TADS/PNVS Augmentation Equipment 13231600, 13082808-39, 13231650, and 13231800 1 February 1986 Organizational and Direct Support Maintenance Manual for Electronic Equipment Test Facility TADS/PNVS Augmentation Equipment 13082700 and 13082808-29 1 February 1986 Organizational and Direct Support Maintenance Manual for Electronic Equipment Test Facility TADS/PNVS Augmentation Equipment 1 July 1988 Operator and Aviation Unit Maintenance (AVUM) Deployment, Operation, and Teardown Procedures, AH-64A Electronic Equipment Test Facility (EETF) OQ-290(V)2/MSM (NSN 4920-01-250-9873)(EIC:TEG) 15 March 1987 Operator and Aviation Unit Maintenance (AVUM) Procedures for Peculiar Subsystem and System Interface Devices (IDs), AH-64A Electronic Equipment Test Facility (EETF) OQ-290(V)2/MSM (NSN 4920-01-250 9873)(EIC:TEG) 15 March 1987 Operator and Aviation Unit Maintenance (AVUM) Procedures for Hookup Diagrams for UUTs and Interface Devices (IDS) for AH-64A Electronic Equipment Test Facility (EETF) OQ-290(V)2/MSM (NSN 4920-01250 9873)(EIC:TEG) 1 December 1995 Aviation Intermediate Maintenance (AVIM) Procedures AH-64A Electronic Equipment Test Facility (EETF) OQ-290(V)2/MSM (NSN 4920 01250-9873)(EIC:TEG) 15 March 1987 Aviation Intermediate Maintenance (AVIM) Procedures AH-64A Electronic Equipment Test Facility (EETF) OQ-290(V)2/MSM (NSN 4920 01-250-9873)(EIC:TEG) 15 March 1987 Aviation Intermediate Maintenance (AVIM) Procedures AH-64A Electronic Equipment Test Facility (EETF) OQ-290(V)2/MSM (NSN 4920 01-250-9873)(EIC:TEG) 15 March 1987 Aviation Intermediate Maintenance (AVIM) Procedures for AH-64A Electronic Equipment Test Facility (EETF) OQ-290(V)2/MSM 15 March 1987 Aviation Intermediate Maintenance (AVIM) Procedures for AH-64A Electronic Equipment Test Facility (EETF) OQ-290(V)2/MSM (NSN 4920 01-250-9873)(EIC:TEG) 1 September 1991 Functional Users Manual for Maintenance Reporting and Management (MRM) (S&I CDR, USALOGC, ATTN: ATCL-SP, FT LEE, VA 23801 6000) 4 February 1985 7 December 2007 STP 9-94K13-SM-TG Training Circulars TC 43-4 Commander's and Shop Officer's Guide for Support Maintenance Management 8 May 1996 Related Publications Related publications are sources of additional information. They are not required in order to understand this publication. Army Regulations AR 5-12 AR 200-1 AR 702-7 AR 702-7-1 Army Management of the Electromagnetic Spectrum 1 October 1997 Environmental Protection and Enhancement 13 December 2007 Product Quality Deficiency Report Program [DLAR 4155.24; SECNAVINST 4855.5A; AFR 74.6] 20 July 1993 Reporting of Product Quality Deficiencies Within the US Army 25 April 2005 Department of Army Forms DA FORM 2028 Recommended Changes to Publications and Blank Forms Department of Army Pamphlets DA PAM 25-380-2 DA PAM 200-1 DA PAM 738-751 DA PAM 750-1 DA PAM 750-3 DA PAM 750-8 (O) Security Procedures for Controlled Cryptographic Items (Item only produced in electronic media). 10 January 1991 Environmental Protection and Enhancement 17 January 2002 Functional Users Manual for the Army Maintenance Management System-Aviation (TAMMS-A) 15 March 1999 Commanders' Maintenance Handbook 2 February 2007 Soldier's Guide for Field Maintenance Operations 29 September 2006 The Army Maintenance Management System (TAMMS) Users Manual 22 August 2005 Field Manuals FM 3-04.500 FM 3-25.26 FM 34-60 Army Aviation Maintenance 23 August 2006 (O) Map Reading and Land Navigation 18 January 2005 Counterintelligence 3 October 1995 Technical Bulletins TB 11-6625-2773-35 TB 43-0129 7 December 2007 Alignment Procedures for Test Station, Electronic Equipment, AN/USM 410(V)2 (NSN 6625-01-069-4223) (EIC:N/A) 1 September 1994 Safety Requirements for Use of Antenna and Mast Equipment 15 June 1986 References-5 STP 9-94K13-SM-TG Technical Manuals TM 1-6625-3081-30P TM 11-6625-2773-20P TM 11-6625-2773-30P TM 11-6625-2773-40P TM 11-6625-3085-12-2 TM 11-6625-3085-23P TM 750-245-4 Direct Support Maintenance Repair Parts and Special Tools List for Electronic Equipment Test Facility TADS/PNVS Augmentation Equipment 13082808-39, 13231526 11 October 1993 Organizational Maintenance Repair Parts and Special Tools List for Test Station, Electronic Equipment, AN/USM-410(V)2 (NSN 6625-01-069 4423) (EIC:N/A) 18 October 1985 Direct Support Maintenance Repair Parts and Special Tools List for Test Station, Electronic Equipment, AN/USM-410(V)2 (NSN 6625-01-069 4423) (EIC:N/A) 18 October 1985 General Support Maintenance Repair Parts and Special Tools List for Test Station, Electronic Equipment, AN/USM-410(V)2 (NSN 6625-01 069-4423) (EIC:N/A) 18 October 1985 Operator and Aviation Unit Maintenance (AVUM) Procedures, Test Van and Support Van Test Facility, AH-64A Electronic Equipment Test Facility (EETF) OQ-290(V)2/MSM 15 March 1987 Aviation Unit and Intermediate Maintenance Repair Parts and Special Tools List for AH-64A Electronic Equipment Test Facility (EETF) OQ 290(V)2 (NSN 4920-01-250-9873) (EIC:TEG) 1 January 1999 Direct Support and General Support for Quality Control Inspector's Inspection Criteria 25 January 1971 Training Circulars TC 3-34.489 References-6 The Soldier and the Environment 8 May 2001 7 December 2007 STP 9-94K13-SM-TG 7 December 2007 By Order of the Secretary of the Army: GEORGE W. CASEY, JR. General, United States Army Chief of Staff Official: JOYCE E. MORROW Administrative Assistant to the Secretary of the Army 0732001 DISTRIBUTION: Active Army, US Army Reserve, and Army National Guard: To be distributed in electronic media only. PIN: 084438-000