1
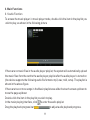
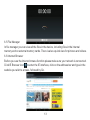
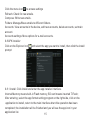
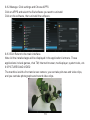
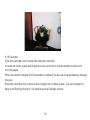
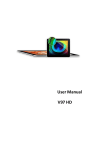
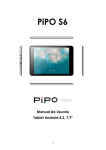
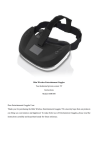
Content 1. Notifications …………………………………… ……………………....................... ……3 2. Introduction ………………………………………………………….................…………5 2.1 Key Functions……………………………………………………………………....…..5 2.2 Technical Specifications………………………………………………………..……..5 3. Quick Guide …………………………………………....................………………………6 3.1 About the Touch screen………………………………………………………………...6 3.2 Switch On/Off. ………………………………………………………………...............6 3.3 Power Save Modes and lock screen………………………………………………….6 3.4 Battery management and charging. ………………………………………………….7 3.5 Explanation of Function items………….……………………………………………..7 3.6 TF Card Storage……………………………………………………………….............8 4. Network Access ……………………………………………………………...............……9 4.1 Wi-Fi Network Access ……………………………………………………………….....9 5. Storage File Copy……………………..……………………………….................……..10 6. Main Functions ……………. ………………………………………......................……11 6.1 Audio Function……………………………………………………………………...….11 6.2 Video Function………………………………………………………………………….12 6.3 Picture Function………………………………………………………....…………….12 6.4 Record Function……………………………………………………… ……………….12 6.5 File Manager……………………………………………………………………….......13 6.6 Internet Browser…………………………………………………………………….....13 6.7 E-mail Function……………………………………………………………………...…14 1 6.8 APK Installer…………………………………………………………...…………………15 6.9 Pictures and Video……………………………………………….......………………16 6.10 Calendar………………..........……………………………...................…………18 7. System Settings………………..........……………………………................…………19 2 1. Notifications Please protect the device against moisture and dust. Do not leave the device in a high-temperature environment, especially a closed car in hot weather. Do not drop or strike the device. Do not shake the device violently, particularly the LCD screen, as this may cause the display to malfunction. Please make sure to carefully adjust the earphone volume; excessive volume may be harmful to your hearing. Please charge the device when (1)The power icon shows that the battery is nearly empty. (2)The device turns itself off automatically and will not come back on. (3)There is no response when operating the buttons. Attention: Please use only the charger provided by the manufacturer; other chargers may damage the device. Input: 100-240V ~ 50/60 Hz, Output: 5V 1500 mA Do not disconnect the device from your PC when downloading, uploading or formatting as this may cause programming errors in the device. Do not disassemble the device yourself; only allow an expert to do so. Do not use alcohol, thinner or benzene-based chemicals to clean the surface of the device. Do not use the device in places where its use is prohibited, like aircraft. Please make sure to always back up your device. The manufacturer is not responsible for lost files or data after the device has been damaged or repaired. 3 The manufacturer reserves all the rights to the technology and design of the device and has no obligation to inform the user if new versions or designs have been developed. The device is NOT waterproof; please keep it away from moisture at all times.This device will take approximately 20 seconds to power up; please don't try to operate the device during this period. 4 2. Introduction 2.1Key functions POWER: Press this button briefly for sleep/wake up mode, press and hold for several seconds to turn device ON or OFF. TF Card Slot: For external TF card, 128 MB to 32 GB. Stereo earphone jack: Stereo jack for earphone. MICRO USB Port:Micro 5-pin USB Port. RESET : Restart MID in case it is crashed during playback. 2.2Technical Specifications CPU OS Display RAM Memory SD Slot WIFI RK3188 Cortex A9, Quad-core Max 1.8GHz Google Android 4.4.2 KitKat 7"capacitive touch panel (1024*600 Resolution) 1GB DDRIII 8GB Micro SD(TF card) up to 32GB 802.11 b/g/n Camera Front 2.0M px;Rear 5.0M px Music format MP3,WMA,FLAC,AAC,OGG,WAV,APE etc. Video format VP8,RMVB,RM,MOV,MPG,MP4,AVI,3GP,DAT, FLV,MKV etc Picture format JPEG, BMP, GIF,PNG etc Battery 2800 MAH 5 3. Quick Guide 3.1 About the Touch screen The screen is a capacitive touch screen; you can use five fingers to touch the screen at the same time. 3.2 Switch On/Off. Switch On and Unlock: When the device is in the OFF mode press and hold the Power key for 3 seconds to enter the Android start-up progress bar; it takes approx. 20 seconds to display the system desktop. When the LCD is in locked mode please press and drag the icon to the green point and the LCD will unlock automatically (see the illustration below): 3.3 Power save Modes and lock screen. Briefly press the 'POWER' key after starting up for the system to switch to power save and lock mode. Briefly press the 'POWER' key or tap the touch screen and system will return to bright in 1 second. 6 3.4 Battery management and charging. 3.4.1 Before using your device for the first time, charge the battery for 8-12 hours to give the device a full charge. 3.4.2 Insert the micro port of the battery adaptor into the DC slot on the device and connect the other side to a power socket. The battery icon on the desktop icon will show the device is charging; please wait until the battery is fully charged before disconnecting. The icon on the desktop will show when the battery is fully charged. 【Note】:In order to keep the battery functioning in optimal condition please note the following: Don't charge the battery in high temperatures. No need to fully discharge the battery, the device can be charged even if there is some battery power remaining. In order to keep the battery in good condition please make sure to charge it once every two weeks if the device is not used for an extended period of time. 3.5 Explanation of function icons 7 Icon Function Icon Function Back to main menu Indicates when the system finds new devices. Show current power status Set the alarm The current system time Reduce the volume Back Menu Increase the volume Menu for Function Block Google search Adjust screen brightness System clock New mail WI-FI on/off USB Connection Status Bar 3.6 TF Card Storage The device has a TF card slot and supports the reading of files on the TF card. Insert the TF card into the card slot (can only be inserted one way); to remove the TF card press down on the card and it will pop out. 3.6.1 Insert the TF into the card slot in the right side of the device. 3.6.2 Don't eject the card when operating (reading, copying) as this may cause data errors. 3.6.3 Don't use the TF card in high temperature conditions. 3.6.4 Protect the TF card from liquids and corrosive materials. 8 4. Network Access The device supports a Wi-Fi network. 4.1 Wi-Fi Network Access 4.1.1 Turn on Wi-Fi and access Wi-Fi settings. The device will scan automatically for available Wi-Fi networks. 4.1.2 Choose the Wi-Fi network that you want to connect to. 4.1.3 Press Connect. Some network may require you to enter a password. 4.1.4 In the Wi-Fi settings screen press the Menu key and touch Advanced; this will give you an increased number of Wi-Fi settings. 9 5. Storage File Copy A) Connect the device to a computer using a USB cable; the status bar will show USB connected. B) Select USB Connected. C)Turn on USB storage. 10 6. Main Functions 6.1 Audio Function To access the music player: in music player mode, double-click the item in the playlist you wish to play, as shown in the following picture If there are no music files in the audio player playlist, the system will automatically upload the music files from the card to the audio player playlist after the audio player is turned on (the device supports the following audio file formats: mp3, wav, midi, wma). The playlist is shown in the above figure. If there are two or more songs in the Music playlist area slide the touch screen up/down to move the page up/down Double-click the item in the playlist you wish to play. In the music playing interface, click to enter the audio playlist. Drag the playback progress bar to adjust audio playback progress. 11 6.2 Video Function Click the Video player icon to enter the video player interface and open the video files The device supports the following video file formats: MKV, AVI, MP4, MOV, VOB, DAT, FLV, 3GP, etc. If there are no music files in the video player playlist the system will automatically upload the video files from the card to the video player playlist after the video player is turned on. Drag the playback progress bar to adjust video playback progress. 6.3 Picture Function Click the HD Video Player to enter the viewing interface. Add image(supports the following picture formats: BMP, JPG, JPEG, PNG, GIF) If there are no files in the photo list, the system will automatically load the image files from the card to the photo browser list after the photo browser is opened. Open the corresponding folder, find the image file and add the picture you want. Click the menu button to set the photo as your wallpaper. 6.4 Record Function Click the record icon to enter the recording interface, click the record button to start recording, click the stop button to stop recording. The system will ask you if you wish to store or delete this recording, please select manually. Recording playback: select audio player to play the recording. First select the record files from the explorer, then click on them and play; for further details please refer to Audio Function. 12 6.5 File Manager In file manager you can view all the files in the device, including files in the internal memory and on external memory cards. There is also a quick view for pictures and videos. 6.6 Internet Browser Before you use the Internet browse function please make sure your network is connected. Click IE Browser icon to enter the IE interface, click on the address bar and type in the website you wish to access, followed by Go. 13 Click on the Click on the icon to view bookmarks and history. menu icon to access settings. The device also supports other Internet browsers; please see the instructions for the Internet browsers in question. 6.7 E-mail Function Before you use the e-mail function please make sure your network is connected. When using this function for the first time you will need to add an e-mail account to the device. The device supports the use of several e-mail accounts. For portal sites e-mail accounts enter your e-mail address and password, then click next. After you have been successfully connected enter Account Name and Your Name. Account Name means the name of this account in the device, Your Name means the displayed name of your e-mail in the recipient's account. You can now access the account. Click on the e-mail titles to read emails, press and hold e-mail titles to access options. 14 Click the menu icon to access settings Refresh: Check for new emails. Compose: Write new emails. Folders: Manage/Move emails to different folders. Accounts: View accounts in the device, add new accounts, delete accounts, set main account. Accounts settings: More options for e-mail accounts. 6.8 APK Installer Click on the Explorer icon and select the app you want to install, then click the install prompt 6.8.1 Install: Click Install and enter the app installer interface. Internal Memory means built-in Flash memory, SD card means inserted T-Flash; After entering, select the app format setting program on the right side, click on the application to install, return to the main interface when this operation has been completed; the installation will be finished and you will see the app icon in your application list. 15 6.8.2 Manage: Click settings and Choose APPS Click on APPS and select the file/software you want to uninstall Click on the software, then uninstall the software. 6.8.3 Exit: Return to the main interface. Note: All the installed apps will be displayed in the application list menu. These applications include games, chat TM, Internet browser, media player, system tools, etc. 6.9 PICTURES AND VIDEO The machine is with a front and a rear camera, you can take pictures and video clips, and you can take photographs and record video clips. 16 Click on the applications tab to display all the applications, then select the 'photo' or 'video' setting. Before taking pictures or recording video you can click on the camera settings to adjust the white balance, picture size, photo quality, point mode etc. Click on the button to start or stop the recording. The photographs or video can be previewed in the preview window. If you want play the video you have recorded turn on the video player and select the video you want to play. If you want to view photographs, select the picture viewer and choose which pictures you want to see. Into the camera, and click on the screen with two fingers, will the pixel scaling function box appears, when two fingers and outward or inward sliding, can realize the pixel scaling function. The tablet is available for autofocus function.Open the rear camera, touch slightly screen one time, then the will appear, right now the camera is proceeding the autofocus function,when the focus is clear, you can shoot high-definition photos. 17 6.10 Calendar Click the Calendar icon to enter the calendar interface. In calendar mode, press and drag the screen up/down to move between months or to turn the pages. When the month changes from December to January the device will automatically change the year. Enter the interface; the number in the orange form is today's date. You can change the date in the Settings function; for details see the Settings section. 18 7. System Settings Click the Settings icon to enter system settings. You can now change wireless & networks, sound, display, location & security, applications, accounts & sync, privacy, storage, language & keyboard, voice input & output, and date & time. 7.1 Wireless & Network Setting, See item 4. 7.2 Sound Setting. You can adjust Silent mode, Volume, Notification ringtone, Audible selection, Screen lock sounds, and Haptic feedback. 7.3 Display Setting. You can adjust Brightness, Auto-rotate screen, Animation, Screen timeout. 7.4 Location & Security Setting. Here you can set up screen lock and device administrators and enter a TF card password. 7.5 Application Setting. Here you manage your apps and check storage & battery usage. Please note: If you want to install applications that you are not downloading from the Google Android Market you should first turn on Unknown sources. 7.6 Accounts & sync Setting. Here you can manage accounts in the device. 7.7 Privacy Setting. In this setting you can back up data and reset factory defaults. 7.8 Storage Setting. Here you can check storage use and insert & erase TF cards. Please note: Before you remove the TF Card (if you have inserted a TF card), please use the 'safely remove hardware and uninstall media' function before ejecting the TF card; if you fail to do so this may cause a problem for some applications. 7.9 Language & Keyboard Setting. In this setting you can change the system language and select keyboard inputs. 7.10 Date & time Setting: In this setting you can adjust the date and time. 7.11 About device. Check device information. 19