1
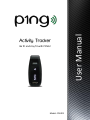
Be fit and stay fit with P1NG!
Model: PB-001
User Manual
Activity Tracker
Table of Contents
Product Content
3
Hardware Description
3
Operation Parameters
3
Features
4
P1NG App System Requirements
4
Getting Started
•
•
•
•
Charging the device
Downloading software
Setting up software
Setting up Bluetooth
5
5
5
6
Wearing your P1NG Activity Tracker
7
P1NG Activity Tracker Display Modes
8
Choosing a Step Buffer
9
Personalizing Software Settings
•
•
•
•
•
My facts
Activity Tracking
Goal setting
Activities
Changing or resetting password
10
10
11
11
11
Personalizing Software Settings
•
•
Synchronizing Time
Resetting P1NG device
12
12
Charging and Battery Life
13
FCC Compliance Statement Policy
15
2
User Manual
Thank you for purchasing the P1NG Activity Tracker. Please read this user manual for detailed
instructions on how to set up and enjoy the various features this device has to offer. If you
have questions or require more information, visit our website at www.p1nghealth.com.
Product Contents
1. P1NG Activity Tracker
2. USB cable*
3. Quick Start User Guide
Hardware Description
•
•
•
•
•
•
•
•
One-button device that displays core metrics
Micro USB port
OLED display with automatic 5-second shut-off
Bluetooth 4.0
Altimeter
3-Axis Digital Accelerometer
Dimensions: 56 x 24 x 13 mm
Weight: 12.8 g
Operation Parameters
•
•
•
•
•
Operating temperature range: -4° to 113°F (-20° to 45°C)
Do not operate below -22° or above 140°F (-30° to 60°C)
Relative Humidity: Operations from 20 to 80% RH / Storage from 5 to 85% RH
Maximum operating altitude: 30,000 feet (9,144 m)
DO NOT immerse in water. This device is NOT waterproof.
*NOTE: You can connect the P1NG unit to a computer USB port using the USB cable for power charging.
The USB cable can also be for uploading data to a computer that does not have Bluetooth capabilities
once the software is installed.
3
User Manual
Features
The P1NG device tracks activities to help you learn how your actions
translate to caloric burn so you can focus on what matters.
• P1NG tracks steps, distance travelled and calories burned.
• The built-in altitude monitor counts vertical distance climbed.
• The MVPA (Moderate to Vigorous Physical Activity) feature reports on intensity of
activity so you know the quality of the activity you have performed during the day.
• Finally, the customizable inactivity alarm reminds you that it’s time to move!
The P1NG device monitors your progress and the app uses enterprise-class
software that lets you access at-a-glance insights and progress reports
• The P1NG app displays fitness reports that present your daily, weekly or monthly progress.
• The app lets you set personalized targets and customized goals.
• The P1NG device syncs automatically via Bluetooth to your smart phone, tablet or
Bluetooth-enabled computer to give you real-time access to your progress.
The P1NG device and app helps you engage in friendly competitions with
others to help everyone stay motivated
•
•
•
•
Invite friends to join in your activities via a simple interface.
Engage in friendly competitions to stay motivated.
Schedule activities and integrate them seamlessly in your calendars.
Receive personalized reporting on your progress.
P1NG App System Requirements
•
•
•
•
PC Windows 7 or 8.1 (no inactivity alert function)
iPhone 4s and later, iPad 3 and later
Android 4.5.0 and later with Bluetooth 4.0 (dual mode)
MacBook Pro and MacBook Air
WARNING: Before beginning any exercise program or changing your physical
activity patterns, you should always consult with your doctor or physician,
particularly if you have been inactive, are very overweight, or have or suspect
any sort of medical condition that might be worsened by exercise.
4
User Manual
Getting Started
Step 1 - Plug the P1NG device in a power source
Before you can use your P1NG Activity tracker, you will
need to plug it in to a computer* or USB power source
using the included USB cable. Before being shipped, your
device was rigorously tested, reset, and set to power-save
mode. Plugging it in awakens the device. You can use it
immediately once it is awake, or you can charge to 100% .
Step 2 – Download software
Visit www.p1nghealth.com/index.php/software and
download the appropriate software for your device or
computer. You can also go to www.p1nghealth.com, click
on Support in the menu, and then on Software.
Step 3 – Set up software
Once the software is installed, create your account.
1 - Open the software and press the “Register” button.
2 - Enter all requested information. This will help us provide you with customized reports
and accurate data.
3 - Choose a nickname for your device. This name will appear on your P1NG indicating
that it belongs to you. By default, this name is “Hello.”
3 - Press “Create Account.”
4 - Read and accept/agree to the Licence Agreement.
5 - Your account has been created.
*NOTE: Some computer USB ports may not deliver enough power supply to charge or awaken the device.
5
Try a different port on the same or on a different computer.
User Manual
Step 4 – Log in and set up Bluetooth
The first time you login to the software, the system
will prompt you to connect your P1NG Activity
Tracker to your smartphone, tablet or computer.
This is necessary in order for the software to tie
your P1NG to your account so that you, and only
you, can see your data. In order to do so, make
sure Bluetooth is enabled on your smartphone,
tablet or computer.
1 - Choose your P1NG device from the list of devices
shown. Usually, there is just one device displayed,
but if you are in an office and many other people
have P1NG devices, you may see others listed.
Yours will have an alphanumeric name.
1.1 - If you are unsure which device is yours, press the button on the
P1NG device repeatedly until the default nickname “HELLO” is
Displayed (see P1NG Activity Tracker Display Modes p. 8).
Press and hold
the button for 5
seconds
1.2 – Press and hold the button for 5 seconds. The P1NG-ID will be
displayed.
1.3 – You can change the nickname at any time by pressing the
of the P1NG app Home screen and choosing “Settings.”
icon at the top
2 – After choosing the correct device on your smartphone, tablet or computer, press
“Connect.” The app will link your P1NG to the mobile. Your P1NG will be renamed to the
nickname you chose during the software setup process in Step 3. Your P1NG is now
paired, your account setup, and your account will start reporting immediately!
Note: While your name and email address remain strictly private, P1NG Health Inc. will use general
information such as gender, age and activity levels to populate the section called Insights. Insights
allow users to see how their activity levels compare to other people of their gender and age across
North America.
6
User Manual
Wearing Your P1NG Activity Tracker
The P1NG Activity Tracker is equipped with an advanced 3-dimensional G-Sensor that lets
you wear it anywhere you like: in a pocket, a bag, on a lanyard around your neck, or even
clipped to an undergarment if you wish it to be hidden from view. No matter what
position your P1NG is in, it will still accurately count your steps and record your data. The
P1NG’s advanced G-Sensor software compares the three-dimensional data it collects to
walking, jogging and running models to ensure that each step it counts is a true rhythmic
step and not an invalid movement or vibration. Just wear it and walk, jog or run—it’s that
simple!
Wearing your P1NG in wet conditions
Your P1NG is water resistant but NOT waterproof. While it is designed to be sweat-proof
and rain-proof, you should NEVER immerse your P1NG in water. Therefore, DO NOT wear
your P1NG when engaging in water sports such as swimming, windsurfing, water skiing,
surfing, etc. We also recommend not wearing the device with its front directly against
your skin if you sweat profusely during exercise. This additional moisture on the device
may cause it harm. It is better to wear your P1NG with the front facing outward.
7
User Manual
P1NG Activity Tracker Display Modes
The P1NG Activity Tracker has one button that cycles through various displays so that you
can see your core metrics without a Bluetooth mobile device or computer.
The P1NG displays 4 modes: Start, Steps, Clock, Altimeter, and User Nickname.
Start mode
User Nickname mode*
Steps mode
Clock mode
*The User Nickname default setting is “HELLO.” The P1NG device will display “HELLO” until you register
the device with the software and choose a new nickname. See Step 3 of GETTING STARTED – Setting Up
Software, p.6.
Once you are registered, you can change the nickname at any time by pressing the
icon at the top of
the P1NG app Home screen and choosing “Settings.”
8
User Manual
Choosing a Step Buffer
In order to prevent your P1NG Activity Tracker from registering incidental movements as
steps such as those which occur when you shift your position while working at a desk or a
counter, your device has a sensitivity buffer that you can adjust.
Your P1NG device allows you to choose between a 3-, 5- or 10-step buffer that will
discount “false” steps. Choosing a buffer tells your P1NG not to count movements until 3,
5 or 10 “true” steps have been registered and not shifts in body position or incidental
steps. For instance, if you choose a buffer of 3, the P1NG will not count movements until
at least 3 step-like movements have been taken in succession. The P1NG will then count
the fourth movement as 4 total steps. If the movement stops at 3, no steps will be
recorded. This is useful if you take many incidental steps to shift your position at work or
at home. These steps add little value toward your fitness goal and so, you may want your
P1NG to ignore them.
By default, your P1NG device is set at 10. Setting your P1NG at 3 increases the buffer’s
sensitivity – more steps will be recorded including occasional incidental steps. Setting your
P1NG at 10 decreases the sensitivity – the device will only track any consecutive step-like
movements beyond 10, so less steps will be recorded though the proportion of incidental
steps will be much decreased. Setting your P1NG at 5 should be suitable for most
lifestyles.
Setting Your Step Buffer
1 – In Steps mode, press and hold the P1NG device button for five seconds. The small
number “3” should appear beside the walking icon.
2 – Pressing and holding the button for five seconds will toggle between the 3-step buffer,
the 5-step buffer and the 10-step buffer. Stop pressing when the small number by the
walking icon indicates the buffer you would like the P1NG to use.
Press and hold 5 seconds
3-step filter
Press and hold 5 seconds
5-step filter
Press and hold 5 seconds
10-step filter
9
User Manual
Personalizing Software Settings
In order to provide you with useful daily, weekly and
monthly reports tracking your progress, you need to
specify details about your personal characteristics,
your fitness goals and the activities you want to
monitor. This is done through “Settings.”
• Press the
icon at the top of the P1NG app Home
screen and then, choose “Settings.”
My Facts
The Personal Details feature will help the
software calculate your stride length,
calorie consumption and other metrics.
• In Settings, press My Facts and Personal
Details
• Press the
button to toggle between
Imperial and Metric systems.
• Press “Save” after entering your
information.
Activity Tracking
Because of the negative health effects of prolonged
sitting, the P1NG software has been designed to alert
you if you have been sitting for too long.
• Press Settings, My Facts and Activity Tracking
• Choose the period of the day you are awake and
active. For instance, you might choose a start time of
8 am and an end time of 7 pm (19:00). Your P1NG
app will then alert you with a notification during
these hours when you have not taken a minimum of
100 steps within the last 30- or 45- minute alert
period.
• Choose the interval (30 or 45 minutes) at which you
would like your inactivity to be monitored, or turn
this feature off.
• Press “Save” after choosing your options.
10
User Manual
Goal Setting
The goal setting feature allows the device and software
to measure your progress toward attaining your
objective. Setting a daily objective is important to
achieve your fitness goals.
• Press the “Goals” button on the Settings page.
• Choose the number of steps per day you would like
to reach. You can also choose the distance you would
like to travel during the day. Both goals are reported
separately, so you can choose different targets. For
instance, you can set steps to the minimum target
you would like to reach during the day, and the
distance as your ultimate goal.
• Press “Save” after entering your goals.
Activities
You can choose the different activities you like to
engage in from a list. These favorite activities will be
useful for planning activities in the “Activities” tab on
the P1NG app home page. Informing your P1NG device
of your planned activities will help the software
calculate your calorie consumption and other metrics
more accurately.
• Press the “Activities” button on the Settings page.
• Choose any number of activities you like to engage in
on a regular basis.
• Press “Save” after making your choices.
Changing or Resetting Password
If you would like to change your password, you can do
so by accessing the password menu.
• Press the
icon at the top of the P1NG app Home
screen and then, choose “Password.”
• Complete the fields by entering the old password,
choosing a new one and then confirming the new
one.
• Press submit. A confirmation will be sent to your
registered email.
• The reset password button should be used if you
have forgotten your password. A link to reset your
password will be sent to your registered email
account.
11
User Manual
Additional Device Settings
Synchronizing Time
If your device is not displaying the correct
time, for instance after travelling across
time zones, you can force your P1NG to
sync its clock to your mobile device.
• Press the
icon at the top of the
P1NG app Home screen
• Press “Sync Time.”
• The app will ask if you wish to
synchronize the P1NG clock with your
app. Choose “OK.”
Resetting P1NG device
The reset function clears the P1NG device’s
buffer and puts it to sleep. This may be
useful if you are planning not to use your
P1NG for an extended period of time and
would like to save battery power, or if you
would like to reboot your P1NG to solve an
issue.
• Press the
icon at the top of the
P1NG app Home screen and then,
choose “Settings.”
• Press “Reset.”
• The app will ask if you wish to reset
your P1NG device. Choose “OK.”
Note that any data already uploaded to the
app will remain. Any data stored in the
device will be deleted and the P1NG will
shut off. To turn it on, you will need to plug
it in a USB power source or port as you did
when you first received it.
12
User Manual
Charging and Battery Life
Your P1NG Activity Tracker contains a rechargeable Lithium-ion polymer battery. With
normal use, your P1NG’s battery should last approximately 10 days before requiring a
charge.
Charging your P1NG
The P1NG device will display “ Charge Now” when the battery is low. Please plug it in to a
USB power source using the included USB cable. To protect the battery life, you should
charge the device when the “Charge Now” indicator appears. Do not leave the device
plugged in for an extended period of time without use. Once it is fully charged, unplug it
from the power source and store until use.
Battery Information
● Operating Temperature: -4° to 113° F (-20° to 45° C)
● Do not operate below -22° or above 140° F (below -30° or above 60° C)
● Relative Humidity: Operational from 20 to 80% RH / Storage from 5 to 85% RH
● Maximum Operating Altitude: 30,000 feet (9,144m)
● This device is not waterproof. Do not immerse in water.
WARNING: DO NOT DISASSEMBLE BATTERY
Never disassemble battery cells
● Opening battery cells may generate short circuits which may cause fire, explosion,
or other harmful effects.
The electrolytes contained in LIP batteries are harmful
● The polymer electrolyte in LIP batteries is securely contained, but should the material come
into contact with skin or eyes, flush the electrolyte immediately with fresh water and contact a
physician.
DO NOT expose batteries to fire or dispose of them by burning
● Never incinerate nor dispose of the batteries in a fire. These may cause explosions and is
prohibited by law.
DO NOT immerse batteries in liquid such as water
● The batteries should not come into contact with liquids such as water, beverages, etc.
Battery replacement
● Batteries should be replaced by a battery supplier or the device supplier only. They should NOT
be replaced by the user.
13
User Manual
DO NOT use damaged battery cells
● The battery cells can be damaged during shipping. If any abnormal features of the
cells are found such as a damaged battery envelope, deformation of the cell package, or
if there is an electrolyte smell, or visible substance due to leakage, DO NOT use the
battery. A damaged battery that smells of electrolyte or has an apparent leakage should
be placed away from fire to avoid ignition and explosion.
Storage
● LIP batteries should be stored at room temperature, charged between 30% to 50% of
capacity. It is recommended that batteries be charged once every six months to prevent
over-discharge.
Performance
● Because batteries use chemical reactions to produce power, battery performance will
deteriorate over time even if stored for a long period without use. In addition, if the
various usage conditions such as charging, discharging, ambient temperature, etc. are
not maintained within the specified ranges, the life expectancy of the battery may be
shortened or the device in which the battery is used may be damaged by electrolyte
leakage. If the batteries cannot maintain a charge for long periods of time, even when
they are charged correctly, this may indicate that it is time to change the battery.
14
User Manual
FCC Compliance Statement Policy
Important Safety Instructions
FCC Compliance Statement: This device complies with Part 15 of the FCC Rules. Operation is
subject to the following two conditions: (1) this device may not cause harmful interference,
and (2) this device must accept any interference received, including interference that may
cause undesired operation.
Note: This equipment has been tested and found to comply with the limits for a Class B
digital device, pursuant to part 15 of the FCC Rules. These limits are designed to provide
reasonable protection against harmful interference in a residential installation. This
equipment generates, uses and can radiate radio frequency energy and, if not installed and
used in accordance with the instructions, may cause harmful interference to radio
communications. However, there is no guarantee that interference will not occur in a
particular installation. If this equipment does cause harmful interference to radio or
television reception, which can be determined by turning the equipment off and on, the
user is encouraged to try to correct the interference by one or more of the following
measures: —Reorient or relocate the receiving antenna. —Increase the separation between
the equipment and receiver. —Connect the equipment into an outlet on a circuit different
from that to which the receiver is connected. —Consult the dealer or an experienced
radio/TV technician for help.
WARNING The connection of a non-shielded equipment interface cable to this equipment
will invalidate the FCC Certification or Declaration of this device and may cause interference
levels which exceed the limits established by the FCC for this equipment. It is the responsibility of the user to obtain and use a shielded equipment interface cable with this device. If
this equipment has more than one interface connector, do not leave cables connected to
unused interfaces. Changes or modifications not expressly approved by the manufacturer
could void the user’s authority to operate the equipment.
For Canadian Users: CAN ICES-3(B)/NMB-3(B)
Environmental Requirements
Operating Temperature-4° to 113° F (-20° to 45° C)
Non-operating Temperature -22° to 140° F (-30° to 60° C)
Relative Humidity Operating: 20 to 80% RH
Storage: 5 to 85% RH
Maximum Operating Altitude 30,000 feet (9,144m)
This device is not waterproof. It should not be immersed in water or other liquid. DO NOT
USE WHEN ENGAGING IN WATERSPORTS INCLUDING SWIMMING.
15