1
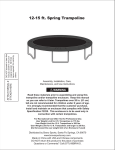
55’ BAND TRAMPOLINE &
SAFETY ENCLOSURE
USER’S MANUAL
FAITES ATTENTION DE NE PAS jeter
ou perdre ce manuel, le numéro de
série et votre reçu de caisse original.
Ces trois éléments seront nécessaires
si vous désirez présenter une
réclamation sous garantie.
ATTACH SERIAL
# STICKER HERE
FIXER ICI L’AUTOCOLLANT
DU NUMÉRO DE SÉRIE
DO NOT Discard or loose this
Manual, Serial #, and your
original receipt. All three
items required for warranty
claims.
MANUEL D’UTILISATION DU
TRAMPOLINE À BANDES DE 140 CM
AVEC ENCEINTE DE SÉCURITÉ
Assembly, Care, Maintenance &
Use Instructions
Instructions d’assemblage,
d’utilisation et d’entretien
!
WARNING:
Read these materials prior to assembling and using this trampoline and trampoline enclosure.
Keep this manual so you can refer to it later.
For use by children ages 3 to 6 years ONLY.
Maximum user weight 60lbs.
ADULT ASSEMBLY REQUIRED - Contains small parts, sharp points and sharp edges.
CHOKING HAZARD - Small parts - not for children under 3 yrs.
!
AVERTISSEMENT :
Avant d’assembler et d’utiliser ce trampoline et son enceinte de sécurité, vous devez lire cette
documentation. Conservez ce manuel pour référence future.
Produit conçu UNIQUEMENT pour des enfants de 3 à 6 ans.
Le poids des utilisateurs ne doit pas dépasser 27 kg (60 lb).
UN ASSEMBLAGE PAR UN ADULTE EST NÉCESSAIRE. Contient de petites pièces, des
extrémités pointues et des rebords coupants.
DANGER DE SUFFOCATION. Contient de petites pièces.
Ce produit n’est pas recommandé aux enfants de moins de 3 ans.
AZB-B-2
!
WARNING:
Read these materials prior to assembling and using this trampoline.
Table of Contents
Liability ........................................................................................................................1
Initial Warning .............................................................................................................1
Assembly and Installation Instructions........................................................................2
Care and Maintenance Instructions ............................................................................2
Use Instructions ..........................................................................................................3
Trampoline Safety and Accident Prevention...............................................................4
Owner’s and Supervisor’s Role in Preventing Injuries & Responsibilities ......................4
User’s Role in Preventing Injuries & Responsibilities ....................................................4
Trampoline & Enclosure Assembly .............................................................................5 - 8
Parts List.....................................................................................................................9
Limited Warranty .........................................................................................................10
Liability
While every attempt is made to embody the highest degree of protection in all equipment, we
cannot guarantee freedom from injury. The user assumes all risk of injury due to use. All merchandise is sold on this condition, which no representative of the company can waive or change.
!
WARNING:
In addition to the instructions and precautions provided with your Trampoline, the following
precautions must be observed while using the Trampoline Safety Enclosure.
• DO NOT attempt or allow somersaults on the Trampoline. Landing on the head or neck can cause serious injury, paralysis, or death,
even when landing in the middle of the bed.
• Do not allow more than one person on the trampoline or inside the trampoline enclosure. Use by more than one person at the same
time can result in serious injuries.
• The metal frame of the trampoline enclosure will conduct electricity. Lights, extension cords, and all such electrical equipment
must never be allowed to come in contact with the enclosure.
• Inspect the enclosure before each use. Make sure the straps and all parts are correctly and securely positioned and attached.
Tighten any loose hardware. Replace any worn, defective, or missing parts.
• Wear comfortable clothing free of hooks, snaps, drawstrings or anything which may snag or catch in the safety enclosure
mesh. Remove jewelry, necklaces, and earrings.
• Climb on and off the trampoline only through the safety enclosure entrance and securely close entrance. Users, especially
children, must not attempt to enter or exit between the trampoline frame and the enclosure. Doing this may pose a
strangulation risk.
• Do not touch or rebound off the safety enclosure mesh while using the trampoline.
• Read all instructions and complete all assembly before allowing your child to use the trampoline & safety enclosure.
• Use trampoline and trampoline enclosure only with mature, knowledgeable adult supervision.
For Recreational Use ONLY. Not for Professional Use.
Weight Limit for Trampoline & Enclosure User is 60 lb.
1
!
WARNING:
Assembly and Installation Instructions
• ADULT ASSEMBLY REQUIRED - Contains small parts, sharp points and sharp edges.
• CHOKING HAZARD - Small parts - Not for children under 3 yrs.
• For use by children ages three (3) to six (6) ONLY.
• Maximum user weight is 60 lbs.
• Adequate overhead clearance is essential. A minimum of 8 ft from ground level
is recommended. Provide clearance for wires, tree limbs, and other possible hazards.
• Lateral clearance is essential. Place the trampoline and trampoline enclosure away from walls,
structures, fences, and other play areas. Maintain a clear space on all sides of the trampoline
and trampoline enclosure. A minimum of six feet from frame edge is recommended.
• Never set-up the trampoline in heavy rain, wind or storm conditions, especially lightning
storms. It is recommended that the trampoline be taken apart and stored in bad weather.
• Place the trampoline and trampoline enclosure on a level surface before use.
• Secure the trampoline and trampoline enclosure against unauthorized and unsupervised use.
• Remove any obstructions from beneath the trampoline and trampoline enclosure prior to use.
• The owner and supervisors of the trampoline and trampoline enclosure are responsible to make
all users aware of practices specified in the “Use Instructions”.
!
WARNING:
Care and Maintenance Instructions
Inspect the trampoline and trampoline enclosure before each use and replace any worn, defective,
or missing parts.
The following conditions could represent potential hazards:
1. Missing, improperly positioned, or insecurely attached frame padding, barrier or enclosure
support system (frame) padding and pole caps.
2. Punctures, frays, tears, or holes worn in the bed or frame padding, barrier or enclosure
support system (frame) padding and pole caps.
3. Deterioration in the stitching or fabric of the bed or frame padding, barrier or enclosure
support system (frame) padding and pole caps.
4. Ruptured suspension cords.
5. A bent or broken frame or support system.
6. A sagging barrier or bed.
7. Sharp protrusions on the frame or suspension system, or
8. Loosened or missing hardware. Always make sure hardware is tight before each use.
2
!
WARNING:
Use Instructions
• DO NOT attempt or allow somersaults on the Trampoline. Landing on the head or neck can cause serious injury, paralysis, or death,
even when landing in the middle of the bed.
• Do not allow more than one person on the trampoline or inside the trampoline enclosure. Use by more than one person at the same time can result
in serious injuries.
• Keep objects away which could interfere with the performer. Maintain a clear area around the trampoline. Do not allow foreign objects
or animals on the trampoline.
• Children should only use trampoline and trampoline enclosure with mature, knowledgeable adult supervision.
• Trampoline is for use by children ages three (3) to six (6).
• The trampoline should be assembled in its entirety before each use. All suspension cords must be attached to the frame. The frame cover must be
correctly positioned at all times.
• Never set-up the trampoline in heavy rain, wind or storm conditions, especially lightning storms. It is recommended that the trampoline be taken
apart and stored in bad weather.
• Inspect the trampoline & enclosure before each use. Make sure the frame cover, barrier mesh, and enclosure support padding are correctly and
securely positioned. Replace any worn, defective or missing parts.
• The metal frame of the trampoline and trampoline enclosure will conduct electricity. Lights, extension cords, and all such electrical equipment must
never be allowed to come in contact with the trampoline or trampoline enclosure.
• Wear comfortable clothing. Remove jewelry, necklaces, and earrings. Wear clothing free of drawstrings, hooks, loops or anything that could
get caught in the barrier mesh.
• Enter and exit the enclosure only at the enclosure door or barrier opening designated for that purpose. It is dangerous practice to jump from the
trampoline to the ground or floor when dismounting, or to jump onto the trampoline when mounting. Do not use the trampoline as a springboard to
other objects.
• Stop bounce by flexing knees as feet come in contact with the trampoline bed. Learn this skill before attemting others.
• Avoid bouncing too high. St ay low until bounce control and repeated landing in the center of the trampoline can be
accomplished . Control is more important than height.
• While keeping the head erect, focus eyes on the trampoline toward the perimeter. This will help control bounc e .
• Avoid bouncing when tired. Keep turns sho rt.
• Properly secure the trampoline when not in use. Protect it against unauthorized use.
• The adult supervisor must not be under the influence of alcohol or drugs.
• For additional information conce rning the trampoline equipment, contact the manufacture r.
• For information conce rning skill training, contact a ce rtified trampoline instructor.
• Bounce only when the surface of the bed is dry. Wind or air movement should be calm to gentle. The trampoline must not be used in gusty
or severe winds. The trampoline should be taken apart or stored indoors during these types of weather conditions.
• Read all instructions before using the trampoline and trampoline enclosure. Warnings and instructions for care, maintenance, and use of this
trampoline and trampoline enclosure are included to promote safe, enjoyable use of this equipment.
• Do not intentionally bounce off the barrier.
• Do not attemp to jump over barrier or attempt to crawl under barrier.
• Do not hang from, kick, cut or climb on barrier.
• Do not attach anything to the barrier that is not a manufacturer approved accessory or part of the enclosure system.
3
Trampoline Safety and Accident Prevention
As in most recreational sport, participants may be injured. This section covers the most
common accidents. Responsibilities of the supervisors and jumpers in accident prevention
are also outlined.
The following are reasons why accidents happen:
• Attempting somersaults.
Landing on the head or neck can cause serious injury, paralysis,
or death, even when landing in the middle of the bed.
• More than one person on the trampoline.
time can result in serious injuries.
Use by more than one person at the same
• Incorrect mounting and dismounting.
Carefully crawl out of and into the trampoline bed.
Do not jump off to the ground. Do not jump from a roof, or other object onto the trampoline.
Small children may need assistance to get on or off the trampoline. Do not step onto the
suspension system.
• Hitting the frame. Stay in the center of the trampoline when jumping. Injury may result
from hitting the frame when control is lost. Be sure the frame cover is always on and the
pads securely fastened. Do not jump directly onto the frame pad.
• Loss of control.
A jumper who looses control will increase his/her chance of injury. Be
sure to familiarize yourself with the basic jumps before doing more difficult ones. Jumps
should be mastered, performed repeatedly before moving on to the next level. To regain
control and stop your jump, bend your knees sharply as you land.
• The adult supervisor must not be under the influence of alcohol or drugs.
• Foreign objects. Please make sure there is nothing sharp under and around the trampoline. Hitting objects under the trampoline can cause injury. Jumping with a foreign object
can also increase the chances of getting injured. Be sure there is adequate clearance 8
feet above and 6 feet around the trampoline. Be careful of overhead wires, tree limbs etc.
• Bad weather. Do not use your trampoline in gusty winds or inclement weather. The bed
should not be wet.
• Poor maintenance of the trampoline.
Make sure you inspect the trampoline before
every use. Check for punctures on the bed, sharp burrs on the frame, stitching that has
gone bad or loose elastic bands. If a replacement part is needed, please call our hotline to
order.
• Unlimited access.
The trampoline should be covered or dis-assembled when not in use.
This will prevent unsupervised small children from using the trampoline.
Owner's & Supervisor's Role in
Preventing Injuries & Responsibilities
The supervisor's role is to make sure the users know all the safety rules as well as learn
the basic, fundamental bounces. They need to enforce all the safety rules and warnings in
the manual, frame and labels. When a supervisor is not available, the trampoline may be
dis-assembled or covered to limit access. It is the supervisor's responsibility that the placards
with the Trampoline Safety Tips and Enclosure Safety tips are reviewed and all jumpers are
informed about the tips.
User's Role in
Preventing Injuries & Responsibilities
The jumper must first learn all of the basic, fundamental bounces before attempting more
difficult ones. Low, controlled bounces are a good start before learning the basic landing positions
and combinations. Jumpers need to understand that control is key to a successful jump.
Following the tips in the placard is important.
Contact a certified trampoline instructor for more information.
4
TRAMPOLINE & ENCLOSURE ASSEMBLY
Refer to PARTS LIST for identification of parts.
! WARNING:
CHOKING HAZARD - Small Parts
Not for children under 3 yrs.
1 Begin by assembling 2 of the top rails 2
together into an arc.
4
!
WARNING:
ADULT ASSEMBLY REQUIRED
Contains small parts, sharp points and sharp edges.
Continue building a circle by adding the
remaining 4 top rails to the arc you made
in Step 1.
5
With the top rail frame connected into a circle, lay it flat
on the floor (either side facing up - they are identical).
Then insert the tapered end of each of the 6 leg tubes
into the 6 leg sockets that are facing up, as shown. The
Curves should all point out - away from the center of
the trampoline.
3 Joining the 2 loose ends of the circle together
may require you to stand the frame on edge
and press downward on the 2 ends, while
connecting them together.
Align the screw hole in the leg with the hole in the leg
socket. Then secure with screw and tighten. DO NOT
OVER-TIGHTEN. Repeat this until all 6 legs are securely
attached to the top rail frame with screws.
Patch with Grommet
Upper Hook & Loop
attaching all 6 of the legs securely to the top
6 After
rail frame, turn the frame over so that the legs
point downward, as shown.
Lower Hook & Loop
Nylon Loop Sewn
to Mat
5
7
To ensure that the enclosure
mesh conectors will be properly
aligned with the enclosure poles,
hold up the mesh by one of the
nylon patches with grommet and
select the nylon loop sewn onto
the jump mat that is directly
beneath the nylon patch you are
holding. The patch at the top,
the upper and lower hook & loop
fasteners, and the nylon loop on
the mat will all be along
the same line (shown in white)
This nylon loop (sewn to the mat)
will be the first one
you attach, and MUST be
attached to the frame right
next to one of the 6 enclosure
pole sockets.
TRAMPOLINE & ENCLOSURE ASSEMBLY
Refer to PARTS LIST for identification of parts.
! WARNING:
!
CHOKING HAZARD - Small Parts
Not for children under 3 yrs.
8
Lay out the jump mat in the center of the frame with
the enclosure mesh facing up. Then slide a suspension
cord from left to right through the nylon loop you
9
picked in step 7, as shown. (When securing the
cords always position your left hand under, and right
hand over, the frame.)
WARNING:
ADULT ASSEMBLY REQUIRED
Contains small parts, sharp points and sharp edges.
release the loop end of the cord so
10 SLOWLY
that it captures the knob, locking the
Use your right hand to stretch the ‘loop’ end
of the cord OVER the top rail and your left
hand to pull the ‘knob’ end of the cord UNDER
the top rail, then pass the knob through the
loop.
suspension cord in place, as shown.
Use care when releasing the loop end
around the knob, so that it does not slip off
or pinch your fingers!
5
3
1
2
2
1
2
3
7
1
2
8
4
6
11 From the 1st attached cord, count around the 12 Next, count back around the jump mat 8 loops Then, from the 3rd attached cord, count
13
jump mat to the 16th loop and repeat steps 1-3
attaching the 2nd cord directly across from the 1st. and repeat steps 1-3 attaching the 3rd cord
about half way between the 1st & 2nd cords.
Enclosure pole
socket
14
Lay the pad cover, AirZone printed side up,
over the suspension cords. Carefully position
each of the 6 openings in the pad cover over their
corresponding enclosure pole sockets, as shown.
around the jump mat 16 loops and repeat
steps 1-3 to attach the 4th cord. Numbers
on the picture above show the approximate
positions of the first 8 suspension cords.
Continue connecting the remaining cords
as shown in steps 1-3, but always connect
a cord, and then switch to the opposite
side of the trampoline to connect the
next cord. Attaching the cords in this
manner is important, as it will ensure
even-tension around the entire jump mat.
As you work, keep the enclosure mesh
gathered to the center of the mat.
15 Carefully work the lower mesh skirt (attached to the pad cover)
down, around the entire perimeter of the trampoline, on the outside of the legs.
!
WARNING:
NEVER ALLOW A CHILD
TO USE OR JUMP ON THE
TRAMPOLINE WITHOUT
THE ENCLOSURE
PROPERLY ASSEMBLED
AND INSTALLED
16
Align the grommet attached to the bottom of the lower mesh skirt with the
hole near the base of the leg and secure with screw. DO NOT OVER-TIGHTEN.
6
17
Repeat Step 9 with the remaining 5 grommets in the
lower mesh skirt and their corresponding legs.
TRAMPOLINE & ENCLOSURE ASSEMBLY
Refer to PARTS LIST for identification of parts.
!
WARNING:
CHOKING HAZARD - Small Parts
Not for children under 3 yrs.
!
WARNING:
ADULT ASSEMBLY REQUIRED
Contains small parts, sharp points and sharp edges.
Top
End
Airzone
Embossed
Foam
Bottom
End
Bottom of enclosure pole that goes
into socket on frame.
the smaller diameter end of an upper
18 Insert
19
enclosure pole into the larger diameter end
of a lower enclosure pole and align screw
holes. (You may need to slide the preinstalled foam sleeves to gain access to the
ends of the poles)
21 Insert screw & tighten. DO NOT OVER-
TIGHTEN!. Repeat step 3 with the remaining
5 enclosure pole assemblies.
Upper
24
Insert screw & tighten. DO NOT OVERTIGHTEN!. Repeat steps 1 & 2 to assemble
remaining 5 sets of upper & lower poles.
22 Locate the 6 nylon patches with grommets
that are sewn onto the top edge of the mesh.
Select a nylon patch that aligns with a pole.
Carefully slip one of the patches over the top
of the enclosure pole so that the grommet is
aligned with the screw hole in the pole. Use
care so that you do not tear the mesh.
20
23
Blank Foam
Insert the bottom end of enclosure pole
assembly into the socket on frame, as
shown. Align screw holes.
Insert screw & tighten. DO NOT OVERTIGHTEN!. Repeat step 5 with the remaining
5 patches and poles. When done properly,
the enclosure mesh will be hanging on the
INSIDE of the enclosure poles. The mesh
should hang down somewhat straight and
not ‘twist’
Lower
25
Locate the upper and lower sets of hook and loop
fasteners sewn to the enclosure mesh There are 6
upper and 6 lower sets of hook & loop fasteners.
7
Tightly wrap both the upper & lower hook and loop
fasteners around the enclosure pole foam to secure
the mesh in place. Repeat this with the remaining
upper and lower hook & loop fasteners on the other
5 enclosure poles.
TRAMPOLINE & ENCLOSURE ASSEMBLY
Refer to PARTS LIST for identification of parts.
! WARNING:
CHOKING HAZARD - Small Parts
Not for children under 3 yrs.
!
WARNING:
ADULT ASSEMBLY REQUIRED
Contains small parts, sharp points and sharp edges.
Attach the hook & loop fasteners
around the nylon loops sewn to
the jump mat.
Congratulations! The “My First AirZone” trampoline & enclosure is ready for your child to enjoy.
!
WARNING:
Always read and follow the safety
instructions included in this manual and on the signs
attached to the trampoline & enclosure.
Always make sure the entrance door is zipped completely closed
before allowing your child to begin jumping.
8
PARTS LIST
PARTS
QTY.
ITEM
1
A
Suspension Cords
32
C
Screws
30
D
Frame Cover w/ Skirt
Jump Mat w/ Encl. Mesh
Screw Driver
1
Top Rail
6
Lower Enclosure Pole
6
G
Upper Enclosure Pole
6
H
Plain (lower) Foam Grey
*6
I
Embossed (upper) Foam
Grey
*6
J
Curved Leg Tube
6
DORA RED Foam Tube
*12
L
DIEGO GREEN Foam Tube
*12
M
A
Frame Cover with Sewn-on Skirt Mesh (1)
#139409 - AirZone Brand
#141022 - DORA
#141023 - DIEGO
K
K Curved Leg Tube #141028
J
AirZone Embossed Grey Foam Tube (upper) # 139412
I
Plain Grey Foam Tube (lower) # 139411
B
Jump Mat with Sewn-on
Enclosure Mesh (1)
(*Included only in the AirZone Branded Unit)
A
I
R
Z
O
N
E
#139403 - AirZone Brand
#141024 - DORA
#141025 - DIEGO
(*Included only in the AirZone Branded Unit)
RED Foam Tube #141026
L DORA
(*Included only in the DORA Branded Unit)
I
M DIEGO GREEN Foam Tube #141027
C
Suspension Cord
# 139408
(*Included only in the DIEGO Branded Unit)
H
D
Upper Enclosure Pole # 139414
Screw #139405
G Lower Enclosure Pole # 139413
F
E
Screw Driver # 139404
Top Rail # 139407
9
LIMITED WARRANTY
DO NOT RETURN TO PLACE OF PURCHASE
Subject to the following limitations, in addition to any imposed by virtue of applicable law, Bravo Sports
warrants this Variflex, UltraFlex or AirZone trampoline and/or safety enclosure to be free from defects in
materials and workmanship under normal use and service conditions. The tubular steel frame is warranted
for two (2) years after the date of purchase. All other parts are warranted for ninety (90) days after the date
of purchase. This warranty is limited to the repair and/or replacement of defective parts only. All requests
for missing parts must be pre-authorized by calling customer service within 30 days of the date of purchase
and must be accompanied by an original receipt from an authorized dealer.
5. Upon receipt of authorization from our Customer
Service Department, you must submit your warranty
claim to the address below, ship parts freight pre-paid,
accompanied by the original, dated purchase receipt
with the Serial # from the manual or frame written on it.
Do not return this product to the place of purchase.
For warranty service, or for missing or replacement parts
or any other problems, call or write to our Customer Service
Department at the phone number or address listed below.
We will send any replacement parts via U.P.S. Ground.
1. This Limited Warranty will apply only if the part(s)
are returned freight pre-paid to the Customer Service
Department listed below and are accompanied by
both an original receipt from an authorized dealer
and the Serial Number found on the frame or instruction
manual, and if BravoSports, at its sole discretion,
determines it (them) to be defective.
2. This Limited Warranty will apply only to Variflex, UltraFlex or
AirZone trampolines and/or enclosures that are purchased
from an authorized dealer. This Limited Warranty is
extended only to the original consumer purchaser and
is not transferable.
6. This Limited Warranty does not cover damage
or loss from: wind, rain, fire, snow, ice, or
other forces of nature; accident; normal wear;
improper assembly, disassembly, or adjustment
during set-up or take-down; or any abuse,
neglect or misuse of this trampoline, enclosure
and/or its parts. Any alteration to the original
product voids this warranty.
3. Be sure to retain your original purchase sales receipt
and instruction manual for any warranty claim. The
instruction manual has a Serial Number on the front
cover (a duplicate of which is also found on one of
the tubular steel components) that is required for all
missing parts and warranty claims. All warranty claims
must be accompanied by the original purchase receipt
from an authorized dealer and this serial number.
7. To the extent allowed by applicable law, any
implied warranty of merchantability or fitness
applicable to this Variflex / AirZone Trampoline
and/or Enclosure is limited to the duration of
this Limited Warranty.
Bravo Sports does not warrant against, and
in no event shall Bravo Sports or its authorized agents be liable for, any personal loss,
injury, or direct or indirect incidental or consequential damage resulting from the use
of this product. Please note that some states
do not allow the exclusion or limitation of
incidental or consequential damages, so the
above limitation or exclusion may not apply
to you. This Limited Warranty gives you specific legal rights and you may have other rights
which vary from state to state.
4. Before returning any parts to Bravo Sports for warranty
inspection, the original consumer purchaser must obtain
an RMA # (Return Merchandise Authorization number)
from BravoSports. Such authorization can be obtained
by calling our Customer Service Dept. at the toll-free
number listed below or by writing to the BravoSports
Customer Service Department at the address listed below.
The original consumer purchaser is responsible for all
shipping costs.
This Limited Warranty is null and void if the “Care and Maintenance” instructions
on page 2 and the “Use Instructions” on page 3 of this Manual are not followed
prior to each use of the trampoline.
Bravo Sports, 12801 Carmenita Rd. Santa Fe Springs, CA 90670
Service Hotline: (877) 99-BRAVO (27286)
10