1
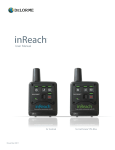
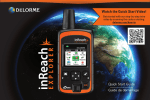
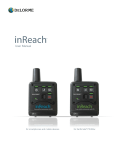
inReach Explorer Online Manual
The inReach Explorer™ two-way satellite communicator with GPS and navigation keeps you in
reach and on track wherever you go—whether you want to share your trip, track your route,
check in with loved ones, or send an SOS in an emergency.
The inReach Explorer is a handheld device that sends and receives text messages and emergency
messages using the Iridium® satellite network. With the inReach Explorer, you can travel to the
farthest reaches of the globe and still stay in touch with your family and friends.
Use the inReach Explorer by itself or pair it with a mobile device, like a smartphone or tablet, to
take full advantage of two-way messaging and navigation.
Getting Started
Check the contents of your box.
Use the inReach Explorer by itself or pair it with a mobile device, like a smartphone or tablet, to
take full advantage of two-way messaging and navigation.
•
•
•
•
•
•
inReach Explorer device
Lanyard
USB cable
AC adaptor
Pack clip
Quick Start Guide
Please note: Charge your inReach Explorer fully before using. Connect the device to the AC
adaptor and plug it into an electrical outlet or use the USB cable to charge from your computer.
Antenna - When using the inReach Explorer, point the antenna up toward the sky and position
the face of the device away from your body when attached to a pack or a vest.
Display Screen - The screen turns off automatically after 30 seconds without activity to preserve
power and prevent accidental button presses. To unlock the screen, press the Power/Enter button,
and then press the Left Arrow and Enter to select Unlock. This sequence must be done within 5
seconds or the screen remains locked. Change the timing of the auto-lock feature by selecting
Settings, then Display, and modifying the Display Timer.
Status Light - The Status Light flashes green when there is a new message waiting. The Status
Light flashes red when there is something important for you to see, like low power or a sending
message delay. The light is NOT an indicator of satellite connection.
Micro-USB Port - Lift the protective cover to access the micro-USB port. Plug in your USB
cable for charging and for updates (when notified). While the cover is not part of the internal
waterproofing, it does protect against dust and corrosion from salt water.
Power/Enter - To turn the device on, press and hold the Power/Enter button for 1.5 seconds.
When the Power On screen appears, press the Left Arrow and then Enter to select Power On.
Note that this sequence must be done in 5 seconds or the device turns back off.
To turn the device off, press and hold the Power/Enter button for 1.5 seconds. When the Power
Off screen appears, press the Up Arrow and then Enter to select Power Off. This sequence must
also be done in 5 seconds or the device remains on.
When the device is turned on, press the Power/Enter button to select highlighted objects or hold
it down to access keyboard shortcuts when sending messages.
Directional Pad - Press arrows to highlight a selection on the screen or hold arrows down to
access keyboard shortcuts when sending messages.
Quit/Preset Messages Shortcut - Press Quit/Preset to back out of pages or operations. Press and
hold Quit/Preset to access the Preset Messages page.
SOS Button Lock - In an emergency, slide the SOS button lock to the left to unlock the SOS.
To avoid triggering a false alarm, make sure your SOS slider is locked. Slide left to unlock
and slide right until you HEAR IT CLICK to lock it! If you do not HEAR IT CLICK, then
the SOS is not locked.
SOS Button - Press and hold the SOS button for three seconds to send a “distress” message to
emergency response. If SOS is no longer needed, press and hold the SOS button for 5 seconds to
send a “cancel SOS” message to emergency response.
See the Familiarize Yourself With Functionality section for more details on the SOS features of
inReach.
Activating inReach Explorer
Step One: Power on your device
Turn your inReach Explorer on by holding down the Power button until the Power On screen
displays. Press the Left Arrow and then Enter. The screen displays a welcome message and
begins the setup process.
Follow the on-screen instructions to continue the setup process.
Step Two: Set up your airtime plan and Explore account
Your inReach Explorer requires a satellite airtime plan and an online Explore account to send
and receive messages, much like a mobile phone plan (Note: Your inReach Explorer GPS
features will not work without a satellite airtime plan). The inReach uses Iridium's satellite
network to track, share information, and send and receive messages. To choose your plan and set
up your account, use the DeLorme Explore website:
Go online from your computer to explore.delorme.com and click Get Started then follow the
instructions to create a new account.
The Explore website prompts you for your IMEI number and Authorization Code; find these in
the Setup Wizard on the inReach Explorer device.
During the online account setup process, choose your inReach service plan, enter your payment
information and contact details, and add your emergency contacts that will be used if your
inReach Explorer is placed into SOS mode.
•
•
•
•
•
Add contacts to your device by selecting the Contacts tab.
Link your Twitter and Facebook accounts to share messages with your friends by
selecting the Social tab.
Set up your MapShare web page to let others follow your trip and send you messages on
your inReach Explorer by adjusting the MapShare options on the Social tab.
Create some commonly used text messages that are stored in your device, e.g. “Busy, will
reply later!” Select the Messages tab and edit the Quick Text Messages.
Write special Preset Messages that you think you’ll use often, e.g. “Just arrived and doing
well” or “Leaving now for my next destination.” Select the Messages tab and edit the
Preset Messages. Specify a group of recipients to whom you’ll send regular updates in
the form of Preset Messages.
Step Three: Check your connection
The inReach Explorer needs a clear satellite signal from the sky to complete the setup process.
Go outside and stand in an open area away from tall buildings, roof overhangs, and trees.
When you set up your Explore account, DeLorme sent you a welcome message for testing your
inReach. Your device receives this message during the activation process. When you have a clear
view of the sky, press Enter to activate and receive your message.
The activation process could take up to 20 minutes. Activation of your inReach with the
Iridium satellite network is a one-time step that uses a different process than standard
inReach functions. Please be patient while your inReach communicates with the Iridium
network for the first time.
To read your welcome message, select Messages from the device's home page and choose the
new message from DeLorme.
Send a test reply to DeLorme. You are allowed five free test messages per month. Select Type
Reply, and then type a message using the on-screen keyboard. Press Send. DeLorme sends you
an automatic reply when your message is received.
Your inReach Explorer listens for waiting messages every 20 minutes by default. Select the
Messages page and press Check Now to look for the reply from DeLorme.
Setting up your inReach Explorer
Step One: Sync your inReach Explorer
After activating your inReach Explorer, set up the device with the information you will need
while on your trip. On the Explore website, create your Contacts, Preset and Quick Text
Messages, Waypoints, Routes, and set up your Social Media links. You can return to the Explore
website at any time to change or update this information.
Step Two: Calibrate your digital compass
The inReach Explorer uses a digital compass to give accurate heading and bearing information
whether you’re stationary or moving. The device automatically checks compass calibration and
tells you to calibrate when necessary. For best performance, calibrate your digital compass any
time the device prompts you, or manually calibrate before a trip when you expect compass use to
be important.
To manually calibrate the compass, go to Settings>Compass & Altimeter, and then choose
Calibrate Compass. Rotate the inReach, turning all six sides of the device to the ground.
Continue until the inReach beeps to report successful calibration.
Step Three: Calibrate your barometric altimeter
The inReach Explorer uses a barometric altimeter to give accurate elevation readings when you
are climbing or descending. The device automatically calibrates the barometric altimeter using
GPS elevation each time it is powered on. Auto calibrating with GPS elevation is best if you do
not know the correct elevation or pressure for your location.
For best performance, manually calibrate your barometric altimeter when you can enter the
atmospheric pressure from an accurate source like a local weather report. To manually calibrate
the altimeter, go to Settings>Compass & Altimeter and choose Calibrate Altimeter. There are
three methods to calibrate the altimeter:
•
•
•
Known Elevation – Enter the true elevation from a source such as a trail marker or a
topographic map.
Known Pressure – Enter the atmospheric pressure from a current source such as a local
weather report.
GPS Elevation – Use this option if you do not know the correct elevation or pressure.
Select a method and follow the on-screen instructions.
Note: Manually calibrating disables auto-calibration until the device is restarted. Changes in
weather conditions can impact barometric altimeter readings, so consider enabling auto
calibration when weather is likely to change.
Pairing the inReach Explorer
While the inReach Explorer works as a stand-alone device, you have the option of using your
inReach Explorer in conjunction with your mobile device — such as a smartphone or tablet —
through a process called pairing. If you choose to pair your mobile device with your inReach,
you will have increased functionality including mapping and access to your mobile device’s
Contacts list.
Step One: Download the Earthmate app to your mobile
device
Download the free Earthmate app by visiting your mobile device's app store. The Earthmate app
is available from the App StoreSM and Google Play.
Note: Your Android mobile device must have 2.2 or later firmware. Your Apple mobile device
must have iOS 5.0 or later.
Step Two: Pair your inReach to your mobile device
To pair your inReach SE to a mobile device, you must first download DeLorme’s free Earthmate
app to your mobile device. Using your device, visit the app store and search for “Earthmate.”
The Earthmate app is available from the Apple Store and Google Play.
Download the app, and then open it. Enter your email address and your Explore site password,
which you set up during the activation process.
Pair with Bluetooth
To pair your inReach with your mobile device, go to Settings>Bluetooth>Pair inReach from
your inReach Explorer. Follow the instructions on the screen.
On your iOS device: Go to Settings>Bluetooth and make sure it is turned on. Select the inReach
Explorer from the Devices list.
On your Android device: Go to Settings>Wireless and Networks>Bluetooth Settings and make
sure Bluetooth is turned on. Select Scan Devices and choose inReach Explorer from the
Bluetooth Devices list.
Your inReach notifies you when it has successfully paired with your mobile device.
Tip: You only need to pair the devices once; from then on, the devices will communicate
with each other anytime they are in range, turned on and Bluetooth is active.
Once your devices are paired and you have a data connection, enter your inReach account
information into the Earthmate app Options page to sync it with the Explore website.
NOTE: Your inReach only pairs with one device at a time. If you want to change the
mobile device with which your inReach is paired, you must unpair it first. To unpair the
inReach Explorer, go to Settings>Bluetooth>Connected and select Forget this device.
On your Android mobile device, select "Unpair"; on an Apple mobile device, select
"Forget this device."
After you have unpaired your inReach and mobile device, you can go through the pairing
process again with a new mobile device.
Step Three: Add your contacts
If you have synced your inReach with the Explore website, the device already has the
information for any contacts you added on the Explore website. To move the same contacts into
the Earthmate app on your mobile device, sync it with your Explore account as well:
1. From your mobile device, open the Earthmate app.
2. For iOS devices, select Options, and then Account & Sync. For Android devices, select
Menu, and then Settings and Account.
3. For iOS devices, select Options, and then Account & Sync. For Android devices, select
Menu, and then Settings and Account.
4. Select Sync.
Once you’ve synced your mobile device with the Explore site, all your contacts appear in the
Earthmate app Contacts list and are available when creating a new message.
Familiarize Yourself with the Device
If you’ve followed all the instructions to activate your device, set up your online account, and set
up your device, you can now use your inReach device to send and receive messages, track your
locations, and share your trip through text messages and social media. You can also use your
inReach device for navigating during your trip.
Charging
Charge your inReach Explorer fully before using. Connect the device to the AC adaptor and plug
it into an electrical outlet or use the USB cable to charge from your computer.
A lightning bolt icon appears on the inReach screen to let you know you are connected to
external power and charging. A percentage appears to tell you how full your battery is. When the
device reaches 100%, the lightning bolt is replaced with a plug icon to indicate the device is
running from external power.
Tip: An exclamation point appears next to the battery percentage when attempting to
charge a device outside the supported temperature range.
Data Use
View the Data Use page to view your data plan, renewal date, billing cycle, and availability of
your next allotment of messages.
Monitor your data usage to see how many Messages, Preset Messages, and Tracking Points you
have sent.
Read plan details to learn about included features and message allotments.
Press Check for Update to download new plan details after making a plan change in your
Explore account.
Tip: Activity counters automatically reset at the beginning of each billing cycle.
LED Light
A green or red LED light flashes to indicate there is something to review.
Tip: The device waits for you to send a message or check for waiting messages before looking
for a satellite connection. The LED light does not flash until there is something to review.
•
•
A green LED flash indicates there is an unread message.
A red LED flash indicates the inReach has an obstructed view of the sky and needs to try
sending again. Your messages and track points will be stored and sent when the device
has a clear view of the sky. Tip: Hold your device with the antenna pointing skyward.
•
A red LED flash may also indicate the battery is at or below 10% of charge.
Approximately 10 hours or less of tracking time remains.
Keyboard Features
When using the keyboard hold the following buttons for special shortcuts:
•
•
•
•
•
Left – Backspace
Right – Space
Up – Cycle keyboards
Down – Highlight OK
Down – Accept text suggestion
Keyboard shortcut reminders appear in the status bar above the keyboard.
As you type, the keyboard predicts your words. When a suggestion is displayed that you would
like to accept, hold the Down arrow to accept the word and continue typing.
Tip: As you type new words, they are added to your dictionary and are suggested the next
time you start to type them.
Hold Enter when highlighting a key with a mark in the upper right corner to view a list of
additional accents, characters, or symbols. Press QUIT to dismiss the list.
Hold Enter when highlighting the ABC/abc key to enable Caps Lock. Press the button again to
disable it.
Map Features
When viewing the Map page, press Enter once to view the Zoom controls:
•
•
Up – Zoom in
Down – Zoom out
Press ENTER a second time to view the Waypoint/Pick controls:
•
•
Up – Pick a map object to view details
Down – Mark a waypoint
When not zooming or picking/marking waypoints, press the directional arrows to pan the map.
Press Quit to dismiss Pan, Zoom, or Waypoint/Pick controls.
Satellite Connection
The inReach Explorer requires a clear view of the sky to acquire a GPS fix and transmit your
messages over the Iridium satellite network. This process should take less than one minute, but it
could take more time if the line of sight is obstructed.
For the best reception when wearing the inReach, attach it to a backpack strap or to your upper
body. If you attach the pack clip to your belt, some of the signal may be blocked by your body
and could prevent proper transmission of messages and tracking points.
Screen Lock
After the Display Timer counts down, the screen turns off and locks. Press Enter, the Left arrow,
and then Enter again to select Unlock.
Screen Lock prevents accidental button presses when carrying the device in your pack.
Tip: Disable the feature with Settings>Display>Screen Lock. Extend the time before locking the
screen by increasing the Display Timer.
Shortcuts
Use shortcuts to save time!
•
•
•
Press the Right directional arrow to scroll down a page at a time. Press the Left arrow to
scroll up a page at a time.
Hold the Enter button for three seconds to view the button lock screen. You have the
option to lock the screen, power off, mute sounds, or adjust display brightness.
Hold the Quit button for three seconds to view the Preset Message page. Tip: Configure
your Preset Messages online in your Explore account.
Status Bar
Review device activity in the Status Bar. See current time, GPS status, satellite communication,
unread messages, Bluetooth connectivity, and charging status.
•
•
•
•
Check the quality of the GPS status. Your device displays a Searching icon, 2D, or 3D
status. 3D is the highest quality and Searching means no location information is
available.
See when the device is communicating with the GPS and Iridium satellites. A double
arrow icon flashes in the Status Bar.
Check the number of unread messages. An envelope icon appears along with a number
indicating the total unread messages.
See whether your inReach Explorer is paired with a mobile device. Bluetooth is enabled
by default and appears as a gray icon when it’s not paired. A bold Bluetooth icon displays
when paired.
•
View remaining battery capacity. A charging indicator with a percentage appears when
the device is connected to external power by the micro-USB port.
Time and Units
Select your correct Time Zone and Daylight Saving value by selecting Settings>Time.
Adjust coordinates and units by selecting Settings>Units.
Familiarize Yourself with the Screen and
Pages
Check Page
The Check page shows important information about the message checking process:
•
•
•
Last Check – The last time a successful satellite connection was made.
Next Listen – The next scheduled time the device will check for new messages.
Time to Next Listen – A countdown timer to the next scheduled check for new messages.
Press Check Now to manually check for waiting messages on the Iridium satellite. Do this if you
feel a message might be waiting and do not want to wait for the Check Interval to complete.
Help Page
Get answers to common questions about your inReach right in the device. Select Help from the
Home page. Help topics are updated with each firmware release.
Press the Right directional arrow to scroll down a page at a time. Press the Left arrow to scroll up
a page at a time. Press Quit to back out of a Help topic. Press Enter to select a Help topic.
History Page
Review your message and tracking activity on the History page. Select a date to review who
received your messages and what the content was on that date. You can also delete the message
from history.
Location Page
View current GPS location details including Speed, Elevation, Course, Accuracy, and Current
Location.
Press Share Location to send a message with your location details to a contact.
Tip: The GPS stays on and delivers continuous updates while you’re viewing the Location
page. The GPS turns off when the Display Timer turns off the screen, conserving battery
life.
Map Page
View your location on a map and see the relative positions of your waypoints, messages, and
track lines. All of your inReach Explorer content appears on the Map page.
•
•
•
•
•
•
Your Location – A green arrow in the center of the map.
Waypoints – Represented by the symbol you selected when you created the Waypoint.
Messages – Sent Messages appear as blue icons; received Messages appear in green.
Track Points – Yellow icons appear in the locations where Track Points were sent to the
Explore site and to MapShare.
Track Line – The high-detail track appears as a green line connecting each point where a
tracking location was logged on the device.
Map Grid – The Grid in the background of the page uses spacing that matches the map
scale. Use the grid squares to count the distance from your location to objects on the map.
NOTE: Map options are controlled in Settings>Map. Change which map objects are
displayed in Settings.
Message Page
View your sent and received messages on the Message page. To compose a new message or to
view details about a message, including date and time, select Messages and press Enter.
To send a new message, select New Message. Use the on-screen keyboard to add recipients and
text to the message and select Send.
Tip: Select the Contacts and Quick Text icons to select recipients or text from Contacts and
Quick Texts Synced to your device from explore.delorme.com.
To reply to a previous message, select the conversation thread you wish to reply to and select
Type Reply. To rapidly reply with a Quick Text message select Quick Reply.
To view details of a previous message, select the message thread containing the message. Move
the cursor to the message and press Enter to view the message details or Delete the message.
Tip: Delete an unsent pending message to cancel it.
Routes Page
If you have an active route to a destination, view it on the Routes page. Planned routes created on
the Explore site appear in this list as part of the inReach Explorer trip-planning feature.
View the Details page for each route and turn routes on or off with a checkbox. Reverse routes
by pressing the Reverse button on the Route Details page.
Use the Stop Navigating button on the Routes list to close your current route.
Settings Page
Configure your personal preferences on the Settings page.
Display – Turn Screen Lock on or off, choose the Dark color scheme to preserve your night
vision, increase the display brightness for better screen visibility, or adjust the timeout of the
display screen.
Tip: Keep the Screen Lock turned on to prevent accidental button presses in your pack.
Map – Set the orientation of your map to rotate as your heading changes or to remain North up;
auto zoom to resize the map area to best fit your location and your destination; choose whether
Messages, Track Points, and/or the Track Line show up on the Map page.
Tracking – Choose how frequently Track Points are sent to the Explore website via satellite.
Choose a time interval between 10 minutes and 4 hours. Extreme Plan users have additional
interval options of 2 and 5 minutes.
Choose how frequently Track Points are logged on the inReach device. There are two Tracking
Log intervals: While Sending and Logging Only.
•
•
Configure the While Sending interval to control how frequently Track Points are stored
on the device while you are sending track points to the Explore and MapShare sites.
Configure the Logging Only interval to control how frequently log points are stored on
the device even when the Track Points aren’t being transmitted via satellite to the Explore
site. The Logging Only interval defaults to always log track points, but you have the
option to turn it off.
Tip: Set your Tracking Log interval to more than 30 seconds to conserve battery power.
Prompt for MapShare – A prompt reminds you to send your MapShare link to your contacts
each time you start tracking. Disable this option in Settings>Tracking. Once you disable it, you
can no longer send your MapShare link until you re-enable it.
Bluetooth – Enable and disable the Bluetooth antenna, pair your inReach with your mobile
device, or see which mobile device is connected.
Compass & Altimeter – Calibrate your compass, enable auto-calibrate on the altimeter, or
calibrate your altimeter manually.
Messages – Choose a time interval for the inReach to check for new messages. Set the device to
ring until a new message is read.
Note: Shorter intervals use more battery.
Sounds – Change the default sounds that play for sending and receiving messages, announcing
critical alerts, and powering off the device; or choose to Mute All sounds.
Time – Choose 12- or 24-hour time format, specify your Time Zone, and select Daylight
Savings status.
Tip: Remember to set your Daylight Savings status seasonally! It will not update
automatically.
Units – Change the coordinates displayed by the device. Select between miles, kilometers, and
nautical units of measurement. The inReach Explorer uses the WGS84 Datum and is not
configurable.
Power – Choose to have the device turn on or off automatically when external power is
connected or disconnected.
Owner Info – Enter your personal information and choose to Display Info at startup. This
information appears when your inReach Explorer turns on.
About This Device – View important information including your IMEI Number, Authorization
Code, and Firmware Version.
Restore Factory Settings – Reset your inReach Explorer to the state it was in when you first
took it out of the box new. DO NOT use this setting unless you are prepared to lose all of your
messages, track points, contacts, and settings.
Social Page
Send messages to Facebook, Twitter, and your MapShare page on the Social page.
Tip: Add your Facebook and Twitter account information on the Explore website for this
feature to work properly.
SOS Page
Use the SOS page to declare an emergency or to communicate back and forth with Emergency
Response while you wait for help to arrive. When you send an SOS to Emergency Response
along with details of your location, they respond with an acknowledgement that appears on the
SOS page. Reply to this message to let Emergency Response know that you are capable of
interacting with them during the rescue.
While your device is in SOS mode, the Status Bar will be highlighted red until you cancel the
SOS.
NOTE: Only use SOS in a real emergency.
Tracking Page
Start and stop sending Track Points with the Tracking page. Your current location is sent to the
Explore website regularly at a preconfigured tracking interval. High-detail tracking points are
automatically logged to your device by default.
•
•
•
•
Send Interval - The time interval at which track points are sent to the Explore site.
Log Interval – The time interval at which track points are logged onto the inReach
device.
Points Sent – The count of track points that have been successfully delivered via satellite
out of the total number sent. Any messages not currently delivered are queued until the
next satellite connection.
Time Until Full – The time remaining before the Tracking Log’s memory is filled. Your
oldest tracking log points are automatically overwritten when the Tracking Log is filled.
NOTE: Even when the Tracking Log is filled and begins overwriting older Track Points, a
lower-detail tracking line is retained.
•
Log Capacity – A bar graph showing the percent of available track points. Start a new
trip with a clean slate by selecting the Clear button.
NOTE: Clearing the Tracking Log prompts the user to also reset Trip Info statistics.
Trip Info Page
View useful statistics about your trip. See trip times, speeds, and distances.
•
•
•
•
•
•
Trip Time – The total time the device has been running since the last Reset.
Time Moving – The total time the device has been in motion since the last Reset.
Speed Max – The maximum recorded speed of the device since the last Reset.
Moving Avg – The average moving speed of the device since the last Reset.
Trip Distance – The distance the device has traveled since the last Reset.
Odometer – A second trip distance with an independent Reset option.
The accuracy of your Trip Info statistics depends on the frequency of your Tracking Log
interval. A more frequent log interval will result in more readings and more accurate statistics.
Tip: If you would like to clear the details of a particular trip while retaining the overall
mileage shown in the Odometer field, select Reset Trip. Select Reset All to clear all Trip
Info fields.
Waypoints Page
The Waypoints page displays the symbol, name, distance, and bearing to each waypoint on your
inReach Explorer. Sort the Waypoints by Distance, Name, Symbol, or Date.
Tip: Change the coordinates in the Location field to move a new waypoint to a location that
you plan to visit. Use Settings>Units to change the coordinate format based on the
coordinates you are using.
When navigating to a Waypoint, the Navigating icon appears next to the Waypoint label. It
shows a green starting point, red finishing point, and orange connecting line.
When you are creating a new Waypoint, it will appear in the Waypoints list and it will be sent to
the Explore website. When the Waypoint is being sent, a Sending animation appears next to its
label.
Familiarize Yourself with Functionality
Viewing Your Contacts
Store your contacts on your InReach. Go to the Contacts page and add email addresses and SMS
text numbers for each contact manually. If you have a contact who owns an inReach, add their
inReach address as well.
Tip: Add your Contacts on the Explore website and sync your InReach to push those
contacts to your device.
When you send a message to an SMS number, that person can reply directly to your message
from a mobile device. When you send a message to an email, the recipient must reply using the
Explore website link in the email. Both options display a map of your location to the recipient.
Emails and SMS numbers are automatically added to your Contacts page when you send or
receive messages. Add contact names and other details manually.
Sending Messages
Send and receive text messages when out of cell phone range with inReach. Select Messages
from the inReach Home page and choose New Message. Type a recipient’s email address or
SMS phone number. You can also select recipients from your Contacts list. Type your message
or choose from your list of Quick Text Messages.
Tip: Review the Shortcuts and Keyboard Features section of this manual to learn more
about typing messages.
Press Send to deliver your message. A spinning Sending icon will appear. It will change to a
Sent icon when the message has been delivered.
If the message is not delivered after 15 minutes, your device may not have a clear view of the
sky. Your device asks you if you would like to continue sending or to stop and send later. If you
choose Stop, you can resend the message when you have a clear view of the sky by going to the
message thread, selecting the message, pressing ENTER to view details, and then pressing Send.
Sending Preset and Quick Text Messages
During the inReach setup, you created Preset and Quick Text Messages on the Explore account.
These messages are loaded onto your device when you sync it with the Explore site. Use them to
communicate quickly with family and friends.
•
•
A Preset Message is a message you created ahead of time that is sent to a list of people
you specified when creating the message. Send a Preset Message by going to
Messages>Preset Messages. Select the message and press Send.
A Quick Text Message is a message you know you’ll use often when replying to or
sending messages, and you don’t want to type it each time. Send a Quick Text Message
by going to Messages>Quick Text Message. Select the message, select the recipients, and
press Send.
Checking Messages
By default the inReach Explorer listens for waiting messages once every 20 minutes and
downloads them. Every time a Message or Track Point is sent, waiting messages are also
downloaded. (For example, if your inReach is set to send track points every 10 minutes, the
device is also checking for waiting messages every 10 minutes.)
Press Check Now to manually check for waiting messages.
The Check page shows important information about the message checking process:
•
•
•
Last Check – The last time a successful satellite connection was made.
Next Listen – The next scheduled time the device will check for new messages.
Time to Next Listen – A countdown timer to the next scheduled check for new messages.
Tracking Your Location
Track your trip and share your location details online with family and friends from anywhere in
the world. Tracking allows you to send your trip details, including GPS coordinates, course,
elevation and speed to your MapShare page online.
To get started, select Tracking from the inReach Home page. Then select Start Sending to begin,
and select Stop Sending when you finish your trip or want to stop sending your trip details.
Sharing Your Trip Information
Send your friends live updates about your location by turning on MapShare on your Explore
account online. Your location information from your device will appear on your MapShare web
page that you can share with others using your personal Mapshare URL. Post your personal
MapShare page link to social media so your friends and family can visit your Mapshare page to
follow your trip and send you messages.
From your inReach device, select Tracking> Start Sending to share your information to your
MapShare page. You can disable the prompt to send a message with your MapShare information
to friends or family members in Settings>Tracking.
NOTE: Sending a MapShare link will turn on your MapShare page if you didn’t already
do so on the Explore website.
Password-protect your MapShare page using the MapShare options on the Social tab of your
Explore account.
Sharing on Social Media
Let your family and friends see your progress and updates on Facebook and Twitter. Link your
Facebook and Twitter accounts on the Explore website using a computer or tablet. Select the
Social tab and enter your usernames and passwords for your accounts. Once you’ve linked your
accounts, you’ll be able to send updates to them through your inReach device.
To send updates from your inReach, go to the Social page. Select the social accounts where you
want to post, write your message, and press Send.
When you return to the Social page, the social accounts you last selected will automatically be
pre-selected. Remember that while you can post to your Facebook and Twitter accounts, replies
to those posts will not be sent to you through the inReach.
Adjusting the Tracking Intervals
The default tracking interval for sending your location information to MapShare is 10 minutes.
To change the tracking intervals, go to Settings>Tracking.
Tip: Select Share after pressing Start Sending to send a Share message with a MapShare
link at the start of your trip to let people know how to follow along.
Adjusting the tracking intervals on inReach is not required, but doing so can offer greater
flexibility depending on your trip speed and desired level of trip detail. inReach automatically
records and stores tracking data in a trip log in the device’s memory, whether or not you choose
to send your track points to MapShare. Therefore, inReach allows you to adjust two different
tracking intervals — a send interval and a log interval.
The send interval determines how often inReach transmits your tracking data to your MapShare
page online. With most of our subscription plans, you can set inReach to transmit your location
at intervals ranging from 10 minutes to 4 hours. (DeLorme’s Extreme subscription plan offers
sending intervals as frequently as 2 minutes.)
The log interval determines how often inReach records and stores tracking data in the device’s
memory. Data recorded at the log interval is NOT transmitted via satellite while you are in the
field and it does not appear on your Mapshare page until you sync your device.
The default log interval when you are sending track points to your MapShare page is 1 minute.
The default log interval when you are not sending track points is also 1 minute. Set your inReach
to log your location on your device at intervals ranging from 1 second to 10 minutes. A shorter
log interval gives a high level of detail but fills the device memory quickly and uses more battery
power.
Tip: Upload your log data to your Explore account by syncing your device via your
computer after your trip.
When you are Tracking, info fields appear showing your send and log intervals, how many
points are waiting to be sent to Mapshare, and how long until your tracking log is full.
Tip: If you notice that several points have been queued for sending, ensure your inReach
has a clear view of the sky.
When you stop moving, your inReach rests and stops sending and logging new tracking points at
normal intervals until you start moving again. A track point is sent once every four hours even
when stationary.
Tip: Clear the stored log on the Tracking page when starting a new trip to have full log
capacity available.
Creating Waypoints
Mark important locations by creating Waypoints. Select Waypoints from the Home page of your
inReach device. Choose New Waypoint or select the New Waypoint shortcut after pressing Enter
twice on the Map page.
After creating the waypoint, edit the name, symbol, and location details to more easily reference
it.
If you know the coordinates of your destination, mark the Waypoint ahead of time by creating a
new Waypoint and then editing the Location field.
Tip: If your known coordinates do not match the current inReach Explorer coordinates
format, change the format in Settings>Units.
Waypoints you create during your trip are also sent to your Explore and MapShare web pages for
others to see.
Navigating to a Destination
Select a Waypoint, Message, or other location you would like to travel toward and choose
Navigate. The Map page appears showing your current position, your selected destination, and
an orange-highlighted route connecting the two locations.
As you travel, a Finish field on the map reports the distance from your current location to your
destination.
The Map page rotates to show your direction of travel at the top of the map. The page always
defaults to show your position and your destination on the map when Navigating. If you zoom in
or out, the Map page returns to its default view when you press Quit to exit zoom mode.
Tip: Change the map orientation and auto zoom options in Settings>Map.
The Compass page shows Bearing and Distance information between your current location and
the destination. A green arrow shows you how to stay on course as you move toward your finish.
Viewing the Map
The Map page shows your current location and your Tracking line along with any Messages or
Track Points you have sent. Messages received from other inReach users appear on the Map
page. Waypoints also appear on the Map page.
•
•
•
•
•
•
Press the Enter button to display shortcuts for zooming in or out.
Press the Up arrow to zoom in and the Down arrow to zoom out.
Press the Enter button again to display shortcuts for picking and marking a Waypoint.
Press the Up arrow to pick objects under the panned cursor location and press the Down
arrow to mark a Waypoint.
When not zooming or picking/marking Waypoints, press the directional arrows to pan the
map and place the cursor over objects. When you select an object on the map, a Details
page appears for the selected point.
Press the Quit button to exit the controls for Pan, Zoom, or Pick/Mark Waypoint.
Using the Compass
The Compass page offers two modes that provide useful information when tracking without a
destination or when navigating a route.
While Tracking: View your current speed, elevation, and heading with the Compass page along
with a rotating compass graphic that shows your heading in relation to the cardinal compass
points.
•
•
•
Speed – The current speed according to GPS readings.
Elevation – The elevation of the device, calculated using the Barometric Altimeter and/or
GPS.
Heading – The direction your device is facing, based on the digital compass reading,
expressed in both cardinal direction and degrees true or magnetic north.
While Navigating: View your destination, distance to finish, and bearing or course to the finish.
A rotating compass graphic shows your heading, and a green arrow represents the bearing to
your destination.
•
•
•
Waypoint – The name and symbol of the route destination.
Distance – The distance remaining from your current location to the finish.
Bearing/Course – The compass reading you must follow to arrive at your destination.
NOTE: The Bearing field changes to display the Course when the inReach Explorer is
moving. The device gathers location information from the GPS rather than the digital
compass when in motion.
Declaring an SOS
NOTE: Only use SOS in a real emergency.
From the Home page, press SOS, then select Emergency, and then select Compose to view the
SOS page. Type the details of your emergency or select an SOS Preset Message and press Send.
Tip: Unlock the SOS slider and hold the SOS button on the inReach Explorer to contact
Emergency Response.
Your message is sent to Emergency Response along with details of your location. When they
receive your message, they respond with an acknowledgement, which appears in the SOS page.
Reply to this message to let Emergency Response know that you are capable of interacting with
them during the rescue.
Your inReach sends an updated location report to Emergency Response every minute for the first
10 minutes of your SOS. To conserve battery power, location updates are subsequently sent
every 10 minutes when moving and every 30 minutes when stationary.
If you decide that you no longer need assistance, cancel your SOS message by selecting Cancel
from the SOS page or by holding down the SOS button. Your inReach needs to successfully
transmit this cancel request and receive a confirmation from Emergency Response before it
returns to normal operation.
Note: It is not possible to turn off your inReach Explorer when in SOS mode or when
cancelling SOS mode.
While your device is in SOS mode, the Status Bar will be highlighted in red until you cancel the
SOS.
Use the Earthmate App
If you chose to pair your inReach Explorer to a mobile device during the setup process, you can
use the Earthmate app for increased functionality. The mobile device and the inReach must stay
within Bluetooth range of each other to use the Earthmate app during your trip.
Tip: Make sure Bluetooth is turned on in your mobile device’s settings to ensure it is
successfully paired with the inReach.
Download detailed topographic maps and NOAA nautical charts to use on your trip. Once
downloaded, your maps are available through the Earthmate app throughout your trip.
Tip: Download maps prior to leaving for your trip. The Earthmate app requires either a
wi-fi connection or cellular coverage for map downloads.
Use the Earthmate app on your mobile device to send and receive Messages or to start and stop
Tracking via the inReach Explorer. All of your Messages and Tracking Points appear on your
Earthmate app map showing your travel.
Tip: Send a message from your vehicle or select Start Tracking to mark your starting point
on your Earthmate app map.
Messages sent using the Earthmate app or the inReach Explorer appear on both devices.
Share a coordinate with someone else via a Message. Tap on the Earthmate app map to send a
Reference Point with a coordinate for a location even if you aren’t currently at that location. (For
example: “Meet me here in four hours.”)
NOTE: An Earthmate app update is currently in development to bring the same Waypoint,
Tracking, and Routes features found in the inReach Explorer to your mobile device.
Sync inReach with the Explore Website
Sync your Explore account with your inReach Explorer device to share information between
your Explore account and device. When you sync your device with the Explore site, the
information you entered online — like Facebook, Twitter, Preset Messages, Waypoints and
Routes — push to your device.
Use your Explore account to create new Contacts, customize your Preset Messages and Quick
Text Messages, and connect to Facebook and Twitter. Afterward, connect your inReach device
to your computer using the USB cord and then click on Sync tab of the Explore website.
Updating inReach Explorer
Firmware Update
The Explore web site will occasionally notify you when firmware updates are available. To
update your firmware, connect your inReach device to your computer using the USB cable and
then click on Sync tab of the Explore website.
Do not unplug the inReach Explorer from your computer during updates. Do not shut down or
unplug your computer during updates.
Troubleshooting inReach Explorer
Some helpful tips to remember:
•
•
•
•
•
•
You must choose a satellite airtime plan and create an Explore account online at
explore.delorme.com before you can begin using your device.
Your inReach must be outside with a clear view of the sky to send and receive Messages
or to Track your location.
You don’t need to pair your inReach with a mobile device to use it as a standalone
device, but you must pair it in order to use inReach with the Earthmate app.
If you choose to pair your inReach with your mobile device, they must be within
Bluetooth range (32 feet or less) of each other.
To reset your inReach device, simultaneously press X and the Down arrow for 10
seconds. Your device will turn off. Power it back on to continue using it.
Your inReach has a “Help” function built in. Select Help from the main menu and search
for solutions to common questions.
If you can’t find answers to your questions through the inReach device help or the online user
manual, visit support.delorme.com.
inReach Customer Service and Support
United States and E.U.
Please login to your account at explore.delorme.com to activate your device, review invoices,
change your plan, suspend or cancel service.
Customer Service
contact.delorme.com
Phone: 800-511-2459
(outside the U.S. call +1 207-847-1165)
Tech Support
contact.delorme.com
Phone: 207-846-8900
DeLorme Customer Care is available Monday – Friday,
9:00 a.m.– 8:00 p.m. Eastern Time (U.S.).
Canada
Find information on rate plans, activations, general information, and support at
inreachcanada.com
Customer Service
[email protected]
Call Customer Service or Tech Support
Monday – Friday, 9:00 a.m.– 6:00 p.m. Eastern Time (Canada).
Phone: 800-337-3155
Tech Support
[email protected]
inReach Explorer Specifications
•
•
•
•
•
•
•
•
•
•
•
•
GPS accuracy to +/- 5 meters
Rugged, waterproof/dustproof (IP67: standard submersion to 1 meter for 30 minutes)
Impact-resistant (Mil-STD-810G for shock)
Height (including antenna): 5.83 in (14.8 cm)
Height (not including antenna): 4.5 in (11.4 cm)
Width: 2.46 in (6.3 cm)
Depth (including belt clip): 1.34 in (3.4 cm)
Depth (not including belt clip): 1.04 in (2.6 cm)
Weight: 6.7 oz (190 g)
Operational temperature range: -4 F to 140 F (-20 C to +60 C)
Storage temperature range: -40 F to 185 F (-40 C to +85 C)
Battery charging temperature range: 32 F to 113 F (0 C to +45 C)
Note: For optimal battery life, DeLorme recommends that devices are stored with a charge level
between 40% to 60% and temperatures between 32 F to 86 F (0 C to 30 C).
Battery life and usage: 100 hours of battery life in 10-minute tracking mode with a clear view to
the sky.
This device includes an internal lithium polymer battery (2,450 mAh capacity at 3.7 V). For
proper performance the battery must be charged before use. The battery can be charged using the
micro-USB connector on the side of the device or using the power pins on the back with an
approved accessory.
Certifications
FCC compliance statement (United States)
This device complies with Part 15 of the FCC Rules. Operation is subject to the following two
conditions: (1) this device may not cause harmful interference, and (2) this device must accept
any interference received, including interference that may cause undesired operation.
Changes and modifications not expressly approved by DeLorme Publishing can void your
authority to operate this equipment under Federal Communications Commission’s rules.
RADIO AND TELEVISION INTERFERENCE
This equipment has been tested and found to comply with the limits for a Class B digital device,
pursuant to Part 15 of the FCC Rules. These limits are designed to provide reasonable protection
against harmful interference in a residential installation. This equipment generates, uses and can
radiate radio frequency energy and, if not installed and used in accordance with the
manufacturer’s instructions, may cause interference harmful to radio communications. There is
no guarantee, however, that interference will not occur in a particular installation. If this
equipment does cause harmful interference to radio or television reception, which can be
determined by turning the equipment off and on, the user is encouraged to try to correct the
interference by one or more of the following measures:
•
•
•
•
Reorient or relocate the receiving antenna.
Increase the separation between the equipment and receiver.
Connect the equipment to an outlet on a circuit different from that to which the receiver is
connected.
Consult the dealer or an experienced radio/TV technician for help.
Industry Canada certification
This device complies with RSS-310 of Industry Canada. Operation is subject to the condition
that this device does not cause harmful interference.
EU Regulatory Conformance
DeLorme hereby declares that this inReach device is in compliance with the essential
requirements and other relevant provisions of Directive 1999/5/EC, Directive 2002/95/EC, and
Directive 2002/96/EC. The Declaration of Conformity made under Directive 1999/5/EC (HG
nr.88/2003) is available for viewing at the following location in the EU community:
manuals.delorme.com.
inReach Explorer Limited Warranty
inReach warrants that your inReach Explorer will be free from defects in materials and
workmanship for one year from the date of purchase. If your inReach fails in normal use during
the one year warranty period, inReach will either repair or replace the unit at inReach's sole
discretion. Such repairs or replacements will be made at no charge for labor, materials or
shipping if within the United States. Additional charges will apply for expedited or International
shipping.
Any repaired or replaced product will be warranted for ninety (90) days from the date of return
shipment, or for the balance of the original warranty, whichever is longer. This warranty does not
cover failures due to abuse, misuse, accidents, or unauthorized disassembly or modification. Any
evidence of tampering with the devices will void the warranty.
inReach DISCLAIMS ANY LIABILITY FOR ANY SPECIAL, INDIRECT, INCIDENTAL,
OR CONSEQUENTIAL DAMAGES, INCLUDING, BUT NOT LIMITED TO, LOSS OF
REVENUES OR PROFITS, EVEN IF inReach HAS BEEN ADVISED OF THE POSSIBILITY
OF SUCH DAMAGES. THIS LIMITED WARRANTY CONTAINED HEREIN IS IN LIEU OF
ALL OTHER EXPRESS WARRANTIES. ANY AND ALL IMPLIED WARRANTIES,
INCLUDING ANY IMPLIED WARRANTIES OF MERCHANTABILITY OR OF FITNESS
FOR A PARTICULAR PURPOSE, SHALL LAST FOR ONE YEAR.
This warranty gives you specific legal rights and you may also have other rights which vary by
jurisdiction. Some states do not allow the exclusion or limitation of relief such as incidental or
consequential damages, or limitations on how long an implied warranty lasts, so the above
limitations or exclusions may not apply to you. This warranty applies to the original purchaser of
the product ONLY.
REMINDER: Be sure to retain the sales receipt proving the date of your original purchase. This
will be needed if warranty service is ever required. inReach reserves the right to refuse warranty
if a receipt is not provided or if the receipt is incomplete/illegible.
Before you return a product, you must contact inReach Suppot at contact.delorme.com to obtain
an RMA number and return shipping label.
For the latest warranty and repair information, visit support.delorme.com.
Third Party Legal Notices
OpenSSL License
Copyright (c) 1998-2007 The OpenSSL Project. All rights reserved.
Redistribution and use in source and binary forms, with or without modification, are permitted
provided that the following conditions are met:
1. Redistributions of source code must retain the above copyright notice, this list of
conditions and the following disclaimer.
2. Redistributions in binary form must reproduce the above copyright notice, this list of
conditions and the following disclaimer in the documentation and/or other materials
provided with the distribution.
3. All advertising materials mentioning features or use of this software must display the
following acknowledgment: "This product includes software developed by the OpenSSL
Project for use in the OpenSSL Toolkit. (http://www.openssl.org/)"
4. The names "OpenSSL Toolkit" and "OpenSSL Project" must not be used to endorse or
promote products derived from this software without prior written permission. For
written permission, please contact [email protected].
5. Products derived from this software may not be called "OpenSSL" nor may "OpenSSL"
appear in their names without prior written permission of the OpenSSL Project.
6. Redistributions of any form whatsoever must retain the following acknowledgment:
"This product includes software developed by the OpenSSL Project for use in the
OpenSSL Toolkit (http://www.openssl.org/)"
THIS SOFTWARE IS PROVIDED BY THE OpenSSL PROJECT ``AS IS'' AND ANY
EXPRESSED OR IMPLIED WARRANTIES, INCLUDING, BUT NOT LIMITED TO, THE
IMPLIED WARRANTIES OF MERCHANTABILITY AND FITNESS FOR A PARTICULAR
PURPOSE ARE DISCLAIMED. IN NO EVENT SHALL THE OpenSSL PROJECT OR ITS
CONTRIBUTORS BE LIABLE FOR ANY DIRECT, INDIRECT, INCIDENTAL, SPECIAL,
EXEMPLARY, OR CONSEQUENTIAL DAMAGES (INCLUDING, BUT NOT LIMITED TO,
PROCUREMENT OF SUBSTITUTE GOODS OR SERVICES; LOSS OF USE, DATA, OR
PROFITS; OR BUSINESS INTERRUPTION) HOWEVER CAUSED AND ON ANY
THEORY OF LIABILITY, WHETHER IN CONTRACT, STRICT LIABILITY, OR TORT
(INCLUDING NEGLIGENCE OR OTHERWISE) ARISING IN ANY WAY OUT OF THE
USE OF THIS SOFTWARE, EVEN IF ADVISED OF THE POSSIBILITY OF SUCH
DAMAGE.