1
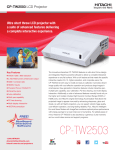
LPR 1274W
7 x 10 W RGBW 4-IN-1
1 SUPER BRIGHT LED PAR LIGHT
User´s Manual
Troubleshooting
1. If the power supply indicator doesn't light up and the light doesn't work, please
check the power supply, the input voltage and the fuse.
2. In Stand-Alone operation, if the power supply indicator is light up and sound
active indicator isn't light up, but the light is shut off doesn't work.
A. Because sound is too small make for light shut off in sound active, please
increase the music volume or increase audio sensitivity with sensitivity knob,
please check as below.
B. Please check if unit has been set up in slave mode, then set up in master mode.
3. In Master-Slave operation, slave unit don't function, please check as below.
A. Make sure to there's only one master in the chain, and the others are set in slave mode.
B. Make sure to control the unit without DMX console controlling.
C. Make sure to take a good quality power cable and connection.
4. In DMX mode operation, the light is OFF and the DMX signal indicator is
unlighted, please check as below.
A. Make sure to set up the DMX mode.
B. Make sure to have a good connection.
5. In DMX operation, the unit can’t be controlled by the DMX console, but the DMX signal
indicator is flashing, please make sure the DMX console and unit have the same channel.
6. If the unit is fail, please turn off the unit, then turn on again after 5 minutes.
Warranty Warnings:
1. Damages caused by the disregard of this user manual are not subject to Warranty.
The dealer will not accept liability for any resulting defects or problems.
2. Please consider that unauthorized modifications on the device are forbidden due to
safety reasons. Please note that damages caused by manual modifications on the
device or unauthorized operation by unqualified persons are not subject to warranty.
3. If this device will be operated in any way different to the one described in this
manual, it may suffer damages and the guarantee becomes void. Furthermore, any
other operation may lead to dangers like short-circuit, burns electric shock, etc.
After trying the above solution you still have a problem, please contact your dealer
or our company for service.
Page 9
General instructions
DMX Control:
The LED light only accepts the DMX512 signal of international standard to control the light.
DMX Control Parameter Chart
Thank you for purchasing this product. Please read user guide for safety and before using
4 Channels
the product. Keep this manual for future reference. This product can create perfect light
Function
Channel
Unpacking:
Description
Value
programs and effects since it has passed a series of strictly tests before delivery. Please check
CH1
0
255
Red brightness, dark to bright
the attachments listed on the page after opening the carton. Immediately upon receiving
CH2
0
255
Green brightness, dark to bright
a fixture, carefully unpack the box. Check the box contents to ensure that all parts are present
0
255
Blue brightness, dark to bright
and that they are in good condition. If any part appears damaged from shipping, or if the
0
255
White brightness, dark to bright
box shows signs of mishandling, notify the shipper immediately. In addition, retain the box
CH3
Brightness
CH4
and all the packing material for inspection.In any event, save the carton and all packing material
9 Channels
because, in case that you have to return the fixture to the factory, you will have to do so in its
Channel
Function
CH1
Brightness
CH2
CH3
CH4
Brightness
CH5
CH6
Strobe
CH8
CH9
Color change
Speed
White color
original box, with its original packing.
1. LED Light: 1PCS
2. Power Cable: 1PCS
0
255
RGBW brightness, dark to bright
0
255
Red brightness, dark to bright
Safty Notice:
0
255
Green brightness, dark to bright
Please read the following notes carefully because they include important safety information
0
255
Blue brightness, dark to bright
about the installation,usage and maintenance of this product. It is important to read all these
0
255
White brightness, dark to bright
notes before starting to work with this product.
0
63
No strobe
64
249 AUTO strobe, speed slow to fast
250
255 Sound Active strobe
0
CH7
Description
Value
10
CH1--CH6 working
Manually select static color, controlled under CH8
11
60
61
110 AUTO color dimmer, controlled under CH8
111
160 AUTO color pulse, controlled under CH8
161
210 AUTO color Jumping, controlled under CH8
211
255 Sound Active color jumping
0
255
Static color selection or speed control, slow to fast
0
127
White color ON
0
255
White color OFF
3. User Guide: 1PCS
LED Expected Lifespan
LEDs gradually decline in brightness over time. HEAT is the dominant factor that leads to the
acceleration of this decline. Packaged in clusters, LEDs exhibit higher operating temperatures than in ideal
or singular optimum conditions. For this reason when all color LEDs are used at their fullest intensity, life of
the LEDs is significantly reduced. It is estimated that a viable lifespan of 40,000 to 50,000 hours will be
achieved under normal operational conditions. If improving on this lifespan expectancy is of a higher
priority, place care in providing for lower operational temperatures. This may include climatic-environmental
and the reduction of overall projection intensity.
There are no user serviceable parts inside the light. Any reference to servicing this unit you
may find from now on in this User Manual will only apply to properly C we certified
technicians. Do not open the housing or attempt any repairs unless you are o
Please refer to all applicable local codes and regulations for proper
installation of the light.
Keep this manual for future consultation. If you sell the light to another user,
make sure that they also receive this manual.
Page 8
Page 1
Avoid direct eye exposure to the light source while the fixture is on. Always disconnect
the light from its power source before servicing. Always connect the light to a grounded
circuit to avoid the risk of electrocution.
This product is for indoor use only! Use only in dry locations. Keep this
device away from rain and moisture, excessive heat, humidity and dust. Do
not allow contact with water or any other fluids, or metallic objects.
the common can cause a ground loop, and your fixture may perform erratically. Test cables with
an ohm meter to verify correct polarity and to make sure the pins are not grounded or shorted
to the shield or each other.
4. Turn on the all units' power, the units begins reset, then the unit begins working. The slave
units will react the same as the master unit.
5. The units will react to the low frequencies of music via the internal microphone. Adjust the
audio sensitivity knob on the back of the master unit to make the unit more or less sensitive in
Make sure there are no
flammable materials close to
the fixture(s) while operating.
Please prevent this light away
from electrical shock
sound active. The panel has LED indicating for sound active.
Universal DMX Operation (DMX mode)
This mode allows you to use universal DMX-512 console to operate.
When hanging this fixture, always secure it to a fastening device using a
safety cable (not provided).
1. Install the units in a suitable position (laying or appending).
2. Use standard XLR microphone cable chain your units together via the XLR connector
Power
110V 240V
Ground
on the rear of the units. For longer cable runs we suggest a terminator at the last fixture.
Always make sure that you are connecting the light to the proper voltage, as per the
specifications in this manual or on the product's sticker. Never connect the light to a
dimmer pack. Make sure that the power cable is not cracked, crimped or damaged. Ne
3. Assign a DMX address to each the unit using dipswitches, see the "DMX Address
Quick Reference Char".
Light No 1
The maximum ambient temperature (Ta) is 104 F (40 C). Do not operate the
fixture at a higher temperature. In case of a serious operating problem, stop
using this product immediately!
Light No 2
Light No 3
Light No ….
Use cleaning tissue to remove the dust absorbed on the external lenses
periodically to optimize light output.
……...
DMX Signal
1
Do not remove or break the warranty label, otherwise it void the warranty.
MASTER: SOUND/AUTO/DMX
2
SLAVE
2
SLAVE
4. Turn on the all units' power, the units begins reset, then the unit begins working.
5. Use DMX console to control your units.
Always replace with the exact same type fuse, replacement with anything
other than the specified fuse can cause fire or electric shock and damage your
unit, and will void your manufactures warranty.
There are no serviceable parts in the light. Please have all servicing and
adjustments made by a qualified service engineer.
Notes:
1. DMX console can not be used in Master-Slave operation (Sound Active or AUTO mode ).
2. There should be only one master unit in Master-Slave operation.
DMX Control
The system only accepts the DMX512 signal of international standard to control the
Don’t throw this product away just as general
trash, please dispose of this product following
the abandon electronic product regulation in your
country.
Page 2
To protect the environment,
recycle packing material
wherever possible.
system mode, the light beam ON /OFF, running direction, running speed and twinkle
speed etc.
Page 7
clockwise direction to decrease. The light diode will automatically turn off after 8
Technical Specification
seconds when the music stops.
Voltage: AC110V-130V/200V-250V, 50HZ-60HZ/ Fuse: 3A/250V
AUTO
Rated Power: 75W
Auto cycles the built-in programs without being controlled externally. It has no light OFF.
LED Light: 10W x 7pcs RGBW LED diodes
Working Modes: DMX, Sound Active, AUTO, Master-Slave
The mode allows a single unit to react to the beat of the music in the master mode.
DMX Control Channel: 4 and/or 9 channels
1. Install the units in a suitable position (laying or appending).
Advanced LED technology, Popular using in world.
2. Set dipswitch to select Sound Active or AUTO mode.
Extremely long life (rated 60,000 to 100,000 hr.)
3. Turn on the unit power, the unit begins reset, then the unit begins working.
Very low power consumption, no duty cycle runs all light.
4. The unit will react to the low frequencies of music via the internal microphone.
Super bright for indoor use.Built-in automated programs via stand alone mode by Menu Button.
Adjust the audio sensitivity knob on the back of the unit to make the unit more or less
4 Digit Digital LED Display
sensitive in sound active.The panel has LED indicating for sound active.
Lighting effects: adjustable strobe speed, color change, adjustable brightness
3 pin male & female XLR interface
Master-Slave Operation
Light body: plastic
This mode will allow you to link up to 32 units together without controller.
Working condition: indoor use only
1. Install the units in a suitable position (laying or appending).
Working environment temperature: 0
-40
2. Choose a unit to function as Master mode, set dipswitch to select Sound Active or
Cooling system: air cool
AUTO mode. The others must be set to Slave mode, set dipswitch to select Slave mode.
Item Size: 18cm*10cm
3. Use standard XLR microphone cable chain your units together via the XLR connector
Net weight: 1.1kg.
on the rear of the units. For longer cable runs we suggest a terminator at the last fixture.
Gross weight: 1.5Kg (inner box), Kg (outer box)
Cabling must have a male XLR connector on one end and a female XLR connector on the other end.
Inner box: 225*210*170(0.008m3), Outer box: 465*435*561(0.114m3), 12pcs/carton
Fixture Dimension
Cable Connectors
Cabling must have a male XLR connector on one end and a female XLR connector on the other end.
5.3cm
18cm
Caution: Do not allow contact between the common and the fixture’s chassis ground. Grounding
Page 6
14cm
10cm
Page 3
Fixture Apperance
LCD Digital Operation Details
LED bulbs
DMX IN
MENU
Description
d001---d512
Under DMX512 mode or Master/Slave mode; Under DMX512, 001---512
means the value, press Down/UP to increase or decrease the value, then press
ENTER to save the selection.
Power supply
Input
Manually color selection
C001---C255 001--255: 255 kinds of static color; Under Uoff white color Off MODE, 0--64
handle screw
Value has 64kinds of static colors, press Down/Up to increase the value.
handle screw
Microphone
rb01---rb16
power switch
ON/OFF
LCD Display
AUTO color dimmer
Value 01--16: dimmer speed, press Down/Up to change the speed.
PL01---PL16
AUTO color Pulse (ON/OFF simultaneously)
Value 01--16: pulse speed, press Down/Up to change the speed.
key menu: menu,
enter, up, enter
Sd01---Sd16
AUTO color Jumping
Value 01--16: jumping speed, press Down/Up to change the speed.
AUTO Strobe
FL01---FL16 01--16 means strobe speed level, press Down/UP to increase or decrease the
Cooling fan
DMX OUT
value, then press Enter to save the selection.
Sod1
Sound Active color Jumping
Sod2
Sound Active color strobe, No sound the light is blackout
Sod3
Sound Active color dimmer
255
Manual set the Red LED brightness
G000
255
Manual set the green LED brightness
b000
255
Manual set the Blue LED brightness
r000
LCD Digital Operation Introduction
MENU: DMX control/colors selection/
colors pulse/colors transition/ sound
control/amnual set
DOWN/UP: previous or next, increase or
decrease
Enter: confirm and save the selection
d4ch
Under DMX512 mode, it's 4 Channels
d9ch
Under DMX512 mode, it's 9 Channels
U ON
White color ON
U Off
White color Off
Press DOWN/UP to change mode
Press DOWN/UP to change mode
Function & Setting
Sound Active
The change of the light pattern is controlled by sound, that is, the rhythm of the sound
control the effect of the changing light pattern. Turning the sensitivity knob in the
clockwise direction to increase the fixture’s sensitivity to sound, the knob in the counter
Page 4
Page 5