Download What`s New 4-6.indd
Transcript
n
i
W
E
N
s
’
t
Wha
.
6
4
n
o
i
s
r
e
V
Dear ECO Community Members,
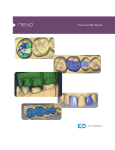
Everyone at E4D is excited to bring you the latest version of our E4D Dentist system software.
This version 4.6 software update is a direct response to your requests. I hope you’ll agree that it provides
even more capabilities and practical opportunities to use your E4D system for greater satisfaction for you,
your team, and your patients.
Your 4.6 update features bridges! Scanning, designing and milling bridges chairside.
Plus, new materials are coming out over the upcoming weeks to be able to take advantage of the advanced
software solutions, including Telio CAD from Ivoclar Vivadent (long term provisional block in 40 and 55 mm
sizes), new sizes of IPS e.max – 16 mm (longer anteriors) and 32 mm (anterior bridges) and Zirlux FC2
a full contour zirconia (single unit for now – bridge block in the works). Zirconia restorations require
additional hardware (sintering oven) for final processing but your Henry Schein/Zahn and Ivoclar Vivadent
representatives can inform you of the options.
Enjoy your E4D 4.6 experience!
Gary Severance, DDS
Chief Marketing Officer
E4D Technologies
2
E4D CAD CAM System Version 4.6
EDU1079.A
Table of Contents
Bridges ................................................................................................................................................4
Bridge Preparation........................................................................................................................4
Updated Block Recommendation Chart ......................................................................................4
Bridge Setup Tab ...........................................................................................................................5
Unlinking a Bridge .........................................................................................................................6
Bridge Scanning ............................................................................................................................6
Bridge Orientation.........................................................................................................................6
Drawing Pontic Margins................................................................................................................7
Designing the Bridge ....................................................................................................................8
Spacer Tool Settings on Bridges ..................................................................................................9
Rotating Slice Plane .....................................................................................................................9
Evaluating the Connectors ...........................................................................................................10
Milling Center Changes ......................................................................................................................11
New Icon for a Parked Job ............................................................................................................11
Zirlux FC2 Mill Maintenance ........................................................................................................11
Zirlux FC2 Scale Factor .................................................................................................................11
New Documentation Available ..........................................................................................................12
Customer Support 800.537.6070
3
Bridges
Bridge cases are unique in that they are designed as individual teeth and milled as one unit.
This document assumes familiarity with multiple restoration cases and other intermediate to advanced
topics. Refer to your User Manual for more information.
Bridge Preparation
Ensure the preparations for the abutment teeth are not angled in different directions. If one is pointed
towards the lingual and one towards the buccal, there may be problems with path of insertion and
overmilling. Cantilever and Maryland bridges are not supported.
Updated Block Recommendation Chart (Subject to Availability)
• New IPS e.max block for longer anteriors (16 mm) and an anterior bridge block (32 mm)
• Telio CAD blocks are intended for long-term provisional restorations (maximum wear of
12 months) (40 and 55 mm)
• Zirlux FC2 is full contour zirconia that can be milled with the E4D Milling Center. Zirconia requires
a sintering oven. Individual restoration (20 mm) and bridge block (55 mm - release date pending).
4
E4D CAD CAM System Version 4.6
EDU1079.A
Bridge Setup Tab
A bridge is made up of two or more restorations that are connected. On the Setup tab, select
each tooth on the anatomical model that is part of the bridge. For each tooth, you must select the
restoration type.
1. Select each tooth that is part of the bridge - the abutment(s) and the pontic(s).
2. Select the Restoration Type for each tooth. In the example below, Tooth 19 is a Pontic and the
abutment teeth are Crowns.
3. Click Link. The cursor changes to a chain symbol.
4. Click the mesial and distal teeth of the bridge. After each end of the bridge is selected, the teeth
turn purple.
The teeth are now designated as a bridge.
5. Select the first tooth in the bridge and designate the Library, Material, and Shade. The material and
shade is duplicated on the other teeth in the bridge when you click on them.
6. Select the remaining teeth in the bridge and designate the Library. Library must be chosen for each
restoration before you can continue to the Scan Tab.
Note: If Library, Material and Shade are chosen before linking the bridge. The software will
replace the Material and Shade of the remaining restorations with that of the highest tooth
number after the link.
Multiple bridges can be created on the same arch. Repeat the steps above to create another bridge.
Customer Support 800.537.6070
5
Unlinking a Bridge
If there is an error in how the bridge was linked, click Unlink and click on any teeth of the bridge in
question.
Bridge Scanning
The scanning procedure for a bridge is the same as that for a multiple restoration case. Scan the
prepped teeth, the edentulous area, and two or more unprepped neighbors to aid in design and
alignment.
Note that scanning more teeth on anterior bridges will aid in the smile design.
Bridge Orientation
Set the Orientation for each tooth tab. Good model alignment will aid Autogenesis with the design and
is important for the bridge’s Path of Insertion.
6
E4D CAD CAM System Version 4.6
EDU1079.A
Drawing Pontic Margins
Draw a margin for each tooth in the bridge.
1. Click the tooth number tab for each abutment and draw the margin on the selected tooth.
An edentulous space does not technically have a margin. The margin is drawn to aid the design
process.
2. Click Trace and designate the position and extension of the base of the pontic on the gingival tissue
to fit the appropriate contour.
Do not go too far down the curve
of the gingival tissue or you may
not be able to fit the bridge in the
block.
Customer Support 800.537.6070
7
Designing the Bridge
With any multiples case, it is generally best to start the Autogenesis process on a tooth with an existing
neighbor. In a bridge case, that means starting with the abutments.
1. Rotate to evaluate the position of the preview library tooth.
In this example, the preview tooth is high because the system is attempting to match the height of the
higher mesial data. This may result in a distorted initial proposal.
2. Resize (Alt + up/down arrows) and move (drag and drop) as needed.
3. Click Apply.
4. Repeat these steps for the other abutment.
5. Repeat these steps for the pontic(s).
8
E4D CAD CAM System Version 4.6
EDU1079.A
When you rotate the model, you will notice that the pontics have a solid base and are raised above the
gumline (0.75 mm). The gingival aspect of the pontic follows the contours of the edentulous tissue and
can be adjusted utilizing the design tools.
Note: If you are unsure whether the bridge will fit in the desired material block, skip ahead
to the Mill tab and verify that it does not say “Please reorient the restoration to fit or try
a different material.” Verify and/or change your material selection in Settings, then try
moving the sprue position. Once you are satisfied that the bridge fits in the block, return to
the Design tab to finish designing your bridge.
6. Follow the normal design workflow except for the interproximal contacts.
7. Adjust the interproximal contacts that touch unprepped teeth to the same contact strength that you
normally use.
The contacts of the bridge teeth will be fused together to form the bridge, so the actual contact
strength is not a concern, but the contact should be heavy enough to ensure a proper connection.
8. When you are satisfied with your designs, click the Mill tab.
Spacer Tool Settings on Bridges
The default Spacer Tool settings are different on bridges to account for the larger Path of Insertion.
The normal maximum for the spacer is 0.20 mm. On bridge cases, the spacer defaults to 0.20 mm
and can be increased to 0.30 mm.
A larger default margin ramp of 1 mm is used to aid in stability.
Rotating Slice Plane
The Slice Plane can now be rotated. Place the center of the Slice Plane approximately where you want
it and then hold down the Ctrl key while moving the mouse to rotate.
Customer Support 800.537.6070
9
Evaluating the Bridge
It is important to evaluate the connections on the bridge and look for possible hangups.
The sprue will be on the mesial or distal side of the bridge.
1. Click View Model to hide the model.
2. Click Sim.
When the Simulation is run, the connections between the teeth are displayed.
3. Click Slice Plane twice.
When Slice Plane is activated on a bridge mill simulation, the system measures the slice width. If
the slice is thinner than the material guidelines, the slice displays as red. It is important to slice the
simulation through the thinnest part of the connectors (yellow lines in the examples).
Posterior cases tend to have wider contacts with smaller embrasures and are unlikely to be thin.
Anterior cases have smaller contacts and larger embrasures. Any thin area should be evaluated.
4. Move the Slice Plane to a connector. If the Slice Plane needs to be rotated to slice through the
thinnest part, hold down the Ctrl key while moving the mouse to rotate.
5. Rotate the model to view the slice.
6. If the slice is red, adjust your embrasures and/or contacts and try the simulation again. Note that
when the model is hidden, the Slice Plane icon displays the mm2 area.
Minimum required thickness:
•
Zirlux FC2 - 9 mm2
•
Telio CAD - 12 mm2
•
IPS e.max - 16 mm2
7. Click View Model to activate it.
8. Click the Gingival View Control arrow to view the model from underneath.
9. Look for internal hangups (blue seen through the stone model on the axial walls or occlusal
surface). Blue around the margin is expected due to the margin ramp. If there are any hangups,
adjustments need to be made to the Spacer on the Design tab. Call Customer Support for help on your
first few cases of hangups on Bridges.
10
E4D CAD CAM System Version 4.6
EDU1079.A
Milling Center Changes
New Icon for a Parked Job
The Parked Job feature was introduced in Version 4.5. In this update, a new icon has been added to
indicate that a job has been saved.
When a job is interrupted by an error message or a manual cancellation of the job, it is saved in
Parked Job. Only the most recent job is available in Parked Job.
When a job has been saved, an icon will appear in the corner to notify you.
1. To restart the interrupted job, touch Parked Job...
Jobs interrupted by a power failure
are not parked.
Do NOT insert a new block for a
Parked Job. A new block will result
in broken tools. To restart the job
with a new block, use Pending
Jobs.
2. Touch Select.
3. Reinsert the partially milled block if it had been removed.
4. Follow the on-screen instructions.
The milling restarts from where it was cancelled.
Zirlux FC2 Mill Maintenance
It is necessary to clean the mill and change the water before milling Zirlux FC2. If the zirconia
is contaminated with other materials, it will turn green when sintered. Cleaning after milling is
recommended because the zirconia acts as a thickening agent with the water.
Zirlux FC2 Scale Factor
See the manufacturer’s Instructions for Use provided with the Zirlux FC2 blocks for processing
instructions.
Zirconia shrinks in the sintering oven. There are numbers on the side of the box that the blocks come
in. You must keep this box with the blocks. Do not mix blocks from different boxes. Each box can have
a different amount of shrinkage. The Milling Center asks for the Scale Factor before a Zirlux FC2 is
milled. The system will increase the size of the restoration according to this number. This means you
cannot test the fit of the restoration before sintering.
Customer Support 800.537.6070
11
New Documentation Available
New documentation and new videos are available on the ECO Members page of
www.e4d.com/resources.
Questions? Call E4D Customer Support 800.537.6070
or e-mail [email protected]
12
www.e4d.com
Copyright 2013. All rights reserved.
E4D CAD CAM System Version 4.6
EDU1079.A


