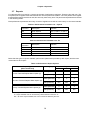
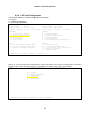
1
Loop-O9310
4E1 Fiber Optical Mux
User’s Manual
LOOP TELECOMMUNICATION INTERNATIONAL, INC.
8F, NO. 8, HSIN ANN RD.
SCIENCE-BASED INDUSTRIAL PARK
HSINCHU, TAIWAN
Tel:
+886-3-578-7696
Fax:
+886-3-578-7695
© 2011 Loop Telecommunication International, Inc. All rights reserved.
Version 19
3 Oct 2011
Loop-O is a trade mark of Loop Telecommunication International, Inc.
TABLE OF CONTENTS
1
PRODUCT DESCRIPTION ........................................................................................................... 1
1.1
Function Description ............................................................................................................. 1
1.2
Features.................................................................................................................................. 1
1.3
Application ............................................................................................................................ 1
1.4
Specifications ........................................................................................................................ 2
2
INSTALLATION............................................................................................................................ 3
2.1
Site Selection ......................................................................................................................... 3
2.2
Mechanical Installation.......................................................................................................... 4
3
OPERATION ................................................................................................................................ 11
3.1
Quick Start for Loop-O 9310............................................................................................... 11
3.1.1
Power On ........................................................................................................................ 11
3.1.2
Load Default ................................................................................................................... 11
3.2
Self Test............................................................................................................................... 11
3.3
Using Terminal .................................................................................................................... 12
3.4
Return to Default ................................................................................................................. 12
3.5
System Configuration .......................................................................................................... 13
3.5.1
Console Port.................................................................................................................... 13
3.6
Alarm................................................................................................................................... 13
3.7
Reports................................................................................................................................. 14
3.8
LED ..................................................................................................................................... 15
4
MAINTENANCE ......................................................................................................................... 17
4.1
Self-Test .............................................................................................................................. 17
4.2
Near End Loopback ............................................................................................................. 17
4.2.1
E1 Line Loopback........................................................................................................... 17
4.2.2
Optical Local Loopback.................................................................................................. 17
5
Front Panel Operation ................................................................................................................... 18
6
Terminal Operation ....................................................................................................................... 19
6.1
1-Hour Performance Report ................................................................................................ 22
6.2
24-Hour Performance Report .............................................................................................. 24
6.3
System Configuration .......................................................................................................... 26
6.3.1
System............................................................................................................................. 26
6.3.2
Board Information........................................................................................................... 28
6.3.3
SNTP Status.................................................................................................................... 29
6.3.4
V.35 Card Configuration ................................................................................................ 31
6.3.5
Bridge Report.................................................................................................................. 32
6.4
Alarm Queue ....................................................................................................................... 34
6.5
Alarm History...................................................................................................................... 35
6.6
Line Status ........................................................................................................................... 37
6.7
Password Setup.................................................................................................................... 39
6.8
System Setup ....................................................................................................................... 40
6.8.1
System............................................................................................................................. 41
6.8.2
Network Cascade ............................................................................................................ 43
6.8.3
Command Line ............................................................................................................... 44
6.8.4
Optical & E1/ T1 Port..................................................................................................... 46
6.8.5
SNTP Setup .................................................................................................................... 48
6.8.6
V.35 Card Setup.............................................................................................................. 49
6.8.7
Bridge Setup ................................................................................................................... 51
6.9
System Alarm Setup ............................................................................................................ 52
6.10
Loopback Test ..................................................................................................................... 53
6.11
File Transfer ........................................................................................................................ 54
6.11.1
Download Mainboard Firmware ................................................................................ 55
6.11.2
Upload Mainboard Firmware ..................................................................................... 58
i
6.11.3
Copy Firmware to Remote ......................................................................................... 59
6.11.4
Download Configuration............................................................................................ 61
6.11.5
Upload Configuration................................................................................................. 63
6.12
Store/ Retrieve Configuration.............................................................................................. 64
6.13
Alarm Cut Off...................................................................................................................... 67
6.14
Clear Performance Data....................................................................................................... 68
6.15
Clear Alarm Queue and History .......................................................................................... 69
6.16
Return to Default ................................................................................................................. 70
6.17
System Reset ....................................................................................................................... 71
ii
LIST OF FIGURES
Figure 1- 1 Application Illustration ..............................................................................................1
Figure 2- 1 Front Panel View (1) ................................................................................................5
Figure 2- 2 Front Panel View (2) ...............................................................................................6
Figure 2- 3 Rear Panel Views....................................................................................................7
Figure 4- 1 Loopback Block Diagram .......................................................................................17
LIST OF TABLES
Table 2-1 DB9S Console Port Pin Assignment ..........................................................................8
Table 2-2 SNMP Ethernet Port...................................................................................................8
Table 2-3 Alarm Relay Connector ..............................................................................................8
Table 2-4 Power Connector........................................................................................................8
Table 2-5 E1/ RJ48C Line Connector.........................................................................................9
Table 2-6 Default Software Configuration ..................................................................................9
Table 2-7 V.35/DB25 DTE Port Pin Definition ..........................................................................10
Table 3-1 DIP Switch Indication ...............................................................................................11
Table 3-2 Console Port Setting ................................................................................................13
Table 3-3 Alarm Default............................................................................................................13
Table 3-4 Performance Parameter List – Optical .....................................................................14
Table 3-5 Performance Parameter List - E1.............................................................................14
Table 3-6 Performance Report Options....................................................................................14
Table 3-7 LED of Main Unit without CPU .................................................................................15
Table 3-8 LED of Main Unit with CPU .....................................................................................16
iii
D
GB
Bitte führen Sie das Gerät am Ende seinerLewbensdauer den zue Verfügung
stehended Rückgabeund Sammelsystemen zu.
At the end of the product's useful life, please dispose of it at appropriate collection
points provided in your country
F
Une fois le produit en fin devie, veuillez le déposer dans un point de recyclage
approprié.
ES
Para preservar el medio ambiente, al final dela vida útil de su producto, depositelo en
los laguares destinado aello de acuerdo con la legislación vigente.
P
No final de vida útil do producto, por favor coloque no ponto de recolha apropriado.
I
Onde tutelare l'ambiente, non buttate l'apparecchio trai i normali rifiuti al termine della
sua vita utile, ma portatelo presso i punti di raccolta specifici per questi rifiuti previsti
dalla normativa vigente.
NL
Wij raden u aan het apparant aan het einde van zijn nuttige levensduur, niet bij hey
gewone huisafval te deponeren, maar op de dearvoor bestemde adressen.
DK
Når produktet er udtjent, bor det børtskaffes via de sæ rlige indsamlingssteder i
landet.
N
Ved slutten av produktets levetid bør det avhendes på en kommunal miljøstasjon eller
leveres til en elektroforhandler.
S
Lämna vänligen in produkten på lämplig återvinningsstation när den är förbrukad.
FIN
Hävitä tuote käytöiän päättyessä viemällä se asianmukaiseen keräyspisteeseen.
PL
Gdy produkt nie nadaje sie juz do dalszego uzytku, nalezy zostawic go w jednym ze
specjalnych punktów zajmujacych sie zbiórka zuzytych producktów w wybranych
miejscach na terenie kraju.
CZ
Po skončení jeho životnosti odložte prosím výrobek na přislušném sbĕrném místé
zřízeném dle předpisů ve vaší zemi.
SK
Po skončení jeho životnosti odovzdajte prosím zariadenie na príslušnom zbernom
mieste podía platných miestnych predpisov a noriem.
SLO
Ko se izdelku izteče življenska doba, ga odnesite na ustrezno zbirno mesto oziroma
ga odvrzite v skladu z veljavnimi predpisi.
GR
Στο Тέλος тης λειτουργικής Ζωής του προϊόντος παρακαλώ
Πετξτε το στα ειōικά σημεία που Παρέχονται οτη χωρα σας.
PRC
當產品使用壽命結束,請在你的國家所提供的適當地點做好回收處理
iv
Chapter 1 Product Description
1 PRODUCT DESCRIPTION
1.1 Function Description
Loop Telecom's O 9310 4E1 Fiber Optical Mux provides point-to-point transport of 4 E1 signals on optical fiber.
Loop-O 9310 offers two models: (1) SNMP manageable and (2) non-manageable.
SNMP manageable model has a master unit with CPU, used to manage a slave unit, and a slave unit without
CPU, managed by the master unit through EOC.
Basic non-manageable model without CPU provides system setup and loopback by DIP switches setting.
1.2 Features
Below lists the features for Loop-O 9310:
• Supports multiple optical fiber transmission distances
• Supports single mode and multi-mode fiber modules
• Supports BNC or RJ45 connectors for 4 E1s (manufacture option)
• Supports console, Ethernet for SNMP management
• Supports SNMP management and LoopView management
• Slave remote unit can be managed through EOC
• Non-manageable model can be configured through DIP switches
• Supports alarm relay and alarm cut off (optional)
• Supports LED indicators
1.3 Application
E1
1
:
:
4
Protection Pair (Optional)
O9310
O9310
10/ 100 M Bridge
E1
1
:
:
4
E1
1
:
:
4
10/ 100 M Bridge
O9310
O9310
10/ 100 M Bridge
E1
1
:
:
4
10/ 100 M Bridge
DTE
DTE
Figure 1- 1 Application Illustration
1
Chapter 1 Product Description
1.4 Specifications
Loop-O9310 4E1 Fiber Optical Mux Product Specifications
Optical Fiber Interface
Source
MLM Laser
Wavelength
1310 ± 50 nm, 1550 ± 40 nm
Power
-26 or -8 dBm
Receiver Sensitivity
-38 dBm at BER < 10-10
50 Km reach
NOTE: Longer or shorter, 15 to 120Km, on special order.
System Gain
Line Code
Detector Type
Fiber Type
30 dB
Scrambled NRZ
PIN-FET
Single mode
Optical Fiber Interface Characteristics
Optical Module
Single
Single
Fiber Direction
Dual uni-direction
Wavelength (nm)
1310
1310
1310
1550
1550
Single bi-direction (master)
1310/1550
Single bi-direction (slave)
1310/1550
Connector
SC (Subscriber Connector)
SC (Subscriber Connector)
FC (Fiber Connector)
SC (Subscriber Connector)
SC (Subscriber Connector)
SC (Subscriber Connector)
SC (Subscriber Connector)
Distance (km)
30
50
30
20
100
30
30
Power (dB)
20
30
20
12
40
20
20
For discussion on whether to choose uni-directonal or bi-directional fiber option, see white paper with that title.
E1 Line Interface
Number of E1 lines
Line Rate
Line Code
4
2.048 Mbps ±50 ppm
HDB3
Line Impedance
Connector
Output Signal
120Ω twisted pair, 75Ω for BNC
RJ48C, BNC
ITU G.703
Bridge
10/ 100 Mbps half/ full duplex ethernet bridging and 22Mbps operation on the HDLC port
ANSI/ IEEE Std. 802.1D MAC Bridging capabilities (without spanning tree algorithm)
Automatic MAC table learning and aging
Support VLAN and extended Ethernet frame support
DTE interface
Port Number
Data Rate
Type
1 port
Connector
DB25S
Nx64kbps (N=1~32)
Clock Mode
External, Internal, Received (Selectable)
Software-selectable V.35, X.21, RS449/V.36, RS232/V.28, EIA530 and EIA530A
Clock
Source
IInternal, Line, E1
Console
SNMP
Connector
DB9 at front panel
Electrical
RS232 interface
Protocol
Menu driven VT-100 terminal
Baud Rate
9600, 19200, 38400, 57600, 115200
Physical/Electrical
Connector
Protocol
Dimensions
216 x 55 x 285 mm. (W x H x D)
Mounting
Stand-alone
Power Source (AC)
Power Source (DC)
Power Consumption
Temperature Range
Humidity
100 to 240 Vac, 50/ 60 Hz
48Vdc : 36-72 Vdc
< 10 W
0°C to 50°C
0% - 95% RH (non-condensing)
RJ45 at front panel
Telnet
Diagnostics Test
Optical Fiber
E1 Lines
2
Local and remote loopbacks
Local and remote loopbacks
Chapter 2 Installation
2 INSTALLATION
2.1 Site Selection
The following list indicates a site selection guideline. User need to follow this guideline to select a proper
installation site.
• Location of the Loop-O 9310 unit should be part of the central office equipment layout design.
Considerations should be given to entrance cable routing.
• The installation site should provide proper room for adequate ventilation and cable routing. Reserve at
least 0.5 m at the rear of the unit for human access, cables, and air flow.
• The site should provide a stable environment. The operating area should be clean and free from extremes
of temperature, humidity, shock, and vibration.
• Relative humidity should stay between 0 and 95%.
3
Chapter 2 Installation
2.2 Mechanical Installation
Loop-O 9310 is a desktop unit, which offers two kinds of power supply: AC power supply or DC power supply,
and also offers two knod of E1 line connectors: RJ48C or BNC. The views for front panel and rear panels are
showed in the following figures. The figures 2-1 shows the Main Unit with CPU and with different daughter
board, including DTE+Bridge, Bridge, DTE, Optical+Bridge and Optical interface. All with Opitional LCD
Display.
For Main Unit without CPU, without daughter board
TM
Loop-O
FIBOMUX
OPTICAL
POWER
3
4
ALARM
1
2
OFF
PORT
PORT
1
2
ON 1
2
3
3
4
OFF
ACO
TX
RX
ON
4
5
LOOPBACK
For Main Unit without CPU, with Optical Interface
TM
Loop-O
FIBOMUX
2
RX
PORT
OFF
TX
OPTICAL
1
2
ON 1
2
3
PORT
1
POWER
3
4
ALARM
1
2
3
4
OFF
ACO
TX
RX
ON
4
5
LOOPBACK
For Main Unit with CPU, without daughter board
TM
Loop-O
FIBOMUX
ESC
ACO
PORT
OPTICAL
TX
RX
POWER
3
4
ALARM
1
2
ENTER
LINK
SNMP
For Main Unit with CPU, with DTE + Bridge Interface
TM
Loop-O
FIBOMUX
BRIDGE
ESC
DTE
ACO
PORT
OPTICAL
TX
RX
POWER
3
4
ALARM
1
2
ENTER
LINK
SNMP
4
Chapter 2 Installation
For Main Unit with CPU, with Bridge Interface
TM
Loop-O
FIBOMUX
BRIDGE
ESC
ACO
PORT
OPTICAL
TX
RX
POWER
3
4
ALARM
1
2
ENTER
LINK
SNMP
For Main Unit with CPU, with DTE Interface
TM
Loop-O
FIBOMUX
ESC
DTE
ACO
PORT
OPTICAL
TX
RX
POWER
3
4
ALARM
1
2
ENTER
LINK
SNMP
For Main Unit with CPU, with Optical + Bridge Interface
TM
Loop-O
FIBOMUX
2
BRIDGE
TX
RX
ESC
ACO
OPTICAL
PORT
1
TX
RX
POWER
3
4
ALARM
1
2
ENTER
LINK
SNMP
For Main Unit with CPU, with Optical Interface
TM
Loop-O
FIBOMUX
2
TX
RX
ESC
ACO
OPTICAL
PORT
1
TX
RX
POWER
3
4
ALARM
1
2
ENTER
LINK
SNMP
Figure 2- 1 Front Panel View (1)
The following figure shows the front panels without the optional purchased LCD display.
For Main Unit with CPU, without Optional LCD
TM
Loop-O
FIBOMUX
PORT
OPTICAL
TX
RX
POWER
3
4
ALARM
1
2
ACO
LINK
SNMP
5
Chapter 2 Installation
For Main Unit with CPU, with DTE + Bridge Interface, without Optional LCD
TM
Loop-O
FIBOMUX
BRIDGE
DTE
PORT
OPTICAL
TX
RX
POWER
3
4
ALARM
1
2
LINK
ACO
SNMP
For Main Unit with CPU, with Bridge Interface, without Optional LCD
TM
Loop-O
FIBOMUX
BRIDGE
PORT
OPTICAL
TX
RX
POWER
3
4
ALARM
1
2
LINK
ACO
SNMP
For Main Unit with CPU, with DTE Interface, without Optional LCD
TM
Loop-O
FIBOMUX
DTE
PORT
OPTICAL
TX
RX
POWER
3
4
ALARM
1
2
LINK
ACO
SNMP
For Main Unit with CPU, with Optical + Bridge Interface, without Optional LCD
TM
Loop-O
FIBOMUX
2
BRIDGE
TX
RX
OPTICAL
PORT
1
TX
RX
POWER
3
4
ALARM
1
2
LINK
ACO
SNMP
For Main Unit with CPU, with Optical Interface, without Optional LCD
TM
Loop-O
FIBOMUX
2
TX
RX
OPTICAL
PORT
1
TX
RX
POWER
3
4
ALARM
1
2
LINK
ACO
SNMP
Figure 2- 2 Front Panel View (2)
6
Chapter 2 Installation
Option for main unit with CPU only.
9600,N,8,1
CONSOLE
RELAY
NO COM NC
1
1
PORT
4
3
2
1
AC LINE, 100-240VAC,
50/60Hz, 0.15A MAX.
2
48V
0.3A
2
RX
-V +V
4
3
2
1
TX
PORT
Figure 2- 3 Rear Panel Views
Chassis Grounding
The chassis is grounded when rack mounted. However, for stand alone units or extra grounding protection
for rack mounted units, a dedicated chassis ground screw and lock washer is provided. The chassis ground
screw is located on the rear side of the unit close to the power supply.
When attaching a ground wire to the chassis ground screw, please follow these instructions.
y Use copper grounding conductors of 18 AWG.
y Conductors should not be of dissimilar metals.
y The bare conductors should be coated with anti-oxidant before crimp connections are made.
y Unplated connection surfaces, connectors, braided strap and bus bars must be bought to a bright finish
and coated with anti-oxidant before connections are made.
y Listed connectors and fastening hardware must be used.
PORT
3
2
1
7
Chapter 2 Installation
Console port can be connected via RS232 interface to a configuration device a VT100 terminal or equivalent.
Pin definition and pin connection of the console port are listed in the following table.
Table 2-1 DB9S Console Port Pin Assignment
Pin Number
1
2
3
4
5
6
7
8
9
Signal
Description
Data Carrier Detect
Receive Data
Transmit Data
Unassigned
Signal Ground
Data Set Ready
Unassigned
Clear to send
Unassigned
To DTE
To DTE
From DTE
To DTE
To DTE
Table 2-2 SNMP Ethernet Port
Pin Number
Signal
Description
1
2
3
6
7
8
TPTX+
TPTXTPRX+
TPRXChassis GND
Chassis GND
TP Driver Output
TP Receive Input
Table 2-3 Alarm Relay Connector
Pin Number
Signal
Description
1
2
3
Alarm Fuse
Alarm Fuse
Alarm Fuse
Normal Close
Common
Normal Open
Table 2-4 Power Connector
Pin Number
1
2
3
Signal
-V
+V
Description
-DC48 Volts
+DC Return
Chassis Ground
8
Chapter 2 Installation
Table 2-5 E1/ RJ48C Line Connector
Pin Number
Signal
1
2
4
5
7
8
Signal Direction
Receive Ring
Receive Tip
Transmit Ring
Transmit Tip
Unassignment
Unassignment
From E1 Network
From E1 Network
To E1 Network
To E1 Network
Table 2-6 Default Software Configuration
Configuration
Console port
Network
management
Baud rate
Data length
Stop bits
Parity
IP address
Subnet mask
Gateway IP
Trap IP
SNMP
Community
Device name
Password for ADMIN
Password for Operator
Option
9600, 19200, 38400, 57600, 115200
8-bits, 7-bits
1-bit, 2-bits
NONE, EVEN, ODD
Default
9600
8-bits
1-bit
NONE
0.0.0.0
0.0.0.0
0.0.0.0
0.0.0.0
Public
O9310
LOOP
LOOP
O9310
9
Chapter 2 Installation
Table 2-7 V.35/DB25 DTE Port Pin Definition
Pin Number
1
2
3
4
5
6
7
8
9
10
11
12
13
14
15
16
17
18
19
20
21
22
23
24
25
Signal
Cable Shield
Transmit Data
Receive Data
Request To Send
Clear To Send
Data Set Ready
Signal Ground
Data Carrier Detect
Receive Clock Return
Unassigned
External Clock Return
Transmit Clock Return
Unassigned
Transmit Data Return
Transmit Clock
Receive Data Return
Receive Clock
Local Loopback
Unassigned
Data Terminal Ready
Remote Loopback
Unassigned
Unassigned
External Clock
Test Mode
10
Source
DTE
DCE
DTE
DCE
DCE
DCE
DCE
DTE
DCE
DTE
DCE
DCE
DCE
DTE
DTE
DTE
DTE
DCE
Chapter 3 Operation
3 OPERATION
This chapter describes the Loop-O 9310 configuration options and operational functions.
3.1 Quick Start for Loop-O 9310
After installation, the user may want to familiarize with the equipment immediately. The following abbreviated
instructions will give the user a quick start.
3.1.1 Power On
Turn power on by attaching power cable at the rear of the unit. Then the LED of POWER will be lighted in
green.
3.1.2 Load Default
NOTE: For Main Unit with CPU only.
Upon initial power up you will see the following screen on your VT-100 monitor. The O9310 will automatically
load the system hardware configuration stored in the flash memory. If you prefer to load the factory default
configuration press the ACO button during the countdown (ie. 3….2…1).
';;'
;;
,, ,,,
,,, ,,
, ,, ,,,,
;;
, ;'
' ;,
,; '
';,
;;; ' ' ;,
;;
,; '
';, ,;'
'; ,
;;
';,
;;
;;
;; ;;
;;
;;
;;
;;
, ;;
;; ;;
;;
;;,
;;
;;
,; ;;
;;
;;
;;
;;' ;,,; '
,;;, ,,, ,;; ;
';, ,,; '
' ;,, ,;'
;;
;;
T e l e c o m
, ;;,
LOOP -O 931 0
Init sy ste m co nfi gur atio n.. .3. ..2. ..1 ...
3.2 Self Test
For Main Unit without CPU:
User can use DIP swtich to do O9310 self-testing. User can do E1 port loopback by adjusting the four DIP
switchs (Switch 2 to Switch 5) to be ON, and do optical port loopback by adjusting the DIP switch of optical to
be ON.
Table 3-1 DIP Switch Indication
SW No.
Function
Direction
Indication
SW1
Optical Port
È (ON)
Optical port loopback testing
SW2
E1 Port #1
È (ON)
The first E1 port loopback testing
SW3
E1 Port #2
È (ON)
The second E1 port loopback testing
SW4
E1 Port #3
È (ON)
The third E1 port loopback testing
SW5
E1 Port #4
È (ON)
The fourth E1 port loopback testing
11
Chapter 3 Operation
For Main Unit with CPU:
Users must enter the password when logging in to gain the privilege to change system configurations on the
terminal. Then key in a username and password to enter into the "Main Menu".
There are two usernames for user to log on the system. The authority for ADMIN and OPERATOR are
different. By using ADMIN, user can view and modify system configuration. By using OPERATOR, user can
view the current configuration only. Default passwords for ADMIN and OPERATOR are same: LOOP. To
change password, press "P" from the "Main Menu". To change the password for the first time, enter the default
password when prompted for the old password. See also the chapter 6 for the detail.
If the password is forgotten, the only recourse is to return to the factory setting of LOOP. To restore the factory
default configuration, press ACO key during power up. If the operation is successful, the VT100 will show
"LOAD DEFAULT CONFIGURATION". All user configuration settings will be lost.
3.3 Using Terminal
NOTE: For Main Unit with CPU only.
Management from a Telnet or Network Management System (NMS) can be effected through a LAN. Use the
DB9S console port of O9310’s rear panel to connect a VT100 terminal to configure the unit. The VT100
terminal can be a PC running a VT100 emulator software.
Upon connection, press ENTER and ESC alternately to bring the main menu into view.
To see the full menu, press O (Log On) from the "Main Menu".
To review the current configuration, press "C" (System Configuration) from the "Main Menut".
To change the current configuration, press "S" (System Setup) from the "Main Menut". Then press "A" from the
"System Setup" sub-menu to do system setup.
For more detail information, see also the chapter 6 in this manual.
3.4 Return to Default
For Main Unit without CPU:
After the unit being powered on, press ACO button to load default during the system is counting from 3 to 1.
For Main Unit with CPU:
Using VT100 to load default. Press "Y" command from the "Main Menu" to return to default.
E1-FOM
=== Mai n M enu ===
0 1:44 :24 06 /01/ 200 5
Seri al Num ber
: 00 9310
Hard war e V ersi on: Ve r.C 06/ 25/ 2005
Firm war e V ersi on: S1 .00 07/ 04/ 2005
Devi ce Nam e :
Conn ect Po rt: SUP V_P ORT
Star t T ime
: 00: 00: 05 0 6/0 1/2 005
[DIS PLA Y]
1 -> 1 Hou r Pe rf. Re port
2 -> 24 Ho ur P erf . R epor t
C -> Sy ste m Co nfi gur atio n
Q -> Al arm Que ue
H -> Al arm His tor y
I -> Li ne Stat us
[SET UP]
P -> Pa ssw ord Set up
S -> Sy ste m Se tup
M -> Sy ste m Al arm Se tup
T -> Lo opb ack Tes t
L -> Fi le Tran sfe r
V -> St ore /Ret rie ve Conf igu rat ion
[LOG ]
F -> Lo g O ff [ SET UP] ,[MI SC] Me nu
O -> Lo g O n [ SET UP] ,[MI SC] Me nu
R -> Co nne ct t o R emo te T erm ina l
[MIS C]
A -> Al arm Cut Of f
K -> Cl ear Per for man ce D ata
X -> Cl ear Ala rm Que ue a nd His tory
Y -> Re tur n to De fau lt
Z -> Sy ste m Re set
>> R etu rn to d efa ult - a re you sur e ? [Y /N]
12
Chapter 3 Operation
3.5 System Configuration
3.5.1 Console Port
The console port allows the user either to use a local VT-100 terminal or use a remote VT-100 terminal via
modem for system configuration, diagnostics, polling status reports, etc. The console port Baud rate, data bit
length, stop bit length, XON_XOFF, and parity bit length are defaulted, as shown below.
Table 3-2 Console Port Setting
Item
Fixed Setting
9600
8-Bits
1-Bits
X_OFF
NONE
Baud
Data Length
Stop Bit
XON_XOFF
Parity
3.6 Alarm
When the O 9310 reports an alarm condition, such as loss of synchronization, the ALARM will cause the LED
on the front panel to light. Each alarm can be individually enabled or disabled. The alarm types are listed in the
table as below.
Table 3-3 Alarm Default
Alarm Type
System
Optical
E1/ T1
Default
Alarm cut off
ENABLE
Protection Switch
ENABLE
Power Failed
ENABLE
Relay
ENABLE
LOF (Loss of Frame)
DISABLE
ES (Error Second)
DISABLE
SES (severely errored second)
DISABLE
UAS (Unavailable Second)
DISABLE
LOS (Loss of Signal)
DISABLE
AIS (Alarm Indication Signal)
DISABLE
BPV (Bipolar Violation)
DISABLE
ES (Error Second)
DISABLE
SES (severely errored second)
DISABLE
UAS (Unavailable Second)
DISABLE
13
Chapter 3 Operation
3.7 Reports
For Optical and E1 line receiver, O 9310 has the sets of performance registers. These are line and user. The
line performance register tracks the Ethernet line receiver performance status. The user performance register
tracks the Ethernet line receiver as well, but user may clear at any time. The performance parameters are listed
in the following tables.
Each performance parameter has ninety six sets of registers to record 24 hours history in 15 minute intervals.
Table 3-4 Performance Parameter List – Optical
Performance
Parameter
Description
Definition
ES
SES
UAS
Error Second
Severe Error Second
Unavailable Second
BPV≥1, OOF≥1, or CS≥1.
BPV ≥ 2048, or OOF ≥ 1
≥ 10 consecutive SES
Table 3-5 Performance Parameter List - E1
Performance
Parameter
ES
SES
UAS
BPV
Description
Definition
Error Second
BPV≥1, OOF≥1, or CS≥1.
Severe Error Second
BPV ≥ 2048, or OOF ≥ 1
Unavailable Second
≥ 10 consecutive SES
Bipolar Violation
Bipolar Error Count
Below lists the types of reports available, performance parameters provided by each report, and the reset
commands for each report.
Table 3-6 Performance Report Options
Report Type
Category
[Menu Command]
1-Hour Terminal Reports Menu Option [1]
24-Hour Terminal Reports Menu Option [2]
7-Day Terminal Reports Menu Option [3]
Report
ES
SES
UAS
USER [Network]
Y
Y
Y
LINE [Network]
N/C
N/C
N/C
USER [Network]
Y
Y
Y
LINE [Network]
N/C
N/C
N/C
USER [Network]
Y
Y
Y
LINE [Network]
N/C
N/C
N/C
Y = Report available and can be cleared by admin terminal command “Y”.
X = Report available and can be cleared by admin terminal command “X”.
N/C = No clear. Report available, but counts cannot be cleared by the user.
14
Chapter 3 Operation
3.8 LED
The front panel of the Loop-O 9310 has mulit-color LEDs for operation and error indications. The indication is
either off, steady on, or flashing. The following tables list each LED and its color and the meaning it represents.
For Main Unit without CPU:
Please refer to Section 2.2 Mechanical Installation to view a complete arrray of front panel drawings.
TM
Loop-O
FIBOMUX
2
RX
PORT
OPTICAL
OFF
TX
1
2
ON 1
2
3
PORT
1
POWER
3
4
ALARM
1
2
3
4
OFF
ACO
TX
RX
ON
4
5
LOOPBACK
Table 3-7 LED of Main Unit without CPU
Main Unit without CPU
LED
Color
POWER
PORT (1-4)
OPTICAL(1-2)
ALARM
Indication
Off
Power off, self-test failure
Green
Normal operation
Red
LOS (Loss of Signal)
Green
Sync
Flashing Green
Loopback testing
Red
LOS (Loss of Signal)
Green
Line in Sync
Flashing Green
Loopback testing
Flashing Amber
Receive RAI
Off
No alarm
Red
Alarm occurs
For Main Unit with CPU:
For Main Unit with CPU, with Optical Interface
TM
Loop-O
FIBOMUX
2
TX
RX
ESC
ACO
OPTICAL
PORT
1
TX
RX
POWER
3
4
ALARM
1
2
ENTER
LINK
SNMP
Please refer to Section 2.2 Mechanical Installation to view a complete arrray of front panel drawings.
15
Chapter 3 Operation
Table 3-8 LED of Main Unit with CPU
Main Unit with CPU
LED
POWER
PORT (1-4)
OPTICAL(1-2)
ALARM
Color
Indication
Off
Power off, self-test failure
Green
Normal operation
Red
LOS (Loss of Signal)
Green
Sync
Flashing Green
Loopback testing
Red
LOS (Loss of Signal)
Green
Line in Sync
Flashing Green
Loopback testing
Flashing Amber
Receive RAI
Off
No alarm
Red
Alarm occurs
No linking
Off
LINK
Green
A valid network connection on the RJ-45
SNMP port.
Link/Act
Green
Link
(Left LED)
Flashing Green
Act
10/100
Off
10 Mbps
(Right LED)
Green
100 Mbps
Bridge
16
Chapter 4 Maintenance
4 MAINTENANCE
4.1 Self-Test
O9310 provides DIP swtich for users to do self-testing. For E1 ports' loopback testing, switch DIP Switch 2, 3,
4, or 5 to ON; For optical port loopback testing, switch DIP Switch 1 to ON.
4.2 Near End Loopback
The near end loopbacks such as analogic local loopback, digital local loopback, and line loopback are
activated by the Loop-O 9310. The loopbacks are at the near end facility. The following paragraph describes
each loopback in detail.
4.2.1 E1 Line Loopback
Line loopback is illustrated in Figure 4-1. The incoming DS1 line signal is loopback to the outgoing DS1 signal
before the DS1 transceiver framer. This loopback is used to isolate the local equipment from a troubled DS1
transmission line. Line loopback test can be activated from the terminal.
4.2.2 Optical Local Loopback
Optical local loopback is illustrated in Figure 4-1. The outgoing optical signal is looped back through the optical
PCM transceiver. All its channels are looped back to the receiver path. This loopback test is activated by the
test command.
E1#1 to #4
1
Optical
Mux
1
Line Loopback (LLB)
2
Optical Payload Loopback
Optical
2
2
E1#1 to #n
Mux
Figure 4- 1 Loopback Block Diagram
17
1
Chapter 5 Front Panel Operation
5 Front Panel Operation
The LCD operation is available only when the LCD option is purchased.
18
Chapter 6 Terminal Operation
6 Terminal Operation
Loop-O 9310 provides comprehensive and enhanced configuration and test capability through the console
port. A VT-100 type terminal or a modem can be connected to the console port on the front of the Loop-O
9310. By use of single-character commands and arrow keys, the Loop-O 9310 can be configured and tested.
The single-character commands are not case sensitive. On each screen, the available commands and the
configurable fields are highlighted.
When the Loop-O 9310 is powered on, the screen will show as below. Press O to log into the Controller Menu.
If the password is enabled (Path: Main Menu > (P) Password Setup), users have to key in the password to log
in. The default password is LOOP. To change password, press P from the Controller Menu. See also the
following sections for the detail. All commands are detailed in the VT-100 Controller Menu Tree illustrations
below.
VT-100
Main Menu
[DISPLAY]
1 -> 1 Hour Perf. Report
2 -> 24 Hour Perf. Report
C -> System Configuration
A -> System
B -> Board Information
S -> SNTP Status
V -> V.35 Card
R -> Bridge Report
Q -> Alarm Queue
H -> Alarm History
I -> Line Status
[SETUP]
P -> Password Setup
S -> System Setup
A -> System
B -> Network Cascade
C -> Command Line
D -> Optical & E1/T1 Port
S -> SNTP Setup
V -> V.35 Card
R -> Bridge Setup
M -> System Alarm Setup
T -> Loopback Test
L -> File Transfer
V -> Store/Retrieve Configuration
[LOG]
F -> Log Off [SETUP], [MISC] Menu
O -> Log On [SETUP], [MISC] Menu
R -> Connect to Remote Terminal
Figure 6- 1 VT-100 Main Menu Tree Overview
19
[MISC]
A -> Alarm Cut Off
K -> Clear Performance Data
A-> Clear Local
B-> Clear Remote
X -> Clear Alarm Queue and History
Y -> Return to Default
Z -> System Reset
Chapter 6 Terminal Operation
6.1
Main Menu / Log On / Log Off
At initial startup the Main Menu will appear as shown below. The main menu appears like following screen after
the O9310 is powered on.
E1-FOM
=== Main Menu ===
01:21:30 01/01/2008
Serial Number
: 118835
Hardware Version: Ver.F 07/2005
Firmware Version: V1.02.07 04/09/2008
Device Name : LOOP O9310
Connect Port: SUPV_PORT
Start Time : 00:00:05 01/01/2008
[DISPLAY]
1 -> 1 Hour Perf. Report
2 -> 24 Hour Perf. Report
C -> System Configuration
Q -> Alarm Queue
H -> Alarm History
I -> Line Status
[SETUP]
[LOG]
F -> Log Off [SETUP],[MISC] Menu
O -> Log On [SETUP],[MISC] Menu
R -> Connect to Remote Terminal
[MISC]
>>SPACE bar to refresh or enter a command ===>
Press O to log on. A full Main Menu will appear as shown below.
E1-F OM
=== Mai n M enu ===
0 1:21 :30 01 /01/ 200 8
Seri al Num ber
: 11 8835
Hard war e V ersi on: Ve r.F 07/ 200 5
Firm war e V ersi on: V1 .02. 07 04/ 09/2 008
Devi ce Nam e : LOO P O 9310
Conn ect Po rt: SUP V_P ORT
Star t T ime
: 00: 00: 05 0 1/0 1/2 008
[DIS PLA Y]
1 -> 1 Hou r Pe rf. Re port
2 -> 24 Ho ur P erf . R epor t
C -> Sy ste m Co nfi gur atio n
Q -> Al arm Que ue
H -> Al arm His tor y
I -> Li ne Stat us
[SET UP]
P -> Pa ssw ord Set up
S -> Sy ste m Se tup
M -> Sy ste m Al arm Se tup
T -> Lo opb ack Tes t
L -> Fi le Tran sfe r
V -> St ore /Ret rie ve Conf igu rat ion
[LOG ]
F -> Lo g O ff [ SET UP] ,[MI SC] Me nu
O -> Lo g O n [ SET UP] ,[MI SC] Me nu
R -> Co nne ct t o R emo te T erm ina l
[MIS C]
A -> Al arm Cut Of f
K -> Cl ear Per for man ce D ata
X -> Cl ear Ala rm Que ue a nd His tory
Y -> Re tur n to De fau lt
Z -> Sy ste m Re set
>>SP ACE ba r to re fre sh o r e nte r a com man d == =>
20
Chapter 6 Terminal Operation
21
Chapter 6 Terminal Operation
To logoff, press F.
E1-FOM
=== Main Menu ===
01:21:30 01/01/2008
Serial Number
: 118835
Hardware Version: Ver.F 07/2005
Firmware Version: V1.02.07 04/09/2008
Device Name : LOOP O9310
Connect Port: SUPV_PORT
Start Time : 00:00:05 01/01/2008
[DISPLAY]
1 -> 1 Hour Perf. Report
2 -> 24 Hour Perf. Report
C -> System Configuration
Q -> Alarm Queue
H -> Alarm History
I -> Line Status
[SETUP]
[LOG]
F -> Log Off [SETUP],[MISC] Menu
O -> Log On [SETUP],[MISC] Menu
R -> Connect to Remote Terminal
[MISC]
>>SPACE bar to refresh or enter a command ===>
6.1 1-Hour Performance Report
This menu is used to display one-hour performance report about user-type or line type of optical port
(Optical#1) and DS1 ports (DS1#01 to DS1#04).
The full menu path for 1 Hour Perf. Report is as follows:
O > Log On
1 > 1 Hour Perf. Report
E1-F OM
=== Mai n M enu ===
0 1:21 :30 01 /01/ 200 8
Seri al Num ber
: 11 8835
Hard war e V ersi on: Ve r.F 07/ 200 5
Firm war e V ersi on: V1 .02. 07 04/ 09/2 008
Devi ce Nam e : LOO P O 9310
Conn ect Po rt: SUP V_P ORT
Star t T ime
: 00: 00: 05 0 1/0 1/2 008
[DIS PLA Y]
1 -> 1 Hou r Pe rf. Re port
2 -> 24 Ho ur P erf . R epor t
C -> Sy ste m Co nfi gur atio n
Q -> Al arm Que ue
H -> Al arm His tor y
I -> Li ne Stat us
[SET UP]
P -> Pa ssw ord Set up
S -> Sy ste m Se tup
M -> Sy ste m Al arm Se tup
T -> Lo opb ack Tes t
L -> Fi le Tran sfe r
V -> St ore /Ret rie ve Conf igu rat ion
[LOG ]
F -> Lo g O ff [ SET UP] ,[MI SC] Me nu
O -> Lo g O n [ SET UP] ,[MI SC] Me nu
R -> Co nne ct t o R emo te T erm ina l
[MIS C]
A -> Al arm Cut Of f
K -> Cl ear Per for man ce D ata
X -> Cl ear Ala rm Que ue a nd His tory
Y -> Re tur n to De fau lt
Z -> Sy ste m Re set
>>SP ACE ba r to re fre sh o r e nte r a com man d == =>
22
Chapter 6 Terminal Operation
Press 1 from the Main menu to access the 15min-1day performance report.
E1-F OM
== = 1 Ho ur P erf orm ance Re por t == =
ARRO W K EYS : CU RSO R M OVE, TA B: ROLL OP TIO NS
0 0:42 :54 06 /01/ 200 5
Perf orm anc e Po rt : O ptic al# 1
Perf orm anc e Ty pe : U SER
<< P res s E SC k ey to abor t, ENT ER k ey to show Pe rf. Rep ort >>
For user type of optical port:
E1-F OM
Opti cal #1 USER
== = 1 Ho ur P erf orm ance Re por t == =
0 0:50 :09 06 /01/ 200 5
-- V ali d S econ ds in Curr ent 15 -Min In ter val : 3 09 seco nds
( ES)
(SE S)
( UAS)
C urr ent 15- Min In terv al
:
0
0
309
1 st Nea rest 15 -Mi n In ter val :
0
0
900
2 nd Nea rest 15 -Mi n In ter val :
0
0
900
3 rd Nea rest 15 -Mi n In ter val :
0
0
898
4 th Nea rest 15 -Mi n In ter val : - --- --- -- ----- V ali d 1 5-Mi n I nte rval s i n C urre nt 24- Hour In ter val: 3
( ES)
(SE S)
( UAS)
C urr ent 24- Hou r I nter val
:
0
0
2698
0 5/3 1/2 005
: - --- --- -- ---0 5/3 0/2 005
: - --- --- -- ---0 5/2 9/2 005
: - --- --- -- ---0 5/2 8/2 005
: - --- --- -- ---0 5/2 7/2 005
: - --- --- -- ---0 5/2 6/2 005
: - --- --- -- ---0 5/2 5/2 005
: - --- --- -- ----
<< E SC key to ret urn to pre vio us m enu , S PACE ba r t o re fre sh >>
23
Chapter 6 Terminal Operation
For line type of DS1#01 port:
E1-F OM
DS1# 01
0 0:51 :36 06 /01/ 200 5
LINE
-- V ali d S econ ds in Curr ent 15 -Min In ter val : 3 96 seco nds
( ES)
(SE S)
( UAS)
(BP V)
C urr ent 15- Min In terv al
:
0
0
396
0
1 st Nea rest 15 -Mi n In ter val :
0
0
900
0
2 nd Nea rest 15 -Mi n In ter val :
0
0
900
0
3 rd Nea rest 15 -Mi n In ter val :
0
0
898
0
4 th Nea rest 15 -Mi n In ter val : - --- --- -- ------ --- V ali d 1 5-Mi n I nte rval s i n C urre nt 24- Hour In ter val: 3
( ES)
(SE S)
( UAS)
(BP V)
C urr ent 24- Hou r I nter val
:
0
0
2698
0
0 5/3 1/2 005
: - --- --- -- ------ ---0 5/3 0/2 005
: - --- --- -- ------ ---0 5/2 9/2 005
: - --- --- -- ------ ---0 5/2 8/2 005
: - --- --- -- ------ ---0 5/2 7/2 005
: - --- --- -- ------ ---0 5/2 6/2 005
: - --- --- -- ------ ---0 5/2 5/2 005
: - --- --- -- ------ ----
<< E SC key to ret urn to pre vio us m enu , S PACE ba r t o re fre sh >>
6.2 24-Hour Performance Report
This menu is used to display 24-hour performance report about user-type or line type of optical port (Optical#1)
and DS1 ports (DS1#01 to DS1#04). Users are also allowed to select performance parameters (ES, SES, and
UAS).
The full menu path for 24 Hour Perf. Report is as follows:
O > Log On
2 > 24 Hour Perf. Report
E1-F OM
=== Mai n M enu ===
0 1:21 :30 01 /01/ 200 8
Seri al Num ber
: 11 8835
Hard war e V ersi on: Ve r.F 07/ 200 5
Firm war e V ersi on: V1 .02. 07 04/ 09/2 008
Devi ce Nam e : LOO P O 9310
Conn ect Po rt: SUP V_P ORT
Star t T ime
: 00: 00: 05 0 1/0 1/2 008
[DIS PLA Y]
1 -> 1 Hou r Pe rf. Re port
2 -> 24 Ho ur P erf . R epor t
C -> Sy ste m Co nfi gur atio n
Q -> Al arm Que ue
H -> Al arm His tor y
I -> Li ne Stat us
[SET UP]
P -> Pa ssw ord Set up
S -> Sy ste m Se tup
M -> Sy ste m Al arm Se tup
T -> Lo opb ack Tes t
L -> Fi le Tran sfe r
V -> St ore /Ret rie ve Conf igu rat ion
[LOG ]
F -> Lo g O ff [ SET UP] ,[MI SC] Me nu
O -> Lo g O n [ SET UP] ,[MI SC] Me nu
R -> Co nne ct t o R emo te T erm ina l
[MIS C]
A -> Al arm Cut Of f
K -> Cl ear Per for man ce D ata
X -> Cl ear Ala rm Que ue a nd His tory
Y -> Re tur n to De fau lt
Z -> Sy ste m Re set
>>SP ACE ba r to re fre sh o r e nte r a com man d == =>
24
Chapter 6 Terminal Operation
Press "2" from the "Main Menu", and use TAB key to select a desired option.
E1-F OM
=== 24 Ho urs Per for manc e R epo rt = ==
ARRO W K EYS : CU RSO R M OVE, TA B: ROLL OP TIO NS
0 0:52 :32 06 /01/ 200 5
Perf orm anc e Po rt : O ptic al# 1
Perf orm anc e Ty pe : L INE
Perf orm anc e Re gs : E S
<< P res s E SC k ey to abor t, ENT ER k ey to show Pe rf. Rep ort >>
Press ENTER from the above menu to display performance report as below.
E1-F OM
=== 24 Ho urs Per for manc e R epo rt = ==
Opti cal #1 LINE
-- V ali d S econ ds in Curr ent 15 -Min In ter val : 5 27 seco nds
-- V ali d 1 5-Mi n I nte rval s i n C urre nt 24- Hour In ter val: 3
( ES)
(SE S)
( UAS)
C urr ent 15- Min In terv al
:
0
0
527
C urr ent 24- Hou r I nter val
:
0
0
2698
-- L INE ,
0 1-0 8
0 9-1 6
1 7-2 4
2 5-3 2
3 3-4 0
4 1-4 8
4 9-5 6
5 7-6 4
6 5-7 2
7 3-8 0
8 1-8 8
8 9-9 6
E S , Las t 9 6 15 -Mi n
>
0
0
0
> --- -- --- -- - --- > --- -- --- -- - --- > --- -- --- -- - --- > --- -- --- -- - --- > --- -- --- -- - --- > --- -- --- -- - --- > --- -- --- -- - --- > --- -- --- -- - --- > --- -- --- -- - --- > --- -- --- -- - --- > --- -- --- -- - --- -
I nter val :
- ---- -- --- ---- -- --- ---- -- --- ---- -- --- ---- -- --- ---- -- --- ---- -- --- ---- -- --- ---- -- --- ---- -- --- ---- -- --- ---- -- ---
--- ---- ---- ---- ---- ---- ---- ---- ---- ---- ---- ---- --
--- ---- ---- ---- ---- ---- ---- ---- ---- ---- ---- ---- --
0 0:53 :47 06 /01/ 200 5
- --- - --- - --- - --- - --- - --- - --- - --- - --- - --- - --- - --- -
<< E SC key to ret urn to pre vio us m enu , S PACE ba r t o re fre sh >>
25
Chapter 6 Terminal Operation
6.3 System Configuration
Press "C" from the "Main Menu" to display the current system setting. This menu provides sub-menus to
display the current status for (1) system, (2) board information, and (3) SNTP (Simple Network Time Protocol).
E1-F OM
== = S yste m C onf igur ati on ===
A
B
S
V
R
->
->
->
->
->
0 0:56 :15 06 /01/ 200 5
Sys tem
Boa rd Inf orma tio n
SNT P s tat us
V.3 5 C ard
Bri dge Re port
<< P res s E SC k ey to retu rn to Main Me nu or e nte r a com man d > >
6.3.1 System
The full menu path for System is as follows:
O > Log On
C > System Configuration
A > System
E1-F OM
=== Mai n M enu ===
0 1:21 :30 01 /01/ 200 8
Seri al Num ber
: 11 8835
Hard war e V ersi on: Ve r.F 07/ 200 5
Firm war e V ersi on: V1 .02. 07 04/ 09/2 008
Devi ce Nam e : LOO P O 9310
Conn ect Po rt: SUP V_P ORT
Star t T ime
: 00: 00: 05 0 1/0 1/2 008
[DIS PLA Y]
1 -> 1 Hou r Pe rf. Re port
2 -> 24 Ho ur P erf . R epor t
C -> Sy ste m Co nfi gur atio n
Q -> Al arm Que ue
H -> Al arm His tor y
I -> Li ne Stat us
[SET UP]
P -> Pa ssw ord Set up
S -> Sy ste m Se tup
M -> Sy ste m Al arm Se tup
T -> Lo opb ack Tes t
L -> Fi le Tran sfe r
V -> St ore /Ret rie ve Conf igu rat ion
[LOG ]
F -> Lo g O ff [ SET UP] ,[MI SC] Me nu
O -> Lo g O n [ SET UP] ,[MI SC] Me nu
R -> Co nne ct t o R emo te T erm ina l
[MIS C]
A -> Al arm Cut Of f
K -> Cl ear Per for man ce D ata
X -> Cl ear Ala rm Que ue a nd His tory
Y -> Re tur n to De fau lt
Z -> Sy ste m Re set
>>SP ACE ba r to re fre sh o r e nte r a com man d == =>
26
Chapter 6 Terminal Operation
Press "A" from the "System Configuration" to display the current status for system and console port.
E1-FOM
=== System Configuration ===
A
B
S
V
R
->
->
->
->
->
04:15:14 01/01/2008
System
Board Information
SNTP Status
V.35 Card
Bridge Report
<< Press ESC key to return to Main Menu or enter a command >>
The screen for System Configuration will show as below.
E1-F OM
== = S yste m C onf igur ati on ===
[Sys tem ]
IP I nte rfa ce
:
IP A ddr ess
:
Subn et Mas k
:
Trap IP Ad dres s:
Devi ce Nam e
:
Syst em Loc atio n:
ETH ERNE T_P ORT
010 .002 .01 2.0 50
255 .255 .00 0.0 00
255 .255 .25 5.2 55
0 0:56 :28 06 /01/ 200 5
Gate way IP
: 010 .002 .25 4.2 54
Comm uni ty Name : pub lic
Syst em Con tact :
[CON SOL E p ort]
Baud Ra te
Data Le ngt h
Stop Bi t
Pari ty
:
:
:
:
960 0
8-B its
1-B it
NON E
<< E SC key to ret urn to pre vio us m enu , S PACE ba r t o re fre sh >>
27
Chapter 6 Terminal Operation
6.3.2 Board Information
The full menu path for Board Information is as follows:
O > Log On
C > System Configuration
B > Board Information
E1-F OM
=== Mai n M enu ===
0 1:21 :30 01 /01/ 200 8
Seri al Num ber
: 11 8835
Hard war e V ersi on: Ve r.F 07/ 200 5
Firm war e V ersi on: V1 .02. 07 04/ 09/2 008
Devi ce Nam e : LOO P O 9310
Conn ect Po rt: SUP V_P ORT
Star t T ime
: 00: 00: 05 0 1/0 1/2 008
[DIS PLA Y]
1 -> 1 Hou r Pe rf. Re port
2 -> 24 Ho ur P erf . R epor t
C -> Sy ste m Co nfi gur atio n
Q -> Al arm Que ue
H -> Al arm His tor y
I -> Li ne Stat us
[SET UP]
P -> Pa ssw ord Set up
S -> Sy ste m Se tup
M -> Sy ste m Al arm Se tup
T -> Lo opb ack Tes t
L -> Fi le Tran sfe r
V -> St ore /Ret rie ve Conf igu rat ion
[LOG ]
F -> Lo g O ff [ SET UP] ,[MI SC] Me nu
O -> Lo g O n [ SET UP] ,[MI SC] Me nu
R -> Co nne ct t o R emo te T erm ina l
[MIS C]
A -> Al arm Cut Of f
K -> Cl ear Per for man ce D ata
X -> Cl ear Ala rm Que ue a nd His tory
Y -> Re tur n to De fau lt
Z -> Sy ste m Re set
>>SP ACE ba r to re fre sh o r e nte r a com man d == =>
Press "B" from the "System Configuration" to display the current board information.
E1-FOM
=== System Configuration ===
A
B
S
V
R
->
->
->
->
->
04:15:14 01/01/2008
System
Board Information
SNTP Status
V.35 Card
Bridge Report
<< Press ESC key to return to Main Menu or enter a command >>
28
Chapter 6 Terminal Operation
The screen for Board Information will show as below.
E1-F OM
= == Boar d I nfo rmat ion == =
Numb er of E1 P ort s
Back pla ce
V35 Car d
V35 Con nec tor
V35 Bri dge
:
:
:
:
:
4
No t
No t
No t
No t
[OPT ICA L M ODUL E]
Opti cal Mo de
Numb er of Port s
Conn ect or Type
Opti cal Wa vele ngt h
:
:
:
:
Mu lti Mo de
1
SC Du al Fibe r
13 10n m
0 0:56 :48 06 /01/ 200 5
E xis t
E xis t
E xis t
E xis t
<< E SC key to ret urn to pre vio us m enu , S PACE ba r t o re fre sh >>
6.3.3 SNTP Status
The full menu path for SNTP Status is as follows:
O > Log On
C > System Configuration
C > SNTP Status
E1-F OM
=== Mai n M enu ===
0 1:21 :30 01 /01/ 200 8
Seri al Num ber
: 11 8835
Hard war e V ersi on: Ve r.F 07/ 200 5
Firm war e V ersi on: V1 .02. 07 04/ 09/2 008
Devi ce Nam e : LOO P O 9310
Conn ect Po rt: SUP V_P ORT
Star t T ime
: 00: 00: 05 0 1/0 1/2 008
[DIS PLA Y]
1 -> 1 Hou r Pe rf. Re port
2 -> 24 Ho ur P erf . R epor t
C -> Sy ste m Co nfi gur atio n
Q -> Al arm Que ue
H -> Al arm His tor y
I -> Li ne Stat us
[SET UP]
P -> Pa ssw ord Set up
S -> Sy ste m Se tup
M -> Sy ste m Al arm Se tup
T -> Lo opb ack Tes t
L -> Fi le Tran sfe r
V -> St ore /Ret rie ve Conf igu rat ion
[LOG ]
F -> Lo g O ff [ SET UP] ,[MI SC] Me nu
O -> Lo g O n [ SET UP] ,[MI SC] Me nu
R -> Co nne ct t o R emo te T erm ina l
[MIS C]
A -> Al arm Cut Of f
K -> Cl ear Per for man ce D ata
X -> Cl ear Ala rm Que ue a nd His tory
Y -> Re tur n to De fau lt
Z -> Sy ste m Re set
>>SP ACE ba r to re fre sh o r e nte r a com man d == =>
29
Chapter 6 Terminal Operation
Press "C" from the "System Configuration" and then press “S” to display SNTP Status.
E1-FOM
=== System Configuration ===
A
B
S
V
R
->
->
->
->
->
04:15:14 01/01/2008
System
Board Information
SNTP Status
V.35 Card
Bridge Report
<< Press ESC key to return to Main Menu or enter a command >>
The screen for SNTP Status will show as below.
E1-F OM
= == S NTP st atus == =
0 0:57 :12 06 /01/ 200 5
SNTP se rve r 1 : 0 00. 000. 000 .00 0
SNTP se rve r 2 : 0 00. 000. 000 .00 0
SNTP ti mez one : + 0
Curr ent SN TP s erv er : 00 0.0 00. 000. 000
Last up dat e ti me at : 00 :00 :00 #00/ 00/ UU0 0
<< E SC key to ret urn to pre vio us m enu , S PACE ba r t o re fre sh >>
30
Chapter 6 Terminal Operation
6.3.4 V.35 Card Configuration
The full menu path for V.35 Card Configuration is as follows:
O > Log On
C > System Configuration
V > V.35 Card Configuration
E1-F OM
=== Mai n M enu ===
0 1:21 :30 01 /01/ 200 8
Seri al Num ber
: 11 8835
Hard war e V ersi on: Ve r.F 07/ 200 5
Firm war e V ersi on: V1 .02. 07 04/ 09/2 008
Devi ce Nam e : LOO P O 9310
Conn ect Po rt: SUP V_P ORT
Star t T ime
: 00: 00: 05 0 1/0 1/2 008
[DIS PLA Y]
1 -> 1 Hou r Pe rf. Re port
2 -> 24 Ho ur P erf . R epor t
C -> Sy ste m Co nfi gur atio n
Q -> Al arm Que ue
H -> Al arm His tor y
I -> Li ne Stat us
[SET UP]
P -> Pa ssw ord Set up
S -> Sy ste m Se tup
M -> Sy ste m Al arm Se tup
T -> Lo opb ack Tes t
L -> Fi le Tran sfe r
V -> St ore /Ret rie ve Conf igu rat ion
[LOG ]
F -> Lo g O ff [ SET UP] ,[MI SC] Me nu
O -> Lo g O n [ SET UP] ,[MI SC] Me nu
R -> Co nne ct t o R emo te T erm ina l
[MIS C]
A -> Al arm Cut Of f
K -> Cl ear Per for man ce D ata
X -> Cl ear Ala rm Que ue a nd His tory
Y -> Re tur n to De fau lt
Z -> Sy ste m Re set
>>SP ACE ba r to re fre sh o r e nte r a com man d == =>
Press “V” from the System Configuration menu to display V.35 system configuration. See also
below screen. Note that this menu is available only when V.35 card is purchased.
E1-FOM
=== System Configuration ===
A
B
S
V
R
->
->
->
->
->
04:15:14 01/01/2008
System
Board Information
SNTP Status
V.35 Card
Bridge Report
<< Press ESC key to return to Main Menu or enter a command >>
31
Chapter 6 Terminal Operation
The screen for V.35 Card will show as below.
E1-F OM
=== V.3 5 C ard ===
Mode
: DT E
Inte rfa ce
Chan nel
ClkS rc
TTM
DCD
CTS
DSR
TM
RI
RTS
DTR
RL
LL
:
:
:
:
:
:
:
:
:
:
:
:
:
0 0:05 :54 06 /01/ 200 5
No tUs ed
un fra me
In ter nal
OF F
OF F
ON
ON
ON
ON
OF F
OF F
OF F
No t S upp ort
<< E SC key to ret urn to pre vio us m enu , S PACE ba r t o re fre sh >>
6.3.5 Bridge Report
The full menu path for Bridge Report is as follows:
O > Log On
C > System Configuration
R > Bridge Report
E1-F OM
=== Mai n M enu ===
0 1:21 :30 01 /01/ 200 8
Seri al Num ber
: 11 8835
Hard war e V ersi on: Ve r.F 07/ 200 5
Firm war e V ersi on: V1 .02. 07 04/ 09/2 008
Devi ce Nam e : LOO P O 9310
Conn ect Po rt: SUP V_P ORT
Star t T ime
: 00: 00: 05 0 1/0 1/2 008
[DIS PLA Y]
1 -> 1 Hou r Pe rf. Re port
2 -> 24 Ho ur P erf . R epor t
C -> Sy ste m Co nfi gur atio n
Q -> Al arm Que ue
H -> Al arm His tor y
I -> Li ne Stat us
[SET UP]
P -> Pa ssw ord Set up
S -> Sy ste m Se tup
M -> Sy ste m Al arm Se tup
T -> Lo opb ack Tes t
L -> Fi le Tran sfe r
V -> St ore /Ret rie ve Conf igu rat ion
[LOG ]
F -> Lo g O ff [ SET UP] ,[MI SC] Me nu
O -> Lo g O n [ SET UP] ,[MI SC] Me nu
R -> Co nne ct t o R emo te T erm ina l
[MIS C]
A -> Al arm Cut Of f
K -> Cl ear Per for man ce D ata
X -> Cl ear Ala rm Que ue a nd His tory
Y -> Re tur n to De fau lt
Z -> Sy ste m Re set
>>SP ACE ba r to re fre sh o r e nte r a com man d == =>
32
Chapter 6 Terminal Operation
Press “R” from the System Configuration menu to display bridge system configuration.
Note that this menu is available only when Bridge card is purchased.
E1-FOM
=== System Configuration ===
A
B
S
V
R
->
->
->
->
->
04:15:14 01/01/2008
System
Board Information
SNTP Status
V.35 Card
Bridge Report
<< Press ESC key to return to Main Menu or enter a command >>
The screen for Bridge Report will show as below.
E1-F OM
== = Br idg e R epor t = ==
0 0:41 :56 06 /02/ 200 8
= Et her net Int erf ace Sta tus =
Link Al ive
: Ye s
Auto Ne got iati on
: EN ABL E
Spee d
: 10 0 M bps
Dupl ex Mod e
: Fu ll
Agin g T ime r
: 30 0 S ec
MAC Lea rni ng
: EN ABL E
<< E SC key to ret urn to pre vio us m enu , S PACE ba r t o re fre sh >>
33
Chapter 6 Terminal Operation
6.4 Alarm Queue
The full menu path for Alarm Queue is as follows:
O > Log On
Q > Alarm Queue
E1-F OM
=== Mai n M enu ===
0 1:21 :30 01 /01/ 200 8
Seri al Num ber
: 11 8835
Hard war e V ersi on: Ve r.F 07/ 200 5
Firm war e V ersi on: V1 .02. 07 04/ 09/2 008
Devi ce Nam e : LOO P O 9310
Conn ect Po rt: SUP V_P ORT
Star t T ime
: 00: 00: 05 0 1/0 1/2 008
[DIS PLA Y]
1 -> 1 Hou r Pe rf. Re port
2 -> 24 Ho ur P erf . R epor t
C -> Sy ste m Co nfi gur atio n
Q -> Al arm Que ue
H -> Al arm His tor y
I -> Li ne Stat us
[SET UP]
P -> Pa ssw ord Set up
S -> Sy ste m Se tup
M -> Sy ste m Al arm Se tup
T -> Lo opb ack Tes t
L -> Fi le Tran sfe r
V -> St ore /Ret rie ve Conf igu rat ion
[LOG ]
F -> Lo g O ff [ SET UP] ,[MI SC] Me nu
O -> Lo g O n [ SET UP] ,[MI SC] Me nu
R -> Co nne ct t o R emo te T erm ina l
[MIS C]
A -> Al arm Cut Of f
K -> Cl ear Per for man ce D ata
X -> Cl ear Ala rm Que ue a nd His tory
Y -> Re tur n to De fau lt
Z -> Sy ste m Re set
>>SP ACE ba r to re fre sh o r e nte r a com man d == =>
To display alarm queue, press "Q" from the "Main Menu". Then the system will show up a summary of alarm
queue as below.
E1-F OM
1 -2 -3 -4 -5 -6 -7 -8 -9 --
E1- 2
E1- 1
E1- 3
E1- 3
E1- 3
E1- 2
E1- 2
E1- 1
E1- 1
:
:
:
:
:
:
:
:
:
AIS ,
AIS ,
AIS ,
ES,
BPV ,
ES,
BPV ,
ES,
BPV ,
== = A larm Qu eue Sum mar y = ==
L ine- --- --- ---- --- --- ---- --- 22: 03:0 3
L ine- --- --- ---- --- --- ---- --- 22: 03:0 3
L ine- --- --- ---- --- --- ---- --- 22: 03:0 0
L ine- --- --- ---- --- --- ---- --- 22: 02:4 9
L ine- --- --- ---- --- --- ---- --- 22: 02:4 9
L ine- --- --- ---- --- --- ---- --- 22: 02:4 9
L ine- --- --- ---- --- --- ---- --- 22: 02:4 9
L ine- --- --- ---- --- --- ---- --- 22: 02:4 9
L ine- --- --- ---- --- --- ---- --- 22: 02:4 9
2 2:03 :09 07 /09/ 200 5
0 7/0 9/20 05
0 7/0 9/20 05
0 7/0 9/20 05
0 7/0 9/20 05
0 7/0 9/20 05
0 7/0 9/20 05
0 7/0 9/20 05
0 7/0 9/20 05
0 7/0 9/20 05
<< S PAC E b ar t o r efr esh or ESC key re tur n to ma in menu >>
34
Chapter 6 Terminal Operation
6.5 Alarm History
The full menu path for Alarm History is as follows:
O > Log On
H > Alarm History
E1-F OM
=== Mai n M enu ===
0 1:21 :30 01 /01/ 200 8
Seri al Num ber
: 11 8835
Hard war e V ersi on: Ve r.F 07/ 200 5
Firm war e V ersi on: V1 .02. 07 04/ 09/2 008
Devi ce Nam e : LOO P O 9310
Conn ect Po rt: SUP V_P ORT
Star t T ime
: 00: 00: 05 0 1/0 1/2 008
[DIS PLA Y]
1 -> 1 Hou r Pe rf. Re port
2 -> 24 Ho ur P erf . R epor t
C -> Sy ste m Co nfi gur atio n
Q -> Al arm Que ue
H -> Al arm His tor y
I -> Li ne Stat us
[SET UP]
P -> Pa ssw ord Set up
S -> Sy ste m Se tup
M -> Sy ste m Al arm Se tup
T -> Lo opb ack Tes t
L -> Fi le Tran sfe r
V -> St ore /Ret rie ve Conf igu rat ion
[LOG ]
F -> Lo g O ff [ SET UP] ,[MI SC] Me nu
O -> Lo g O n [ SET UP] ,[MI SC] Me nu
R -> Co nne ct t o R emo te T erm ina l
[MIS C]
A -> Al arm Cut Of f
K -> Cl ear Per for man ce D ata
X -> Cl ear Ala rm Que ue a nd His tory
Y -> Re tur n to De fau lt
Z -> Sy ste m Re set
>>SP ACE ba r to re fre sh o r e nte r a com man d == =>
Press "H" from the "Main Menu". This menu is used to display alarm history for optical port and DS1 ports. Use
TAB key to select a desired port: "Optical" or "DS1#01~04".
For Optical port:
E1-F OM
== = Al arm Hi stor y = ==
ARRO W K EYS : CU RSO R M OVE, TA B: ROLL OP TIO NS
Sele ct Por t :
O ptic al
<< P res s E SC k ey to abor t, ENT ER k ey to cont inu e > >
35
0 0:59 :21 06 /01/ 200 5
Chapter 6 Terminal Operation
Then press ENTER from the above menu to display alarm types, current state, and count numbers for the
selected port.
E1-F OM
== = Al arm Hi stor y = ==
0 1:01 :06 06 /01/ 200 5
= Op tic al #1 =
[Ala rm Typ e] [ Cur r S tate ] [ Cou nt]
LOF , L ine
Di sab le
0
ES,
L ine
Di sab le
0
SES , L ine
Di sab le
0
UAS , L ine
Di sab le
0
<< E SC key to ret urn to pre vio us m enu , S PACE ba r t o re fre sh >>
For DS1 ports:
E1-F OM
== = Al arm Hi stor y = ==
ARRO W K EYS : CU RSO R M OVE, TA B: ROLL OP TIO NS
Sele ct Por t :
D S1#0 1~0 4
<< P res s E SC k ey to abor t, ENT ER k ey to cont inu e > >
36
0 0:59 :21 06 /01/ 200 5
Chapter 6 Terminal Operation
E1-F OM
== = Al arm Hi stor y = ==
0 1:00 :40 06 /01/ 200 5
= E1 #1 =
[Ala rm Typ e] [ Cur r S tate ] [ Cou nt]
LOS , L ine
Di sab le
0
AIS , L ine
Di sab le
0
BPV , L ine
Di sab le
0
ES,
L ine
Di sab le
0
SES , L ine
Di sab le
0
UAS , L ine
Di sab le
0
= E1 #2 =
[Ala rm Typ e] [ Cur r S tate ] [ Cou nt]
LOS , L ine
Di sab le
0
AIS , L ine
Di sab le
0
BPV , L ine
Di sab le
0
ES,
L ine
Di sab le
0
SES , L ine
Di sab le
0
UAS , L ine
Di sab le
0
= E1 #3 =
[Ala rm Typ e] [ Cur r S tate ] [ Cou nt]
LOS , L ine
Di sab le
0
AIS , L ine
Di sab le
0
BPV , L ine
Di sab le
0
ES,
L ine
Di sab le
0
SES , L ine
Di sab le
0
UAS , L ine
Di sab le
0
= E1 #4 =
[Ala rm Typ e] [ Cur r S tate ] [ Cou nt]
LOS , L ine
Di sab le
0
AIS , L ine
Di sab le
0
BPV , L ine
Di sab le
0
ES,
L ine
Di sab le
0
SES , L ine
Di sab le
0
UAS , L ine
Di sab le
0
<< E SC key to ret urn to pre vio us m enu , S PACE ba r t o re fre sh >>
6.6 Line Status
The full menu path for Line Status is as follows:
O > Log On
I > Line Status
E1-F OM
=== Mai n M enu ===
0 1:21 :30 01 /01/ 200 8
Seri al Num ber
: 11 8835
Hard war e V ersi on: Ve r.F 07/ 200 5
Firm war e V ersi on: V1 .02. 07 04/ 09/2 008
Devi ce Nam e : LOO P O 9310
Conn ect Po rt: SUP V_P ORT
Star t T ime
: 00: 00: 05 0 1/0 1/2 008
[DIS PLA Y]
1 -> 1 Hou r Pe rf. Re port
2 -> 24 Ho ur P erf . R epor t
C -> Sy ste m Co nfi gur atio n
Q -> Al arm Que ue
H -> Al arm His tor y
I -> Li ne Stat us
[SET UP]
P -> Pa ssw ord Set up
S -> Sy ste m Se tup
M -> Sy ste m Al arm Se tup
T -> Lo opb ack Tes t
L -> Fi le Tran sfe r
V -> St ore /Ret rie ve Conf igu rat ion
[LOG ]
F -> Lo g O ff [ SET UP] ,[MI SC] Me nu
O -> Lo g O n [ SET UP] ,[MI SC] Me nu
R -> Co nne ct t o R emo te T erm ina l
[MIS C]
A -> Al arm Cut Of f
K -> Cl ear Per for man ce D ata
X -> Cl ear Ala rm Que ue a nd His tory
Y -> Re tur n to De fau lt
Z -> Sy ste m Re set
>>SP ACE ba r to re fre sh o r e nte r a com man d == =>
37
Chapter 6 Terminal Operation
Press "I" from the "Main Menu". This menu is used to display line status for fiber optical interface and E1/T1
interface. The line status for fiber optical interface includes: active state, LOF, frame error, checksum error, ES
error, and EOC status. The line status for four E1/T1 interface includes: LOS, AIS, BPV, and ES.
If Optical Module 1 is in use, the screen will appear as shown below.
E1-F OM
= == L ine St atus == =
0 1:01 :33 06 /01/ 200 5
= Fi ber Op tica l I nte rfac e =
#1
Sta te : Wo rki ng
#1
L OF : YE S
#1
F ram ing err or : 0
#1
Ch eck sum err or : 0
#1
ES er ror cou nt : 0
#1
E OC S tat us : No t R ead y
= R emo te S tat us =
#1 O93 10 w ith CP U
#1
LOF : N O
#1
Fram ing er ror : 0
#1
C heck sum er ror : 0
= E1 In ter face =
= R emo te E 1 I nte rfac e =
[No]
[LO S] [ RxA IS/ Tx]
#01 E1
YE S
NO
Y ES
#02 E1
YE S
NO
Y ES
#03 E1
YE S
NO
Y ES
#04 E1
YE S
NO
Y ES
[BP V]
[ES ]
000 000 0 0 000 0
000 000 0 0 000 0
000 000 0 0 000 0
000 000 0 0 000 0
[No ]
01 E1
02 E1
03 E1
04 E1
[LO S]
YE S
YE S
YE S
YE S
[BP V]
000 0000
000 0000
000 0000
000 0000
<< E SC key to ret urn to pre vio us m enu , S PACE ba r t o re fre sh >>
If Optical Module 2 is in use, the screen will appear as shown below.
E1-F OM
= == L ine St atus == =
0 1:01 :33 06 /01/ 200 5
= Fi ber Op tica l I nte rfac e =
#2
Sta te : Wo rki ng
#2
L OF : YE S
#2
F ram ing err or : 0
#2
Ch eck sum err or : 0
#2
ES er ror cou nt : 0
#2
E OC S tat us : No t R ead y
= R emo te S tat us =
#1 O93 10 w ith CP U
#1
LOF : N O
#1
Fram ing er ror : 0
#1
C heck sum er ror : 0
= E1 In ter face =
= R emo te E 1 I nte rfac e =
[No]
[LO S] [ RxA IS/ Tx]
#01 E1
YE S
NO
Y ES
#02 E1
YE S
NO
Y ES
#03 E1
YE S
NO
Y ES
#04 E1
YE S
NO
Y ES
[BP V]
[ES ]
000 000 0 0 000 0
000 000 0 0 000 0
000 000 0 0 000 0
000 000 0 0 000 0
[No ]
01 E1
02 E1
03 E1
04 E1
[LO S]
YE S
YE S
YE S
YE S
[BP V]
000 0000
000 0000
000 0000
000 0000
<< E SC key to ret urn to pre vio us m enu , S PACE ba r t o re fre sh >>
38
Chapter 6 Terminal Operation
6.7 Password Setup
The full menu path for Password Setup is as follows:
O > Log On
P > Password Setup
E1-F OM
=== Mai n M enu ===
0 1:21 :30 01 /01/ 200 8
Seri al Num ber
: 11 8835
Hard war e V ersi on: Ve r.F 07/ 200 5
Firm war e V ersi on: V1 .02. 07 04/ 09/2 008
Devi ce Nam e : LOO P O 9310
Conn ect Po rt: SUP V_P ORT
Star t T ime
: 00: 00: 05 0 1/0 1/2 008
[DIS PLA Y]
1 -> 1 Hou r Pe rf. Re port
2 -> 24 Ho ur P erf . R epor t
C -> Sy ste m Co nfi gur atio n
Q -> Al arm Que ue
H -> Al arm His tor y
I -> Li ne Stat us
[SET UP]
P -> Pa ssw ord Set up
S -> Sy ste m Se tup
M -> Sy ste m Al arm Se tup
T -> Lo opb ack Tes t
L -> Fi le Tran sfe r
V -> St ore /Ret rie ve Conf igu rat ion
[LOG ]
F -> Lo g O ff [ SET UP] ,[MI SC] Me nu
O -> Lo g O n [ SET UP] ,[MI SC] Me nu
R -> Co nne ct t o R emo te T erm ina l
[MIS C]
A -> Al arm Cut Of f
K -> Cl ear Per for man ce D ata
X -> Cl ear Ala rm Que ue a nd His tory
Y -> Re tur n to De fau lt
Z -> Sy ste m Re set
>>SP ACE ba r to re fre sh o r e nte r a com man d == =>
This menu is used to enable, disable, and change password. Press "P" from the "Main Menu". Use arrow keys
to move the cursor at the desired position and TAB key to roll up a desired opton.
E1-F OM
= == Pas swor d S etu p (S yst em) ===
ARRO W K EYS : CU RSO R M OVE, TA B: ROLL OP TIO NS
Ena ble Pas swo rd : YE S
Cha nge Pas swo rd : NO
<< P res s E SC k ey to retu rn to prev iou s m enu >>
39
0 1:01 :54 06 /01/ 200 5
Chapter 6 Terminal Operation
For changing passowrd:
To change password, use TAB key to select "YES" for "Change Password" item. Then key in old password,
press ENTER.
E1-F OM
= == Pas swor d S etu p (S yst em) ===
ARRO W K EYS : CU RSO R M OVE, BA CKS PACE to ed it, ESC to abo rt
0 1:01 :54 06 /01/ 200 5
Ena ble Pas swo rd : YE S
Cha nge Pas swo rd : YE S
O ld
Pas swo rd : __ ___ ____ _
>> Ple ase inp ut old pas swo rd, the n p res s EN TER .
6.8 System Setup
To do system setup, press "S" from the "Main Menu". This menu is used to set up system configuration and
SNTP, enable or disable network cascade function, interfaces, and Auto Laser Shutdown, display descriptions
of commands.
E1-F OM
= == S yst em Setu p = ==
A
B
C
D
S
V
R
->
->
->
->
->
->
->
0 1:03 :20 06 /01/ 200 5
Sys tem
Net wor k C asca de
Com man d L ine
Opt ica l & E1/ T1 Por t
SNT P s etu p
V.3 5 C ard
Bri dge Se tup
<< P res s E SC k ey to retu rn to Main Me nu or e nte r a com man d > >
40
Chapter 6 Terminal Operation
6.8.1 System
The full menu path for System is as follows:
O > Log On
S > System Setup
A > System
E1-F OM
=== Mai n M enu ===
0 1:21 :30 01 /01/ 200 8
Seri al Num ber
: 11 8835
Hard war e V ersi on: Ve r.F 07/ 200 5
Firm war e V ersi on: V1 .02. 07 04/ 09/2 008
Devi ce Nam e : LOO P O 9310
Conn ect Po rt: SUP V_P ORT
Star t T ime
: 00: 00: 05 0 1/0 1/2 008
[DIS PLA Y]
1 -> 1 Hou r Pe rf. Re port
2 -> 24 Ho ur P erf . R epor t
C -> Sy ste m Co nfi gur atio n
Q -> Al arm Que ue
H -> Al arm His tor y
I -> Li ne Stat us
[SET UP]
P -> Pa ssw ord Set up
S -> Sy ste m Se tup
M -> Sy ste m Al arm Se tup
T -> Lo opb ack Tes t
L -> Fi le Tran sfe r
V -> St ore /Ret rie ve Conf igu rat ion
[LOG ]
F -> Lo g O ff [ SET UP] ,[MI SC] Me nu
O -> Lo g O n [ SET UP] ,[MI SC] Me nu
R -> Co nne ct t o R emo te T erm ina l
[MIS C]
A -> Al arm Cut Of f
K -> Cl ear Per for man ce D ata
X -> Cl ear Ala rm Que ue a nd His tory
Y -> Re tur n to De fau lt
Z -> Sy ste m Re set
>>SP ACE ba r to re fre sh o r e nte r a com man d == =>
Press "A" from the above menu to do system setup.
E1-FOM
=== System Setup ===
A
B
C
D
S
V
R
->
->
->
->
->
->
->
05:21:26 01/01/2008
System
Network Cascade
Command Line
Optical & E1 Port
SNTP Setup
V.35 Card
Bridge Setup
<< Press ESC key to return to Main Menu or enter a command >>
41
Chapter 6 Terminal Operation
This menu is allowed users to set up the system and console port. Use arrow keys to move the cursor, TAB key
to select a desired option, and BACKSPACE key to edit message.
For system setting, users are allowed to set up sytem time, IP interface (Ethernet-port or EOC-port), IP
addresses, Trap IP addresses, IP addresses for subnet mask and Gateway. This menu also allowed users to
edit message for system.
For Console port setting, users are allowed to set up baud rate (9600, 19200, 38400, 57600, or 115200), data
length (8-bits or 7-bits), stop bit (1-bit or 2-bits), and parity (NONE, EVEN, or ODD).
E1-F OM
= == S yst em Setu p = ==
0 1:03 :52 06 /01/ 200 5
ARRO W K EYS : CU RSO R M OVE, Pl eas e In put : h h:mm :ss mm /dd/ yyy y, BACK SPA CE to e dit
[Sys tem ]
Time /Da te
: 01: 03:5 3 0 6/0 1/20 05
IP I nte rfa ce
: ETH ERNE T_P ORT
IP A ddr ess
: 010 .002 .01 2.0 50
Subn et Mas k
: 255 .255 .00 0.0 00
Gate way IP
: 010 .002 .25 4.2 54
Trap IP Ad dres s: 255 .255 .25 5.2 55
Comm uni ty Name : pub lic
Devi ce Nam e
:
Syst em Loc atio n:
Syst em Con tact :
[CON SOL E p ort]
Baud Ra te
Data Le ngt h
Stop Bi t
Pari ty
:
:
:
:
960 0
8-B its
1-B it
NON E
<< P res s E SC k ey to retu rn to prev iou s m enu >>
E1-F OM
= == S yst em Setu p = ==
0 1:03 :52 06 /01/ 200 5
ARRO W K EYS : CU RSO R M OVE, TA B: ROLL OP TIO NS
[Sys tem ]
Time /Da te
: 01: 03:5 3 0 6/0 1/20 05
IP I nte rfa ce
: EOC _POR T
IP A ddr ess
: 010 .002 .01 2.0 50
Subn et Mas k
: 255 .255 .00 0.0 00
Gate way IP
: 010 .002 .25 4.2 54
Trap IP Ad dres s: 255 .255 .25 5.2 55
Comm uni ty Name : pub lic
Devi ce Nam e
:
Syst em Loc atio n:
Syst em Con tact :
[CON SOL E p ort]
Baud Ra te
Data Le ngt h
Stop Bi t
Pari ty
:
:
:
:
960 0
8-B its
1-B it
NON E
>> C han ge conf igu rat ion (Y/ N)? (No te: to save ,pl eas e us e V -co mman d)
42
Chapter 6 Terminal Operation
6.8.2 Network Cascade
The full menu path for Network Cascade is as follows:
O > Log On
S > System Setup
B > Network Cascade
E1-F OM
=== Mai n M enu ===
0 1:21 :30 01 /01/ 200 8
Seri al Num ber
: 11 8835
Hard war e V ersi on: Ve r.F 07/ 200 5
Firm war e V ersi on: V1 .02. 07 04/ 09/2 008
Devi ce Nam e : LOO P O 9310
Conn ect Po rt: SUP V_P ORT
Star t T ime
: 00: 00: 05 0 1/0 1/2 008
[DIS PLA Y]
1 -> 1 Hou r Pe rf. Re port
2 -> 24 Ho ur P erf . R epor t
C -> Sy ste m Co nfi gur atio n
Q -> Al arm Que ue
H -> Al arm His tor y
I -> Li ne Stat us
[SET UP]
P -> Pa ssw ord Set up
S -> Sy ste m Se tup
M -> Sy ste m Al arm Se tup
T -> Lo opb ack Tes t
L -> Fi le Tran sfe r
V -> St ore /Ret rie ve Conf igu rat ion
[LOG ]
F -> Lo g O ff [ SET UP] ,[MI SC] Me nu
O -> Lo g O n [ SET UP] ,[MI SC] Me nu
R -> Co nne ct t o R emo te T erm ina l
[MIS C]
A -> Al arm Cut Of f
K -> Cl ear Per for man ce D ata
X -> Cl ear Ala rm Que ue a nd His tory
Y -> Re tur n to De fau lt
Z -> Sy ste m Re set
>>SP ACE ba r to re fre sh o r e nte r a com man d == =>
Press “B” to enter Network Cascade.
E1-FOM
=== System Setup ===
A
B
C
D
S
V
R
->
->
->
->
->
->
->
05:21:26 01/01/2008
System
Network Cascade
Command Line
Optical & E1 Port
SNTP Setup
V.35 Card
Bridge Setup
<< Press ESC key to return to Main Menu or enter a command >>
43
Chapter 6 Terminal Operation
Press "B" from the "System Setup" menu to enable or disable network cascade function. If the network
cascade is enabled, IP addresses for routing are required to input.After done the setting press "Y" to confirm
the new configuration or "N" to abort it. For saving this new configuration, press "v" from the "Main Menu".
E1-F OM
=== Net wor k C asca de ===
ARRO W K EYS : CU RSO R M OVE, TA B: ROLL OP TIO NS
0 1:08 :24 06 /01/ 200 5
Netw ork Ca scad e: DIS ABLE
[Rou tin g T able ]
IP A ddr ess 1
:
IP A ddr ess 2
:
IP A ddr ess 3
:
IP A ddr ess 4
:
IP A ddr ess 5
:
000 .000 .00 0.0 00
000 .000 .00 0.0 00
000 .000 .00 0.0 00
000 .000 .00 0.0 00
000 .000 .00 0.0 00
>> C han ge conf igu rat ion (Y/ N)? (No te: to save ,pl eas e us e V -co mman d)
6.8.3 Command Line
The full menu path for Command Line is as follows:
O > Log On
S > System Setup
C > Command Line
E1-F OM
=== Mai n M enu ===
0 1:21 :30 01 /01/ 200 8
Seri al Num ber
: 11 8835
Hard war e V ersi on: Ve r.F 07/ 200 5
Firm war e V ersi on: V1 .02. 07 04/ 09/2 008
Devi ce Nam e : LOO P O 9310
Conn ect Po rt: SUP V_P ORT
Star t T ime
: 00: 00: 05 0 1/0 1/2 008
[DIS PLA Y]
1 -> 1 Hou r Pe rf. Re port
2 -> 24 Ho ur P erf . R epor t
C -> Sy ste m Co nfi gur atio n
Q -> Al arm Que ue
H -> Al arm His tor y
I -> Li ne Stat us
[SET UP]
P -> Pa ssw ord Set up
S -> Sy ste m Se tup
M -> Sy ste m Al arm Se tup
T -> Lo opb ack Tes t
L -> Fi le Tran sfe r
V -> St ore /Ret rie ve Conf igu rat ion
[LOG ]
F -> Lo g O ff [ SET UP] ,[MI SC] Me nu
O -> Lo g O n [ SET UP] ,[MI SC] Me nu
R -> Co nne ct t o R emo te T erm ina l
[MIS C]
A -> Al arm Cut Of f
K -> Cl ear Per for man ce D ata
X -> Cl ear Ala rm Que ue a nd His tory
Y -> Re tur n to De fau lt
Z -> Sy ste m Re set
>>SP ACE ba r to re fre sh o r e nte r a com man d == =>
44
Chapter 6 Terminal Operation
Press "C" from the "System setup" to enter command line.
E1-FOM
=== System Setup ===
A
B
C
D
S
V
R
->
->
->
->
->
->
->
05:21:26 01/01/2008
System
Network Cascade
Command Line
Optical & E1 Port
SNTP Setup
V.35 Card
Bridge Setup
<< Press ESC key to return to Main Menu or enter a command >>
The command line screen will show as below.
0 1:09 :35 Ju n 01 /05
R epla ce
Pres s ? ge t he lp or QUIT re tur n.
O931 0@0 1:0 9:35 >>
Key in a question mark (?) from the above menu to display all available commands. To exit from this screen,
key in "quit".
0 1:09 :56 Ju n 01 /05
Pres s ? ge t he lp or QUIT re tur n.
O931 0@0 1:0 9:35 >> ?
Avai lab le Comm and s:
qu it
hel p
ar p
eo c
als
ca rd
O931 0@0 1:0 9:56 >>
clr arp
ver
45
pi ng
R epla ce
Chapter 6 Terminal Operation
Key in "help" to get commands' help. To exit from this screen, key in "quit".
0 5:31 :32 Ja n 01 /08
Pres s ? ge t he lp or QUIT re tur n.
LOOP O9 310 @05: 31: 00 >>?
Avai lab le Comm and s:
qu it
hel p
ar p
clr arp
pi ng
eo c
ver
LOOP O9 310 @05: 31: 08 >>
hel p
Comm and s S uppo rt:
qu it --- ---- --- --- ---- -> Lea ve f iel d s uppo rt.
ar p/c lra rp - --- --- ---- -> Pri nt/C lea r A RP t abl e.
pi ng ip ---- --- --- ---- -> Pin g an ip ad dres s.
eo c - --- ---- --- --- ---- -> Dis play EO C s tati sti cs.
LOOP O9 310 @05: 31: 23 >>ve r
SW v ers ion is V1. 02. 07.0 032 04 /09/ 200 8
R epla ce
LOOP O9 310 @05: 31: 26 >>qu it
6.8.4 Optical & E1/ T1 Port
The full menu path for Optical & E1/T1 is as follows:
O > Log On
S > System Setup
D > Optical & E1/T1
E1-F OM
=== Mai n M enu ===
0 1:21 :30 01 /01/ 200 8
Seri al Num ber
: 11 8835
Hard war e V ersi on: Ve r.F 07/ 200 5
Firm war e V ersi on: V1 .02. 07 04/ 09/2 008
Devi ce Nam e : LOO P O 9310
Conn ect Po rt: SUP V_P ORT
Star t T ime
: 00: 00: 05 0 1/0 1/2 008
[DIS PLA Y]
1 -> 1 Hou r Pe rf. Re port
2 -> 24 Ho ur P erf . R epor t
C -> Sy ste m Co nfi gur atio n
Q -> Al arm Que ue
H -> Al arm His tor y
I -> Li ne Stat us
[SET UP]
P -> Pa ssw ord Set up
S -> Sy ste m Se tup
M -> Sy ste m Al arm Se tup
T -> Lo opb ack Tes t
L -> Fi le Tran sfe r
V -> St ore /Ret rie ve Conf igu rat ion
[LOG ]
F -> Lo g O ff [ SET UP] ,[MI SC] Me nu
O -> Lo g O n [ SET UP] ,[MI SC] Me nu
R -> Co nne ct t o R emo te T erm ina l
[MIS C]
A -> Al arm Cut Of f
K -> Cl ear Per for man ce D ata
X -> Cl ear Ala rm Que ue a nd His tory
Y -> Re tur n to De fau lt
Z -> Sy ste m Re set
>>SP ACE ba r to re fre sh o r e nte r a com man d == =>
46
Chapter 6 Terminal Operation
Press "D" from the "System Setup" menu.
E1-FOM
=== System Setup ===
A
B
C
D
S
V
R
->
->
->
->
->
->
->
05:36:17 01/01/2008
System
Network Cascade
Command Line
Optical & E1 Port
SNTP Setup
V.35 Card
Bridge Setup
<< Press ESC key to return to Main Menu or enter a command >>
This menu is used to enable or disable optical and E1/T1 ports. Also users are allowed to enable or disable the
auto laser shutdown function.
E1-F OM
=== Op tica l & E1 /T1 Opt ion ===
ARRO W K EYS : CU RSO R M OVE, TA B: ROLL OP TIO NS
Opti cal Po rt
E1 P ort
E1 P ort
E1 P ort
E1 P ort
#
#
#
#
#
1
1
2
3
4
:
:
:
:
:
E NABL E
E NABL E
E NABL E
E NABL E
E NABL E
0 1:13 :12 06 /01/ 200 5
Auto La ser Shu tdo wn : DI SAB LE
<< P res s E SC k ey to retu rn to prev iou s m enu >>
47
Chapter 6 Terminal Operation
6.8.5 SNTP Setup
The full menu path for SNTP Setup is as follows:
O > Log On
S > System Setup
S > SNTP Setup
E1-F OM
=== Mai n M enu ===
0 1:21 :30 01 /01/ 200 8
Seri al Num ber
: 11 8835
Hard war e V ersi on: Ve r.F 07/ 200 5
Firm war e V ersi on: V1 .02. 07 04/ 09/2 008
Devi ce Nam e : LOO P O 9310
Conn ect Po rt: SUP V_P ORT
Star t T ime
: 00: 00: 05 0 1/0 1/2 008
[DIS PLA Y]
1 -> 1 Hou r Pe rf. Re port
2 -> 24 Ho ur P erf . R epor t
C -> Sy ste m Co nfi gur atio n
Q -> Al arm Que ue
H -> Al arm His tor y
I -> Li ne Stat us
[SET UP]
P -> Pa ssw ord Set up
S -> Sy ste m Se tup
M -> Sy ste m Al arm Se tup
T -> Lo opb ack Tes t
L -> Fi le Tran sfe r
V -> St ore /Ret rie ve Conf igu rat ion
[LOG ]
F -> Lo g O ff [ SET UP] ,[MI SC] Me nu
O -> Lo g O n [ SET UP] ,[MI SC] Me nu
R -> Co nne ct t o R emo te T erm ina l
[MIS C]
A -> Al arm Cut Of f
K -> Cl ear Per for man ce D ata
X -> Cl ear Ala rm Que ue a nd His tory
Y -> Re tur n to De fau lt
Z -> Sy ste m Re set
>>SP ACE ba r to re fre sh o r e nte r a com man d == =>
Press "S" from the "System Setup" menu to do SNTP setup.
E1-FOM
=== System Setup ===
A
B
C
D
S
V
R
->
->
->
->
->
->
->
05:36:17 01/01/2008
System
Network Cascade
Command Line
Optical & E1 Port
SNTP Setup
V.35 Card
Bridge Setup
<< Press ESC key to return to Main Menu or enter a command >>
48
Chapter 6 Terminal Operation
This menu is used to set up IP addresses and timezone for SNTP servers. The range for SNTP timezone is
+12 to -12. After done the setting, press "Y" to confirm the new configuration or "N" to abort it. For saving this
new configuration, press "v" from the "Main Menu".
E1-F OM
=== SNT P s etup == =
0 1:14 :28 06 /01/ 200 5
ARRO W K EYS : CU RSO R M OVE, Pl eas e In put : n nn.n nn. nnn .nnn , B ACK SPAC E t o e dit
SNTP se rve r 1 : 0 00. 000. 000 .00 0
SNTP se rve r 2 : 0 00. 000. 000 .00 0
SNTP ti mez one : + 0
>> C han ge conf igu rat ion (Y/ N)? (No te: to save ,pl eas e us e V -co mman d)
6.8.6 V.35 Card Setup
The full menu path for V.35 Card Setup is as follows:
O > Log On
S > System Setup
V > V.35 Card Setup
E1-F OM
=== Mai n M enu ===
0 1:21 :30 01 /01/ 200 8
Seri al Num ber
: 11 8835
Hard war e V ersi on: Ve r.F 07/ 200 5
Firm war e V ersi on: V1 .02. 07 04/ 09/2 008
Devi ce Nam e : LOO P O 9310
Conn ect Po rt: SUP V_P ORT
Star t T ime
: 00: 00: 05 0 1/0 1/2 008
[DIS PLA Y]
1 -> 1 Hou r Pe rf. Re port
2 -> 24 Ho ur P erf . R epor t
C -> Sy ste m Co nfi gur atio n
Q -> Al arm Que ue
H -> Al arm His tor y
I -> Li ne Stat us
[SET UP]
P -> Pa ssw ord Set up
S -> Sy ste m Se tup
M -> Sy ste m Al arm Se tup
T -> Lo opb ack Tes t
L -> Fi le Tran sfe r
V -> St ore /Ret rie ve Conf igu rat ion
[LOG ]
F -> Lo g O ff [ SET UP] ,[MI SC] Me nu
O -> Lo g O n [ SET UP] ,[MI SC] Me nu
R -> Co nne ct t o R emo te T erm ina l
[MIS C]
A -> Al arm Cut Of f
K -> Cl ear Per for man ce D ata
X -> Cl ear Ala rm Que ue a nd His tory
Y -> Re tur n to De fau lt
Z -> Sy ste m Re set
>>SP ACE ba r to re fre sh o r e nte r a com man d == =>
49
Chapter 6 Terminal Operation
Press “V” from the System Configuration menu to setup V.35 system configuration.
E1-FOM
=== System Setup ===
A
B
C
D
S
V
R
->
->
->
->
->
->
->
05:36:17 01/01/2008
System
Network Cascade
Command Line
Optical & E1 Port
SNTP Setup
V.35 Card
Bridge Setup
<< Press ESC key to return to Main Menu or enter a command >>
See also below screen. Note that this menu is available only when V.35 card is purchased.
E1-F OM
=== V.3 5 C ard ===
Mode
: DT E
Inte rfa ce
Chan nel
ClkS rc
TTM
DCD
CTS
DSR
TM
RI
RTS
DTR
RL
LL
:
:
:
:
:
:
:
:
:
:
:
:
:
0 0:05 :54 06 /01/ 200 5
No tUs ed
un fra me
In ter nal
OF F
OF F
ON
ON
ON
ON
OF F
OF F
OF F
No t S upp ort
<< E SC key to ret urn to pre vio us m enu , S PACE ba r t o re fre sh >>
50
Chapter 6 Terminal Operation
6.8.7
Bridge Setup
The full menu path for Bridge Setup is as follows:
O > Log On
S > System Setup
R > Bridge Setup
E1-F OM
=== Mai n M enu ===
0 1:21 :30 01 /01/ 200 8
Seri al Num ber
: 11 8835
Hard war e V ersi on: Ve r.F 07/ 200 5
Firm war e V ersi on: V1 .02. 07 04/ 09/2 008
Devi ce Nam e : LOO P O 9310
Conn ect Po rt: SUP V_P ORT
Star t T ime
: 00: 00: 05 0 1/0 1/2 008
[DIS PLA Y]
1 -> 1 Hou r Pe rf. Re port
2 -> 24 Ho ur P erf . R epor t
C -> Sy ste m Co nfi gur atio n
Q -> Al arm Que ue
H -> Al arm His tor y
I -> Li ne Stat us
[SET UP]
P -> Pa ssw ord Set up
S -> Sy ste m Se tup
M -> Sy ste m Al arm Se tup
T -> Lo opb ack Tes t
L -> Fi le Tran sfe r
V -> St ore /Ret rie ve Conf igu rat ion
[LOG ]
F -> Lo g O ff [ SET UP] ,[MI SC] Me nu
O -> Lo g O n [ SET UP] ,[MI SC] Me nu
R -> Co nne ct t o R emo te T erm ina l
[MIS C]
A -> Al arm Cut Of f
K -> Cl ear Per for man ce D ata
X -> Cl ear Ala rm Que ue a nd His tory
Y -> Re tur n to De fau lt
Z -> Sy ste m Re set
>>SP ACE ba r to re fre sh o r e nte r a com man d == =>
Press “R” from the System Configuration menu to display bridge system configuration.
E1-FOM
=== System Setup ===
A
B
C
D
S
V
R
->
->
->
->
->
->
->
05:36:17 01/01/2008
System
Network Cascade
Command Line
Optical & E1 Port
SNTP Setup
V.35 Card
Bridge Setup
<< Press ESC key to return to Main Menu or enter a command >>
51
Chapter 6 Terminal Operation
Note that this menu is available only when Bridge card is purchased
ARRO W K EYS : CU RSO R M OVE, TA B: ROLL OP TIO NS
Auto Ne got iati on
Spee d
Dupl ex Mod e
Agin g T ime
MAC Lea rni ng & Fi lte r
: ENA BLE
: 100 Mb ps
: Ful l
: 30 Sec
: ENA BLE
<< P res s E SC k ey to retu rn to prev iou s m enu >>
6.9 System Alarm Setup
The full menu path for System Alarm Setup is as follows:
O > Log On
M > System Alarm Setup
E1-F OM
=== Mai n M enu ===
0 1:21 :30 01 /01/ 200 8
Seri al Num ber
: 11 8835
Hard war e V ersi on: Ve r.F 07/ 200 5
Firm war e V ersi on: V1 .02. 07 04/ 09/2 008
Devi ce Nam e : LOO P O 9310
Conn ect Po rt: SUP V_P ORT
Star t T ime
: 00: 00: 05 0 1/0 1/2 008
[DIS PLA Y]
1 -> 1 Hou r Pe rf. Re port
2 -> 24 Ho ur P erf . R epor t
C -> Sy ste m Co nfi gur atio n
Q -> Al arm Que ue
H -> Al arm His tor y
I -> Li ne Stat us
[SET UP]
P -> Pa ssw ord Set up
S -> Sy ste m Se tup
M -> Sy ste m Al arm Se tup
T -> Lo opb ack Tes t
L -> Fi le Tran sfe r
V -> St ore /Ret rie ve Conf igu rat ion
[LOG ]
F -> Lo g O ff [ SET UP] ,[MI SC] Me nu
O -> Lo g O n [ SET UP] ,[MI SC] Me nu
R -> Co nne ct t o R emo te T erm ina l
[MIS C]
A -> Al arm Cut Of f
K -> Cl ear Per for man ce D ata
X -> Cl ear Ala rm Que ue a nd His tory
Y -> Re tur n to De fau lt
Z -> Sy ste m Re set
>>SP ACE ba r to re fre sh o r e nte r a com man d == =>
52
Chapter 6 Terminal Operation
Press "M" from the "Main Menu". This menu is allowed users to enable or disable these items: (1) alarm cut-off,
(2) alarm relay, (3) protection switch, and (4) power fail. Also users are allowed to set up alarm type for optical
and E1/ T1 interfaces.
The range of decimal number for BPV of E1/T1 is: 1 to16383.
The range of decimal number for ES/SES/UAS of E1/T is: 1 to 900.
The range of decimal number for ES/SES/UAS of Optical is: 1 to 900.
E1-F OM
= == A lar m S etup == =
ARRO W K EYS : CU RSO R M OVE, TA B: ROLL OP TIO NS
[Con tro l]
Alar m C ut Off
[E1/ T1]
LOS, Li ne
AIS, Li ne
BPV, Li ne
ES,
Li ne
SES, Li ne
UAS, Li ne
: DISA BLE
[TH RES HOL D]
:
:
:
:
:
:
000 01
0 01
0 01
0 01
0 0:03 :19 01 /01/ 200 8
Rela y : DI SABL E
[AL ARM ]
DIS ABL E
DIS ABL E
DIS ABL E
DIS ABL E
DIS ABL E
DIS ABL E
[OPT ICA L]
LOF, Li ne
ES,
Li ne
SES, Li ne
UAS, Li ne
[TH RES HOL D]
:
:
:
:
0 01
0 01
0 01
[AL ARM ]
DIS ABL E
DIS ABL E
DIS ABL E
DIS ABL E
<< P res s E SC k ey to retu rn to prev iou s m enu >>
6.10 Loopback Test
The full menu path for Loopback Test is as follows:
O > Log On
T > Loopback Test
E1-F OM
=== Mai n M enu ===
0 1:21 :30 01 /01/ 200 8
Seri al Num ber
: 11 8835
Hard war e V ersi on: Ve r.F 07/ 200 5
Firm war e V ersi on: V1 .02. 07 04/ 09/2 008
Devi ce Nam e : LOO P O 9310
Conn ect Po rt: SUP V_P ORT
Star t T ime
: 00: 00: 05 0 1/0 1/2 008
[DIS PLA Y]
1 -> 1 Hou r Pe rf. Re port
2 -> 24 Ho ur P erf . R epor t
C -> Sy ste m Co nfi gur atio n
Q -> Al arm Que ue
H -> Al arm His tor y
I -> Li ne Stat us
[SET UP]
P -> Pa ssw ord Set up
S -> Sy ste m Se tup
M -> Sy ste m Al arm Se tup
T -> Lo opb ack Tes t
L -> Fi le Tran sfe r
V -> St ore /Ret rie ve Conf igu rat ion
[LOG ]
F -> Lo g O ff [ SET UP] ,[MI SC] Me nu
O -> Lo g O n [ SET UP] ,[MI SC] Me nu
R -> Co nne ct t o R emo te T erm ina l
[MIS C]
A -> Al arm Cut Of f
K -> Cl ear Per for man ce D ata
X -> Cl ear Ala rm Que ue a nd His tory
Y -> Re tur n to De fau lt
Z -> Sy ste m Re set
>>SP ACE ba r to re fre sh o r e nte r a com man d == =>
53
Chapter 6 Terminal Operation
Press "T" from the "Main Menu" to do loopback test for a local unit and a remote unit.
ALoc: Anolog Local Loopback
DLoc: Digital Local Loopback
LineLB: Line Loopback
E1-F OM
== = Lo opb ack Tes t = ==
ARRO W K EYS : C URS OR MOVE , ENT ER K EY : I TEM SEL ECT
==== Lo cal === =
Opti cal :* Off
Lo cal
E1 # 01 : * Off
AL oc
E1 # 02 : * Off
AL oc
E1 # 03 : * Off
AL oc
E1 # 04 : * Off
AL oc
V35 :
* Off
Lo cal
Li ne
DLo c
DLo c
DLo c
DLo c
Li ne
Lin eLB
Lin eLB
Lin eLB
Lin eLB
==== Re mot e == ==
Opti cal :* Off
Li ne
E1 # 01 : * Off
AL oc
E1 # 02 : * Off
AL oc
E1 # 03 : * Off
AL oc
E1 # 04 : * Off
AL oc
DLo c
DLo c
DLo c
DLo c
Lin eLB
Lin eLB
Lin eLB
Lin eLB
0 0:04 :56 01 /01/ 200 8
Stat us :
<< P res s E SC k ey to retu rn to prev iou s m enu >>
6.11 File Transfer
To do file transfer, press "L" from the "Main Menu". This menu is used to download or upload firmware and
configuration. The function, to copy firmware to remote site, is also supported.
E1-F OM
== = Fi le Tra nsfe r = ==
0 5:55 :28 01 /01/ 200 8
A -> Dow nlo ad Main boa rd Firm war e
B -> Upl oad Ma inbo ard Fi rmwa re
C -> Cop y F irm ware to Re mote
D -> Dow nlo ad Conf igu rat ion
E -> Upl oad Co nfig ura tio n
<< P res s E SC k ey to retu rn to Main Me nu or e nte r a com man d > >
54
Chapter 6 Terminal Operation
6.11.1
Download Mainboard Firmware
The full menu path for Download Mainboard Firmware is as follows:
O > Log On
L > File Transfer
A > Download Mainboard Firmware
E1-F OM
=== Mai n M enu ===
0 1:21 :30 01 /01/ 200 8
Seri al Num ber
: 11 8835
Hard war e V ersi on: Ve r.F 07/ 200 5
Firm war e V ersi on: V1 .02. 07 04/ 09/2 008
Devi ce Nam e : LOO P O 9310
Conn ect Po rt: SUP V_P ORT
Star t T ime
: 00: 00: 05 0 1/0 1/2 008
[DIS PLA Y]
1 -> 1 Hou r Pe rf. Re port
2 -> 24 Ho ur P erf . R epor t
C -> Sy ste m Co nfi gur atio n
Q -> Al arm Que ue
H -> Al arm His tor y
I -> Li ne Stat us
[SET UP]
P -> Pa ssw ord Set up
S -> Sy ste m Se tup
M -> Sy ste m Al arm Se tup
T -> Lo opb ack Tes t
L -> Fi le Tran sfe r
V -> St ore /Ret rie ve Conf igu rat ion
[LOG ]
F -> Lo g O ff [ SET UP] ,[MI SC] Me nu
O -> Lo g O n [ SET UP] ,[MI SC] Me nu
R -> Co nne ct t o R emo te T erm ina l
[MIS C]
A -> Al arm Cut Of f
K -> Cl ear Per for man ce D ata
X -> Cl ear Ala rm Que ue a nd His tory
Y -> Re tur n to De fau lt
Z -> Sy ste m Re set
>>SP ACE ba r to re fre sh o r e nte r a com man d == =>
Press "A" from the "File Transfer" menu to download mainboard firmware.
E1-FOM
=== File Transfer ===
05:55:28 01/01/2008
A -> Download Mainboard Firmware
B -> Upload Mainboard Firmware
C -> Copy Firmware to Remote
D -> Download Configuration
E -> Upload Configuration
<< Press ESC key to return to Main Menu or enter a command >>
55
Chapter 6 Terminal Operation
Two transferring protocols are available: TFTP or ZMODEM.
1. Via TFTP transferring protocol:
E1-F OM
= == Down loa d F irmw are == =
ARRO W K EYS : CU RSO R M OVE, TA B: ROLL OP TIO NS
Firm war e 1 Ver sio n
:
Firm war e 2 Ver sio n
:
Curr ent Fi rmwa re Ban k:
Next Bo ot Firm war e
:
Tran sfe r P roto col
:
Firm war e F ile Nam e
:
TFTP Se rve r IP
:
0 1:28 :05 06 /01/ 200 5
S 1.0 0 0 7/04 /20 05
S 1.0 0 0 7/01 /20 05
1
1
T FTP
0 10. 002 .012 .00 1
<< P res s E SC k ey to retu rn to prev iou s m enu >>
2. Via ZMODEM transferring protocol:
E1-F OM
= == Down loa d F irmw are == =
ARRO W K EYS : CU RSO R M OVE, TA B: ROLL OP TIO NS
Firm war e 1 Ver sio n
:
Firm war e 2 Ver sio n
:
Curr ent Fi rmwa re Ban k:
Next Bo ot Firm war e
:
Tran sfe r P roto col
:
S 1.0 0 0 7/04 /20 05
S 1.0 0 0 7/01 /20 05
1
1
Z MOD EM
<< P res s E SC k ey to retu rn to prev iou s m enu >>
56
0 1:28 :05 06 /01/ 200 5
Chapter 6 Terminal Operation
Press ENTER from the above menu.
E1-F OM
= == Down loa d F irmw are == =
ARRO W K EYS : CU RSO R M OVE, TA B: ROLL OP TIO NS
Firm war e 1 Ver sio n
:
Firm war e 2 Ver sio n
:
Curr ent Fi rmwa re Ban k:
Next Bo ot Firm war e
:
Tran sfe r P roto col
:
0 1:28 :05 06 /01/ 200 5
S 1.0 0 0 7/04 /20 05
S 1.0 0 0 7/01 /20 05
1
1
Z MOD EM
Real ly wan t to Do wnl oad ?
<< P res s E SC k ey to retu rn to prev iou s m enu >>
Press "Y" from the above scrren.
E1-F OM
=== Upg rad e F irmw are == =
Syst em is read y t o u pgra de (to FIR MWA RE 2).
Star t Z MOD EM s end ing com man d f rom you r t ermi nal em ulat or.
Wait ing fo r ZM ODE M p acke ts ...
**B0 100 080 0257 737
57
0 1:29 :03 06 /01/ 200 5
Chapter 6 Terminal Operation
6.11.2
Upload Mainboard Firmware
The full menu path for Upload Mainboard Firmware is as follows:
O > Log On
L > File Transfer
B > Upload Mainboard Firmware
E1-F OM
=== Mai n M enu ===
0 1:21 :30 01 /01/ 200 8
Seri al Num ber
: 11 8835
Hard war e V ersi on: Ve r.F 07/ 200 5
Firm war e V ersi on: V1 .02. 07 04/ 09/2 008
Devi ce Nam e : LOO P O 9310
Conn ect Po rt: SUP V_P ORT
Star t T ime
: 00: 00: 05 0 1/0 1/2 008
[DIS PLA Y]
1 -> 1 Hou r Pe rf. Re port
2 -> 24 Ho ur P erf . R epor t
C -> Sy ste m Co nfi gur atio n
Q -> Al arm Que ue
H -> Al arm His tor y
I -> Li ne Stat us
[SET UP]
P -> Pa ssw ord Set up
S -> Sy ste m Se tup
M -> Sy ste m Al arm Se tup
T -> Lo opb ack Tes t
L -> Fi le Tran sfe r
V -> St ore /Ret rie ve Conf igu rat ion
[LOG ]
F -> Lo g O ff [ SET UP] ,[MI SC] Me nu
O -> Lo g O n [ SET UP] ,[MI SC] Me nu
R -> Co nne ct t o R emo te T erm ina l
[MIS C]
A -> Al arm Cut Of f
K -> Cl ear Per for man ce D ata
X -> Cl ear Ala rm Que ue a nd His tory
Y -> Re tur n to De fau lt
Z -> Sy ste m Re set
>>SP ACE ba r to re fre sh o r e nte r a com man d == =>
Press "B" from the "File Transfer" menu to Upload Mainboard Firmware.
E1-F OM
== = Fi le Tra nsfe r = ==
0 6:20 :22 01 /01/ 200 8
A -> Dow nlo ad Main boa rd Firm war e
B -> Upl oad Ma inbo ard Fi rmwa re
C -> Cop y F irm ware to Re mote
D -> Dow nlo ad Conf igu rat ion
E -> Upl oad Co nfig ura tio n
<< P res s E SC k ey to retu rn to Main Me nu or e nte r a com man d > >
58
Chapter 6 Terminal Operation
The Upload Firmware screen will show as below.
E1-F OM
=== Upl oad Fi rmwa re ===
ARRO W K EYS : CU RSO R M OVE, BA CKS PACE to ed it, ESC to abo rt
Firm war e 1 Ver sio n
:
Firm war e 2 Ver sio n
:
Curr ent Fi rmwa re Ban k:
Tran sfe r P roto col
:
Firm war e F ile Nam e
:
TFTP Se rve r IP
:
Firm war e B ank Num ber :
0 1:35 :11 06 /01/ 200 5
S 1.0 0 0 7/04 /20 05
S 1.0 0 0 7/01 /20 05
1
T FTP
_ ___ ___ ____ ___ ___ ____ ___ ___ ____ ___ ___ ____ ___ ___ ____ ___ __
0 10. 002 .012 .00 1
1
<< P res s E SC k ey to abor t, ENT ER k ey to cont inu e > >
6.11.3
Copy Firmware to Remote
The full menu path for Copy Firmware to Remote is as follows:
O > Log On
L > File Transfer
C> Copy Firmware to Remote
E1-F OM
=== Mai n M enu ===
0 1:21 :30 01 /01/ 200 8
Seri al Num ber
: 11 8835
Hard war e V ersi on: Ve r.F 07/ 200 5
Firm war e V ersi on: V1 .02. 07 04/ 09/2 008
Devi ce Nam e : LOO P O 9310
Conn ect Po rt: SUP V_P ORT
Star t T ime
: 00: 00: 05 0 1/0 1/2 008
[DIS PLA Y]
1 -> 1 Hou r Pe rf. Re port
2 -> 24 Ho ur P erf . R epor t
C -> Sy ste m Co nfi gur atio n
Q -> Al arm Que ue
H -> Al arm His tor y
I -> Li ne Stat us
[SET UP]
P -> Pa ssw ord Set up
S -> Sy ste m Se tup
M -> Sy ste m Al arm Se tup
T -> Lo opb ack Tes t
L -> Fi le Tran sfe r
V -> St ore /Ret rie ve Conf igu rat ion
[LOG ]
F -> Lo g O ff [ SET UP] ,[MI SC] Me nu
O -> Lo g O n [ SET UP] ,[MI SC] Me nu
R -> Co nne ct t o R emo te T erm ina l
[MIS C]
A -> Al arm Cut Of f
K -> Cl ear Per for man ce D ata
X -> Cl ear Ala rm Que ue a nd His tory
Y -> Re tur n to De fau lt
Z -> Sy ste m Re set
>>SP ACE ba r to re fre sh o r e nte r a com man d == =>
59
Chapter 6 Terminal Operation
Press "C" from the "File Transfer" menu to Copy Firmware to Remote.
E1-F OM
== = Fi le Tra nsfe r = ==
0 6:20 :22 01 /01/ 200 8
A -> Dow nlo ad Main boa rd Firm war e
B -> Upl oad Ma inbo ard Fi rmwa re
C -> Cop y F irm ware to Re mote
D -> Dow nlo ad Conf igu rat ion
E -> Upl oad Co nfig ura tio n
<< P res s E SC k ey to retu rn to Main Me nu or e nte r a com man d > >
This menu is used to copy firmware to remote site.
E1-F OM
== = Fi rmw are Cop y = ==
0 9:36 :17 07 /11/ 200 5
[Rem ote ]
Firm war e 1 Ver sio n
: S 1.f 0 0 7/26 /20 05
Firm war e 2 Ver sio n
: V 1.0 0 0 7/29 /20 05
Curr ent Fi rmwa re Ban k: 2
Real ly wan t to co py ? (Y /N/ W/C )
(Y=y es, N= no, W=w arm res et aft er t ran sfe r co mpl ete d, C =co ld rese t.. )
<< P res s E SC k ey to retu rn to prev iou s m enu >>
60
Chapter 6 Terminal Operation
Press "Y" from the above menu to confirm the transfer. The system will start to transfer firmware and show up
the current transfer status. When the transfer is done, please press "W" to warm start the system or "C" to cold
start the system. Then the system will be started with the new firmware.
E1-F OM
== = Fi rmw are Cop y = ==
0 9:36 :17 07 /11/ 200 5
[Rem ote ]
Firm war e 1 Ver sio n
: S 1.f 0 0 7/26 /20 05
Firm war e 2 Ver sio n
: V 1.0 0 0 7/29 /20 05
Curr ent Fi rmwa re Ban k: 2
Real ly wan t to co py ? (Y /N/ W/C )W
(Y=y es, N= no, W=w arm res et aft er t ran sfe r co mpl ete d, C =co ld rese t.. )
09:3 6:4 8 0 7/11 /05
09:3 6:4 8 0 7/11 /05
S tart ing tr ansf er ...
T rans fer St atus : 10%
<< P res s E SC k ey to retu rn to prev iou s m enu >>
6.11.4
Download Configuration
The full menu path for Download Configuration is as follows:
O > Log On
L > File Transfer
D> Download Configuration
E1-F OM
=== Mai n M enu ===
0 1:21 :30 01 /01/ 200 8
Seri al Num ber
: 11 8835
Hard war e V ersi on: Ve r.F 07/ 200 5
Firm war e V ersi on: V1 .02. 07 04/ 09/2 008
Devi ce Nam e : LOO P O 9310
Conn ect Po rt: SUP V_P ORT
Star t T ime
: 00: 00: 05 0 1/0 1/2 008
[DIS PLA Y]
1 -> 1 Hou r Pe rf. Re port
2 -> 24 Ho ur P erf . R epor t
C -> Sy ste m Co nfi gur atio n
Q -> Al arm Que ue
H -> Al arm His tor y
I -> Li ne Stat us
[SET UP]
P -> Pa ssw ord Set up
S -> Sy ste m Se tup
M -> Sy ste m Al arm Se tup
T -> Lo opb ack Tes t
L -> Fi le Tran sfe r
V -> St ore /Ret rie ve Conf igu rat ion
[LOG ]
F -> Lo g O ff [ SET UP] ,[MI SC] Me nu
O -> Lo g O n [ SET UP] ,[MI SC] Me nu
R -> Co nne ct t o R emo te T erm ina l
[MIS C]
A -> Al arm Cut Of f
K -> Cl ear Per for man ce D ata
X -> Cl ear Ala rm Que ue a nd His tory
Y -> Re tur n to De fau lt
Z -> Sy ste m Re set
>>SP ACE ba r to re fre sh o r e nte r a com man d == =>
61
Chapter 6 Terminal Operation
Press "D" from the "File Transfer" menu to Download Configuration.
E1-F OM
== = Fi le Tra nsfe r = ==
0 6:20 :22 01 /01/ 200 8
A -> Dow nlo ad Main boa rd Firm war e
B -> Upl oad Ma inbo ard Fi rmwa re
C -> Cop y F irm ware to Re mote
D -> Dow nlo ad Conf igu rat ion
E -> Upl oad Co nfig ura tio n
<< P res s E SC k ey to retu rn to Main Me nu or e nte r a com man d > >
This menu is used to download system configuration. User has to key in a file name for tirmware. Then press
ENTER key to confirm or ESC to abort.
E1-F OM
=== Do wnlo ad Con figu rat ion ===
ARRO W K EYS : CU RSO R M OVE, BA CKS PACE to ed it, ESC to abo rt
Tran sfe r P roto col
Firm war e F ile Nam e
TFTP Se rve r IP
0 1:42 :14 06 /01/ 200 5
: T FTP
: _ ___ ___ ____ ___ ___ ____ ___ ___ ____ ___ ___ ____ ___ ___ ____ ___ __
: 0 10. 002 .012 .00 1
<< P res s E SC k ey to abor t, ENT ER k ey to cont inu e > >
62
Chapter 6 Terminal Operation
6.11.5
Upload Configuration
The full menu path for Upload Configuration is as follows:
O > Log On
L > File Transfer
E> Upload Configuration
E1-F OM
=== Mai n M enu ===
0 1:21 :30 01 /01/ 200 8
Seri al Num ber
: 11 8835
Hard war e V ersi on: Ve r.F 07/ 200 5
Firm war e V ersi on: V1 .02. 07 04/ 09/2 008
Devi ce Nam e : LOO P O 9310
Conn ect Po rt: SUP V_P ORT
Star t T ime
: 00: 00: 05 0 1/0 1/2 008
[DIS PLA Y]
1 -> 1 Hou r Pe rf. Re port
2 -> 24 Ho ur P erf . R epor t
C -> Sy ste m Co nfi gur atio n
Q -> Al arm Que ue
H -> Al arm His tor y
I -> Li ne Stat us
[SET UP]
P -> Pa ssw ord Set up
S -> Sy ste m Se tup
M -> Sy ste m Al arm Se tup
T -> Lo opb ack Tes t
L -> Fi le Tran sfe r
V -> St ore /Ret rie ve Conf igu rat ion
[LOG ]
F -> Lo g O ff [ SET UP] ,[MI SC] Me nu
O -> Lo g O n [ SET UP] ,[MI SC] Me nu
R -> Co nne ct t o R emo te T erm ina l
[MIS C]
A -> Al arm Cut Of f
K -> Cl ear Per for man ce D ata
X -> Cl ear Ala rm Que ue a nd His tory
Y -> Re tur n to De fau lt
Z -> Sy ste m Re set
>>SP ACE ba r to re fre sh o r e nte r a com man d == =>
Press "E" from the "File Transfer" menu to Upload Configuration.
E1-F OM
== = Fi le Tra nsfe r = ==
0 6:20 :22 01 /01/ 200 8
A -> Dow nlo ad Main boa rd Firm war e
B -> Upl oad Ma inbo ard Fi rmwa re
C -> Cop y F irm ware to Re mote
D -> Dow nlo ad Conf igu rat ion
E -> Upl oad Co nfig ura tio n
<< P res s E SC k ey to retu rn to Main Me nu or e nte r a com man d > >
63
Chapter 6 Terminal Operation
Key in a file name for tirmware. Then press ENTER key to confirm or ESC to abort.
E1-F OM
== = U ploa d C onf igur ati on ===
ARRO W K EYS : CU RSO R M OVE, BA CKS PACE to ed it, ESC to abo rt
Tran sfe r P roto col
Conf ig Fil e Na me
TFTP Se rve r IP
0 1:42 :40 06 /01/ 200 5
: T FTP
: _ ___ ___ ____ ___ ___ ____ ___ ___ ____ ___ ___ ____ ___ ___ ____ ___ __
: 0 10. 002 .012 .00 1
<< P res s E SC k ey to abor t, ENT ER k ey to cont inu e > >
6.12 Store/ Retrieve Configuration
The full menu path for Store/Retrieve Configuration is as follows:
O > Log On
V > Store/Retrieve Configuration
E1-F OM
=== Mai n M enu ===
0 1:21 :30 01 /01/ 200 8
Seri al Num ber
: 11 8835
Hard war e V ersi on: Ve r.F 07/ 200 5
Firm war e V ersi on: V1 .02. 07 04/ 09/2 008
Devi ce Nam e : LOO P O 9310
Conn ect Po rt: SUP V_P ORT
Star t T ime
: 00: 00: 05 0 1/0 1/2 008
[DIS PLA Y]
1 -> 1 Hou r Pe rf. Re port
2 -> 24 Ho ur P erf . R epor t
C -> Sy ste m Co nfi gur atio n
Q -> Al arm Que ue
H -> Al arm His tor y
I -> Li ne Stat us
[SET UP]
P -> Pa ssw ord Set up
S -> Sy ste m Se tup
M -> Sy ste m Al arm Se tup
T -> Lo opb ack Tes t
L -> Fi le Tran sfe r
V -> St ore /Ret rie ve Conf igu rat ion
[LOG ]
F -> Lo g O ff [ SET UP] ,[MI SC] Me nu
O -> Lo g O n [ SET UP] ,[MI SC] Me nu
R -> Co nne ct t o R emo te T erm ina l
[MIS C]
A -> Al arm Cut Of f
K -> Cl ear Per for man ce D ata
X -> Cl ear Ala rm Que ue a nd His tory
Y -> Re tur n to De fau lt
Z -> Sy ste m Re set
>>SP ACE ba r to re fre sh o r e nte r a com man d == =>
64
Chapter 6 Terminal Operation
This menu is used to store and retrieve system configuration. Press "V" from the "Main Menu". Use arrow keys
to mvoe the cursor at "STORE" or "RETRIEVE", press ENTER to confirm the selection. The current selection
will be highlighted by an asterisk (*).
1. Store Configuration:
E1-F OM
>> S ele ct ?
=== Sto re/ Retr iev e C onfi gur ati on== =
*ST ORE
0 1:43 :17 06 /01/ 200 5
R ETR IEVE
Press ENTER from the above menu. To store the current system configuration, press "Y". Otherwise, press "N"
to abort.
E1-F OM
=== Sto re/ Retr iev e C onfi gur ati on== =
>> S ele ct ?
*ST ORE
R ETR IEVE
>> S tor e C urre nt Con figu rat ion ? [ Y/N ]
65
0 1:43 :59 06 /01/ 200 5
Chapter 6 Terminal Operation
2. Retrieve Configuration:
The operation for "RETRIEVE"is same as "STORE".
E1-F OM
>> S ele ct ?
E1-F OM
=== Sto re/ Retr iev e C onfi gur ati on== =
ST ORE
0 1:43 :17 06 /01/ 200 5
*R ETR IEVE
=== Sto re/ Retr iev e C onfi gur ati on== =
>> S ele ct ?
ST ORE
*R ETR IEVE
>> R etr iev e La st Sto red Con fig urat ion ? [Y/N ]
66
0 1:43 :17 06 /01/ 200 5
Chapter 6 Terminal Operation
6.13 Alarm Cut Off
The full menu path for Alarm Cut Off is as follows:
O > Log On
A > Alarm Cut Off
This menu is used to do alarm cut-off. Press "A" from the "Main Menu", then press "Y" to confirm or "N" to
abort.
E1-F OM
=== Mai n M enu ===
0 1:44 :24 06 /01/ 200 5
Seri al Num ber
: 00 9310
Hard war e V ersi on: Ve r.C 06/ 25/ 2005
Firm war e V ersi on: S1 .00 07/ 04/ 2005
Devi ce Nam e :
Conn ect Po rt: SUP V_P ORT
Star t T ime
: 00: 00: 05 0 6/0 1/2 005
[DIS PLA Y]
1 -> 1 Hou r Pe rf. Re port
2 -> 24 Ho ur P erf . R epor t
C -> Sy ste m Co nfi gur atio n
Q -> Al arm Que ue
H -> Al arm His tor y
I -> Li ne Stat us
[SET UP]
P -> Pa ssw ord Set up
S -> Sy ste m Se tup
M -> Sy ste m Al arm Se tup
T -> Lo opb ack Tes t
L -> Fi le Tran sfe r
V -> St ore /Ret rie ve Conf igu rat ion
[LOG ]
F -> Lo g O ff [ SET UP] ,[MI SC] Me nu
O -> Lo g O n [ SET UP] ,[MI SC] Me nu
R -> Co nne ct t o R emo te T erm ina l
[MIS C]
A -> Al arm Cut Of f
K -> Cl ear Per for man ce D ata
X -> Cl ear Ala rm Que ue a nd His tory
Y -> Re tur n to De fau lt
Z -> Sy ste m Re set
>> C ut off ala rm - a re y ou sur e (Y /N) ?
67
Chapter 6 Terminal Operation
6.14 Clear Performance Data
The full menu path for Clear Performance Data is as follows:
O > Log On
K > Clear Performance Data
To clear performance data, press "K" from the "Main Menu". Then press "Y" to confirm or "N" to abort.
E1-F OM
=== Mai n M enu ===
0 1:44 :24 06 /01/ 200 5
Seri al Num ber
: 00 9310
Hard war e V ersi on: Ve r.C 06/ 25/ 2005
Firm war e V ersi on: S1 .00 07/ 04/ 2005
Devi ce Nam e :
Conn ect Po rt: SUP V_P ORT
Star t T ime
: 00: 00: 05 0 6/0 1/2 005
[DIS PLA Y]
1 -> 1 Hou r Pe rf. Re port
2 -> 24 Ho ur P erf . R epor t
C -> Sy ste m Co nfi gur atio n
Q -> Al arm Que ue
H -> Al arm His tor y
I -> Li ne Stat us
[SET UP]
P -> Pa ssw ord Set up
S -> Sy ste m Se tup
M -> Sy ste m Al arm Se tup
T -> Lo opb ack Tes t
L -> Fi le Tran sfe r
V -> St ore /Ret rie ve Conf igu rat ion
[LOG ]
F -> Lo g O ff [ SET UP] ,[MI SC] Me nu
O -> Lo g O n [ SET UP] ,[MI SC] Me nu
R -> Co nne ct t o R emo te T erm ina l
[MIS C]
A -> Al arm Cut Of f
K -> Cl ear Per for man ce D ata
X -> Cl ear Ala rm Que ue a nd His tory
Y -> Re tur n to De fau lt
Z -> Sy ste m Re set
>> C lea r P erfo rma nce Dat a ? [Y /N]
68
Chapter 6 Terminal Operation
6.15 Clear Alarm Queue and History
The full menu path for Clear Alarm Queue and History is as follows:
O > Log On
X > Clear Alarm Queue and History
This menu is allowed users to clear alarm queue. Press "X" from the "Mani Menu", then press "Y" to confirm or
"N" to abort.
E1-F OM
=== Mai n M enu ===
0 1:44 :24 06 /01/ 200 5
Seri al Num ber
: 00 9310
Hard war e V ersi on: Ve r.C 06/ 25/ 2005
Firm war e V ersi on: S1 .00 07/ 04/ 2005
Devi ce Nam e :
Conn ect Po rt: SUP V_P ORT
Star t T ime
: 00: 00: 05 0 6/0 1/2 005
[DIS PLA Y]
1 -> 1 Hou r Pe rf. Re port
2 -> 24 Ho ur P erf . R epor t
C -> Sy ste m Co nfi gur atio n
Q -> Al arm Que ue
H -> Al arm His tor y
I -> Li ne Stat us
[SET UP]
P -> Pa ssw ord Set up
S -> Sy ste m Se tup
M -> Sy ste m Al arm Se tup
T -> Lo opb ack Tes t
L -> Fi le Tran sfe r
V -> St ore /Ret rie ve Conf igu rat ion
[LOG ]
F -> Lo g O ff [ SET UP] ,[MI SC] Me nu
O -> Lo g O n [ SET UP] ,[MI SC] Me nu
R -> Co nne ct t o R emo te T erm ina l
[MIS C]
A -> Al arm Cut Of f
K -> Cl ear Per for man ce D ata
X -> Cl ear Ala rm Que ue a nd His tory
Y -> Re tur n to De fau lt
Z -> Sy ste m Re set
>> C lea r a larm qu eue - a re you sur e ( Y/N )?
69
Chapter 6 Terminal Operation
6.16
Return to Default
The full menu path for Return to Default is as follows:
O > Log On
Y > Return to Default
If users want to return the system configuration to default setting. Press "Y" from the "Main Menu", then press
"Y" to confirm or "N" to abort.
E1-F OM
=== Mai n M enu ===
0 1:44 :24 06 /01/ 200 5
Seri al Num ber
: 00 9310
Hard war e V ersi on: Ve r.C 06/ 25/ 2005
Firm war e V ersi on: S1 .00 07/ 04/ 2005
Devi ce Nam e :
Conn ect Po rt: SUP V_P ORT
Star t T ime
: 00: 00: 05 0 6/0 1/2 005
[DIS PLA Y]
1 -> 1 Hou r Pe rf. Re port
2 -> 24 Ho ur P erf . R epor t
C -> Sy ste m Co nfi gur atio n
Q -> Al arm Que ue
H -> Al arm His tor y
I -> Li ne Stat us
[SET UP]
P -> Pa ssw ord Set up
S -> Sy ste m Se tup
M -> Sy ste m Al arm Se tup
T -> Lo opb ack Tes t
L -> Fi le Tran sfe r
V -> St ore /Ret rie ve Conf igu rat ion
[LOG ]
F -> Lo g O ff [ SET UP] ,[MI SC] Me nu
O -> Lo g O n [ SET UP] ,[MI SC] Me nu
R -> Co nne ct t o R emo te T erm ina l
[MIS C]
A -> Al arm Cut Of f
K -> Cl ear Per for man ce D ata
X -> Cl ear Ala rm Que ue a nd His tory
Y -> Re tur n to De fau lt
Z -> Sy ste m Re set
>> R etu rn to d efa ult - a re you sur e ? [Y /N]
70
Chapter 6 Terminal Operation
6.17 System Reset
The full menu path for System Reset is as follows:
O > Log On
Z > System Reset
O9310 provides two mode of system restart for users: (1) warm restart and (2) cold restart.
Move the cursor at a desired mode, press ENTER to enable the current selecton, which will be highlighted by
an asterisk (*).
E1-F OM
=== Mai n M enu ===
0 1:44 :24 06 /01/ 200 5
Seri al Num ber
: 00 9310
Hard war e V ersi on: Ve r.C 06/ 25/ 2005
Firm war e V ersi on: S1 .00 07/ 04/ 2005
Devi ce Nam e :
Conn ect Po rt: SUP V_P ORT
Star t T ime
: 00: 00: 05 0 6/0 1/2 005
[DIS PLA Y]
1 -> 1 Hou r Pe rf. Re port
2 -> 24 Ho ur P erf . R epor t
C -> Sy ste m Co nfi gur atio n
Q -> Al arm Que ue
H -> Al arm His tor y
I -> Li ne Stat us
[SET UP]
P -> Pa ssw ord Set up
S -> Sy ste m Se tup
M -> Sy ste m Al arm Se tup
T -> Lo opb ack Tes t
L -> Fi le Tran sfe r
V -> St ore /Ret rie ve Conf igu rat ion
[LOG ]
F -> Lo g O ff [ SET UP] ,[MI SC] Me nu
O -> Lo g O n [ SET UP] ,[MI SC] Me nu
R -> Co nne ct t o R emo te T erm ina l
[MIS C]
A -> Al arm Cut Of f
K -> Cl ear Per for man ce D ata
X -> Cl ear Ala rm Que ue a nd His tory
Y -> Re tur n to De fau lt
Z -> Sy ste m Re set
>> R est art Mod e ?
*War m R est art
C old Res tar t
Press ENTER from the above menu. Then press "Y" to confirm or "N" to abort the reset.
1. Warm Restart:
E1-F OM
=== Mai n M enu ===
0 1:46 :09 06 /01/ 200 5
Seri al Num ber
: 00 9310
Hard war e V ersi on: Ve r.C 06/ 25/ 2005
Firm war e V ersi on: S1 .00 07/ 04/ 2005
Devi ce Nam e :
Conn ect Po rt: SUP V_P ORT
Star t T ime
: 00: 00: 05 0 6/0 1/2 005
[DIS PLA Y]
1 -> 1 Hou r Pe rf. Re port
2 -> 24 Ho ur P erf . R epor t
C -> Sy ste m Co nfi gur atio n
Q -> Al arm Que ue
H -> Al arm His tor y
I -> Li ne Stat us
[SET UP]
P -> Pa ssw ord Set up
S -> Sy ste m Se tup
M -> Sy ste m Al arm Se tup
T -> Lo opb ack Tes t
L -> Fi le Tran sfe r
V -> St ore /Ret rie ve Conf igu rat ion
[LOG ]
F -> Lo g O ff [ SET UP] ,[MI SC] Me nu
O -> Lo g O n [ SET UP] ,[MI SC] Me nu
R -> Co nne ct t o R emo te T erm ina l
[MIS C]
A -> Al arm Cut Of f
K -> Cl ear Per for man ce D ata
X -> Cl ear Ala rm Que ue a nd His tory
Y -> Re tur n to De fau lt
Z -> Sy ste m Re set
>> R est art Mod e ?
*War m R est art
Rese t - ar e yo u s ure ? [ Y/N ]
C old Res tar t
71
Chapter 6 Terminal Operation
1. Cold Restart:
E1-F OM
=== Mai n M enu ===
0 1:44 :24 06 /01/ 200 5
Seri al Num ber
: 00 9310
Hard war e V ersi on: Ve r.C 06/ 25/ 2005
Firm war e V ersi on: S1 .00 07/ 04/ 2005
Devi ce Nam e :
Conn ect Po rt: SUP V_P ORT
Star t T ime
: 00: 00: 05 0 6/0 1/2 005
[DIS PLA Y]
1 -> 1 Hou r Pe rf. Re port
2 -> 24 Ho ur P erf . R epor t
C -> Sy ste m Co nfi gur atio n
Q -> Al arm Que ue
H -> Al arm His tor y
I -> Li ne Stat us
[SET UP]
P -> Pa ssw ord Set up
S -> Sy ste m Se tup
M -> Sy ste m Al arm Se tup
T -> Lo opb ack Tes t
L -> Fi le Tran sfe r
V -> St ore /Ret rie ve Conf igu rat ion
[LOG ]
F -> Lo g O ff [ SET UP] ,[MI SC] Me nu
O -> Lo g O n [ SET UP] ,[MI SC] Me nu
R -> Co nne ct t o R emo te T erm ina l
[MIS C]
A -> Al arm Cut Of f
K -> Cl ear Per for man ce D ata
X -> Cl ear Ala rm Que ue a nd His tory
Y -> Re tur n to De fau lt
Z -> Sy ste m Re set
>> R est art Mod e ?
War m R est art
Rese t - ar e yo u s ure ? [ Y/N ]
*C old Res tar t
72