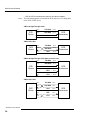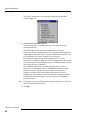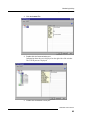
1
AirStream™
Wireless Modem
Operation
Manual
63108
Contents
Chapter 1: Overview1......................................................................................... 1
Why Wireless? .................................................................................................... 1
AirStream Technology ........................................................................................................ 2
Frequency Hopping .................................................................................................................. 3
Speed and Bandwidth ............................................................................................................. 3
Sessions and Links ................................................................................................................... 4
Error Detection and Correction ................................................................................................. 4
Transmit Power Control ............................................................................................................ 5
Data Transfer Sessions ............................................................................................................ 5
Security .............................................................................................................................. 6
Transceiver Features .......................................................................................................... 6
Using This Manual ............................................................................................................. 7
Assumptions ....................................................................................................................... 8
Getting Help........................................................................................................................ 8
Chapter 2: Installation and Specifications
.................................................... 9
Hardware Installation ........................................................................................................ 9
Installing Stand-alone Transceivers .........................................................................................9
Interface Requirements .................................................................................................. 11
Stand-alone Transceiver Pin Out .............................................................................................12
Serial Communications ................................................................................................... 13
Hardware Specifications ................................................................................................. 15
Software Requirements ................................................................................................... 16
Software Installation ........................................................................................................ 16
Configuration Manager ............................................................................................................16
Network Software Utilities ....................................................................................................... 17
Antennas ........................................................................................................................... 17
Chapter 3: Point to Point and Network Topologies
..................................... 19
Point to Point Pair ............................................................................................................. 19
Networks .......................................................................................................................... 19
Multi-Point Network ................................................................................................................ 20
Repeater Network ...................................................................................................................20
Broadcast Network ................................................................................................................. 22
Network Software Utilities ............................................................................................... 23
Copyright © 2002 Rice Lake Weighing Systems. All rights reserved. Printed in the United States of America.
Specifications subject to change without notice.
February 2002
i
ComPort Intercept .................................................................................................................. 23
TCP/IP Intercept ..................................................................................................................... 24
ActiveX Library ........................................................................................................................ 24
DOS Library............................................................................................................................ 24
Chapter 4: Configuring Your Transceiver ........................................................ 25
Getting Status .................................................................................................................. 26
The Toolbar ...................................................................................................................... 27
Exiting the program .......................................................................................................... 27
Quick Configuration ................................................................................................... 27
Modifying Settings ..................................................................................................... 31
Applying and Storing Changes ......................................................................................... 31
Generating Reports .................................................................................................... 32
Power Management................................................................................................... 34
Passwords and Access ............................................................................................... 36
Levels Of Access ............................................................................................................. 36
Passwords ....................................................................................................................... 36
Using Hop Tables......................................................................................................... 37
Entering Hop Table Numbers ........................................................................................... 37
Validating the Hop Table .................................................................................................. 38
Specifying Hopping Parameters ....................................................................................... 38
Assigning IDs.............................................................................................................. 39
Signal Analysis .......................................................................................................... 41
Serial Settings ............................................................................................................ 41
Data Threshold ........................................................................................................... 43
Chapter 5: Setting up a Network with ComPort .............................................. 45
ComPort Configurator ................................................................................................ 46
Advanced View ................................................................................................................ 48
Entering and Changing Information .................................................................................. 48
Adding Virtual Ports ......................................................................................................... 48
Setting Control Line Parameters ....................................................................................... 51
Tx Purge ........................................................................................................................... 51
Remove Unit ID Number .................................................................................................. 52
Remove Virtual Communications Port ............................................................................... 53
Renaming Virtual Ports ..................................................................................................... 53
Using ComPort Activator............................................................................................ 53
ComPort Activator ............................................................................................................ 54
ii
Chapter 6: Setting up a Network with TCP/IP
.............................................. 55
TCP/IP Configurator .......................................................................................................... 56
Advanced View ....................................................................................................................... 57
Entering and Changing Information ......................................................................................... 58
Adding TCP/IP Ports ...............................................................................................................58
Editing Ports ...........................................................................................................................60
Setting Control Line Parameters.............................................................................................. 61
Remove Unit ID Number .........................................................................................................61
Remove TCP/IP COM Port ......................................................................................................62
Renaming TCP/IP Ports ..........................................................................................................62
Monitoring Activity ........................................................................................................... 62
Using TCP/IP Activator ..................................................................................................... 64
TCP/IP Activator ..................................................................................................................... 64
Chapter 7: ActiveX Network Applications
67
wCi_OPEN ........................................................................................................................67
wCi_Close ........................................................................................................................68
wCi_WriteDataEx .............................................................................................................68
wCi_GetDestinationID ......................................................................................................69
wCi_CheckRxQue .............................................................................................................69
wCi_SetOutputDeviceID ...................................................................................................69
wCi_StartStopPrinting ......................................................................................................70
wCi_GetSourceID .............................................................................................................70
wCi_SetGpioOutput ..........................................................................................................71
wCi_GetGpioOutput ..........................................................................................................71
wCi_GetGpioInput ............................................................................................................72
wCi_GetGpioMode ............................................................................................................72
wCi_Ping ..........................................................................................................................73
AboutBox ..........................................................................................................................73
NewMessage..................................................................................................................... 73
ActiveX Design Time Properties Page: ............................................................................ 74
Chapter 8: Testing Your Units
....................................................................... 75
Terminal Mode Test ......................................................................................................... 75
What You Need .......................................................................................................................75
Performing the Test................................................................................................................. 76
Loopback Test .................................................................................................................. 76
What You Need....................................................................................................................... 77
Performing the Test ................................................................................................................ 77
Viewing Data In The Rx And Tx Panes ....................................................................................79
iii
Using Hyperterminal ............................................................................................................... 80
Chapter 9: Troubleshooting .............................................................................. 81
Chapter 10: Learning Exercises....................................................................... 83
Point to Point .............................................................................................................. 83
Materials Needed ............................................................................................................. 83
Procedure ........................................................................................................................ 83
Multi-Point ComPort Intercept................................................................................... 86
Materials Needed ............................................................................................................. 86
Procedure ........................................................................................................................ 86
Multi-Point TCP/IP Intercept ...................................................................................... 91
Materials Needed .............................................................................................................. 91
Procedure ........................................................................................................................ 91
Repeater TCP/IP Intercept ......................................................................................... 95
Materials Needed ............................................................................................................. 95
Procedure ........................................................................................................................ 95
Broadcast Remote-To-All ......................................................................................... 100
Materials Needed ........................................................................................................... 100
Procedure ...................................................................................................................... 100
Broadcast Remote-To-Host ...................................................................................... 104
Materials Needed ........................................................................................................... 104
Procedure ...................................................................................................................... 104
Glossary ........................................................................................................... 109
Warranty .......................................................................................................... 110
iv
1
Chapter 1: Overview
Welcome to the AirStream™ family of wireless
Transceivers. These frequency hopping transceivers
are supplied as a Stand-alone Transceiver that plugs
into the RS232 port of an existing product and can be
used to create wireless data networks in the licensefree band at 2.4 GHz. AirStream Transceivers can
function in a wide array of network topologies. This
manual provides the information you need to install,
configure, and test this transceiver in a variety of
these networks.
In this Chapter
• Why Wireless
• AirStream
Technology
• Frequency
Hopping
• Security
• Transceiver
Features
• Assumptions
• Using this
Manual
WHY WIRELESS?
AirStream Transceivers provide the first practical and
affordable alternative to wire for industrial and
commercial applications where data must be
transmitted reliably and securely in a wide range of
indoor and outdoor environments. These applications
are solutions for OEMs and Systems Integrators in
need of reliable, secure, long-range, and low-cost
alternatives to wire for commercial and industrial
applications. There are hundreds of factory, office,
industrial, transportation, medical, financial, and
retail applications for which AirStream solutions are
ideally suited.
• Getting Help
Wireless data connectivity offers many advantages
over wire:
•
•
•
•
•
Wireless systems are easier to install
Wireless system installation and maintenance
costs are lower
Wireless links are feasible in many locations
where wire is not
Wireless installations can be reconfigured or
relocated easily
Wireless products are mobile
AirStream User’s Manual
1
AirStream Technology
Overview
Reliability, security, range, and cost have been the traditional obstacles to
widespread adoption of wireless data networks. But today frequency
hopping technology provides reliability comparable to and security
greater than wire. AirStream Transceivers have been designed specifically
for long range and low cost. Moreover, the license-free band at 2.4GHz
allows wireless data connectivity solutions to be implemented without
site licenses or carrier fees. These developments make wireless data
networks more practical and affordable than wire for many applications.
AirStream wireless data connectivity solutions are more reliable, more
secure, longer range, and lower cost than wire:
•
More Reliable
AirStream Transceivers evaluated with industry standard test
equipment have exceeded a bit error rate (BER) standard 100 times
more rigorous than for 10 BaseT Ethernet and 1,000 times more
reliably than cellular devices.
•
More Secure
AirStream Transceivers utilize frequency hopping technology
developed by the military and refined by intelligence agencies to
avoid interception and interference. It is more difficult to intercept
communications between AirStream wireless devices than to tap a
wire.
•
Longer Range
AirStream Transceivers operate through walls and floors up to 1,500
feet in most buildings, and line-of-sight to the horizon outdoors. For
longer distances, networks of AirStream Transceivers can relay data
packets to and from out-of-range devices to significantly extend the
range of a wireless data network.
•
Lower Cost
Wireless devices are installed at prices that can be a fraction of the
cost of wires. AirStream devices can be moved or reconfigured at no
additional cost.
AIRSTREAM TECHNOLOGY
AirStream uses Frequency Hopping Spread Spectrum (FHSS) technology
to ensure secure, reliable long-range data transmissions. AirStream
utilizes this proven technology to provide OEMs and Systems Integrators
with a superior wireless data connectivity solution for many industrial and
commercial applications.
AirStream User’s Manual
2
AirStream Technology
Overview
Frequency Hopping
Interference
2.483
. . .
. . .. .. . . .
. .. . . .
2.4
Transmitting
Transceiver
Receiving
Transceiver
Frequency Hopping Spread Spectrum technology was developed by the
U.S. military to prevent interference or interception of radio transmissions
on the battlefield. Frequency hopping devices concentrate their full power
into a very narrow signal and randomly hop from one frequency to
another within that spectrum up to 200 times per second. If they
encounter interference on a particular frequency, the devices retain the
affected data, randomly hop to another point on the spectrum, and
continue transmission. There are always spaces without interference
somewhere in the allotted radio spectrum. A frequency hopping device
will find those spaces and complete a transmission where other wireless
technologies fail.
AirStream Transceivers operate in the license-free Industrial, Scientific,
and Medical (ISM) band at 2.4GHz. No one owns or licenses these
frequency bands. Consequently, anyone may operate a wireless network
in a license-free band without licenses or carrier fees (unlike cellular
technology), subject only to restrictions on how much power can be used
(1 watt or less in the U.S.) and the type of radio signals transmitted
(spread spectrum). The U.S. FCC and telecommunications regulators in
many countries have designated this band for low-power license-free use.
Speed and Bandwidth
There is a common misconception regarding speed and data connectivity;
specifically, that faster is better. In computer and telecommunications
networks, higher speeds are unquestionably superior. However, this is not
the case with wireless data connectivity. There are many circumstances
where range, in-building penetration, and reliability are more important
than speed.
Paying for more speed than what is necessary to implement a data
connectivity application is not efficient. The broader radio frequency (RF)
bandwidth needed to transmit higher data rates dramatically reduces
range. In contrast, the lower data rates used by AirStream allow narrow
bandwidths to be used. This is ideal for intermittent, repetitive data
transfer, where the premium is on accuracy and long-range transmission.
AirStream products have been designed specifically to meet the
requirements of such applications. A lower data rate enables AirStream
Transceivers to operate within a narrow RF band over significantly longer
ranges than other 2.4 GHz Frequency Hopping or Direct Sequence Spread
Spectrum (DSSS) products.
AirStream User’s Manual
3
AirStream Technology
Overview
Sessions and Links
AirStream Transceivers use demand-based frequency hopping where RF
is only transmitted when there is data available to transmit. The initiating
transceiver is termed the master and the receiving transceiver is called the
slave. Any device (host or remote transceiver) can be a master or a slave
depending on who initiates the data transfer. AirStream Transceivers
transmit data using sessions and links. A session represents a complete
data transfer cycle between two devices. The session lasts as long as it
takes to transfer all of the data being sent. A session can be comprised of a
number of links which represent the actual transfer of data between two
devices. Radio interference can break a link but not end a session. It may
take several links to complete a session. If a link is broken, it is the job of
the master to reinitiate the link in order to complete the session. This
strategy reduces the collision rate of packets and RF interference from
adjacent devices.
Data going in and out of the transceiver via the serial port is (or can be) a
continuous stream of information; whereas, data transmitted over the air
is broken into frames. Links consist of these frames. The frame represents
the physical data packet transmitted per hop between units.
The transceiver’s channel access (communications link) is based on the
Carrier Sense Multiple Access (CSMA) protocol. This protocol has the
advantage of requiring no special coordination between remotes and
works best with a large or variable number of remotes transmitting
infrequent bursts of data. Channel latency is exponentially distributed,
meaning there is a wait cycle during interference. During interference,
data is hopped to another frequency. Although there is a slight delay
during each hop, data is not lost.
Error Detection and Correction
AirStream Transceivers provide CRC error correction, forward error
correction, and transmission retry to ensure complete transmissions, even
in the most demanding circumstances.
The transceiver uses the ITU cyclical redundancy code 16 (CRC-16) for
error detection. Two separate CRC-16 checks are used within each packet
frame:
•
•
AirStream User’s Manual
4
Header Section
Data Section
AirStream Technology
Overview
Most wireless systems experience single bit errors as the most common
type of reception error. Forward Error Correction (FEC) can be used to
correct for a specific number of bit errors within x-number of bits
transmitted. AirStream uses a ‘Half Rate Coding’ algorithm which
achieves a correction rate of 1 bit-error in 4 bits transmitted.
The transceiver maintains data integrity over the air by means of an
internal automatic-repeat-request (ARQ) protocol, which will resend
erroneous data until it is received correctly. The transceiver takes user
data and breaks it into packets which are then transmitted at a much
higher channel data rate. If the received packet has errors and is not
correctable via the forward-error-correction (FEC) algorithm, the packet
is rejected and resent until a valid packet is received. The transceiver
maintains two 4kB buffers (transmit and receive) which helps to support
continuous uninterrupted transfers even in noisy situations. See Broadcast
Network on page 22 for details on how Broadcast Network behavior
differs.
Transmit Power Control
Wireless devices in close proximity often experience desensing or overloading. AirStream Transceivers minimize this problem by providing
adjustments in the Power Level Feed-Back Control Loop based on the
time-averaged Received Signal Strength Indicator (RSSI) values and the
Actual Power Level Setting as shared between both devices during a
communication session.
Data Transfer Sessions
All units are in one of six possible sequential modes or phases of
operation which cover the complete cycle of data transfer.
1. Idle
Unit listens and scans in each of the 75 channels in the hop table. No
activity.
2. Link Acquisition
Data is present locally, unit begins to ping (search) each frequency in hop
table to find the remote unit.
3. Synchronization
Units on both ends of data transfer synchronize their hopping patterns.
AirStream User’s Manual
5
Security
Overview
4. Data Transfer
In-sync units each alternate transmitting and receiving data in 32msec
intervals (32msec Tx, 32msec Rx). Each 64 msec they hop to the next
frequency.
5. Exit Phase
Data transfer is complete based upon the setting for number of frames of
No Data specified in the transceiver’s configuration.
6. End Connection
Data transfer is complete, units return to Idle mode.
SECURITY
Frequency hopping is inherently more secure than other RF technologies.
In addition, each AirStream Transceiver has a Vendor ID set in the
firmware shipped straight from the factory. As you configure each
transceiver you may provide additional network ID numbers and assign
varying hop tables for independent networks. The combination of
firmware, software IDs, and frequency hopping technology ensures safe
and secure data transmissions. AirStream Transceivers also support your
data encryption software.
TRANSCEIVER FEATURES
AirStream Transceivers enable OEMs and Systems Integrators to
integrate license-free 2.4GHz frequency hopping technology into their
own products. Each transceiver includes a proprietary RF module with a
frequency hopping transmitter and receiver, a Digital Control Module for
RF Module and Application Interface management, and an interface (TTL
or RS232) designed to communicate with a variety of products. The
AirStream Transceivers employ a wireless interface designed to function
as a virtual wire replacement.This offers some distinct advantages over
wire. AirStream Transceivers:
•
•
AirStream User’s Manual
6
Enable mobility that may not have been possible before. And using
either the RS232 or RS485 serial connection, the transceivers can
connect devices at long range—up to 1500 feet indoors, and line of
sight to the horizon.
Compensate for baud rate differences between devices, eliminating
the need for converters between older, slower devices and newer,
somewhat faster ones.
Using This Manual
Overview
•
Provide a GPIO (General Purpose Input/Output) mode for enabling
communication of status and control information in addition to data.
This ensures timely notification of state changes such as an “out of
paper” indication, eliminating the need for time-consuming manual
checking for such conditions.
Provide both Software and Hardware Flow Control to enable pacing
of data transmission between devices.
Enable efficient timed or batched transmission of data through data
thresholding capabilities.
Provide power control modes for power conservation.
Provide asymmetrical data rates to accommodate large directional
data transfers.
Provide the configurabilitiy to support a variety of network topologies.
Can be upgraded in the field.
•
•
•
•
•
•
USING THIS MANUAL
All AirStream software applications are Windows® based and adhere to
Windows software conventions.
The conventions used for instructions in this manual are as follows:
Convention
Definition
bold
Bold is used to indicate something that should be typed exactly or an exact
duplication of a window name or button.
click
Click with the button on the mouse and release. Left button always implied on
Windows.
Control-e
Hold down the Control key and press the E key.
double-click
Click two times quickly on the mouse button and release.
right-click
Click with the right button on the mouse and release.
select
This can mean to highlight (which is the action of changing a screen object’s
attribute to have an inverted look on the screen) icons or list items by clicking
or by clicking a menu item and dragging the cursor over its options to choose
that option or sub-item.
Shift-click
Hold down the Shift key and click.
AirStream User’s Manual
7
Assumptions
Overview
ASSUMPTIONS
It is assumed that you are familiar with your Windows operating system.
It is also assumed that your Windows operating system is operating in
default mode (e.g., double-click to open). All instructions in this manual
assume default mode (as delivered) operation.
GETTING HELP
Each software program has on-line help accessible through the help menu
within the program. For Technical Support call 1-800-472-6703.
AirStream User’s Manual
8
1
Chapter 2: Installation and Specifications
This chapter discusses the physical installation of the
transceiver and the installation of the software
needed to configure each transceiver. All AirStream
Transceivers need to be configured for a specific
network topology. This process involves
understanding how the equipment is physically
installed and how the software is installed.
Sequentially, all transceivers are configured on a
Host PC prior to being physically attached to their
designated device. Configuration of the transceivers
is discussed in Chapter 4, Configuring your
Transceiver on page 25.
In this Chapter
• Hardware
Installation
• Interface
Requirements
• Pin Outs
• Serial
Communication
• Hardware
Specifications
• Software
Requirements
• Software
Installation
HARDWARE INSTALLATION
Prior to installing your transceiver(s), please count
all of the delivered equipment. Use your packing slip
or purchase order for verification. Each transceiver
needs power and an antenna. It will be attached either
internally or externally to a single device(e.g., PC,
laptop, or printer).
• Antennas
Installing Stand-alone Transceivers
To Install Stand-alone Transceivers
1. Insert the power supply male connector into the
corresponding female connector slot on transceiver
chassis.
Power
Power
RS232
Antenna
2. Insert Power supply plug into power (i.e., power
outlet)
AirStream User’s Manual
9
Hardware Installation
Installation and Specifications
Verify LEDs 1 and 2 on front panel blink three times. LED 1 remains lit.
3. Attach the Antenna to the transceiver.
Note that the antenna connection is a reverse thread SMA connection. You
must turn it counter-clockwise to attach.
4. Attach the male connector on the RS232 cable to the matching serial port
on the rear panel of the transceiver.
5. Connect the other end of this cable to the matching serial port on the
device.
Note: Prior to installation on the desired device, all transceivers must first be
connected to and configured with a PC. In the case of some network
installations, it must be the Host PC.
AirStream User’s Manual
10
Interface Requirements
Installation and Specifications
INTERFACE REQUIREMENTS
Design-in
Stand-alone
Input Power Requirements
Voltage
+5.0 Volts, +/- 5%
Greater than 6.5 Volts and
Less than 9.0 Volts
(6.5 -32 Volts if Wide Input
model)
Ripple
Less then 10mV(RMS) from DC to
1MHz
Less then 250mV(RMS) from
DC to 1MHz
Current in Idle
mode
~200mA
~200mA
Instantaneous
Current in Tx mode
550mA
550mA
Time averaged
(over 100mSec.)
Current in Tx/Rx
mode
~360mA
~360mA
Physical Interface Requirements
PCB connector: 1x12 right angle
connector; 0.025 square pin @ 0.1
spacing
PCB connector: Standard
DB-9(Female)
Matching connector: AMP Part
Number 2-87499-1 or equivalent
Electrical Interface Voltage Levels
Input levels
Output levels
Open Collector
Output
Low <1.5 Volts;
Low -3.0 to -30 Volts;
High > 3.5 Volts @ 20uA
High +3.0 to +30
Low < 0.4 Volts;
Low < -5.0 Volts;
High > 3.7 Volts @ 6 mA
High > +5.0 Volts @ 3mA
Low < 0.7 Volts @12mA
N/A
AirStream User’s Manual
11
Interface Requirements
Installation and Specifications
Stand-alone Transceiver Pin Out
Pin
name
I/O
Function
1
DCD – Data Carrier Detect
Output
Session Status (True)
2
TxD – Transmit Data
Output
Data from transceiver to the attached
device
3
RxD – Receive Data
Input
Data into transceiver from the
attached device
4
DTR – Data Terminal Ready
Input
Data/Command Mode
5
Gnd
--
Signal Ground
6
DSR – Data Set Ready
Output
Always Asserted (High)
7
RTS – Request to Send
Input
HW Flow Control (internally pulled
up)
8
CTS – Clear to Send
Output
HW Flow Control (default: asserted/
High)
9
RI – Ring Indicate
Output
Status Change (default: de-asserted/
Low)
AirStream User’s Manual
12
Serial Communications
Installation and Specifications
SERIAL COMMUNICATIONS
In order to configure any transceiver, you must use a 9 pin RS232 cable.
This is necessary because pin 4 is used to transmit the configuration data
into EEPROM and other pins are used during the configuration process as
well. AirStream provides a 9 pin RS232 cable with all Stand-alone
Transceivers. A TTL to RS232 pin adapter is purchasable for Design-in
Transceivers.
You must use the 9 wire cable in the following cases:
•
•
•
When using the Configuration Manager to initialize/setup a
transceiver.
When the Host PC is using network utilities.
When field upgrading the transceiver.
Once configuration is complete, you may opt to use a 3 or 5 wire cable
during field communication with Stand-alone transceivers. These cables
are not provided by AirStream. They can be purchased from a number of
sources.
To determine which cable you need in the field
1. Evaluate which connections you need
Wire Type
What’s Connected
3 Wire Connection
Data (TxD/RxD) and Ground. Does NOT support Hardware Flow
Control; will work with no Flow Control or Software Flow Control
5 Wire Connection
Data and Ground; with Hardware Flow Control (RTS/CTS)
(receive, transmit, ground, hardware flow control). Required for
Hardware Flow Control, will also work with no Flow Control or
Software Flow Control.
9 Wire Connection
All 9 pins are connected.
2. Determine whether you need a straight through or null cable.
The interface between the transceiver and the attached device is a Data
Communications Equipment (DCE) or Data Terminal Equipment (DTE)
connection requiring either a straight through or Null cable. The Null
cable (or Null adapter) simply crosses the required pins to allow similar
devices to communicate properly (e.g., DCE to DCE). In general:
• The AirStream Transceiver is always a DCE device.
• A PC is typically a DTE device.
• Remote devices (customer equipment) can be DCE or DTE depending
on the device.
• DCE to DTE communications require a straight through cable.
AirStream User’s Manual
13
Serial Communications
Installation and Specifications
• DCE to DCE communications require a null cable or adapter.
Note: The following diagrams assume that the DCE transceiver is sending data
to the DCE or DTE device.
3 Wire Straight Through Cable
DTE
Device
Pin 2
TxD Data
Pin 2
Pin 3
RxD Data
Pin 3
Pin 5
Gnd
Pin 5
Pin 2
TxD Data
Pin 2
Pin 3
RxD Data
Pin 3
Pin 5
Gnd
Pin 5
DCE
Transceiver
3 Wire Null Cable
DCE
Device
DCE
Transceiver
5 Wire Straight Through Cable (flow control in use)
Pin 2
TxD Data Pin 2
DTE
Device
Pin 3
RxD Data
Pin 3
Pin 5
Gnd
Pin 5
Pin 7
RTS
Pin 7
Pin 8
CTS
Pin 8
Pin 2
TxD Data
Pin 2
Pin 3
RxD Data
Pin 3
Pin 5
Gnd
Pin 5
Pin 7
RTS
Pin 7
Pin 8
CTS
Pin 8
DCE
Transceiver
5 Wire Null Cable
DCE
Device
AirStream User’s Manual
14
DCE
Transceiver
Hardware Specifications
Installation and Specifications
HARDWARE SPECIFICATIONS
Design-in
Stand-alone
Frequency
2.400 - 2.4835 GHz license-free ISM band in
U.S. (varies in other countries where
AirStream Transceivers have been certified)
same
Radio Type
Frequency Hopping Spread Spectrum
same
Number of
Channels
417 independent, non-interfering frequencies
same
Data Rate
600bps to 9.6 kbps full duplex, up to 19.2kbps
asymmetrical
same
Transmit Power
Output
10mW to 500mW nominal, self-adjusting
(lower maximum power output where
required)
same
Indoor Range
Up to 1,500 feet (457 m) in normal
construction
same
Outdoor Range
Up to 2 miles (3.2 km) with omni-directional
antenna
same
Transceiver
Up to 12 miles (19.3 km) with optional
directional antenna (line of sight to the
horizon)
Up to 75 miles (120 km) theoretical range
(line of sight to the horizon from towers above
the curvature of the earth)
Protocol
CSMA (Carrier Sense Multiple Access)
same
Flow control
Supports Hardware, Software or None
same
Warranty
1 year parts and labor
same
Error Detection &
Correction
CRC 16 error detection; forward error
correction can correct errors in 1 out of every 4
bits transmitted
same
Certification
FCC Part 15 Certified, Industry Canada,
Japan, Europe, Brazil
same
Other International certifications pending
Electrical
Electrical Interface
Serial TTL Voltage Levels
RS-232C Voltage Levels
Physical Interface
1x12 right angle connector (header)
Standard RS-232C DB-9 (female) connector
Input Power
Voltage: +5.0 V, +/- 5%
Shipped with a 115VAC power adapter
providing:
Ripple: Less than 10mV (RMS) from DC to
1MHz
Voltage: > 6.5 V and < 9.0 V
Ripple: Less than 250mV (RMS) from DC to
1MHz
AirStream User’s Manual
15
Software Requirements
Installation and Specifications
Design-in
Input Current Draw
Idle:
Stand-alone
200mA
same
Transmit: 550mA instantaneous current
Transmit/Receive (time averaged over
100msec): 360mA
Environmental
Temperature Range
-4°F to +140°F, -20°C to +60°C
same
Humidity
0% to 95% (non-condensing)
same
Dimensions
0.75 inches height (19mm) x 2.35 inches
width (60mm) x 4.25 inches length (108mm)
1.2 inches height (30mm) x 3.8 inches width
(97mm) x 5.2 inches length (132mm)
Weight
2.3 ounces (65grams)
6 ounces (170 grams)
Physical
SOFTWARE REQUIREMENTS
•
•
•
•
•
•
Windows® 95/98 or above (depending on software used)
Pentium processor >233 MHz or higher
1 available RS-232 serial port
Minimum 32 MB DRAM
Maximum 20 MB hard disk space for Configuration Manager Plus
necessary Network Software Utilities
1 parallel port (for hardware key used in certain networks only for
Developer Kits)
SOFTWARE INSTALLATION
Configuration Manager
This program is used to configure all transceivers.
To install the Configuration Manager
1. Make sure all Windows applications are closed.
2. Insert the Installation CD-ROM or diskette 1 into the appropriate drive.
3. Open the contents of the drive in your usual manner.
You can use Windows Explorer or My Computer on the desktop, for
example.
4. Double-click Setup.exe.
5. Follow the on-screen instructions.
AirStream User’s Manual
16
Antennas
Installation and Specifications
Network Software Utilities
Intercept and Library Utilities
This installation process is required if you are configuring transceivers in
networks using ComPort or TCP/IP Intercept, ActiveX, or DOS Utilities.
To install Network Software Utilities
1. Insert the Installation CD-ROM or diskette 1 into the appropriate drive.
2. Open the contents of the drive in your usual manner.
You can use Windows Explorer or My Computer on the desktop, for
example.
3. Double-click Setup.exe.
4. Follow the on-screen instructions
If installing ActiveX, make sure to install the sample files as these will
provide the examples you need to create your own applications.
ANTENNAS
Antennas must be connected to each transceiver for proper operation.
Without an antenna, two units will not communicate. The higher the gain
of the antenna, the longer the range of the transceiver signal.
AirStream Transceivers are designed to be used only with certain antenna
products. AirStream offers the omni-directional antennas listed below as
compliant with FCC Certification for the transceiver. The AirStream
Transceiver uses a unique mechanical connection (reverse thread SMA
connector) for all external mount antennas to ensure that only compliant
antennas are used with the transceiver. AirStream does not endorse the use
of omni-directional antennas other than those listed below.
AirStream Part Number
Description
Call
1dBi Omni-Directional Antenna (2”)
Call
2dBi Omni-Directional Antenna (6”)
52375
3dBi Omni-Directional Antenna (5”)
Call
5dBi Omni-Directional Antenna (9”)
Other higher gain directional antennas may be purchased through an
approved Rice Lake Weighing Systems supplier. Contact Rice Lake
Weighing Systems for additional information.
AirStream User’s Manual
17
Antennas
Installation and Specifications
AirStream User’s Manual
18
1
Chapter 3: Point to Point and Network Topologies
AirStream Transceivers support Point to Point Pairs
and several Network topologies. Each AirStream
Transceiver can be configured via its Configuration
Manager to work in any of these topologies. The
transceiver’s Configuration Manager controls how the
transceiver transmits and receives data as connected to
the device. The operation of the transceiver in the
network topology is determined by its Network
Software Utility.
In this Chapter
• Point to Point
Pairs
• Networks
• Network Utilities
POINT TO POINT PAIR
A
1
1
B
In a Point to Point topology, AirStream Transceivers
are used to connect two devices (e.g., a bar code reader
and a printer), or a PC with a single remote device. The
Point to Point topology can be considered a virtual
wire replacement (e.g., data in on one side equals data
out on the other side). This is useful for machine to
machine communications. All of the transceiver
features listed in Transceiver Features on page 6 apply
in Point to Point topologies.
NETWORKS
Wireless data connectivity applications require a wide
range of networking options. The AirStream Network
topologies consist of more than two transceivers and
may have a PC to host a network of devices. The host
and network devices are each physically attached to a
AirStream Transceiver.
The following Network topologies may require
Network Software Utilities. The required utilities are
listed within each topology description and explained
in detail in “Network Software Utilities” on page 23.
Depending on the topology and network utility
combination you select, some of the Transceiver
Features on page 6 may not apply. This is explained for
each topology.
AirStream User’s Manual
19
Networks
Point to Point and Network Topologies
Multi-Point Network
1
B
2
C
3
D
The Multi-Point Network enables data to be transmitted between as many
as 238 remote devices and a PC host. The transceiver connected to the
Host PC transmits and receives data from any other transceiver one at a
time. Sessions may be initiated by any device on the network. Devices can
be dumb (accept data directly without recognition) or intelligent
(recognize data transmission on a network and grab what applies). In a
Multi-Point Network there is no direct remote to remote communication,
everything must go through the host.
As opposed to a Point to Point topology, where you have a machine to
machine interface, Multi-Point networks are communicating at the
application level. Depending on the utility chosen, these networks can
communicate with one or more applications at a time. Multi-Point
Networks can be created with the following Network Software Utilities.
•
•
•
•
ComPort Intercept
TCP/IP Intercept
ActiveX Library
DOS Library
Note: Depending on the network utility used, GPIO may be available. If you
assign GPIO mode to any remote on the network, the host must also be
assigned GPIO mode. The Host has a GPIO register so it can detect which
remotes are using GPIO.
Repeater Network
AirStream Transceivers in a Repeater Network function similarly to a
Multi-Point Network. They expand the range of the Multi-Point Network
by relaying data packets between otherwise out-of-range remote devices
and a Host PC. The effective transmission rate for data packets for devices
beyond direct connection with the host is reduced by one third. Data can
be transmitted between as many as 238 remote devices and a Host PC.
The transceiver connected to the Host PC transmits and receives data
from any transceiver one at a time. Sessions may be initiated by any
device on the network. Devices can be dumb (accept data directly without
recognition) or intelligent (recognize data transmission on a network and
grab what applies).
The most significant advantage of a Repeater Network is the ability to
extend range. This is advantageous when you have some remote devices
that are not within direct range of the host. This network extends range in
AirStream User’s Manual
20
Networks
Point to Point and Network Topologies
layers. These layers may overlap but you cannot go beyond 4 layers of
range. Data travels through a single path to the receiving transceiver. This
network works well in environments where you do not need to
communicate large amounts of data but need to communicate over long
range. In the diagram below there are four layers. Data is sent from the
host through a path consisting of D, G, J, and M. This is the single path
used to get the data from the host to M as M is out-of-range of the host.
1
B
4
E
7
H
10
K
2
C
5
F
8
I
11
L
3
D
6
G
9
J
12
M
Repeater Networks can be created with the following Network Software
Utilities:
•
•
•
•
ComPort Intercept
TCP/IP Intercept
ActiveX Library
DOS Library
Note: GPIO, power management modes, and asymmetrical data flow rates are
not applicable to Repeater Networks. Even though you can use GPIO
with ComPort Intercept, you cannot implement this function on a
Repeater Network.
AirStream User’s Manual
21
Networks
Point to Point and Network Topologies
Broadcast Network
A
R
B
R
C
R
D
Remote to Host (4 wire)
A
R
B
R
C
R
D
Remote to All (2 wire)
In a Broadcast Network, data is sent out by one transceiver (sending
transceiver) and received by an unlimited number of remote devices
simultaneously. These devices must be intelligent enough to recognize
relevant messages and recover lost or corrupted data. Broadcast Networks
operate solely as configured by the Configuration Manager.
The AirStream Broadcast Network has two modes of operation; Remote
To All and Remote To Host. In both modes all transmissions sent by the
sending transceiver can be received by every remote unit in its associated
network. The difference is in the way that transmissions by remote units
are handled:
•
•
In Remote To Host, transmissions by remote units can only be
received by the host.
In Remote To All, transmissions by remote units can be received by
every other unit in the network that is within range.
Unlike other AirStream Network topologies, in Broadcast there is no
session established between the units engaged in communication. This
means that transmitted data is not acknowledged by the receiving side. If,
for example, there is a momentary signal blockage at the receiving unit
location, the affected receiving unit will miss any data transmitted during
the signal blockage. Although signal impairments could cause data “dropouts” any data received over the wireless link is still checked and
corrected (if possible) by the AirStream error detection/correction
process. This ensures that data is error free.
Broadcast mode is especially useful to applications where you must
transfer the same information to all units at once or where a polling
protocol is employed to collect data from remote units. In polling
applications, the sending transceiver sends a query message to each
remote unit in turn, asking for any data that the remote unit has available.
The remote unit then has a chance to send its data to the polling
transceiver. In a typical polling arrangement, each remote must wait until
it is queried by the sending transceiver before transmitting. In this way
collisions between transmissions of more than one remote unit are
avoided. If, when polling a number of remotes, a reply is not received
within a predetermined time interval the sending transceiver can
retransmit its query or simply move on to the next query on its list.
Broadcast mode is intended primarily to be a RS485 network wire
replacement. It is especially useful in adding new equipment to older
(legacy) systems where there is a 2 wire or 4 wire RS485 connection. The
AirStream User’s Manual
22
Network Software Utilities
Point to Point and Network Topologies
4 wire connection is replaced with the Remote to Host mode and the 2
Wire connection is replaced with Remote to all mode. The AirStream
RS232 to RS485 converter is needed to configure AirStream Transceivers
for RS485 devices.
Note: The Broadcast Network does not support GPIO, data thresholding, or
power management and asymmetrical data rates are lower. Flow control
was not intended for use in this topology.
Note: The sending transceiver’s link light will only turn on if a remote is
sending data. The remote transceiver’s link light will always be lit when
synchronized on the network. The sending transceiver is always
transmitting; however, other AirStream Networks will work when
collocated with a Broadcast Network as long as their hop table
assignment is different.
NETWORK SOFTWARE UTILITIES
Each network topology is supported by a combination of a Configuration
Manager which allows you to configure each individual transceiver for
your network topology and a variety of available Network Software
Utilities which allow you to arrange data transmission in your network.
Although summarized here, usage of each of these utilities is described in
detail throughout this manual.
Note that the network software utilities are optional; contact Rice Lake
Weighing Systems for details.
ComPort Intercept
2
B
16
X
1
ComPort Intercept is a software program which provides all the
functionality you need to assign virtual ports (enabling transparent
communication) in your Windows System Registry for a small network
configuration of up to 16 devices (including the host PC). See Setting up a
Network with ComPort on page 45 for information on using this software.
You can use this utility for the following network topologies:
•
•
Multi-Point
Repeater
AirStream User’s Manual
23
Network Software Utilities
Point to Point and Network Topologies
TCP/IP Intercept
B
2
1
TCP/IP Intercept is a software program which provides all the
functionality you need to route wireless data through a Host PC to and
from as many as 238 devices on a TCP/IP based network. See Setting up a
Network with TCP/IP on page 55 for information on using this software.
You can use this utility for the following network topologies:
238
X
•
•
Multi-Point
Repeater
ActiveX Library
The ActiveX Library provides the standard ActiveX system calls you need
to create applications which can link as many as 238 devices. See ActiveX
Network Applications on page 67 for information on using this software.
You can use this utility for the following network topologies:
•
•
Multi-Point
Repeater
DOS Library
The DOS Library provides the standard DOS system calls you need to
create applications which can link as many as 238 devices. This feature is
currently being tested and will not be documented further in this version
of the manual. You can use this utility for the following network
topologies:
•
•
AirStream User’s Manual
24
Multi-Point
Repeater
1
Chapter 4: Configuring Your Transceiver
The Configuration Manager is used to configure all
transceivers being used in all network topologies. The
procedures in this chapter describe how to configure
the transceiver to meet your specific needs. These
instructions assume that your transceiver is in default
OEM mode (as shipped) and correctly connected to a
PC with the Configuration Manager installed.
Note: All transceivers are delivered from the factory in
default mode with OEM privileges. If you have user
privileges, some features may not be available.
Note: You cannot open Configuration Manager if ComPort or
TCP/IP Activators are running.
In this Chapter
• Quick
Configuration
• Modifying
Settings
• Generating
Reports
• Power
Management
• Passwords and
Access
• Using Hop
Tables
To open your Configuration Management Application
• Assigning IDs
1. From the Start menu in Windows, select Programs and
then Configuration Manager.
• Signal Analysis
A splash screen appears with a Login dialog on top
requesting username and password.
• Data Threshold
• Serial Settings
2. Enter the username: oem
3. Enter the password: oem
Note: oem is lower case.
4. Click OK.
The Main Window appears.
A Tip of The Day window also appears. A new tip of
the day will appear each time you open the
configuration program. You can turn this off by
unchecking the box. Click OK to dismiss the window.
AirStream User’s Manual
25
Configuring Your Transceiver
Menu bar
Tool bar
Status bar
Modification
tabs
Receive pane
Transmit pane
Getting Status
Status lights on the Status bar indicate the status of the control lines on the
RS232 link between the PC and the transceiver being configured.
AirStream User’s Manual
26
Abbreviation
Name
Definition
RI
Ring Indicator
A signal is coming into the host unit
from the transceiver at the remote
unit.
DCD
Data Carrier
Detect
A connection has been established
with another unit. This lets the PC
know that communication between
two units can take place.
DTR
Data Terminal
Ready
Indicates that the unit is in
Command Mode. This mode is
utilized by the network software.
RTS
Ready To Send
This is a hardware flow control
indicator
CTS
Clear To Send
A hardware control indicator
DSR
Data Set Ready
Reserved for future use
Quick Configuration
Configuring Your Transceiver
In addition to the status lights in the Configuration Manager, the LED’s
on the Stand-alone transceiver also display status.
Power Sync
TX
RX
The Toolbar
Apply
Refresh
Store
Reset
Quick
Configure
Reload
Clear RX
Change
Password
Help
Clear Tx
Exiting the program
To Exit the Configuration Manager
1. From the File menu, select Exit.
Note: It is important to note that any changes in any tab not Stored in EEPROM
will be lost. See “Applying and Storing Changes” on page 31.
QUICK CONFIGURATION
This is the fastest and easiest way to configure a unit. Activation of Quick
Configuration loads settings directly into EEPROM. These settings will
remain in effect until a unit is reconfigured.
To use Quick Configure
1. Click Quick Configuration on the General tab, click it on the toolbar, or
select it from the Commands menu.
AirStream User’s Manual
27
Quick Configuration
Configuring Your Transceiver
The Quick Configuration wizard appears with the Operating Mode
window displayed.
2. Select the desired Operating Mode.
Select Point-to-Point to configure two units for a direct one-to-one
communication link.
Select H-to-M (Host) for a network configuration of 3 or more
transceivers. If host is configured first, the wizard will provide options for
configuring remotes. This feature is used for Multi-Point Networks. The
H-to-M (Remote) will follow after the host is configured.
Select Repeater (Host) for a network configuration of 3 or more
transceivers on a Repeater Network. If host is configured first, the wizard
will provide options for configuring remotes. The Repeater (Remote) will
follow after the host is configured.
Select Broadcast (Host) for a network configuration of 3 or more
transceivers on a Broadcast network. The Broadcast (Remote to Host)
allows the remote to talk directly (only) to the host. You can also
configure a remote to talk to all remotes on the network. If host is
configured first, the wizard will provide options for configuring remotes.
See Broadcast Network on page 22 for a more detailed explanation of
Broadcast modes.
Note: To operate transceivers in Multi-Point or Repeater modes you will need to
install a Network Software Utility.
3. Click OK.
AirStream User’s Manual
28
Quick Configuration
Configuring Your Transceiver
The Unit Settings screen appears.
4. Enter the desired criteria.
Enter the desired identification numbers. See “Assigning IDs” on page 39
for acceptable parameters. Select a Hop Table (0-100). The Hop Table
selected must be the same for all transceivers in a Point To Point Pair or a
Network. This number specifies a table of predefined frequencies, which
the transceiver will use for transmitting and receiving. If multiple separate
networks exist in the same area, each network should have a unique Hop
Table number to avoid RF collisions.
Note: Depending on which network you selected in the previous screen, certain
ID fields may be grayed and inaccessible.
5. Click Change in the Serial settings group
The Serial Settings dialog appears. This allows you to set the various
serial port parameters.
AirStream User’s Manual
29
Quick Configuration
Configuring Your Transceiver
6. Enter the desired settings
These should match the requirements for the device that the transceiver
will be attached to once the configuration is complete, not those of the
computer you are using to configure the transceiver. See the equipment
manufactures specifications for details. To use GPIO mode see “GPIO
Mode” on page 42.
Note: Depending on which network topology you selected, some parameters
may be grayed and inaccessible. Some network topologies have required
serial settings.
7. Click OK.
8. Click Submit.
A Configuration Sequence dialogue box appears while the unit is being
configured. This shows the sequence of configuration steps as they are
being executed. Upon completion, a Configuration Status box appears
with a checkbox option for report generation. All fields should read “OK”
if the configuration was successful. If you do not wish an ASCII report to
be generated automatically, click Report generation to deactivate the
selection.
9. Click Close.
A few more status dialogs appear. All entries are stored in EEPROM
permanently.
10. Click OK to configure another unit or Cancel to discontinue.
11. Continue to configure as many transceivers as required.
Disconnect the transceiver attached to the computer. Connect a new one.
Wait until this transceiver’s information is displayed. Follow the onscreen instructions.
Note: Transceivers can be reconfigured as needed.
AirStream User’s Manual
30
Modifying Settings
Configuring Your Transceiver
12. Select File and then Exit to exit the Configuration Manager.
If Report Generation was checked, Quick Configuration will
automatically create and store a configuration data profile for each unit
configured in the location specified in the Report Settings. See
“Generating Reports” on page 32.
MODIFYING SETTINGS
You can run the Quick Configuration wizard to modify settings or you can
change entries manually in the fields in the modification tabs provided.
When manually changing entries, you must click apply and/or store for
the changes to take effect. See “Applying and Storing Changes” on page
31.
To manually change data in fields
1.
2.
3.
4.
Click the desired tab.
Click in and highlight the data to be changed.
Change the data.
Click Apply and/or Store.
Applying and Storing Changes
The following features can be selected from the Commands menu or you
can click the appropriate button on the toolbar. These features write the
information entered into temporary or permanent storage.
Transceiver
Host PC
Apply
RAM
Store
EEPROM
Note: Settings must be Applied before they can be Stored.
AirStream User’s Manual
31
Generating Reports
Configuring Your Transceiver
Apply
This applies (transfers) changes from the all tabs into the attached
transceiver’s RAM (temporary memory). This is useful when changing
and testing settings you are not sure you really want.
Note: When you exit the configuration program these changes will not remain in
effect. You must click Store for them to become permanent.
Store Applied Settings
Stores all Applied changes into the transceiver’s EEPROM. These settings
will remain in effect upon exiting the program. Stored changes are
overwritten when new stored entries are made or when you load the
default factory settings. You must Apply settings prior to storing them.
Reset Unit
Performs a soft reset of the attached unit returning the settings stored in
EEPROM. Any configuration settings Applied but not Stored to EEPROM
will be lost.
Load Default Settings
Reloads Factory Default settings into unit. All changes made previously
will be lost.
Refresh
This queries a transceiver about its current settings. These settings will be
displayed on the screen. It lets you go back to the last Stored settings
before Apply was selected. Settings will not be refreshed if Store has been
selected.
GENERATING REPORTS
Reports can be generated during the Quick Configure (if the box was
checked) or can be generated at any time using menu commands. Two
types of reports can be generated. Information in each report can be
cleared separately. Both reports generate text (.txt) files. The default
AirStream User’s Manual
32
Generating Reports
Configuring Your Transceiver
location for reports is C:\Program Files\Configuration Program. The
RReport.txt file produces a formatted text file which can be viewed using
any text reader or word processing program. For example, Microsoft
Word ®. The DReport.txt produces a comma delimited ASCII report
which can be viewed with any spreadsheet program, for example
Microsoft Excel®. It can also be imported into a database program like
Microsoft Access®.
To Add to an existing Report
1. From the File menu, select Add To Report.
The configuration data profile for the attached transceiver is added to the
report in the location specified under the Report Settings command.
To change Report Settings
1. From the File menu select Report Settings.
A dialog appears showing the settings and location for storage of
configuration data profiles.
Location of
file
2. Select the type of report desired or both.
Both files generated are ASCII files readable by any text reader. A
readable report is formatted in ASCII with spaces and tabs to make it
readable when opened in programs such as NotePad.
Comma delimited formatting is useful when you want to import the text
into spreadsheet or database programs.
You can clear the contents of a report by clicking Clear Report.
If you wish reports to be generated when you run Quick Configuration,
the Report generation box must be checked.
3. Click OK.
AirStream User’s Manual
33
Power Management
Configuring Your Transceiver
To View reports in ASCII form
1. From the File Menu, select Report Settings.
2. Locate the path to the desired report.
You can close this window and the Configuration Manager if desired.
3. Using a text reader such as Notepad or a word processor, open the file.
To import reports into Microsoft Excel (for example)
1.
2.
3.
4.
From the File menu, select Report Settings.
Check Tab Delimited.
Open Microsoft Excel.
From the File menu, select Import.
The Text Import wizard appears.
5. Import the DReport.txt file.
6. Click Comma and Tab in the Delimiters box.
7. Click Next and fill out the rest of the wizard as desired.
Each comma in the delimited file will be transformed into a column in the
Excel spreadsheet.
POWER MANAGEMENT
There are three modes which can be used to manage the power in your
transceiver. Each serves a specific purpose and has an advantage in certain
circumstances. For example, if you have a PC acting as a host to a bar
code reader and printer, you can have all three transceivers in different
power modes. The Host will be normal as it is always sending and
receiving data. The transceiver attached to the printer can doze as it will
AirStream User’s Manual
34
Power Management
Configuring Your Transceiver
only be receiving data and will wake up when it is needed to deliver
incoming data to the printer. The transceiver attached to the bar code
reader will only be sending so it can sleep until awakened by the reader
when it needs to send data to the printer. It is possible to conserve power
usage in this manner without sacrificing efficiency of data transfer.
To change power modes
1. Click the Special Features tab.
2. Click the desired Power mode.
Mode
Explanation
Normal
Unit operates at full power. LED is a constant light.
Sleep
Unit will enter a Sleep mode with minimal power requirements.
The unit will not wake-up until data appears locally on the unit’s
serial port for transmission. During Sleep mode reception of data
from another unit is not possible. This is practical for battery
applications and other low power requirements. LED on unit will
slowly blink on and off when unit is in Sleep mode.
Doze
Unit will cycle the receiver on and off (at a 50% duty cycle).
Data can be received from another unit or transmitted from the
local unit during the Doze mode. Response time in receiving
data from another unit may be slightly longer than under Normal
power. LED on unit will blink very rapidly when the unit is in
Doze mode.
3. Click Apply and/or Store.
AirStream User’s Manual
35
Passwords and Access
Configuring Your Transceiver
PASSWORDS AND ACCESS
Levels Of Access
There are two levels of access: OEM and USER. Each level has access to
different sets of fields in the Configuration Manager. A User has the
lowest level of access and is only able to change parameters in some of
the fields available to OEMs. OEMs have access to all functions.
All transceivers are shipped with OEM access. It is up to the
administrator to assign user privileges from that point on.
Passwords
You can change your password as frequently as you desire. A password
consists of any combination of numbers or letters up to 29 characters. If
you forget your password, contact AirStream for a new password file. All
units are shipped with oem as the password. It is recommended for
security reasons to change your password from the factory setting.
Depending on access level, you have User or OEM privileges. The dialogs
that appear and the options available vary by privilege.
Note: All units are delivered with OEM privileges.
User Functions
To change your password as a user
1. From the File menu, select Change Password.
Change password dialog appears.
2. Enter the desired criteria.
Enter your user name and new password. Retype the new password in
Confirm Password.
3. Click OK.
OEM Functions
All units are delivered with default OEM privileges. The system
administrator must set units to User access.
AirStream User’s Manual
36
Using Hop Tables
Configuring Your Transceiver
To access OEM privileges
1. From the File menu, select Change Password.
Change password dialog appears.
2. Select the desired User name from the list.
3. Change user permissions as desired.
Privilege
Options
User privileges
Assign privileges as OEM or User. They can also be assigned
Administrator privilege which provides the ability to change user
privileges. If you are assigned as a User, you can not add other
users or change the passwords of other users. Click update for
these changes to take effect.
New
Add a new user by typing in their name and password. You must
retype the password to confirm it.
Change password
Change the password of an existing user by typing in their name
and password. You must retype the password to confirm it.
Remove users
Removes the currently selected user.
USING HOP TABLES
A Hop Table is a listing of frequencies in a given spectrum that are used
for communication. Data is sent to each frequency in the table in a
hopping pattern. Hop Tables provide improved security and the ability to
avoid localized noise sources. There are 100 possible Hop Tables in your
transceiver (this number may vary for international transceiver models).
These are subdivided into five completely independent, non-overlapping
Hop Table sets, each with no more than three consecutive frequencies.
Each individual network can only utilize one Hop Table.
Entering Hop Table Numbers
Hop Table numbers can only be entered or changed by using the Quick
Configuration wizard.
AirStream User’s Manual
37
Using Hop Tables
Configuring Your Transceiver
Validating the Hop Table
This command verifies the integrity of the Hop Table stored within the
transceiver. The Hop Table in the transceiver is compared to the Hop
Table with the same number in the Configuration Manager database. The
Advanced Settings tab provides the selected Hop Table number and
whether the Hop Table has passed validation and the first and last indices
used for the Hop Table. Index values are set to meet the requirements of
the country in which the transceiver is deployed for a minimum number
of hop frequencies. These values can not be changed to avoid violating
country regulations. To validate the Hop Table, from the Commands
menu, select Validate Hop Table.
Specifying Hopping Parameters
You can customize Hop Table parameters by setting some features
available from the Advanced Settings tab.
Max No Data
Max No Data is the number of hop cycles that must pass during which no
data was received and no data was available for transmission before a
session can be declared down. It is used as the trigger to end a session.
After a certain number of Frames No Data between both units, the master
will terminate the current session/link.
Max Bad Hop
Max Bad Hop is the number of data frames with errors received before a
link is considered bad. This is the trigger to stop the current link and wait
for a random standoff period (~0.5 to 3 seconds). This is due to the
assumption that after 4 (system default but can be changed) consecutive
bad hops, the link has been lost — either due to interference or lost
synchronization. By waiting a small amount of time before attempting to
reestablish the link, the obstruction (i.e., noise source) may have moved
somewhere else.
Session Holdoff
This will only be enabled for a host transceiver and is required to manage
the communication from multiple remotes. It prevents a host unit from
AirStream User’s Manual
38
Assigning IDs
Configuring Your Transceiver
starting a new session until it completes its current session. It keeps other
devices from establishing a session with the host until the host has
completed its current session with a particular device.
Permanent Link
This is only used in a Point to Point configuration to keep a link between
the two units active at all times.
ASSIGNING IDS
Using a combination of firmware and software assigned IDs, the security
of your data is ensured. Some IDs can be modified and others cannot
depending on your privileges. IDs are all accessed either via Quick
Configuration or the General Tab.
.
ID Type
Explanation
Vendor ID
Assigned at the factory and burned into the firmware. This
number is not modifiable. This ensures that no other AirStream
customer can intercept data assigned to your ID. There are
64,000 unique Vendor IDs.
Network ID
A number that identifies the network and makes it unique from
other networks in the area. All units in a network must have the
same Network ID. The Network ID allows you to have multiple
networks within the same transceiver space. There are up to
64,000 unique numbers. Units with different IDs cannot
communicate with each other.
AirStream User’s Manual
39
Assigning IDs
Configuring Your Transceiver
ID Type
Explanation
Alias Network
Name
A descriptive name for the network.
Source Unit ID
For Point to Point communication the source and destination IDs
must be the same number for both transceivers. For most
network communication, the source ID = 0 for the host and the
source IDs for the remotes are unique numbers from 1- 238.
Alias Source Name
A descriptive name for the unit.
Destination Unit
ID
The numeric ID of the unit that the transceiver being configured
will communicate with. For Point to Point communication, the
destination ID will match the source ID. For a Multi-Point
network, the host will have a destination ID = X. The remotes
will each have a destination ID = 0 (the host source ID number).
The way source and destination IDs are assigned differs between Point to
Point and Network configurations. In Point to Point the source and
destination IDs between the two units must match. Any unit with a
different ID will not be able to communicate.
Transceiver 1
Transceiver 2
Transceiver 3
Source=15
Source=15
Source=20
Dest.=15
Dest.=15
Dest.=20
In a Multi-Point Network the Source for the Host PC is always zero and
destination corresponds to the transceiver it is trying to communicate with
in each session. It is a dynamic number. The remote units have the
matching destination of zero but source numbers are unique.
Host PC
Transceiver 2
Transceiver 1
Source=0
Source=1
Dest.=0
AirStream User’s Manual
40
Dest.=X
Source=2
Dest.=0
Signal Analysis
Configuring Your Transceiver
SIGNAL ANALYSIS
There are a number of features which can help you analyze the strength
and consistency of your data signal. They are available via the Advanced
Settings tab.
Feature
Explanation
Tx Power
The transmit power of the unit relative to the possible power
levels.
Power Ctrl Upper
Value
The upper RSSI (Received Signal Strength Indicator) threshold
which when surpassed causes the unit to reduce its transmit
power.
Power Ctrl Lower
Value
The lower RSSI threshold which when surpassed causes the unit
to increase its transmit power.
Temperature
The operational temperature of the unit as reported by the
thermistor in fractional volts.
Local timeaveraged RSSI
The RSSI averaged over the last 16 transmissions. Used in
analyzing the strength and quality of the transmit signal.
Local
instantaneous RSSI
The value of RSSI for the last transmission. Used in analyzing
the strength and quality of the transmit signal.
D/A / A/D
Loopback
Factory Diagnostic.
SERIAL SETTINGS
The Serial Settings tab allows you to select the serial port, baud rate, flow
control, data bit size, parity, and stop bits settings. Each side of the
communication link need not have the same serial settings. Serial Settings
can also be entered via Quick Configuration. These settings are how the
transceiver communicates with the device attached to it.
Setting
Explanation
Port
The particular serial port number to be used. The default setting
is COM1.
Baud Rate
Speed of the serial connection for the device to which the
transceiver will be connected. Available options: 300, 600, 1200,
2400, 4800, and 9600 full duplex and 14,400 and 19,200 for
asymmetrical data transfer. The asymmetrical rates will
automatically default back to 9600 full duplex during periods of
peak bi-directional data exchange. The default setting is 9600.
For a Host transceiver the setting must be 9600. Supported
values are: 600, 1200, 2400, 4800, and 9600.
AirStream User’s Manual
41
Serial Settings
Configuring Your Transceiver
Setting
Explanation
Flow Control
A method of temporarily suspending the flow of data between
two devices. Available options: None, Hardware (RTS/CTS) or
Software (Xon/Xoff). The default setting is None. Software flow
control is not available for a Host transceiver. Flow control is a
means of temporarily suspending the flow of data between two
devices. The most popular methods are called hardware and
software flow control. Hardware flow control uses the RTS/CTS
lines. Software flow control uses special characters, often called
tokens (Xon/Xoff) to achieve the same result. Hardware flow
control is typically the more common of the two methods. When
using asymmetrical data rates, hardware control should be used
to ensure data buffers are not overfilled which can result in a loss
of data. Supported values for Flow Control are: None, Hardware,
or Software.
Data Bits
Represents the number of bits within each piece of data.
Available options: 7 or 8. The default setting is 8. A host
transceiver must be set to 8.
Parity
Traditionally used as a method of detecting data errors. Available
options: None, Odd, Even, Mark, or Space. The default setting is
None. A host transceiver must be set to N.
GPIO Mode
When enabled this allows for a General Purpose Input and
Output pin to be assigned on the RS232 connector (e.g. RTS &
CTS). This provides additional benefit for contact closure
applications such as opening/closing, turning on/off, notifying
when specific events have occurred. When this function is
enabled, Hardware Flow Control will be automatically disabled.
NOTE: You must assign control lines in your network utility
software for GPIO mode to take affect.
Stop Bits
Available options: 1 or 2. The default setting is 1. A Host
transceiver must be set to 1.
Supported combinations for Data Bits, Parity, and Stop Bits are:
---
7, None, 2
8, None, 1
7, Odd, 1
7, Odd, 2
8, Odd, 1
7, Even, 1
7, Even, 2
8, Even, 1
7, Mark, 1
7, Mark, 2
8, Mark, 1
7, Space, 1
7, Space, 2
8, Space, 1
Note: When setting up a Host device within a Network setting, the configuration
program will automatically preset the serial parameters to: 9600, 8, N, 1.
These settings are required for the Network Software Utility to ensure the
best possible data transfer speeds.
AirStream User’s Manual
42
Data Threshold
Configuring Your Transceiver
DATA THRESHOLD
This feature allows a predetermined time to elapse or amount of data to
accumulate before a data transfer session is initiated. It is accessed
through the Special Features tab.
To set data threshold
1. Click the Special Features tab.
2. Click Enabled.
3. Enter Time and Size criteria.
Setting
Explanation
Time
A number (from 1 to 65,535) will specify the number of
100msec increments that must elapse between the initial receipt
of data (locally) before a data transfer with another transceiver is
initiated. This will provide up to 109 minutes of time that data
can accumulate before a transfer. The time must be set to ensure
that no more than 4K (the size of the data transfer storage buffer)
of data collects before a transfer occurs. If the buffer were to fill
up before a transfer, all additional data would be lost.
Size
Up to 4096 bytes of data can be collected before a data transfer is
initiated.
AirStream User’s Manual
43
Data Threshold
Configuring Your Transceiver
AirStream User’s Manual
44
1
Chapter 5: Setting up a Network with ComPort
2
B
1
16
X
In this Chapter
Note that network software utilities are optional;
contact Rice Lake Weighing Systems for details.
• ComPort
Intercept
ComPort Intercept™ is a Windows communication
driver (software application) that intercepts all RS232
traffic and automatically reroutes it to/from the host
transceiver. It allows up to 16 transceivers to be
configured in a network topology. One transceiver is
designated as the host and is connected to a local
personal computer with up to 15 remote units in the
network. The remote units can be dumb or intelligent.
The Host PC must be running a Microsoft Windows 95
or 98 operating system. ComPort Intercept allows the
host transceiver to be configured to provide the
network management functions. It can have multiple
applications on the host communicating through the
virtual ports at the same time. It can be used for MultiPoint or Repeater Network topologies.
• ComPort
Configurator
• ComPort
Activator
• Virtual Ports
• Physical Ports
This chapter discusses the configuration of the small
network. It assumes that the ComPort Intercept
software has been correctly installed.
ComPort Intercept consists of two components which
are designed to hook into Windows serial
communication traffic and transparently reroute the
data through a Multi-Point or Repeater Network. The
Configurator component is used to configure the
Windows System Registry, by creating virtual
communications devices. The Activator component is
the actual loader/driver that will run in the background
of the operating system and capture any configured
serial data traffic and reroute it to the assigned remote
transceiver and application program.
The host transceiver needs to be assigned to a physical
communication port (typically COM1 or COM2).
Virtual ports are created and assigned a remote Unit ID
which corresponds to a particular remote transceiver’s
Source ID Number thereby creating a logical
association between each virtual COM port number
and a remote transceiver within the network.
AirStream User’s Manual
45
ComPort Configurator
Setting up a Network with ComPort
Note: The ComPort Intercept program will work with various client programs
that communicate via COM ports (e.g., HyperTerminal) with serial rates
of greater than 115K baud. While "over the air" data rates are effectively
9600 full duplex, the ComPort Intercept process will buffer data to each
application according to its particular requirements. Internal buffer space
for each virtual port is 8K Bytes.
Note: You can not activate ComPort Activator if any other application is
currently using the Physical COM port that has been configured for the
host transceiver on the network (e.g., Configuration Manager).
COMPORT CONFIGURATOR
Microsoft Windows requires that all physical and virtual ports be
registered within the System Registry for proper operation. ComPort
Configurator is used to create and configure virtual ports and assign them
to the host.
You can make changes to ComPort Configurator options either by
clicking the appropriate icon or clicking the right mouse button and
selecting the desired topic. All instructions given are based on clicking an
icon.
To run ComPort Configurator
1. In Windows, select Start then ComPort Intercept Program and then
ComPort Configurator.
AirStream User’s Manual
46
ComPort Configurator
Setting up a Network with ComPort
The ComPort Intercept main window appears.
Toolbar
Physical Port Window
Virtual Port Window
Assignment Arrows
Note: For Developer Kits only, the hardware key must be connected to the
parallel port of the computer for the ComPort Configurator to run.
The Physical Port window shows:
• all physical COM ports as contained within the Host PC (this will
include any modems or other assigned ports)
• the one serial port assigned to the host transceiver
• any assigned virtual ports (if this is the first time you are running the
ComPort Configurator program, no virtual ports will be shown)
The Virtual Port window lists all available virtual ports that have not been
assigned to a particular physical port (e.g., a temporary storage/
maintenance area). If this is the first time that you have used the Port
Configurator program, this area should be blank.
When the program is opened, only the Add Virtual Port icon and Help
icons on the Toolbar are active. Other icons are deactivated.
AirStream User’s Manual
47
ComPort Configurator
Setting up a Network with ComPort
Advanced View
This check box allows you to change the fields displayed in the main
window. Advance view provides more detailed information and options
by adding new columns. These include Input, Output, and Tx Purge
which are all described in this chapter.
Entering and Changing Information
You can use the left and right assignment arrows to move items between
the Physical Port and Virtual Port windows or you can drag and drop
items. There are also items available on the right-click pop-up menu.
Adding Virtual Ports
You will need to add a virtual port for each device in your small network.
New port numbers are created in numerical order. Up to 15 virtual ports
can be created; however, the actual number will be limited by the number
of physical COM ports that are assigned. If the Physical Port window
shows more than the host transceiver as a physical COM port, the
available virtual ports will be decreased from 15 accordingly.
The number of virtual ports can vary depending on network size (15
remotes maximum) and the number of physical ports in use (if 4 Physical
Ports are in use, the maximum number of virtual ports will be 12).
AirStream User’s Manual
48
ComPort Configurator
Setting up a Network with ComPort
To Add Virtual Ports:
1. Click Add Virtual Ports on the toolbar.
You can also right-click and select Add Virtual Port from the menu. This
applies to many features in this application.
The Add Virtual Ports dialog appears.
2. Enter the number of ports you wish to add.
This number should equal the amount of devices on your network (not
including the host machine)
3. Click OK.
A message appears asking you to restart the computer.
4. Click NO.
5. Select a virtual port.
6. Click Assign Unit ID Number.
The Assign Device ID dialog appears which allows you to enter a Remote
Unit ID number for the selected virtual port. The Remote Unit ID Number
is equal to a remote transceiver’s Source ID number. You can select a
number between 1 and 238.
7. Enter the desired number.
8. Repeat steps 6-8 for each port added.
Note: Using standard Windows methods, you may also change the name of each
port while it is selected.
9. Select the virtual port(s) in the Virtual Port window.
Note: You can shift-click the first and last port to select all virtual ports or
control-click to select a varying group of ports, or you may do each port
individually.
10. Select the appropriate physical COM port in the Physical Port window.
This will be the COM port to which the host transceiver is connected.
The left assignment arrow is enabled.
You can now associate each virtual port with a physical host port as
displayed in the Physical Port window.
11. Click the Left Assignment arrow.
This will transfer the virtual ports to the host transceiver and establish the
virtual communication link between the host transceiver and remote
devices.
AirStream User’s Manual
49
ComPort Configurator
Setting up a Network with ComPort
If your PC has more than one physical port, make sure you assign the
virtual ports to the correct physical port number.
Attach to Host is available on the right-click pop-up menu in the Virtual
Port window. When invoked, the currently selected port is moved to the
Physical Port window under the last selected host. Detach from Host is
available on the right-click pop-up menu in the Physical Port window.
When invoked the currently selected port is moved to the Virtual Port
window. These can be used instead of the drag and drop or the assignment
arrow features.
Note: If you have selected multiple ports, it is more efficient to use the drag and
drop method to assign them.
Note: Virtual ports can not be associated with a physical port until the Remote
Unit ID number has been assigned.
12. Click Exit.
13. Restart Windows.
Each time a virtual port is Added or Deleted, a message asking if you
want to restart windows will be displayed. Windows must be restarted
when virtual ports are added or deleted (this is a Microsoft Windows
requirement).
AirStream User’s Manual
50
ComPort Configurator
Setting up a Network with ComPort
Setting Control Line Parameters
Available in Advanced View, this feature allows you to assign Input and
Output lines. You must have GPIO mode turned on for the host and at
least one remote on the network. This is assigned in the Configuration
Manager as shown in “GPIO Mode” on page 47. Any remote device using
GPIO mode can not use hardware flow control. GPIO mode will only
work in Point to Point and some Network topologies.
1. In Advanced View, click the Set Control Line icon.
A dialog appears.
You can also select Control Lines from the right-click menu.
2. Click the desired radio buttons.
Select the desired input and output lines.
3. Click OK.
The assigned input and output lines are displayed in the Input and Output
columns in the main window.
Tx Purge
Available in Advanced View, this feature allows you to create a buffer
within the ComPort intercept program for outgoing data. If the host is
sending but the remote is not ready to receive, this can be a useful tool.
You can set the buffer size and the amount of seconds before time-out. By
default, Purge Control is enabled with a maximum threshold (8192 bytes)
and a timeout setting (1000 seconds).
1. Select the desired port.
2. Right-click.
AirStream User’s Manual
51
ComPort Configurator
Setting up a Network with ComPort
3. Select the Set Purge Control from the pop-up menu.
4. Select the desired criteria.
You can select the buffer size (Threshold) between 1 and 8192 and
amount of seconds between 1 and 1000 before time-out. Clicking the
checkbox will turn this criteria on. The check will also be displayed in the
main window view.
5. Click OK.
This information is added to the TX Purge column for that port.
6. Toggle the purge feature on and off by checking/unchecking the box for
that port.
Remove Unit ID Number
This button will remove the Remote Unit ID number associated with a
selected virtual port. Remember that the Remote Unit ID Number is equal
to a remote transceiver’s Source ID number.
To remove ID numbers
1. Highlight desired port.
2. Click Remove Unit ID.
The ID is removed. If an ID is removed and you are letting the program
increment IDs, the ID removed will be skipped and not reassigned. You
will have to reassign it manually, if desired.
AirStream User’s Manual
52
Using ComPort Activator
Setting up a Network with ComPort
Remove Virtual Communications Port
This button will remove the selected virtual port from the system registry.
To remove a virtual port
1. Select the desired port.
2. Click Remove Port.
The port is removed from the display and from the system registry.
3. Remove all desired ports.
4. Restart Windows.
The port will not actually be removed until Windows is restarted.
Renaming Virtual Ports
The system will automatically name each virtual port sequentially. You
can rename the virtual ports to a more conventional notation.
To rename a virtual port
1. Select the virtual port.
2. Right-click and select Rename.
The name field is now editable.
3. Edit the name of the port.
You may use up to 20 characters for the name. A descriptive name such as
“Printer”, may help you remember what equipment each port represents.
USING COMPORT ACTIVATOR
To complete the setup of the Small Network, the ComPort Activator
program must be activated. This program resides in the lower right hand
of the computer task bar as represented by its icon. ComPort Activator
runs in the background, captures virtual port traffic, and reroutes it as
specified by ComPort Configurator.
Note: The Configuration Manager will not work if the ComPort Activator
program is running in the background. Suspend or unload ComPort
Activator when using the Configuration Manager to make changes.
Note: For Developer Kits only, the white hardware key must be connected to the
parallel port of the computer for the ComPort Activator to run.
AirStream User’s Manual
53
Using ComPort Activator
Setting up a Network with ComPort
ComPort Activator
To run ComPort Activator
1. Double click the ComPort Activator icon in the right hand corner of your
desktop or click Load Driver in the Configurator Main window.
You may also select Start> Programs> ComPort Intercept Program>
ComPort Activator.
The icon now appears active and ComPort Activator is running in the
background. All serial communication traffic is redirected between the
host transceiver and remote transceivers according to the network of
virtual ports created with the ComPort Configurator program.
Note: If you right click the icon, a list of several options will be displayed (Load
& Unload ComPort Activator, Load with Windows [at start-up] and Exit).
You can also open your ComPort Configurator from this menu.
Note: Once ComPort Activator is running, restrict all application programs from
using the physical serial port which has been assigned to the host
transceiver.
To stop ComPort Activator
1. Double click the ComPort Activator icon.
2. A red symbol indicates that ComPort Activator is now inactive.
To start ComPort Activator when you start windows
1. Right-click the ComPort Activator icon.
2. Select Load With Windows.
ComPort Activator will automatically start each time you restart
Windows.
AirStream User’s Manual
54
1
Chapter 6: Setting up a Network with TCP/IP
2
B
1
238
X
Note that network software utilities are optional;
contact Rice Lake Weighing Systems for details.
In this Chapter
TCP/IP Intercept™ is a software package that provides
all the functionality you need to route wireless data
packets through a Host PC to and from as many as 238
devices. The remote units can be dumb or intelligent.
The Host PC must be running a Microsoft Windows 95
or 98 operating system. TCP/IP Intercept allows the
host transceiver to be configured to support the network
management functions. This chapter discusses the
configuration of the TCP/IP network. It assumes that
the TCP/IP software has been installed. TCP/IP enables
multiple applications in various locations on the
network to communicate. Remote units can send data
to the host transceiver one at a time while the host can
send to many applications on the PC all at once
depending on the network topology. TCP/IP Intercept
can be used with Multi-Point and Repeater Network
topologies.
• TCP/IP
Intercept
• TCP/IP
Configurator
• TCP/IP
Activator
• TCP/IP ports
TCP/IP Intercept consists of two components which
are designed to hook into TCP/IP communication
traffic and transparently reroute the data through a
Multi-Point or Repeater Network. The Configurator
component is used to assign TCP/IP post addresses to
multiple devices on a network. The Activator
component is the actual loader/driver that will run in
the background of the operating system and capture
any configured TCP/IP traffic and reroute it to the
assigned remote transceiver and application program.
The host transceiver needs to be assigned to one
physical communication port (typically COM1 or
COM2). TCP/IP ports are created and assigned a
remote Unit ID Number that corresponds to a particular
remote transceiver’s Source ID Number thereby
creating a logical association between each TCP/IP
port and a remote transceiver within the network. The
entire network consisting of a host and multiple
remotes must reside on one physical COM port.
AirStream User’s Manual
55
TCP/IP Configurator
Setting up a Network with TCP/IP
Note: The TCP/IP Intercept program will work with various client programs
that communicate via TCP/IP assignable ports (e.g., HyperTerminal or
Telnet) serial rates of greater than 115K baud. While ‘over the air’ data
rates are effectively 9600 full duplex, the TCP/IP Intercept process will
buffer data to each application according to its particular requirements.
Internal buffer space for each TCP/IP port is 8K Bytes.
Note: You cannot load TCP/IP Intercept any other applications are currently
using the physical COM port you have configured for your network (e.g.,
Configuration Manager)
Note: All functions will be disabled in the Configurator if the Activator is
currently loaded.
Note: You cannot implement GPIO mode on TCP/IP networks.
Note: The base IP address used by the TCP/IP Intercept Program is that of the
Host computer. See your local system administrator if you are unsure of
the number.
TCP/IP CONFIGURATOR
This program is used to create and configure TCP/IP ports and assign
them to the host.
You can make changes to TCP/IP Configurator options either by clicking
the appropriate icon or clicking the right mouse button and selecting the
desired topic. All instructions given are based on clicking an icon.
To run TCP/IP Configurator
1. In Windows, select Start then Programs then TCP/IP Intercept Program
and then TCP/IP Configurator.
If you already have TCP/IP ports configured, you can also open this
program by right clicking the TCP/IP icon at the bottom right of your
desktop and selecting Show Configurator.
AirStream User’s Manual
56
TCP/IP Configurator
Setting up a Network with TCP/IP
The TCP/IP Intercept main window appears with the Design tab open.
Toolbar
Change
View
Physical Port Window
TCP/IP Port Window
Assignment Arrows
Load/Unload Activator
The Physical Port window shows:
• all physical COM ports as contained within the Host PC (this will
include any modems or other assigned ports)
• one serial port assigned to the host transceiver
The TCP/IP Port window lists all available TCP/IP ports that have not
been assigned to a particular physical port (e.g., a temporary storage/
maintenance area). If this is the first time that you have used the TCP/IP
Configurator program, this area should be blank.
When the program is opened, only the Add TCP/IP Port icon and Help
icons on the Toolbar are active. Other icons are deactivated.
Advanced View
This check box allows you to change the fields displayed in the main
window. Advance view provides more detailed information and options
by adding new columns. These include Input and Output which are
described in this chapter.
AirStream User’s Manual
57
TCP/IP Configurator
Setting up a Network with TCP/IP
Entering and Changing Information
You can use the left and right assignment arrows to move items between
the Physical Port and TCP/IP Port windows or you can drag and drop
items.
Adding TCP/IP Ports
You will need to add a TCP/IP port for each device in your small network.
New port numbers are created in numerical order.
To Add TCP/IP Ports:
1. Click Add TCP/IP Port on the toolbar.
You can also right-click and select Add TCP/IP Port from the menu. This
applies to many features in this application.
The Add TCP/IP Port dialog appears.
AirStream User’s Manual
58
TCP/IP Configurator
Setting up a Network with TCP/IP
2. Enter the desired criteria.
Enter the number of ports you would like to add. The total number of
ports should equal the amount of remote transceivers on your network
(not including the host machine). The maximum number of ports allowed
with the TCP/IP Configurator is no more than 238.
Enter the starting port number (these will be incremented by 1). The TCP/
IP port numbers available are between 1024 and 10,000. Enter the
maximum number of connections you would like to allow for each port.
The maximum number of connections cannot be greater than 8. These
connections should be the number of concurrent applications that will be
logged into the TCP/IP Intercept.
The Auto Assign feature allows you to automatically increment the
Remote Unit ID number as you are creating multiple TCP/IP ports. The
start window will allow you to choose the Remote Unit ID number you
wish to start with. This feature will be of particular use when configuring
a large network from the beginning. Remember the Remote Unit ID
number must match the Source ID number of the remote transceiver.
You can also use the two buttons in the toolbar to Assign Unit ID Number
of Remove Unit ID Number.
Note: Using standard Windows methods, you may change the name of each port
while it is selected.
3. Click OK.
4. Select the port(s) in the TCP/IP Port window.
Note: You can shift-click the first and last port to select all TCP/IP ports or
control-click to select a varying group of ports, or you may do each port
individually.
5. Select the appropriate physical COM port in the Physical Port window.
This will be the COM port to which the host transceiver is connected.
The left assignment arrow is enabled.
You can now associate each TCP/IP port with a physical communications
port.
Note: All devices in the network must reside on one physical port.
6. Click the Left Assignment arrow.
This will transfer the TCP/IP ports to the host transceiver and establish
the TCP/IP communication link between the host transceiver and remote
devices.
If your Host PC has more than one physical port, make sure you assign
the TCP/IP ports to the correct physical port number.
AirStream User’s Manual
59
TCP/IP Configurator
Setting up a Network with TCP/IP
Attach to Host is available on the right-click pop-up menu in the TCP/IP
Port window. When invoked, the currently selected port is moved to the
Physical Port window under the last selected host. Detach from Host is
available on the right-click pop-up menu in the Physical Port window.
When invoked, the currently selected port is moved to the TCP/IP Port
window. These can be used instead of the drag and drop or assignment
arrow features.
Note: If you have selected multiple ports, it is more efficient to use the drag and
drop method to assign them.
Note: TCP/IP ports can not be associated with a physical port until the Remote
Unit ID number has been assigned.
7. Click Exit.
Editing Ports
You can change the assigned TCP/IP port number and the maximum
amount of connections at any time.
1.
2.
3.
4.
5.
AirStream User’s Manual
60
Select the desired port.
Right-click.
Select the Edit TCP Port from the pop-up menu.
Select the desired criteria.
Click OK.
TCP/IP Configurator
Setting up a Network with TCP/IP
Setting Control Line Parameters
Available in Advanced View, this feature allows you to assign Input and
Output lines. You must have GPIO mode turned on for the host and at
least one remote on the network. This is assigned in the Configuration
Manager as shown in “GPIO Mode” on page 47. You can not use this
feature in conjunction with Hardware Flow Control.
1. In Advanced View, click the Set Control Line icon.
A dialog appears.
You can also select Control Lines from the right-click menu.
2. Click the desired radio buttons.
Select the desired input and output lines.
3. Click OK.
The assigned input and output lines are displayed in the Input and Output
columns in the main window.
Remove Unit ID Number
This button will remove the Remote Unit ID number associated with a
selected TCP/IP port. Remember that the Remote Unit ID Number is
equal to a Remote transceivers Source ID number.
To remove ID numbers
1. Highlight desired port.
2. Click Remove Unit ID.
The ID is removed. If an ID is removed and you are letting the program
increment IDs, the ID removed will be skipped and not reassigned. You
will have to reassign it manually, if desired.
AirStream User’s Manual
61
Monitoring Activity
Setting up a Network with TCP/IP
Remove TCP/IP COM Port
This button will remove the selected TCP/IP port.
To remove a TCP/IP port
1. Highlight desired port(s).
2. Click Remove TCP Port.
The port is removed.
Note: The port can only be removed while it resides in the TCP/IP port window.
Renaming TCP/IP Ports
The system will automatically name each TCP/IP port sequentially. You
can rename the TCP/IP ports to a more conventional notation.
To rename a TCP/IP port
1. Select the TCP/IP port.
2. Right-click and select Rename.
The name field is now editable.
3. Edit the name of the port.
You may use up to 20 characters for the name. A descriptive name such as
“Printer”, may help you remember what equipment each port represents.
MONITORING ACTIVITY
You can monitor communication port, TCP/IP port, and connection
activity on your network.
To Monitor activity
1. Open TCP/IP Configurator.
2. Click Load Driver (if the Activator is not already loaded).
AirStream User’s Manual
62
Monitoring Activity
Setting up a Network with TCP/IP
3. Click the Control Tab.
4. Double-click the Communication port.
Information about the port is displayed on the right side of the window.
The TCP/IP ports are displayed.
5. Double-click the desired TCP/IP port.
AirStream User’s Manual
63
Using TCP/IP Activator
Setting up a Network with TCP/IP
Information about the port is displayed on the right side of the window.
The connections (IP addresses) are displayed.
6. Double-click the desired connection.
Information about the connection is displayed on the right side of the
window.
USING TCP/IP ACTIVATOR
To complete the setup of the network, the TCP/IP Activator program must
be activated. This program resides in the lower right hand of the computer
task bar as represented by its icon. TCP/IP Activator runs in the
background, captures traffic from TCP/IP port as assigned by TCP/IP
Configurator.
Note: You cannot load the TCP/IP Activator if any other application is currently
using the physical COM port you have configured for the network.
Suspend or unload TCP/IP Activator when using the Configuration
Manager to make changes.
Note: For Developer Kits only, the green hardware key must be connected to the
parallel port of the computer for the TCP/IP Activator to run.
TCP/IP Activator
To run TCP/IP Activator
1. Double click the TCP/IP Activator icon in the right hand corner of your
desktop or click Load Driver in the Configurator Main window.
AirStream User’s Manual
64
Using TCP/IP Activator
Setting up a Network with TCP/IP
The icon now appears active and TCP/IP Activator is running in the
background. All serial communication traffic is redirected between the
Host transceiver and remotes according to the network of TCP/IP ports
created with the TCP/IP Configurator program.
Note: If you right click the icon, a list of several options will be displayed (Load
& Unload TCP/IP Activator, Load with Windows [at start-up] and Exit).
You can also open your TCP/IP Configurator from this menu.
Note: Once TCP/IP Activator is running, restrict all application programs from
using the physical serial port which has been assigned to the Host
transceiver.
To stop TCP/IP Activator
1. Double click the TCP/IP Activator icon.
2. A red symbol indicates that TCP/IP Activator is now inactive.
To start TCP/IP Activator when you start windows
1. Right-click the TCP/IP Activator icon.
2. Select Load With Windows.
TCP/IP Activator will automatically start each time you restart Windows
.
AirStream User’s Manual
65
Using TCP/IP Activator
Setting up a Network with TCP/IP
.
AirStream User’s Manual
66
1
Chapter 7: ActiveX Network Applications
2
B
1
Custom
Application
238
X
Note that network software utilities are optional;
contact Rice Lake Weighing Systems for details.
In this Chapter
The ActiveX Library provides a number of API system
calls which can be used to create custom network
applications which can link as many as 238 devices in
Multi-Point and Repeater Network topologies. One
application controls the entire network. The ActiveX
driver may be used for Windows NT as well as
Windows 95/98 and above.
• Location of
sample files
• ActiveX API
You can use any Windows compliant compiler,
however, the examples provided in the following
functions are specific to Visual C++, Visual Basic, and
Visual J++. The sample code placed on your system
during installation is also based on these three
compilers. These files have been modularized to
emphasize the unique properties of each of these
compilers and the various system calls. Please use
these examples as your instructional material for
creating an application template. They are located in
C:\Program Files\Zeuswireless\Samples. These
samples include a simple Host to Multi-point
application, a ping application, a background printing
function, and complex example that incorporates all of
these. This chapter provides the entire ActiveX API.
Note: GPIO transactions are performed on a per device basis.
WCI_OPEN
This function is used to open a communications port
(handle) and establish a connection with the host
transceiver. The specific Serial Port number is assigned
within the properties screen of the ActiveX device, this
is a design time variable assignment.
Syntax
lHandle = wCi_Open() as long;
Return Value
> 0 handle of the communication,
< 0 Failure to connect the port.
AirStream User’s Manual
67
wCi_Close
ActiveX Network Applications
WCI_CLOSE
This function is used to close the communications port, which was
previously opened with the wCi_Open function.
Syntax
void wCi_Close(long lHandle)
Parameters
lHandle
The handle of the communication returned
from wCi_Open.
WCI_WRITEDATAEX
This function is used to write the data buffer to a specific destination ID.
Syntax
Result = wCi_WriteDataEx(VARIANT WriteBuf, long
WriteLen, long lDestID, long lHandle) as long;
Parameters
WriteBuf
The data to be transmitted.
WriteLen
Number of bytes contained in the string.
lDestID
The identity of the destination unit that data will be
transmitted to.
lHandle
The handle of the communications port being used.
Return Value
Result
> 0 The length of transmitted data.
= 0 No data was transferred.
< 0 No transceiver is available to transfer.
AirStream User’s Manual
68
wCi_GetDestinationID
ActiveX Network Applications
WCI_GETDESTINATIONID
This function is used to get the current identity of the destination unit as
contained in the host unit.
Syntax
Result = wCi_GetDestinationID(long lHandle) as long;
Parameters
lHandle
The handle of the communications port being used.
Return Value
Result
The ID of the destination unit.
WCI_CHECKRXQUE
This function is used to check the number of incoming messages
contained within the receive queue.
Syntax
Result = wCi_CheckRxQue(long lHandle) as long;
Parameters
lHandle
The handle of the communications port being used.
Return Value
Result
Returns the number of the incoming messages
currently in the receive queue.
WCI_SETOUTPUTDEVICEID
This function is used to set the output device to log all incoming data. All
data received from any remote device will be passed up to the application
program as well as forwarded to the listed devices.
Syntax
void wCi_SetOutputDeviceID(short iPrintID, long
lHandle);
AirStream User’s Manual
69
wCi_StartStopPrinting
ActiveX Network Applications
Parameters
iPrintID
The ID of the output device.
lHandle
The handle of the communications port being used.
WCI_STARTSTOPPRINTING
This function is used to start and stop the logging of the output device.
Syntax
void wCi_StartStopPrinting(short iStatus, long
lHandle);
Parameters
iStatus
The status of output device. ‘True’ starts logging.
‘False’ stops logging.
lHandle
The handle of the communications port being used.
WCI_GETSOURCEID
This function is used to get the host transceiver’s ID.
Syntax
Result = wCi_GetSourceID(long lHandle) as long;
Parameters
lHandle
The handle of the communications port being used.
Return Value
Result
AirStream User’s Manual
70
Returns the host transceiver’s ID.
wCi_SetGpioOutput
ActiveX Network Applications
WCI_SETGPIOOUTPUT
This function is used to set the GPIO output line on the specific device.
Note: GPIO must be enabled on the host transceiver as well as the listed device
contained in this function call. GPIO is enabled via the Configuration
Manager as described in Quick Configuration on page 27.
Syntax
wCi_SetGpioOutput(short iStatus, long lDestID, long
lHandle);
Parameters
iStatus
Output status which can be 0 or 1.
lDestID
The destination ID.
1Handle
The handle of the communications port being used.
WCI_GETGPIOOUTPUT
This function is used to read the current GPIO output status line on the
selected devices.
Note: GPIO must be enabled on the host transceiver as well as the listed device
contained in this function call. GPIO is enabled via the Configuration
Manager as described in Quick Configuration on page 27.
Syntax
Result = wCi_GetGpioOutput(long lDestID, long lHandle)
as short;
Parameters
lDestID
The destination ID.
lHandle
The handle of the communications port being used.
Return Value
Result
Returns the status. 0 is OFF, 1 is ON.
AirStream User’s Manual
71
wCi_GetGpioInput
ActiveX Network Applications
WCI_GETGPIOINPUT
This function is used to read the GPIO input status line on the selected
device.
Note: GPIO must be enabled on the host transceiver as well as the listed device
contained in this function call. GPIO is enabled via the Configuration
Manager as described in Quick Configuration on page 27.
Syntax
Result = wCi_GetGpioInput(long lDestID, long lHandle)
as short;
Parameters
lDestID
The destination ID.
lHandle
The handle of the communications port being used.
Return Value
Result
Returns an integer which denotes the status. 0 is OFF
1 is ON.
WCI_GETGPIOMODE
This function is used to verify that GPIO has been enabled.
Note: GPIO must be enabled on the Host transceiver as well as the listed device
contained in this function call. GPIO is enabled via the Configuration
Manager as described in Quick Configuration on page 27.
Syntax
Result = wCi_GetGpioMode(long lDestID, long lHandle)
as short;
Parameters
lDestID
The destination ID.
lHandle
The handle of the communications port being used.
Return Value
Result
AirStream User’s Manual
72
Returns a 1 if GPIO is enabled.
wCi_Ping
ActiveX Network Applications
WCI_PING
This function is used to check if a particular remote device is available.
Syntax
Result = wCi_Ping(long lDestID, long lHandle) as
short;
Parameters
lDestID
The destination ID.
lHandle
The handle of the communications port being used.
Return Value
Result
Returns the following possible status results.
0 - Not available
1 - Available
2 - The host device is currently too busy to perform
this check
ABOUTBOX
This function is used to display the About message box (i.e., version
number).
Syntax
void AboutBox();
NEWMESSAGE
This is an event/callback function that occurs whenever a new message
has been received from the driver.
Syntax
void NewMessage(short iStatus, long lDestID, VARIANT
DataInfo, long Datalen);
AirStream User’s Manual
73
ActiveX Design Time Properties Page:
ActiveX Network Applications
Parameters
iStatus
Predefined message types:
0 – Data received
1 – Time-out or error condition
4 – GPIO event, remote input when low
5 – GPIO event, remote input when high
lDestID
The destination ID.
DataInfo
The string that has been received.
Datalen
Number of bytes contained in the DataInfo string.
ACTIVEX DESIGN TIME PROPERTIES PAGE:
AirStream User’s Manual
74
CommPort
The specific Serial Port connected to the host
transceiver. Range: 1, 2, 3 and 4.
Timeout
A global timeout value (in seconds) used when
attempting to communicate with a remote device.
1
Chapter 8: Testing Your Units
You can test the operation of transceivers in a variety of
ways using the Configuration Manager. The
instructions in these chapter assume that the
Configuration Manager is correctly installed and the
transceiver is properly connected to your PC. These
tests include:
•
•
In this Chapter
• Terminal Mode
• Loopback
• Rx and Tx
Panes
• Using
HyperTerminal
Terminal mode
Loopback test (Stand-alone model only)
TERMINAL MODE TEST
The Terminal Mode tab provides a simple terminal
interface from which data can be sent between two
units configured as a Point to Point Pair. Anything
typed in the input field of transceiver 1 will
immediately be transferred to transceiver 2. The data is
displayed in the transmit pane for transceiver 1 and the
receive pane for transceiver 2. (Note you will only see
received data if the destination transceiver is connected
to a PC with Configuration loaded and open or if the
destination PC’s transceiver has a loopback connector.)
What You Need
•
Two transceivers (A and B) configured as a Point to
Point Pair
The Source Unit ID of unit A equals the
Destination Unit ID of unit B and vice-versa. In
addition, both units must have matching Vendor ID
numbers, Network ID numbers and Hop Table
numbers.
•
One of these units is connected to a PC with the
Configuration Manager loaded.
AirStream User’s Manual
75
Loopback Test
Testing Your Units
Performing the Test
To test communications between units:
1. Open the Configuration Manager.
See Configuring your Transceiver on page 25.
2. Click the Terminal Mode tab.
3. In Test String, enter some text.
4. Click Resent.
The test string is transmitted to the Destination Unit
LOOPBACK TEST
The Loopback Test screen allows you to perform two functions; to test
that two units can communicate and to determine the best placement of
one unit relative to another based on received signal strength. This test is
only used for stand-alone models.
AirStream User’s Manual
76
Loopback Test
Testing Your Units
What You Need
•
Two transceivers (A and B) configured as a Point to Point Pair
The Source Unit ID of unit A equals the Destination Unit ID of unit B
and vice-versa. In addition, both units must have matching Vendor ID
numbers, Network ID numbers and Hop Table numbers. Transceiver
A is connected to a PC loaded with the Configuration Manager,
•
Loopback connector
Transceiver B (the one not connected to the PC running this program)
must have a loopback connector (pins 2 and 3 of the serial port tied
together) on the serial port of the remote unit.
Performing the Test
To test communications between units
1. Open the Configuration Program.
See Configuring your Transceiver on page 25.
2. Click the Loopback Test tab.
3. In Test String, enter some text.
4. Enter the desired criteria in other fields in this group.
The default values are recommended for this type of testing. 100 msec is
minimum for Repeat Every.
5. Click Start.
The test string is transmitted to the Destination Unit and looped back to
the Source Unit.
The RX Pane shows the test string as received by the transceiver
connected to the computer after being loopbacked from the remote
transceiver. If no data is received within the timeout period the message
!Timeout! is printed in the RX Pane. The TX Pane shows the test string as
typed in the dialogue box.
To test the placement of a unit:
1.
1.
2.
3.
4.
Click the Loopback Test tab.
Click Test.
Click Instantaneous RSSI.
In Test String, enter some text.
Enter the desired criteria in other fields in this group.
The default values are recommended for this type of testing.
5. Click Start.
AirStream User’s Manual
77
Loopback Test
Testing Your Units
AirStream User’s Manual
78
Viewing Data In The Rx And Tx
Testing Your Units
6. Move one or both units until the greatest RSSI values for local and remote
are achieved. The optimization of the unit placement does not have to be
too exact. An RSSI value above the half mark is acceptable.
VIEWING DATA IN THE RX AND TX PANES
These display areas show the data being transmitted and received during
tests. The RX panes shows data being received into the transceiver. The
TX pane shows data being transmitted from the transceiver. All data sent
will be displayed and at times the pane may become cluttered. You can
use the Clear buttons on the toolbar or the commands in the Edit menu to
clear the panes of data. To clear data in the panes, select Clear RX Pane or
Clear TX Pane.
AirStream User’s Manual
79
Using Hyperterminal
Testing Your Units
USING HYPERTERMINAL
On every Windows system there is a terminal program called
HyperTerminal. The following instructions show how to use
HyperTerminal to test data communication for Point to Point or Multipoint networks.
To use Hyperterminal
1. Select Start> Program Files> Accessories> Communications>
HyperTerminal.
2. Double-click HyperTerminal.exe.
The main window appears with a session window active.
3. Enter a name for this session and click the first icon (red and yellow
telephones).
4. Click OK.
The Connect To window appears.
5. Select a connection option.
6. For Point to Point and ComPort Intercept select the direct Com port. (This
is the COM Port used to connect the transceiver in the Configuration
Manager). Fill out the serial settings to match what you have set in the
Configuration Manager.
For TCP/IP select TCP/IP(winsock).
7. Enter the Begin Typing and watch for the results.
Note: If you type but do not see the characters on screen and wish to see them,
select File> Properties> Settings> ASCII setup> Echo Typed Characters
Locally.
Note: If you are testing Multi-Point or Repeater with ComPort Intercept or TCP/
IP Intercept their Activators must be running.
AirStream User’s Manual
80
1
Chapter 9: Troubleshooting
In this Chapter
Problem
Possible Cause
Possible Solution
“(?) Timeout” messages are
displayed in the
Configuration Manager
general tab fields.
The equipment is not
connected properly.
Check that all connections are
secure. Make sure transceiver has
power (LED 1 is lit).
Wrong serial port is
selected.
Select the correct serial port in the
Serial tab of the Configuration
Manager.
Antenna cannot be threaded
onto the antenna connector.
Antenna and antenna
connector have “lefthanded” threads.
Turn antenna connector counterclockwise to attach to transceiver.
In Network mode a link gets
stuck on—that is, LEDs 1 &
2 stay lit.
The application program
running on the host PC is
writing to the physical
COM port which is
attached to the host
transceiver, instead of
writing to a virtual COM
port.
Power off the host transceiver and
ensure that the mapping of virtual
COM ports to a physical COM
port is correct. Make sure that the
ComPort Activator is running.
Make sure that the application
program is not writing data to the
PC’s physical COM port which is
attached to the transceiver.
LED 1 not lit
Power is not being
supplied to unit.
Check power supply connection
into unit and outlet. Make sure
supply of power is active.
LED 1and LED 2 flashes 3
times
Normal operation.
No need to troubleshoot.
Open the Configuration
Manager and get an error
message
Outdated DLL.
Run 401COMUPD.exe included
in program disk to install
COMCTL32.DLL in your
C:\Windows\System directory.
Point to Point or remote
transceiver in a network is
malfunctioning with a 9
wire cable
The device to which the
transceiver is connected
is activating the pin
utilized by the Zeus
Network Software Utility.
Try replacing the 9 wire cable
with a 5 wire cable. If this corrects
the problem, utilize the 5 wire
cable.
The Configuration Program
will not start
ComPort or TCP/IP
Activator program is
running in the
background.
Suspend or unload Activators
when using the Configuration
Program to make changes.
• Problem
• Possible Cause
• Solution
AirStream User’s Manual
81
Troubleshooting
Problem
Possible Cause
Possible Solution
Unit is being sent data but is
not receiving
Power mode settings
(sleep) can prevent the
transfer of data.
Use Configuration Manager to
place unit in normal power mode.
User applications report a
“timeout” while waiting for
a response from another
user-supplied device (e.g.
printer or computer)
connected to the remote
transceiver.
Longer data propagation
delay compared with
cable.
Increase the period that the user
application waits before declaring
a “timeout.” (Suggest 1500 to
2000 msec.)
AirStream User’s Manual
82
Chapter 10: Learning Exercises
The following exercises guide you through the steps of
the setup, configuration, and test for Point to Point and
Network wireless operation. These procedures rely on
the assumptions that you have adequate power,
peripherals, and host devices.
Note: These procedures are written for Stand-alone Models.
In this Chapter
• Point to Point
• Multi-Point
• ComPort
Intercept
• TCP/IP
• Repeater
POINT TO POINT
A
1
1
B
• Broadcast
This exercise provides a demonstration of all the steps
needed to have a direct wireless communication
between two transceivers.
Materials Needed
•
•
•
•
•
•
•
1 PC
2 transceivers
2 Antennas
2 Power sources (outlet and/or surge strips) and 2
power supplies for transceivers
1 other peripheral (must have a RS232 connector)
Configuration Manager software
2 RS-232 cables
Procedure
Install Software
1. Power up your PC.
2. Insert the Configuration Manager CD into the
appropriate drive.
3. Using your usual method (Windows Explorer, My
computer etc.) to view the contents of the drive.
4. Double-click Setup.exe.
5. Follow the on screen instructions to complete the
installation.
AirStream User’s Manual
83
Point to Point
Learning Exercises
Connect the Transceiver
6. Attach the power supply to transceiver 1.
7. Plug the power supply into power source.
8. Verify that LED 1 on the front panel of the transceiver blinks 3 times and
remains lit.
9. Attach an antenna to transceiver 1.
10. Insert the RS232 cable connector into the serial connector in the back of
the transceiver.
11. Attach the other end of this cable into the serial port on the back of your
computer.
Configure Transceiver 1
12. Select Configuration Manager form the Start menu in Windows.
The Main window appears.
13.
14.
15.
16.
Click Quick Configuration.
Click Point-to-Point.
Click OK.
Enter the information as shown in the dialog below.
17. Click Submit.
Generate a Report (if desired)
18. Click Report Generation.
19. Click Close.
AirStream User’s Manual
84
Point to Point
Learning Exercises
Connect and Configure Transceiver 2
20. Click OK.
21. Click OK to configure another Unit.
22. Disconnect serial connector from transceiver 1. (You can leave it on the
computer.)
23. Attach power supply to transceiver 2.
24. Plug power supply into power source.
25. Verify that LED 1 on the front panel of the transceiver blinks three times
and remains lit.
26. Attach an antenna to transceiver 2.
27. Insert the RS232 connector into the serial connector in the back of the
transceiver.
Note that all of the fields are grayed out except Alias Source name.
28. Click Submit.
29. Uncheck Report Generation.
30. Click Close.
View the Report
31. In your Windows Explorer, open C:\Program Files\Configuration
Manager\RReport.txt.
AirStream User’s Manual
85
Multi-Point ComPort Intercept
Learning Exercises
Test Operation
32. Connect transceiver 1 to a peripheral device. Note power supply,
connector and antenna connections must all be made.
33. On the Host PC, Click the Terminal Mode tab in the Configuration
Manager.
34. In Test String, enter some text.
The test string is transmitted to the Destination Unit as shown in the TX
and RX panes.
35. Select Exit from the File menu.
MULTI-POINT COMPORT INTERCEPT
B
2
1
This exercise demonstrates how you can have three transceivers
configured on a small Multi-Point Network communicate without wire.
This network topology can support up to 16 transceivers (including one at
the Host PC).
Materials Needed
16
X
•
•
•
•
•
•
•
•
1 Host PC
3 Transceivers
3 Antennas
2-3 Power sources (outlet and/or surge strips) and 3 power supplies
for transceivers
2 other peripherals (must have a RS232 connector)
Configuration Manager software
ComPort Intercept software
3 RS232 cables
Procedure
Install Software
36. Power up your Host PC.
37. Insert the Configuration Manager software into the appropriate drive.
38. Using your usual method (Windows Explorer, My computer etc.) view the
contents of the drive.
39. Double-click Setup.exe.
40. Follow the on screen instructions to complete the installation.
41. Insert the ComPort Intercept Software into the appropriate drive.
AirStream User’s Manual
86
Multi-Point ComPort Intercept
Learning Exercises
42. Using your usual method (Windows Explorer, My computer etc.) to view
the contents of the drive.
43. Double-click Setup.exe.
44. Follow the on screen instructions to complete the installation.
Connect the Transceiver
45. Attach the power supply to transceiver 1.
46. Plug the power supply into power source.
47. Verify that LED 1 on the front panel of the transceiver blinks 3 times and
remains lit.
48. Attach an antenna to transceiver 1.
49. Insert the RS232 cable connector into the serial connector in the back of
the transceiver.
50. Attach the other end of this cable into the serial port on the back of your
Host PC.
Configure Transceiver 1
51. Select Configuration Manager from the Start menu in Windows.
The Main window appears.
52.
53.
54.
55.
Click Quick Configuration.
Click Host to Multi-Point (Host)
Click OK.
Enter the information as shown in the dialog below.
Host
56. Click Submit.
AirStream User’s Manual
87
Multi-Point ComPort Intercept
Learning Exercises
Generate a Report (if desired)
57. Click Report Generation.
58. Click Close.
Connect and Configure Transceiver 2
59. Click Yes.
60. Click OK.
61. Disconnect serial connector from transceiver 1. (You can leave it on the
computer.)
62. Attach power supply to transceiver 2.
63. Plug power supply into power source.
64. Verify that LED 1 on the front panel of the transceiver blinks three times
and remains lit.
65. Attach an antenna to transceiver 2.
66. Insert the RS232 connector into the serial connector in the back of the
transceiver.
Note that all of the fields are grayed out except Alias Source name and
Source Unit ID.
Make sure that Auto increment is checked.
67. Click Submit.
68. Uncheck Report Generation.
69. Click Close.
AirStream User’s Manual
88
Multi-Point ComPort Intercept
Learning Exercises
Connect and Configure Transceiver 3
70. Click OK.
71. Disconnect serial connector from transceiver 2. (You can leave it on the
computer.)
72. Attach power supply to transceiver 3.
73. Plug power supply into power source.
74. Verify that LED 1 on the front panel of the transceiver remains lit.
75. Attach an antenna to transceiver 3.
76. Insert the RS232 connector into the serial connector in the back of the
transceiver.
Note that all of the fields are grayed out except Alias Source name and
Source Unit ID. Make sure that Auto Increment is checked.
77.
78.
79.
80.
81.
Click Submit.
Check Report Generation.
Click Close.
Click Cancel.
Select Exit from the File menu.
View the Report
82. In your Windows Explorer, open C:\Program Files\Configuration
Manager\RReport.txt.
Set up Virtual Ports
83. Select ComPort Configurator from the Start Menu under ComPort
Intercept.
The Comport Configurator Main Window appears.
84. Click the Add Virtual Ports Icon.
85. Enter 2 and click OK.
A message appears asking to restart your computer.
86.
87.
88.
89.
Click No.
In the Virtual ports window, right-click the first listed Virtual port.
Click Assign Unit ID.
Enter 1 and click OK.
This will be assigned to the remote called Device 1.
90. Right-click the second virtual port.
91. Click Assign Unit ID.
92. Enter 2 and click OK.
This will be assigned to the remote called Device 2.
AirStream User’s Manual
89
Multi-Point ComPort Intercept
Learning Exercises
Note: The host device is not assigned to a virtual port as it is physically
connected to the Host PC.
93. Highlight both virtual ports.
94. Drag them to the physical Port window under Comm Port 1.
Note that this is most likely your comm port but others may be listed.
95. Click Exit to exit the ComPort Intercept program.
96. Restart your computer.
97. Select Start then Programs and then Comport Activator.
Test Operation
98. Connect transceivers 2 and 3 to peripheral devices. Note power supply,
connector, and antenna connections must all be made.
Transceiver 1 must remain connected to the Host PC.
99. Send data from the Host PC to a peripheral device.
For example, if you had a printer (with a serial connection) that you have
been using (i.e., drivers are already set up) you could write a short memo
in a word processor on the Host PC and select File>print. The information
would be printed out on the printer just as if it had been connected by
wire. This would work for any existing wired connection on a local LAN.
Another example would be to use HyperTerminal. This requires that your
peripherals are also PCs or that you use a loop back connector to see the
data sent returned in your HyperTerminal Window.
Note: If you are using hyperterminal, remember to connect the Virtual Port
number and not the physical port number (COM1). You will need to open
two HyperTerminals to connect to both remote transceivers at the same
time.
AirStream User’s Manual
90
Multi-Point TCP/IP Intercept
Learning Exercises
MULTI-POINT TCP/IP INTERCEPT
2
1
B
This exercise demonstrates how you can have 3 transceivers configured
on a TCP/IP based Multi-Point network communicating without wire.
Materials Needed
238
X
•
•
•
•
•
•
•
•
1 Host PC
3 Transceivers
3 Antennas
2-3 Power sources (outlet and/or surge strips) and 3 power supplies
for transceivers
2 other peripherals (must have a RS232 connector)
Configuration Manager software
TCP/IP Intercept software
3 RS232 cables
Procedure
Install Software
1. Power up your Host PC.
2. Insert the Configuration Manager software into the appropriate drive.
3. Using your usual method (Windows Explorer, My computer etc.) view the
contents of the drive.
4. Double-click Setup.exe.
5. Follow the on screen instructions to complete the installation.
6. Insert the TCP/IP Intercept software into the appropriate drive.
7. Using your usual method (Windows Explorer, My computer etc.) view the
contents of the drive.
8. Double-click Setup.exe.
9. Follow the on screen instructions to complete the installation.
Connect the Transceiver
10. Attach the power supply to transceiver 1.
11. Plug the power supply into power source.
12. Verify that LED 1 on the front panel of the transceiver blinks 3 times and
remains lit.
13. Attach an antenna to transceiver 1.
AirStream User’s Manual
91
Multi-Point TCP/IP Intercept
Learning Exercises
14. Insert the RS232 cable connector into the serial connector in the back of
the transceiver.
15. Attach the other end of this cable into the serial port on the back of your
Host PC.
Configure Transceiver 1
16. Select Configuration Manager form the Start menu in Windows.The Main
window appears.
17. Click Quick Configuration.
18. Click Host to Multi-Point (Host).
19. Click OK.
20. Enter the information as shown in the dialog below.
21. Click Submit.
Generate a Report (if desired)
22.
23.
24.
25.
Click Report Generation.
Click Close.
Click Yes.
Click OK.
Connect and Configure Transceiver 2
26. Disconnect serial connector from transceiver 1. (You can leave it on the
computer.)
27. Attach power supply to transceiver 2.
28. Plug power supply into power source.
AirStream User’s Manual
92
Multi-Point TCP/IP Intercept
Learning Exercises
29. Verify that LED 1 on front panel of transceiver blinks three times and
remains lit.
30. Attach an antenna to transceiver 2.
31. Insert the RS232 connector into the serial connector in the back of the
transceiver.
Note that all of the fields are grayed out except Alias Source name and
Source Unit ID.
Make sure that Auto Increment is checked.
32. Click Submit.
33. Uncheck Report Generation.
34. Click Close.
Connect and Configure Transceiver 3
35. Click OK.
36. Disconnect serial connector from transceiver 2. (You can leave it on the
computer.)
37. Attach power supply to transceiver 3.
38. Plug power supply into power source.
39. Verify that LED 1 on the front panel of the transceiver remains lit.
40. Attach an antenna to transceiver 3.
41. Insert the RS232 connector into the serial connector in back of the
transceiver.
Note that all of the fields are grayed out except Alias Source name and
Source Unit ID. Make sure that Auto increment is checked.
42. Click Submit.
43. Check Report Generation.
44. Click Close.
AirStream User’s Manual
93
Multi-Point TCP/IP Intercept
Learning Exercises
45. Click Cancel.
46. Select Exit from the File menu.
View the Report
47. In your Windows Explorer, open C:\Program Files\Configuration
Manager\RReport.txt.
Set up TCP/IP Ports
48. Select Start> Programs> TCP/IP Intercept Program.
Note: If you receive a message requesting you set up TCP/IP ports, click OK.
49. Right-click the TCP/IP Activator icon in the lower right corner of your
Desktop.
50. Select Show Configurator.
The TCP/IP Configurator Main Window appears.
51. Click the Add TCP/IP Ports Icon.
52. Enter 2 and a start from value.
The value here refers to your machines TCP/IP port number. values range
from 1024 to 10,000, make sure that the value in the units section is 1.
53. Click OK.
Unit IDs are automatically assigned.
54. Highlight both virtual ports.
55. Drag them to the Physical Port window under COM Port 1.
Note that this is most likely your COM port but others may be listed.
56. Click Hide to hide the TCP/IP Configurator and keep the Activator
running.
Test Operation
57. Connect transceivers 2 and 3 to peripheral devices. Note power supply,
connector, and antenna connections must all be made.
Transceiver 1 must remain connected to the Host PC.
58. Send data from the Host PC to a peripheral device.
For example, if you had a printer (with a serial connection) that you have
been using (i.e., drivers are already set up) you could write a short memo
in a word processor on the Host PC and select File>print. The information
would be printed out on the printer just as if it had been connected by
wire. This would work for any existing wired connection on a local LAN.
Another example would be to use HyperTerminal. This requires that your
peripherals are also PCs or that you use a loop back connector to see the
data sent returned in your HyperTerminal Window.
AirStream User’s Manual
94
Repeater TCP/IP Intercept
Learning Exercises
REPEATER TCP/IP INTERCEPT
This exercise demonstrates how you can have 3 transceivers configured
on a TCP/IP based Repeater network communicating without wire.
Materials Needed
•
•
•
•
•
•
•
•
1 Host PC
3 Transceivers
3 Power sources (outlet and/or surge strips) and 3 power supplies for
transceivers
1 other peripherals (must have a RS232 connector)
Configuration Manager software
TCP/IP Intercept software
3 RS232 cables
1 loopback connector
Procedure
Install Software
1. Power up your Host PC.
2. Insert the Configuration Manager software into the appropriate drive.
3. Using your usual method (Windows Explorer, My computer etc.) view the
contents of the drive.
4. Double-click Setup.exe.
5. Follow the on screen instructions to complete the installation.
6. Insert the TCP/IP Intercept software into the appropriate drive.
7. Using your usual method (Windows Explorer, My computer etc.) view the
contents of the drive.
8. Double-click Setup.exe.
9. Follow the on screen instructions to complete the installation.
Connect the Transceiver
10. Attach the power supply to transceiver 1.
11. Plug the power supply into power source.
12. Verify that LED 1 on the front panel of the transceiver blinks 3 times and
remains lit.
13. Insert the RS232 cable connector into the serial connector in the back of
the transceiver.
AirStream User’s Manual
95
Repeater TCP/IP Intercept
Learning Exercises
14. Attach the other end of this cable into the serial port on the back of your
Host PC.
Configure Transceiver 1
15. Select Configuration Manager form the Start menu in Windows.
The Main window appears.
16.
17.
18.
19.
Click Quick Configuration.
Click Repeater (Host).
Click OK.
Enter the information as shown in the dialog below.
20. Click Submit.
Generate a Report (if desired)
21.
22.
23.
24.
Click Report Generation.
Click Close.
Click Yes.
Click OK.
Connect and Configure Transceiver 2
25. Disconnect serial connector from transceiver 1. (You can leave it on the
computer.)
26. Attach power supply to transceiver 2.
27. Plug power supply into power source.
28. Verify that LED 1 on the front panel of the transceiver blinks three times
and remains lit.
AirStream User’s Manual
96
Repeater TCP/IP Intercept
Learning Exercises
29. Insert the RS232 connector into the serial connector in the back of the
transceiver.
Note that all of the fields are grayed out except Alias Source name and
Source Unit ID.
Make sure that Auto Increment is checked.
30. Click Submit.
31. Uncheck Report Generation.
32. Click Close.
Connect and Configure Transceiver 3
33. Click OK.
34. Disconnect serial connector from transceiver 2. (You can leave it on the
computer.)
35. Attach power supply to transceiver 3.
36. Plug power supply into power source.
37. Verify that LED 1 on the front panel of the transceiver remains lit.
38. Insert the RS232 connector into the serial connector in the back of the
transceiver.
Note that all of the fields are grayed out except Alias Source name and
Source Unit ID. Make sure that Auto increment is checked.
39.
40.
41.
42.
43.
Click Submit.
Check Report Generation.
Click Close.
Click Cancel.
Select Exit from the File menu.
AirStream User’s Manual
97
Repeater TCP/IP Intercept
Learning Exercises
View the Report
44. In your Windows Explorer, open C:\Program Files\Configuration
Manager\RReport.txt.
Set up TCP/IP Ports
45. Select Start> Programs> TCP/IP Intercept Program.
Note: If you receive a message requesting you set up TCP/IP ports, click OK.
46. Right-click the TCP/IP Activator icon in the lower right corner of your
Desktop.
47. Select Show Configurator.
The TCP/IP Configurator Main Window appears.
48. Click the Add TCP/IP Ports Icon.
49. Enter 1 and a start from value.
The value here refers to your machines TCP/IP port number. Values range
from 1024 to 10,000.
Make sure that the value in the units section is 1.
This is the configuration of the port that will be used to send data to
Transceiver 3.
50. Click OK.
Unit IDs are automatically assigned.
51. Highlight the virtual port.
52. Drag them to the Physical Port window under COM Port 1.
Note that this is most likely your COM port but others may be listed.
53. Click Hide to hide the TCP/IP Configurator and keep the Activator
running.
Test Operation
54. Connect transceiver 2 to power only.
Transceiver 1 must remain connected to the Host PC.
55. Place a loopback connector and power on transceiver 3.
56. Send data from the Host PC to transceiver 3.
For example, if you had a printer (with a serial connection) that you have
been using (i.e., drivers are already set up) you could write a short memo
in a word processor on the Host PC and select File>print. The information
would be printed out on the printer just as if it had been connected by
wire. This would work for any existing wired connection on a local LAN.
AirStream User’s Manual
98
Repeater TCP/IP Intercept
Learning Exercises
Another example would be to use HyperTerminal. This requires that your
peripherals are also PCs or that you use a loop back connector to see the
data sent returned in your HyperTerminal Window.
Note: You can not use the Loopback test in Configuration Manager, it will
conflict with TCP/IP Activator.
57. Unplug transceiver 3 and move significantly away from transceiver 1.
Plug-into power.
58. Resend data. If data is received, repeat moving away and resending until
you receive a time out message.
59. Move transceiver 2 and resend data to transceiver 3 until data is again
received.
60. Connect transceiver 3 to peripheral devices. (Note power supply and
connector connections must be made.)
61. Resend data.
Instead of being looped back, data is received on the peripheral attached
to transceiver 3.
AirStream User’s Manual
99
Broadcast Remote-To-All
Learning Exercises
BROADCAST REMOTE-TO-ALL
This exercise demonstrates how you can have 3 transceivers configured
on a Broadcast Network communicating without wire.
Materials Needed
•
•
•
•
•
•
•
1 Host PC
3 Transceivers
3 Power sources (outlet and/or surge strips) and 3 power supplies for
transceivers
3 antennas
2 smart peripherals (must have a RS232 connector and be able to
produce output (i.e, laptop))
Configuration Manager software
3 RS232 cables
Procedure
Install Software
1. Power up your Host PC.
2. Insert the Configuration Manager software into the appropriate drive.
3. Using your usual method (Windows Explorer, My computer etc.) view the
contents of the drive.
4. Double-click Setup.exe.
5. Follow the on screen instructions to complete the installation.
6. Insert the TCP/IP Intercept software into the appropriate drive.
7. Using your usual method (Windows Explorer, My computer etc.) view the
contents of the drive.
8. Double-click Setup.exe.
9. Follow the on screen instructions to complete the installation.
Connect the Transceiver
10. Attach the power supply to transceiver 1.
11. Plug the power supply into power source.
12. Verify that LED 1 on the front panel of the transceiver blinks 3 times and
remains lit.
13. Insert the RS232 cable connector into the serial connector in the back of
the transceiver.
AirStream User’s Manual
100
Broadcast Remote-To-All
Learning Exercises
14. Attach the other end of this cable into the serial port on the back of your
Host PC.
Configure Transceiver 1
15. Select Configuration Manager form the Start menu in Windows.
The Main window appears.
16.
17.
18.
19.
Click Quick Configuration.
Click Broadcast (Host).
Click OK.
Enter the information as shown in the dialog below.
20. Click Submit.
Generate a Report (if desired)
21.
22.
23.
24.
25.
Click Report Generation.
Click Close.
Click Yes.
Click OK.
Click Remote to All.
Connect and Configure Transceiver 2
26. Disconnect serial connector from transceiver 1. (You can leave it on the
computer.)
27. Attach power supply to transceiver 2.
28. Plug power supply into power source.
AirStream User’s Manual
101
Broadcast Remote-To-All
Learning Exercises
29. Verify that LED 1 on the front panel of the transceiver blinks three times
and remains lit.
30. Insert the RS232 connector into the serial connector in the back of the
transceiver.
Note that all of the fields are grayed out except Alias Source name and
Source Unit ID.
Make sure that Auto Increment is checked.
31. Click Submit.
32. Uncheck Report Generation.
33. Click Close.
Connect and Configure Transceiver 3
34. Click OK.
35. Disconnect serial connector from transceiver 2. (You can leave it on the
computer.)
36. Attach power supply to transceiver 3.
37. Plug power supply into power source.
38. Verify that LED 1 on the front panel of the transceiver remains lit.
39. Insert the RS232 connector into the serial connector in the back of the
transceiver.
Note that all of the fields are grayed out except Alias Source name and
Source Unit ID. Make sure that Auto increment is checked.
40.
41.
42.
43.
AirStream User’s Manual
102
Click Submit.
Check Report Generation.
Click Close.
Click Cancel.
Broadcast Remote-To-All
Learning Exercises
44. Select Exit from the File menu.
View the Report
45. In your Windows Explorer, open C:\Program Files\Configuration
Manager\RReport.txt.
Test Operation
46. Connect transceivers 2 and 3 to peripheral devices. (Note power supply,
connector, and antenna connections must all be made.)
Transceiver 1 must remain connected to the Host PC.
47. Send data from the host pc to a peripheral device.
An example would be to use HyperTerminal. This requires that your
peripherals are also PCs or that you use a loop back connector to see the
data sent returned in your HyperTerminal Window.
The data appears on both peripheral at once.
48. Send data from the peripheral device to a the host.
The data appears on the Host and on the other peripheral device.
AirStream User’s Manual
103
Broadcast Remote-To-Host
Learning Exercises
BROADCAST REMOTE-TO-HOST
This exercise demonstrates how you can have 3 transceivers configured
on a broadcast network communicating without wire.
Materials Needed
•
•
•
•
•
•
•
1 Host PC
3 Transceivers
3 Power sources (outlet and/or surge strips) and 3 power supplies for
transceivers
3 antennas
2 smart peripherals (must have a RS232 connector and be able to
produce output (i.e, laptop))
Configuration Manager software
3 RS232 cables
Procedure
Install Software
1. Power up your Host PC.
2. Insert the Configuration Manager software into the appropriate drive.
3. Using your usual method (Windows Explorer, My computer etc.) view the
contents of the drive.
4. Double-click Setup.exe.
5. Follow the on screen instructions to complete the installation.
6. Insert the TCP/IP Intercept software into the appropriate drive.
7. Using your usual method (Windows Explorer, My computer etc.) view the
contents of the drive.
8. Double-click Setup.exe.
9. Follow the on screen instructions to complete the installation.
Connect the Transceiver
10. Attach the power supply to transceiver 1.
11. Plug the power supply into power source.
12. Verify that LED 1 on the front panel of the transceiver blinks 3 times and
remains lit.
13. Insert the RS232 cable connector into the serial connector in the back of
the transceiver.
AirStream User’s Manual
104
Broadcast Remote-To-Host
Learning Exercises
14. Attach the other end of this cable into the serial port on the back of your
Host PC.
Configure Transceiver 1
15. Select Configuration Manager form the Start menu in Windows.
The Main window appears.
16.
17.
18.
19.
Click Quick Configuration.
Click Broadcast (Host).
Click OK.
Enter the information as shown in the dialog below.
20. Click Submit.
Generate a Report (if desired)
21.
22.
23.
24.
25.
Click Report Generation.
Click Close.
Click Yes.
Click OK.
Click Remote to Host.
Connect and Configure Transceiver 2
26. Disconnect serial connector from transceiver 1. (You can leave it on the
computer.)
27. Attach power supply to transceiver 2.
28. Plug power supply into power source.
AirStream User’s Manual
105
Broadcast Remote-To-Host
Learning Exercises
29. Verify that LED 1 on the front panel of the transceiver blinks three times
and remains lit.
30. Insert the RS232 connector into the serial connector in the back of the
transceiver.
Note that all of the fields are grayed out except Alias Source name and
Source Unit ID.
Make sure that Auto Increment is checked.
31. Click Submit.
32. Uncheck Report Generation.
33. Click Close.
Connect and Configure Transceiver 3
34. Click OK.
35. Disconnect serial connector from transceiver 2. (You can leave it on the
computer.)
36. Attach power supply to transceiver 3.
37. Plug power supply into power source.
38. Verify that LED 1 on the front panel of the transceiver remains lit.
39. Insert the RS232 connector into the serial connector in the back of the
transceiver.
Note that all of the fields are grayed out except Alias Source name and
Source Unit ID. Make sure that Auto increment is checked.
40.
41.
42.
43.
AirStream User’s Manual
106
Click Submit.
Check Report Generation.
Click Close.
Click Cancel.
Broadcast Remote-To-Host
Learning Exercises
44. Select Exit from the File menu.
View the Report
45. In your Windows Explorer, open C:\Program Files\Configuration
Manager\RReport.txt.
Test Operation
46. Connect transceivers 2 and 3 to peripheral devices. Note power supply,
connector, and antenna connections must all be made.
Transceiver 1 must remain connected to the Host PC.
47. Send data from the host pc to a peripheral device.
An example would be to use HyperTerminal. This requires that your
peripherals are also PCs or that you use a loop back connector to see the
data sent returned in your HyperTerminal Window.
The data appears on both peripheral at once.
48. Send data from the peripheral device to a the host.
The data appears on the Host but not on the other peripheral device.
AirStream User’s Manual
107
Broadcast Remote-To-Host
Learning Exercises
AirStream User’s Manual
108
1
Glossary
ActiveX Library
A Network Software Utility used to develop custom applications.
Asymmetrical Data Rates
The ability to send data in different directions at varying data rates
which accommodates large data transfers.
Automatic-repeat-request
(ARQ)
A protocol which helps maintain data integrity.
Broadcast Network
A type of Host to Multi-Point Network. A network topology.
Buffer
A collection station for data.
Carrier Sense Multiple
Access (CSMA)
A protocol used for communication between transceivers.
ComPort Activator
The driver part of ComPort Intercept.
ComPort Configurator
The application part of ComPort Intercept.
ComPort Intercept
A Network Software Utility used for networks with up to 16 devices.
Configuration Manager
Name of the program used to configure all Transceivers.
dBi
A ratio of decibels to an isotropic antenna that is commonly used to
measure antenna gain. The greater the dBi value, the higher the gain
and, as such, the more acute the angle of coverage.
Design-in Transceiver
A type of AirStream Transceiver. Integrated into OEM products.
Device
Refers to customer equipment, peripheral, nodes.
Direct Sequence Spread
Spectrum (DSSS)
A type of spread spectrum radio transmission that spreads its signal
continuously over a wide frequency band
Directional Antenna
An antenna with range extended in a particular direction.
DOS Library
A Network Software Utility to port AirStream software to controllers
and embedded microprocessors that are not Windows PCs.
Ethernet
A type of data transmission technology that enables LAN/WANs,
Internet, and Intranet connectivity.
Forward-error-correction
(FEC)
An algorithm which corrects and retransmits erroneous data.
Frame
Term for the smallest unit of data being transmitted. The physical
data packet.
Frequency Hopping
Spread Spectrum (FHSS)
A type of spread spectrum radio transmission that hops, in a
prearranged pattern, through a prescribed frequency band.
Gain
A method accomplished by an antenna of increasing signal strength
by concentrating a signal in a single direction. The higher the gain
the longer the distance of transmission.
AirStream User’s Manual
G-109
Glossary
GigaHertz (GHz)
A unit of measure for frequency. Billions of Cycles per second.
GPIO
A feature which enables General Purpose Input/Output control lines.
Hardware Key
Hardware used to prevent unauthorized duplication of proprietary
software. Used in AirStream Developer Kits.
Hertz(Hz)
A unit of measure for frequency. Cycles per second.
Hop Table
A list of frequencies in a given spectrum that is used for Frequency
Hopping.
Host
Any device or transceiver that acts as the controlling mechanism on a
network.
Host PC
A PC that acts as a host in a network topology.
ITU cyclical redundancy
code 16 CRC-16
Used to detect errors in data packets.
Line of Sight
An unobstructed straight line between two transceivers.
Link
A term which describes the period of time two transceivers are in
sync and transmitting data. Links consist of frames.
Loopback Connector
A connector used to test Stand-alone transceivers.
Master
A transceiver that initiates a communications link.
MegaHertz (MHz)
A unit of measure for frequency. Millions of Cycles per second.
Multi-Point Network
A network topology consisting of three or more transceivers with
one transceivers connected to a Host PC.
Network Software Utilities
All software used to create network topologies.
Network Topology
Used to describe the configurations of networks.
OEM
Original Equipment Manufacturer. Typically uses AirStream Designin Transceivers. Also refers to a level of access in the Configuration
Manager.
Omni-directional Antenna
An antenna with range extended in a 360 degree transmission
pattern.
Peripheral
A device that is not a host.
Point to Point Pair
A network topology consisting of only 2 transceivers.
Quick Configuration
A wizard contained in the Configuration Manager application which
allows you to configure all transceivers and load the settings into
EEPROM.
Radio Frequency (RF)
A generic term for radio-based technology.
Range
A linear measure of the distance that a transmitter can send a signal.
Repeater Network
A network topology consisting of three or more transceivers with one
transceivers connected to a Host PC. Extends the range of a MultiPoint Network
AirStream User’s Manual
G-110
Glossary
Remote
Any device or transceiver on a network that is not a host.
RS232
A COMM protocol and the 9 pin type of cable shipped with Standalone transceivers.
Session
A term which describes the complete process of transmission
between two transceivers. Sessions consist of links.
Slave
The target of a communications link initiated by a master.
Spread Spectrum
A radio transmission that spreads the user information over a wide
bandwidth.
Stand-alone Transceiver
A AirStream Transceiver in a case with an RS232 port and external
power adaptor.
Systems Integrator
Designs or Integrates equipment systems using AirStream Standalone Transceivers or OEM products built with AirStream Design-in
Transceivers.
TCP/IP Activator
A part of TCP/IP Intercept
TCP/IP Configurator
A part of TCP/IP Intercept
TCP/IP Intercept
A Network Software Utility used to connect three or more
transceivers to a TCP/IP backbone.
Transceiver
A two-way (transmit and receive) radio.
TTL
A 12 pin connection (interface) provided on Design-in Transceiver
boards.
User
A level of access in the Configuration Manager.
Virtual Ports
Ports that are created via software and used to route communications
traffic.
Transceiver User’s Manual
G-111
Glossary
AirStream User’s Manual
G-112
AirStream Limited Warranty
Rice Lake Weighing Systems (RLWS) warrants that all RLWS equipment and systems properly installed
by a Distributor or Original Equipment Manufacturer (OEM) will operate per written specifications as
confirmed by the Distributor/OEM and accepted by RLWS. All systems and components are warranted
against defects in materials and workmanship for one year.
RLWS warrants that the equipment sold hereunder will conform to the current written specifications
authorized by RLWS. RLWS warrants the equipment against faulty workmanship and defective materials.
If any equipment fails to conform to these warranties, RLWS will, at its option, repair or replace such
goods returned within the warranty period subject to the following conditions:
• Upon discovery by Buyer of such nonconformity, RLWS will be given prompt written notice
with a detailed explanation of the alleged deficiencies.
• Individual electronic components returned to RLWS for warranty purposes must be packaged
to prevent electrostatic discharge (ESD) damage in shipment. Packaging requirements are
listed in a publication, Protecting Your Components From Static Damage in Shipment,
available from RLWS Equipment Return Department.
• Examination of such equipment by RLWS confirms that the nonconformity actually exists,
and was not caused by accident, misuse, neglect, alteration, improper installation, improper
repair or improper testing; RLWS shall be the sole judge of all alleged non-conformities.
• Such equipment has not been modified, altered, or changed by any person other than RLWS or
its duly authorized repair agents.
• RLWS will have a reasonable time to repair or replace the defective equipment. Buyer is
responsible for shipping charges both ways.
• In no event will RLWS be responsible for travel time or on-location repairs, including
assembly or disassembly of equipment, nor will RLWS be liable for the cost of any repairs
made by others.
T HESE WARRANTIES EXCLUDE ALL OTHER WARRANTIES , EXPRESSED OR IMPLIED , INCLUDING
WITHOUT LIMITATION WARRANTIES OF MERCHANTABILITY OR FITNESS FOR A PARTICULAR PURPOSE.
N EITHER RLWS NOR DISTRIBUTOR WILL , IN ANY EVENT , BE LIABLE FOR INCIDENTAL OR
CONSEQUENTIAL DAMAGES.
RLWS AND BUYER AGREE THAT RLWS’S SOLE AND EXCLUSIVE LIABILITY HEREUNDER IS LIMITED TO
REPAIR OR REPLACEMENT OF SUCH GOODS. IN ACCEPTING THIS WARRANTY, THE BUYER WAIVES ANY
AND ALL OTHER CLAIMS TO WARRANTY.
SHOULD THE SELLER BE OTHER THAN RLWS, THE BUYER AGREES TO LOOK ONLY TO THE SELLER
FOR WARRANTY CLAIMS.
NO TERMS, CONDITIONS, UNDERSTANDING, OR AGREEMENTS PURPORTING TO MODIFY THE TERMS OF
THIS WARRANTY SHALL HAVE ANY LEGAL EFFECT UNLESS MADE IN WRITING AND SIGNED BY A
CORPORATE OFFICER OF RLWS AND THE BUYER.
© 2002 Rice Lake Weighing Systems, Inc. Rice Lake, WI USA. All Rights Reserved.
RICE LAKE WEIGHING SYSTEMS • 230 WEST COLEMAN STREET • RICE LAKE, WISCONSIN 54868 • USA
FCC Warning
This equipment complies with the limits for a Class B digital device, pursuant to Part 15 of the FCC Rules.
These limits are designed to provide reasonable protection against harmful interference in a residential
installation. Operation of this device is subject to the condition that it does not cause harmful interference;
this device must accept any interference received, including interference that may cause undesired operation. This equipment generates, uses and can radiate radio frequency energy and, if not installed and used
in accordance with the instructions, may cause harmful interference to radio communications. However,
there is no guarantee that interference will not occur in a particular installation. If this equipment does
cause harmful interference to radio or television reception, which can be determined by turning the equipment off and on, the user is encouraged to try to correct the interference by one or more of the following
measures:
•
•
•
•
Reorient or relocate the receiving antenna.
Increase the separation between the equipment and the receiver.
Connect the equipment into an outlet on a circuit different from that to which the receiver is connected.
Consult the dealer or an experienced radio/TV technician for help.