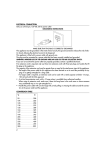
1
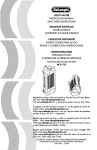
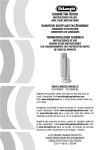
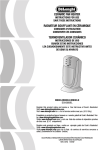
DEEP FRYER
FRITEUSE
FREIDORA
FRIGGITRICE
D14522DZ
Register this product on-line and receive a free trial issue of Cook's
Illustrated. Visit www.delonghiregistration.com.
Visit www.delonghi.com for a list of service centers near you. (U.S. and
Canada Only)
Enregistrez ce produit en ligne et recevez un numéro gratuit de Cook's
Illustrated. Visitez www.delonghiregistration.com.
Visitez www.delonghi.com pour y voir une liste des centres de réparation
proches de chez vous. (É.-U. et Canada uniquement)
Registre este producto en línea y reciba un ejemplar gratis de Cook's
Illustrated. Visite www.delonghiregistration.com.
Visite www.delonghi.com para ver la lista de centros de servicios cercanos a usted. (Solamente en los Estados Unidos y Canada)
Registra questo prodotto "on-line" per ricevere una copia omaggio della
rivista Cook's Illustrated. Visita www.delonghiregistration.com
Visita www.delonghi.com per una lista dei centri di servizio a te piu
vicini. (Solo negli Stati Uniti e Canada)
Instructions for use
Keep these instructions
Mode d'emploi
Conservez cette notice
Instrucciones para el uso
Repase y guarde estas instrucciones
Lea cuidadosamente este instructivo antes de usar su aparato.
Istruzioni per l’uso
Leggere e conservare queste istruzioni
ELECTRONIC CHARACTERISTICS: CARACTÉRISTIQUES ÉLECTRIQUES:
CARACTERISTICAS ELECTRICAS: CARATTERISTICHE ELETTRICHE:
120V~60Hz 1500W
A
Q
R
O
P
B
C
N
M
L
F
D
E
G
S
K
I
J
H
2
T
1
3
2
3A
NO!
MAX
level
X
4
3B
NO!
6
5
OK!
7
8
3
IMPORTANT SAFEGUARDS
When using electrical appliances, basic safety
precautions should always be followed, including
the following:
1. Read all instructions.
2. Do not touch hot surfaces. Use handles and
knobs.
3. To protect against electric shock do not
immerse cord, plug and fryer in water or
other liquid.
4. Close supervision is necessary when any
appliance is used by or near children.
5. Unplug from outlet when not in use and
before cleaning. Allow to cool before
putting on or taking off parts, and before
cleaning the appliance.
6. Do not operate any appliance with a damaged cord or plug or after the appliance
malfunctions, or has been damaged in any
manner. Return appliance to the nearest
7.
8.
9.
10.
11.
12.
13.
14.
authorized service facility for examination,
repair or adjustment.
The use of accessory attachments not recommended by the appliance manufacturer
may cause injuries.
Do not use outdoors.
Do not let cord hang over edge of table or
counter, or touch hot surfaces.
Do not place on or near a hot gas or electric burner or in a heated oven.
Extreme caution must be used when moving an
appliance containing hot oil or other liquids.
Always attach plug to appliance first, then
plug cord into the wall outlet.
Do not use appliance for other than intended use.
Be sure handle is properly assembled to basket and locked in place.
SAVE THESE INSTRUCTIONS
THIS PRODUCT IS FOR HOUSEHOLD USE ONLY
•
•
•
•
•
•
WARNING
Do not use the fryer without oil. The fryer
will be severly damaged if heated dry.
This fryer has a thermal cut-out, thus preventing
overheating.
Plug cord into a 120 volt AC outlet.
If your product is provided with a polarized
alternating current plug (a plug having one blade
wider than the other), this plug will fit into the
power outlet only one way. This is a safety feature. If you are unable to insert the plug fully into
the outlet, try reversing the plug. If the plug
should still fail to fit, contact your electrician to
replace your obsolete outlet. Do not defeat the
safety purpose of the polarized plug.
Before using the fryer for the first time, wash the
aluminum pot, basket and lid thoroughly with hot
soapy water, carefully dry the pot to maintain its
attractive finish.
Should the fryer leak, contact your nearest
Service Center or authorized Dealer for qualified
assistance.
•
•
•
•
•
•
To assure safe operation, oversized foods or
utensils must not be inserted into the fryer.
Children or infirm persons should not be allowed
to use this product unsupervised.
Children should not be allowed to play with this
appliance.
In order to avoid possible injuries or burns, do
not touch any metal parts on the deep fryer
because they may be very hot, use always
appropriate gloves.
It is totally normal that, on first use, the appliance
emits a “new appliance” smell. If this happens,
aerate the room.
Before cleaning and when not in use, make sure that
the power plug is disconnected.
DO NOT USE AN EXTENSION CORD
A short power supply cord is provided to reduce the
risks resulting from being entangled in or tripping
over a longer cord.
YOUR DEEP FRYER IS SUPPLIED WITH A CORD SET WITH MAGNETIC CONNECTOR:
First fit the magnetic connector to the appliance, as
seen in Figure 3B, making sure that the protruding
part of the connector (X) is correctly inserted in the
corresponding slot on the appliance, and then plug
the cable into the power outlet.
Warning
Never leave the appliance plugged into the power
outlet if the magnetic connector is not fitted to the
deep fryer, Figure 3.
4
If the magnetic connector does not remain in place,
check that it has been inserted correctly, see Figure
3B. If the problem persists, contact an authorized
service center.
When the appliance is powered, always leave some
free space around the magnetic connector, so as to
prevent it from becoming detached.
Only use a type TA-35PA cord set supplied by
De’longhi authorized service centers.
DO NOT DRAPE CORD!
WARNING
SERIOUS HOT-OIL BURNS MAY
RESULT FROM A DEEP FAT FRYER
OR COOKER/FRYER BEING PULLED
OFF OF A COUNTERTOP. DO NOT
ALLOW THE CORD TO HANG
OVER THE EDGE OF THE COUNTER
WHERE IT MAY BE GRABBED BY
CHILDREN OR BECOME ENTANGLED WITH THE USER.
KEEP FROM
CHILDREN!
DESCRIPTION OF THE APPLIANCE:
A.
B.
C.
D.
E.
F.
G.
H.
I.
J.
K.
L.
M.
N.
O.
P.
Q.
R.
S
T.
Thermostat knob for setting the temperature
Oil temperature light (red, green)
Safety micro-switch
MIN– MAX level indicators
Basket support
Viewing window
Filter
Housing
Handles
Slots for fitting the control unit
Cover with handle slots
Removable bowl
Basket with folding handle
Electrical heating element
Cable compartment
Hooks for fastening the control box to the appliance
Thermal safety device reset
Control unit
Oil drain tap
Oil drain tap cover
THERMAL SAFETY DEVICE
The appliance is fitted with a thermal safety device that
stops the appliance from heating in the event of incorrect use or irregular operation. Once the appliance has
cooled, using a toothpick or similar, delicately press the
safety device reset button “Q” (see Fig. 1). If the
appliance does not start operating again, contact a service center authorized by the manufacturer.
DO NOT USE WITH AN EXTENSION CORD.
OPERATING INSTRUCTIONS
Before using the deep fryer for the first time, carefully
clean, using warm water and dishwashing detergent,
the basket, the bowl and the cover. The control unit,
power cable and heating element may be cleaned using
a damp cloth. Check that water does not enter into the
control unit and that there is no residual water in the bottom of the removable bowl. Carefully dry all the parts.
Check that the control unit is properly fastened to the
deep fryer body. The safety micro-switch “C” will not
allow the appliance to be operated if the control unit “R”
is not correctly positioned in the housing “H”.
The deep fryer is now ready for use.
FILLING WITH OIL OR FAT
• Remove the cover “K”, lifting it by the handle. Turn the
folding handle of the basket until it locks into place
(pos. 2, Fig. 2). Remove the basket “M” by lifting it
upwards.
• Remove the length of cable required to connect the
appliance to the mains, from the cable compartment
“O” (see Fig. 3A). The oil temperature light “B” becomes green.
If your fryer is supplied with magnetic connector:
First connect the magnetic connector (see fig. 3B)
keeping attention to place the connector with the jut
(X) on the bottom side, then connect the plug.
• If oil is used, pour it into the bowl “L” until reaching
the maximum level indicated (see Fig. 4). Never
5
exceed this limit, as oil may overflow from the container. The level of oil must always be between the maximum and minimum limits, “D”. For best results, use
good quality peanut, canola or vegetable oil.
• If lumps of fat are used, cut the lumps into pieces and
melt them in another container, then pour the liquefied fat into the deep fryer bowl. Never melt the fat
in the basket or on the deep fryer heating element
(see Fig. 5).
• If the oil contains food residues on the bottom, these
should be removed before heating the oil, to ensure
that the oil lasts longer.
• Close the cover “K”.
PREHEATING
• Place the food to be fried in the basket “M”, without
overfilling; max 3 lb of fresh potatoes. Check that the
handle of the basket is correctly positioned (pos. 2 in
Fig. 2).
• Move the thermostat knob “A” (see Fig. 6) to the
required temperature (see cooking table). The oil temperature light “B” becomes red.
• When the set temperature is reached, the oil temperature light “B” will become green.
STARTING FRYING
• As soon as the light becomes green, place the basket
“M” into the oil, lowering it very slowly to prevent the
hot oil from spraying or overflowing.
• A significant amount of steam will be released: this is
completely normal.
• It is normal during frying for steam to be released
from the cover and condensate to drip from the edge
of the cover.
• To avoid the risk of burns, never place your hands
above the filter on the cover or above the deep fryer
when frying. Before opening the cover completely,
open it slowly to release the steam from the side.
END OF FRYING TIME
• When the set cooking time has elapsed, lift the basket
“M” and check that the food has been cooked to the
required color.
• If the food is completely cooked, turn the appliance
off by moving the thermostat knob “A” to the “•”
position, until it clicks. The oil temperature light “B”
will become green.
• Unplug the appliance.
6
• Allow the excess oil to drain by hooking the basket
“M” onto the support “E” on the bowl; never leave the
basket too long in this position, as the steam may
make the fried food less crispy.
• Note: When cooking in two phases or if more food
needs to be cooked, at the end of the first phase hook
the basket ”M” onto the basket support “E” and wait
for the light to go off again. Then slowly lower the
basket “M” in the oil a second time.
COOKING HINTS
HOW LONG THE OIL OR FAT LASTS
The level of oil or fat must never fall below the minimum.
Every now and then it must be completely changed. The
life of the oil or fat depends on what foods are being
fried. Food coated in breadcrumbs, for example, dirties
the oil more than simple frying. As for any deep fryer,
the oil deteriorates after being heated a number of
times! Therefore, even if used correctly, it should be
completely changed after 8-10 uses.
CORRECT FRYING
Fresh potatoes must be washed in cold water and thoroughly dried, to prevent them from sticking together
and ensure they are crisp after frying. The recommended temperature should be followed for all recipes. If the
temperature is too low, the oil will be absorbed. If the temperature is too high, a crust will form immediately and the
inside of the food will not be cooked. The food being
fried must only be immersed in the oil when the oil has
reached the correct temperature, that is when the light
“B” becomes green. Never overfill the basket, as this
may cause a sudden drop in the temperature of the oil
and thus greasier and less uniform frying. Check that
the food is sliced into thin, even pieces. If the slices are
too thick, the food will not be well cooked inside, despite its appearance, while even slices will be perfectly
cooked at the same time. Carefully dry the food before
immersing it in the oil or fat, to avoid oil being sprayed;
furthermore, wet food will be less crisp after cooking
(especially potatoes). Foods with a high water content
(fish, meat, vegetables) should be coated with flour or
breadcrumbs before frying, making sure the excess
flour or breadcrumbs are removed before immersing
the food in the oil. Do not fry potatoes more than 3
times consecutively.
When cooking food in batter, you should first immerse
the basket empty. Then, when the set temperature has
been reached, immerse the food directly in the hot oil to
avoid the batter sticking to the basket.
FRYING NON-FROZEN FOOD
When referring to the following table, please keep in mind that the cooking times and temperatures are approximate, and must be adjusted according to the quantity of food and personal tastes.
Food
Max quantity
gr
lb
800
1.8
Temperature
°C
°F
170
340
Full portion
1300
3
170
340
12 – 14
Fish
Calamari
Scallops
Sardines
Prawns
600
600
600
600
1.3
1.3
1.3
1.3
140
140
140
140
280
280
280
280
9 - 11
10-12
10-12
8 - 10
Meat
Pork cutlets
Chicken cutlets
Meatballs
500
500
700
1.1
1.1
1.5
160
160
160
320
320
320
8-9
8 - 10
8 - 10
Vegetables
Artichokes
Cauliflower
Mushrooms
Eggplant
Zucchini
400
600
500
200
500
0.9
1.3
1.1
0.4
1.1
150
150
150
150
150
300
300
300
300
300
15-17
10-11
8 - 10
9 - 11
13-15
Fresh potato chips Half portion
Time (minutes)
8 - 10
FRYING FROZEN FOODS
Frozen foods are stored at very low temperatures. Consequently, they significantly lower the temperature of the liquid
used for cooking.
For best results, never exceed the maximum recommended quantity of food when frying.
Frozen foods are often covered with a layer of ice; this ice should be removed before cooking. Immerse the basket
in the oil very slowly to prevent the oil from boiling over.
The cooking times are approximate and must be adjusted according to the initial temperature of the food being fried
and the temperatures indicated on the packaging of the food.
Food
Pre-cooked frozen potato chips
Potato croquettes
Fish
Fish-fingers
Fish fillets
Meat
Chicken cutlets
Max quantity
gr
lb
600
1.3
700
1.5
500
1.1
500
1.1
300
0.7
Temperature
°C
°F
180
360
180
360
180
360
180
360
180
360
Time (minutes)
9 - 11
9 - 11
7-8
6-7
5-6
7
OIL DRAIN TAP
CAUTION! To avoid getting burnt do not drain oil
when oil is hot.
Proceed as follows:
1. Remove the basket.
2. Open the cover “T”.
3. Open the tap “S” by turning it counterclockwise.
4. Run the liquid into a container (see figure),
making sure it doesn’t overflow.
5. Remove any deposits from the bowl using a
sponge or paper towel.
6. Close the tap by turning it clockwise.
7. Close the cover “T”.
It is a good idea to keep the oil used to fry fish
separate from that used to fry other food.
If lard or fat is used, make sure it does not cool
down too much, otherwise it will solidify.
CLEANING
Before cleaning, make sure that the power plug is
disconnected.
Never immerse the deep fryer in water and never place
it under running tap water (see Fig. 7). The infiltration of
water into the control unit may cause electrocution.
Check that the oil has cooled down, and then remove
the control unit and drain the oil. Remove the deposits
from the bowl using a sponge or paper towel.
Except for the control unit, power cable and heating ele-
ment, all the other parts can be cleaned with warm
water and dishwashing detergent. Carefully wash the
filter “G” of the cover to maintain its efficiency. Never
use abrasive sponges, to avoid damaging the deep
fryer.
When this procedure has been completed, carefully
dry all parts, to prevent hot oil from spraying out
during operation.
The control unit can be cleaned with a damp cloth.
OPERATING FAULTS
FAULT
Bad smell
The oil
overflows
8
REMEDY
CAUSE
The oil has deteriorated.
The cooking liquid is unsuitable.
Replace the oil or fat.
Use a good quality peanut, canola or vegetable
oil.
The oil has deteriorated and causes too
much foam.
You have immersed food which is not
sufficiently dry in the hot oil.
The basket has been immersed too
quickly.
The oil level in the deep fryer is over the
maximum limit.
Replace the oil or fat.
Dry the food well.
Immerse it slowly.
Reduce the amount of oil in the fryer bowl.
Food does not
brown during
cooking
Oil temperature is too low.
The basket is over loaded.
Select a higher temperature.
Reduce the food quantity.
The oil does
not heat up
The deep fryer has previously been used
without oil in the fryer bowl, causing the
thermal safety device to break.
The magnetic connector is not correctly
inserted.
Press the safety device reset button.
Insert the connector with the jut (X) on the bottom
side.
This warranty applies to all products with De’Longhi or Kenwood brand names.
Limited Warranty
What does the warranty cover?
We warrant each appliance to be free from defects in material and workmanship. Our obligation under
this warranty is limited to repair at our factory or authorized service center of any defective parts or part
thereof, other than parts damaged in transit. In the event of a products replacement or return, the unit must
be returned transportation prepaid. The repaired or new model will be returned at the company expense.
This warranty shall apply only if the appliance is used in accordance with the factory directions, which
accompany it, and on an Alternating current ( AC ) circuit.
How long does the coverage last?
This warranty runs for one year ( 1 ) from the purchase date found on your receipt and applies only to the
original purchaser for use.
What is not covered by the warranty?
The warranty does not cover defects or damage of the appliance, which result from repairs or alterations
to the appliance outside our factory or authorized service centers, nor shall it apply to any appliance,
which has been subject to abuse, misuse, negligence or accidents. Also, consequential and incidental
damage resulting from the use of this product or arising out of any breach of contract or breach of this
warranty are not recoverable under this warranty. Some states do not allow the exclusion or limitation of
incidental or consequential damage, so the above limitation may not apply to you.
How do you get service?
If repairs become necessary, see contact information below:
U.S. Residents:
Please contact our toll free hotline at 1-800-322-3848 or log onto our website at www.delonghi.com.
For all accessories, spare parts or replacement parts, please contact our parts division at 1-800-8656330.
Residents of Canada: Please contact our toll free hotline at 1-888-335-6644 or log onto our website at
www.delonghi.com.
Residents of Mexico: Please refer to the Limited Warranty statement for Mexico.
Please refer to the back page of the manual for De’Longhi addresses.
The above warranty is in lieu of all other express warranties and representations. All implied warranties
are limited to the applicable warranty period set forth above. This limitation does not apply if you enter
into an extended warranty with De’Longhi. Some states do not allow limitations on how long an implied
warranty lasts, so the above exclusions may not apply to you. De’Longhi does not authorize any other person or company to assume for it any liability in connection with the sale or use of its appliance.
How does state law apply?
This warranty gives you specific legal rights, and you may also have other rights, which vary from state to
state.
9
De’Longhi America, Inc.
Park 80 West, Plaza One
Saddle Brook, NJ 07663
1-800-322-3848
De’Longhi Canada, Inc.
6150 McLaughlin Road
Mississauga, Ontario
L5R 4E1 Canada
1-888-335-6644
Fiducia Italiana S.A. de C.V.
Pestalozzi #814
Col. Narvarte
Del. Benito Juarez
C.P. 03100
tels: 5543 1447
lada sin costo: 01 800 711 8805
www.delonghi.com
451IDL/07.07
Printed in China