Transcript
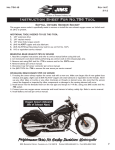
No.1746-IS
Rev B
3-15
A Division of Thiessen Products, Inc.
Instruction Sheet For Kit Nos. 1746, 1747, and 1748
J I M S A x l e Lo c k do w n K i t s a r e
d e s i gn e d t o u p g r a d e t h e s t o c k
hardware on the following:
Part No. 1746- Fits 1991-2005 Dyna
Part No. 1747- Fits 1979-2004 XL, 1973-1986 FL/FX, and
1984-85 FXST
Part No. 1748- Fits 1980-2001 FLHT and 1982-2000 FXR
RECOMMENDED TOOLS AND SUPPLIES
•
•
•
•
•
•
15/16 socket and ratchet wrench
Torque wrench reading ft./lbs.
1/2” and 9/16” socket or wrench (except Dyna)
5/16” Allen wrench (Dyna)
Cotter Pin as needed
H-D Service manual for year and model motorcycle you are
working on
• JIMS No. 904 Center Jack
• JIMS No. 928 Rear Wheel Alignment Tool
• JIMS No. 923 Belt Tension Gauge
Note: Read this entire instruction sheet before starting the job.
If you are not sure of the processes or methods, take the vehicle to an
authorized repair shop. Follow safety procedures such as wearing eye protection or a full face shield. Tie down the motorcycle so that it cannot and
will not fall over. Use the proper tools for the job. Always follow the service manual for the year and model motorcycle you are working on. JIMS
is not responsible for your safety or the quality of your work. Test ride the
motorcycle before going out into traffic.
PARTS AVAILABLE SEPARATELY
QTY.
DESCRIPTION
PART NO.
2
ADJUSTING PLATE, DYNA
1746-2
1
AXLE WASHER, DYNA
1746-1
2
ADJUSTING PLATE, FX/FL/XL
1747-2
1
AXLE WASHER, FX/FL/XL
1747-1
2
ADJUSTING PLATE, FLHT/FXR
1748-2
1
AXLE WASHER, FLHT/FXR
1748-1
1
INSTRUCTION SHEET
1746-IS
1. Support motorcycle with JIMS No.904 Center Jack. Keep bike level with rear tire lifted just slightly off the
ground.
2. Remove nuts or Allen screws from the axle adjuster plates. Remove stock axle adjuster plates and replace with
JIMS axle adjuster plates. Re-install the original fasteners and snug up for now.
3. Remove cotter pin or cotter clip depending which came stock on your bike. Remove the axle nut and flat
washer. Discard the original flat washer. Leave the axle in place.
4. Install JIMS axle nut washer onto axle and align the slot of the JIMS washer with the slot in the swingarm. This
replaces the OEM flat washer. Install the stock axle nut just snug for now.
5. Follow H-D service manual for the year and model of your bike to verify and/or adjust rear drive belt tension
and rear wheel alignment.
6. Torque rear axle nut to the proper torque specification per service manual.
7. Re-install cotter clip or new cotter pin.
8. Spin the wheel to verify belt runs true in the pulley. Test ride and re-check the axle adjuster fasteners for proper tension and adjustment.
CAUTION: Wear safety glasses over your eyes.
See JIMS® catalog for Hundreds of top quality professional tools.
The last tools you will ever need to buy.
555 Dawson Drive, Camarillo, CA 93012 Phone 805-482-6913 • Fax 805-482-9224
Visit us on the web at WWW.JIMSUSA.COM
1