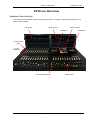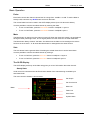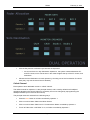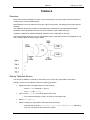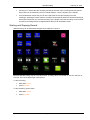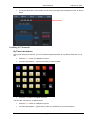
1
Operator’s Manual 2 February 2015 Live Software Version 4.5 Issue 00002 Important Notice COPYRIGHT The material in this document is copyright to Fairlight.AU Pty Ltd, and may not be quoted or reproduced in any form without written permission from the company. Fairlight is a trademark of Fairlight.AU Pty Ltd. All other trademarks are the property of their respective owners. LIMITED WARRANTY POLICY All the software and hardware provided with, or purchased especially for, Fairlight products has been tested for functionality. Fairlight.AU Pty Ltd will make its best efforts to correct reported defects for future releases subject to technical practicalities. Fairlight.AU will also replace any defective media on which software has been delivered provided that the item to be replaced is returned to the dealer who supported the product within 90 days of purchase. Fairlight.AU Pty Ltd makes no warranty or representation either expressed or implied with respect to the system's performance or fitness for a particular purpose. In no event will Fairlight.AU Pty Ltd be liable for direct or indirect damages arising from any defect in the product or its documentation. Further, Fairlight.AU Pty Ltd will not accept any liability for any programs, sounds, audio recording or sequences stored in or used with Fairlight products, including the cost of recovery of such data. Product features and specifications are subject to change without notice. Fairlight.AU reserves the right to change any part of this document without notice. The warranties, remedies and disclaimers above are exclusive and take precedence over all others, oral or written, express or implied, to the extent permitted by law in the geographical area of the product's use. No employee of Fairlight.AU, agent, distributor or employee of an agent or distributor is authorized to offer any variation from this policy. Copyright © 2014 Fairlight.AU Pty Ltd, Unit 3, 15 Rodborough Rd, Frenchs Forest, NSW 2086, AUSTRALIA. Telephone +61 2 9975 1777 Fax +61 2 9975 1999 END USER LICENSE AGREEMENT You have acquired a device (“DEVICE”) which includes software licensed by Fairlight.AU from one or more software licensors (“Fairlight.AU's Software Suppliers”). Such software products, as well as associated media, printed materials, and “online” or electronic documentation (“SOFTWARE”) are protected by international intellectual property laws and treaties. The SOFTWARE is licensed, not sold. All rights reserved. IF YOU DO NOT AGREE TO THIS END USER LICENSE AGREEMENT (“EULA”), DO NOT USE THE DEVICE OR COPY THE SOFTWARE. INSTEAD, PROMPTLY CONTACT Fairlight.AU FOR INSTRUCTIONS ON RETURN OF THE UNUSED DEVICE(S) FOR A REFUND. ANY USE OF THE SOFTWARE, INCLUDING BUT NOT LIMITED TO USE ON THE DEVICE, WILL CONSTITUTE YOUR AGREEMENT TO THIS EULA (OR RATIFICATION OF ANY PREVIOUS CONSENT). GRANT OF SOFTWARE LICENSE. This EULA grants you the following license: You may use the SOFTWARE only on the DEVICE. NOT FAULT TOLERANT. THE SOFTWARE IS NOT FAULT TOLERANT. Fairlight.AU HAS INDEPENDENTLY DETERMINED HOW TO USE THE SOFTWARE IN THE DEVICE, AND Fairlight.AU'S SOFTWARE SUPPLIERS HAVE RELIED UPON Fairlight.AU TO CONDUCT SUFFICIENT TESTING TO DETERMINE THAT THE SOFTWARE IS SUITABLE FOR SUCH USE. NO WARRANTIES FOR THE SOFTWARE. THE SOFTWARE is provided “AS IS” and with all faults. THE ENTIRE RISK AS TO SATISFACTORY QUALITY, PERFORMANCE, ACCURACY, AND EFFORT (INCLUDING LACK OF NEGLIGENCE) IS WITH YOU. ALSO, THERE IS NO WARRANTY AGAINST INTERFERENCE WITH YOUR ENJOYMENT OF THE SOFTWARE OR AGAINST INFRINGEMENT. IF YOU HAVE RECEIVED ANY WARRANTIES REGARDING THE DEVICE OR THE SOFTWARE, THOSE WARRANTIES DO NOT ORIGINATE FROM, AND ARE NOT BINDING ON, Fairlight.AU'S SOFTWARE SUPPLIERS. Note on Java Support. The SOFTWARE may contain support for programs written in Java. Java technology is not fault tolerant and is not designed, manufactured, or intended for use or resale as online control equipment in hazardous environments requiring fail-safe performance, such as in the operation of nuclear facilities, aircraft navigation or communication systems, air traffic control, direct life support machines, or weapons systems, in which the failure of Java technology could lead directly to death, personal injury, or severe physical or environmental damage. Sun Microsystems, Inc. has contractually obligated Fairlight.AU's Software Suppliers to make this disclaimer. No Liability for Certain Damages. EXCEPT AS PROHIBITED BY LAW, Fairlight.AU'S SOFTWARE SUPPLIERS SHALL HAVE NO LIABILITY FOR ANY INDIRECT, SPECIAL, CONSEQUENTIAL OR INCIDENTAL DAMAGES ARISING FROM OR IN CONNECTION WITH THE USE OR PERFORMANCE OF THE SOFTWARE. THIS LIMITATION SHALL APPLY EVEN IF ANY REMEDY FAILS OF ITS ESSENTIAL PURPOSE. IN NO EVENT SHALL Fairlight.AU'S SOFTWARE SUPPLIERS BE LIABLE FOR ANY AMOUNT IN EXCESS OF U.S. TWO HUNDRED FIFTY DOLLARS (U.S.$250.00). Limitations on Reverse Engineering, Decompilation, and Disassembly. You may not reverse engineer, decompile, or disassemble the SOFTWARE, except and only to the extent that such activity is expressly permitted by applicable law notwithstanding this limitation. SOFTWARE TRANSFER ALLOWED BUT WITH RESTRICTIONS. You may permanently transfer rights under this EULA only as part of a permanent sale or transfer of the Device, and only if the recipient agrees to this EULA. If the SOFTWARE is an upgrade, any transfer must also include all prior versions of the SOFTWARE. Obtaining Technical Support Users requiring technical support should contact their local distributor. Information can also be found at: http://www.fairlightau.com Table of Contents INTRODUCTION....................................... 1 About This Manual ............................................ 1 What Else You Need to Know .......................... 1 Some Important Terms ..................................... 2 Anything Missing?............................................. 2 The Intellipad .................................................... 2 The Xplain System............................................ 3 Using Xplain...................................................... 3 PanPot Function ............................................. 52 The Library ..................................................... 53 Dual Operation ............................................... 55 VCA GROUPS ........................................ 58 Assignment to VCA Groups ........................... 58 Naming a Group ............................................. 58 Calling a Group Master .................................. 59 Control ............................................................ 59 EVO.LIVE OVERVIEW ............................. 5 MONITORING ......................................... 60 Hardware User Interface .................................. 5 Graphic User Interface ..................................... 6 Starting the System .......................................... 8 System Shutdown ............................................. 8 Configure Monitor Speaker Sets .................... 60 Monitor Control ............................................... 61 INPUT CHANNELS .................................. 9 Introduction ....................................................... 9 Channel Selection or “Calling” .......................... 9 Source .............................................................. 9 The Multi Button.............................................. 12 The Info Button ............................................... 13 Bus Assignment .............................................. 14 Mix-minus Assignment.................................... 17 Processing ...................................................... 19 Solo and Mute................................................. 19 CHANNEL FORMAT .............................. 24 Introduction ..................................................... 24 MIXING ................................................... 28 Introduction ..................................................... 28 Busing ............................................................. 28 THE IN LINE PANEL (ILP2) ................... 31 Introduction ..................................................... 31 Panel Controls ................................................ 35 Path Controls .................................................. 38 Equaliser ......................................................... 39 The Surround Panner ..................................... 40 Dynamics ........................................................ 42 Auxiliary Sends ............................................... 44 Bus Assign, Mix Minus, Talkback Selection ... 44 FADERS ................................................. 46 Introduction ..................................................... 46 Basic Operation .............................................. 47 Fader Sets ...................................................... 48 Call button....................................................... 51 Auto button ..................................................... 51 Fader Function................................................ 51 TALKBACK ............................................ 65 Overview......................................................... 65 Setting Talkback Source ................................ 65 Talkback Destinations .................................... 66 Activating Talkback ........................................ 66 Creating Talkback Groups.............................. 69 Talkback with Two Operators ......................... 70 SIGNAL CHECK ..................................... 71 Using the ILP Extension Panel ....................... 71 Using the Signal Check Sub-Page ................. 71 METERS ................................................. 73 Stereo Compound Meters .............................. 73 Meter Peaks ................................................... 75 PROJECT AND FILE MANAGEMENT ... 76 Introduction ..................................................... 76 Basic File Commands .................................... 76 Video Files ...................................................... 77 Designating Media Device.............................. 77 SCENES .................................................. 79 Overview......................................................... 79 Saving a Scene .............................................. 79 Recalling a Scene .......................................... 79 TEMPLATES ........................................... 80 Saving a Template ......................................... 80 Loading a Template ........................................ 80 THE CUE LIST ........................................ 81 Creating a Cue List......................................... 81 Loading Cues ................................................. 82 WILD RECORDING ................................ 83 Introduction ..................................................... 83 Record Channels ............................................ 83 Patching Record Inputs .................................. 83 Arming Record Channels and WildTracks...... 86 Setting Record Parameters ............................ 87 Starting and Stopping Record ........................ 89 TRACK PLAYBACK............................... 91 Introduction ..................................................... 91 Where is the Audio? ....................................... 91 Selecting Channels for Playback .................... 91 Initiating Playback ........................................... 92 Locating to Timecode ..................................... 93 Locking the Transport ..................................... 94 SYSTEM SYNC ...................................... 96 Introduction ..................................................... 96 Setting Sync Parameters ................................ 96 Introduction February 2, 2015 Introduction Based on Fairlight’s leading edge audio processing and control surface hardware, EVO.Live is a broadcast production powerhouse. This console can switch between live and post production modes at the touch of a button. By combining live and post production capabilities in a single console EVO.Live is more flexible and cost effective than any other live broadcast console on the market. The console can be used in a dual operator configuration with each engineer having independent access to separate fader sets, channels and monitor controls. Designed for the most demanding on-air and live productions EVO.Live‘s compact, modular design creates the perfect mixing environment. About This Manual The EVO.Live User Manual provides all the information necessary to rapidly become proficient at operating the system in a professional audio environment. This manual is designed to familiarise sound editors and engineers with the facilities provided by EVO.Live. The terminology and concepts used in this manual assume a reasonable knowledge of audio principles and studio procedures. Finding the Information You Need Read through the chapters in the order presented to learn all the features of the system or use the Table of Contents or Index to quickly find the specific information you require. What Else You Need to Know Installation If you need to install or re-install the system, please read the manual: EVO.Live Installation, Configuration and Service manual.pdf. First Startup Even if someone else has installed the system for you, there are some things you need to do the first time you start the system. The manual mentioned in the previous paragraph includes a chapter on this subject, called Launching EVO.Live for the First Time. Please read this before using EVO.Live, or at least have it standing by in case things get confusing. Momentary and Latching This is one of the keys to speed. Many operations can be performed in two ways. Momentary means: Hold down a key to open a mode, do one thing in that mode, then let go the key to exit the mode and go back to where you were. This is skilful, because it requires two hands, but it’s fast. Latching means: Press a key to enter (latch) a mode, do some things in that mode, then press the original key again to exit the mode. This is not as fast, but it’s easier, being one-handed. When we refer to momentary operation, you’ll see words like hold down and release. When we refer to latched operation, you’ll see the word press or type which both mean “press and release”. Page 1 Introduction February 2, 2015 Some Important Terms Throughout this manual we will use some terms that you need to understand. Project The file created by Fairlight software containing the stored audio and its editing and mixing instructions. Physical Input/Output An analog or digital audio input or output. Input Channel A signal path (channel) feeding to or from the disk recorder which can be processed and routed to mix buses and monitoring. Live Feed A signal path (channel) fed from a live, real time signal that has been brought from a physical input and can be processed and routed to mix buses and monitoring. Bus Destination of a mixing operation. Feeds are usually routed to buses via a multiformat surround panner. Buses may be configured with various multichannel formats such as stereo, LCRS or 5.1. Multitrack buses provide bus paths for summing feeds to be recorded to disk or other I/O. Bus Element One component signal of a bus (e.g. left, right, centre or surround). Bus elements are automatically allocated to individual buses as they are created. Each system has a finite number of bus elements which will limit the format of buses as they are created. A full-sized EVO.Live has 72 available bus elements allowing, for example: 1 X 5.1 main bus, 4 x 5.1 sub-buses, 2 X 5.1 auxes, 12 X stereo auxes and 3 multi-track buses. Anything Missing? If you find there’s some aspect of EVO.Live that is not explained (or Xplained) adequately, please let us know. You can email: [email protected] With new releases of software you’ll sometimes get a new version of this manual that adds more information. You can also download the latest version from Fairlight’s website: www.fairlightau.com The Intellipad The Intellipad is used to quickly access a large number of system commands and settings. It uses Fairlight’s Picture Key technology to make navigation clear and easy. Page 2 Introduction Bank Keys February 2, 2015 Command Keys The EVO.Live system is equipped with two Intellipads. We refer to these as: Intellipad 1 – the first button is labelled “Live” Intellipad 2 – the first button is labelled “Bus Assign”. Intellipad Layouts Each Intellipad is programmed at the factory to display four different layouts of commands. The Bank Keys are used to access these layouts. The use of the Intellipad keys will be detailed in context with their purpose, in the body of this User Manual. Here we refer to Intellipad layouts by Intellipad number, and Intellipad layout number (from left to right according to the button that opens the layout). For example, to access the “Talk to Sub Bus 4” button, you would use Intellipad 2 Layout 3. The Xplain System Xplain is EVO.Live’s built-in Help system. It’s great to use as it gives you help about exactly where you are right now. Xplain places text in a box on the Mixer Screen, allowing you to keep working while you get help for your task. Using Xplain The Xplain button (shown above) is located on Intellipad 1, Layout 1. Pressing the Xplain button causes a window to be displayed on the Mixer screen. The upper part displays a list of topics. Choosing one of the topics in the upper part of the screen causes sub-topics to be shown in the lower part. Page 3 Introduction February 2, 2015 Choosing a sub-topic causes text to be displayed at the right of the screen. Xplain Text In most cases, Xplain text is a series of instructions that take you through a setup or other process in the system. Please note that there are often several ways to do the same thing, and the Xplain text will normally show only one. Xplain covers most of the console’s frequently used functions/ Recommendation If you are new to Fairlight systems, it’s highly recommended that you go through the Xplain-How-To’s at least once. Fairlight’s user interface is quite different to most others, but after learning a couple of routines, it becomes quite logical and intuitive – and extremely fast. Page 4 EVO.Live Overview February 2, 2015 EVO.Live Overview Hardware User Interface The diagram below shows the panels comprising the EVO.Live system. These are described in more detail in later chapters. ILP Screen Monitor Panel Mixer Screen Intellipad 1 In-Line Panel (ILP) In-Line Extension Fader Panel Switches Page 5 Fader Panel Intellipad 2 EVO.Live Overview February 2, 2015 Graphic User Interface Mixer Screen The Mixer Screen shows 40 channels in some detail, plus an overview of bus activity, the Cue List (future feature) and Wild Recording status. All these features are described in detail later in this manual. A number of optional windows can be selected for display using the Intellipad or your mouse (Setup Menu and Mixer Menu). Page 6 EVO.Live Overview February 2, 2015 ILP Screen This screen is primarily intended for reporting the status of In-Line Panel (ILP) controls and the channels occupying the faders below them. For more information about this, please see the section of this manual describing the ILP. There are also sections devoted to bus masters, monitoring, Wild Recording and the ON AIR button. Page 7 EVO.Live Overview February 2, 2015 Starting the System Step 1 Start the host computer (PC) by turning on its power switch. The PC will boot the Windows 7 operating system and display your PC desktop. Video monitor(s) should be powered up and displaying the Windows desktop. Step 2 Power on your audio interface box if fitted (SX-20 or SX-36). If your system uses an SX-8 or SX12, they are inserted in the host computer. Step 3 Power on the EVO.Live mixer surface. Step 4 Start the EVO.Live application using one of the following: Double-click its desktop icon Select it in the Start Menu under the Fairlight group. System Shutdown Step 1 Exit EVO.Live by selecting Exit from the File Menu or by clicking the Mixer Screen close box or by the keystroke combination Alt-F4 when the application is in focus (click anywhere on an EVO.Live screen to bring it into focus if necessary). Step 2 If a project is open, the system will prompt you to save any changes that have occurred since it was opened. Click Yes if you want to save the changes in the project. This may take a minute or so, during which a progress bar will grow in size. Step 3 You may now power down the EVO.Live surface and shut down your PC if desired. Page 8 Input Channels February 2, 2015 Input Channels Introduction The Input Channel or simply channel, is the basic audio path in EVO.Live. It conducts audio from a physical input to a mixing bus, applies processing along the way and routes components of the audio signal to a number of useful destinations, including mix-minus, talkback, auxiliary buses, direct outputs and more. Channel Selection or “Calling” There are many situations where one channel is selected for an operation. We call this “calling” the channel. The called channel is the one whose properties will be changed at times when only one channel can be changed. There are a number of ways to call a channel: Press the CALL button on its fader. Click its Name Plate in the Mixer Screen. Click or touch its Name Plate in the ILP Screen. Touch its fader when “Call Fader” is on Solo the channel when “Call Solo” is on Touch one of its knobs in the ILP when “Call ILP” is on o To turn on Call Fader, press the Call Fader button in Intellipad 1 Layout 3 o To turn on Call Solo, press the Call Solo button in Intellipad 1 Layout 3 o To turn on Call ILP, press the Call ILP button in Intellipad 1 Layout 3 Source A channel’s “source” is the origin of the audio in the channel. It typically comes from one of the following: A physical input Another audio path in the console, like a bus output, insert return etc. Choosing the source for a channel is done in the Patch I/O Page. All other connections between audio paths are also done from this screen. Patching – the Patch I/O Page To display the Patch I/O Page, do one of the following: Select Patch in Intellipad 1 Layout 3 Click Setup Patching Sources are shown on the left of the screen, while Destinations are shown at the right. Page 9 Input Channels February 2, 2015 Destinations Sources Command Buttons Destination categories Source categories Source Categories Categories of signal paths are selected in the lower part of the screen. Source categories Selecting a category of sources expands the category in the upper left of the screen. Note: Screen colours in this manual may be from earlier versions of software, but the working method is exactly the same. Page 10 Input Channels In this case Analog Inputs have been selected. Destination Categories Selecting a category of destinations expands it into the upper right of the screen. In this case Channel Inputs are shown. Page 11 February 2, 2015 Input Channels February 2, 2015 Making a Patch Select a source and a destination then click the Patch button in the center. Afterwards the tiles used in the patch will show the results. Source is always shown above destination. Source Source Destination Destination Patch Multiple Paths You can select multiple sources and multiple destinations and patch them all with one command. For example, select Analog Inputs 1 to 8 and Track Inputs 9-16, then click the Patch command once. Any source can be patched to any destination. For example a Bus Element can be patched to a Track Input, for recording purposes. To illustrate, select the Category sub-Bus Out (the outputs of all the sub buses.) The expanded view will show the sub-Bus elements separately and they can be selected and patched to track inputs for recording. To deselect all the signal paths you have selected, touch the Clear button. The Multi Button Clicking the Multi button allows you to easily patch the same sources to multiple different destinations. Normally after a patch, all sources and destinations are deselected, but if Multi is ON, the sources remain selected through as many patchings as you like. View Buttons Page 12 Input Channels February 2, 2015 The View buttons control which names appear on the tiles. If you choose View System, the names shown are the functional system names like Track 5, Live 3 etc. If you choose View User, the names will be the ones you have given to these signal paths. For signal paths where you have not given a name, the system name is used. The Info Button Pressing the Info button allows you to see more detail about specific tiles. To do this, press Info, then click on any tile. The system will show a box with information about the source and destination patching associated with that tile. What are the Categories? Each category name has two parts. The first part can be Channel Main MM Bus MT-Bus sub-Bus Aux-Bus CR-Mon Analog Digital MADI Osc WildTrack Solo – a Channel – the Main mix bus – a Mix-minus bus – a Multi-track bus, as used in traditional mixing systems – a multi-Element bus used for extra mixing functions – a bus used with the Auxiliary sends on the channels – elements of the Control Room monitor path – an analog physical input or output – an AES-EBU physical input or output – a MADI physical input or output – the system oscillator and noise generator – a wild recording track – the solo-bus outputs (AFL 1 and 2, PFL) The second part can be: In – the input of a signal path (not a physical input) Out – the output of a signal path (not a physical output) MM Out – the Mix-minus output of a channel Direct – each signal can have a Direct Output Send – Insert Send from a signal path Return – Insert Return to a signal path Talkback – the Talkback system – shows Comm1 and Comm2 Inputs – physical inputs (analog or digital) Outputs – physical outputs (analog or digital) Meters – the components of the current Meter Set So, for example Analog Inputs means the physical analog input ports, while Aux-Bus Send means the Insert Sends from the aux-buses. Page 13 Input Channels February 2, 2015 Bus Assignment Overview Assigning a channel to a bus means sending it to that mix destination. Every channel in the system has separate assignment to Main and each sub-bus, meaning that you can choose which paths go to which buses. Bus-to-bus assignment is limited. Sub-buses and aux-buses can be assigned to the Main Bus, but not to each other. Main and MT Buses cannot be assigned to any other bus. Bus Assignment can be done on the Bus Assignment Page or by clicking on the Mixer Screen and/or ILP Screen. Quick assignment to a limited range of buses is also available in the Intellipad. The Bus Assignment Page To access the Bus Assignment Page, do one of the following: Select Bus Assign in Intellipad 1 Layout 1 Click Mixer Bus Assign Sources (channels, Buses) Destinations (Buses) Page 14 Input Channels February 2, 2015 Basic operation of the Bus Assign screen is as follows: Choose Destination Bus in the lower part of the screen Toggle Sources on and off in the upper part of the screen Toggling a Source ON means assigning it to the selected destination bus. Only buses with a defined “non-zero” format (Mono, Stereo, 5.1 etc) may be selected as destinations. Buses with zero format are shown with grey backgrounds. To change Bus Format, use Setup Bus Format. Non‐zero format Zero format Sources include sub-buses and aux-buses. These can be assigned to the Main Bus, but not to other buses. When the Main Bus is selected as the destination, these sources become active for assignment, but at other times they are greyed out. Assign Multiple Channels You can assign or unassign a sequence of channels by dragging the mouse across, up or down the Source area. Assigning on the Mixer Screen Main Bus Assignment Sub‐bus Assignment Each channel on the Mixer Screen displays its current Bus Assignment as shown above. Clicking on any display element toggles its assignment. Page 15 Input Channels February 2, 2015 Assign Multiple Channels You can assign or unassign a sequence of channels by clicking on the assignment button for the first, then dragging to the left or right. You do not need to drag “accurately”, as only the horizontal position of the mouse is used for this operation – assignment occurs as soon as you enter a channel’s strip. Assigning on the ILP Screen Main Bus Assignment Sub‐bus Assignment Each channel on the ILP Screen displays its current Bus Assignment as shown above. Clicking on any display element toggles its assignment. In the same area you can assign channels to mix-minus buses and Talk Groups. Assigning on the Intellipad The Main Bus and the first 8 sub-buses can be assigned, for the currently selected channel, on the Intellipad. To do this: Select the channel you wish to assign, by pressing the CALL button on its fader or by clicking on its name in the Mixer Screen or ILP Screen. Select Intellipad 2 Layout 1 – Bus Assign. Page 16 Input Channels February 2, 2015 Use the Intellipad buttons to toggle assignment of the current channel to Main or any of the first 8 sub-buses. Select other channels to check or change their assignment to this group of buses. Mix-minus Assignment Mix-minus Buses constitute a large topic which has its own chapter later in this manual. Here we show only assignment. Channels may be assigned to one or more of the 16 mono mix-minus buses. Mix-minus Bus Assignment can be done on the Mix-minus Assignment Page, by clicking on the ILP Screen or using the Intellipad. The Mix Minus Assignment Page To display the mix-minus Assignment Page, do one of the following: Select mix-minus from Intellipad 1 Layout 1. Select Mixer Mix Minus Page 17 Input Channels February 2, 2015 Sources (channels) Destinations (Mix Minus Buses) Basic operation of the mix-minus Assign screen is as follows: Choose Destination mix-minus Bus in the lower part of the screen Toggle Sources on and off in the upper part of the screen Toggling a Source ON means assigning it to the selected mix-minus bus. Page 18 Input Channels February 2, 2015 Assigning on the ILP Screen Mix‐minus Assignment Each channel on the ILP Screen displays its current mix-minus bus assignment(s) and allows you to toggle them. Processing Signal processing is a very powerful area of Fairlight Live consoles. The main families of processing are Equalisation (EQ), Dynamics, Panning and sending of level-controlled channel components to a variety of destinations. Insert points are provided for extra processing both inside and outside the system. Details of signal processing are provided in the chapter called Mixing. Solo and Mute EVO.Live has a number of ways to solo and mute. Page 19 Input Channels Fader Panel Solo toggle (AFL) Mute toggle Page 20 February 2, 2015 Input Channels February 2, 2015 Mixer Screen Click a Solo button in the Mixer Screen to toggle solo on any channel. Click a Mute button in the Mixer Screen to toggle mute on any channel. Solo ON / OFF (AFL) Mute ON / OFF Extension Panel Click a PFL button in the Extension Panel to toggle PFL solo on any channel. Solo ON / OFF (PFL) Solo Modes – AFL, PFL The system supports two types of solo, as follows: AFL – After Fade Listen – applies fader and pan settings to soloed signals, before summing them to an independent stereo bus. The AFL bus is separately metered. PFL – Pre Fade Listen – ignores fader settings and sums soloed signals at full level to an independent mono bus. The PFL bus is separately metered. Dual Operator Solo When the system is running in dual operator mode, the system provides a separate AFL bus and PFL bus for each operator. These two pairs of buses are individually metered and may be routed to different Monitor Circuits. Dual Operation becomes active when a group of faders is assigned to the Operator 2. This is done on the Dual Operator Config sub-page, which is accessed by one of the following: Page 21 Input Channels Click Setup Dual Operator Config Press Dual Ops on Intellipad 1 Layout 3 February 2, 2015 Note: Dual Operator mode is only meaningful for systems with more than one Fader Bay. Setup Solo Destinations The solo-buses (AFL and PFL) are routed to one of the four Monitor Circuits. When Solo is activated i.e. when at least one signal path is soloed, the solo-bus replaces the normal signal on the selected Monitor C Circuit. To choose the Monitor Circuit for the solo-buses, open the Dual Operator Config sub-page by one of the following methods: Click Setup Dual Operator Config Press Dual Ops on Intellipad 1 Layout 3 Click in the Operator 1 or Operator 2 row to set the Solo destination for that operator. Solo Clear (Monitor Panel) The entire group of currently soloed channels can be toggled ON and OFF using the Solo Clear function on the Monitor Panel. Page 22 Input Channels February 2, 2015 Solo Clear Page 23 Channel Format February 2, 2015 Channel Format Introduction The simplest format for a channel is mono, but EVO.Live allows you to create wide channels with up to 6 members, where the panning laws optionally conform to a surround format. A wide channel is created by linking a set of contiguous mono channels. Channel Surround Format When a wide channel is created, you have the option to apply default pans to the members. If you do this, the number of members determines the format. If default pans are selected each member of the wide channel is panned to one element of an equivalent bus with the same number of elements. Normally the factory bus formats are used and this works out as follows: If 2 channels are linked, they are panned L R. If 3 channels are linked they are panned L C R or L C B (2.1) If 4 channels are linked they are panned L C R S. If 5 channels are linked they are panned L C R LS RS. If 6 channels are linked they are panned L C R LS RS B or L R C B Ls Rs (SMPTE 5.1) Panning By default each member is panned hard to one Bus Element position. The system includes a spread parameter, which is set to maximum by default. Reducing spread pans the elements back in towards the Left-Right and Front-Back centre. The system also includes a rotate parameter, which is set to zero by default. Increasing rotation turns the whole channel clockwise, moving the individual elements around the two-dimensional panning space. Channel Format Behaviour Linking channels to create formats greater than mono has the following effects: There is only one fader for the channel. When the channel is created out of a set of mono channels, the group master fader adopts the level of the first fader in the group. When the fader is adjusted, the member’s fader levels are instantly set to the same level and continue to track that level. The same applies to every other mix parameter – they are made identical by any change in the “master” control. Pressing a switch with a toggled value (e.g. Mute On/Off) will toggle the master’s value and set all other members to that value. For switches which cycle through a number of values, pressing the switch will set all members to the next value of the Group Master. Setting Channel Format To change Channel Format, select the Channel Format sub-page using one of the following: Click Setup Channel Format Page 24 Channel Format February 2, 2015 Press Chan Format on Intelllipad Layout 3 The currently linked channels are shown with a yellow line. Mono channels available for selection are shown darker. To increase the format of a mono channel: Click on a mono channel. The system displays channels available for linking above and below the one you selected. Click a second channel to be the end-point of your new group. Choose one of the displayed options as follows: Applies pan settings to each member to set the wide channel into a surround format as described above. All defaults also apply the channel parameter values of the first member of the group to all the members. Parameters modified are fader level, pan, EQ, dynamics, aux sends, inserts and direct out state. all defaults default pans Applies pan settings to each member to set the wide channel into a surround format as described above. Default pans affect the pan parameter only. channel params Applies the channel parameter values of the first member of the group to all the members, excluding pan. Parameters modified are fader level, EQ, dynamics, aux sends, inserts and direct outs. no defaults No channel parameters are modified. To break a wide channel into a group of mono channels: Click on a wide channel Click the Unlink button Page 25 Channel Format February 2, 2015 Panning Wide Channels When a wide channel is the Current Path, the pan controls act on each wide channel member at the same time. The system maintains a spread box for each wide channel, which affects panning behaviour. Wide channel with default panning. Spread box is set to maximum size, so Link Group members are panned as wide as possible. The spread box is set to 70%, so members are brought inwards. Now the whole spread box can be moved LR and FB. Note: to see this panning display, select: Click Mixer Pan Zoom Select Pan Zoom in Intellipad 1 Layout 1 The Spread Control The spread control is only available for channels wider than mono. The spread control adjusts the perceived size of a surround channel. Its range is from 0 to 100%. At 0 the display reads POINT, meaning point source. At 100 the display reads FULL, meaning full surround. At FULL spread the LR and FB pan controls have no effect as each member of the wide channel is hard panned to its respective bus element. As the spread is reduced, the panning of each wide channel member converges on the Page 26 Channel Format February 2, 2015 location of the master pan control. With the spread control less than full, the pan control enables the sound field to be moved to favour the location of the pan target. As the spread control approaches POINT, the panning of each member becomes closer to the pan location of the channel master. This has the effect of mixing the signals of each wide channel member so that they all emerge from the same loudspeakers as determined by the channel master pan. When a wide channel is created with default pans, spread is set to maximum, divergence is set to minimum and rotation is set to zero. The spread control can be used to great effect when it is desired to collapse the surround sound field to a point source. This may occur for instance, where the camera moves continuously from an interior shot to an exterior or vice versa. The surround field can be established for the interior and then as the camera moves through the door or window, the surround field collapses and pans and fades down to the location of the window. As this is occurring a pre-mixed surround field for the exterior can be growing from the rear speakers and spread out to the entire speaker system as the exterior shot is established. Page 27 Mixing February 2, 2015 Mixing Introduction This chapter describes everything you need to know about mixing in the EVO.Live system. The information is organised in sections as follows: Bussing – types, formats, assignment Signal Processing using Tactile controls Screen Mix Controls Inserts and Direct outputs Faders Preset Library Busing Definitions Bus – a mix destination where many channels are summed in desirable proportions. Bus Format – the number and order of outputs that a Bus addresses. Typically the format matches that of a speaker set in the final listening environment. Common format examples include Mono, Stereo and 5.1. EVO.Live provides all the commonly used formats up to 5.1, ready to go. Bus Element – one output from a Bus e.g. Left or Centre. Buses may have any number of elements up to 6. The system provides a fixed number of 144 bus elements. These elements are consumed by the buses according to their format e.g. a Stereo bus uses two elements, while a 5.1 bus uses 6. Bus Types EVO.Live supports four types of buses. MAIN The main mixing destination for the system, often used to create the final product of a project. Format can be set from 1 to 6 (mono to 5.1). Sub-Buses 1 to 24 Sub Buses are extra buses to which channels can be assigned. In turn, they can be assigned to feed into the Main bus. Faders send the same levels to all Subs and Main at the same time. Format can be set from zero (off) to 6 (5.1). Page 28 Mixing February 2, 2015 Auxes 1 to 24 Aux buses are typically used to create independent mixes for effect sends and for headphone mixes. The sends to these buses are controlled from each channel, and can be sent pre/post fader – also pre/post mute. Format can be set from zero (off) to 6 (5.1). Multi-Track (MT) MT buses were created to allow traditional multi track tape bussing. There can be up to 24 of them, and their format is either mono or off. Mix Minus The system maintains 16 mono Mix Minus buses at all times. These have special routing options, and are handled separately from the other buses. A dedicated chapter in this manual describes the behaviour of Mix Minus buses. Setting Bus Format Bus Format is changed using the Bus Format sub-page. To open it, Click Setup Bus Format A list of the buses with non-zero format is displayed. You can see how many bus elements remain unused at the bottom right of the window. Add a Bus To add a new bus to the list, click Sub, Aux or MT in the Add group. You can also use a shortcut to create a new bus with the same format as an existing one: Select a bus Click Duplicate Page 29 Mixing February 2, 2015 Remove a Bus To remove a bus from the list (i.e. set its format back to zero), select it and click Remove. Change Bus Format To change the format of an existing bus, click its current format and then click the triangle to bring down the list of formats, as shown below. Reduce Bus Reduction is currently not used in Live consoles. Page 30 The In Line Panel (ILP2) The In Line Panel (ILP2) Introduction The In Line Panel (ILP2) is a hardware panel providing controls for a number of signal paths at the same time, normally the ones belonging to the faders directly underneath. It can also be expanded to show more information about one channel. The panel works closely with the screen directly above. Page 31 February 2, 2015 The In Line Panel (ILP2) February 2, 2015 Each physical button and knob on the surface is shown on the screen above, giving you information about its function, current parameter value, automation status and more. Different operational modes are offered. They include Strip Mode, Channel Mode and Master Mode, as summarized below. Detailed instructions are found later in this chapter. Strip Mode Strip Mode is the default operational mode for the ILP. Each column of four knobs and buttons is connected to the fader strip immediately below. The columns are all alike, controlling the same parameters for each channel. Page 32 The In Line Panel (ILP2) February 2, 2015 In the illustration above, the strips are controlling EQ settings for the 12 signal paths on the faders below. The ALT Button While the ALT button is held down, a different control set is displayed. Page 33 The In Line Panel (ILP2) February 2, 2015 In this example, the “normal” layout offers Gain control for EQ bands 1 to 4, while the “ALT” layout offers Frequency and Band In/Out switching for the same bands. Channel Mode In Channel Mode, all 12 columns work on the currently selected channel, providing a complete control set for that channel’s EQ, Dynamics, Aux sends, Pan and Path controls. From left to right: Path controls (trim, record level, insert, Direct out etc), Compressor, Expander/Gate, Limiter, EQ, Filters, Aux sends, Pan controls. The ALT button is also used in Channel Mode, expanding the range of available controls. Master Mode All bus levels and mutes can be controlled from one ILP panel. The compressor and limiter for the Main bus are also accessible, as are the Talkback level and Monitor dim controls. Page 34 The In Line Panel (ILP2) February 2, 2015 Panel Controls Mode Buttons Strip Buttons BLUE is used to access the lower of any pair of functions e.g. U1, U2, U3. Also hold and touch ILP controls to set default values for some parameters e.g. 0 dB for faders and aux sends. BLUE is used to access the lower of any pair of functions e.g. Path, Filter. Also hold and touch ILP controls to set default values for some parameters e.g. 0 dB for faders and aux sends. Master displays all the system Pan displays all the surround panning controls for the channel. buses across the ILP. U1 is an ILP layout that you can build and access. Plug is not used in this version of software. Path displays Channel Trim, Record Level, Direct out and others. EQ displays controls for the four bands of parametric EQ. U2 is an ILP layout that you can build and access. Chan displays all the regular channel parameters for the current selected channel. U3 is an ILP layout that you can Filt displays controls for the two channel filters. Aux displays controls for Aux sends 1 to 8. build and access. Aux displays controls for Aux sends 9 to 12. Enab is not used in this version of software Comp displays controls for the channel compressor. Copy is used to copy parameters between channels. See below. U1 is a strip layout that you can build and access. Curve is not used in this version of Lim displays controls for the channel limiter. U2 is a strip layout that you can software build and access. Exp displays controls for the channel Expander / Gate. Open is not used in this version of software. ALT is used to access a second function on any ILP control. Hold it down or latch it, and the display will change to show the ALT function. Using the Copy Button To copy parameters between channels: Step 1 Hold down the BLUE button and the Enab / Copy button. Page 35 U3 is a strip layout that you can build and access. ALT is used to access a second function on any ILP control. Hold it down and the display will change to show the ALT function. You can also latch it by pressing and releasing it quickly. The In Line Panel (ILP2) February 2, 2015 Step 2 Touch a control on any channel. This copies the whole channel to a clipboard. Keep holding down the Enab / Copy button. Step 3 Choose which parameters you want to paste by toggling their buttons on the right side of the ILP. You may choose any number of buttons, and they will flash. Hold down BLUE if you want to select parameters whose buttons work with the BLUE key, like Filter. If you want to paste the whole channel, press the Chan button on the left side of the ILP. Step 4 Touch controls on any number of destination channels. The system will paste your chosen parameters into each channel as you touch its control. Step 5 Release the Enab / Copy button. Strip Buttons The Strip buttons control which “pages” of controls are shown in Strip Mode and Wide Mode. Pressing a strip button once displays the first page of that parameter’s controls on all strips. Some parameters have more than one page, such as EQ and Aux. Press the Strip button again to access the extra pages. Strip buttons can be used in momentary mode: Hold down a Strip button, make a change to a parameter, then release the Strip button to return to the previously displayed page. BLUE Strip functions are those displayed below, like this: Normal function– simply press to access Blue function – to access, hold down the BLUE button and press The BLUE button The BLUE button is a “modifier” key, like Shift and Ctrl on a QWERTY keyboard. Holding it down affects the behaviour of other buttons. Here are some of the things the BLUE button does in the ILP: Accesses the lower of each pair of functions on the Mode buttons and Strip buttons. Sets default values on some controls. For example, hold down BLUE and: o Touch any fader to set its value to 0 dB o Touch any aux level knob to set its value to 0 dB o Touch any LR Pan control to set it to Centre o Touch any FB Pan control to set it to Front Strip Details The available pages are as follows: Pan Pan L-R, Pan F-B, Spread, Divergence, Rotation, Boom Path Trim, Phase, Record Level, Arm, Insert, Direct Output Page 36 The In Line Panel (ILP2) February 2, 2015 Compressor Threshold, Ratio, Attack, Release Expander/Gate Threshold, Expand/Gate, Range/Ratio, Attack, Release Limiter Threshold, Attack, Release EQ Page 1 Gain and Frequency for bands 1 to 4 Page 2 Gain and Q-factor for bands 1 to 4 Filter Gain, Frequency and filter type for bands 5 and 6 Aux Page 1 Send levels and mutes for Auxes 1 to 8 Page 2 L-R Pans and Pre/Post toggles for Auxes 1 to 8 BLUE+Aux All controls for Auxes 9 to 12 Mode Buttons Mode Buttons affect the way all 12 columns of controls are configured. The default mode is “Strip Mode” where each column shows one “page” of controls for the fader directly beneath it. The other modes are described in detail below. BLUE The BLUE button has exactly the same functions as the one in the Strip buttons. Exposes alternative strip pages Reset parameters when held down while they are touched (e.g. set faders to 0 dB) Chan When Chan is pressed, the entire ILP is toggled into Channel mode. When it is on, all 12 sets of controls are used for the currently selected channel. This might be a Track, a Live Feed or a Bus. Note: Buses do not have a full set of controls. For example, they do not have equalizers, Aux sends, or Expander/Gates. To change the selection of Current Channel, you can do any of the following: Press the CALL button on a fader Press one of the Path buttons on the XYNERGI Central Section panel. Click (or touch) one of the Name Plates on the ILP screen. Name Plates Click (or touch) one of the tiles on the Mixer Screen. Click one of the Track Numbers on the Edit Screen. Page 37 The In Line Panel (ILP2) February 2, 2015 If the ILP is already in Channel mode, pressing Chan again takes it back to Strip mode, with each strip remembering which page it was displaying. Plug The Plug button is not used in this version of software. Master Pressing the Master button toggles Master mode on and off. When Master mode is on, the whole ILP is used to display Master fader levels and mutes for the system buses. Hold down BLUE and touch any bus knob to set its value to 0 dB. Open The Open button is not used in this version of software. Enable The Enable button is not used in this version of software. Curve The Curve button is not used in this version of software. User Modes U1, U2 and U3 User modes can only be set up by editing XML files, which is considered too awkward for users. If you have a particular need for a custom layout on the ILP, please contact Fairlight in Australia. ALT This ALT button is a repeat of the one on the right. Its purpose is to access more controls in Strip mode, Open mode and Channel mode. Path Controls The Path strip controls the general behaviour of the audio channel. Trim The rotary knob controls the gain of the Input, after any conversion from analog to digital. Phase The button toggles the phase of the input. Track Arm Can be used to arm a track, but only if an input is patched to it. (This is done using the Patch I/O button – see Patching and Routing for details.) Record Level Sets the gain in the recording path. This only applies to Tracks with inputs patched to them. Page 38 The In Line Panel (ILP2) February 2, 2015 Insert Switches the Insert In and Out of the channel. Only works if an Insert Return has been defined for the channel. (This is done using the Patch I/O button – see Patching and Routing for details.) Direct Output The rotary knob controls the level of the Direct Output, while the switch mutes and unmutes this output. Only works if a Direct Output Port has been defined for the channel. (This is done using the Patch I/O button – see Patching and Routing for details.) Main Bus Assign Toggles the assignment of the signal path to the Main Bus. Holding down the ALT key while pressing the Main button causes the Bus Assign window to display on the Mixer screen. Equaliser The equaliser provides four bands of parametric EQ and two filters. Each parametric section can be switched to band-pass/reject, shelving or notch. Each parametric section can be switched to one of four ranges: LF - 10-250Hz; LMF - 50Hz-1k50Hz; HMF - 450-8k00Hz; HF 1k40-22k0Hz. Each parametric section provides +/-18dB of gain. Q has a range of 0.3 to 10. When notch is selected the filter has a gain of 0 to -99dB. Gain controls include an IN/OUT switch for the band. Hi Gain High Frequency gain for the channel. Hi-Mid Gain High-mid gain for the channel. Hi-Mid Frequency High-mid frequency for the channel. Lo-Mid Gain Lo-mid gain for the channel. Lo-Mid Frequency Lo-mid frequency for the channel. Lo Gain Low frequency gain for the channel. EQ In/Out The switch at the bottom of the strip is EQ In/Out EQ Flat To quickly set an individual band to flat, hold down an ALT key and press the band IN key to set the gain to 0dB. To set the whole EQ section to flat, hold down a ALT key and press the EQ Mode button. Page 39 The In Line Panel (ILP2) February 2, 2015 Filter The Gain control controls the gain of shelving filters with a range of +/-18dB. The slope of hi or lo-pass filters are fixed at -12dB/octave. The actual gain and slope values are displayed on the fat channel at the bottom of the mixer video display. Gain controls include an IN/OUT switch for the specific filter. The Freq control of the filters provides the following ranges of control: hi-pass: 20Hz - 1.50kHz lo-pass: 3kHz - 18kHz The Surround Panner The In-Line Panel provides controls for a comprehensive surround panning system. The panner automatically configures itself for control of signals within all the supported surround formats. In addition to simple two-dimensional panning of a mono signal, the surround panner provides advanced control of multichannel signal paths contained in link groups. The supported surround formats are: Mono, Stereo and 5.1. For mono signal paths the pan control is a simple panner, moving the signal left to right, and front to back around the surround field with the addition of divergence control to increase the size of the sound field. For link groups, the pan control pans all members of the link group at once, and adds spread and rotate functions which can imitate the effect of a camera pan with the entire surround sound field, or collapse the entire sound field to a single point. Link groups can be created with default pan settings for each member. Panning IN/OUT The Pan IN/OUT key bypasses the level control matrix of the panner and sends the signal path at unity gain to all destination bus elements. The connection to individual bus elements may be turned on and off using stem assignment as described in “Stem Assign”. If the signal being panned is a Link Group, all members of the group are sent to all bus elements. Divergence Control The divergence control spreads the signal of an individual feed across more of the adjacent loudspeakers making the perceived size of the sound source larger. The diverge control operates in one-dimensional or two-dimensional mode. To switch between modes hold down the ALT key and press the Panning IN key. The fat channel pan display changes from a bar to a circle when divergence is added. The boom or LFE channel is not included in diverge. One-dimensional Divergence One-dimensional mode is useful for spreading a mono source across left, right and centre speakers in a 5.1 bus for example, without allowing the signal to move into the surround loudspeakers. The divergence control range is 0 to 100%. At 0% the panner behaves as if the signal were a single point source. When the signal is panned to front-centre, at 70% divergence the signal is sent at equal level to left, centre and right loudspeakers. The divergence control approximates an equal loudness contour as it adds signal to more loudspeakers. As the control moves beyond 70%, signal is removed from the centre loudspeaker or the loudspeaker closest to the pan target, and progressively added to the other loudspeakers. At Page 40 The In Line Panel (ILP2) February 2, 2015 100% divergence there is no signal in the centre loudspeaker and the signal is distributed equally to left and right loudspeakers. Two-dimensional Divergence Two dimensional mode is useful for quickly spreading a signal to all loudspeakers or for contracting an effect from all loudspeakers down to a single speaker. Two-dimensional diverge includes front and surround loudspeakers. As the divergence is increased towards 70% the signal is distributed to all loudspeakers. Beyond 70% the signal is removed from the loudspeaker closest to the pan target. For Link Groups, divergence is applied to all members individually. When a link group is created with default pans, divergence is set to minimum. The Spread Control The spread control is only available when a link group is selected. The spread control adjusts the perceived size of a surround mix. The spread control range is from 0 to 100%. At 0 the display reads POINT, meaning point source. At 100 the display reads FULL, meaning full surround. At FULL spread the LR and FB pan controls have no effect as each member of the link group is hard panned to their respective bus elements. As the spread is reduced, the panning of each link group member is made to converge with the location of the link group master pan control. With the spread control less than full, the pan control enables the sound field to be moved to favour the location of the pan target. As the spread control approaches POINT, the panning of each member becomes closer to the pan location of the link group master. This has the effect of mixing the signals of each link group member so that they all emerge from the same loudspeakers as determined by the link group master pan. When a link group is created with default pans, spread is set to maximum, divergence is set to minimum and rotation is set to zero. The spread control can be used to great effect when it is desired to collapse the surround sound field to a point source. This may occur for instance, where the camera moves continuously from an interior shot to an exterior or vice versa. The surround field can be established for the interior and then as the camera moves through the door or window, the surround field collapses and pans and fades down to the location of the window. As this is occurring a pre-mixed surround field for the exterior can be growing from the rear speakers and spread out to the entire speaker system as the exterior shot is established. Rotate Control Rotate controls the left/right and front/back pan controls to rotate a single feed around the centre of the room. Adjust the front/back pan to reduce the radius of rotation. Use rotate on a link group to rotate a pre-mixed surround sound field with respect to the listener’s position. This effect is the audible equivalent of panning a camera, where all the elements in the visual field are subject to the same angular movement. The rotate control range is from 0 to +359 degrees. When rotation is applied, the panning of each link group member is offset in the direction of the rotation. Rotate can be used in conjunction with spread and link group pan to create more or less audible panning effects for the entire surround field. When a link group is created with default pans, spread is set to maximum, divergence is set to minimum and rotation is set to zero. Boom The Boom control is available when the selected signal path is feeding a 5.1 bus or greater, whose surround format includes a sub-bass or low frequency effects (LFE) channel. The boom level is independent of the panner position. By default, the boom element of a link group is assigned only to the boom element of assigned buses. Page 41 The In Line Panel (ILP2) February 2, 2015 Boom ON/OFF The signal sent to the boom element of a bus may be switched on or off using the switch in the Boom section of the In Line Panel. Boom Level The Boom Level control adjusts the amount of signal sent to the boom element of the bus to which a feed or link group is assigned. The boom level control range is OFF to +10dB. This level control may be pre or post the feed fader. Boom Pre / Post Button Boom can be set to Pre Fader or Post Fader the Pre/Post button. Dynamics The EVO.Live Dynamics comprises three sections, a compressor, a limiter, and an expander or gate. The dynamics transfer function and parameter values are displayed in the fat channel at the bottom of the mixer video display. The In-Line Panel offers one strip for the Compressor, called Comp, another for the expander or gate, called Exp, and a third called Lim. Comp Parameters Gain Makeup The Gain control adjusts the gain makeup. This gain element is used to compensate for the overall gain reduction caused by reducing the dynamic range of the signal. Compression Threshold The Thresh control adjusts the compressor threshold. This sets the signal level above which gain reduction occurs. The control range is -50 to 0dB. Compression Ratio The Ratio control adjusts the compression ratio. This sets the gain reduction ratio (input to output) applied to signals which rise above the threshold level. The control range is 1.0:1 to 10:1. Compressor Attack Time The Attack control adjusts the attack rate time constant of the sidechain detector. The control range is 0 to 100mS. Compressor Release Time The Release control adjusts the release time constant of the sidechain detector. The control range is 0.03 to 4.03mS. Compressor IN/OUT The Compressor IN/OUT key bypasses the compressor section. Exp Parameters Exp represents the second channel of dynamics. It may be configured as an expander or gate. Press the Exp / Gate toggle button to toggle between these types. Page 42 The In Line Panel (ILP2) February 2, 2015 Expander Threshold The Thrsh control adjusts the expander threshold. The expander threshold sets the signal level below which gain reduction occurs. The control range is from -50 to 0 dB. Expander Ratio The Ratio control adjusts expander ratio. This sets the gain reduction ratio (input to output) applied to signals which fall below the threshold level. The control range is 1.0:1 to 10:1. Expander Attack Time The Attack control adjusts the attack rate time constant of the sidechain detector. The control range is 0 to 100mS. Expander Release Time Press the Hold key to toggle the Release control between Hold and Release. The Release control adjusts the release time constant of the sidechain detector. The control range is 0.03 to 4.03mS. Gate Threshold The Thresh control sets the signal level below which gain reduction occurs. The control range is from 50 to 0dB. Gate Range The Range control sets the maximum amount of gain reduction that will be applied when the signal falls below the gate threshold. Once the signal has fallen below the level determined by the gate threshold minus the gate range, no gain reduction is applied. The control range is from 0 to 60.2dB. Gate Attack Time The Attack control adjusts the attack rate time constant of the sidechain detector. The control range is 0 to 100mS. Gate Release Time The Release control adjusts the release time constant of the sidechain detector. The control range is 0.03 to 4.03mS. Limiter Controls Limiter Threshold The Thresh control adjusts the limiter threshold. This sets the maximum output level of the limiter section. Control range is from -50 to 0dB. Limiter Attack Time The Attack control adjusts the attack rate time constant of the sidechain detector. The control range is 0 to 100mS. Limiter Release Time Press the Hold key to toggle the Release control between Hold and Release. The Release control adjusts the release time constant of the sidechain detector. The control range is 0.03 to 4.03mS. Page 43 The In Line Panel (ILP2) February 2, 2015 Limiter Hold Time Press the Hold key to toggle the Release control between Hold and Release. Hold time controls the delay between applying gain reduction and commencing release of gain reduction. Limiter IN/OUT The Lim/EXP IN/OUT key bypasses the limiter section. Auxiliary Sends Each full channel in EVO.Live system includes twelve auxiliary bus sends. The auxiliary send signals are derived immediately before or after the feed fader. Each auxiliary bus may be configured in any of the supported surround formats. Press the Bus Format key in the Setup Megamode and an Aux bus selection key to set an Aux bus format. To control the auxiliary bus master level, CALL the bus to the Master Fader by clicking its name in the FMC2 screen. Auxiliary Send Controls Gain The gain control adjusts the amount of signal sent from the selected feed to the auxiliary bus. The control range is OFF to +10dB. Mute The send Mute key toggles the feed to auxiliary bus assignment on or off. Pan Provides panning across stereo aux bus destinations. Pre/Post The Pre/Post switch is used to switch aux sends pre and post fader. Pre Mute This function is available on the third Aux page. Pressing the Pre/Post Mute switch causes the send to be Pre Mute. That means you can mute the channel’s fader without stopping the aux send. Post Pan This function is available on the third Aux page. Pressing the Pre/Post Pan switch causes the send to be Post Pan. This is useful for stereo aux sends, where you want the positioning for the stereo aux send to match the position of the main channel in the Left-Right pan field. Bus Assign, Mix Minus, Talkback Selection The ILP screen provides Bus switching for the channels controlled by the corresponding faders, as shown below. Page 44 The In Line Panel (ILP2) Main Assign Sub Bus Assign Mix Minus Assign Talkback Group Assign Page 45 February 2, 2015 Faders February 2, 2015 Faders Introduction EVO.Live has groups of 12 faders for individual feeds, buses, or groups. Fader Controls OLED Soft Pot – normally Left-Right Pan Control, but switchable to other functions Solo toggle Mute toggle AUTO button – Isolates channel from Scene Changes CALL button – brings channel to PAD, ILP screen etc. Fader Set Buttons Fader – controls level (or other choices) Zero Faders and Pan Pots A fader can be set to exactly zero dB by holding down the BLUE key and touching the fader. Similarly the Left-Right pan pot can be placed exactly in its centre position by holding down the BLUE key and touching the pan pot. A Front-Back pan pot is placed full front when touched with the BLUE key down. Page 46 Faders February 2, 2015 Basic Operation Fader Each fader controls the channel volume level in a range from -90 dB to +10 dB. To set the fader to exactly 0 dB, hold down any BLUE button and touch the fader. The current fader level can be read in the OLED display above (more info about this below). It is also possible to call the controlled channel by touching the fader. To turn on Call Fader, press the Call Fader button in Intellipad 1 Layout 3 To turn on Call Fader, press the Call Fader button in Intellipad Layout 3 Mute The Mute button is used to turn the channel on and off. When the channel is muted, it is equivalent to having the fader pulled right down, and no signal passes from the channel to its send destination. The Mute button always “follows” the fader. See below how the fader can be reassigned to various functions in the channel – in all cases the Mute button is reassigned to the same function. Solo The Solo button has the general effect of isolating the soloed channel so it can be heard alone. It is also possible to call the controlled channel by soloing it. To turn on Call Solo, press the Call Solo button in Intellipad 1 Layout 3 To turn on Call Solo, press the Call Solo button in Intellipad Layout 3 The OLED Display The OLED display at the top of the fader strip gives you a lot of information about the channel. Steady State Under normal circumstances the OLED will show details of the channel being controlled by its associated fader. The most common situation is shown below: Pan Graph Pan Pot function Mute Icon Meter Fader Icon User Name System Name Page 47 Faders February 2, 2015 Fader Button Usage Each button has two potential uses, one “unshifted” and one with BLUE pressed. Holding down the Blue button triggers alternative functions in the other keys. The BLUE button is equivalent to the BLUE buttons on ##NAME and on ILP II. Bank toggles the function of buttons 1 to 6. In its “A” state, it is lit yellow, and buttons 1 to 6 select Fader Sets 1 to 6. In its “B” state, it is lit purple, and buttons 1 to 6 select Fader Sets 7 to 12. When BLUE is held down, the Flip function toggles between “normal” and “flipped” statuses. In flipped status, the functions of the fader and pot are reversed. While BLUE is pressed, the Flip button is lit yellow for normal state and blue for flipped. The 1-button chooses Fader Set 1 if Bank is A, or Fader Set 7 if Bank is B. Similarly for 2-button to 6-button. Pressing and releasing the 1-button while BLUE is pressed toggles between “normal” mode (pot controls LR Pan, 1-button is solid blue while BLUE is held) and “alternative” mode, where the pot goes back to controlling the last-used alternative parameter (default FB Pan). The alternative parameters are chosen using the Pan button in the Mixer Megamode (next to the Proj Megamode button). See PanPot Function below for details. Pressing and releasing the 2-button while BLUE is pressed toggles between “normal” mode (fader controls channel level, 2-button is solid blue while BLUE is held) and “alternative” mode, where the fader goes back to controlling the last-used alternative parameter. The alternative parameter is chosen by holding down the Faders To… button in the Mixer Megamode. See Fader Function below for details. If BLUE is pressed, the 3-button enters fader mapping for the current fader set. The ILP screens above all ILP panels display the Fader Mapping page, which the user can touch to map channels to faders. During mapping, the corresponding fader set button flashes blue. Pressing it exits fader mapping at the point reached by the user. If BLUE is pressed the 4-button toggles Bus Mode on and off. When Bus mode is on the system puts non-zero format buses on all faders (or as many as are needed to accommodate all the non-zero format buses). Pressing a button from 1 to 6 returns control to the appropriate fader set. Mixer Set is not implemented in this version of software. Lock is not implemented in this version of software. Fader Sets A fader set is a group of channels mapped to the faders. The system offers up to 12 fader sets, each including as many channels as there are faders on the system. Page 48 Faders February 2, 2015 Each fader position actually has two channels assigned to it, known as Layer 1 and Layer 2. Selecting Fader Sets To select a fader set: Press a Fader Set button, 1 to 6, on the left side of the Fader Panel Press or hold down the Bank button to access Fader Sets 7 to 12. Selecting Layer 2 Channels For an individual fader, press the Layer 2 button in the ILP Extender section. Layer 2 button To select the second layer for all faders on the console, double-press any Layer 2 button in the ILP Extender section. Holding Faders To temporarily retain a selection of channels in their current fader positions when recalling a new fader set, simply touch and hold the faders while pressing a fader set key. The existing channels will temporarily replace those in the new fader set. Press the fader set key without holding a fader, to resume the normal fader set. Mapping Fader Sets Mapping is the process of selecting which channels will be controlled by which faders in a Fader Set. Select the Fader Set that you wish to map. Hold down Blue and press Map Page 49 Faders o The Fader Mapping window will appear on the screen. Page 50 February 2, 2015 Faders o February 2, 2015 The channels that are currently mapped to the selected fader set are highlighted, as shown above. Select User 1 or User 2 o This is only relevant if the console has been divided between two users. o In this case, each Fader Bay (of 12 faders each) is assigned to EITHER User 1 OR User 2. Select Layer 1 or Layer 2 o You can make separate mappings for Layer 1 and Layer 2, and switch between them individually, or over the whole console, as described above. Use the mouse to select any channel for your first fader. The next fader is automatically selected. Continue to assign faders in order or select a fader out of sequence by pressing its CALL key and making a selection on the selection panel. o Use the buttons at the bottom of the window to select channels, VCA Groups, buses. You can stop changing the current map at any time by holding down Blue and pressing Map again. Setting a Blank Fader Press the Blank key to leave the current fader un-mapped. Call button For each fader, the Call button selects that channel for all single-channel operations. Auto button The Auto button controls the channel for Scene Changes. When Auto is lit, the channel is available for Scene Change, but when it is unlit, the channel will not be replaced or changed in any way when a Scene Change is loaded. Scene Changes are described in their own chapter. Fader Function The standard fader function is to control the send level of the channel to its assigned buses i.e. Main Bus and sub-busses. Faders To... Faders can also control a number of other parameters. At any time there is an “alternate” fader function. To activate the alternate fader function: Select the Fader To layout on Intellipad Layout 4 Page 51 Faders February 2, 2015 Select the function you would like to control with faders. The OLED display on the fader names the function you are controlling with the fader. Note that the Mute button always “follows” the fader function – if that is possible. For example, if the fader is controlling the send level to Aux 1, the Mute button cuts that send. But if the Fader is controlling Record Level for the track, the Mute button has no function. In many cases the Panpot function also changes its function to accord with the fader function. Faders to Aux All channel faders now control the level at which their signal path is sent to the selected Auxiliary bus. The MUTE key now controls the aux send ON/OFF control. The Panpot controls the Aux pan function, if the Aux bus has larger than mono format. Faders to Direct Output All channel faders now control the direct out level. The Mute key toggles the direct output ON and OFF. Faders to LFE All channel faders now control the boom (LFE) level. The Mute key toggles the boom ON and OFF. PanPot Function The Panpot default function is to control the Left-Right Pan position of each channel. It may adopt other functions to match choices for Fader function. For example, if Faders are set to control Aux send level, the Panpot will be set to control Aux pan. For details of Fader function, see “Faders To…” below. To independently toggle the Panpot function: Hold down BLUE and the 1 (Pot) button o The OLEDs display all the functions which can be controlled by the Panpot. Release the Pot button. Page 52 Faders February 2, 2015 This toggles the Pot button toggles between the standard function (Pan L-R) and the most recent nonstandard function that you used. If you have not used any non-standard function, it toggles between Pan L-R and Pan F-B (front / back). The OLED display names the function you are controlling with the panpot, and shows a graphic display of the current parameter value. The Library The Library provides storage for Equaliser, Dynamics, Plugins, whole Channel presets or complete EVO.Live snap shots. Up to 100 of each type of preset can be stored. These presets can be recalled and applied to any signal path in any project. To access the Library, Press the Lib button in Intellipad 1 Layout 1. Select Setup Library Select the preset type by touching the EQ, Dynamics, Channel or Console button. Select the library function by pressing the Save, Load or Delete keys. The presets and functions are described below. Channel means all the parameters in the currently selected signal path. The Library page is shown above, with EQ selected. The EQ presets are shown in the upper left section of the window. Page 53 Faders February 2, 2015 Presets Equaliser A library of 100 equaliser settings is provided. Each equaliser preset stores all the parameter settings of the equaliser section on the called channel. Click or touch the EQ button on the Library page to select equaliser presets. Dynamics A library of 100 dynamics settings is provided. Each dynamics preset stores all the parameter settings of the dynamics section on the called channel. Click or touch the DYN button on the Library page to select equaliser presets. Channel A library of 100 channel settings is provided. Each channel preset stores all the parameter settings on the called channel, excluding I/O patching. ALL Console A library of 100 Console settings is provided. Each Console preset stores all mixer parameters for all feeds and buses. All patching, routing and name settings are also stored. Default Console Template A special Console library file named default is used to store the default setup of the EVO.Live on power up. You may overwrite this file with any setup that suits your requirements. Saving a Preset Follow these steps to save a preset: Open the Library page o Press the Lib button in Intellipad 1 Layout 1. o Select Setup Library Click the chan EQ, chan dyn, all chan or all console button to select the type of preset you wish to save. Click the Save screen button and type a new name for the library preset. The previously entered name is displayed by default. To remove it, press the DEL button Click OK to save the preset or Cancel to cancel the operation. Loading a Preset Follow these steps to load a preset: Open the Library page o Press the Lib button in Intellipad 1 Layout 1. o Select Setup Library Click or touch the chan EQ, chan dyn, all chan or all console button to select the type of preset you wish to load. On the screen, click or touch the preset you wish to load. Page 54 Faders Select the destination channels at the right of the screen. Click the Apply button. o February 2, 2015 If you choose an all console preset, it doesn’t matter which signal path is selected, because the whole console will be loaded. Deleting a Preset Unwanted library presets can be deleted by following these steps: o Press the Lib button in Intellipad 1 Layout 1. o Select Setup Library Click or touch the chan EQ, chan dyn, all chan or all console button to select the type of preset you wish to load. Select the preset you wish to delete Click or touch the Delete soft key then press the Yes soft key to confirm the operation. Dual Operation Overview EVO.Live provides dual operation for consoles with more than 12 faders. The basic features are as follows: Each operator has control of one or more Fader Bays. o Each operator has independent Fader Sets for the faders (s)he controls o Bays cannot be “split” Each operator has dedicated Solo (AFL and PFL) buses o The solo buses for each operator can be routed to different monitor speakers Each operator has an independent current or “called” channel Allocating Fader Bays and Solo Destinations To allocate Fader Bays between the two operators Open the Dual Operator sub-page: o Press Dual Ops in Intellipad 1 Layout 3 - Setup o Select Setup Dual Operator Config Page 55 Faders Click the Bay buttons to allocate bays between the Operators. o February 2, 2015 As soon as there is a bay allocated to Operator 2, the system creates alternative AFL and PFL buses, which can be seen in the meter bridge at the top of the ILP screen, and elsewhere. Allocate the Solo Destination for each operator by choosing one of the four Monitor Circuits for each (they may use the same Circuit if desired). Called Channel Each operator has a dedicated current or “called” channel. The called channel for Operator 1 is the principal channel, and is used by default in all Intellipad operations targetting the current channel. If necessary this can be changed by reprogramming the Intellipad software (not covered in this manual). The principal channel is selected in the following ways: Press the CALL button on a fader controlled by Operator 1. Click or touch its Name Plate in the Mixer Screen. Click or touch its Name Plate in an ILP Screen above faders controlled by Operator 1. Touch its Fader when “Call Fader” is on, on faders controlled by Operator 1. Page 56 Faders February 2, 2015 Solo the Channel when “Call Solo” is on, on faders controlled by Operator 1. Touch one of its knobs in the ILP when “Call ILP” is on, above faders controlled by Operator 1. o To turn on Call Fader, press the Call Fader button in Intellipad 1 Layout 3 o To turn on Call Solo, press the Call Solo button in Intellipad 1 Layout 3 o To turn on Call ILP, press the Call ILP button in Intellipad 1 Layout 3 Operator 2 can call channels in exactly the same ways, on faders that s(he) controls. The channel called by Operator 2 is used on her/his ILP when it is in Channel mode i.e. when all its controls are dedicated to a single channel. If Operator 2 has dedicated Intellipads, they can be programmed to act on this second called channel, but this programming is beyond the scope of this manual. Page 57 VCA Groups February 2, 2015 VCA Groups VCA Groups are similar to other fader grouping schemes and allow a master fader to control a group of faders. VCA Groups can include any number of members, but they can only be channels (not Buses). There are 32 VCA groups on EVO.Live. Members of a VCA groups have their fader levels controlled by a Master, and can also be accessed individually to set relative levels within the group. VCA group masters also control pan and mute values of the members. Assignment to VCA Groups VCA group membership is set up in the VCA Assign Window. To open this, Click Mixer VCA Assign Select VCA Assign in Intellipad 1 Layout 1 To use this window: Select a VCA group at the bottom of the window. Toggle signal paths in and out of the group. Use Page Up and Page Down to access more channels. Naming a Group Groups are named the same way as other signal paths, using the Path Naming function. To display the Path Naming dialog: Click Setup Path Naming or Press Name List in Intellipad 1 Layout 1 Page 58 VCA Groups February 2, 2015 Scroll down to the group you wish to name. You can use the search box in the upper left of the dialog to narrow the list of displayed paths. Note: a group is only visible in this list if it has members. Click the current name of the group. Type in a new name. Accept the new name by selecting another path, or by closing the dialog. Calling a Group Master To CALL a Group Master, do one of the following: Click its name on the Mixer or ILP Screen. If not visible, scroll the mixer screen. Note: a Group Master is only visible if its group has members. Press the CALL button on the group’s fader. Control Faders in a group are controlled relatively by the Group Master fader. To do this, you must either: Add the Group Master to a fader set. Use the mouse directly on the Mixer Screen, by moving the Group Master faders. Page 59 Monitoring February 2, 2015 Monitoring The Monitor system provides four independent circuits, each with summing and switching to handle speaker formats of up to 6 channels. Their names are: Control Room A Control Room B Studio Monitor 1 Studio Monitor 2 It offers the flexibility of multiple speaker sets of any format, selectable sources amongst any system bus and up to 16 external sources, plus fold-up/fold-down facilities to manage any combination of the above. Configure Monitor Speaker Sets The system allows you to define many speaker sets for each of your monitor Circuits. You must configure at least one Speaker set before any audio can be heard through speakers. This is done in the Monitoring subpage. To display it do one of the following: Select Setup Monitoring Press Mon Setup in Intellipad 1 Layout 3 Choose a Monitor Circuit at the lower left. The default is Control Room A. Choose a Speaker set at the underneath the monitor Circuit. Page 60 Monitoring February 2, 2015 o Each monitor Circuit has 8 speaker sets, independent of the other circuits. By default they are empty i.e. they have no speakers. o The first set for each monitor Circuit is called MAIN, and the others mostly have generic names. You can name each speaker set, for each monitor Circuit, after you configure it. Click the Increase Format button until you see the desired format for this speaker set. Select all its Elements (Left, Centre, Right etc) at the top left. Click Analog, Digital or MADI outputs at lower right. Choose the right number of unused outputs to match the number of speakers. Click Patch. Click Name if you want to name the Speaker set To exit, click the Close box in the upper right corner, or right-click anywhere in the dialog. Monitor Control Choose Monitor Circuit Talkback Groups Mute All Speakers Choose Monitor Format Mute Individual Speakers Choose Speaker Set The Monitor Panel provides real-time control of all monitoring functions. See below for details. Select Monitor Circuit By default, all controls on the Monitor Panel are directed at the Control Room A monitor circuit. The buttons in the “Cues” section allow you to select different monitor circuits. The behaviour of these buttons depends on whether the console is in Dual Operator Mode. Page 61 Monitoring February 2, 2015 Dual Operator Mode Off In this state, holding down one of the circuit buttons (CR B, Stu A or Stu B) causes that circuit to be targeted by Monitor Panel commands. Releasing the circuit button returns targetting to the Control Room A circuit. Dual Operator Mode On In this state, the circuit buttons work in latching mode i.e. pressing them once latches the monitor circuit for control by the Monitor Panel. Each of the two operators may have an independent Monitor Panel, of which each has a set of circuits that it is allowed to choose. (This is set in the System Variables File, as described below). Putting it another way, each operator is locked out of the monitor circuits belonging to the other. The following is a technical setup. If you don’t have time to struggle with it, call your Fairlight distributor. In any case it is normally set up before the console is delivered, according to your instructions at the time of ordering your system. Technical Setup To set this up, open the file System_Variables.txt, which is located in C:\ProgramData\Fairlight\FMC\Data In this file you will see lines of text like this: OP1_MON,1 OP2_MON,6 The number next to OP1_MON controls which monitor circuits that operator’s panel can access. This number is a binary number in which the monitor circuits are expressed as a bitmask. For example, monitors 0, 1 and 2 would be binary 0111, which is 7 In the example above, Operator 1 is allowed to access circuit 1 (Control Room A), while Operator 2 is allowed to access circuits 2 and 3 (Control Room B and Studio A). If you change these lines of text in System_Variables, be sure to save the file and restart the system. Set Monitor Levels, Mute and Dim Level Control The knob at upper left controls the volume of the currently selected monitor Circuit. Muting The Mute button near the lower right of the panel is used to mute the selected monitor circuit. The Dim button near the lower right of the panel is used to reduce the level in the selected monitor circuit. Individual Speaker Mute The buttons at the lower right of the Monitor Panel are used to mute individual speakers. Only the ones corresponding to active speakers in the current speaker are illuminated. Pressing any one of these mutes that speaker. Individual Speaker Phase The buttons at the lower right of the Monitor Panel are used to reverse the phase of individual speakers. Only the ones corresponding to active speakers in the current speaker are illuminated. Page 62 Monitoring February 2, 2015 Holding down the Phase button and pressing any one of these button flips the phase of that speaker. Monitor Format Regardless of the format of your current monitor source, you can force it to monitor in Stereo, Mono or anti-phase Mono through the current Speaker Set (unless that speaker set is itself Mono). To do this, press a button in the Format group. Alternative Speakers By default, your current monitor circuit will play from its first speaker set, usually called Main. To listen to your second or third speaker set, press the Alt 1 or Alt 2 buttons in the Speaker Sets group. Monitor Sources Overview The standard source for monitoring is the MAIN system bus. You can choose many other sources, including any other system bus, or External Source Sets, which are created by you for CD players, video machines etc. External Sources come directly from physical inputs to the system. Configuring External Sources Select Setup Ext Mon Sources Choose the external source you wish to define Choose the monitor circuit that will play that source (Control Room or Studio Monitor). Touch or click the Increase Format button one or more times to set the number of desired Elements in your External Source. Choose Analog, Digital or MADI Inputs at lower left. Choose the inputs you want to use at upper left and their destination Monitor Elements at the upper right. Click Patch. If desired, click Rename to name the set. To exit, click the Close box in the upper right corner, or right-click anywhere in the dialog. Select Monitoring Source To select the Main bus as source, press the Main button in the Monitor Panel. To select a Sub Bus as source, press the Sub button, then press a number from 1 to 12 in the numeric pad at the right. o While Sub remains illuminated, you can change to any Sub Bus simply by pressing a number. To select an Aux Bus as source, press the Aux button, then press a number from 1 to 12 in the numeric pad at the right. Page 63 Monitoring o February 2, 2015 While Aux remains illuminated, you can change to any Aux Bus simply by pressing a number. To select an External Source for monitoring, press the Ext button, then press a number from 1 to 12 in the numeric pad at the right. o While Ext remains illuminated, you can change to any External Source simply by pressing a number. Fixed Level For some applications the Control Room monitors must be set to a fixed level, and afterwards not respond to monitor pots. To toggle Fixed level monitoring press the Fixed button on the Monitor Panel. To change the Fixed level, hold down the Fixed button on the Monitor Panel and turn the level knob. Page 64 Talkback February 2, 2015 Talkback Overview EVO.Live provides two talkback circuits, of which the second is only used when a second operator is working on the console (details below). Either talkback circuit can take as its input any signal in the system, including physical inputs and the oscillator. Four Talkback Groups are provided, so that particular participants can be addressed as needed. Channels, buses and Mix Minus buses can all be members of the Talkback Groups. In addition, talkback can address individual channels. This is called Talk to Channel. The drawing below shows the “logic” of the talkback system. Note that the lines in this diagram do not refer to audio signals, but rather logical states. Setting Talkback Source The source for talkback is normally a microphone, but it can be any signal path in the system. Setting a source for the Talkback circuits is a patching operation. Display the Patch I/O page using one of the following: o Select Patch in Intellipad 1 Layout 3 o Click Setup Patching Click or touch Talk Back in the lower right of the screen o This causes the display of Talk 1 and Talk 2 in the upper right. Select Talk 1 or Talk 2 Select a category of signal path in the lower left of the screen. o Normally this would be Analog Inputs, Digital Inputs or MADI Inputs, depending how your microphones are wired to the system. Page 65 Talkback Select an individual input in the upper left of the screen. Click or touch Patch to make the connection. February 2, 2015 Talkback Destinations Talkback can target channels and buses. Channel When targeting a channel, the talkback signal may be added to: The Channel Direct Output The Channel Mix Minus Output Both of the above This choice is made on the Channel Routing page. To display this page do one of the following: Press Rout Page on Intellipad 1 Layout 1. Select Mixer Channel Routing Talk to Mix Minus Talk to Direct Out Bus When targetting a bus, the talkback signal is added to the bus. Activating Talkback Talkback can be activated in the following ways: Activate a Talkback Group, of which the target signal path is a member. Activate Talk to Channel for the specific target signal path. Talkback Group To activate a Talkback Group, press one of the four Talk buttons on the Monitor Panel Page 66 Talkback February 2, 2015 Talkback buttons o Note: these Talk buttons can be operated in momentary mode (hold down to activate, release to deactivate) or latched mode (press quickly to activate, press again to deactivate). Talk to Channel To talk to a specific channel, do one of the following: Page 67 Talkback o Press the Talk button on the ILP Extension panel for that channel Talk to Channel o Click the Talk button for that channel on the Mixer Screen Talk to Channel Page 68 February 2, 2015 Talkback o February 2, 2015 Click or touch the Talk button on the Channel Routing page for that channel (to display this page, press Rout Page on Intellipad 1 Layout 1, or select Mixer Channel Routing) Talk to Channel Creating Talkback Groups The system supports four Talkback Groups, which are individually addressable. Any channel, bus or Mix Minus bus can be a member of one or more groups. To put a signal path into a TalkBack Group, do one of the following: Using the Channel Routing Page Select the signal path using the Call button on its fader or touching its Name on the Mixer Screen. Open the Channel Routing Page using one of the following: o Press Rout Page on Intellipad 1 Layout 1. o Select Mixer Channel Routing Click or touch buttons in the Talkback Assignment section. You can select other channels while the Channel Routing page is open, using the Call buttons, clicking the name on the Mixer Screen, or using the + and – buttons on the Channel Routing screen. Page 69 Talkback February 2, 2015 Using the Mixer Screen Click the Talkback Group button on any channel Talkback Group button Note: you can assign a sequence of adjacent channels to the same Talkback Group by clicking on one Talkback Group button and dragging the mouse right or left. You do not need to drag accurately – the assignment is made as soon as the mouse pointer enters the channel strip. Using the ILP Screen Click the Talkback Group button on any channel Talkback Group button Talkback with Two Operators When dual operation is activated, the second talkback circuit (Talk-2) becomes active. The system automatically uses the Talk-2 signal when talkback is initiated by Operator 2. This occurs when: Operator 2 presses a Talk Group button on his/her local Monitor Panel. Operator 2 presses a Talk button on a fader in one of his/her assigned fader bays. Page 70 Signal Check February 2, 2015 Signal Check EVO.Live provides a quick way of listening to any signal through any monitor circuit. Using the ILP Extension Panel Any individual signal path can be checked by pressing the Sig Chk button in its ILP Extension panel. This will cause it to be heard in whichever Monitor Circuit(s) you last selected in the Signal Check subpanel (see below). Only one signal path at a time may be Signal Checked. Using the Signal Check Sub-Page To open Signal Check: Select Mixer Signal Check or Press Sig Check in Intellipad 1 Layout 1 Page 71 Signal Check February 2, 2015 Signal Paths Monitor Circuits On/Off Toggle Signal Path Categories To use the Signal Check sub-page: Select a Signal Path Category in the lower left of the screen Select a Signal Path in the upper section of the screen (this normally lights up the On button at lower right) Toggle one or more Monitor Circuits ON If necessary, toggle the On/Off button at lower right, so that it is ON You may leave Monitor Circuits engaged after leaving the Signal Check sub-page. This will determine where signals are heard when the Sig Chk button is pressed on the ILP Extension panel. Page 72 Meters February 2, 2015 Meters Stereo Compound Meters The system offers a compound stereo meter including PPM and Loudness metering, as well as Phase indication. The meters appear on the EVO.Live Mixer Screen (see above), and on the ILP2 screen (if you have one). It will only be present if your Main bus has stereo format. The Loudness metering has stereo LEQ meters and a mono LU meter. The blue and white numbers give running reports on level according to ITU R BS 1770 standard, known as LKFS. They represent the subjective loudness of the audio program. The right number gives a rolling average over 10 seconds, and the left number gives an average over the entire length of program i.e. since you started playing. Note that readings amongst different brands of meters commonly differ, because there are no agreed standards for some metering characteristics. In particular the “integration” time of a meter, which represents the length of time signal needs to be at a particular level before the meter reaches that level, and the decay time when the level drops, are not defined as standards. For this reason, the Fairlight meters may not match the levels shown by other meters. Page 73 Meters February 2, 2015 Parameter Setup The Compound meters are controlled by accessing the Meters window using: Setup Metering The compound meter contains 2 individual components, a BarGraph and a Loudness meter. The compound meters source can be selected as either the Control room source (pre-volume control), or fixed to the main meter from the Source selection in the meter preferences. The Width of the individual components is defined by the source, and so if for example you have the control room selected as the source, and change the monitoring source between a 5.1 main, and a stereo sub bus, the compound meter source and format will follow. The Bargraph can be chosen from several scales: Peak; PPM – BBC; PPM – DIN; RMS. The Loudness meter component offers BS1770-1 compliant loudness metering consisting of simultaneous momentary, short term and infinite integration RLB2 weighted meters. These meters are referenced to a target LKFS value, and offer either a standard -18 - +9 LU scale, or an optional -36 - +18 LU scale for material with a wider dynamic range (e.g. long form). Settings for the loudness component include: RMS Window: The length of the momentary sliding window (in ms). Target Reference (in LKFS). Short Window: The length of the short-term sliding window meter integration time (in seconds). Integrated Gate: An optional Gate can be applied to the Infinite (programme) integration. The blue numbers give running reports on level according to ITU R BS 1770-1 standard as a referenced LKFS value (LK). They represent the subjective loudness of the audio program. The right-hand number Page 74 Meters February 2, 2015 gives a rolling average over the defined short term window length, and the left-hand number gives an average over the entire length of program i.e. since you last reset the meter. You can reset the long-term average (infinite integration) by clicking the number. The long-term average level can additionally have a gate applied in the meter preferences, in order to allow it comply with the R128 EBU Standard. Meter Peaks All channel and bus meters in the EVO.Live system, apart from the loudness meters, share the same ballistics. Controls for these meters are in two places. For control of peak timings, use the Peak button in Intellipad 1 Layout 1. This button allows you to choose short, medium, long or permanent peak display. Pressing Clear Peak will remove existing displayed peaks immediately. For more detailed control of metering, use the System Variables dialog. o This can be displayed by typing Shift+Ctrl+u whenever the EVO.Live system is running (make sure that one of its screens is in focus). Notes: Clear Peak on Record or Play – these are only relevant when using Wild Record or channel playback mode, which are discussed elsewhere in this manual. All Meters use same meter point is not relevant to this product Launch on-screen meters at Bootup is not relevant to this product Page 75 Project and File Management February 2, 2015 Project and File Management Introduction File handling in EVO.Live supports legacy formats from previous products, but also introduces powerful modern Project and File management capabilities. This chapter details the way the system looks after files. Basic File Commands New Project To create a new project, click File New Project Type: no need to choose – EVO.Live has only one type. Folder: This will be the storage location for the project file, and for any audio that you record (though this can be changed later). Comment: This is a line of text which appears in the title bar of the Mixer Screen. Sample Rate: If you are going to import any audio for playback, use that sample rate. Otherwise you can choose 44.1 kHz or 48 kHz. Frame Rate: This is only relevant when synchronising to other systems using timecode, or in other special cases. Resolution: This field applies to video associated with the project. You may record or play video (as explained later) – this field should be set to the best quality you can record, play or monitor externally. Audio Tracks: This is fixed at 128, of which 104 become Channels, and the other 24 are available as recording tracks. Add Pyxis Track: not used in this product Video Scroller: not used in this product Page 76 Project and File Management February 2, 2015 Open Project Click File Open The Open File dialog box is shown. Browse, select a project and click OK. Save Project To save the current project: Click File Save or type ctrl-s Save Project As Click File Save As and supply a new name in the Save dialog. Close Project Click File Close Load Recent Projects Click File File Name (a list of recent projects) Video Files EVO.Live supports “wild” recording of video files. For correct operation, video files must be recorded to a separate hard disk than the audio data. **WARNING: If you attempt to play video and audio data from the same hard disk, you will experience SEVERE performance problems!! Typical EVO.Live Drive Configuration Designating Media Device When EVO.Live is first started it displays a dialogue box requesting that a default project device be selected. Select the devices (Audio and Video) you wish to use from the list of available drives. Page 77 Project and File Management February 2, 2015 To prepare the drive for use with EVO.Live, select Setup Media and Project Management from the EVO.Live main menu. Select the device from the devices list and click on Convert to Media device. Please also set the Device Info accordingly (in most cases, this is set automatically and does not need to be changed). Click here for folder display To use a network connected device, first create a mapped network drive or folder in Windows Explorer. This can now be selected in the device panel and converted to an EVO.Live Media Device as above. ** Please note that audio and video files can only be played from a designated Media Device. If you try to play files from any other disk, you will receive an error message. Page 78 Scenes February 2, 2015 Scenes Overview EVO.Live provides a facility for saving and loading “Scenes”. A scene contains all the settings for channels and buses on the console, with the exception of: Routing (patching) Bus Format Fader Sets Saving a Scene Open the Scene List sub-page: o Select Mixer Scene List or o Press Scene List in Intellipad 1 Layout 3 Click or touch the Save Scene button o The system will display a naming dialog – enter a name and click or touch OK. o You may take advantage of the automatic name feature, where the last Recalling a Scene A scene is recalled quickly and with no break in the audio signal. Control parameters are changed over a time period that depends in length on the number of changes to be made, but should never exceed half a second. Manually Open the Scene sub-page: o Select Mixer Scene List or o Press Scene List in Intellipad 1 Layout 3 Select the Scene you want to recall. Click or touch the Load Scene button o Click or touch Yes to confirm loading the Scene. Using a Cue The Cue List allows you to build a list of scenes and recall them quickly. This is covered in a later chapter of this manual. Isolating a Channel You can prevent a channel from being affected by scene changes. To do this, press the AUTO button on its fader. When the button is ON, the channel will not be updated when a scene is recalled. Page 79 Templates February 2, 2015 Templates A template is a complete console setup that you can load into your current project. It includes routing, bus formats, fader sets and everything else on the mixer. It does not include any audio that has been stored in the project. If you make changes and save your work, you will not overwrite the template, but only the currently open project. Saving a Template Open the Template List sub-page: o Select Setup Template List or o Press Templates in Intellipad 1 Layout 3 Click or touch the Save Template button o The system will display a naming dialog – enter a name and click or touch OK. o You may take advantage of the automatic name feature, where the last Loading a Template Open the Template List sub-page: o Select Setup Template List or o Press Templates in Intellipad 1 Layout 3 Select the Template you want to recall. Click or touch the Load Template button o Click or touch Yes to confirm loading the Scene. Page 80 The Cue List February 2, 2015 The Cue List The Cue List is a sequence of items (Cues) that are loaded on command. In this version of software, each Cue can have an associated Scene, which is loaded with the Cue (a scene contains all real-time control settings on the console, like faders, pans, EQs etc, but not routing, bus format, or fader sets). Creating a Cue List Open the Cue List sub-page: o Select Setup Cue List or o Press Cue List in Intellipad 1 Layout 3 The existing Cues, if any, are shown at the left of the screen. The saved Scenes are shown in a list at the right of the screen. To create a new Cue, click the Add button o If a cue is already selected, either deselect it, or click the Insert button to add a Cue above the selected one. o Name the Cue using the on-screen keyboard, or an attached QWERTY keyboard While the new Cue is selected, click on a Scene in the list at the right. o This will associate the selected Scene with this Cue. Page 81 The Cue List o February 2, 2015 You can change the association for any Cue by selecting it and then selecting a different Scene. Loading Cues Cues are loaded from the screen or from the Intellipad. Both methods will be described here. The next Cue to be loaded is shown on the Mixer Screen. To select a Cue, do one of the following: Use Intellipad 1 Layout 4 (Scenes) o Press the Up or Down button to bring the desired Cue into the Next Cue window. o To move down (or up) one page of Cues at a time, hold down the Page Up-Dn button and press the Down (or Up) button. o To select the first (or last) Cue in the list, hold down the Top Bottom button and press the Down (or Up) button. On the Mixer Screen, click the Up or Down arrow until the desired Cue is visible in the Next Cue window. To Load the selected Next Cue, do one of the following: Use Intellipad 1 Layout 4 (Scenes) o Hold down the Pink button and press the Load button. Click the Load button on the Mixer Screen. The Cue List automatically advances to the next Cue when one is loaded. This allows you to run the whole show using just the Load command, provided the Cues are in the correct order for the show. Page 82 Wild Recording February 2, 2015 Wild Recording Introduction EVO.Live provides up to 24 channels of “wild recording” so-called because it takes place separately from the live mixing system, as though it were a different device. The main purpose of wild recording is to capture audio channels from live performances. Record Channels The system provides two types of record channels: Normal input channels o Any input channel can be armed for recording, in which case the system records whatever is coming into that channel Special WildTracks created just for recording o There are 20 WildTracks, to which you can patch any system signal. This is useful, for example, for recording buses that are not being brought into the mix via input channels. Recordings of channels will be visible as audio clips when the same project is opened in Post mode. They will be located on the track with the same number as the channel that was recorded. The resulting media files (WAV format) will also be accessible independently in the Media folder associated with the project. Recordings made from Wild Tracks will not appear as clips. They are accessible as WAV files in the Media folder associated with the project. Patching Record Inputs It is only possible to arm a channel or WildTrack if a signal is patched to its input. To do this, open the Patch I/O subpage using one of the following: Select Patch in Intellipad 1 Layout 3 Click Setup Patching Page 83 Wild Recording February 2, 2015 In the Destination Category section at lower right, choose Channel Input or WildTrack Inputs In the Source Category section at lower left, choose Analog, Digital or MADI inputs if you want to record a physical input, or choose Main Out, Sub-Bus Out or Aux-Bus Out … … or choose Main Out, Sub-Bus Out or Aux-Bus Out to record buses. Page 84 Wild Recording February 2, 2015 You can now choose the appropriate number of signal path sources and destinations, then select the Patch command to link them. Page 85 Wild Recording Arming Record Channels and WildTracks Channels can be armed using the Mixer Screen. Click to Arm (channel must have a source) Page 86 February 2, 2015 Wild Recording February 2, 2015 Channels and WildTracks can both be armed on the Channel Mode sub-page. To open this page: Select Setup Channel Mode Click to Arm WildTracks Click to Arm channels Setting Record Parameters Record parameters are set on the Record Settings window. To open this: Select Setup Record Settings The window shown below opens. Page 87 Wild Recording February 2, 2015 Sample Rate This value can only be set when creating a new project. Handle Setting non-zero handles allows you to capture audio occurring before the record command is issued, and after it is stopped. This is extra data that was present in the system input buffers. Bit Depth Allows you to make 16-bit, 24-bit or 32-bit audio recordings Monitor Has no function in this product. Wild Record This section controls where in the “Time Line” the recordings will later appear. The Time Line becomes visible when the EVO.Live system is run in Post mode. At this time audio tracks become visible, and the wild recordings are shown as audio clips. Choosing Time of Day means that each recording will appear in the timeline at the time shown on the system clock (i.e. the Windows PC time of day). Choosing timecode means that the recording will start at the position of the system playback (see the chapter called Track Playback for details). Page 88 Wild Recording February 2, 2015 Choosing LTC means that the recording will start at the time of the incoming timecode (whose frame rate must be matched in the Sync Setup Window – see the System Sync chapter). At nominated time means that you can set a start time for the clips resulting from wild recordings. Selecting the Auto Advance checkbox means that the start time will automatically be incremented each time you exit wild recording, by the length of the last recording. In other words successive recordings will be arranged head-to-tail on their destination tracks. Starting and Stopping Record Wild Recording can be started and stopped from Intellipad 2 Layout 4 Because Wild Recording may be a crucial function, a “safety catch” is used with it. This is in the form of a Pink X, since in the upper right corner above. To start recording: Hold down Pink X Press Wild Rec To stop recording, do the same: Hold down Pink X Press Wild Rec Page 89 Wild Recording February 2, 2015 The Wild Record button in the upper left of the Mixer screen can also be used to start recording. Click to start Wild Record While Recording is active, the Record Stop button is displayed. Click to stop Wild Record Page 90 Track Playback February 2, 2015 Track Playback Introduction Most channels in EVO.Live are used for bringing audio into the mix from outside the console (this is the essence of “live”. But any number of channels can be used for playback of stored audio instead. Where is the Audio? Audio files can be located on any hard drive designated as an audio drive by the system. To do this, please see Designating Media Device in Project and File Management. To get the audio on to the channels of your EVO.Live, the system must be run in Post mode. Doing this is beyond the scope of this manual – please refer to the Post Operator’s Manual. In short, audio clips are placed on “tracks” in Post mode. These tracks will correspond to the Input Channels of the same number in Live mode. The timeline position of the clips in your project is significant. In order to hear them you must put the system into Play mode, and it must play through the appropriate timecode position. Selecting Channels for Playback There are two ways to toggle channels from input to playback mode: Click the Playback button in the Mixer Screen o Note: you can toggle many contiguous channels at once by clicking an dragging sideways Toggle Playback and Input Page 91 Track Playback February 2, 2015 Use the Channel Mode sub-window o Open it by selecting Setup Channel Mode o Click any Playback icon to toggle it Initiating Playback To start playback, use one of the following: Press the Play button in Intellipad 2 Layout 4 o Note the presence of other transport controls – Stop, FF, REW Press the Space Bar on your PC keyboard – this toggles between Play and Stop. Page 92 Track Playback February 2, 2015 The timecode position of the system can be seen in the upper left of the Mixer Screen, as shown below: Locating to Timecode By Timecode Address At any time during a live session, you can locate the Playback position to any desired Timecode. To do this: Press the GoTo button in Intellipad 2 Layout 4 A number pad appears – type the timecode you wish to locate Press the GO button to complete the action. You can also use GOTO in a relative sense: Press the GoTo button in Intellipad 2 Layout 4 A number pad appears – type a time by which you would like to move the transport Page 93 Track Playback Press + to move forward or – to move backwards Press GO to complete the action. February 2, 2015 Using Locators The system provides three locators to store timecode positions for quick location. To use the locators, open Intellipad 2 layout 4. To store a location: Move the transport to the location you want to store Hold down the Set Loc button Press a Locator button (Loc 1, Loc 2 or Loc 3) To go to a stored location: Press the Locator button Locators are stored with the project. Locking the Transport If you are playing audio as part of a live event, it may be a good idea to lock the transport, so that it cannot be relocated or stopped. Page 94 Track Playback February 2, 2015 To lock (or unlock) the transport: Hold down Pink X Press the Lock button While the transport is locked, you cannot use the GoTo function, the transport controls, or the Locator buttons. Page 95 System Sync February 2, 2015 System Sync Introduction Like all digital systems, EVO.Live relies on a steady clock signal to maintain its highly regulated sample rate. The core system is designed to work in live, post production and music environments, so it needs to provide great flexibility in synchronising with other systems. All clock signals are derived from Fairlight’s SX-series Sync I/O components, which are designed with very fast and stable sync behaviour. Setting Sync Parameters Sync parameters are set on the Sync Setup window. To open this: Select Setup Sync Settings The window shown below opens. Sample Rate This value can only be set when creating a new project. Frame Rate Can be changed at any time. It is important to match the frame rate of any Master video device working with you, or the timecode being chased, if any. Pull Up/Down Allows setting of Pull Up and Pull Down, often used in NTSC video setups. Detailed explanation below. Sync Source The system sample rate is synchronised to its clock source. Your installed Fairlight SX box provides the clock signal, and you may lock to its internal clock, or a Video or Word Clock source being fed into it. Synchronization Indicators True Rate True Sample Rate shows the speed at which EVO.Live is running. It also shows the real frame rate, after adjusting for Pull Up/Down setting. Page 96 System Sync February 2, 2015 Video Detect The Video Clock Detected indicator is green when a valid Video Clock reference is detected and red when Video Clock is missing or invalid. Sync The Sync indicator is green when a valid Clock Sync Source reference is detected, and red when the Clock Sync Source is missing or invalid. Word Clock Out Enables other systems to synchronise with EVO.Live. Pull-Up and Pull-Down The normal sample rates used by the digital audio industry are 32,000, 44,056. 44,100, 48,000 and 96,000 samples per second. The normal frame rates are 24, 25, 29.97 and 30. These last two may cause confusion when used together. EVO.Live can alter its sample rates far enough to accommodate the small speed change caused by going from 30 to 29.97 frames per second and back again. In other words, if you slow down the frame rate from 30 to 29.97, EVO.Live can slow its internal sample rate to match. This is called Pull-up or Pull-down, depending in which direction you are taking the speed. When you choose a frame rate you are telling EVO.Live what frame rate to expect. To put it more accurately, you are telling it the frame rate at which the chosen sample rate will be accurately reproduced. For example, if you tell EVO.Live that the NTSC frame rate is 30 (in the Setup Menu) and the sample rate is 44,100, it will pull down the sample rate to 44,056 if you feed in timecode at 29.97. If, however, you change the NTSC field to 29.97, EVO.Live will play at 44,100 at 29.97 frames per second, and will pull up to a sample rate of 44,144 when timecode runs at 30 frames per second. It is advisable to choose a sample rate at which you want to make the final transfer of the Project. Then record your material at whichever frame rate is going to be used during that final transfer. The importance of this choice is that you do not want to compromise the quality of your final product by using sample rate conversion at the moment it leaves EVO.Live for the last time. You should make these choices at the very beginning of the Project, and then you may use any other combination that suits your purposes temporarily during the recording and editing process. Page 97