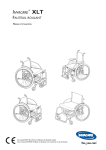
Download INVACARE® XLT Service Manual
Transcript
Invacare® Service Manual English 2 INVACARE® XLT Service Manual Contents Product description................................................. 4 XLT Models............................................................... 5 NB!.............................................................................. 6 Lifting the wheelchair.............................................. 6 Intended use.............................................................. 7 Upholstery and frame colours.............................. 8 Equipment and accessories.................................... 8 Technical data........................................................... 9 Accessories: Anti-tip devices....................................................... 29 Trunk support........................................................ 31 One-arm drive........................................................ 32 Assistant manoeuvred drumbrakes................... 33 Amputee legrest/External push handles........... 34 Foldable push handles........................................... 35 Pelvic belt................................................................. 35 Adjustments: Legrests.................................................................... 10 Calf pads/Footplates.............................................. 11 Seat............................................................................ 13 Backrest.................................................................... 14 Armrests/Mudguards............................................. 17 Brakes....................................................................... 18 Rear wheels ........................................................... 19 Castor wheels......................................................... 20 Wheelchair heights................................................ 21 Washing and Disinfection.................................... 36 Reconditioning........................................................ 37 Tool List................................................................... 38 Check List................................................................ 39 Parts of the wheelchair 3 2 11 4 10 1 5 12 6 9 13 7 8 1. Frame (chassis) 2. Backrest 3. Push handles 4. Seat 5. Rear wheel INVACARE® XLT Service Manual 14 6. Hand rims 7. Brakes 8. Castors 9. Anti tip device 10. Armrests 11. Jaw 12. Legrests 13. Footrest 14. Footbow 3 Product description Invacare® XLT Invacare® XLT is a wheelchair with many adjustment options and accessories. To ensure that you benefit as much as possible from your Invacare® XLT, and in order to do its options justice, the chair must be tested and adjusted by competent personnel. We hope that you have also received instructions for using your Invacare® XLT in everyday life. The Invacare® XLT frame, footbow and backrest are manufactured from high quality titanium. For the Swing version the legrest hangers are made from aluminium. The cover for the seat cushion is made of Jemima and the backrest cover is made of nylon. This manual includes a description of the parts of the chair, simple adjustment options, how to use the Invacare® XLT safely and how to transport it. The manual must be read thoroughly before the chair is used. Also included in this manual is a description of how the most common accessories are fitted and also some slightly more advanced settings. As the Invacare® XLT has many different components and accessories, the appearance of the accessories you have for your chair may differ from those shown. 4 INVACARE® XLT Service Manual XLT Models XLT Power U-front XLT Power V-front Until January 2004: XLT is made of titanium which is very light and strong. This makes it a light, stable and durable wheelchair. XLT fits in almost everywhere thanks to its comfort, ergonomics and performance. XLT is designed for experienced, active users, who understand how important it is with good propelling characteristics. The very stable chassis and the excellent wheel balance provide good propelling characteristics on almost every surface. XLT is designed for easy handeling and transport, wherever you want to travel. XLT is well balanced for an one-arm lift into a car. It takes up so little space that it easily can be lifted in front of you into the passanger seat of a car. Titanium is also extra strong and durable which gives it a long life. Quick release wheels and foldable back, is of course standard. XLT is a solid frame wheelchair with driving wheel plates and castor attachments of aluminium. This provides a light weight and stable wheelchair. The black vinyl seat is easy to clean. The back rest is made of black plastic-coated fabric/black Strix. XLT Power U-front has a front that helps keep together the lower parts of the legs and the feet. The standard delivery includes a foot bow. With 120 mm castors the seat angles 4°, 8°, and 12° can be obtained, dependent on the row of mounting holes used for the rear wheel. XLT Power V-front has a front that helps keep together the feet. The standard delivery includes a foot bow. With 120 mm castors the seat angles 4°, 8°, and 12° can be obtained, dependent on the row of mounting holes used for the rear wheel. XLT Nordic XLT Box has a front offering more space for the lower parts of the legs and the feet. The standard delivery may include a foot bow or collapsible footrests. With 120 mm castors the seat angles 3° or 8° can be obtained, dependent on the row ofof mounting holes used for the rear wheel. From spring 2008: Invacare Frame, footbow and backrest are manufactured from high quality titanium. For the Swing version the legrest hangers are made from aluminium. The cover for the seat cushion is made of Jemima and the backrest cover is made of nylon. XLT Active The new XLT is available in the models: XLT Active (75° knee angle) is designed to hold your feet and lower parts of your leg steady. The footbow is delivered as standard. Seat angles 0-14° can be obtained, depending on the size of castors and rear wheels and the row of mounting holes used for the castors and rear wheels. XLT Dynamic XLT Swing INVACARE® XLT Service Manual XLT Dynamic (90° knee angle) is desgned to hold your feet steady. The wheelchair is very compact and the total length is low. The footbow is delived as standard. Seat angles 0-14° can be obtained, depending on the size of castors and rear wheels and the row of mounting holes used for the castors and rear wheels. XLT Swing (80°, 90° and angle adjustable legrests) is desgned with a front offering more space for the feet and lower parts of the legs. The standard delivery includes collapsible footrests. Seat angles 0-14° can be obtained, depending on the size of castors and rear wheels and the row of mounting holes used for the castors and rear wheels. 5 NB! This symbol means warning. On this page a number of points affecting your personal safety are shown. Please Read it carefully! Invacare® is only responsible for product changes carried out by personnel who we authorise. We reserve the right to make any changes to equipment and specifications without prior notice. Failure to comply with instructions given may result in personal injury and/or product damage. • Check each of the following before using the wheelchair: - that all parts are attached securely to the frame - that all wheels and knobs are properly tightened - that all brakes and anti-tip devices function correctly • Never lift the wheelchair by the detachable armrests, footrests, backrest stay or by the adjustable push handles. Always apply the brake before getting into or out of the chair. Never stand on the footplates when getting into or out of the chair, because of the risk of tipping. Changing the seat angle always gives an increased risk of tipping over. The hand rims may become hot due to friction, and this may cause injury to your hands. Use extensively the anti-tip device Remember that the effectiveness of the carer-operated brake is reduced in wet and slippery conditions, as well as when on a slope. Be careful to ensure that the drive wheels are securely attached. Drive wheels are not to be detached while the user is sitting in the chair. The more the backrest cover’s Velcro straps are slackened the greater the risk of tipping the wheelchair becomes. Surfaces of the wheelchair like frame parts or upholstery can with long time exposure to sun reach temperatures over 41 °C. • • • • • • • • • • LIFTING THE WHEELCHAIR Always lift the wheelchair by grabbin the frame at the points shown in the picture. Never lift the wheelchair by the removable armrests or the footrests. Ensure that the backrest and push handles are securely in place. Also read the chapter Safety instructions/Propelling techniques. 6 INVACARE® XLT Service Manual Intended use • Invacare® XLT is a manual wheelchair aimed for those who use the wheelchair for a longer period of time, i.e. several hours in a row. • Invacare® XLT is designed for the user who can manoeuvre the wheelchair him/her-self, as well as for the user who requires assistance. • Invacare® XLT is versatile and has accessories that makes it possible to adjust the sitting posture so it stays comfortable for several hours. • Invacare® XLT have many adjustment possibilities. With the right adjustments, carried out by a professional the wheelchair can be set up specifically for a user and according to the requirements of his assistant. All adjustments that are possible, are described in the Owners Manual that is delivered together with the wheelchair. • Invacare® XLT can be used both indoors and outdoors on level ground and paved areas. We recommend the larger wheels when the wheelchair is used on uneven ground. • Note that there is an increased risk that the Invacare® XLT could tip backwards, when being wheeled uphill, especially when the incline is more than 8°. Or if the rear wheels are mounted in their formost position on the rear wheel attachment. The effect of mounting the rear wheels in their foremost position is that the chair will be easier to manoeuvre. However, there is the increased risk of tipping backwards. Therefore the use of anti tip devices to achieve better stability is strongly recommended. • Invacare® XLT is designed to have a seat cushion on the seat. The seat cushion improves the user's body posture and makes it possible for him to sit comfortably for longer periods of time. • INVACARE® XLT Service Manual XLT Swing with a backrest, adjusted to a height of minimum 48 cm, and a neckrest can be used as a seat in a vehicle. For other models or configurations the user must transfer to the normal seat in a car or bus. 7 Upholstery and frame colours Backrest cover Black Nylon TR33 Seat cushion cover Black Jermina TR18 (standard) Frame colours Black, Grey, Blue and Red (Blasted titanium and Orange as special) Equipment and accessories Invacare® XLT has a wide range of accessories and options. Some of the accessories may not be available in all countries. Backrest Tension adjustable Angle adjustable, fixed or height adjustable Narrow back Seat Tension and depth adjustable seat Seat cushions Standard 5 cm Flo-Tech Lite Flo-Tech Lite Visco Legrests Footbow rigid** Footbow rigid with footplate** Footrest one piece, flipup, angle adjustable Footrest, high mounted** 80° & 90° fixed legrest* Angle adjustable legrest* Fixed footplate* Angle and depth adjustable footplate* Armrests Flip-up armrest with long or short pad Height adjustable armrest "Rio", with long or short pad Hemi armrest Castors 75 - 125 mm (Dynamic), 75 - 180 mm (Swing, Active) Rear wheels 22", 24", 25", 26" pneumatic or puncture-proof 24", one-arm drive Brake User-brake (3 types) Carer-operated drumbrake One-arm brake Others Several types of handrims Spoke guard Anti-tip device Trunk Support Reflectors Kit Table Tray Pump Cane holder Tool kit Various push handles Pelvic belt Mudguard Sideguard Step tube Brake lever extension Mounting brackets for E-Motion and E-Fix 8 * for XLT Swing only ** for XLT Active and Dynamic only INVACARE® XLT Service Manual Technical data SW SD SH BH* AH LL SA BA W H L W ML TW Crash test** * Fixed/Angle adjustable backrest **Our wheelchairs comply with ISO norm 7176-19 and have been tested in a basic configuration. The use in other configurations has not been tested. See section "Test report from dynamic safety restraint test", for test configuration. Wheelchair users should however transfer to the vehicle seat and use the vehicle installed restraint system whenever it is feasible SW (cm) SD (cm) SH (cm)* BH (cm)* AH (cm) LL (cm)* SA (°) BA (°) W (cm)** H (cm) L (cm) W (kg) ML (kg) TW (kg)*** Active 35,5/38/40,5/43/45,5/48 Dynamic 35,5/38/40,5/43/45,5/48 Swing 35,5/38/40,5/43/45,5/48/50,5 36-40/41-45/46-50 40-52 36-40/41-45/46-50 40-52 36-40/41-45/46-50 20-35 / 30-49 21-31 38-50,5 0°-14° ±10° 20-35 / 30-49 21-31 35,5-48,5 0°-14° ±10° 39-52 20-35 / 30-49 21-31 28-51 0°-14° ±10° Seat width + 20 cm 61-105 83-103 9,8 135 6 Seat width + 20 cm 61-105 73-88 9,8 135 6 Seat width + 20 cm 61-105 82-123 11,3 135 6 * without seat cushion ** with 0° camber ***without rearwheels and accessories INVACARE® XLT Service Manual 9 Adjustments LEGRESTS It is important to adjust the footbow, footrests, legrests, footplates and calf pads to obtain a good seating position Height adjustment, footbow Loosen the screws using an Allen key, remove them, and adjust the footbow to the correct height. Retighten the screws and adjust the calf-strap. The distance between the lowest part of the footrest and the floor or ground must be at least 40 mm. Tools: 4 mm Allen Key 10 mm fixed spanner High mounted footbow Loosen the screws using an Allen key and adjust the clamp and footbow to a suitable height. Retighten the screws and adjust the calf-strap. Tools: 5 mm Allen Key Fixed legrests C A Height adjustment Adjust the height of the footrests by loosening the screw (A) one half turn with an Allen key. When adjusting the height a clicking sound will occur. One ”click” is one step in height. Pull the legrest until you have obtained the correct height and the screw is caught by one of the recesses on the legrest tube. Then retighten screw. NOTE! Do not adjust the upper screw (C). Tools: 5 mm Allen Key 10 The distance between the lowest part of the footrest and the floor or ground must be at least 40 mm. INVACARE® XLT Service Manual angle adjustable Legrests Angle adjustable legrests support the legs and reduce pressure. The legrests can be used for bandaged legs, but not for legs in plaster casts. The legrests must always be fitted with calf pads, footplates and heel straps. 1. A It is important to adjust the height and angle of the legrests to obtain a good seating position. 1. Height adjustment Loosen screw (A) with an Allen key. Adjust the legrest into a suitable height and the screw is caught by one of the recesses on the legrest tube. Then retighten the screw. Tools: 5 mm Allen Key B 2. Angle adjustment Pull the lever (B) with one hand while supporting the legrest with your other hand. When a suitable angle is obtained, let go of the lever and the legrest will look into one of seven preset positions (C). 2. Do not place anything heavy, or let children sit on the legrest. It may cause damage to the mechanism. C The distance between the lowest part of the footrest and the ground must be at least 40 mm. Calf pads/ Footplates C D B Calf pads The calf pads can be fitted in four different depth positions. Swing the pad forwards. Unscrew screw (B) using an Allen key. Remove the large nut (C) on the reverse side and place it in the other attachment hole. Move the calf pad to the new position and secure it into place with the screw. The height of the calf pads can easily be adjusted using the handwheel (D). Tools: 5 mm Allen Key Depth- and angle adjustable footplates Adjust the angle and the depth by loosening the screw (A) at the footplate attachment with a 5 mm Allen key. Adjust the footplate to the correct position and retighten the screw. A Do not place anything on the footplate when the screws have been loosened. Tools: 5 mm Allen Key INVACARE® XLT Service Manual 11 Footrests one-piece A 1. 1. Footrest, one piece Adjust the angle by loosening the four screws (A) on the footplate attachment with a 4 mm Allen key. Adjust the footplate to the correct position and retighten the screws. Do not place anything on the footplate when the screws have been loosened. Tools: 4 mm Allen Key 10 mm fixed spanner 2. The footrest can be flipped up. Lift the right side of the footrest upwards. 2. Be careful not to trap your fingers between the footrest and the receiver when you fold down the footrest. 1. A 1. Footrest, one piece (XLT Swing) Adjust the angle and the depth by loosening the two screws (A) on the footplate attachment with a 5 mm Allen key. Adjust the footplate to the correct position and retighten the screws. Do not place anything on the footplate when the screws have been loosened. Tools: 2. 5 mm Allen Key 2. The footrest can be flipped up. Lift the left side of the footrest upwards. Be careful not to trap your fingers between the footrest and the receiver when you fold down the footrest. 12 INVACARE® XLT Service Manual SEAT 1. 1. Adjusting the seat depth Lift up the front part, slide into required depth. 2. 2. Adjusting the shape (tension adjustable seat) Use the straps underneath the seat to adjust the shape of the seat. Always have a cushion on the seat when testing its adjusted shape. INVACARE® XLT Service Manual 13 BACKREST 1. Angle adjustment 1. The backrest can be mounted in two different positions, each with the possibility to change the angle of the backrest. The angle is infinitely variable by ±10 degrees. The backrest tube has an 8 degree bend towards the back. 2. 2. If you want to tilt the backrest forwards, position the eccentric (hexagon) plate in the position furthest back (as in the illustration). You can then adjust the tilt of the backrest to maximum –10°. 3. 3. If you want to tilt the backrest backwards, position the eccentric (hexagon) plate in the position furthest to the front. You can then adjust the angle to maximum +10°. 4. 4 Move the eccentric (hexagon) plate by loosening the socket cap screw on the plate. Hold the inner nut firmly in place using a 10 mm fixed spanner. Remove the plate, push the backrest to the desired angle, move the plate forwards or backwards and mount it in that position. Hold the nut steady from the inside, and retighten the socket cap screw with the Allen key. Tools: 4 mm Allen Key 10 mm fixed spanner 14 INVACARE® XLT Service Manual Angle adjustment, fine adjustments When you have decided the direction in which you want to tilt the backrest, it is time to make the fine adjustments, i.e. adjusting the backrest to suit your body. Proceed as follows: 1. A Tools: B 4 mm Allen key 10 mm fixed spanner 1. Loosen the four nuts (B) on the inside of the backrest tubes with 1- 2 turns with a 10 mm fixed spanner. Hold screws (A) firmly in place with a 4 mm Allen key. 2. Then, using a 24 mm fixed spanner, turn the plates – a little at a time, first on one side of the chair, then on the other side. By this alternating procedure, you can adjust the tilt of the backrest. 2. Note! You must alternate between the two plates whenever you turn them, otherwise, the backrest could become twisted, and its ergonomic advantages will be lost. Tools: 24 mm fixed spanner 3. Once you have found the right position, retighten the nuts on the inside. Hold the screws (A) firmly in place with the Allen key. 3. A B Tools: The tip risk increases the further back the backrest is tilted. We recommend the use of anti-tip devices. 4 mm Allen key 10 mm fixed spanner INVACARE® XLT Service Manual 15 4. Adjust the shape of the backrest by adjusting the Velcro straps. The user should be seated in the chair when the Velcro straps are adjusted. When adjustment is complete fold the backcloth back into position and secure it with the Velcro straps. 4. When you loosen the backrest, the tip-risk increases. We recommend the use of anti-tip devices. For backrest heights of more than 35 cm use a backrest extension. Height adjustment With the height-adjustable backrest it is possible to adjust the backrest height to suit the user without changing the backframe. Proceed as follows: Loosen and remove screws (A) and the small plastic bracket (B) on the back of the back support. Adjust the backrest extension to the desired height and refit the screws. A Tools: 16 4 mm Allen key B INVACARE® XLT Service Manual ARMRESTS/MUDGUARD Adjusting the height of the armrests 1. 1. Flip up armrest If your chair is equipped with armrests that can be raised or lowered, this is achieved by loosening the screw (A), moving the armrest into the required position and retightening the screw. When adjusting the height, do not place your fingers between armrest pad and side plate as they may get trapped. A Tools: 5 mm Allen key. 2. Detachable armrest If your chair is equipped with armrests that can be raised or lowered, this is achieved by pulling up the armrest and loosening the screw (B) under the armrest. Move the screw up or down to the desired position and retighten the screw. Lower the armrest again. 2. Tools: 5 mm Allen key. B When adjusting the height do not place your fingers between seat tube and side plate as they may get trapped. 3. Mudguard Adjust the height of the mudguard by pulling up the mudguard and loosening the screw (C). Move the screw up or down to the desired position and retighten the screw. Insert the mudguard again in it's attachment. 3-4. D When adjusting the height do not place your fingers between seat tube and side plate as they may get trapped. C Tools: 3 mm Allen key 5 mm Allen key 4. To adjust the depth of the mudguard, unscrew screws (D) using an Allen key. Move the mudguard into the required position and fasten the screws again. 5. F Tools: 5 mm Allen key. 5. Adjusting the play The armrests and mudguards are equipped with adjustable supports that enables you to reduce the play when pulling up or pushing down the tubes. Tighten or loosen the screws (F) in the four corners as needed. Take care not to loosen the two middle screws. These attach the supports to the frame. Take care that your fingers do not get caught between armrest/mudguard and tyre. INVACARE® XLT Service Manual 17 BRAKES 1. A B Tool: 5 mm Allen key 2. Adjusting the brake 1. Check that the tyres are inflated to the correct air pressure as indicated on the side of the tyre. Then use an Allen key to loosen the screws (A) and slide the brake and brake attachement to the desired position and tighten. The correct distance between the brake pin (B) and the tyre, when the brake is disengaged, is approx. 15 mm. The brake pin should be in a horizontal position. Incorrect adjustments or use of the brake can reduce their performance. 2. Using the Standard brake Apply the brake by pushing the brake lever forwards until it reaches the stopper. Release the brake by pulling back the brake lever. Take care not to trap your fingers between brake shaft and tyre. When the standard brake is applied, the brake lever can be pushed backwards without disengaging the brakes. This is to prevent the brakes from accidentally disengaging during transfer to and from the wheelchair. 3. 3. Using the Performance brake Apply the brake by pushing the brake lever forwards until it reaches the stopper. Release the brake by pulling back the brake lever. Take care not to trap your fingers between brake shaft and tyre. 4. 4. Using the Active brake Apply the brake by pulling the brake lever forwards (on the side of, or between your legs) until it reaches the stopper. Release the brake by pushing the brake lever back (on the side of, or between your legs). Take care not to trap your fingers between brake shaft and tyre. 18 INVACARE® XLT Service Manual Rear wheels By changing the position of the rearwheel on the rearwheel attachment you can alter both the rear seat height and the manoeuvrability/stability of the wheelchair. The further forward the rearwheel is positioned, the more manoeuvrable your chair becomes, but with reduced stability. B 1. 1. To alter the height position of the rearwheel plate, use an Allen key to hold the screws (A) in place and loosen nuts (B) with a fixed spanner. Choose the new position and fasten the screws. A Always remember to adjust the brakes, when the rearwheel position has been changed. Tools: 5 mm Allen Key 10 mm spanner D 2. 2. To move the rearwheel (either backwards or forwards) on the rearwheel attachment, first remove the nut (C), adjust the axle housing (D) to the required position and then refasten the nut. C The tip risk increases if the rear wheels are located in front of the backrest. Use anti-tip devices. Tools: 24 mm spanner Always remember to adjust the brakes, when the rearwheel position has been changed. When you have fitted the wheels in the correct position, it is important that you check thoroughly that the nuts and screws are tightened securely. This is important for your own safety! Camber The cambered rearwheel plate is mounted and adjusted in the same way as the original rearwheel plate, see above. 1. A INVACARE® XLT Service Manual B 1. Make sure that the rib (A) on the rearwheel plate and the chamfer (B) on the camber block is placed downwards. 19 Castor WHEELS 90º The manoeuverability of the wheelchair is very much dependent on the castors and their position relative to the ground surface. The angle between the castors and the ground should be 90 degrees. Adjusting the castor angle To adjust the castor angle, loosen nuts (A) with 1-2 turns with a fixed spanner, while holding screws (B) firmly in place with a 4 mm Allen key. B Adjust the castor housing to desired angle by inserting the 5 mm Allen key in the hexagon hole (C) and turning it to the desired angle. Retighten nuts (A). A Check that the castor is securely fitted after replacement. C Tools: 4 mm Allen key 5 mm Allen key 10 mm fixed spanner 20 INVACARE® XLT Service Manual XLT Active SHf 7 5 3 1 SHr 6 4 2 2 A BCD SHf SHr 1 2 3 4 L=75 7 4 3 1 L=110 L L=150 mm * 5 6 40 39 38 2 22" 40 75 (3") 41 41 40 39 38 1 75 (3") 41 41 40 39 38 2 100 (4") 42 41-42 40 39 38 1 100 (4") 43 43 41-42 40 39 38 2 75 (3") 43 43 41-42 40 39 38 4 125 (5") 43 43 41-42 40 39 38 3 100 (4") 43 43 41-42 40 39 38 44 44 43 41-42 40 39 38 1 4 140 (5,5") 125 (5") 44 44 43 41-42 40 39 38 1 75 (3") 44 44 43 41-42 40 39 38 3 125 (5") 44 44 43 41-42 40 39 38 2 100 (4") 45 45 44 43 41-42 40 39 38 3 140 (5,5") 45 45 44 43 41-42 40 39 38 1 100 (4") 45 45 44 43 41-42 40 39 38 2 125 (5") 45 45 44 43 41-42 40 39 38 3 150 (6") 46 45 44 43 41-42 40 39 38 2 140 (5,5") 47 45 44 43 41-42 40 39 38 1 125 (5") 47 45 44 43 41-42 40 39 38 2 47 45 44 43 41-42 40 39 38 2 75 (3") 47 45 44 43 41-42 40 39 38 3 100 (4") 47 45 44 43 41-42 40 39 38 47 45 44 43 41-42 40 39 48 45 44 43 41-42 40 39 48 45 44 43 41-42 40 39 1 150 (6") 48 45 44 43 41-42 40 39 2 180 (7") 48 45 44 43 41-42 40 1 75 (3") 48 45 44 43 41-42 40 2 100 (4") 48 45 44 43 41-42 40 3 125 (5") 48 45 44 43 41-42 40 4 150 (6") 49 45 44 43 41-42 40 3 140 (5,5") 49 45 44 43 41-42 40 49 45 44 43 41-42 1 100 (4") 50 45 44 43 41-42 2 125 (5") 50 45 44 43 41-42 3 150 (6") 50 45 44 43 4 180 (7") 50 45 44 43 2 140 (5,5") 51 45 44 43 1 125 (5") 51 45 44 43 2 150 (6") 51 45 44 43 3 180 (7") 51 45 44 43 1 140 (5,5") 52 45 44 1 150 (6") 52 45 44 2 180 (7") 150 (6") 4 1 125 (5") 140 (5,5") 4 1 140 (5,5") 180 (7") * = Not applicable SD =seat depth INVACARE® XLT Service Manual 21 XLT Active SHf 7 5 3 1 SHr 6 4 2 2 A BCD SHf SHr 1 2 3 4 5 L=75 6 4 3 1 L=110 L L=150 mm * 7 24"/25" Low profile 40 40 2 41 41 40 1 75 (3") 41 41 40 2 100 (4") 1 42 75 (3") 41-42 40 43 43 41-42 40 2 75 (3") 43 43 41-42 40 4 125 (5") 43 43 41-42 40 3 100 (4") 43 43 41-42 40 44 43 41-42 40 4 140 (5,5") 44 44 44 100 (4") 1 125 (5") 43 41-42 40 1 75 (3") 44 43 41-42 40 3 125 (5") 44 43 41-42 40 2 100 (4") 45 45 44 43 41-42 40 3 140 (5,5") 45 45 44 43 41-42 40 1 100 (4") 45 45 44 43 41-42 40 2 125 (5") 45 45 44 43 41-42 40 3 150 (6") 46 46 45 44 43 41-42 40 2 140 (5,5") 47 46-47 45 44 43 41-42 40 1 125 (5") 47 46-47 45 44 43 41-42 40 2 47 46-47 45 44 43 41-42 40 2 75 (3") 47 46-47 45 44 43 41-42 40 3 100 (4") 47 46-47 45 44 43 41-42 40 4 125 (5") 47 150 (6") 46-47 45 44 43 41-42 40 48 48 46-47 45 44 43 41-42 40 1 140 (5,5") 48 48 46-47 45 44 43 41-42 40 48 48 46-47 45 44 43 41-42 40 48 48 46-47 45 44 43 41-42 40 1 75 (3") 48 48 46-47 45 44 43 41-42 40 2 100 (4") 48 48 46-47 45 44 43 41-42 40 3 125 (5") 48 48 46-47 45 44 43 41-42 40 4 150 (6") 49 48 46-47 45 44 43 41-42 40 3 140 (5,5") 49 48 46-47 45 44 43 41-42 40 49 48 46-47 45 44 43 41-42 40 1 100 (4") 50 48 46-47 45 44 43 41-42 40 2 125 (5") 50 48 46-47 45 44 43 41-42 3 150 (6") 50 48 46-47 45 44 43 41-42 4 180 (7") 50 48 46-47 45 44 43 41-42 2 140 (5,5") 51 48 46-47 45 44 43 41-42 1 125 (5") 51 48 46-47 45 44 43 41-42 2 150 (6") 51 48 46-47 45 44 43 41-42 3 180 (7") 51 48 46-47 45 44 43 1 140 (5,5") 52 48 46-47 45 44 43 1 150 (6") 52 48 46-47 45 44 43 2 180 (7") 4 1 * D1-4 (SD40) 150 (6") 2 180 (7") 1 * D1-5 (SD40) * D1-3 (SD40) 140 (5,5") 180 (7") * = Not applicable SD =seat depth 22 INVACARE® XLT Service Manual XLT Active SHf 7 5 3 1 SHr 6 4 2 2 A BCD SHf SHr 1 2 3 4 5 6 L=75 4 3 1 L=110 L L=150 mm * 7 26" Low profile 41 41 41 1 75 (3") 100 (4") 41 2 42 42 41 1 43 42-43 41 2 75 (3") 43 42-43 41 4 125 (5") 43 42-43 41 3 100 (4") 43 42-43 41 100 (4") 1 125 (5") 44 44 42-43 41 4 140 (5,5") 44 44 42-43 41 1 75 (3") 44 44 42-43 41 3 125 (5") 44 44 42-43 41 2 100 (4") 45 45 44 42-43 41 3 140 (5,5") 45 45 44 42-43 41 1 100 (4") 45 45 44 42-43 41 2 125 (5") 45 45 44 42-43 41 3 150 (6") 46 * D4 (SD40) 46 45 44 42-43 41 2 140 (5,5") 47 47 46 45 44 42-43 41 1 125 (5") 47 47 46 45 44 42-43 41 2 150 (6") 47 47 46 45 44 42-43 41 2 75 (3") 47 47 46 45 44 42-43 41 3 100 (4") 47 47 46 45 44 42-43 41 47 47 46 45 44 42-43 41 48 47-48 46 45 44 42-43 41 48 47-48 46 45 44 42-43 41 * D2 (SD40) 1 48 47-48 46 45 44 42-43 41 * D2-6 (SD40) 2 48 47-48 46 45 44 42-43 41 1 75 (3") 48 47-48 46 45 44 42-43 41 2 100 (4") 48 47-48 46 45 44 42-43 41 3 125 (5") 48 47-48 46 45 44 42-43 41 4 150 (6") 3 140 (5,5") * D2 (SD40) 4 1 125 (5") 140 (5,5") 4 140 (5,5") 150 (6") 180 (7") 49 49 47-48 46 45 44 42-43 41 49 49 47-48 46 45 44 42-43 41 49 49 47-48 46 45 44 42-43 41 1 100 (4") 50 49 47-48 46 45 44 42-43 41 2 125 (5") 50 49 47-48 46 45 44 42-43 41 * D1 (SD40) 3 150 (6") 50 49 47-48 46 45 44 42-43 41 * D1-6 (SD40) 4 180 (7") 50 49 47-48 46 45 44 42-43 41 2 140 (5,5") 51 49 47-48 46 45 44 42-43 41 1 125 (5") 51 49 47-48 46 45 44 42-43 41 2 150 (6") 51 49 47-48 46 45 44 42-43 41 51 49 47-48 46 45 44 42-43 41 52 49 47-48 46 45 44 42-43 52 49 47-48 46 45 44 42-43 * C1,D1-7 (SD40) *D1-6 (SD40) * D1-7 (SD40) 1 180 (7") 3 180 (7") 1 140 (5,5") 1 150 (6") 2 180 (7") * = Not applicable SD =seat depth INVACARE® XLT Service Manual 23 XLT Dynamic SHf 7 5 3 1 SHr 6 4 2 2 A BCD SHf SHr 1 2 3 4 5 L=75 6 4 3 1 L=110 L L=150 mm * 7 22" 39 39 38 2 40 40 39 38 1 75 (3") 41 40 39 38 2 100 (4") 1 42 75 (3") 41-42 40 39 38 43 43 41-42 40 39 38 2 75 (3") 43 43 41-42 40 39 38 4 125 (5") 43 43 41-42 40 39 38 3 100 (4") 43 43 41-42 40 39 38 44 44 43 41-42 40 39 38 44 44 43 41-42 40 39 38 44 44 43 41-42 40 39 38 * D3 (SD40) 100 (4") 1 * D2 (SD40) 125 (5") 1 75 (3") 3 125 (5") 2 100 (4") 45 45 44 43 41-42 40 39 38 1 100 (4") 45 45 44 43 41-42 40 39 38 * D1 (SD40) 2 125 (5") 46 45 44 43 41-42 40 39 38 * D1 (SD40) 1 125 (5") 47 45 44 43 41-42 40 39 2 75 (3") 47 45 44 43 41-42 40 39 3 100 (4") 47 45 44 43 41-42 40 39 4 125 (5") 48 45 44 43 41-42 40 1 75 (3") 48 45 44 43 41-42 40 2 100 (4") 48 45 44 43 41-42 40 3 125 (5") 49 45 44 43 41-42 1 100 (4") 49 45 44 43 41-42 2 125 (5") 50 45 44 43 1 125 (5") 24" / 25" Low profile 40 40 1 75 (3") 41 40 2 100 (4") 41-42 40 1 100 (4") 42 43 43 41-42 40 * D5 (SD40) 2 75 (3") 43 43 41-42 40 * D1-7 (SD40) 4 125 (5") 43 43 41-42 40 * D5 (SD40) 3 100 (4") 43 43 41-42 40 * D1-7 (SD40) 44 44 43 41-42 40 * D4-5 (SD40) 1 75 (3") 44 44 43 41-42 40 * D1-7 (SD40) 3 125 (5") 44 44 43 41-42 40 * D4 (SD40) 2 100 (4") 45 44 43 41-42 40 * D3-4 (SD40) 1 100 (4") 125 (5") 45 45 24 1 125 (5") 45 44 43 41-42 40 * D3-6 (SD40) 2 46 46 45 44 43 41-42 40 * D2-6 (SD40) 1 47 46-47 45 44 43 41-42 40 * D2-4 (SD40) 2 75 (3") 47 46-47 45 44 43 41-42 40 * D2-4 (SD40) 3 100 (4") 47 46-47 45 44 43 41-42 40 * D2-5 (SD40) 4 125 (5") 125 (5") 48 48 46-47 45 44 43 41-42 40 * D1-4 (SD40) 1 75 (3") 48 48 46-47 45 44 43 41-42 40 * D1-4 (SD40) 2 100 (4") 48 48 46-47 45 44 43 41-42 40 * D1-5 (SD40) 3 125 (5") 49 48 46-47 45 44 43 41-42 * D1-4 (SD40) 1 100 (4") 49 48 46-47 45 44 43 41-42 * D1-4 (SD40) 2 125 (5") 50 48 46-47 45 44 43 * D1-7 (SD40) 1 125 (5") * = Not applicable, SD =seat depth INVACARE® XLT Service Manual XLT Dynamic SHf 7 5 3 1 SHr 6 4 2 2 A BCD SHf SHr 1 2 3 4 5 6 L=75 4 3 1 L=110 L L=150 mm * 7 26" Low profile 42 41 * D1-7 (SD40) 43 42-43 41 * D1-7 (SD40) 2 75 (3") 43 42-43 41 * D1-7 (SD40) 4 125 (5") 43 42-43 41 * D1-7 (SD40) 3 100 (4") 43 42-43 41 * D1-7 (SD40) 42-43 41 * D1-7 (SD40) 1 75 (3") 42-43 41 * D1-7 (SD40) 3 125 (5") 44 42-43 41 * D1-7 (SD40) 2 100 (4") 44 44 44 44 1 100 (4") 1 125 (5") 45 45 44 42-43 41 * D1-7 (SD40) 1 100 (4") 45 45 44 42-43 41 * D1-7 (SD40) 2 125 (5") 46 45 44 42-43 41 * D1-7 (SD40) 1 125 (5") 46 47 47 46 45 44 42-43 41 * D1-7 (SD40) 2 75 (3") 47 47 46 45 44 42-43 41 * D1-7 (SD40) 3 100 (4") 47 47 46 45 44 42-43 41 * D1-7 (SD40) 4 125 (5") 48 47-48 46 45 44 42-43 41 * D1-7 (SD40) 1 75 (3") 48 47-48 46 45 44 42-43 41 * D1-7 (SD40) 2 100 (4") 48 47-48 46 45 44 42-43 41 * D1-7 (SD40) 3 125 (5") 49 49 47-48 46 45 44 42-43 41 * D1-7 (SD40) 1 100 (4") 49 49 47-48 46 45 44 42-43 41 * D1-7 (SD40) 2 125 (5") 50 49 47-48 46 45 44 42-43 * D1-7 (SD40) 1 125 (5") * = Not applicable SD =seat depth INVACARE® XLT Service Manual 25 XLT Swing SHf 7 5 3 1 SHr 6 4 2 2 A BCD SHf SHr 1 2 3 4 5 6 L=75 4 3 1 L=110 L L=150 mm * 7 22" 39 39 38 2 75 (3") 40 39 38 1 75 (3") 40 39 38 2 100 (4") 41-42 40 39 38 1 41-42 40 39 38 2 40 41 41 42 43 43 75 (3") 43 43 41-42 40 39 38 4 125 (5") 43 43 41-42 40 39 38 3 100 (4") 43 26 100 (4") 43 41-42 40 39 38 44 44 43 41-42 40 39 38 1 4 140 (5,5") 125 (5") 44 44 43 41-42 40 39 38 1 75 (3") 44 44 43 41-42 40 39 38 3 125 (5") 44 44 43 41-42 40 39 38 2 100 (4") 3 140 (5,5") 45 45 44 43 41-42 40 39 38 45 45 44 43 41-42 40 39 38 * D1-2 (SD40) 1 100 (4") 45 45 44 43 41-42 40 39 38 2 125 (5") 38 45 45 44 43 41-42 40 39 46 45 44 43 41-42 40 39 * D1-4 (SD40) 47 45 44 43 41-42 40 39 47 45 44 43 41-42 40 39 47 45 44 43 41-42 40 39 2 * D1-2 (SD40) 3 150 (6") 2 140 (5,5") 1 125 (5") 2 150 (6") 75 (3") 47 45 44 43 41-42 40 39 3 100 (4") 47 45 44 43 41-42 40 39 4 125 (5") 47 45 44 43 41-42 40 * D1-2 (SD40) 48 45 44 43 41-42 40 * D1-2 (SD40) 4 140 (5,5") 48 45 44 43 41-42 40 * D1-3 (SD40) 1 * D1-7 (SD40) 2 48 45 44 43 41-42 40 48 45 44 43 41-42 40 48 45 44 43 41-42 48 45 44 43 41-42 48 45 44 43 41-42 40 49 45 44 43 41-42 140 (5,5") 150 (6") 180 (7") 1 75 (3") 40 2 100 (4") 40 3 125 (5") 4 150 (6") 3 140 (5,5") * D1-2 (SD40) * C1-2,D1-7 (SD40) + D1-2 (SD45) 49 45 44 43 49 45 44 43 41-42 1 50 45 44 43 41-42 2 125 (5") 50 45 44 43 41-42 * D1-2 (SD40) 3 150 (6") 50 45 44 43 41-42 * D1-7 (SD40) 4 180 (7") 50 45 44 43 2 140 (5,5") 51 45 44 43 1 125 (5") 51 45 44 43 2 150 (6") 51 45 44 43 3 180 (7") 51 45 44 1 140 (5,5") 52 45 44 * D1-7 (SD40) 1 150 (6") 52 45 44 * D1-7 (SD40) 2 180 (7") * = Not applicable SD =seat depth 41-42 1 * C1,D1-7 (SD40) + D1 1 180 (7") 100 (4") INVACARE® XLT Service Manual XLT Swing SHf 7 5 3 1 SHr 6 4 2 2 A BCD SHf SHr 1 2 3 4 5 6 L=75 4 3 1 L=110 L L=150 mm * 7 24"/25" Low profile 40 40 2 75 (3") 41 40 1 75 (3") 41 41 40 2 100 (4") 42 41-42 40 1 43 41-42 40 2 75 (3") 41 100 (4") 43 43 41-42 40 4 125 (5") 43 43 41-42 40 3 100 (4") 4 140 (5,5") 43 44 43 41-42 40 44 44 43 41-42 40 1 44 44 43 41-42 40 1 75 (3") 44 44 43 41-42 40 3 125 (5") 44 44 43 41-42 40 2 100 (4") * D4-6 (SD40) 45 45 44 43 41-42 40 3 140 (5,5") 45 45 44 43 41-42 40 1 100 (4") 45 45 44 43 41-42 40 2 125 (5") 45 * D3-6 (SD40) 125 (5") 45 44 43 41-42 40 * D1-7 (SD40) 3 150 (6") 46 46 45 44 43 41-42 40 * D2-5 (SD40) 2 140 (5,5") 47 46-47 45 44 43 41-42 40 * D1 (SD40) 1 125 (5") 47 46-47 45 44 43 41-42 40 * D2-6 (SD40) 2 47 46-47 45 44 43 41-42 40 2 75 (3") 47 46-47 45 44 43 41-42 40 3 100 (4") 47 46-47 45 44 43 41-42 40 4 125 (5") 47 150 (6") 46-47 45 44 43 41-42 40 * D1-5 (SD40) 48 48 46-47 45 44 43 41-42 40 * D1-4 (SD40) 1 140 (5,5") 48 48 46-47 45 44 43 41-42 40 1 48 48 46-47 45 44 43 41-42 40 2 48 48 46-47 45 44 43 41-42 40 1 75 (3") 48 48 46-47 45 44 43 41-42 40 2 100 (4") 48 48 46-47 45 44 43 41-42 40 3 125 (5") 48 48 46-47 45 44 43 41-42 40 4 150 (6") 49 48 46-47 45 44 43 41-42 3 140 (5,5") 49 48 46-47 45 44 43 41-42 49 48 46-47 45 44 43 41-42 1 100 (4") 50 48 46-47 45 44 43 41-42 2 125 (5") 50 48 46-47 45 44 43 41-42 * D1-7 (SD40) 3 150 (6") 50 48 46-47 45 44 43 * C1-7,D1-7 (SD40) + D1-7 (SD45) 4 180 (7") 50 48 46-47 45 44 43 * D1-3 (SD40) 2 140 (5,5") 51 48 46-47 45 44 43 1 125 (5") 51 48 46-47 45 44 43 * D1-7 (SD40) 2 150 (6") 43 * C1-7,D1-7 (SD40) + D1-7 (SD45) 3 180 (7") 4 * D1-6 (SD40) * D1-4 (SD40) 140 (5,5") 150 (6") 180 (7") 1 180 (7") 51 48 46-47 45 44 51 48 46-47 45 44 * D1-3 (SD40) 1 140 (5,5") 52 48 46-47 45 44 * D1-7 (SD40) 1 150 (6") 52 48 46-47 45 44 * C1-7,D1-7 (SD40) + D1-7 (SD45) 2 180 (7") INVACARE® XLT Service Manual * = Not applicable, SD =seat depth 27 XLT Swing 7 5 3 1 SHr SHf 6 4 2 2 A BCD SHf SHr 1 2 3 4 5 6 L=75 4 3 1 L=110 L L=150 mm * 7 26" Low profile 41 41 1 75 (3") 41 41 2 100 (4") 1 42 42 41 43 42-43 41 2 75 (3") 43 42-43 41 4 125 (5") 43 42-43 41 3 100 (4") 43 42-43 41 * D6 (SD40) 42-43 41 * D1-7 (SD40) 42-43 41 44 42-43 41 44 44 44 44 44 1 125 (5") 4 140 (5,5") 1 75 (3") 3 125 (5") 44 42-43 41 2 100 (4") 45 45 44 42-43 41 * D1-7 (SD40) 3 140 (5,5") 45 45 44 42-43 41 * D4 (SD40) 1 100 (4") 45 45 44 42-43 41 * D4 (SD40) 2 125 (5") 45 45 44 42-43 41 * C4-5,D1-7 (SD40) + D4-5 (SD45) 3 150 (6") 46 46 45 44 42-43 41 * D1-7 (SD40) 2 140 (5,5") 47 47 46 45 44 42-43 41 * D2-4 (SD40) 1 125 (5") 47 47 46 45 44 42-43 41 * C2-3,D1-7 (SD40) + D2-3 (SD45) 2 47 47 46 45 44 42-43 41 47 47 46 45 44 42-43 41 * D2-3 (SD40) 47 47 46 45 44 42-43 41 * D2-3 (SD40) 47 47 46 45 44 42-43 41 * D1-7 (SD40) 48 47-48 46 45 44 42-43 41 * D1-7 (SD40) 48 47-48 46 45 44 42-43 41 * C2-3,D1-7 (SD40) + D2-3 (SD45) 1 150 (6") * B2,C1-7,D1-7 (SD40) + D1-7 (SD45) 2 180 (7") 150 (6") 2 75 (3") 3 100 (4") 4 1 125 (5") 140 (5,5") 4 140 (5,5") 48 47-48 46 45 44 42-43 41 48 47-48 46 45 44 42-43 41 1 75 (3") 48 47-48 46 45 44 42-43 41 * D2-3 (SD40) 2 100 (4") 48 47-48 46 45 44 42-43 41 * D2-3 (SD40) 3 125 (5") 48 28 * D5-6 (SD40) 100 (4") 47-48 46 45 44 42-43 41 * D1-7 (SD40) + D2 (SD45) 4 150 (6") 49 49 47-48 46 45 44 42-43 41 * D1-6 (SD40) 3 140 (5,5") 49 49 47-48 46 45 44 42-43 41 * B1-4,C1-3,D1-7 (SD40) + C1-2,D1-7 (SD45) 49 49 47-48 46 45 44 42-43 41 * D1-2 (SD40) 1 100 (4") 50 49 47-48 46 45 44 42-43 41 * D1-2 (SD40) 2 125 (5") 50 49 47-48 46 45 44 42-43 41 * C1-3,D1-7 (SD40) + D1-3 (SD45) 3 150 (6") 41 * B1,C1-7,D1-7 (SD40) + D1-7 (SD45) 4 180 (7") * D1-6 (SD40) 2 140 (5,5") 1 180 (7") 50 49 47-48 46 45 44 42-43 50 49 47-48 46 45 44 42-43 51 49 47-48 46 45 44 42-43 * D1-2 (SD40) 1 125 (5") 51 49 47-48 46 45 44 42-43 * C1,D1-7 (SD40) + D1 (SD45) 2 150 (6") 51 49 47-48 46 45 44 42-43 * B1-2,C1-7,D1-7 (SD40) + C1-2,D1-7 (SD45) 3 180 (7") 51 49 47-48 46 45 44 * D1-7 (SD40) 1 140 (5,5") 52 49 47-48 46 45 44 * C1,D1-7 (SD40) + D1 (SD45) 1 150 (6") 52 49 47-48 46 45 44 * C1-7,D1-7 (SD40) + D1-7 (SD45) 2 180 (7") * = Not applicable SD =seat depth INVACARE® XLT Service Manual Accessories ANTI-TIP DEVICEs The anti-tip device is foldable and adjustable in both height and depth. Please pay special attention to the placement of the anti-tip device when in use. A sticker will warn you if the anti-tip device is not activated. 1. When the extended rear wheel attachment is used an extended anti-tip device is recommended, see next page. 1. Mounting Remove the back screws (A) and nuts on the rear wheel attachment. Insert the Anti-tip device in the holes in the rear part of the chassis. Fit the anti-tip device on the screws and tighten. A Tools: 4 mm Allen Key 2. B 2. Adjusting height To adjust the height press the two knobs (B) on each side of the housing and pull the tube (C) to desired set of holes. The knobs will lock the tube into position. C 3. 3. Adjusting depth To adjust the depth press knob (D) and pull the wheel tube out to desired depth. The knob will lock the tube into position. The distance between the anti-tip wheel and the ground, and the distance between the antitip wheel and rear wheel, should be approx. 5 cm. D 4. Do not use knobs (B) to fold or unfold the anti-tip device. E 4. Folding To swing the anti-tip device under the wheelchair, press the cap (E) downwards and then sideways. NOTE! A red warning sticker can now be seen. To activate the anti-tip device, just swing it back in place and it will lock into position automatically. NOTE! When the anti-tip device is correctly activated the warning sticker will be hidden. Use your foot when folding the anti-tip device. If you do it by hand, there is an increased risk that you will trap your fingers between the anti-tip housing and the tube. For safety reasons we recommend the use of two anti-tip devices Never forget to fold down the anti-tip devices or the wheelchair may tip over. Make sure the anti-tip device is securely locked before use. Use extended anti-tip devices when an extended rear weel attachment is used. INVACARE® XLT Service Manual 29 A This extended anti-tip device is primarily used when an extended rear wheel attachment is used. It can also be used with the standard rear wheel attachment. 1. Tool: 5 mm Allen key 2. Anti-tip device, extended The anti-tip device also acts as a step tube. It is height adjustable and easy to adjust. 1. Attach the anti-tip device to the frame tube with brackets and screws (A). 2. Lift the spring loaded button and select the required height. Ensure that the anti-tip device locks into its new position. Never forget to fold down the anti-tip devices or the wheelchair may tip over. The distance between the anti-tip wheel and the ground, and the distance between the antitip wheel and rear wheel, should be approx. 5 cm. For safety reasons we recommend the use of two anti-tip devices 30 INVACARE® XLT Service Manual TRUNK SUPPORT 1a. The trunk support can be swung away or lifted out of its holder. The height, depth and sideways positions are easy to adjust. A B Height adjustment 1a. Adjust the height by first slackening the screws (A) with an Allen key and then sliding the holder (B) up or down to the required position. Re-tighten screws. Tool: 4 mm Allen key b.The bracket (C) can also be adjusted up or down by first removing the screws (D) on the attachments with an Allen key. Move the bracket up or down to the required position. Re-tighten screws. b. C D Tool: 4 mm Allen key 2. E 2. Depth adjustment Open the zip on the cover to reach screws (E) and slacken with a screw driver. Adjust the trunk support to the desired position. Re-tighten screws and close the zip. Tool: Screw driver 3. Angle adjustment Remove the cover on the arm of the trunk support to reach the screws and nuts and slacken them. Remember to secure tightly when the desired position has been achieved. 3. Be careful not to catch your thumb between the trunk support and the wheel when propelling the chair. Tool: 5 mm Allen key 13 mm fixed spanner INVACARE® XLT Service Manual 31 ONE-ARM DRIVE The quick release one-arm drive allows the user to propel the wheelchair with one hand. Two hand rims are mounted on the same rear wheel. The one-arm drive wheel can be mounted on either the left or the right side. A 1. 1a.Detaching the wheel Pull the knob (A) and remove the wheel from the hub. 1b.Attaching the wheel Pull the knob (A) and push the wheel back onto the hub. It is very important that you check that the locking pin has actually locked the wheel into position when the knob has been released. Take hold of the wheels and try to detach them. This should NOT be possible. The hand rims can be positioned either level with each other (internal position) or with the inner, smaller hand rim protruding slightly (external position). 2. Changing the position of the hand rims Unscrew the three screws (B), remove the hand rim and turn it over. Put it back into position and firmly retighten the three screws. 2. Take care when removing the telescopic transmission shaft. Point it away from the body when releasing the powerful spring. B Tools: 4 mm Allen Key 10 mm fixed spanner C Please note! The transmission shaft (C) is an integral part of the wheelchair and the user will be unable to propel the wheelchair without it. D Take care not to trap your fingers between the spokes and the three bars of the outer handrim (D). Anti-tip device for one-arm drive For information about usage and safety, read the page about anti-tip devices in this manual. Mounting 1. Attach the adapter plate to the anti-tip device with the screws (A) using a 5 mm Allen key. B Tools: 5 mm Allen Key 4 mm Allen Key 32 A 2. Attach the anti-tip device with adapter plate to the rear wheel attachment with the screws and washers (B) using a 4 mm Allen Key. INVACARE® XLT Service Manual Assistant manoeuvred drumbrakes A B C Active rear wheel fixation with drumbrake By changing the position of the rearwheel on the rearwheel attachment you can alter both the seat height and the manoeuvrability/stability of the wheelchair. The further forward the rearwheel is positioned, the more manoeuvrable your chair becomes, but with reduced stability. 1. To alter the height position of the rearwheel plate, use an Allen key to remove the screws (A), choose the new position and fasten the screws again. 1-2. Always remember to adjust the brakes, when the rearwheel position is changed. A Tools: 5 mm Allen Key 22 mm fixed spanner 2. To move the rearwheel (either backwards or forwards) on the rearwheel attachment, first remove the screw (B), and nut (C), adjust to the required position and then fasten the screw and nut. The tip risk increases if the rearwheels are located in front of the backrest. Use anti-tip devices. Always remember to adjust the brakes, when the rearwheel position is changed. When you have fitted the wheels in the correct position, it is important that you check thoroughly that the nuts and screws are tightened securely. This is important for your own safety! 1. Applying the brakes when moving Pull both brake handles upwards (squeeze the handles) and the brake will be applied. 1. 2. Locking the brakes Pull the brake handle upwards and move the lock catch (A) upwards. Then release the handle. 2. A 3. 3. Releasing the brake Pull the handle upwards and the lock catch will release automatically. Incorrect adjustments or use of the brakes can reduce their performance. INVACARE® XLT Service Manual 33 AMPUTEE LEGREST 1. Attach the legrests by pushing the tube at the upper part of the legrests down into the tubes on the wheelchair. Lock the legrests by turning them inwards. 1-2. B A 2. Slacken lever (A), on the cushion’s mounting, in order to adjust the cushion’s angle and height. Slacken screws (B) under the cushion, in order to adjust the cushion depth. EXTERNAL PUSH HANDLES 1. Adjusting the height of the push handles 1. To raise or lower the height of the push handles turn the knob and raise the handles to the required height. Tighten when the correct position is achieved. 34 2. 2. When hole (A) is visible, just above the attachment, the handle will be in the right “locking-position”. A Make sure the push handles care securely locked before use. INVACARE® XLT Service Manual FOLDABLE PUSH HANDLES 1. Folding down push handle 1. Press and hold the trigger, which is hidden under the plastic handle, with your thumb. 2. 2. Pull back the push handle and fold it down. . Folding up push handle 3. Pull the push handle upwards until it has snapped into place. 3. Make sure that the push handles have snapped into position, so that they cannot accidentally fold down again when the wheelchair is being pushed. PELVIC BELT The pelvic belt is strapped around the tubing under the seat (A). A INVACARE® XLT Service Manual 35 Washing and Disinfection 1. Remove all loose and removable covers and wash these in a washing machine following the washing instructions for each article. 2. If the wheelchair is very dirty we recommend that you remove the back and seat to make it easier to wash. 3. Rinse the wheelchair with a high-pressure or ordinary jet of water depending on how dirty the chair is. Do not aim the jet towards bearings and draining holes. If the wheelchair is washed in a machine the water must not be hotter than 60 degrees. 4. Spray the chair with alcohol for disinfection. 5. Spray the wheelchair with detergent, for example a car-cleaning agent with wax. 6. Leave the detergent to work for a couple of minutes. 7. Rinse the wheelchair with a high-pressure or ordinary jet of water depending on how dirty the chair is. Do not aim the jet towards bearings and draining holes. 8. Check that the chair is clean. 9. Leave the chair to dry in a drying cabinet. Remove parts where water has collected for example in end tubes, ferrules etc. If the chair has been washed in a machine, blow-drying with compressed air is recommended. 10. Check that the chair is dry, wipe with a cloth if needed. Also check that all labels are readable, if not change them (e.g. labels and stickers for tilting, and attachment points for transport.). 11. If the wheelchair is not very dirty it may be sufficient to spray with alcohol and wiping dry with a cloth. 12. The wheelchair is now reconditioned. Dartex Superficial dirt on the coating may be removed by wiping with a soft cloth moistened with water containing a neutral detegent. More persistent contamination may be treated by wiping with alcohols or turpentine substitute, followed by hot water and detergent. Proprietary disinfectants may be used provided manufacturer's instructions are followed. The fabric may be washed at temperatures up to 71° C (160° F). using normal detergent. 36 INVACARE® XLT Service Manual Reconditioning Lubricate all movable parts if they are sticking or squeaking with a dry teflon based spray, e.g. Viso 900-B5. Screws and nuts: Check that all screws and nuts are tight. Chassis: All parts must be checked for cracks or other damages. Pay special attention to areas close to welds. If damages are discovered the chassis must be discarded. Back rest: Check that the angle is easy to adjust, that it is esasy fold down and that it locks as it should. Push handles: Check that the external push handles are firm and that the screws are tight. Back and seat covers: Check that the velcro strips are intact and stick and that the covers are intact, if not we recommend that torn parts are exchanged. Sideguards/armrests: Check that they are intact and easy to remove and put back. Anti-tip device: Check that the anti-tip device is easy to raise and lower, and that the screws holding the anti-tip device in place and in the correct position, are tight. Rear wheel attachment: Check that the screws on the rear wheel attachment are tight. That the axle housing is correctly placed and tightened with a manual and dynamometric wrench calibrated to 45 Nm. The axle housing must be assembled with a sideguard of at least 3 mm and armrests at least 12 mm outside of the axle housing. Rear wheels: We recommend that the tyres are changed if the pattern is worn. Missing spokes are replaced, loose ones are tightened. Especially on solid wheels there is a risk of spokes becoming loose. Fasten the hand rim if it is loose. Feel the hand rim to check if it is smooth and that no sharp bits are sticking out. In that case exchange it. Check that the rear wheel axle is completely inserted into the axle housing, and that the two locking balls stick out behind the axle housing and locks the axle. Check the air pressure in the tyre. Correct air pressure is stated on the tyre. Castors: Remove the castors and clean the castor forks from dust and dirt. Reassemble and check that the castors turn and rotate smoothly. If the castors are air filled, check the pressure and pump them. Correct air pressure is stated on the tyre. If the castors are solid check for cracks and decide if they need to be changed. Angle adjustable castor housing: Check that the castor housing is at a straight angle (90 degrees) towards the floor. Tighten the screws. Brakes: Check that the brake pin is not worn down. If the pin is worn it should be changed for safety reasons. Check that all screws are tight. Test the brakes with the correct air pressure in the tyres. In a braked position the pin should press down the tyre 5 mm. If the brake pin is moved to another position, it is important that thread locking, Loctite, is used in order to prevent the brake pin from coming loose. When moving the brake pin it may be necessary to warm the brake pin/screw with a heat gun. At the factory the brake pin is tightened with thread soldering to prevent it from unthreading. INVACARE® XLT Service Manual 37 Accessories Lubricate all movable parts if they are sticking or squeaking with a dry teflon based spray, e.g. Viso 900-B5. Screws and nuts: Check that all screws and nuts are tight. Head- and Head support with cheak supports: Check that the side and angle adjustment for the "wings" work. Also check that there is a memory function (after 2005). Neck support: Check that there is a memory function (after 2005). Trunk support Multi functional from 2005: Check that the angle adjustment works and that there is a memory function. Abduction cushion: Check that the depth adjustment works (before 2005). Tool List To ajust: Leg rests - 4 mm Allen key, 5 mm Allen key, 10 mm fixed spanner Calf pads/footrests - 5 mm Allen key Footrests one-piece - 4 mm Allen key, 10 mm fixed spanner Backrest - 4 mm Allen key, 10 mm fixed spanner, 24 mm fixed spanner Armrest/mudguards - 3 mm Allen key, 5 mm Allen key Rear wheels - 5 mm Allen key, 10 mm fixed spanner, 24 mm fixed spanner Brakes - 5 mm Allen key Castor wheels - 4 mm Allen key, 5 mm Allen key, 10 mm fixed spanner Anti-tip device - 4 mm Allen key Trunk support - 4 mm Allen key, screw driver, 13 mm fixed spanner One-arm drive - 4 mm Allen key, 10 mm fixed spanner Anti-tip device, for one-arm drive - 4 mm Allen key, 5 mm Allen key Assistant manoeuvred drumbrakes - 5 mm Allen key, 22 mm fixed spanner Headrest, neckrest - 5 mm Allen key, 10 mm fixed spanner 38 INVACARE® XLT Service Manual CHECK LIST OK NOTE SIGN WASHING RECONDITIONING: Screws and nuts Chassis Push handles Back cover Seat cover Back Back support Back angle. Back folding Seat Parking legs Sideguards/armrests Foot plates Leg rests Anti-tip devices Ferrules Rubber handles Rear wheel axles Drive wheels Castors Brakes Angle adjustable castor housing Assistant manoeuvred brakes Tools TEST DRIVE: Chair rolls in straight line Easy to propel DELIVERY CHECK: Include a manual INVACARE® XLT Service Manual 39 Manufacturer: Invacare Rea AB Växjövägen 303 S-343 71 DIÖ, SWEDEN Sales companies: Belgium & Luxemburg: Invacare nv, Autobaan 22, B-8210 Loppem Tel: (32)(0)50 83 10 10, Fax: (32)(0)50 83 10 11, [email protected] Danmark: Invacare A/S , Sdr. Ringvej 37, DK-2605 Brøndby Tel: (45)(0)36 90 00 00, Fax: (45)(0)36 90 00 01, [email protected] Deutschland: Invacare Aquatec GmbH, Alemannenstraße 10, D-88316 Isny Tel: (49)(0)75 62 7 00 0, Fax: (49)(0)75 62 7 00 66, [email protected] Eastern Europe, Middle East and Africa: Invacare European Distributor Organisation, Kleiststraße 49, D-32457 Porta Westfalica Tel: (49)(0)57 31 754 540, Fax: (49)(0)57 31 754 541, [email protected] España: Invacare SA, c/Areny, s/n, Poligon Industrial de Celrà, E-17460 Celrà (Girona) Tel: (34)(0)972 49 32 00, Fax: (34)(0)972 49 32 20, [email protected] France: Invacare Poirier SAS, Route de St Roch, F-37230 Fondettes Tél. : (33)(0)2 47 62 64 66, Fax : (33)(0)2 47 42 12 24, [email protected] Ireland: Invacare Ireland Ltd, Unit 5 Seatown Business Campus, Seatown Road, Swords, County Dublin Tel: (353)1 810 7084, Fax: (353)1 810 7085, [email protected] Italia: Invacare Mecc San s.r.l., Via dei Pini 62, I-36016 Thiene (VI) Tel: (39)0445 38 00 59, Fax: (39)0445 38 00 34, [email protected] Nederland: Invacare BV, Celsiusstraat 46, NL-6716 BZ Ede Tel: (31)(0)318 695 757, Fax: (31)(0)318 695 758, [email protected], [email protected] Norge & Island: Invacare AS, Grensesvingen 9, Postboks 6230, Etterstad, N-0603 Oslo Tel: (47)(0)22 57 95 00, Fax: (47)(0)22 57 95 01, [email protected], [email protected] Österreich: Mobitec Mobilitätshilfen GmbH, Herzog Odilostraße 101, A-5310 Mondsee Tel.: (43)6232 5535 0, Fax.: (43)6232 5535 4, [email protected], [email protected] Sverige & Suomi: Invacare AB, Fagerstagatan 9, S-163 91 Spånga Tel: (46)(0)8 761 70 90, Fax: (46)(0)8 761 81 08, [email protected], [email protected] Switzerland: Mobitec Rehab AG, Benkenstrasse 260, CH-4108 Witterswil Tel: (41)(0)61 487 70 80, Fax: (41)(0)61 487 70 81, [email protected], [email protected] United Kingdom: Invacare Ltd, South Road, Bridgend Industrial Estate, UK-Bridgend CF31 3PY Tel: (44)(0)1656 664 321, Fax: (44)(0)1656 667 532, [email protected] XLT Service Manual 090305 Portugal: Invacare Lda, Rua Estrada Velha, 949, P-4465-784 Leça do Balio Tel: (351) (0)225 1059 46/47, Fax: (351) (0)225 1057 39, [email protected]


