1
?i
F
b
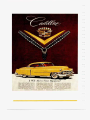
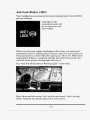
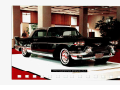
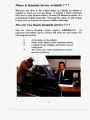
1994 OWNER'S LITERATURE
P
b
r
C A D I L L A C
O W N E R
r
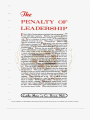
PENALTY OF
LEADERSHIP
-
(CadLc
&tor
Car Co. Detroit, Mich.)
THIS TEXT APPEARED AS AN ADVERTISEMENT IN THE SATURDAY EVENING POST
JANUARY 2ND. IN THE YEAR 1915
COPYRIGHT. CADILLAC MOTOR CAR DIVISION
1
cu
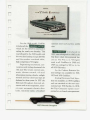
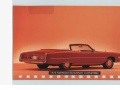
Few automobiles are fortunate enough to have the rich
kage that is Cadillac. The name Cadillac is appropriately
t r : of Antcine de La Mothe Cadillac, the French military
commander who founded the city of Detroit . 1701. What
better name for the oldest autsmobile manufacturer in Detroit.
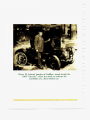
Henry M. Leland, known as the
Club of England awarded the pres-
b Dewar Trophy 1
master of precision, initiated his pre-
tigious
cision manufacturing techniques at
to Cadillac twice . . .
the founding of Cadillac
first in 1908 for achieving
in 1902. His exacting
perfect interchangeability
standards prompted the
of parts and again in 1912
motto by which Cadillac
i for introducing the elec-
has been guided over the
years - “Craftsmanship
A Creed - Accuracy A
Law:’
j tric self starter, electric
I lighting and ignition
system.
Cadillac is the only
The introduction of
the first four cylinder enginein
1905 ledtheindustryand
American manufacturer
to win this honor and the
only manufacturer in the worldtowin
enabled Cadillacs to travel at speeds
it twice. As commonplace as stan-
up to 50 mph.
dardized parts are today, in 1908 parts
For attention to quality and innovation, the Royal Automobile
were still individually hand fitted
both in production and service.
-
r
Standardization o-pened theeyes of
the industrial world and was the cor-
1:
ner-stone of modern assembly lir
r
production. From this achievemc--evolved the reference to Cadillac as
“Standard of the World:
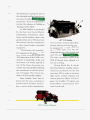
In 1909 Cadillac was purchased
by the then new General Motors
Corporation. Convenience, cleanliness and all-weather comfort were
greatly enhanced in 1910 when Cadc-
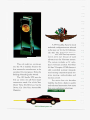
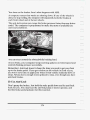
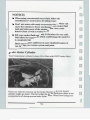
45 O V-16 Engine
illac became the first manufacturer
service policy, security plate glass,
to offer closed bodies as standard
chrome plating and the first car to
equipment.
be designed by a stylist (1927 La-
“The Penalty of Leadership”
Salle/Harley Earl). The
first appeared in the January 2, 1915
c-
’30s wit-
\
issue of The Saturday Evening Post
quiet V12 and
as an expression of the Cadillac com-
The crisp, contemporary lmes ot the
mitment to leadership, quality, and
1938 60 Special series ushered in a
innovation. It is widely regarded as
new era in styling.
c-
one of the finest documents ever
During World War 11, shortly
written and was published following
after Pearl Harbor, Cadillac discon-
the introduction of the first produc-
tinued car production for the first
tion V8 engine. The V8 was stan-
time since 1902 in order to construct
dard in all 1915 model Cadillacs.
lowed over the years, including the
light tanks, combat vehicles and
internal parts for Allison V1710 engines. Two Cadillac V8 engines and
synchro-mech clashless transmis-
Hydra-Matic transmissions were
sion, a nation-wide comprehensive
used in each tank.
Many Cadillac “firsts” have fol-
p
A
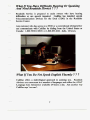
A 1993 Cadillac Allant6 in stock
b.
technical configuration, was selected
as the pace car for the 76th Indianapolis 500. The demanding pace car
- 1
J
I
performance and handling requirements were met because
of such
advances as the Northstar system.
The system includes the 32 valve,
This rich traditi.on continues
dual overhead camshaft, Northstar
into the '90s as Cadillac became the
4.6 liter V8 engine, 4T80 E electroni-
first automobile manufacturer to be
cally controlled automatic transaxle,
awarded the prestigious Malcolm
road sensing suspension, speed sen-
Baldrige National Quality Award.
sitive steering, antilock brakes and
The 1992 Seville STS was the
first car ever to win
all three major
traction control.
For more than nine decades
automotive awards: Car of the Year,
Cadillac has been a leader in quality
Motor Trend; Ten Best List, Car &
and technical innovation. Now more
Driver; Car of the' Year, Automobile
than ever, substance takes shape
Magazine.
-
I
..
p
,'
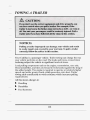
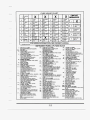
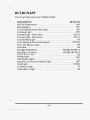
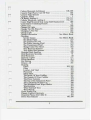
This Cadillac Manual is divided into major sections.
Introduction - How to Use this Manual ..........................
This section tells you how to use your manual and includes
safety and vehicledamage warnings and symbols.
lrn
..........................
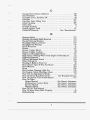
- Section 1 - Seats and Restraint Systems
This section tells you howto use your seats and safety
belts properly. It also explainsthe “SIR” system.
..............................
Section 2 - Features and Controls
67
This section explains how to start and operate your Cadillac.
Section 3 - Comfort Controls and Audio Systems
................ 146 1-
This section tells you how to adjust the ventilation and
comfort controls and how to operate your sound system.
Section 4 -Your Driving and the Road
......................... 166
Here you’ll find helpful information and tips about the
road and how to drive under different conditions.
-
.............................
Section 5 - Problems on the Road
212
This section tells you what to doif you havea problem
while driving, such asa flat tire, or engine overheating, etc.
.......................
Section 6- Service and Appearance Care
Here themanual tells you howto keep your Cadillac
running properly and looking good.
245
For more informationon “Reporting Safety Defects”, see Owner
Assistance, Page 5.
:d?irstEdition
n
.
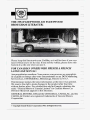
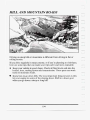
THE 1994 FLEETWOOD AND FLEETWOOD
BROUGHAM LITERATURE
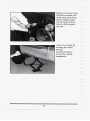
Please keep this literature in your Cadillac,so it will be there if you ever
need it when you’reon the road. If you sell the vehicle, please leave this
book in it so the new owner can use it.
FOR C’ADiWV
O W E R S WHO PREFER A FRENCH
LANGUAGE 2MANuAL:
A m propriktaires canadiens: Vous pouvez vousprocurer un exemplaire
de ce guide en franGais chez votre concessionaire ou au DGN Marketing
Services Ltd., 1500 Bonhill
Rd., Mississauga, Ontario L5T 1C7.
This literature includes the latest information at the time it was printed.
We reserve the right to make changes in the product after that time
without further notice. For vehicles first sold in
Canada, substitute the
name “General Motors of Canada Limited” for Cadillac Motor Car
Division whenever it appears in thisliterature.
GENERAL MOTORS, GMand the GM Emblem, CADILLAC, and the
CADILLAC Emblem are registered trademarks of General Motors
Corporation.
I
3
I
,
0 Copyright General Motors Corporation1993. All Rights Reserved.
*
-
-
HOW TO USE THIS MANUAL
Many people read theirowner’s manual from beginningto end when they
first receive their new vehicle. Thiswill help you learn about the features
and controls for your vehicle. In thismanual, you’ll findthat pictures and
words worktogether toexplain things quickly.
INDEX A good placeto look for what you need is the Index in back of
the manual. It’s an alphabetical list of all that’s inthe manual, and the
page number where you’ll find it.
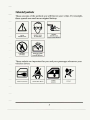
SAFETY W M Z N G S A N D SWBOLS
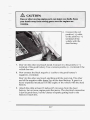
You will find a number of safety cautions in this book. We use gray and
the word CAUTION to tell you about things that could hurt you if you
were to ignore the warning.
In thegray caution area, we tell you what the hazard is. Then we tell you
what to do tohelp avoid or reduce thehazard. Please read thesecautions.
If you don’t, you or otherscould be hurt.
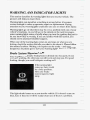
You will also finda circle witha slash through it in this book. This safety
symbol means “Don’t,” “Don’t do
this,’’ or “Don’t let this happen.”
1
Ehicle Damage Warnings
Also, in this book you will find these notices:
NOTICE:
Thesemeanthere
31
I
is somethingthatcoulddamageyourvehicle.
$
3
In the notice area, we tell you about something that can damage your
vehicle. Many times, this
damage would not be covered by your warranty,
and it could be costly. Butthe notice will tell you whatto do to help avoid
the damage.
When you read other manuals, you might see CAUTION and NOTICE
warnings indifferent colors or in different words. In this manual, we’ve
used the familiar wordsand colors that Cadillac has usedfor years.
You’ll also see warning labels on your vehicle.
They use the same colors,
and the words CAUTION orNOTICE.
31
- !
I
1
I
2
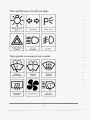
Vehicle Symbols
r
These are some of the symbols you will findon your vehicle. For example,
these symbols are used on anoriginal battery:
n
A
POSSIBLEINJURY
AVOID SPARKS
OR FLAMES
PROTECT EYES
BY SHIELDING
BATTERY ACID
COULD
These symbols are important for
you and your passengers whenever your
vehicle is driven:
I
DOOR LOCK UNLOCK
IU
POWER
WINDOW
FASTEN SEAT BELTS
3
I
r
AIR BAG
These symbols haveto do with your lights:
a
pf
MASTER LIGHTING
SWITCH
I
I
t
uI
TURN SIGNALS
PARKING
LIGHTS
A ;tD
HAZARD WARNING
FLASHER
II
LIGHTS OR
BEAM
HIGH
II
LAMPS
I
These symbols are on some of your controls:
I
WINDSHIELD
WIPER h WASHER
REAR WINDOW
DEFOGGER
II
I
WINDSHIELD
WASHER
VENTILATING
FAN
II
WINDSHIELD
DEFROSTER
I
HEADLAMP
WASHER WIPER
4
B
d
I
1
I
3'
These symbols are used on warning and indicator lights:
-I
I
1
ENGINE COOLANT
TEMPERATURE
FUEL
CHARGING
1I
ENGINEOIL
PRESSURE
I
1I
BRAKE
ENGINE OIL
TEMPERATURE
I
II
RADIATOR
COOLANT
I
ANTILOCK BRAKE
.Here aresome other symbols you may see:
-%r
FUSE
I
I
I
RADIO
TRUNK HATCHBACK
RELEASE
RADIO VOLUME
SELECTOR
AIR
CONDITIONING
SPEAKER
I
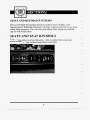
SEATS AND RESTRAINT SYSTEMS
Here you’ll findinformation about the seats in your Cadillac, your
Supplemental Inflatable Restraint (“air bag”) system and how to use your
safety belts properly. You can also learn about some things you should
not do with safety belts.
SEATS AND SEAT CONTROLS
This section tells you about the seats-- how to adjust them, and also
about reclining front seatbacks, and head restraints.
1
.f
n
i
P
6
I
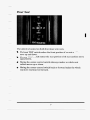
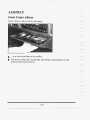
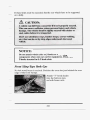
Power Seat
I
The control is located on both front door
arm rests.
The front TILT switch makes the frontportion of the seatcushion
move up and down.
The rearTILT switch makes the rearportion of the seatcushion move
up anddown.
Moving the center controlswitch sideways makesthe whole seat
cushion moveup ordown.
Moving the center controlswitch back or forward makes the whole
seat move rearward or forward.
7I
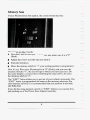
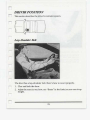
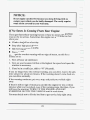
Memory Seat
If your Fleetwood has thisoption, the control looks like this:
3;
Here’s howto make it work:
0 You don’t need to start your vehicle yet,just make sure it is in “P”
(Park).
Adjust the driver’s seat theway you want it.
Push the Set button.
Move the memory switch to L C 1 your seating position is programmed.
Now it’s set. When your Fleetwood is “P”
in (Park), and you move the
LL
memory switchto 1 , the seatwill go to where you havejust set it. Do
the same thing for a second driver followi,ng
the steps above, but move
the memory switchto “2”.
The “EXIT”.button allows youto get out of your vehiclemore easily. The
“EXIT”button is programmed the same as the memory selections. For
easy entrance and exit, it isrecommended that you position itfully back
and fully down.
If you hit the wrong memory switchor “EXIT” button, you canstop it by
just pushing anyof,the Power Seat Adjuster switches.
77
99
8
n
I
J i
I
Reclining FrontSeatback(s)
To adjust the seatback,
press the switch
forward or rearward to
operate therecliner.
9
But don't have a seatback reclined if your vehicleis moving.
8
3I
3'
-
10
I
0
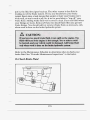
On t
d
Fleetwood Brougham
first slide the head
restraint up or down so
that the topof the
restraint is closest to
the topof your ears.
This position reduces
the chanceof a neck
injury in a crash.
Fomard/Rearward: Hold both sides of the head restrant and pull
forward untilyou reach the forward-most position.
From this position,
. .,
3
firmly pullthe restraint forward again until it releases
to the
full-rearward position.Now slowly movethe restraint forward until
you reach a comfortableposition. You should hear a clicking sound as
the restraint moves forward.
Articulating: Head restraint can be adjusted by holding both sides and
gently rotating in a fore/aft direction.
LumbarIHeater Seat Controls (Fleetwood Brougham)
With thisfeature, you can changethe shape of the driver’s or passenger’s
seatback. Adjustthe power seat control first to get the properposition.
For the best adjustment, it is recommended that you first start with the
“MIDDLE” lumbar.
MIDDLE (Back
Support): Adjust
support for the
middle back.
UPPER (Back
Support): Adjust
support for the
upper back.
LOWER (Back
Support): Adjust
support for the
lower back.
Push the switch to either “HI” or “LO” to turn on the heating element in
the seat.
Designed primarilyfor use on damp and chilly days,the “LO” setting
warms the seatback and cushion untilthe seatapproximates body
temperature. On colder days,the “HI” setting heats theseats to an even
higher temperature. To prevent uncomfortable overheatingof the seats,
the heating elements are thermostatically regulatedto automatically
maintain the temperature at the
setting selected. Atelltale light on the
control switch remindsyou that theheating system is in use.
To preserve
the battery, the heatedseats can onlybe used whenthe ignition isturned
on, andis deactivated whenthe ignition isturned off.
1
7
I
*
9
- 1
2
1
’!
3
12
I
SAFETYBELTS: THEY’RE FOR EVERYONE
This part of the manual tells you how to use safetybelts properly. It also
tells yousome things youshould not do with safety belts.
And it explainsthe SupplementalInflatable Restraint, or “air bag”
system.
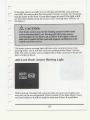
This figure lightsup as a reminder to buckle up. (See “Safety Belt
Reminder Light” in the Index.)
In many states and Canadian provinces, the law saysto wear safety belts.
Here’s why: They work.
You never knowif you’ll be in a crash.If you do have a crash, you don’t
know if it will be a bad one.
13
-1
7
A few crashes are mild, and some crashes canbe so serious that even
buckled up a person wouldn’t survive. But most crashes
are in between.
In many of them, people who buckleup can surviveand sometimes walk
away. Without belts they could have
been badly hurt or killed.
After more than 25 years of safety belts in vehicles,the facts are clear. In
most crashes buckling up does matter ... a lot!
J!
I
14
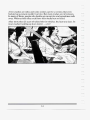
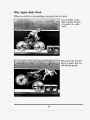
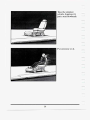
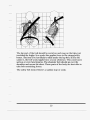
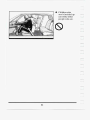
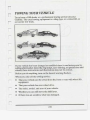
why Safety Belts Work
When you ride in or on anything, you go as fast as it goes.
-
- I
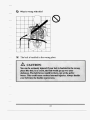
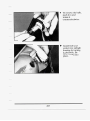
When the bike hits the
block, it stops. But the
child keeps going!
1
Take the simplest
vehicle. Suppose it's
just a seaton wheels.
3
Put someone on it.
16
"
I
i
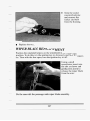
HERE ARE QUESTIONS “YPEOPLE
ASKABOUT SAFETYBELTS -AND THE
ANSWERS
Q:
Won’t I be trapped in the vehicleafter an accident ifI’m wearing a safety
belt?
A:
You could be -- whether you’re wearing a safety belt
or not. But you
can easily unbuckle a safety
belt, even if you’re upside down. And
your chance of being consciousduring and after anaccident, so you
can unbuckle and get out, is much greater if you are belted.
Q:
Why don’t they
just putin air bags so people won’t haveto wear safety
belts?
A:
Air bags, or Supplemental Inflatable Restraint systems, are in some
vehicles todayand will be in more of them in the future.But they are
not
supplemental systems only-- so they work with safety belts,
instead of them. Every air bag system ever offeredfor sale has
required theuse of safety belts. Evenif you’re in a vehiclethat has
air bags, you still haveto buckle up to get the most protection. That’s
true not only in frontal collisions, but especially in sideand other
collisions.
Q: r f I’m a
good driver,and I never drivefar from home, whyshould I wear
safety belts?
A:
You may be an excellent driver,but if you’re in an accident -- even
one thatisn’t yourfault -- you and your passengerscan be hurt.
Being a good driver doesn’t
protect you from things beyond your
control, such asbad drivers.
Most accidents occur within25 miles (40 km) of home. And the
greatest number of serious injuries and deaths occur at speeds of less
than 40 mph (65 kmk).
Safety beltsare foreveryone.
19
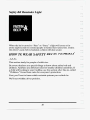
Safety Belt Reminder Light
3‘
When the key is turned to “Run” or “Start,” a light will come on for
about eight seconds to remind people to fasten their safety belts.Unless
the driver’s safety beltis buckled, a chime will also sound.
k
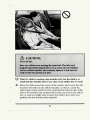
HOW TO FVEAR SAFETYBELTS PROPERLY
7
Adults
d
This section is onlyfor people of adult size.
Be aware that there arespecial thingsto know about safety beltsand
children. And there aredifferent rules for smaller children and babies. If
a child will be riding in your Cadillac,see the section after this one, called
“Children.” Follow those rules for everyone’s protection.
First, you’ll want to know whichrestraint systems your vehicle has.
We’ll start with the driver position.
3/
1‘
20
1
I
I I II I I l l
r
I'
1
I
.LapshoulderBelt
.
-I
i
r
.
1
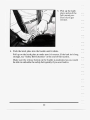
3. Pick up the latch
plate and pull the
belt across you.
Don’t let itget
twisted.
4. Push the latch plate into thebuckle until it clicks.
Pull up on the latch plate to make sure it is secure.If the belt isn’t long
enough, see “Safety BeltExtendeYat theend of this section.
Make sure the release button on thebuckle is positioned so you would
be ableto unbuckle the safety belt quickly if you ever had to.
22
- 1
h-
The lap partof the belt shouldbe worn low and snugon the hips, just
touching the thighs. In acrash, this applies force to thestrong pelvic
bones. And you’d be less likelyto slide under the lapbelt. If you slid
under it, the belt would applyforce atyour abdomen. This could cause
serious or even fatal injuries. The shoulderbelt should go over the
shoulder and across the chest. These partsof the body are best able to
take belt restraining forces.
The safety belt locks if there’s a suddenstop or crash.
23
Shoulder Belt Tightness Adjustment
Your Fleetwood sedan has a shoulder belt tightnessadjustment feature. If
the shoulder belt seems too tight, you can adjust it like this:
1. Sit well back in the seat.
2. Start pulling the
shoulder belt out.
1
;
- 1
L
u
3. Just .before it
reaches the end,
give it a quick
pull.
1'
u . )
1
7
24
i
4. Let thebelt go back allthe way. You should hear a slight clicking
sound. If you don’t, the adjustment feature won’t set, and you’ll have
to start again.
5. Now you can add a small amount of slack. Lean forward slightly, then
sit back.If you’ve added more than 1inch (25 mm) of slack, pullthe
shoulder belt out as you did before and start again.
If you move around in the vehicle enough, or if you pullout theshoulder
belt, the belt will become tight again.If this happens, you can reset it.
25
3
Q: Vvnars wrong with this?
8
I
&
,
1
I
I
I
I
I
I
1
I
I
I
The shoulder belt is too loose. It won't give nearly as much
protection this way.
26
7
U
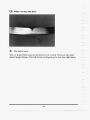
Q: What’s wrong with this?
A:
The belt is buckled in the wrong place.
27
Q: What's wrong with this?
8
A:
The shoulder belt is worn under thearm. It should be worn over the
shoulder at all times.
r
28
I'
29
To unlatch the belt,
just push the button
on the buckle. The
belt should go back
out of the way.
I
Before you close the door, be sure thebelt is out of the way. If you slam
the door on it, you can damage both the belt and your vehicle.
SUPPLEMENTL INFLATABLE
R E S T U N T SYSTEM (AIR BAGS)
This section explains the Supplemental Inflatable Restraint (SIR), or “air
bag,” system. YourCadillac has an air bag for both the driver and the
right-front passenger.
Here’s the most important thing to know:
30
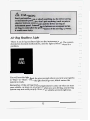
Air Bag Readiness Light
There is an air bag readiness light on theinstrument panel. The system
checks for electrical malfunctions, and the light tells youif there is a
problem.
AIR
BAG
You will see this light flashfor a few seconds when youturn your ignition
to “Run”or “Start.” Then thelight should go out, which means the
system isready.
Re.member,if the air bag readiness light doesn’t come on when you
start
your vehicle, or stays on, or comes on when you are driving, yourair bag
system may not work properly. Have your vehicle serviced right
away.
32
-
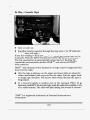
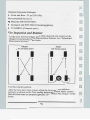
How l"he Air Bag System Works
A
33
t
Where is the air bag?
The driver’s air bag is inthe middle of the steering wheel. The right-front
passenger’s air bag is located in the instrument panel on thepassenger’s
side.
When is an air bag expected to inflate?
The airbag is designedto inflate in moderate to severe frontal or
near-frontal crashes. The air bag will only inflate if the velocity of the
impact is abovethe designed threshold level. When impactingstraight
into a wallthat does notmove or deform, the threshold level for most
GM vehicles is between9 and 15 mph (14 and 23 km/h). However,this
velocity threshold depends on thevehicle design and may be several
miles-per-hour faster or slower. In addition, this threshold velocity willbe
considerably higherif the vehicle strikes an object suchas a parked car
which will moveand deform on impact. The air bag is alsonot designed
to inflate in rollovers,side impacts, or rear impacts where the inflation
would provideno occupant protection benefit.
It is possiblethat in a crash, only
one of the two air bags in your
Fleetwood will deploy. This is rare, butcan happen in a crashjust severe
enough to make an air baginflate.
al
In any particular crash, the determination of whether the air bag should
have inflated cannot bebased solely on the level of damage on the
vehicle(s). Inflation is determined by the angle of the impact and the
vehicle’s deceleration, of which vehicledamage is onlyone indication.
Repair cost isnot a goodindicator of whether an air bag should have
deployed.
What makesan air bag inflate?
In a frontal or near-frontal impact of sufficient severity,the air bag
sensing systemdetects that thevehicle is suddenlystopping as a resultof
a crash. The sensing system triggers a chemical
reaction of the sodium
azide sealed in the inflator. The reaction produces nitrogen gas, which
inflates a cloth bag. The inflator, cloth bag,and related hardware are all
part of the airbag inflator modules packed insidethe steering wheel and
in the instrumentpanel in front of the passenger.
34
fl
DI
How does an air bag restrain?
In moderate tosevere frontal or near-frontal collisions, evenbelted
occupants can contact the steering wheel or theinstrument panel. The
air bag supplements the protection provided by safety belts.Air bags
distribute the force of the impact more evenly over the occupant’s upper
body, stopping the occupant more gradually. But air bags wouldnot
provide protection in manytypes of collisions, including rollovers and
rear and side impacts, primarily because an occupant’s motion is not
toward the air bag.Air bags should never be regarded as anything more
than a supplement to safety belt protection in moderate tosevere frontal
and near-frontal collisions.
What will you see afteran air bag inflation?
After the air bag has inflated, it will then quickly deflate. This occurs so
quickly that some people may not even realize that theair bag inflated.
Some components of the air bag module in the steering wheel hub for the
driver’s air bag or the instrument panel for the passenger’s bag may be
hot for a short time, but the portion of the bag that comes into contact
with you willnot be hot to thetouch. There will be small amounts of
smoke and dust coming from vents in the deflated air bags. The air bag
will not impede the driver’s visionor ability to steer thevehicle, nor will it
hinder the occupants from exiting the vehicle.
In many crashes severe enough to inflate an air bag, windshieldsare
broken by vehicle deformation. Additional windshield breakage may
occur in vehicles withpassenger air bagsbecause the windshield acts asa
reaction surface for the inflating air bag.
The air bags are designed to inflate only once. After they inflate, you’ll
need some new parts for your air bag system.If you don’t get them,
the air bag system won’tbe there tohelp protect you inanother crash.
A new system willinclude air bag modules and possibly other parts.
The service manual has information about the need to replace
other parts.
35
Your vehicle is equipped with a diagnostic module, which records
information about the air bag systemif the air bag deploys ina crash.
The module records information about the readiness of the system,
which sensors activated the deployment, and whether the driver’s
safety beltwas in use.
Let only qualifiedtechnicians work on your air bag system.Improper
service canmean that your air bag system won’t work properly.
See
your dealer for service.
n
L
A
NOTICE:
If you damage the cover for the driver‘s or the right-front
passenger’s air bag, they may not work properly.
You may have
to replace theair bag on the steering wheel or both the air bag
and the instrument panel for the passenger‘s
air bag. Do not
open or break the
air bag covers.
r
L
Y
Is the smokefiom an air bag inflation harmful?
The particles emitted during air bag inflationare not harmful to most
people. Some people with respiratory ailments may experience difficulty
breathing if they stay inthe vehicle withthe windows closedafter air bag
inflation. So, if your air bag inflates,you and any passengers should exit
the vehicle if and when it is safeto do so. If you or your passengers can’t
get out of the vehicle, tryto get fresh airby opening a window, turning on
the fan, or opening a door.
31
Jl
36
r
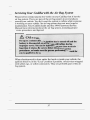
Servicing Your Cadillac with the Air Bag System
Please tell or remind anyone who workson your Cadillac that it has the
air bag system.There are partsof the air bag systemin several places
around your vehicle.You don’t want the system to inflate while someone
is workingon your vehicle. The air bag systemdoes not need regular
maintenance. Your Cadillac dealer and the 1994 Fleetwood Service
Manual have information about the air bag system, includingproper
service procedures and disposal.
When electrical work isdone under thehood or inside your vehicle, the
ignition should be in the “Lock’’ position if possible. Avoid wireswrapped
with yellowtape, or yellow connectors. They are probably part of the air
bag system.
37
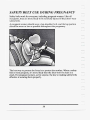
SAFETYBELT USE DUNNG PREGNANCY
Safety belts work for everyone, including pregnant women. Like all
occupants, they are more likely to be seriously injured if they don't wear
safety belts.
A pregnant woman Should weara lap-shoulder belt, and the lap portion
should be wo.rn as low as possible.
throughout the.pregnancy.
The best way to protect the fetus is to protect the mother. When a safety
belt is worn properly, it's more likely that thefetus won't be hurtin a
crash. For pregnant women, asfor anyone, the key to making safetybelts
effective is wearing .themproperly.
3
38
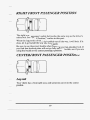
RIGHT FRONT PASSENGER POSITION
The right front passenger’s safetybelt works the same way as the driver’s
safety belt. See “Driver Position,” earlier in this part.
When the lap portion of the belt is pulled out all the way, it will lock. If it
does, let it go back allthe way and start -again.
Be sure to use the correct buckle when bucklingyour lap-shoulder belt. If
you find that thelatch plate will not go fullyinto thebuckle, see if you are
using the buckle for the centerpassenger position.
CENTER-FRONT PASSENGER POSITION
Lap Belt
Your vehiclehas a-front split seat, and someonecan sit -inthe center
position.
I
When you sit ina
center front seating
position you have a
lap safety belt, which
has no retractor. To
make the belt longer.
tilt the latch plate
and pull it alongthe
belt.
3‘
II
- I
To make the belt
shorter, pull itsfree
end as shown until
the belt is snug.
I
I
Buckle, position and release it the same way as the lap part of a lapshoulder belt. If the belt isn’t longenough, see “Safety BeltExtender” at
the end of this section.
Make sure the release button on the buckle ispositioned so you would be
able to unbuckle the safety belt quickly if you ever had to.
40
I
.4
Lap Belt
Your vehicle has a rear bench seat, and someone can sit inthe center
position.
1. Pick up the latch
plate and, in a
single motion, pull
the belt across
you. Don't let it
get twisted.
2. Push the latch plate into thebuckle until it clicks. If the belt stops
before it reaches the buckle, let it goback into the retractor all the
way and start again. Pullup on the latch plate to make sure it is
secure.
3. Feed the lapbelt into the retractor totighten it.
41
r
.
.
3‘
I
Position and release it the same way as the lap part of a lap-shoulder
belt.
If the belt isn’t longenough, see “Safety Belt Extender’’at the end of
this section. Makesure therelease button on the buckle is positioned
so you would be able to unbuckle the safety belt quicklyif you ever
had to.
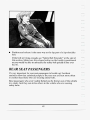
REAR SEAT PASSENGERS
It’s veryimportant for rear seat passengers to buckle up! Accident
statistics showthat unbelted people in the rearseat are hurt more often
in crashes than those who are wearing safety belts.
Rear passengers who aren’t safetybelted can be thrown out of the vehicle
in a crash. And they canstrike others in the vehicle whoare wearing
safety belts.
42
- 1
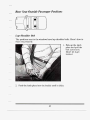
Rear Seat Outside Passenger Positions
Lap-Shoulder Belt
The positions next to thewindows havelap-shoulder belts. Here’s how to
wear one properly.
1. Pick up the latch
plate and pull the
belt across you.
Don’t let itget
twisted.
2. Push the latch plate into the buckle until it clicks.
43
I
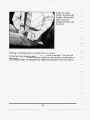
If the belt stops
before it reaches the
buckle, tiltthe latch
plate and keep
pulling until you can
buckle it.
Pull up on the latch plate to make sure it is secure.
If the belt is not long enough, see “Safety Belt Extender” at the end of
this section.Make sure the release button on the buckle is positioned so
you would be able to unbuckle the safety belt quickly if you ever had to.
3
44
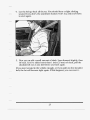
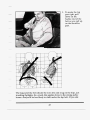
3. To make the lap
part tight, pull
down on the
buckle end of the
belt as you pull up
on theshoulder
part.
The lap partof the belt should be worn low and snug on the hips, just
touching the thighs. In a crash, this applies force to thestrong pelvic
bones. And you’d be less likelyto slide under the lapbelt. If you slid
45
under it, the belt would applyforce at your abdomen. This could cause
serious or even fatal injuries. The shoulder belt should go over the
shoulder and across the chest. These partsof the body are best able to
take belt restraining forces.
The safety belt locks if there's a sudden stop or a crash,or if you pull it
very quicklyout of the retractor.
0
To unlatch the
belt, just push the
button on the
buckle.
I
46
r
CHILDREN
Everyone in a vehicle needs protection! That includes infants andaall
children smaller than adult size. In fact, the law in everystate in the
United States and in every Canadian province says children up to some
age must be restrained while ina vehicle.
47
1
Smaller Children and Babies
1
48
49
!
CHILD R E S T U N T S
Be sure to follow the instructions for the restraint. You may find these
instructions on the restraint itself or in a booklet, or both. These
restraints use the belt system in your vehicle,but the child alsohas to be
secured within the restraint to help reduce the chance of personal injury.
The instructions that come with the infant or child restraint will show you
how to do that.
Where to Put the Restraint
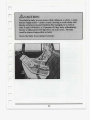
Accident statistics show that children are safer if they are restrained in
the rear ratherthan the front seat. We at General Motors therefore
recommend that you put your child restraint in the rearseat. NEVER put
a rear-facing child restraint in the front passenger seat. Here’s why:
50
I
El
51
I
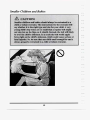
Wherever you install it, be sure tosecure the child restraint properly.
Keep in mindthat an unsecured child restraint can move around in a
collision or sudden stop and injure people in the vehicle. Be sure to
properly secure any childrestraint in your vehicle -- even when no child is
in it.
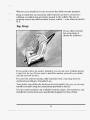
Top Strap
If your childrestraint
has a top strap, it
should be anchored.
If you need to have an anchor installed, you can ask your Cadillac dealer
to putit infor you. If you want to install an anchor yourself, your dealer
can tellyou how to doit.
For cars first sold inCanada, child restraints with a top strapmust be
anchored according to Canadian Law.
Your dealer can obtain the hardware kit and install itfor you, or you may
install it yourself using
the instructions provided in the kit.
Use the tether hardware kit availablefrom the dealer. The hardware and
installation instructions were specifically designed for this vehicle.
51
I
1 ’
Securing a Child Restraint in a Rear Outside Position
You’ll be using the lap-shoulder belt. See the earlier section about the top
strap if the child restraint has one.
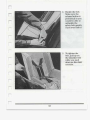
1. Put the restraint on the seat. Follow the instructions for the child
restraint.
2. Secure the child in the child restraint as the instructions say.
3. Pick up the latch plate, and run the lap and shoulder portions of the
vehicle’s safety beltthrough or around the restraint. The child
restraint instructions will show you how.Tilt the latch plate to adjust
the belt if needed.
If the shoulder belt goes in front of the child’s face or neck, put it
behind the child restraint.
Ll
LEI
52
I
1
f
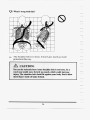
6 . Push and pull
the child restraint
in different
directions to b.e
sure it issecure.
r
To remove the child restraint, just unbuckle the vehicle’s safety beltand
let it go back all the way. The safety belt will move freely againand be
ready to work for an adult or larger child passenger.
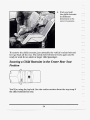
Securing a Child Restraint in the Center Rear Seat
Position
You’ll be using the lapbelt. See the earlier section about the top strap
if
the child restraint has one.
-
u
54
1. Put the restraint on the seat. Follow the instructions for the child
restraint.
2. Secure the child inthe child restraint as the instructions say.
3. Pull the lap belt
all the way out
without stopping.
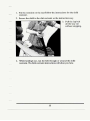
4. While holding it out, run the belt through or around the child
restraint. The child restraint instructions will showYOU how.
55
-
I
5.
P
7. Push and pull
the child restraint
in different
directions to be
sure it is secure.
To remove the child restraint, just unbuckle the vehicle’s safety beltand
let it go back all the way. The safety beltwill move freely again and be
ready to work for an adult or larger child passenger.
Securing a Child Restraint in the Right Front Seat
Your vehicle has a right-front passenger’s air bag. NEVER put a
rear-facing child restraint in this seat. Here’s why:
57
I
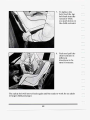
You’ll be using the lap-shoulder belt. See the earlier section about the top
strap if the child restraint has one.
1. Because your vehiclehas a right-front passenger’s air bag, always
move the seatas far back as itwill gobefore securing a front-facing
child restraint.
2. Put the restraint on the seat. Follow the instructions for the child
restraint.
- 1
3. Secure the child inthe child restraint as the instructions say.
4. Pick up the latch plate, and run the lap and shoulder portions of the
vehicle’s safetybelt through or around the restraint. The child
restraint instructions will show you how.
If the shoulder belt goes in front of the child’s face or neck, put it
behind the child restraint.
I
I
58
5. Buckle the belt.
Make sure the release button is positioned so you would be able to
unbuckle the safety belt quickly if you ever had to.
6. Pull the rest of the
lap belt all the
way out of the
retractor toset
the lock.
59
7. To tighten the
belt, feed the lap
belt back into the
retractor while
you push down on
the child restraint.
n
8. Push and pull the
child restraint in
different
directions to be
sure it is secure.
1
I
;7
L.
The safety belt will move freely again and be ready to work for an adult
or larger child passenger.
60
Larger Children
Children who have outgrown child restraints should wear the vehicle’s
safety belts.
If you havethe choice, a child should sit nextto a window so the child can
wear a lap-shoulder belt and get the additional restraint a shoulder belt
can provide.
Accident statistics showthat children are safer if they are restrained in
the rearseat. But they need to use the safety beltsproperly.
61
I
I
Children who
aren’t buckledup
can strike other
people who are.
8
7
i
62
Q: What if a childis wearing a lap-shoulder belt, but the child
is so
small that the shoulder belt
is very close to the child’s face
or neck?
A:
Move the child toward the centerof the vehicle, but be sure that the
shoulder belt still ison the child’s shoulder, so that in a crash the
child’s upper body would havethe restraint that belts provide. If the
child isso small that theshoulder belt is still veryclose to the child’s
face or neck, you mightwant to place the child inthe center seat
position, the one thathas only a lap belt.
63
n
Wherever the child sits,the lapportion of the belt should be worn low
and snug on the hips, just touching the child's thighs.This applies belt
force to thechild's pelvicbones in a crash.
64
l
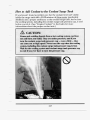
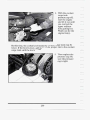
SAFETY ‘BELTEXTENDER
If the vehicle’s safetybelt will fasten around you, youshould use it.
But if a safety belt isn’t long enough to fasten, your dealer will order you
an extender. It’s free. When you go in to orderit, take the heaviest coat
you willwear, so the extender will be long enough for you. The extender
will be just for you, and just for the seat in your vehiclethat you choose.
Don’t let someone else use it, and use it only for the seatit ismade to fit.
To wear it, just attach it to theregular safety belt.
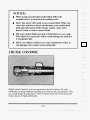
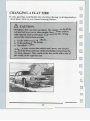
CHECIUNG YOURR E S T U N T SYSTEMS
Now and then, make sure all your belts, buckles, latchplates, retractors,
anchorages and reminder systems are working properly. Look for any
loose parts or damage. If you see anything that might keep a restraint
system from doing its job, have it repaired.
REPLACING SAFETYBELTSAFTERA
CRASH
If you’ve had a crash, do you need new belts?
After a very minor collision, nothing may be necessary. But if the belts
were stretched, as they would be if worn during a more severe crash, then
you need new belts.
If belts are cut or damaged, replace them. Collision damage also may
mean you will need to have safetybelt or seat parts repaired or replaced.
New parts and repairs may be necessary evenif the belt wasn’t being used
at thetime of the collision.
65
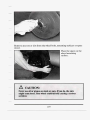
Q: What’s wrong with this?
n
A:
The belt is torn.
Torn or frayed belts may not protect you in a crash.They can ripapart
under impact forces. If a belt is torn or frayed, get a new one right away.
n
66
I
I SECTTON 2
I
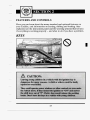
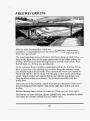
FEATURES AND CONTROLS
Here you can learn about the many standard and optional features on
your Cadillac,and information on starting, shifting and braking. Also
explained are the instrument panel and the warning systemsthat tell you
if everything is working
properly -- and what to doif you havea problem.
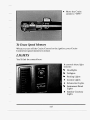
KEYS
8
I
67
I
-
-
The round keys are for
..
the doors..andall other
, .
.
- .
..
-
68
~
.
,
I
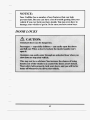
NOTICE:
Your Cadillac has a number of new features that can help
prevent theft. But you can have.lot
a of trouble getting into your
vehicle if you ever lock your keys inside.
You may even have to
damage your vehicle to get
in. So be sure you have extra keys.
DOOR LOCKS
69
I
3
If your vehiclehas a theft deterrent system and it isarmed, unlock the
doors only withthe key or Keyless Entry System. This will avoid setting
off the alarm.
From the inside: To
lock the door, push
down on the lock lever.
.To unlock the door,
push the lock lever up.
70
'1'
U
'
I
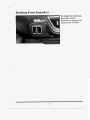
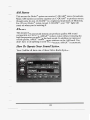
Power Door Locks
Push the lower part of
the switch marked
“LOCK” to lock all
doors at once. Push
the upper partof the
switch marked
“UNLOCK” to unlock
all the doors.
The switch on each rear door will lock allthe doors. It won’t unlock allof
the doors -- that’s a safety feature.
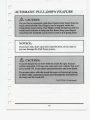
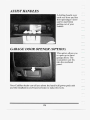
Automatic Door Locks (Option)
Just close your doors, turn on theignition . Every time you moveyour
shift leverout of “P7’(Park) all of the doors will lock. And, every time you
stop and move your shiftlever into “P” (Park), your doors will unlock. If
someone needs to get out while you’renot in “P” (Park), have that person
use the manual or power lock.When the door is closed-again;it will not
lock automatically.Just use the manual or power lockto lock the door
again.
You can also have thisfeature changed where the doors.wil1 stay locked
when you shift backinto “P (Park)”. Ask yourdealer for detail$.
Central Door Unlocking Feature(Option)
If you have this feature you can unlock the doors from either front,.
outside door lock. Hold the key in the turnedposition for a fewseconds.
71
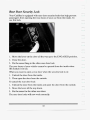
Rear Door Security Lock
Your Cadillac is equipped with rear door security locksthat help prevent
passengers .from opening the reardoors of your car from the inside. To
use this lock,
n
I
1. Move the lever on the door all the way up to the ENGAGEDposition.
2. Close the door.
3. Do thesame thing to the other rear door lock.
The rear doors of your vehiclecannot be opened from the inside when
this feature is in use.
When you want to open a rear doorwhen the security lockis on:
1. Unlock the door from the inside.
2. 'Then open the door from the outside.
To cancel the reardoor lock:
1. Unlock the door from the inside and open the door mom the outside.
2. Move the lever all the way down.
3. Do the same for the other reardoor.
The rear door
locks will now worknormally.
72
14
'1
ii
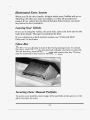
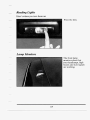
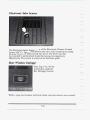
Illuminated Entry System
When you liftthe door handle, the lights inside yourCadillac will go on.
They’ll go offwhen youstart your engine, or when 30 seconds have
passed. If you vehicle has the Remote Keyless Entry feature, just push
any button on thetransmitter.
Leaving Your Vehicle
If you are leaving the vehicle, take your keys,open your door and set the
locks from inside. Then get out and close the door.
If your vehiclehas a theft deterrent system, see “Universal Theft
Deterrent’’ in the Index.
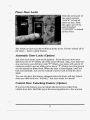
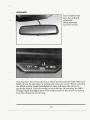
Glove Box
The glove boxis directly infront of the frontpassenger seat. To unlock
the door,insert the doorkey into the lock cylinderand turn it to the left.
To lock the door, turn the
key to the right and remove athe key. The key
may be removed in the locked or unlocked position.
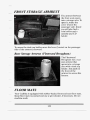
Securing OwnerManual Portfolio
To secure your portfolio, insert edge of the portfolio in the groove of the
glove box door as shown.
73
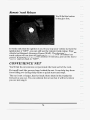
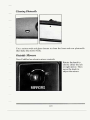
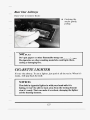
Remote Trunk Release
You’ll find the button
in the glove box.
It works only whenthe ignition ison. If you stop your vehicleand turn the
ignition key to “OFF”,you can still usethe remote trunk release. Your
vehicle has Retained Accessory Power(RAP). The electrical powerto the
trunk release will not shut off until you open a door or 10 minutes has
passed. If you want this powerfor another 10 minutes, just turn the key to
“RUN” and then back to “OFF”.
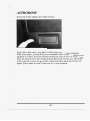
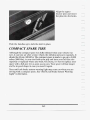
CONVENIENCE NET
You’ll find the convenience net just inside the back wall ofthe trunk.
Put small loads, like grocery bags,
behind the net. It can help keep them
from falling overduring sharp turns or quick starts and stops.
The netis not for larger, heavier loads. Store them in the trunk as far
forward as your can. You can unhook the net so that it will lie flat when
you are not using it.
74
n
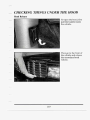
Check the distmce. You maybe too far from your vehicle.T ~ H
product hasa maximum range
Check the location. Other vehicles
or objects may be blocking
the
. ,. . :., , - : , : . signal.
,=
't'*--:m
:-:;
See your Cadillac dealeror a qualsed technician for service.
I
'_,I'
;
'
>
.
Changes or modifications to this system by other than an authorized
service facilitycould void authorization to use this equipment.
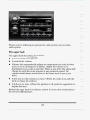
Operation
0
-,
Press this symbol to
unlock the driver’s
door. Press it again
within 5 seconds to
unlock the other
doors. Pressing this
button will also
disarm the Theft
Deterrent System
and turn on the
interior lights.
Press this symbol to
lock yourdoors.
This also arms the
Theft Deterrent
System.
Press this symbol to
open thetrunk.
Press this button to
turn on theinterior
lights only.
77
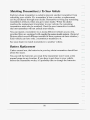
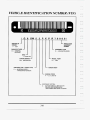
Matching Transmitter(s) To Your Vehicle
Each key chain transmitter is coded to prevent another transmitter from
unlocking your vehicle. If a transmitter is lostor stolen, a replacement
can be purchased through your dealer. Remember to bring any remaining
transmitters with you when you go
to your dealer. When the dealer
matches the replacement transmitter to your vehicle,the remaining
transmitters must alsobe matched. Once the new transmitter is coded,
the lost transmitter will not unlock your vehicle.
You can match a transmitter to as many different vehicles as you own,
provided they are equipped with exactly the same model system. (General
Motors offers several different models of these systems on their vehicles.)
Each vehicle can have only2 transmitters matched to it.
See your dealer to match transmitters to another vehicle.
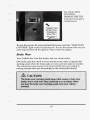
Battery Replacement
Under normal use, the batteriesin yourkey chain transmitter should last
about two years.
You can tell the batteries areweak if the transmitterwon’t workat the
normal range in anylocation. If you haveto get close to your vehicle
before the transmitterworks, it’s probably timeto change the batteries.
78
o/
E1
n
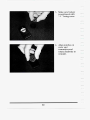
3. Make sure battery
is positioned with
" + " facing cover.
4. mlgn notches on
cover and
transmitter and
rotate clockwise to
reinstall.
I
1
80
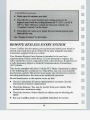
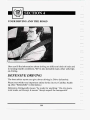
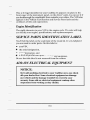
THEFT
Vehicle theft is bigbusiness, especially insome cities. Although your
Cadillac has a number of theft deterrent features, we know that nothing
we put onit can make it impossible to steal. However,there areways you
can help.
Key in the ignition
If you walk away
from your vehicle withthe keys inside, it’san easy target
for joy riders or professional thieves -- so don’t do it.
When you park your Cadillac and open thedriver’s door, you’ll hear a
chime reminding you to remove your key from the ignition and take it
with you. Alwaysdo this. Your steering wheel will be locked, and so will
your ignitionand transmission. And remember to lock the doors.
Parking at Night
Park in a lighted spot, close all windowsand lock your vehicle.Remember
to keep your valuables out of sight. Put them in a storage area, ortake
them with you.
Parking Lots
If you park in a lot where someone will be watching your vehicle, it’s
best
to lock it upand take your keys. But what if you have to leave your
ignition key?What if you have to leave something valuable in your
vehicle?
0 Put your valuables in a storage area, like yourtrunk or glove box.
Lock the glove box.
0 Lock all the doors except the driver’s.
Then take the door key with you.
81
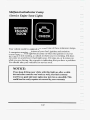
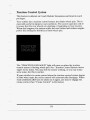
THEFT D E T E W N T (OPTION)
SECURIT”
SYSTFM
If your Cadillac has this
option, it has a theft
deterrent alarm system.
With this system,the
“SECURITY
SYSTEM” light will
flash as you open the
door (if your ignitionis
off).
This light reminds you to arm the theft deterrent system. Here’s how to
do it:
1. Open the door.
2. Lock the door with the power door lock switch or Keyless Entry
System. The “SECURITY SYSTEM” light should come on and
stay on.
3. Close all doors. The “SECURITYSYSTEM” light should go off.
If a door or thetrunk is opened without the key, the alarm will go off.It
will also gooff if a door lock or the trunk lock is damaged. Your vehicle’s
lights will flash and the horn will sound.
Remember, the theft deterrent system won’t armif you lock the doors
with a key or manual door lock. It arms only if you use a power door lock
switch or Keyless Entry System.
Here’s how to avoid setting off the alarm by accident:
If you don’t wantto arm the theft deterrent system, the vehicle should
be locked after the doors are closed.
0 Always unlock a door with a key or Keyless Entry System. Unlocking a
door any other way will set off the alarm.
If you set off the alarm by accident, unlockany door with your keyor
Keyless Entry System.
82
- 1
I
- 1
The alarm won’t stop if you try to unlock a door any other way.
How to Test
r
The
Alarm
From inside the vehicle roll down your window,
then get out of your
vehicle keeping the dooropen.
0 From outside the vehicle withthe dooropen, lock the vehicle using
the power door lock or theKeyless Entry System and close the door.
0 Once the interior lights are off, reach in and unlock the door using the
manual lock. Open the door, the hornwill sound and your headlights
will flash.
If the alarm does not sound when it should, check to see if the horn
works. The horn fuse may be blown. To replace the fuse, see “Fuses and
Circuit Breakers” in the Index.
0
To reduce the possibility of theft, always arm the theft deterrent system
when leaving your vehicle.
PASS-KEY@II
Your vehicle is equipped with the PASS-Key@II(Personalized
Automotive Security System) theft deterrent system. PASS-Key@IIis a
passive theft deterrent system. This means you don’t have to doanything
different to arm or disarm the system. It works when youinsert or remove
a resistor pellet in the
the key from the ignition. PASS-Key@II uses
ignition key that matches a decoder in your vehicle.
When the PASS-Key@II systemsenses that someone is usingthe wrong
key, it shuts down the vehicle’s starter and fuel systems. For about three
minutes, the starterwon’t work and fuel won’t go to theengine. If
someone tries to startyour vehicle again or uses another key during this
time, the vehicle will not start. This discourages someone from randomly
trying different keys with different resistor pellets in an attempt to make a
match.
The ignition key must be clean and dry before it’s inserted in the ignition
or theengine may not start. If the engine does not start and and the
“PASS KEY FAULT” light comes on, the key may be dirty or wet. Turn
the ignition off.
83
Clean and dry the key. If the starterstill won’t work, and the key appears
to beclean and dry, waitabout three minutes and try the otherignition
key. At this time, you may also wantto check the (see “Fuses and Circuit
Breakers” in the Index). If the starterwon’t work withthe otherkey, your
vehicle needs service. If your vehicledoes start, thefirst ignitionkey may
be faulty. See your Cadillac dealer or a locksmith who can service
the
PASS-Key@II.
If you accidentally use a key that has a damaged or missing resistorpellet,
the starterwon’t work But youdon’t have to wait three minutes before
trying one of the otherignition keys.
See your Cadillac dealer or a locksmith who can service the PASS-Key@II
to have a new key made.
If you’re ever driving and the “PASS KEY FAULT” light comeson and
stays on, you will be able to restart your engine if you turn it off. Your
PASS-Key@II system, however,not
is working properly and must be
serviced by your Cadillac dealer. Your vehicle isnot protected by the
PASS-Key@II system.
If you lose or damage a PASS-Key@II ignition ke, see your Cadillac
dealer or a locksmith who can servicePASS-Key I1 to have a new key
made.
J
84
o/
‘U I
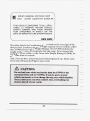
NOTICE:
Your modern Cadillac doesn’t need.an elaborate“break-in.” But
it will perform better in thelong run if you followthese
guidelines:
Keep your speed at 55 mph (88 km/h) or less for the first
1000 miles (160 km).
Don’t drive at any one speed -- fast.or slow -- for the first
1000 miles (160 km). Don’t make full-throttle starts.
Avoid making hard stops for the first200 miles (322 km) or
so. During this timeyour new brake liningsaren’t yet broken
in. Hard stopswith new linings can mean premature wear
and earlierreplacement. Follow this “breaking-in’’ guideline
every time you get new brake linings.
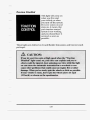
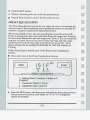
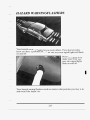
IGNITIQN KEY POSITIONS
This lock: gives you five
different positions.
‘Beforeyou put the-keyin, your ignition will be in the Lock position. This
position locksyour ignition, steering wheel and transmission. It’san
anti-:theft ,feature.
I
1
The otherpositions let you perform these functions:
ACC: Accessory lets you use things likethe radio and the windshield
wipers whenthe engine is off. To get into “ACC”, push
in the key and turn
it towardyou. Yoursteeringwheel will remain locked, just as it was
before you inserted thekey.
OFF: This position lets you turn off the engine but still turn thesteering
wheel. It doesn’t lockthe steeringwheel like “Lock.”Use “Off” if you
must have yourcar in motion while the engine is off (for example, if your
car is being pushed).
RUN This is the position for driving.
START This starts your engine.
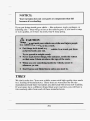
NOTICE:
If your key seems stuck in “Lock” and you can’t turn it, be sure
it is all theway in. If it is, then turn thesteering wheel left and
right while. youturn the key hard. But turn the key only with
your hand. Using a tool to force it could break thekey or the
ignition switch. If none of this works, then your vehicle needs
service.
W
I
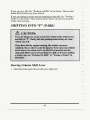
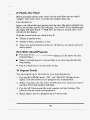
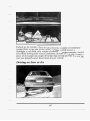
STARTING YOUR ENGINE
Move your shift leverto “P” (Park) or “N” (Neutral). Your,,engine won’t
start in any other position -- that’s a safety feature. To restart when you’re
already moving, use “N” (Neutral)only.
NOTICE:
Don’t try to shift to “P” (Park)..if your Cadillae is moving. If you
do, you could .damagethe transmission. Shift to “P” (Park) only
when your vehicle is stopped. ”..
D
-
I
I
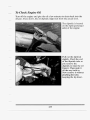
To start vour V8 engine:
1. Without pushing the accelerator pedal, turn
your ignitionkey to
“Start.” When the engine starts, letgo of the key. The idle speed will
go down as yourengine gets warm.
NOTICE:
Holding yourkey in “Start” for longer than15 seconds at a time
will cause your battery to be drained much sooner.
And the
excessive heat can damage your starter motor.
2. If it doesn’tstart within 3 seconds, pushthe accelerator pedal about
one-third of the way down, while you hold
the ignition key in “Start.”
When the engine starts, let go of the key and let up on the accelerator
pedal. Wait about 15 seconds between each tryto help avoid draining
your battery.
When starting your engine in very coldweather (below O°F or -18 C), do
this:
1. With your foot off the accelerator pedal, turn theignition key to
“Start” and holdit there. Aftertwo seconds, pushthe accelerator
pedal about one-third
of the way down. When the engine starts, let go
of the key. Use the accelerator pedal to maintain engine speed, if you
have to, until your engine has run for a while.
2. If your engine still won’t start (or starts but then stops),
it couldbe
flooded with too much gasoline.Try pushing youra,cceleratorpedal all
the way to thefloor and holdingit there as you holdthe key in “Start”
for about three seconds. If the vehicle starts briefly but thenstops
again, do the same thing, but this time keep the pedaldown for five or
six seconds. Thisclears the extra gasoline fromthe engine.
87
I
NOTICE:
Your engine is designed to work withthe electronics in your
vehicle. If you add electrical parts oraccessories, you could
change the way the fuel injection systemoperates. Before
adding electrical equipment, check withyour dealer. If you
don’t, your engine might not perform properly.
If you ever haveto have your vehicle towed, seethe part of this
manual that tells how to do it without damaging your vehicle.
See “Towing Your Vehicle’’in the Index.
L
D m N G THROUGH DEEP STMDING
WATER
NOTICE:
If you drive too quicklythrough deep puddles or standing water,
water can come in through your engine’s air intake andbadly
damage your engine. If you can’t avoiddeep puddles or standing
water, drive through them very slowly.
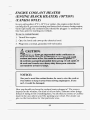
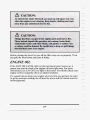
ENGINE COOLANT HEATER
(ENGINE BLOCKHEATER) (OPTION)
(CANADA ONLY)
In very cold weather, 0°F (-18O C) or colder, the engine coolant heater
can help. You’ll get easier starting and better fuel economy during engine
warm-up. Usually,the coolant heater should be plugged in a minimum
of
four hours priorto starting your vehicle.
To use the coolant heater:
1. Turn off the engine.
2. Open thehood and unwrap the electrical cord.
3. Plug it into a normal, grounded 110-volt outlet.
NOTICE:
After you’ve used the coolant heater, be sure to store the cord
as
it was before to keepit away from movingengine parts. If you
don’t, it could be damaged.
How longshould you keep thecoolant heater plugged in? The answer
depends on theweather, thekind of oil you have,and some other things.
Instead of trying to list everythinghere, we ask that you contact a Cadillac
dealer in the areawhere you’ll be parking your vehicle.The dealercan
give youthe best advice for that particular area.
89
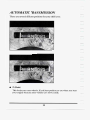
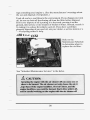
AUTOMTIC TRANSIMIISSION
There areseveral different positions for your shift lever.
1
;
- 1
-
P (Park)
This locks yourrear wheels. It’sthe best position to use whenyou start
your engine because your vehicle can’t move easily.
90
7
i
r_
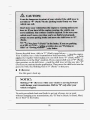
Ensure theshift lever is fully in“P” (Park) range before starting the engine.
Your Cadillac has a brake-transmission shift interlock. You have to fully
apply your regular brakes before you can shift from “P” (Park) when the
ignition key is in the “Run”position. If you cannot shift out of “P” (Park),
ease pressure on the shift lever -- push the shift lever all the way into “P77
(Park) as you maintain brake application. Then move the shift leverinto the
gear you wish.See “Shifting Out of ‘P’(Park)” in this part.
R (Reverse)
Use this gear to back up.
NOTICE:
Shifting to“R” (Reverse) whileyour vehicle is moving forward
could damage your transmission. Shift to“R” only after your
vehicle is stopped.
To rock your vehicle back and forth to get out of snow, iceor sand
without damaging your transmission, see “If You’re Stuck: In Sand, Mud,
Ice or Snow” in the Index.
91
A
I
N(Neutral)
In this position, your engine doesn’t connect with the wheels. To
restart when you’realready moving, use“N” (Neutral) only. Also, use
“N” when your vehicle is being towed.
7 ’
P
I
1
NOTICE:
Damage to your transmission caused
by shifting outof “P”
(Park) or “N” (Neutral) with the engine racing isn’t covered
by
your warranty.
0
@ (AutomaticOverdrive)
This position is for normal driving. If you need more power for
passing, and you’re:
- Going less than about 35 mph (60 km/h), push your accelerator
pedal about halfway down
- Going about 35 mph (60 h/h)
or more, push the accelerator all
the way down.
You’ll shift downto thenext gear and have more power.
92
D or 3 (Third Gear)
This is like@, but you never gointo Overdrive.
Here aresome times you mightchoose “D” or “3” instead of “@”:
- When driving on hilly, winding roads
- When towing a trailer, so there is less shiftingbetween gears
- When going down a steep hill
2 (Second Gear)
This position gives youmore power but lower fuel economy. You can
use 2 on hills. It can help control your speed as you go down steep
mountain roads, but thenyou would also want
to use yourbrakes off
and on.
(6
77
NOTICE:
Don’t drive in “2” (Second Gear) formore than 5 miles (8 km),
or atspeeds over 55 mph (88 km/h), or you can damage your
transmission. Use “D” or “3” as much as possible.
Don’t shift into “2” unless you are going slowerthan 65 mph
(105 km/h), or you can damage your engine.
1 (First Gear)
This position gives you evenmore power (but lower fuel economy)
than “2.” You can use it on very steep hills, or in deep snow or mud. If
the selector lever isput in “1,”the transmission won’t shiftinto first
gear until the vehicle is going slowly enough.
NOTICE:
If your rear wheels can’t rotate, don’t try to drive. This might
happen if you werestuck invery deep sand ormud or were up
against a solid object.You could damage your transmission.
Also, if you stop when goinguphill, don’t holdyour vehicle there
with only the accelerator pedal. This could overheat and
damage the transmission. Use your brakes to hold your vehicle
in position on a hill.
93
3
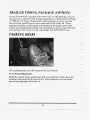
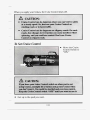
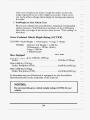
T M L E R TOWING PACMGE (OPTION)
If your Fleetwood is equipped with either V92 or V4P package,you can
increase your vehicle's trailer towing capabilityto 5,000 pounds (2270 kg)
or 7000 lbs. (3178 kg).To determine which package you have,see the
Service Parts Label located on theunderside of the trunklid. These
packages include a trailering harness located in the trunk,heavy-duty
engine and transmission cooling.Also included are heavy-duty front and
rear springs, 2.93:l rear axle ratio and Eagle GA P235/70R15 tires.
P-NG
I
BRAKE
The parking brake uses the brakes on the rear
wheels.
To set the parkingbrake:
Hold the regular brake pedaldown with your rightfoot. Push down the
parking brake pedal with yourleft foot. If the ignition is on, the brake
system warning light will
come on.
94
I
a,
I
I
I
When you move out of “P” (Park) or “N”(Neutral), if your engine is
running, your parking brake should go off.If it doesn’t, you havea
parking brake problem and should have it fixed.In themeantime, you
can still release your parking brake. Just pull on themanual release lever,
as shown.
I
NOTICE:
Driving with the parking brake
on can cause your rear brakes to
overheat. You may haveto replace them, and you could
also
damage other partsof your vehicle.
95
If you are on a hill: See “Parking on Hills” inthe Index. That section
shows howto turn your front wheels.
If you are towing a trailer and are parking on any hill:See “Towing a
Trailer” inthe Index. That section shows what to do first to keep the
trailer from moving.
E
1
SHIFTING INTO 44P”
(PARK)
Steering Column Shift Lever
n
! f l
I
1. Hold the brake pedal down with your rightfoot.
.
96
.
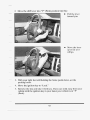
2. Move the shift lever into “P” (Park) position like this:
0 Pull the lever
toward you.
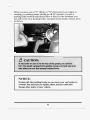
3. With your right foot still holding the brakepedal down, set the
parking brake.
4. Move the ignition key to “Lock.”
5. Remove the key and take it with you.If you can walk away from your
vehicle withthe ignition key in your hand, your vehicle is in
“P”
(Park).
97
3
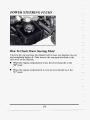
having Your VehicleWith the Engine Running
r
b
Torque Lock (Automatic Transmission)
If you are parking on a hill and you don’t shift your transmission
into “P”
(Park) properly, the weight of the vehicle may put toomuch forceon the
parking pawl inthe transmission. You may find it difficultto pull the shift
lever out of “P” (Park). Thisis called “torque lock.” To prevent torque
lock, alwaysbe sureto shift into “P” (Park) properly before you leave the
driver’s seat. To find out how, see “Shifting Into ‘P’ (Park)” in the Index.
If “torque lock” does occur, you may need to have another vehicle push
yours a little uphill to takesome of the pressure from the transmission, so
you can pullthe shift lever out of “P” (Park).
4
Ir
Eli
SHIFTING OUT OF “P” (PARK)
Your Cadillac has a brake-transmission shift interlock.You have to fully
apply your regularbrake before you can shift from“P” (Park) when the
ignition is inthe “Run”position. See “Automatic Transmission”in the
Index.
If you cannot shift out of “P” (Park), ease pressure on theshift lever-push the shift lever allthe way into “P” (Park) as you maintain brake
application. Then move the shift leverinto the gearyou want. If you ever
hold the brake pedal down but still can’t shiftout of “P” (Park), try this:
1. Turn the key to “Off.” Open and close the driver’s door to turnoff the
Retained Accessory Powerfeature.
98
I
2. Apply and hold the brake until the end of Step 4.
3. Shift to “N” (Neutral).
4. Start thevehicle and then shift to the drive gear you want.
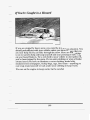
P m N G OVER THINGS T m T BURN
99
ENGINE EXH14UST
51
*-
U
100
-
RUNNING YOUR ENGINE WHILE YOU’RE
PARKED
It’s better not to park
with the engine running. But if you ever haveto,
here aresome things to know.
Follow the propersteps to be sure
your vehicle won’t move.See “Shifting
Into ‘P’ (Park)’’ inthe Index.
If you are parking on a hill and if you’re pullinga trailer, also see “Towing
a Trailer” in the Index.
101
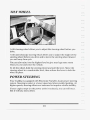
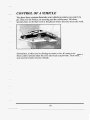
TILT WHEEL
A tilt steering wheel allows youto adjust the steering wheel before you
drive.
A tilt and telescope steering wheel allows you to adjust the height of the
steering wheel before you drive and to move the steering wheel toward
you and away from you.
You can also raiseit to the highest level to give your legsmore room
when you exitand enter thevehicle.
To tilt the wheel, holdthe steering wheel and pullthe lever. Movethe
steering wheel to a comfortable level, then release the lever to lock the
wheel in place.
GI
POWER STEERLNG
Your Cadillac is equipped with Electronic Variable Assist powersteering
system. Steering is easier at a lower speed and when parallelparking. At
higher speeds, steering efforts are increased to improve vehicle stability.
If your engine stops (or the power assist is reduced), you can stillsteer.
But it willtake more effort.
102
nr
r
r_
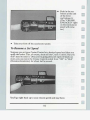
POWER WTNDOWS
The controls are near each window. Here’s how the master control works.
0
Push the switch
forward to close.
0
Push the switch
rearward to open.
Express Down Window (Driver’sSide)
c-
Just press the switch once -- for half a second or more -- and then letgo.
The window will goall the way down.If you want to stop the window as it
is going down,press the switch again.
Your vehicle has Retained Accessory Power(RAP). When you stop your
vehicle and turn theignition key to “OFF”,you can still use your power
windows. The electrical powerto thepower windows willnot shut off
until you open a door or 10 minutes has passed. If you want this power
for another 10 minutes, just turn the,key to “RUN” and then back.to
‘ 6 0 ~ ~ 7 3 .
103
Rear .WindowLock.Out
.HORN
To sound the horn,just preiss the &ee$ingwheelpad..
104
The lever on theleft side of the steering column includes your:
0
Turn Signal and Lane Change Indicator
0
Headlight High-Low Beam & Passing Signal
Windshield Wipers
WindshieldWasher
Cruise Control
0
Turn Signaland Lane Change Indicator
To signal a turn, move
the lever allthe way up
or down. When the
turn is finished,the
lever will return
automatically.
To signal a lane change. slightly movethe lever up or down. When the
lane change is finished release the lever.
105
A green arrow on the
instrument panel will
flash inthe direction of
the turn or lane
change.
-
To signal a lane change, just raise or lower the lever untilthe greenarrow
starts to flash. Hold it there until you complete your lane change. The
lever willreturn by itself when yourelease it.
As you signal a turn or a lane change, if the arrows don’t flashbut just
stay on, a signal bulbmay be burned outand other drivers won’t see your
turn signal.
If a bulb is burned out,replace it to help avoid an accident. If the green
arrows don’tgo on atall when you signala turn, check the fuse (see
“Fuses” in the Index) and for burned-outbulbs.
If you havea trailer towing option with added wiring for the trailer lights,
a different turn signal flasher is used. With thisflasher installed, the
signal indicator will flash evenif a turn signal bulb isburned out. Check
the frontand rear turnsignal lights regularlyto make sure they are
working.
1
I
E,
Operation of Lights
Although your vehicle’s lighting system (headlights, parking lights, fog
lamps, sidemarker lights and taillights) meets all applicablefederal
lighting requirements, certain statesand provinces may applytheir own
lighting regulations that may require special attention before you operate
these lights.
For example, some jurisdictions mayrequire thatyou operate your lower
beam lights with fog lamps
at all times,or thatheadlights be turned on
whenever you must use
your windshield wipers.In addition, most
3’
i
i
i
- I
J
106
jurisdictions prohibit driving solely with parking lights, especially
at dawn
or dusk. It is recommended that you check with your own
state or
provincial highwayauthority for applicable lightingregulation.
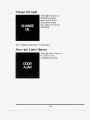
Headlight High-Low Beam
To change the
headlights from low
beam to high or high to
low, pullthe turnsignal
lever allthe way toward
you. Then releaseit.
When the high beams
are on,this blue light
on theinstrument
panel also will be on.
Flash-To-Pass Feature
This lets you use your high beam headlights
to signal a driver in
front of
you that you wantto pass. It works evenif your headlightsare off.
To use it, pullthe multifunction lever towardyou. When you do:
If your headlights are off Your high beam headlights will
turn on.They’ll
stay on as long as you hold
the lever there. Release the lever to turn them
off.
If your headlights are on. but on low beam: The system works normally.
Just pull the lever. Your headlights will shift
to high beam and stay there.
To return to low beam, just pull the lever toward you.
If your headlights are on. and onhigh beam: Your headlights will switch
to low beam.To get back to high beam, pull the lever toward you.
107
Windshield Wipers
g:
WIPER To control the wipers, turn the band on the multifunction lever.
MIST: Turn the band to “MIST” and then release it for a single wipe
cycle. Formore cycles, hold the band on MIST longer.
LO or HI: Turn the band toward you to either LO (low speed) or to HI
(high speed), depending on the wiper speed you want.
DELAY: With this you canset the wiper speed for a long or short delay
between wipes. Movethe band to ON for long delaysand the closer you
get to LO the shorter the delay.
OFF: To turn thewipers off,turn the band to OFF.
LJ
n,
Heavy snowor ice canoverloadyour wipermotor. A circuit breaker will stop
the motor until it cools.Clear away snowor ice to prevent an overload.
i
108
Windshield
Washer
To wash your
windshield, push the
paddle labeled
“PUSH”, then release
it. After washing the
windshield the wipers
will stop, unless you
were using your
wipers. If you were, the
wipers will resume the
wiper speed you were
using. For more
washer cycles, push
and hold the paddle.
Washer
Fluid
Low Light
If this light comes on,
when your wipersare
turned on, it means
you’re low on washer
Driving without washer fluid can be dangerous. A bad mud splash can
block your vision.You could hit another vehicle or go off the road. Check
your washer fluid leveloften.
109
3
NOTICE:
I
II
When using concentrated washer fluid, follow the
manufacturer’s instructions for adding
water.
Don’t mix water with ready-to-use washer fluid. Water can
cause thesolution to freeze and damage your washer fluid
tank andother parts of the washer system. Also, water
doesn’t clean as well as washer fluid.
ill
Fill your washer fluid tank only 3/4 full when it’s very cold.
This allows for expansion, which coulddamage the tankif it
is completely full.
Don’t use radiatorantifreeze in your windshield washer.It
can damage your washer system and paint.
CRUISE CONTROL
CI
E
With Cruise Control, you can maintain a speed of about 25 mph
(40 km/h) or more without keeping your foot on the accelerator. This
can reallyhelp on long trips.Cruise Control does not work at speeds
below about 25 mph (40 kmh).
-J
110
I
I
When you apply yourbrakes, the Cruise Control shuts off.
To Set Cruise Control
Move the Cruise
Control switch to
“ON.”
0
Get up to the
speed you want.
111
To Increase Speed While Using Cruise Control
There aretwo ways to go to a higher speed. Here’s the first:
Use the accelerator pedal to get to the higher speed.
Push the button at theend of the lever, then release the button and
the accelerator pedal. You’ll now cruise at the higher speed.
Here’s the second way to go to a higher speed:
0
Move the Cruise switch from “ON” to “R/A.”Hold it there until you
get up to thespeed you want, and then release the switch.
To increase your speed in very small amounts, move the switch to
“R/A’
for less than half a second and then release it. Each time you do
this, yourvehicle will go about 1mph (1.6 km/h) faster.
To Reduce Speed While Using Cruise Control
There aretwo ways to reduce your speed while using cruisecontrol:
Push in the button at theend of the lever until you reach the lower
speed you want, then release it.
To slow down in very smallamounts, push the button for less than half
a second. Each time you do this, you’ll go 1mph (1.6 km/h) slower.
Passing Another Whicle while Using Cruise Control
Use the accelerator pedal to increase your speed. When you take your
foot off the pedal, your vehicle will slow downto the Cruise Control
speed you set earlier.
113
Using Cruise Control on
Hills
How well yourCruise Control will work on hills depends upon your
speed, load, and the steepness of the hills. When going up steep hills, you
may have to stepon the accelerator pedal to maintain your speed. When
going downhill,you may have to brake or shift to a lower gear to keep
your speed down. Of course, applying the brake takes you out of Cruise
Control. Many drivers find thisto be too much trouble and don’t use
Cruise Control on steep hills.
To Get Out of Cruise Control
There aretwo ways to turn off the Cruise Control:
Step lightly on the
brake pedal;
114
Di
0
Move the Cruise
switch to "OFF."
To Erase Speed Memory
When you turn off the Cruise Control or the ignition, yourCruise
Control set speed memory is erased.
LIGHTS
You'll find the control here.
It controls these light
systems:
Headlights
Taillights
0
0
II
115
0
Parking Lights
License Lights
Sidemarker Lights
Instrument Panel
Lights
Interior Courtesy
Lights
Here’s how your light systems work:
Pull the switch out to thefirst stop to turn onyour parking and
taillights, sidemarker lights, and instrument panel lights.
Pull the switch out all the way to turn on the headlights.
You can brighten or dim yourinstrument cluster by rotating the
headlight switch.
Push the switch all the way in to turn themoff.
Headlight “On” Warning
!
C I‘
If the manual light switch is left
on (as when someone has parked your
car), you’ll hear a warningtone when youturn off the ignition and open
the driver’s door.
Retained Accessory Power
When youstop your Cadillacand turn theignition to “OFF”,you can use
these accessories for 10 more minutes.
Radio
Powerwindows
Astroroof (If equipped)
Windshieldwipers
Trunk release
When you open a door, everything will go off.And, after 10 minutes
everything will go off also.
If you want power for another10 minutes, just turn thekey to “RUN”
and back to “OFF”.
Power Drain Protection
When the ignition is off and the interiorlights or underhood lights are
accidentally lefton, they will automatically shut off after 10 minutes. This
protects you from a possibledead battery. To turn power backon, lift up
on theoutside door handle or turn theignition to the “RUN”position.
116
I
El E
ci
e
.-
y_
I-
Please don't cover the
light sensor.
If you cover the sensor, it will sense that it is dark outside and your lights
will come on.
Cornering Lights
If your exterior lights are on, thecornering lights will come on when you
signal a turn. This will provide more light for cornering when itsdark.
Underhood Light
Your vehicle hasa Delay Interior Lighting System(DIL). This system
controls power to theunderhood light. Just pull up on the door handle
,with the hood raised and the lamp will light for about10 minutes.
Every time the door handleis pulled up thelight will stay on another
10 minutes. The light will go off when you close the hood.
01I
Daytime Running Lights (Canada Only)
The Canadian Federal Government has decided that “Daytime Running
Lights’’ (DRL) area useful feature, in that DRLcan make your vehicle
more visible to pedestrians and other drivers during daylighthours. DRL
are required on new vehicles sold inCanada.
Your DRL work with a light sensor on top of the instrument panel. Don’t
cover itup.
The high beam headlights will come on at reduced brightness in daylight
when:
0 The ignition is on
The headlight switch is off, and
The transmission is not in “P” (Park).
At dusk, the DRLwill switch off and the exterior lightswill come on
automatically. At dawn, the exterior lights will go out and the high beams
will change to thereduced brightness of DRL (if the headlight switch is
off).
Of course, you may stillturn on the headlights any time you need to.
To idle your vehicle with
the DRLoff, shiftthe transmission into “P”
(Park), turn theignition OFF, and then restartyour engine.The DRLwill
stay off until you shift out of “P” (Park).
0
l
I
i
118
Reading Lights
Here's where you turn them on:
Lamp Monitors
The frontlamp
monitors show that
your headlamps, high
beams and turn signals
are working.
119
The rearlamp
monitors show that
your taillightsare
working.
MIRRORS
Inside DaylNight Rearview
Mirror
To reduce glare from lights behind you, move the lever like this:
I'
r
a
4
120
I
l
Automatic
Your Cadillacmay
have the optional
automatic
electrochromic
rearview mirror.
You may have the mirror that has a Three-position switch: OFF, MIN and
MAX. If you do, just select a setting that suits yourneeds. When selecting
the MAX setting, bright headlights far away will cause the mirror to
gradually darken. Usethis setting in rural driving. By selecting the MIN
setting, bright headlights have to be ratherclose for themirror to darken.
Use this setting for city driving.
This mirror automatically changesto reduce glare from headlights behind
you. A photocell on theback of the mirrorsenses when itis becoming
dark outside. Another photocell built into the mirror
surface senses the
headlights behind you.
The mirror will darken gradually to reduce glare. This change may take a
few seconds.
I
ONIOFF Switch
i,'
I
To turn the mirroron, press the switch located at thebase of the mirror.
I
0 I'
';i
Reverse Gear Day Mode
The reverse mode is another important featureof the automatic mirror.
When the shift lever is placed in
"R'(Reverse), the mirror changes to the
daytime mode for a bright image in the mirror as you back up.
122
I
1I
Cleaning Photocells
7
Use a cotton swab and glass cleaner to clean the front and rear photocells
that make the mirror work.
Outside Mirrors
Your Cadillac has electric mirror controls.
Rotate theknob to
choose either theleft
or right mirror. Then
move the knob to
adjust the mirror.
123
7:
Convex OutsideMirror
1
n
Your right sidemirror is convex.
A convex mirror's surfaceis curved so you can see more from the driver's
seat.
Front Seat Illuminated Vanity
Mirrors
To use one, turn the
sunshade down. Then
lift the cover up to see
the mirror. The switch
makes the light
brighter.
-I
- 1
I
Rear Seat Vanity Mirrors
The Fleetwood Brougham hasthese unless you have anastroroof. Press
the buttonto bring a mirror down. The switch makesthe light brighter.
i
i
124
ASTROROOF
If you have this option, the switch is here:
If you have this option, you have a safety glasspanel and a sunshade.
With the handle, you can slide your sunshade open or closed. When your
ignition is in Run, move the switch toward the rear of the car to open the
roof. To close it, move the switch toward the frontof your car. Once the
roof is closed, youcan let go of the switch and then push the front of it
again. This opens the roof at therear to avent position.
125
ASHTRAYS
Front Center Ashtray
Here’s how to take it out forcleaning:
i
Lift it out by pulling on the snuffer.
If it won’t come out, reach under the drawer and push up on the
ashtray bowl and remove it.
-J
-!
126
,
-
Rear Door Ashtrays
Here’s how to remove them:
0
Grabbing the
snuffer gently,
pull up.
NOTICE:
Don’t put papersor other flammable things into your ashtrays.
Hot cigarettes or other smoking materials could ignite them,
causing a damaging fire.
CIGARETTE LIGHTER
It’s near theashtray. To use a lighter, just push it all the way in. When it’s
ready, itwill pop back by itself.
NOTICE:
7
If you hold a cigarette lighter in with your hand while it is
heating, it won’t be able to back away from the heating element
when it’s ready. That can make it overheat, damaging the lighter
and the heating element.
127
ASSIST HAiVDLES
A folding handle over
each rear door and the
front passenger’s door
can be used when
getting out of your
vehicle.
1
‘
d
I
r
GARAGE DOOR OPENER (OPTION)
This option allows you
to open up to three
garage doors. The
transmitter unit fits
into the overhead
panel.
Your Cadillac dealer can tellyou about the hand held power pack unit
and the installation you’ll need at home to make this work.
128
i
d
- FRONT STORAGE ARMREST
I
The armrest between
the frontseats opens
into a storage area. To
open it, rotate the
cover toward the
passenger side. Inside
you will also finda
coin holder and a
cassette and CD
holder.
__
-.
To access the dual cup holder move the lever (located on the passenger
side of the armrest) rearward.
Rear StorageArmrest (Fleetwood Brougham)
The Fleetwood
Brougham has a rear
seat armrest that
opens into a storage
area with a dual cup
holder. Just push on
the frontof the
armrest to access this
feature.
FLOOR IMATS
Your Cadillac is equipped with rubber-backed front and rear floor mats.
Keep floor mats vacuumed and use a spot cleaner, if necessary. Do not
machine wash.
129
1
1
THE INSTRUMENT PANEL: YOUR
INFORMATION SYSTEM
Your instrument panel is designed to let you know at a glance how your
Cadillac is running. You’ll know how fast you’re going, how much fuel
you’re using,and many of other things you’llneed to know to drive safely
and economically.
EnglishlMetric Button
You can change from
English (miles)to
metric (kilometers) by
pushing thisbutton.
130
r
‘
I
F
L a i
3I
I
I
W M I N G AND INDICATOR LIGHTS
This section describesthe warning lightsthat are on
your vehicle.The
pictures will help you locate them.
Warning lights can signalthat something is wrong before it bec0me.s
serious enough to cause an expensive repair or replacement. Paying
attention to your warning lights could also save
you or othersfrom injury.
Warning lights goon when there may be or is aproblem with one of your
vehicle’s functions.As you will see in the details on the next few pages,
some warning lightscome on briefly when youturn theignition key just to
let you know they’re working.If you are familiar with this section, you
should not bealarmed when this happens.
When one of the warning lights comeson and stays on when youare
driving, checkthe section that tells you whatto do aboutit. Please follow
the manual’s advice. Waiting
to do repairs can be costly -- and even
dangerous. So please get to know your warning lights. They’re a big help.
D I‘
Brake System Warning Light
Your Cadillac’s hydraulicbrake system is dividedinto two parts. If one
part isn’t working,the other partcan still workand stop you. For good
braking, though, you need both parts working well.
If the warning light
comes on, therecould
be a brake problem.
Have your brake
system inspected right
away.
1
This light should comeon as you start thevehicle. If it doesn’tcome on
then, have it fixed so it will be ready to warn youif there’s aproblem.
1
i’
132
If the light stays on, turn the ignition off.Or, if the light comes on when
you’re driving, stop as soon as possible and turn theignition off.Then
start theengine again to reset the system. If the light still stayson, or
comes on again while you’re driving, your Cadillac
needs service. If the
regular brake system warning light isn’t
on, you still have brakes,but you
don’t have anti-lockbrakes. If the regular brake system warning light is
also on, you don’t haveanti-lock brakes and there’s a problem with your
regular brakes. See “Brake System Warning Light”earlier in this part.
i - ‘
The anti-lock brake system warning light may also
come on when you are
driving witha compact spare tire.If this happens, the light means you
won’t have anti-lock until youreplace the compact spare with a full-size
tire. If the warning light stayson after you replace the compact spare with
d
a full-size tire, or if it comeson again when you’re driving, your Cadillac
needs service.
Zl
Traction Control SystemLights
I
:il
I
1,
Traction Engaged
This light will go on as
a bulb check whenyou
start your engine.It
will also come on when
the traction control
system is active.
n
t
134
Traction Disabled
-
TRACTION
CONTROL
This light will come on
when you firststart
your vehicleor when
you turn off the system.
If it ever comes on and
stays on, it means that
your traction control
system is not working,
and you should have it
serviced assoon as
possible.
These lights are deleted on Coach Builder limousines and funeral coach
packages.
NOTICE:
Spinning your wheels whenthe “Tkaction Disabled” light comes
on can destroy parts of your vehicle .as as
well
the tires. If you
spin your .wheelstoo fast while shiftingyour transmission back
and forth, you can destroy your transmission.
When you’re
stuck., spin the wheelsas little as possible.
3
Engine Coolant Temperature Warning’Light
This light tells youthat
your engine coolant has
overheated. If you have
been operating your
vehicle under normal
driving conditions, you
should pulloff the
road, stopyour vehicle
and turn theengine off
as soon as possible.
HOT COOLANT CAN BURN YOU BADLY!
In “Problems on the Road,” this manual shows whatto do. See “Engine
Overheating” in the Index.
n
u
n
1 4 1
i
136
r
Oil Pressure Light
This light tells youif
there could be a
problem with your
engine oil pressure.
The light goes on when you turn your key to “Run” or “Start.” It goes off
once you start your engine. That’s just a checkto be sure the
light works.
If it doesn’t,be sureto have it fixed so it will be there to
warn you if
something goes wrong.
When this light comeson and stays on, it means oil isn’t goingthrough
your engine properly. You could be low on oil, or you might havesome
other oil problem.
NOTICE:
Damage to your engine from neglected oil problems can be
costly andis not covered by your warranty.
137
Charge Light
When you turn the key
to “Run” or “Start”,
this lightwill come on
briefly, to show that
your alternator and
battery charging
systems are working.
n
Cf
n
- 1
If a light stayson, you need service, and you should take your Cadillac to
the dealer at once. To save yourbattery until you get there, turn off all
accessories, and set your Electronic Climate Control system to “OFF.”
Low Oil Level Light
If it doesn’tcome on, have it repaired. If the light comes on and stays on,
your engine oil level istoo low. Check your oil level
and add enough oil
to bring the engine oil levelup to the proper level. See “Engine Oil” in
the Index.
1
138
L_
r
Change Oil Light
This light comes on
following engine
start up for about
20 seconds when
the engine oil needs
changing.
See “Oil Life Indicator” in the Index.
Door Ajar Light (Option)
This lightwill come on
if a dooris not
completely closed.
139
Brake To Shif’t Light
This light will corne on
to remind you that you
must press the brake
pedal to shift out of
“P” (Park).
i7
Trunk Ajar Light
IThis light will come on
if your trunk is not
closed.
u
140
Cruise Engaged Light
This lightwill come on
when yourcruise
control is set to a
selected speed.
CRUISE
ENGAGED
Low Coolant WarningLight
If the coolant level in
the radiatoris low by
3 quarts (2.8 L) or
more this lightwill
come on. The light will
stay on until you add
coolant. Continuing to
drive your vehicle with
the “Low Coolant”
warning lighton, may
result in damage to
your engine.
See “Engine Coolant”
in the Index and have your vehicle servicedas soon
as you can.
This lightwill come on when the ignition is on, but theengine is not
running, as a check.It doesn’t haveto befixed right away.
141
1
Malfinction Indicator Lamp
(Service Engine SoonLight)
SERVICE
ENGINE
SOON
n
CHECK
Your vehicle couldbe equipped with either oneof these indicators lamps.
A computer monitors operation of your fuel, ignitionand emission
control systems. This light shouldcome on when the ignition is on, but
the engine is not running, as a checkto show you it is working.
If it does
not come on atall, have it fixed right away.If it stays on, orit comeson
while youare driving, the computer is indicating that you have aproblem.
You should take your vehicle infor service soon.
I
1
Cl
NOTICE:
If you keep driving your vehicle with
this light on, after a while
the emission controlswon’t work as well, your fuel economy
won’t be as good and your engine
may not run as smoothly. This
could lead to costly repairs not covered
by your warranty.
ut
142
Pass Key Fault Light
If this light comeson
while driving and stays
on, you will be able to
restart your vehicle.If
you turn it off, your
vehicle will not be
protected by the
PASS-Key II@feature.
Have it servicedby
your Cadillac
dealership.
ELECTRONIC L E W L CONTROL
I
This keeps your car
level. When the system
is adjusting, the
“LEVEL RIDE”light
will be on. If the light
comes on and off while
driving, that’s normal.
The Electronic Level Control (ELC)will operate forseveral minutes
after you haveturned theignition off.
If the light stayson for7 minutes, itwarns that your leveling system may
not beworking. You should see your dealer forservice. You can keep
using your Cadillac,though.
143
FUEL GAGE
Your fuel gage shows
about how much fuel is
in your tank.
13
C
It works only whenthe ignition is in the “RUN”position. The 17 bar
segments show the fuel remaining in your
tank.
>When only
one barsegment stillis lit, the “LOW FUEC‘ lightwill go on.
‘If the fuel supply gets criticallylow, none of the bar segments will be lit
and the “LOWFUEC’ will flash. You should get fuel immediately.
Here area few concerns some owners have had
about thefuel gage. All
.these situations are normal and indicate nothing wrong withthe fuel
>gageThe pump at the gas station shuts off before the fuel gage reads “F”.
It takes more (or less) gas to fill up than the gage said. For example,
the gage said“l/2”, but it took more or less than half the tankcapacity
to fill it.
The gage changeswhen you turn (or stop, or speed up).
Ql
i
C I’
. .
144
OIL LIFE INDICATOR
Your Cadillac has an Oil LifeIndicator feature. This tells you when
you need to change your engine oil. It’s basedupon the engine oil
temperatures and your driving patterns.
Your Oil Life Indicator may sayto change the oil sooner thanyour
maintenance schedule. This can happen if driving conditions, such as
short trips in coldweather, cause shorter oil life. Alwayskeep a written
record of the mileage and date when you last changed your oil.
For more
information on when to change your oil,see theCadillac Maintenance
Schedule Booklet.
The system probablywill say to change the oil between3000 miles
(5000 km) and 7500 miles (12500 km),
but it may even say to change it
before 3000 miles under severe conditions. It all depends onyour driving
patterns. (If it doesn’t, or if it doesn’t even light
up, then something is
wrong. You will need to have it serviced.)
There aretwo things the system won’tdo: It can’t sense heavy dust inthe
places where you drive.If you drive in a dustyarea, you should change
your oil every3000 miles (5000 km)or 3 months (whichever comes first),
unless the “CHANGEOIC’ light comeson sooner.
It doesn’t check how much oil you have
so you will still haveto check for
that. To check it, see theIndex under “EngineOil.”
When You’ve Changed the Oil
When new oil isput in, you’llneed to reset your system. To do that, turn
the ignition switchto the“ON” position withthe engine stopped.
Fully
depress andrelease the accelerator pedal 3 times within5 seconds.
If the “CHANGEOIC’ light comeson and stays on for5 seconds, it did
not reset.You’ll need to reset thesystem again.
145
SECTION 3
COMFORT CONTROLS AND AUDIO SYSTEMS
In this section you’ll findout how to operate thecomfort control systems
and audio systems offered with your Cadillac.
YOUR CXLIILUCAIR SYSTEM
This part tells you how to make your Electronic Climate Control (ECC)
work for you.
Outside Air
Outside air always flows through your Cadillac when the car is moving.
Even if the car is not moving, you can alwaysget outside air to flow
through by selecting any air choice (except the rear window defogger).
The Electronic Climate Control System mayautomatically recirculate the
inside air of your vehicle,to provide maximum airconditioning. During
recirculation, a louder blower noise may be heard until the system returns
to outside air.
Air Outlets
The air outlets are
located in the center
and each side of the
instrument panel. You
can adjust the direction
of air flow by moving
the control levers. The
lever at the bottom of
the air outlet opens or
stops the air flow from
that outlet.
146
(
1
L
L
I
Ei
n
L
ELECTRONIC C L I M T E CONTROL
With this system you can
control the ventilation, heating and air
conditioning in your vehicleautomaticallyby setting the desired
temperature. The digital screen displays the outside temperature, the
inside temperature setting, fan speed, and the ECC selection you have
selected.
OUT TEMP (Outside Temperature)
Push thisto get the outside temperature. Push it againto return to the
regular system display.
TEMP (Inside Temperature)
Sets the interior temperature you want. Press the lower portion (blue
arrow) to lower the inside temperature setting. Press the upperportion
(red arrow) to raise the temperaturesetting. Once you set the
temperature, thesystem willautomatically maintain the set temperature.
You can change the temperature from 65 F (18 C) to 85 F (29 " C), one
degree at a time. You may also choose 60 " F (16 " C), for maximum
cooling, and 90°F (33"C), for maximum heating, the fan will stay on high
speed unless you selecta different speed. In maximum heating most of
the air will flow out the heaterducts. In maximum cooling,the system will
recirculate the air inside your vehicleinstead of pulling air from outside.
147
I
I
OFF
Nothing is on, butair will flowthrough your Cadillacif the thecar is
moving. The air flow willbe felt through the heaterducts.
ECON
Use this in coldor cool weather to save fuel.It won’t coolor remove
humidity from the air. However,the system will tryto keep theair at the
chosen temperature.
G
If it’s so warm outside that you need to cool the air, use the next choice.
I
I
1
AUTO
With this setting the system automaticallycontrols the temperature,air
distribution and fan speeds. In cold conditions the the fan
well not come
on until the system sensesthat theengine has started to warm up.This
prevents cold airfrom blowing on you and your occupants.
I
I
FAN
The fan speed is controlled automaticallyif you have the Electronic
Climate Control set on “AUTO.” However, if you want the fan to run ata
lower speed, push the lower portion of the fan switch.
If you want the blower to run ata fixed higherspeed, push the upper
portion of the fan switch until you see “HI” on thedisplay.
If you wantthe fan to run at a fixed lowspeed, push the switch until“LO”
is shownon thedisplay.
If you want the fanspeed to be automatic but
you likethe fan to be
higher or lower than the“AUTO”settings, just push the switch until
either “HI AUTO” or “AUTO LO” is displayed.
If the Fahrenheit (F’) or Celsius (C”) symbol beginsto flash, or flashes
when youturn on the ignition, it indicates an electricalproblem with your
148
q:
L
I
c
air conditioning system. The flashing will continue for abouttwo minutes.
It means you should have your system serviced.
Push thisbutton to
divide the air between
the windshield and the
heater ducts. This is
useful when fog
appears on the
windshield or side glass
due toa sudden rain or
snowy conditions.
DeJi-oster
~
To get fogor ice off the
windshield, pushthe
Defroster button.
The fan speed will work automaticallyor you can choose another fan
speed if you want.
It will help a lot if you firstclear any ice and snowfrom the hood and the
air inlet (it’s between the hood and the windshield).
149
I
Electronic Solar Sensor
ni
I
The Electronic Solar Sensor is part of the Electronic Climate Control
System (ECC). The sensor monitors the sun's solar radiation by telling
the ECC system at what intensity the sun is. The ECC uses this
information to automatically make the necessary temperature
adjustments. The sensor is located in the defroster grille.
Rear Window Defogger
To get fog or ice off the
rear window, push the
Rear Defogger button.
CTI
'
With it,your rear window and both outside rearview mirrors are warmed.
150
L
1
I
To turn it off,push the buttonagain. After 10 minutes, it will go off by
itself. To make it go longer,just push the buttonagain.
NOTICE:
Scraping the insideof your rear window could cut and damage
the heater. Your warranty would not cover
this damage. And
don’t put decals there; you might have to scrape them
off.
SOUND SYSTEMS
Your Delco sound system has been designed to operateeasily and give
years of listening pleasure. You will get the most enjoyment out of it if
you acquaint yourself with itfirst. Find out what yourDelco system can
do and how to operateall itscontrols, to be sureyou’re getting the most
out of the advanced engineering that went into it.
Be aware that hearing damage from loud noise is almost undetectable
until it istoo late. Your hearing can adapt tohigher volumes of sound.
Sound that seems normal can be loud and harmful to your hearing. Take
precautions by adjusting the volume control on your radio to a safe sound
level before your hearing adapts to it.
To help avoid hearing loss or damage:
Adjust the volume control to the lowest setting.
Increase volume slowly until you hear comfortably and clearly.
I
I
NOTICE:
Before you add any sound equipment to pour vehicle -- like a
. tape player, CB radio, mobile telephoneor two-way radio -- be
sure you can addwhat you want. If you can, it's very important
to do it properly. Addedsound equipment may interfere with the
radio or other
operation of your vehicle's engine, Delco@
systems, and even damage them. And,your vehicle's systems
may interfere with the operationof sound equipment that has
been added improperly.
So, before adding sound equipment, check withyour dealer and
be sure tocheck Federal'rules covering mobile
radio and
telephone units.
Dl
fl
FM Stereo
FM stereo will give youthe best sound. But FM signals will reach only
about 10 to 40 miles (16 to 65 km). And, tall buildingsor hills can
interfere with FM signals, causingthe popping, crackling,or a momentary
hissing sound.
AM
The range formost AM stations is greater than for
FM, especially at
night. The longer range, however, can cause
stations to interfere with
each other. AM can pickup noise from things likestorms and power
lines. Try reducing the trebleto reduce this noiseif you ever get it.
Speed Sensitive Volume
Your Delco radio automatically adjuststhe volume levelto compensate
for road andwind noise as youare driving.
Dolby@
This feature automatically removes noiseon Dolby encoded tapes (no
button is required).
*Dolby@is a registered trademark of Dolby Laboratories.
152
El
AM Stereo
This means the belco’ system can receive C-QUAM@ stereo
broadcasts.
Many AM stations around thecountry use C-QUAM@to produce stereo,
though some do not. (C-QUAM@is a registered trademark of Motorola,
Inc.) If your Delco@system can get C-QUAM@,your “ST” light will
come on when you’re receivingit.
This means that your sound system can produce quality AM sound
comparable to FM stereo.
reduces noise without reducing the
high frequencies you need for the best sound. In addition to improved
includes more stations on theAM band. You
sound quality,
don’t haveto do anything in yourradio because
is automatic.
A
A
M
A
X
M
A
X
@
@
A
M
A
X
@
How To Operate Your Sound System
Your Cadillac will have one of these Delco Radio Systems.
153
n
Please read thefollowing to operate theradio portion of your Delco
radio system.
r
The upper knob
The upper knob does these fourthings:
0 It turns the
radio on and off.
0
It controls the volume.
Volume level automatically adjuststo compensate for road and wind
noise as you're driving your Cadillac. Adjustthe volume to the
listening level you want
at any time.Then as you drive the volume will
change to match the noise present atany particular speed. The
volume should always sound close to thesame level to you asyou
drive.
0 It lets you see what station you have. (When the radio is on, push the
knob to display the station.)
0 It tells you the time. (When the ignition is off, push the upperknob to
display the time.)
Behind the upperknob is a balancecontrol. It moves the sound between
the left and right speakers.
Ll
0
I
s
U I
D i'
d
154
The lower knob
Turn the lower knob to choose radio stations. Push the knob to switch
from AM to FM.
The control behind the lower knob moves the sound between yourfront
and rear speakers.
SCAN
When you push this switch
either up ordown, the SCAN indicator in the
display will lightand the radio will find the next station and stay there for
5 to 10 seconds. Then it will goto thenext station and pause, and keep
doing that. When you wantit to stop, just push either theSCAN switch
again or the upperknob.
SEEK
This switch choosesstations, but it doesn’tkeep moving as SCAN does.
When youpush SEEK up ordown, the radiowill automatically goto the
next strongest station and stay there.
W S H BUTTONS
You can set thepush
buttons to get up to
ten favorite stations
(Five on AM and five
on FM.) Just:
0
Choose either AM or FM.
Tune in the station.
155
I
Push the SET button.
Within .5 seconds, pushone of the five push buttons.
Repeat thesesteps for each of the five pushbuttons.
PRESET EQUALrZATION
The Preset Equalization buttons letyou adjust the tone, tosound just the
way youwant it. Each individual auto-equalization button (Athrough E)
contains a separateequalization adjustment feature.
When your vehicle
is new, the auto-equalization is alreadypreset with
Preset A having more bass and treble tone than
mid-range tone. Preset B
has more bass than trebleand mid-range tone. Preset C has an overall flat
response in sound.Preset D has more treble thanbass and mid-range,
and Preset E has more mid-range soundthan bass and treble. These
preset settings can be modified individuallyfor AM, FM, cassette or
CD play.
Follow these steps to
modify each of the Preset Auto-equalization
buttons. __ . . .. ... !, .:,; ;.y=Ks+.qb+‘’
&>.I.‘!.;,*’ .:.
:&;%
-;.I<
;,x 7
* ,:Li;%j
;’{ :!&i”Y,.
First, seTect’oneoft e Preset Equ
.
,\%:.
,
- ;,
.
,
-..L,.l
9-
:
,
f?,;.,
!:;;?
~
..f&
-4
6°K;
q
$
;
,:
2. EqualizationBand
3. Equalization Gain (1 thru 15)
- i’
&:i ; ,
-. 1..
0
I
Press the SET button’, and then press and hold the Preset Equalization
button you have selected, until either an “F” or “U”is displayed
(about 10 seconds).
I
-,tu:.J
-4%
--..@
I
The display will showeither 3 or 4 digits and the preset button“LED”
will flash. In the farthestright position of the display willbe an“F”
(for factory setting), or if the equalization has been modified, a “U”
(for user setting).
Press the SCAN switch up ordown to select the band you prefer.
The middle digitindicates the equalization band. There arefive bands
60Hz, 250Hz, lkHz, 3.5Hz and lOkHz, numbered 1 through 5
respectively. The band will display band 1when the mode is first entered.
Press the SEEK switch up or down to select the gain setting you want.
The left digit, or two digits are theequalization gain settings (0-15) for
each band. The display will indicate the active setting (F or U) when
the mode is first entered. A typical setting for a flat response is 7.
0 Press the upper radio knob to compare the factory setting to your
setting. Once you are satisfied with yourselection, press and hold the
preset equalization button for about4 seconds, the“ Pr” (program)
will display indicatingthat your selection isprogrammed.
If you haveprogrammed the presetequalization buttons and set thepush
buttons to thestations you’ve selected, you can preset thefive Preset
Equalization buttons to a particular station. Just:
Tune in a station using one of the preset push buttons.
157
Push one of the Preset Equalization buttons (A thru E) until you like
the sound.
0 Push the SET button.
4 Push the same Preset Equalization button you've selected.
0 Push the preset push button again to set the Preset Equalization tone.
Now each time you push that push button, thePreset Equalization is set
in memoryfor thatstation.
0
For Example:
Suppose you like classical music witha flat soundingtone. The station has
already been preset to push button 3. Since the flat response is on button
C, you wouldjust:
Push the preset push button 3.
Push the tone control button C.
Now, push the SET button.
Push the tone control button C again.
~
Push the Preset push button 3 again and your Preset Equalization is
set in memory.
Now every time you push the preset push button 3, the Preset
Equalization tone is programmed to that preset
push button. Tuning to
the station already preset to 3 using the knob, or Seek or Scan, the tone
control will automatically change to C. The Preset Equalization button
will light when it programmed
is
to a particular push button orwhen
manually pushed in.
Your Cassette Tape Player
Your cassette tape player works best with
tapes thatare 30 to 45 minutes
long on eachside. Tapeslonger than that areso thin that they maynot
work well inthis player.
158
o/
To Play A Cassette Tape
I
.
0
Turn the radio on.
0
Insert the cassette squarely through the tapedoor. (The TP indicator
in the display will light.)
If you hear nothing or hear just a garbled sound, the cassette may not be
in squarely.Push the EJECT button to
remove the tapeand start over.
The tapeequalization is automatically sensed and set. Inserting the
cassette also automatically disables DNR@*and activates DOLBY@
noise reduction.
DNR@is the Dynamic Noise Reduction. It helps remove background hiss
noise from the radio.
Once the tapeis playing,use the upper and lower knobs to adjust the
volume and balance, just as you do for the radio. Push the upperknob
to change tape direction. The arrows show whichdirection the tape is
being played.
To go forward rapidly to another part of the tape push F W D . To go
backward, pushREV To stop the tape, push the same button lightly or any
of the other buttons. The radio will play during fast forwardor reverse.
*DNR@is a registered trademark of National Semiconductor
Corporation.
159
I
I
3
To go from one side of the tapeto the other,push in the upper knob
on your radio. To remove the tape, push EJECT The tapecan be
ejected when the ignition isturned off.
SCAN
Push the SCAN button up tojump quickly to thenext selectionor down
to return tothe beginning of the selection you just heard. The tapewill
play for approximately 15 seconds to sample a selection before going on
to thenext selection.To stop the SCAN function,just press it up or down
again or theupper knob. If the selection isat theend of the tape, the tape
will reverse directions and begin playingat a normal speed.
SEEK
Push the SEEK button up to quickly go to thebeginning of the next
selection. Push the SEEKbutton down to go backto the beginning of the
selection youare listening to.
During the SCAN and SEEK functions the radio will not play.
S T P U Y (Stop-Play)
Press ST-PLAY to switch backto theradio without ejecting the tape. In
ST-PLAY function only the tuning knob can be used for selecting stations.
To Eject A Tape
To remove the tapeonce it isstopped, push EJECT
lThe Delco CassetteAnd Compact Disc Music System
This optional sound system combines an AMEM stereo radio with a
cassette tape player and a compact disc player in a single unit.
To operate theradio and cassette tape player portion of this.music
system, please read the beginning of this section, “HowTo Operate Your
Sound System” and “Your Cassette Tape Player”.
160
RI
[7/
clj
El
I
I
To Play the Disc Player
Before you begin, please note: don’t use the mini-discs that arecalled
“singles”. They won’t eject.Use full-size compact discs only.
Turn the radio on.
Insert a disc (label side up) partway into theslot. The player will pull it in.
Wait a few seconds and the disc will play.The DNR@will be disabled and
the display will show Track“1TRK CD” for about 5 seconds, then “CD”
will show in the display.
If the disc comes back out, check to see if
0 The disc is upside down.
0 The disc is dirty, scratched, or wet.
0 There’s too much moisture in the air. (If there is, wait about one hour
and try again).
RCLJPROG (RecallJProgram)
0
Press once to see which track is being played. (It also allowsfor disc
programming.)
Within 5 seconds press it a second time to see how long the disc has
been playing.
Press it a third time to see the time of day.
To Program Packs
You can program up to 10 tracks for your listeningpleasure.
1. Press the RCL/PROG knob. “CD” and “TRACK” will light in the
display. This also allows youto program disc track playback.
2. Within 5 seconds, turn the lower TUNE knob to thetrack you want to
hear first. The track number will flash.
3. Press the SETbutton and the track number will stop flashing. This
indicates that the track is programmed.
4. Repeat steps 2 and 3 to program up to9 more tracks.
161
5. Press the RCLPROG knob a second time to begin playing the first
programmed track.
To cancel the programming mode press RCWPROG and press SET If
‘‘ALI? is showing onthe display, allow10 seconds to pass. You can also
cancel the programming mode by ejecting the disc.
SEEK
Push this switch up or down to go to thebeginning of the next or previous
track. At least 8 seconds must have playedfor the SEEKfunction to find
the startof the current track.
SCAN
Push this switch up or down to sample about 15 seconds of the beginning
of each track. Press itagain or theupper knob to stop theSCAN
function.
Note: If you are in the Program mode, it is possibleto modify the
playback order by using the TUNEknob. If you need to review the
playback order use either the SEEK or SCAN switch.This review can be
stopped by pushing the SCAN switch.
REV (Reverse)
Push and hold REV to returnrapidly to a favorite passage.Release it to
play the passage. The elapsed time will be displayed to show the reverse
progress of the CD.
FWD (Fast Forward)
Press and hold FWD to advance quickly withina track. Release it to
resume playing. Elapsed time will be displayed to show the forward
progress of the CD.
ST-EJECT (Stop-Eject)
Press ST-EJECT.The disc or tape will stop without ejecting it and the
radio will start toplay. Press it againand the disc or tapewill eject.
162
I
PLAY
Press PLAY to restart thedisc or tape. It will begin playingat thepoint
where it had stopped. If the CD and cassette tape areinserted at the
same time, pressing the play button will switchbetween CD and the Tape.
COMP (Compression)
Pressing COMP makes soft and loud passages more nearly equal in
volume. For example, playing classicalor jazz music with
very quiet and
very loud passages in the same tune. The COMPdisplay will light as long
as COMP is on.
Setting The Clock
Turn the ignition and radio on. Then:
To Set theHour:
0
Press SET, and within 5 seconds,
Press and hold SEEK up ordown. When the clock gets to the correct
hour, let go.
To Set the Minutes:
Press SET, and within 5 seconds,
Press and hold SCAN up or down. When the clock gets to the correct
minute, let go.
Your clock isset.
Care of Your Cassette Tape Player
A tape player that is not cleaned regularly can cause reduced sound
quality, ruined cassettes, or a damaged mechanism. Cassette tapes should
be stored in their cases away from contaminants, direct sunlight, and
extreme heat. If they aren’t, they may not operate properly or cause
failure of the tapeplayer.
Your tape player should be cleaned regularly each month or after every
15 hours of use. If you notice a reduction in sound quality, trya known
163
good cassette to see if the tape or the tape
player isat fault. If this other
cassette has no improvement in sound quality, clean the tapeplayer.
Clean your tape player witha wiping-action, non-abrasive cleaning
cassette, and follow the directions provided with it.
Cassettes are subject to wear and the sound quality may degrade over
time. Always make sure that thecassette tape is in good condition before
you have your tape player serviced.
I
01
Care of Your Compact Discs
Handle discs carefully.Store them in their original casesor other
protective cases and away from direct sunlight and dust. If the surface of
a disc is soiled,dampen a clean, soft cloth ina mild, neutral detergent
solution and clean it, wiping from the center to theedge.
Be sure never to touch the signal surface when handling discs. Pickup
discs by grasping the outeredges or theedge of the hole and the outer
edge.
31
Power AntennaMast Care
Your power antenna will look its best and work well if it’s cleaned from
time to time.
To Clean the Antenna Mast:
1. Turn on the ignition and radio to raise the antennato full mast
extension.
2. Dampen a clean cloth with mineral spirits or equivalent solvent.
3. Wipe cloth over the mast sections, removing anydirt.
4. Wipe dry with cleancloth before retracting.
5. Make the antenna go up and down by turning the radio or ignition on
and off.
6 . Then repeat if necessary.
I
n,
I
II
E
164
NOTICE:
Don’t lubricate thepower antenna. Lubrication could damage
it.
NOTICE:
Before entering an automatic car wash, turn off your radio to
make the power antenna go down. This will prevent the mast
from possibly getting damaged. If the antenna does not go down
when you turn theradio off, it may be damaged or need to be
cleaned. In eithercase, lowerthe antennaby hand by carefully
pressing the antennadown.
If the mast portion of your antenna is damaged, you can easilyreplace it.
See your dealer for areplacement kit and followthe instructions in the
kit.
165
.
YOUR DRIVIlNG AND THE ROAD
L
Here you’ll find information about driving on different kinds of roads and
in varying weather conditions. We’ve also included many other useful tips
on driving.
DEFENSZFE D M N G
The best advice anyone can give about driving is: Drive defensively.
Please start with a very important safety devicein your Cadillac: Buckle
up. (See “Safety Belts” in the Index.)
Defensive driving reallymeans “be ready for anything.” On city streets,
rural roads, or freeways, itmeans “always expectthe unexpected.”
166
7
I f ,
How much alcohol is in thedrink.
a The drinker's body weight.
0
*
The amountof food that is consumed before and during drinking.
The length of time it has taken the drinker
to consume the alcohol.
3
i
I
According to theAmerican Medical Association, a 180-pound (82 kg)
person who drinks three 12-ounce (355 ml) bottles of beer in an hour will
end up with a BAC of about 0.06 percent. The person would reach the
same BAC by drinking three 4-ounce (120 ml) glassesof wine or three
mixed drinks if each had 1-1/2 ounces (45 ml)of a liauor like whiskey, gin
or vodka.
It’s the amount of alcohol that counts. For example, if the same person
drank three double martinis (3 ounces or 90 ml of liquor each) within an
hour, the person’s BAC would
be close to 0.12 percent. A person who
consumes food just before or during drinking will have a slightly lower
BAC level.
n
168
I
DRINKING THAT WILL
RESULT IN A BAC OF .O5%
IN THE TIME SHOWN
NUMBER
OF DRINKS
(as in picture)
140
120
100
160
180
240
220
200
BODY WEIGHT IN POUNDS
The law in most U.S. states sets the legal limitat a BAC of 0.10 percent.
In Canada the limit is0.08 percent, and in some other countries it’s lower
than that. TheBAC willbe over 0.10 percent after three tosix drinks (in
one hour). Of course, as we’ve seen, it depends on how much alcohol is in
the drinks, and how quicklythe person drinks them.
But it’s very important to keep in mindthat theability to drive isaffected
well belowa BAC of 0.10 percent. Research shows that thedriving skills
of many people are impaired at a BAC approaching 0.05 percent, and
that theeffects are worse at night. All driversare impaired at BAC levels
above 0.05 percent. Statistics show that thechance of being in an accident
increases sharply for drivers who havea BAC of 0.05 percent or above.
A driver witha BAC levelof 0.06 percent (three beers in one hourfor a
180-pound or 82 kg person) has doubled his or her chance of having an
accident. At a BAC levelof 0.10 percent, the chance of that driver having
an accident is six times greater; at a level of 0.15 percent, the chances are
twenty-five times greater! And, the body takes about an hour to rid itself
of the alcohol in one drink. No amount of coffee or number of cold
showers will speed that up.
169
“I’ll be careful” isn’t the right answer.What if there’s an emergency, a
need to take sudden action, as whena child darts into the street?A
person with a higher BAC might not be at& to react quickly enough to
avoid the collision.
There’s something else about drinking and driving that many people
don’t know. Medicalresearch shows that alcohol ina person’s system can
make crash injuries worse.That’s especially true for brain, spinal cord
and heart injuries. That means that if anyone who hasbeen drinking -driver or passenger -- is in a crash, the chance of being killed or
permanently disabled is higher than if that person had not been drinking.
And we’ve already seen that thechance of a crash itself ishigher for
drinking drivers.
170
31
- 1
r
CONTROL OF A KEHICLE
You have three systems that make your vehiclego where you want it to
go. They are thebrakes, the steering and the accelerator. All three
systems haveto dotheir work at theplaces where the tires meet the road.
on snow or ice, it’s easyto ask more of
Sometimes, as when you’re driving
those control systems than the tires and road can provide. That means
you can lose control of your vehicle.
171
$RAKING
Braking action involves perception time and reaction time.
First, you haveto decide to push on thebrake pedal. That’s perception
time. Then you haveto bring up your foot and do it. That’s reaction time.
Average reaction time is about 3/4 of a second. But that’s onlyan
average. It might be less withone driver and as long astwo or three
seconds or more with another. Age, physicalcondition, alertness,
coordination, and eyesight all playa part. So do alcohol, drugs and
frustration. But even in3/4 of a second, a vehicle movingat 60 mph
(100 km/h) travels 66 feet (20 m). That could be a lot of distance in an
emergency, so keeping enough space between your vehicleand others is
important.
And, of course, actual stopping distances vary greatly withthe surface of
the road (whether it’s pavement or gravel); the condition of the road
(wet, dry, icy);tire tread;and the condition of your brakes.
Avoid needless heavy braking.Some people drive inspurts -- heavy
acceleration followed by heavybraking -- rather than keeping pace with
traffic. This is a mistake. Your brakes may not have time to cool between
hard stops. Your brakes will wear out much faster if you do a lot of heavy
braking. If you keep pace with the traffic and allow realistic following
distances, you will eliminate a lot of unnecessary braking.That means
better braking and longer brake life.
If your engine ever stops while you’re driving,brake normally but don’t
pump your brakes. If you do, the pedal may get harder topush down.If
your engine stops, you willstill havesome power brake assist. But youwill
use it when youbrake. Once the power assist is usedup, it may take
longer to stopand the brake pedal will be harder topush.
r_
,
- 1
172
Anti-Lock Brakes (ABS)
Your Cadillachas an advanced electronic braking system that will help
prevent skidding.
This light on the
instrument panelwill
go on when you start
your vehicle.
When youstart your vehicleand begin to drive away, you mayhear a
momentary motor orclicking noise.And you may evennotice that your
brake pedal moves a little while this is going on. This is the ABS system
testing itself.If there’s a problem with the anti-lock brake system, the
anti-lock brake system warning light
will stay on.
See “Anti-lock Brake System Warning Light’’ in
the Index.
Here’s how anti-lock works. Let’s say
the roadis wet. You’re driving
safely. Suddenlyan animal jumps out in front of you.
173
You slam on thebrakes. Here's what happens with A B S .
A computer senses that wheels are slowing down. Ifone of the wheels is
about to stop rolling, the computer will separately work the brakes at
each front wheel and at the rearwheels.
The anti-lock system canchange the brake pressure faster than any driver
could. The computer is programmed to make the most of available tire
and road conditions.
i
You can steer around the obstacle while braking hard.
As you brake, your computer keeps receiving updates on wheel speed and
controls braking pressure accordingly.
Remember: Anti-lock doesn't change the time you need to get your foot
up to thebrake pedal. If you get too close to thevehicle infront of you,
you won't havetime to apply your brakes if that vehicle suddenly slows or
stops. Always leave enough room up ahead to stop, even though you have
anti-lock brakes.
To Use Anti-Lock
Don't pump the brakes. Just hold the brake pedal down and let anti-lock
work for you. You may hear the anti-lock pump or motor operate, and
feel the brake pedal pulsate, but this is normal.
174
n!
Traction Control System
This feature is deleted on Coach Builder limousines and funeral coach
packages.
Your vehiclehas a traction control system that limits wheel spin. This is
especially useful in slipperyroad conditions. The system operates only if
it senses that the rear wheels are spinning or beginning to lose traction.
When this happens, the system worksthe rearbrakes and reduces engine
power (by closingthe throttle)to limit wheel spin.
The ‘TRACTION ENGAGED’’ light will comeon when the traction
control system is limiting wheel spin.
See “Traction Control System Active
Light” inthe Index. You mayfeel the system working,or you may notice
some noise,but this is normal.
If your vehicle is in cruise
control when the traction control system begins
to limit wheel spin, the cruise control will automatically disengage. When
road conditions allow youto safely useit again, you mayre-engage the
cruise control,.(See “Cruise Control” in the Index.)
175
The “TRACTION CONTROL? warning light willcome on when youturn
the traction control system off. Whenthe system ison, this light willcome
on to let you know ifthere’s a problem with yourtraction control system.
‘Whenthis warning lightis on, the system will not limit wheel spin.Adjust
your driving accordingly.
The traction control system automaticallycomes on whenever you start
your vehicle.To limit wheel spin, especially in slippery
road conditions,
you should always leave the system on. But you can
turn the traction
control system off if you ever need to. (You should turn the system off if
your vehicle ever gets stuck sand,
in mud, ice or snow. See “RockingYour
Vehicle’’ in the Index.)
176
.
The TRACTION
CONTROL
DISABLE SWITCH
is located in the glove
compartment.
n
I
To turn thesystem off,press and hold the buttonuntil the “TRACTION
CONTROC’ light comes on and stays on. To turn thesystem backon, you
must stop and turn off the ignition. Then restart theengine.
Brake Wear
Your Cadillac has front disc brakes and rear drum brakes.
Disc brake pads have built-in wearindicators that make a high-pitched
warning sound when the brake pads are worn and new pads are needed.
The sound may come and go or be heard all the time your vehicleis
moving (except when youare pushing on thebrake pedal firmly).
177
I
I
I
NOTICE:
Continuing to drive with worn-out brake pads coula result
in
costly brake repair.
Some driving conditions or climates may cause a brake squeal when the
brakes are first applied or lightly applied. Thisdoes notmean something
is wrong with your brakes.
Your rear drum brakes don't have wear indicators,but if you ever hear a
rear brakerubbing noise, havethe rear brake
linings inspected.Also, the
rear brakedrums should be removed and inspected each time the tires
are removed for rotation or changing. When you have
the frontbrakes
replaced, have the rearbrakes inspected, too.
Brake linings shouldalways be replaced as complete axle sets.
Brake Pedal Travel
See your dealer if the brake pedaldoes not returnto normal height,or
if there is a rapid increase in pedal travel. This couldbe a sign of brake
I
trouble.
I Brake
Adjustment
Every time you make a moderate brakestop, your disc brakes adjustfor
wear. If you rarely makea moderate or heavier stop, then your brakes
might not adjust correctly.If you drive inthat way, then -- very carefully-make a few moderate brake stops about
every 1000 miles (1600 km), so
your brakes will adjust properly.
Every time you make a brake stop, your discbrakes adjust for wear.
If your brake pedal goes downfarther thannormal, your rear drum
brakes may need adjustment. Adjust them by backing up and firmly
applying the brakes a few times.
ni
Braking in Emergencies
Use your anti-lock braking system when youneed to. With anti-lock, you
can steer and brake at thesame time. In many emergencies, steering can
help you more than even the very best braking.
STEEHNG
Power Steering
If you lose powersteering assist because the engine stops or the system is
not functioning, you can steer but it will take much more effort.
Steering Tips
Driving on Curves
It’s important to take curves at a reasonable speed.
A lot of the “driver lost control’’accidents mentioned on the news
happen on curves. Here’s why:
Experienced driver or beginner, each of us is subject to thesame laws of
physics when drivingon curves. The traction of the tires against the road
surface makes it possiblefor the vehicle to change its path when you turn
the frontwheels. If there’s no traction, inertia will keep the vehicle going
in the same direction. If you’ve ever tried to steera vehicle on wet ice,
you’ll understand this.
The traction you can get ina curve depends on the condition of your tires
and the road surface, the angle at which the curve is banked, and your
speed. While you’re ina curve, speed is the onefactor you can control.
Suppose you’re steering through a sharp curve. Then you suddenly
accelerate. Both control systems -- steering and acceleration -- have to do
their work where the tires meet the road. Adding the sudden acceleration
can demand too much of those places. You can lose control.
Suppose you’re steering through a sharp curve. Then you suddenly
accelerate. Both control systems -- steering and acceleration -- have to do
their work where the tires meet the road. Unless your traction control
179
system ison, adding the suddenacceleration can demand too much of
those places. You can losecontrol.
What should you do if this ever happens? Ease up on theaccelerator
pedal, steer thevehicle the way you want itto go, and slow down.
Speed limit signs near curves warnthat you should adjust yourspeed. Of
course, the posted speeds are based on good weather and road
conditions. Under less favorable conditions you’ll want
to go slower.
If you need to reduceyour speed as you approach a curve,do it before
you enter thecurve, while yourfront wheels are straight ahead.
Try to adjust yourspeed so you can “drive’’through the curve. Maintain a
reasonable, steady speed. Wait to accelerate until you are outof the
curve, and then accelerate gently into thestraightaway.
i
7
L1
Steering in Emergencies
There are times whensteering can be more effective than braking. For
example, you come over a hill
and find atruck stopped in yourlane, or a
car suddenly pullsout from nowhere, or a child darts outfrom between
parked cars and stops right infront of you. You can avoid these problems
by braking -- if you can stop in time.But sometimes you can’t; there isn’t
room. That’s the time for evasive action -- steering around theproblem.
Your Cadillac canperform very well in emergencies like these. First apply
your brakes.It is better toremove as much speed as you can from a
possible collision.Then steer around the
problem, to theleft or right
depending on thespace available.
An emergency likethis requires close attention and a quick decision.If
you are holding the steering wheel at therecommended 9 and 3 o’clock
positions, you canturn it a full 180 degrees very quickly without removing
either hand. But you haveto act fast, steer quickly, and just as quickly
straighten the wheel once you have avoidedthe object.
180
n
1
Lil
c3
I
I
‘
The fact that such emergencysituations are always possible is a good
reason to practice defensive drivingat all times and wear safety belts
properly.
OFF-ROAD RECOVERY
You may findsometime that your right wheels have
dropped off the edge
of a road onto the shoulder
while you’re driving.
If the level of the shoulder is only slightly below
the pavement, recovery
should be fairly easy.Ease off the accelerator and then,if there is nothing
in the way, steer so that your vehiclestraddles the edgeof the pavement.
You can turn the steeringwheel up to114 turn until the right front tire
contacts the pavement edge. Then turnyour steering wheel to go straight
down the roadway.
181
I
I
OFF. ROAD: RECOVERY
LEFT APPROX.
OUARTERTURN
SLOW DOWN
edge of paved surface
PASSING
I
1
.The driver of a vehicle about to pass another on a two-lane highway waits
for just the right moment, accelerates, moves around the vehicle .ahead,
then goes back into the right lane again. A simple maneuver?
Not necessarily! Passinganother vehicle on a two-lane highway is a
potentially dangerous move, sincethe passing vehiclepccupies the same
lane as oncoming traffic for several seconds.A miscalculation, an error in
judgment, or a brief surrender tofrustration or anger can suddenlyput
the passing driverface to face with the worst of all trafficaccidents -- the
head-on collision.
So here aresome tips for passing:
. @ “Drive ahead3Look down the road, to the sides, and to crossroads
for situations that might affect your passing
patterns. If you have any
doubt whatsoever about making a successful pass, waitfor a better
time.
Watch for traffic signs, p.avement markings,
and lines. If you can see a
.signup ahead that might indicate a turn or an intersection, delay your
pass. A broken center line usually indicates it’s all rightto pass
(providing the road ahead is clear). Never cross a solid line on your
side of the lane ora double.solid line,-evenif the road seems empty of
approaching traffic.
.
ai
- 1
0
c-
Do not get too close to thevehicle you wantto pass while you’re
awaiting an opportunity. For one thing, followingtoo closely reduces
your area of vision, especiallyif you’re followinga larger vehicle. Also,
you won’t haveadequate space if the vehicle ahead suddenly slows or
stops. Keep b.ack a reasonable distance.
When it looks like a chance to pass is comingup, start to accelerate
but stay inthe right lane and don’t get too close. Time your move so
you willbe increasing speed as the time comes to move into the other
lane. If the-way is clear to pass, you will havea “running start” that
more than makes up for the distance you would loseby dropping back.
And if something happens to cause you to cancel your pass, youneed
only slow downand drop back.again and wait for anotheropportunity.
If other cars are lined up to pass a slow vehicle, waityour turn. But
take care thatsomeone isn’t tryingto pass you as you pullout to pass
the slow vehicle. Remember to.glance over your shoulder and check
the blind spot.
Check your mirrors, glance over your shoulder, and start your left lane
change signal before moving out of the right lane topass. When you
are far enough ahead of the passed vehicle to see its front in your
inside mirror, activate your rightlane change signal.and move back
into the right lane.(Remember that your. rightoutside mirror is
convex. The vehicle youjust passed may seem to befarther away from
you than it reallyis.)
Try not to pass more than onevehicle at a time on two-lane roads.
Reconsider before passing the next vehicle.
Don’t overtake a slowly moving vehicletoo rapidly. Even though the
brake lights are not flashing, it may be slowing downor starting to
turn.
If you’re being passed, make it easy for thefollowing driver to get
ahead of you. Perhaps you can ease a little to the right.
183
LOSS OF CONTROL
Let’s reviewwhat driving experts say about what happens when the three
control systems (brakes, steering and acceleration) don’t haveenough
friction where the tires meet the road to do what the driver has asked.
In any emergency, don’t giveup. Keep trying to steerand constantly seek
an escape route orarea of less danger.
tl
Skidding
In a skid, a driver can losecontrol of the vehicle. Defensive drivers avoid
most skidsby taking reasonable care suited to existing conditions,and by
not “overdriving”those conditions. But skids are always possible.
The threetypes of skids correspond to your Cadillac’sthree control
systems. In thebraking skid your wheels aren’t rolling.
In thesteering or
cornering skid, too much speed or steering in a curve causes tiresto slip
and lose cornering force. And in the acceleration skid too much throttle
causes the driving wheelsto spin.
A cornering skid is best handled by easing yourfoot off the accelerator
pedal.
Remember: Any traction control system helps avoid onlythe acceleration
skid.
If your traction control system is off,then an acceleration skid is also best
handled by easing your foot off the accelerator pedal.
If your vehicle starts to slide, ease your foot off the accelerator pedal and
quickly steer theway you want the vehicle to go. If you start steering
quickly enough, your vehiclemay straighten out. Always be ready for a
second skidif it occurs.
Of course, traction is reduced when water, snow, ice, gravel,or other
material is on the road. For safety, you’ll want to slow down and adjust
your drivingto these conditions. It is important to slow down on slippery
surfaces because stopping distance will be longer and vehicle control
more limited.
While drivingon a surface with reduced traction, try yourbest to avoid
sudden steering, acceleration, or braking (including engine braking by
shifting to a lower gear). Any sudden changes couldcause the tires to
184
a,i‘
c4’
I,
0 t!
slide. You may not realize the surface is slipperyuntil your vehicleis
skidding. Learn to recognize warning clues-- such as enough water, ice or
packed snow on the road to
make a “mirrored surface” -- and slow down
when you have anydoubt.
Remember: Any anti-lock braking system(ABS) helps avoid onlythe
braking skid.
DRZWNG AT NIGHT
Night driving ismore dangerous thanday driving.One reason is that
some drivers are likely to beimpaired -- by alcohol or drugs, with night
vision problems, or by fatigue.
Here aresome tips on night driving.
0 Drive defensively.
0
0
0
0
Don’t drink and drive.
Adjust your inside rearview
mirror to reduce the glare from headlights
behind you.
Since you can’tsee as well, you mayneed to slow down and keep more
space between you and othervehicles.
Slow down, especiallyon higher speed roads. Your headlights can light
up only so much road ahead.
185
0
In remote areas,watch for animals.
If you’re tired, pull off the road in a safe place and rest.
Night Vision
No one can see as well at night as inthe daytime. Butas we get older
these differences increase. A 50-year-old driver
may require atleast twice
as much lightto see thesame thing at night as a 20-year-old.
What you do in the daytime can also affect your night vision. For
example, if you spend the day in brightsunshine you are wise to wear
sunglasses. Your eyes will have less
trouble adjusting to night. Butif
you’re driving, don’t wear sunglasses
at night. They maycut down on
glare from headlights, but they alsomake a lotof things invisible.
You can be temporarily blindedby approaching lights. It can take a
second or two, or even several seconds,for your eyesto readjust to the
dark. When you are faced with severeglare (as from a driver who doesn’t
lower the high beams,or a vehicle with misaimed headlights), slow down
a little. Avoidstaring directly into theapproaching lights.
Keep your windshield and all the glass on your vehicle clean-- inside and
out. Glare atnight is made much worseby dirt on theglass. Eventhe
inside of the glass can buildup a film causedby dust. Dirty glassmakes
lights dazzleand flash more than clean glass would, makingthe pupils of
your eyescontract repeatedly.
Remember that your headlights lightup far less of a roadway when you
are in a turn or curve. Keep your eyes moving;that way, it’s easier to pick
out dimly lighted objects.Just as your headlights should
be checked
regularly for properaim, so should your eyesbe examined regularly.
Some drivers sufferfrom night blindness-- the inability to see in dim light
-- and aren’t even awareof it.
186
c3
I
187
t
Driving too fast through large water puddles or even goingthrough some
car washes can cause problems, too. The water may affect yourbrakes.
Try to avoid puddles. But if you can't, tryto slow downbefore you
hit them.
P
UI
a
'
1
188
Hydroplaning
Hydroplaning is dangerous. So much water can buildup under your tires
that they can actually ride on the water. This can happen if the road is wet
enough and you’re going fastenough. When your vehicleis hydroplaning,
it has little or no contact with the road.
Hydroplaning doesn’t happen often. But it canif your tires haven’t much
tread orif the pressure in one ormore is low. It can happen if a lot of
water is standing on theroad. If you can see reflections from trees,
telephone poles, or other vehicles, and raindrops “dimple” the water’s
surface, there could be hydroplaning.
Hydroplaning usually happens at higher speeds. There just isn’t a hard
and fast rule about hydroplaning. The best advice isto slow down whenit
is raining.
Some Other Rainy WeatherTips
0
Turn on your low-beamheadlights -- not just your parking lights -- to
help make you more visible to others.
Besides slowing down, allowsome extra following distance. And be
especially careful when you passanother vehicle. Allow yourselfmore
clear room ahead, and be preparedto have your viewrestricted by
road spray.
Have good tires with proper tread depth.(See “Tires” in the Index.)
189
I
CITYDRZJTNG
One of the biggest .problemswith city-streets.is the amount of traffic on
them. You’ll want to watch out for what the.other drivers are doing and
pay attention totraffic signals.
Here areways to increase your safetyin city driving:
0 Know the best way to get to where you are going. Get a city map and
plan your trip into an unknown part of the city just as you would for a
cross-countrytrip.
0 Try to use the freeways that rim and crisscross mostlarge cities. You’ll
save time and energy. (See the next section, “Freeway Driving.”)
0 Treat a green light asa warn@ signal. A traffic lightis there because
the corner is busy enough to need it. When a light turns green., and
just before you start to move, check.both ways for vehicles that have
not cleared the intersection or may.be running the red light.
190
r
FREEWAYDRZWNG
,. . .
Mile for mile, freeways (also called thruways, parkways, expressways,
turnpikes, or superhighways) are thesafest of all roads. But they have
their own special rules.
The most important advice on freeway driving is:Keep up with trafficand
keep to theright. Driveat thesame speed most of the.other drivers are
driving. Too-fastor too-slow drivingbreaks a smooth traffic flow.Treat
the left lane on a freeway asa passing lane.
At the entrance thereis usuallya ramp thatleads to thefreeway. If you
have a clear view of the freeway as you drive along the entrance ramp,
you should begin to check traffic.Try to determine where you expectto
blend with the flow. Try to merge into thegap at close to theprevailing
speed. Switch on your turn signal, checkyour-mirrorsand glance over
your shoulder as often as necessary. Try to blend smoothly withthe
traffic flow.
Once you are on the.freeway, adjust your speed to theposted limit or to
the prevailing rate if it’s slower. Stay in
the right lane unless you want
to pass..
Before changing lanes, check your mirrors..Then use your turn signal.
Just before you leave the lane, glance quickly over your shoulder to make
sure thereisn’t another vehicle inyour “blind” spot.
191
I
Once you are moving onthe freeway, make certain you allow a
reasonable following distance. Expectto move slightly slowerat night.
When you want to leave the freeway, moveto the proper
lane well in
advance. If you miss your exit do not, under any circumstances,stop and
back up. Drive on to thenext exit.
The exit ramp can be curved, sometimes quite sharply.
The exit speed is usuallyposted.
Reduce your speed according to your speedometer, not to your sense of
motion. After driving for any distance at higher speeds, you may tend to
think you are going slowerthan you actually are.
BEFORE LEAWNG O N A LONG TMP
Make sure you’re ready.Try to be well rested. If you must start when
you’re not fresh -- such asafter a day’s work-- don’t plan to make too
many,milesthat first part of the journey. Wear comfortable clothing and
shoes you can easily drive in.
Is your vehicleready for a long.trip? If you keep it servicedand
maintained, it’s ready to go. If it needs service, have itdone before
starting out. Of course, you’ll find experienced and able service experts in
Cadillac dealerships all acrossNorth America. They’ll be readyand
willing to help if you need it.
Here aresome things you can checkbefore a trip:
Windshield Washer Fluid:Is thereservoir full? Are all windowsclean
inside and outside?
Wiper Blades: Are they in good shape?
Fuel, EnEine Oil. Other Fluids: Have you checked all levels?
Lights: Are they all working?Are thelenses clean?
Tires: They are vitally important to a safe, trouble-free trip. Is the
tread good enough for long-distance driving? Are the tires allinflated
to therecommended pressure?
192
Ql
cl‘
I
GI
0
Weather Forecasts: What’s the weather outlook along your route?
Should you delay yourtrip a short time to avoid a major storm
system?
0
Maps: Do you have up-to-date maps !
r
HIGHVKAY HIPNOSIS
Is there actually sucha condition as “highway hypnosis”?Or is itjust
plain falling asleep at thewheel? Call ithighway hypnosis, lack of
awareness, or whatever.
There is something about an easy stretch of road with the same scenery,
along with the hum of the tires on theroad, the droneof the engine, and
the rush of the wind against the vehicle that can make you sleepy. Don’t
let it happen to you! If it does, your vehicle can leave the road in lessthan
a second, and you could crash and be injured.
What can you do abouthighway hypnosis?First, be aware that it can
happen.
Then here aresome tips:
Make sure your vehicle is well ventilated, with a comfortably cool
interior.
Keep your eyes moving. Scan the road ahead and to the sides. Check
your rearviewmirrors and your instruments frequently.
If you get sleepy, pulloff the road into a rest, service, or parking area
and take a nap, get some exercise, or both. For safety, treat drowsiness
on thehighway asan emergency.
193
HILL AND MOUNTMN ROADS
Driving on steep hills or mountains is different from driving inflat or
rolling terrain.
If you drive regularly insteep country, or if you’re planning to visit there,
here are some tips that can make your trips safer and more enjoyable.
0 Keep your vehicle in goodshape. Check all fluid levels and also
the
brakes, tires, cooling systemand transmission. These partscan work
hard onmountain roads.
Know how to go down hills.The most important thing to know is this:
let your engine do some of the slowing down. Shiftto a lower gear
when you go down
a steep orlong hill.
13
I
194
0
0
0
0
Know how to go uphill.You may want to shift downto a lower gear.
The lower gears help cool your engine and transmission, and you can
climb the hill better.
Stay in yourown lane when driving on two-lane roads in hillsor
mountains. Don’t swing wide or cut across the center of the road.
Drive at speeds that let you stay in yourown lane.
As you go over the top of a hill, be alert. There could be something in
your lane, like a stalled car or an accident.
You may see highway signson mountains that warn of special
problems. Examples are long grades, passing or no-passing zones, a
falling rocks area, or winding roads. Be alert tothese and take
appropriate action.
195
".E
.R
DRZUNG
.
.
Here are some tips for winter driving:
Have your Cadillacin good shape for winter.Be sure your engine
coolant mix is correct.
You may want to put winter emergency suppliesin your trunk.
Include an ice scraper, a small brush or broom, a supply of windshield
washer fluid, a rag, some winter outer clothing, a small shovel, a
flashlight, a red cloth, and a couple of reflective warning triangles.And, if
you will be driving under severe conditions, include a small bagof sand, a
piece of old carpet or a couple of burlap bags to help provide traction. Be
sure you properly secure these items in your vehicle.
Driving on Snowor Ice
197
Most of the time, those places where your tires meet the road probably
have good traction.
However, if there is snowor ice between your tires and the road, you can
have a very slippery situation. You’ll have a lot lesstraction or “grip” and
will need to be very careful.
What’s the worst time for this? “Wet ice.”’Very cold snow
or ice canbe
slick and .hard to drive on. But wet icecan be even more trouble because
it may offer the least traction of all. You can get “wet ice” when it’s about
freezing (32 O F ; 0 * C) and freezing rain begins to fall. Try to .avoid driving
on wet ice until saltand sand crews canget there.
Whatever the condition -- smooth ice, packed, blowing or loose snow -drive withcaution.
1
l
Keep your traction control system on. It improves your abilityto
accelerate when drivingon a slippery road. Even though your vehiclehas
a traction control system, you’llwant to slow down and adjust your
driving to theroad conditions. See “Traction Control System’’ in the
Index.
Your anti-lock,brakes improve your abilityto make a hard stop on a
slippery road. Even though you have the anti-lock braking system, you’ll
.want to begin stopping sooner than you wouldon dry pavement. See
“Anti-lock”in the Index.
Allow greater following distance on any slippery road.
Watch for slippery spots.The road might be fine until you hit a spot
that’s covered with ice..On anotherwise clear road, ice patches may
appear in shaded areas where the sun can’t reach: around clumps of
trees, behind buildings, or under bridges. Sometimes the surface of a
curve or an overpass may remain icy when the surrounding roads are
clear. If you see a patch of ice ahead of you; brake before you are on
it. Try not to brake while you’re actuallyon the ice, and avoid sudden
steering maneuvers.
198
E
l
I
I
El I
i
- 1
If You’re Caught
ina Blizzard
If you are stopped by heavy snow, youcould be in a serious situation. You
should probably stay withyour vehicle unlessyou knowfor sure thatyou
are near help and you can hike.through the snow. Here aresome things
to do to
summon help and keep yourself and your passengers safe:.Turn
.on your hazard flashers. Tie a red cloth to your vehicle to alert police that
you’ve been stopped by the snow. Put on extra clothing or wrap a blanket
around you. If you have no blankets or extra clothing, make body
insulators from newspapers, burlap bags, rags, floormats -- anything you
can wrap around yourself or tuck under your clothing to keep warm.
You can run the engine to keep warm, but be careful.
199
Run-your engine only as long as you must.
This saves fuel.When you
run the engine, make it go a little faster than just idle. That is, pushthe
accelerator slightly. This uses less fuelfor the heat thatyou-get and it
keeps the battery charged. You will need a well-charged battery to restart
the vehicle, and possibly for signaling later .on with your headlights.
Let
the heaterrun for awhile.
the way to preserve
Then, shut the engine off and closethe window almost all
the heat. Start the engine againand repeat this only when you feel really
uncomfortable from the cold. Butdo it aslittle as possible. Preserve
the fuel as
long as you can.
To help keep warm, you can out
get of the vehicle and do some
fairly vigorous exercises every half
hour or so until help comes.
200
TOWING A TRAILER
NOTICE:
Pulling a trailer improperly can damage your vehicle and result
in costly repairs not covered
by your warranty.To pull a trailer
correctly, follow the advice in this section.
Your Cadillac is a passenger vehicle. Trailer towingcan change the way
your vehicle performs on theroad. The loads and forces created when
trailering subject the vehicle to significant levelsof stress.
Load pulling components such asthe engine, transmission, rear axle,
wheel assemblies,and tires are forced to work harder against the drag of
the added weight. The engine is required to operate atrelatively higher
speeds and under greaterloads, whichgenerates extra heat. Trailer
towing adds considerably to wind resistance whichincreases pulling
requirements.
All thismeans changes in:
Handling
Durability
Fuel Economy
201
I
If You Do Decide To Pull A Trailer
If you do, here aresome important points.
There aremany different laws including speed limit restrictions which
apply to trailering. Make sure your rigwill be legal, not only where
you livebut also where you’llbe driving. A good source for this
information can be state or
provincial police.
You should always use a load equalizing hitchif your trailer will weigh
more than 2,000 pounds (900 kg). Consider using swaycontrol if your
loaded trailerwill weigh 2,000 pounds (900 kg) or less. If your loaded
trailer will weigh2,000 pounds (900 kg.) or more you should useboth
load equalizing hitchand sway control.
o/
I
NOTICE:
Do not use sway control devices on trailers equipped with surge
brakes, i.e. boat trailers. Surge brakes
do not function properly
when used with most sway control devices.
5
0
Don’t tow a trailer during the first 1000 miles (1600 km) your new
vehicle is driven. The engine, axleor other partscould be damaged.
During thefirst 1,000 miles (1600 km) that you tow a trailer, don’t
drive over50 mph (80 km/h) and avoid full throttle starts. This helps
the engine and other partsof your vehicle wear in
at theheavier loads.
Avoid continuous operation in mountainous areas thathave grades
greater than2% for longer than 5 miles.
A maximum highway speed to 55 mph (90 km/h) whentrailering will
enhance thelong term durability of your vehicle.
Change axle lubricant annuallyor every 7,500 miles (12,500 km) of
trailer towing, whichever occurs first.
Three important considerations have to dowith weight:
202
cI
nl
I
u,
‘
p
’
1. Weight of the ’hailer
How heavy cana trailer safely be? It should never weighmore than
2,000 pounds (907 kg) includingthe load. Unless you have one of
the optional Trailer Towing Packages.
Trailer weightalso depends onhow you planto use your rig. For example,
speed, altitude, road grades, outside temperature and how much your
vary depending
vehicle is used
to pull a trailer are allimportant. It can also
on any special equipment that you have on your vehicle.
You can ask yourdealer for trailering information or advice, or at
Cadillac, you can call 1-800-43FLEET
In Canada, write to General Motors of Canada Limited, Customer
Assistance Center, 1908 Colonel Sam Drive, Oshawa,Ontario L1H
8P7.
2. Weight of the ’hailerTongue
The gross vehicle weight includesthe weight of the vehicle, any
cargo you may carry in it,and the people who will be riding in the
vehicle. If you are towing a trailer, you must subtractthe tongue load
from the vehicle’s capacity, because your vehicle
will be carrying that
weight, too. See “Loading Your Vehicle” inthe Index for more
information about your maximum vehicle’s load capacity.
A
B
203
If you’re usinga
“dead-weight”hitch,
the trailer tongue (A)
should weigh 10% of
the totalloaded
trailer weight (B). If
you have a
“weight-distributing”
hitch, the trailer
tongue (A) should
weigh 12% of the
total loaded trailer
weight (B).
I
I
31
i
After you’ve loaded your trailer, weigh the trailer and then the
tongue separately to see if the weights are proper. If they aren’t,
you may be able to change them simply by moving some items in
the trailer.
3. Total Weight onYour Vehicle Tires
EI
Be sure your vehicletires are inflated to maximum recommended
cold tire pressure. You’ll find these numbers on the Certification
label at the rearedge of the driver’s door (or see “Tire Loading’’ in
the Index).
Gross Combined Vehicle WeightRating (GCvmC)
GCVWR = Curb Weight + 2 Passengers + Cargo + Trailer
WHERE: Vehicle Curb Weight = 4,368lbs.
2 Passengers = 150 lbs. (Each)
Cargo = 200 lbs.
+ Safety Factor
How Equipped
GCWR
Standard Vehicle Up to2,000 lbs. (908 kg)
Trailer ...................................
With 5,000 lbs. (2270 kg)
Trailer Tow Option (V92) ....................
With 7,000 lbs. (3178 kg)
Trailer Tow Option (V4P) ....................
.7,450 lbs. (3178 kg)
10,800 lbs. (3382 kg)
12,100 lbs. (5493 kg)
nl
To determine how your Fleetwood is equipped, see the Service Parts
Identification label on the underside of the trunk lid.
n
NOTICE:
I
Do not exceed the gross vehicle weight rating
(GVWR) for your
vehicle.
204
I
-
I
r
Hitches
It’s important to have the correct hitch equipment. Crosswinds, large
trucks going by, and rough roads are a few reasons why you need the right
hitch. Here aresome rules to follow:
If you pull a fully loaded trailer that will weigh more than 2,000
pounds (900 kg), be sure touse a properly mounted,
weight-distributinghitch and sway control of the propersize. This
equipment is very important for proper vehicle loading and good
handling when you’re driving.
Will you have to make any holes inthe body of your vehiclewhen you
install a trailer hitch? If you do, be sureto seal the holes to prevent
deadly carbon monoxide (CO) from your exhaust from entering into
your vehicle (see Index under “CarbonMonoxide”).
Don’t let the steel in a hitch contact the aluminum on your bumper. If
you do, the two will corrode. You can use a insulator such aspaint or
plastic tape to separate the
steel and aluminum. The same steel to
aluminum corrosion can happen with fasteners, too.
Using A Dead Weight TrailerHitch
0
The trailer tongue should weigh 10% of the total trailer load
(maximum 300lbs.) or as specifiedby the trailer manufacturer to
minimize sway.
Trailer brakes of adequate size are required on trailers over 1,000 lbs.
(450 kg) loaded weight.
If the trailer is over 5,000 lbs.(2270 kg) adjust vehicle rear tire
pressure to (35 psi coldtire pressure).
NOTICE:
7
Surge brakes do not function properly if used with most
equalizer hitches.
Trailer Hitching Procedure Using
A Weight
Distributing (Equalizing) Hitch
(Recommendedfor loaded trailers weighing 3,000 lbs. to 7,000lbs.)
Your vehicle is equipped with an Electronic Level Control (ELC) feature.
When hooking up a trailer using a weight distributing hitch,always use
the following procedure:
0 Place the vehicle on a level surface without the trailer hitched. With
the ignition off,and all doors closed, allowthe vehicle to level
automatically.
0
Disable the Electronic Level Control (ELC) by pulling MAXI@
fuse #9 (30 AMP) from the underhood electrical center located on
the passenger side wheel housing in
the engine compartment. Remove
the cover to gain access.
0
Attach the trailer to the vehicle. The trailer tongue should weight 12%
of the total loaded trailer weight.
Level the vehicle withthe load leveling spring bars (equalizers).
Leave the fuse out while towing yourtrailer.
0
0
n
I
t
I
E I'
NOTICE:
Adjusting an equalizing hitch with the Electronic Level Control
(ELC) system engaged will defeat the function of the load
equalizing hitch andmay cause unsatisfactory handling.
Once you havecompleted towing yourtrailer, be sure toreinstall the
Electronic Level Control (ELC) fuse.
In Addition
0
Use two friction sway controls if your trailer is over 5,000 lbs. .(2270
kg) loaded weight, and/or is.over 24'. long..
Use at least one friction sway control if your trailer is over 2,000 lbs.
(908 kg)loaded weight, and consider using one for trailers under
2,000 lbs. (908 kg).
ill
i
3
206
NOTICE:
Do not use sway control devices on trailers equipped with surge
brakes, i.e. boat trailers. Surge brakes do not function properly
when used with most
sway control devices.
r
0
Trailer brakes of adequate size are recommended on trailers over
1,000 lbs loaded weight.
If trailer is over 5,000 lbs. (2270 kg), adjust vehiclerear tirepressure
to (35 psi. coldtire pressure).
Use a Reese custom made weight distributing hitch or the equivalent
for your Cadillac Fleetwood. (Reese product part number 36042)
Safety Chains
You should always attach chains between your vehicleand your trailer.
Cross the safety chains under the.tongue of the trailer so that the
tongue will not drop to the
road if it becomes separated from the hitch.
Instructions about safety chains may be provided by the hitch
manufacturer or by the trailer manufacturer. Follow the manufacturer’s
recommendation for attaching safety chains.Always leave just enough
slack so you can turn with your rig.And, never allow safetychains to drag
on theground.
Trailer Brakes
If your trailer weighs more than 1,000 pounds (450 kg)loaded, it needs to
be equipped with adequate brakes. Be sure to read and follow the
instructions for the trailer brakes so you’ll be able to maintain them
properly.
Because you have anti-lockbrakes, don’t tryto tap into your vehicle
hydraulic brake system. If you do, both brake systems won’t work well,
or
at all.
207
I
Trailer Wiring Harness
I
If your Fleetwoodis equipped with one of the heavy duty trailering
options, a 5 wire trailering harness is located inthe trunk. You may have
to have it wired to your vehicle.
These trailer harness colorcodes should be followed when connectingto
your trailer:
White: Direct Trailer Ground for Trailer Lights
Brown: Park Lamps
Yellow: Left Turn and Stop Lamps
Dark Green: Right T u h and Stop Lights
Dark Blue: Auxiliary Circuit
DRIFTNG W T H A T W L E R
Safe trailer towing requires a certain amount of experience. Before
setting out for the open road, you'll want to get to know your rig.
Acquaint-yourselfwith the feel of handling and braking withthe added
weight of the trailer. Always keep in mindthat thevehicle you are driving
is longerand not nearly as responsive as your vehicle
is by itself.
Before you start, check the trailer hitch and safety chains, electrical
connector, lights, tires and mirror adjustment. If the trailer has electric
brakes, start your vehicleand trailer moving and apply the trailer brakes
by hand to be sure thebrakes are working. This also checks your
electrical connectionat thesame time.
During your trip check occasionallyto be sure that the
load is secure and
that thelights and trailer brakes are operating correctly.
Following Distance
Stay at least twice as far behind the vehicle ahead as you wouldwhen
driving your vehicle without trailer.
a
This can help you avoid situations
that requireheavy brakingand sudden turns.
208
I
I
Passing
You’ll need more passing distance ahead when you’re towinga trailer.
Because you’re longer, you’ll need to go muchfarther beyond the passed
vehicle before you can return toyour lane.
Backing Up
Hold the bottom of the steering wheel withone hand. Then,to move the
trailer to theleft, just move that hand to the left. To move the trailerto
the right, move yourhand to theright. Always back up slowly and, if
possible, havesomeone guide you.
Making Turns
When you’returning with a trailer, make wider turns thannormal. Do
this so your trailer won’t strike soft shoulders, curbs, road signs, trees, or
other objects. Avoid jerkyor sudden maneuvers. Signalwell in advance.
Turn Signals When Towing a Trailer
When you tow a trailer, your vehiclehas to have a different turn signal
flasher and extra wiring. The green arrows on your instrument panel will
flash whenever you signal
a turn or lane change. Properlyhooked up, the
trailer lights will also flash, tellingother drivers you’reabout to turn,
change lanes or stop.
When towing a trailer, the green arrows on your instrument panel will
flash for turnseven if the bulbs on the trailer are
burned out. Thus, you
may think drivers behind you are seeing your signal when they
are not.
It’s important to check occasionallyto be sure the trailer
bulbs are still
working.
Driving On Grades
Reduce speed and shift to a lower gear before you start down a long or
steep downgrade. If you don’t shift down, you might have
to use your
brakes so much that they get hotand no longer work well.
209
On a long uphillgrade, shift downto a lower gear and reduce your speed
and reduce your speed to around 45 mph (70 km/h) to reduce the
possibility of engine and transmission overheating.
If your trailer weighs more than2,000 pounds (908 kg), you should drive
in “D or 3” instead of Overdrive. This allowsthe torqueconvertor clutch
to engage and allowing the transmission to run cooler.
iI;
Parking onHills
I
I
You really shouldnot parkyour vehicle,and trailer ona hill. If something
goes wrong your rig could
start tomove. People can be injured and both
your vehicle and the trailer can be damaged.
If you eve1 haveto park your rig on a hill, here’s howto doit:
Apply your regularbrakes, but don’t shift into “P7,(Park) yet.
Have someone place chocks (tapered triangular blocks) under the
downhill sidethe trailerwheels.
When the wheel chocksare in place, release the regular brakes until
the chocks absorb the load.
Reapply the regular brakes. Then shift into “P” (Park) and apply the
parking brake.
Release the regular brakes.
n
Gi
I
B
I1
h
- 1
When YouAre Ready to Leave Afier Parkingon a Hill
1. Apply your regularbrakes and hold the pedal down while you:
Start your engine;
Shift into a gear; and
Be sure the parking brake has released.
2. Release the brake pedal.
3. Drive slowly until the trailer is clear of the chocks.
4. Stop andhave someone pick up and store thechocks.
210
l
U1
a I‘
Engine Cooling When Trailering
Your cooling systemmay temporarily overheat during severe operating
conditions such as;
0
0
Climbing grades steeper than 4% at ambient temperatures above
90’Fahrenheit (32O Celsius) with a loaded vehicle and trailer.
Stopping after high-speed driving.
Idling for long periods in stop and go traffic.
If the “TEMP”warning lightcomes on, pull to the side of the road as
soon as it is safeto do so. When the vehicle is at acomplete stop, shift the
transmission selector to P (Park) and allow the engine to idle. If your
Electronic Climate Control system is on, shut it off. Do not turn off the
engine or increase engine speed above a normal idle. Within two or three
minutes the system should cool sufficientlyto allow A/Coperation to
resume. At that time resume driving at areduced speed. Return to
normal driving after 10 minutes if the “TEMP”warning light isnot
displayed.
Maintenance when Trailer Towing
Your vehicle will need service more often when you’re pullinga trailer.
See the Maintenance Schedule for details. Thingsthat are especially
important in trailer operation are automatic transmission fluid (don’t
overfill), engine oil, axlelubricant, engine drive belt, cooling system,and
brake adjustment. Each of these is covered in thismanual. The Index will
help you find them quickly. If you’re trailering, it’s a good idea to review
these sections before you start your trip.
Check periodicallyto see that all hitch attaching nuts and bolts are tight.
211
1
PROBLEMS ON THE ROAD
n
n
U
212
I
ELUARD W M I N G FLASHERS
Your hazard warning flashers let you warn others. They alsolet police
know you havea problem. Your front and rear turnsignal lightswill flash
on and off.
make your front and
rear turnsignal lights
flash on and off.
I
I
Your hazard warning flashers work no matter what position yourkey isin,
and even if the key isn’t in.
I
To turn off the
flashers, pull out on
the collar. Whenthe
hazard warning
flashers are on, your
turn signals won't
work.
Dl
OTHER W N I N G DE'C.ICES
If you carry reflective triangles,you can set one up at the side of the road
about 300 feet (100 ,m) behind your vehicle.
JUMP STARTING
If your battery has run down, you maywant to use another vehicle and
some jumper cables to start your Cadillac. Butplease follow the steps
below to doit safely.
E!
214
r
I
NOTICE:
Ignoring these steps could result incostly damage to your
vehicle that wouldn’t be covered byyour warranty.
m i n g to start.your Cadillac by pushing or pulling it won’t
work, and it could damage your vehicle.
TO JUMP START YOUR CXDILLAC:
1. Check the othervehicle. It must have a 12-volt battery with a negative
ground system.
NOTICE:
If the othersystem isn’t a 12-volt system witha negative ground,
both vehicles can be damaged.
2. Get thevehicies closeenough so the jumpercables can reach, but be
sure thevehicles aren’t touching each other. If they are, it could cause
a ground connection you don’twant. You wouldn’t be able to start
your Cadillac,and the bad grounding could damage the electrical
systems.
You could be injured if the vehicles roll.Set the parking brake firmly
on each vehicle. Put an automatic transmission in “P” (Park) or a
manual transmission in “N” (Neutral).
3. Turn off the ignition on both vehicles. Turnoff all lights that aren’t
needed, and radios. This will avoidsparks and help save both
batteries. And it could save yourradio!
NOTICE:
If you leave your radio on, it could be badlydamaged. The
repairs wouldn’t be coveredby your warranty.
215
I
4. Open the hoods and locate the batteries.
I
n
Find the positive (+) and negative(-) terminals on each battery.
5. Check that thejumper cables don't have loose or missing insulation. If
they do, you couldget a shock. The vehicles could be damaged, too.
Before you connect the cables, here are some basic things youshould
know. Positive (+) will go to positive (+) and negative (-) will go to
negative (-) or a metal engine part. Don't connect (+) to (-) or you'll
get a short thatwould damage the battery and maybe other parts, too.
216
6. Connect the red
positive (+) cable
to thepositive (+)
terminal of the
vehicle withthe
dead battery.
7. Don’t let the other end touch metal. Connect it to the positive (+)
terminal of the good battery. Use a remote positive (+) terminal if the
vehicle has one.
8. Now connect the black negative (-) cable to the good battery’s
negative (-) terminal.
Don’t let the otherend touch anything until the next step. The other
end of the negative cable doesn’t go to thedead battery. It goes to a
heavy unpainted metal part on theengine of the vehicle withthe dead
battery.
9. Attach the cable at least 18 inches (45 cm) away from the dead
battery, but not near engine parts that move. The electrical connection
is just as goodthere, but thechance of sparks getting back to the
battery is much less.
217
I
I
I
I
10.Now start thevehicle with the good battery and run the engine for a
while.
11.Try to start thevehicle with the dead battery.
If it won't start after a few tries, it probably needs service.
12. Remove the cables in reverse order to prevent electrical shorting.
Take care thatthey don't touch each other orany other metal.
218
I
When the towing service arrives,let the tow operator know that this
manual contains detailed towing instructions and illustrations. The
operator may want to see them.
When your vehicle is being towed, have
the ignition key off. The steering
wheel should be clamped ainstraight-aheadposition, with a clamping
Do not use the vehicle's steering
device designed for towing service.
column lockfor this. The transmission shouldbe in Neutral and the
parking brake released.
Don't have your vehicle towedon the rearwheels, unless you must. If the
vehicle must be towedon the rearwheels, don't go more than35 mph (56
km/h)
or farther than50 d e s (80 km) or your transmissionwill be damaged.
I!:' I
u
f
220
If these limits mustbe exceeded, thenthe rear wheels have to be supported
on a dolly.
r
I
NOTICE:
Do not attach winch cables or J-hooks
to suspension
components when using car carrier equipment. Always use
T-hooks inserted in theT-hook slots.
Front Sling-Type Hook-Ups
No 4x4 wood beam is required. Position the cross bar just behind the rear
edge of the frontbumper.
,,
Attach “T” hook chains
into the bottom slots
on both frame rails.
,
,
221
Attach a separate
safety chain around the
outboard end of each
lower control arm.
Rear SliinpType Hook- Ups
No 4x4 wood beam is required. Position the cross bar directly under the
rear bumper.
Attach “T” hook chains
to the slots inframe
rails justahead of the
rear wheels.
Attach a separate
safety chain around
each side of the axle
inboard of the springs
01
nr
!
j
L
222
.
r_
ENGINE O'VERHEATING
You will findthe warning lightabout a hot engine on your Cadillac
instrument panel.
-
If Steam Is Coming FromYour Engine
223
NOTICE:
If your engine catches fire because you keep driving with no
coolant, your vehicle can be badly damaged. The costly repairs
would not be covered by your warranty.
I
i 3 ‘I
IfNo Steam Is Coming From Your Engine
If you get the overheat warning but seeor hear no steam, theproblem
may not be tooserious. Sometimes the engine can get a little too hot
when you:
0 Climb a long hillon a hot day.
Stop after high speed driving.
0 Idle for long periods in traffic.
Tow a trailer.
If you get the overheat warning withno sign of steam, try thisfor a
minute orso:
1. Turn off your air conditioner.
2. Turn on your heater tofull hot at thehighest fan speed and open the
window as necessary.
3. If you’re in a trafficjam, shift to “N” (Neutral).
If you no longer have the overheat warning, youcan drive. Just to be safe,
on,
drive slowerfor about tenminutes. If the warning doesn’t come back
you can drive normally.
If the warning continues, pull over,stop, and park your vehicle right
away.
If there’s stillno sign of steam, you can idle the engine for two or three
minutes while you’reparked, to see if the warning stops. Butthen, if you
still havethe warning, TURN OFF THE ENGINE AND GET
EVERYONE OUT OF THE VEHICLE until it cools down.
You may decide not to lift the hood but to get service help right away.
3
224
r
COOLING SYSTEM
When you decide it’s safeto lift the hood, here’s whatyou’ll see:
A. Coolant surge tank
B. Electric engine fans (If equipped)
If the coolant inside the coolant surge tank is boiling, don’tdo anything
else until it cools down.
225
I
The coolant level shouldbe at or above the seam inside the surge tank. If
it isn’t, you may have
a leak inthe radiatorhoses, heater hoses, radiator,
water pump or somewhere else in the cooling system.
NOTICE:
Engine damage from running your engine without coolant isn’t
covered by your warranty.
If there seems to beno leak, checkto see if the electric engine fans are
running. If the engine is overheating, both fans should be running. If they
aren’t, your vehicleneeds service.
226
P
l
i
r_
How to Add Coolant to the Coolant Surge Tank
If you haven’tfound a problem yet, but the coolant level isn’t visible
inside the surge tank add a 50/50 mixture of clean water (preferably
distilled) and a properantifreeze at the coolant surge tank, but be sure
the cooling system, includingthe coolant surge tank pressure cap, is cool
before you do it. (See “Engine Coolant” in the Index for more
information about the proper coolant mix.)
227
L
NOTICE:
In cold weather, water can freeze and crack the engine, radiator,
heater core and other parts.
So use the recommended coolant.
3)
n
--I
228
'
1. You can remove the coolant surge tank pressure capwhen the cooling
system, includingthe coolant surge tankpressure cap and upper
radiator hose, is no longer hot.
Turn the pressure cap
slowly about
one-quarter turn to
the left and then stop.
-
~
I
If you hear a hiss, waitfor thatto stop. A hiss means there is stillsome
pressure left.
2. Then keep turning the pressure capslowly, and remove it.
3. Fill the coolant
surge tank with
the proper mix, up
to thebase of the
filler neck.
4. With the coolant
surge tank
pressure cap off,
start theengine
and let it run until
you can feelthe
upper radiator
hose getting hot.
Watch out for the
engine fan(s).
I
Ll
n
i$ ,
I
I
By this time, the coolant level insidethe coolant surge tank may be
lower. If the level is lower,add more of the propermix to the coolant
surge tank until the level reaches
5. Then replace the
pressure cap. Be
sure thepressure
cap is tight.
230
3;
r
IF A TIREGOES FLAT
It’s unusual for a tire to“blow out” while you’re driving, especially
if you
maintain your tires properly. If air goes out of a tire, it’s muchmore likely
to leak out slowly. But if you should ever have a “blowout,” here are a
few tips about what to expect and what to do:
If a front tirefails, the flat tire will create a drag that pulls the vehicle
toward that side. Take your foot off the accelerator pedal and grip the
steering wheel firmly. Steer tomaintain lane position, then gently brake
to a stop well out of the traffic lane.
A rear blowout, particularlyon a curve, acts much like
a skid and may
require the same correction you’d use in a skid. In any rear blowout,
remove yourfoot from the accelerator pedal. Get the vehicle under
control by steering the way you want the vehicle to go. It may be very
bumpy and noisy, but you can still steer. Gently brake to a stop, well off
the road if possible.
If a tire goes flat, the next section shows howto use your jacking
equipment to change a flat tire safely.
231
>2
"-
L"
-
^',
,'
If a tiregoes.flat,avoid farther tire and wheel damage
bv driving slowlyto
a level place.Turn on your hazard warning flashers.
I
-1
L-
Rear Fender Skirt
-
If the flat tireis at the rearwheel, you have to remove the fenderskirt
first.
To unlock the fender
skirt, locate the
handles inside the
fender skirt. Pushthe
handles up and inward,
and then pull them
down. Gently remove
the skirt by pulling it
toward you.Place it to
one side.
Use the flat end of the
wheel wrench.Insert
into the small slot on
the wheel and gently
remove the center
cover. Be carefulnot
to drop thecover on
the ground, you could
scratch it.
234
nl
I
qi
i
l
Using the wheel
wrench, loosen all the
wheel nuts. Don't
remove them, yet.
it
:
+,'
r
,e7'.
:+ :
&..A
NOTICE:
Raising your vehicle with the jack improperly positioned will
damage the vehicle or may allow the vehicle tooff
fall
the jack.
Be sure tofit the jacklift head into the proper location before
raising your vehicle.
Raise the vehicle by rotating the wheel wrench clockwise. Raise
the
vehicle far enough off the ground so there is enough room for the spare
tire to fit.
- 1
Remove the wheel nuts .and take off the flat tire.
I
236
Remove any rust or dirtfrom the wheel bolts, mounting surfaces or spare
wheel.
Place the spare on the
wheel mounting
surface.
237
I
Replace the wheel nuts
with the roundedend
of the nuts toward the
wheel. Tighteneach
nut by hand until the
wheel is held against
the hub.
, .....
i
l
' I '
Lower the vehicle
rotating the wheel
wrench
counterclockwise.
Lower the vehicle
completely.
238
L
v'
- 1
Tighten the wheel nuts
firmly in a criss-cross
sequence as shown.
I-
k
j
Don’t try to put .a wheel cover on.yom,Gampact
spare tire. It won’t fit.
Store the wheel coverin thetrunk untibyou have the flat tire repaired
or
replaced.
.
.
NOTICE:
Wheel covers wsa’tfit on your compact spare..If you try40 puta
wheel cover on your comp&t spare, you .coulddamsme the cover
or the spare.
-
239
Just follow this drawing:
I
WING NUT
u
COMPACT SPARE
t]
BOLT SCREW
I
FLOOR BRACKET
~
~
240
241
Align the upper
locator pins and insert
the pins into the holes.
I
I
i
1
-
1
;
l
Push the handles up to lock the skirt in place.
COMPACT SPARE TIRE
Although the compact spare was fullyinflated when your vehiclewas
new, it can lose air after a time. Check the inflation pressure regularly. It
should be 60 psi (420 P a ) . The compact spare is made to go up to 3,000
miles (5000 km), so you can finish yourtrip and have your full-sizetire
repaired or replaced where you want. Of course, it’s best to replace your
spare with a full-size tire as soon as you can. Yourspare will last longer
and be in goodshape in case you need it again.
Your anti-lock brake system warning light may come on when you are
driving witha compact spare. See “Anti-Lock Brake System Warning
Light” in the Index.
I
CII
i
242
r
NOTICE:
Don’t take your compact spare through an automatic car wash
with guide rails. The compact spare can get caught on the rails.
That can damage the tire andwheel, and maybe other partsof
your vehicle.
Don’t use your compact spare on some other vehicle.
And don’t mix your compact spare orwheel withother wheels or tires.
They won’t fit.Keep your spare and its wheel together.
Tire chainswon’t fit your compact spare. Using them will
damage your vehicle and destroy the chainstoo. Don’t use tire
chains on your compact spare.
SPARE TIRE
243
-I
IF YOU’RE STUCK: IN SAND, MUD, ICE
OR SNOW
What you don’t wantto do when your vehicle is
stuck is to spin your
wheels. The method known as “rocking” can help you get out when
you’re stuck,but you must use caution.
II
NOTICE:
Spinning your wheels can destroy parts of your vehicle
as well
as the tires.If youspin the wheels too fast while shifting
your
transmission back and forth, you can destroy your
transmission.
’
Rocking your vehicle to get
it out:
First, turn your steering wheel left and right. That will clear the area
around your front wheels. You should turn your traction control system
off. (See “Traction Control System” in the Index.) Then shift backand
forth between “ R ’ (Reverse) and a forward gear, spinning the wheels as
little as possible.Release the accelerator pedal while you shift,and press
lightly on theaccelerator pedal when the transmission is in gear.If that
doesn’t get you out after a few tries, you may need to be towed out. If you
do need to betowed out, see “Towing Your Vehicle”in the Index.
244
D/
SERVICE AND APPEARANCE CARE
Here you will find information about the care of your Cadillac. ThisPart
begins with serviceand fuel information, and then it shows how to check
important fluid and lubricant levels.There is also technical information
about your vehicle,and a section devoted to its appearance care.
SERVICE
Your Cadillac dealer knows your vehiclebest and wants you to be happy
with it. We hope you’ll goto your dealer for all your serviceneeds. You’ll
get genuine GM parts and GM-trained and supported service people.
We hope you’ll want to keep your GM vehicle allGM. Genuine GM parts
have one of these marks:
Doing Your Own Service Work
If you want to dosome of your own service work,you’ll want to get the
proper Cadillac Service Manual. It tells you much more about how to
service your Cadillac than this manual can. To order the properservice
manual, see “Service Publications” in the Index.
You should keep a record with all parts receipts and list the mileage and
the dateof any service work youperform. See “Maintenance Record” in
the Index.
245
I
op
3 I’
-’
n
NOTICE:
If you try to do yourown service work without knowing enough
about it, your vehicle could be damaged.
I
I
i
’
Lll
“I
FUEL
‘1
I
Use regular unleaded gasoline rated at 87 octane or higher. It should
meet specifications ASTM D4814 in the U.S. and CGSB 3.5-92 in
Canada. These fuels should have the proper additives, so you should not
have to add anything to thefuel.
In the U.S. .and Canada, it’s easyto be sureyou get the right kindof
gasoline.(unleaded). You’ll see “UNLEADED” right.on the pump. And
only unleaded nozzles will fit into your vehicle’s filler neck.
Be sure theposted octane is at least 87. If the octane is lessthan 87, you
may get a heavy knockingnoise when you drive.If it’s bad.enough, it can
damage your engine.
If you’re usingfuel rated at87 octane or higher and you stillhear heavy
knocking, yourengine needs service. But don’t worry
if you hear a little
pinging noise when you’re accelerating or driving up a. hill.That’s normal,
246
-
1
I
I
r7
n
and.youdon’t have to buy a higher octane fuel to get rid of pinging. It’s
the heavy, constant knock that means you havea problem.
What aboutgasoline with blending materials that contain oxygen
(oxygenates), such as MTBE oralcohol?
MTBE is “methyl tertiary-butyl ether.’’Fuel that is no more than 15%
MTBE is fine for your vehicle.
Ethanol is ethylor grain alcohol. Properly-blended fuel that is no more
than 10% ethanol is fine for your vehicle.
Methanol is methyl or wood alcohol.
NOTICE:
Fuel that is more than 5% methanol is bad for your.vehicle.
Don’t.use it. It can corrode metal parts in your fuel system and
also damage plastic and rubber.parts. That damage
wouldn’t be
covered under your warranty. And even
at 5%or less, there must
he “cosolvents” and corrosion preventers in
this fuel to help
avoid these problems.
Gasolinesfor Cleaner Air
~
Your useof gasoline with deposit control additives will help prevent
deposits from forming in your engine and fuel system. That helps.keep
your engine in tune and your emission control system workingproperly.
It’s goodfor your vehicle,and you’ll be doing your part for cleaner air.
Many gasolines are now blended with oxygenates.General Motors
recommends that you use gasolines with these blending materials, such as
MTBE and ethanol. By doing so, you can help clean the air, especially in
those parts of the country that have highcarbon monoxide levels.
In addition, some gasoline suppliers are now producing reformulated
gasolines. These gasolines are specially designed to reduce vehicle
emissions. General Motors recommends that you use reformulated
gasoline. By doing so, you can help clean the air, especially inthose parts
of the country that have high ozone levels.
247
I
I
You should ask your servicestation operators if their gasolines contain
deposit control additives and oxygenates, and if they havebeen
reformulated to reduce vehicle emissions.
FUELS IN FOREIGN COUNTHES
If you plan on drivingin another country outside the U.S. or Canada,
unleaded fuel may be hard to find. Do not use leaded gasoline. If you use
even one tankful, your emissioncontrols won’t work wellor atall. With
continuous use, spark plugs can get fouled,the exhaust system can
corrode, and your engine oil candeteriorate quickly. Your vehicle’s
oxygen sensor will be damaged. All of that means costly repairs that
wouldn’t be covered by your warranty.
To check on fuel availability, askan auto club, or contact a major oil
company that does business in the country where you’ll be driving.
ni
I
I
o(
You can alsowrite us at the following address for advice. Just tell us
where you’re going andgive your Vehicle IdentificationNumber (VIN).
General Motors Overseas Distribution Corporation,
North American Export Sales (NAES)
1908 Colonel Sam Drive
Oshawa, Ontario LlH 8P7
FUEL ECONOMY
Your fuel economy (milesper gallon or liters per 100 kilometers) can vary
depending on how your Cadillac is driven. Several vehicles like yours
have been driven through a standard test and their actual fuel economy
was recorded. These readings were adjusted and printed on the fuel
economy window sticker which was
attached to your new Cadillac whenit
was delivered and in the Gas Mileage Guide which is available from your
dealership.
The fuel economy estimates are based on results of tests required by the
U. S. Environmental Protection Agency (EPA).These tests are used to
certify that vehicles meet the Federal emissions and fuel economy
standards. Cadillac tests prototypes of new vehicles and submits the
results to theEPA. The EPA then confirms the accuracy of the figures
provided by Cadillac. The vehicles are driven by a professional driver
under controlled laboratory conditions, on an instrument similar to a
248
L
nl
r
r
treadmill. These procedures ensure thateach vehicle istested under
identical conditions.
There aretwo different fuel economy estimates for each vehicle, one Ior
city drivingand one for highway driving.To develop these two estimates,
separate tests are used to representtypical everyday cityand rural
driving.
The test used to determine the city fuel economyestimate simulates a
7.5 mile (12 km), stop and go trip with an average speed of 20 mph
(32 km/h). The trip takes 23 minutes and has 18 stops. About one fifth
of the time is spent idling, as in waiting
at traffic lightsor in rush hour
traffic. Two kinds of engine starts are used: a cold start, which is similarto
starting a car in the morning after it has been parked all night and a hot
start, which is similar to restarting a vehicle after it has been warmed up,
driven and stopped for a short time.
The test used to determine thehighway fuel economy estimate
represents a mixture of “non-city” driving. Segments corresponding to
different kinds of rural roads and interstate highways are included. The
test simulates a 10 mile (17 km)trip with an average speed of 48 mph
(77 km/h). The test is run from a hot start and has little idling time and
no stops.
To assure that thefuel economy numbers are most usefulfor consumers,
the EPA adjusts these laboratory test results to account for the difference
between controlled laboratory conditions and actual driving on the road.
The laboratory fuel economy resultsare adjusted downward to arrive at
the estimates on thefuel economy window stickerand the Gas Mileage
Guide. The city estimate is lowered by 10 percent and the highwqY
estimate is lowered by 22 percent from the laboratory test results.
Experience has proven that these adjustments make the mileage
estimates correspond more closely to theactual fuel economy realized
by the average driver.
249
Even though these figures are adjusted, they stillrepresent what the
average driver will get. Your fuel economy may be significantly higher or
lower, depending on how, when, and where your vehicle is driven.
Here
are some things you can do toincrease fuel economy;
Combine errands into one trip.
Turn the engine off rather than letting it idle for more than a minute.
Have your Cadillac serviced as described in the maintenance booklet.
Keep tires inflated to recommended pressures.
Anticipate traffic stops.
Here aresome things that will lower fuel economy:
cl;
31
- 1
ra
1-1
Quick acceleration.
Traveling at higher speeds. Traveling at 65 mph instead of 55 mph
lowers fuel economyby 15 percent.
Carrying unnecessary weight in the vehicle.
Rewing the engine. This is not necessary for your vehicle.
Operating your vehicle withthe suspension out of alignment or with
the wheels and tires out of balance.
Use of electrical accessories whichrequire high amperage when they
are not needed.
Even things beyond your
control such asweather conditions affect your
fuel economy. Drivingup steep hills, inrain or snow, and into a strong
wind will lower fuel economy.
In thelower leftcorner of the fuel
economy window sticker from your vehicle is the range of city and
highway fuel economy you can expect
to get from your Cadillac. If you
are doing everything to raise your fuel economy, but are still not within
this range, your vehicle may need service. Collect as much
information
about your fuel economy asyou can find, (miles driven, gallon’s
of fuel
used, etc.) and provide it yourdealership for their review and assistance.
250
ra
..
I
7
i
The filler door is
locked and unlocked
every time youuse the
power door locks. If
pushing the power lock
switch doesn't unlock
or lock the fuel filler
door, you can usethe
manual lock release
lever, inthe trunk.
Move the lever to the
left to unlock the fuel
filler door.
To take off the cap, turn it slowly to theleft (counterclockwise).
'
L
i
a
When you put thecap back on, turn it to the right untilyou hear a
clicking noise.
r
NOTICE:
L
U
If you need a new cap, be sure to get the right type.
Your dealer
can get onefor you. If you get the wrong type,
it may not fitor
have proper venting, and your fuel tank and emissions system
might be damaged.
252
1
CHECKIING THINGS UNDER THE HOOD
Hood Release
To open thehood, first
pull the handle inside
the vehicle.
Then go to the front of
the vehicle and release
the secondary hood
release.
I
253
Before closing the hood, be sureall the filler caps are on properly. Then
just pull the hood down and close it firmly.
ENGINE OIL
If the LOW OIL LEVEL light on the instrument panel comes on, it
means you need to check yourengine oil level right away.For more.
information, see Low Oil Level light in
the Index. You should check yourengine oil level regularly; this is .an,
added reminder.
It's a good idea to check your engine oil every time you get fuel. In order
to get an accurate reading, the oil must be warm and the vehicle must be
om level ground.
t
E
-
254
4
To Check Engine Oil
Turn off the engine and give the oil afew minutes to drain back into the
oil pan.If you don't, the oil dipstick mightnot show the actual level.
IPull out the dipstick
slightly. Pinchthe end
of the dipstick tube as
you remove the
dipstick to wipe the oil
from it. Then push it
all the way back in.
Now remove it without
pinching the tube,
keeping the tip lower.
When to Add Oil
If the oil isat orbelow the ADD line, then you’ll need to add some oil.
But you mustuse the right kind. This section explains what kind
of oil to
use. For crankcase capacity, see “Capacities and Specifications” inthe
Index.
I
NOTICE:
Don’t add too muchoil. If your engine hasso much oil that the
oil level gets above the cross-hatched area that shows the proper
operating range, your engine could be damaged.
Push the dipstick all
the way back in when
you’re through.
256
:f
r
What Kind of Oil to Use
Beginning midyear1993, oils of the properquality for your vehiclewill be
identified with this new “starburst” symbol. The “starburst” symbol
indicates that theoil has been certified by the American Petroleum
Institute ( M I ) , and is suitable for use in your gasoline engine.
You should look for this on the front of the oil container, and use only
oils that display this new symbol.
257
You should also usethe properviscosity oilfor your vehicle,as shown in
the following chart:
RECOMMENDED SAE VISCOSITY GRADE ENGINE OILS
FOR BEST FUEL ECONOMY AND COLD STARTING, SELECT THE LOWEST
SAE VISCOSITY GRADE OIL FOR THE EXPECTED TEMPERATURE RANGE.
.
LOOK FOR
ONE OF THESE
LABELS
HOP
WEATHER
7
“F
L . .
T
”C
t 100
.
t 38
+80
-
t 27
t 16
+SO.
+40
-
t4
+20
-
-7
0-
- 18
I-
c Ii
--PREFERRED
SAE 5W-30
--.SAt
COLD
WEATHER
IF NEITHER SAE 5W-30 NOR SAE 1OW-30
GRADE OILS ARE AVAILABLE, SAE 30
GRADE MAY BE USED AT TEMPERATURES
ABOVE 40 DEGREES F (4 DEGREES C).
DO NOT USE SAE 1OW-40, SAE 20W-50 OR
ANY OTHER GRADE OIL NOT RECOMMENDED
As shown inthe chart, S A E 5W-30 isbest for your vehicle. However,you
can use S A E 1OW-30 if it’s goingto be 0°F (-18OC) or above. These
numbers on an oil container show its viscosity,or thickness. Do not use
other viscosity oils, such as
S A E 1OW-40 or S A E 20W-50.
If you cannot find oils withthe new “starburst” symbol on the frontof the
container, you should look for and use oilscontaining the following three
things:
I
n
UI
tl I
i
258
I
0
0
0
SH orSG
“SH”or “SG”must be on theoil container, either by itself or
combined with other quality designations, such as“SWCD,”
“SH,SG,CD,” etc. These letters show American Petroleum Institute
( M I ) levels of quality.
S A E 5W-30
Energy Conserving I1
Oils with these words on the container will help you save fuel.
These three things are usually included in a doughnut shaped logo
(symbol) on most containers. If you cannot find oils withthe “starburst”
symbol, youshould look for oils withthe doughnut shaped symbol,
containing the threethings noted above.
I
NOTICE:
If you use oils that do not have either the “starburst” symbol or
an API SH designation, you can cause engine damage not
covered by your warranty.
GM Goodwrench@oil (in Canada, GM Engine Oil) meets all the
requirements for your vehicle.
259
Engine Oil Additives
Don’t add anything to your oil.Your Cadillac dealer is ready to advise if
you think something should be added.
When to Change Engine Oil
Your Cadillac has an “Oil Life Indicator.” This feature will let you know
when to change your oil-- usually between 3,000 miles (5 000 km) and
7,500 miles (12500 km) since your last oil
change. Under severe
conditions, the indicator may come on before 3,000 miles (5 000 km).
Never drive your vehicle
more than 7,500 miles (12500 km) or 12 months
without an oil change.
The system won’tdetect dust in the oil. So, if you drive ina dusty area, be
(5 000 km)or sooner if the
sure to change your oil every 3,000 miles
“Change Oil Soon” light comes on.Remember to reset the Oil Life
Indicator when the oil has been changed. For more information, see
“Oil Life Indicator” in the Index.
How to Reset the Oil Life Indicator
- 1
c:
After the oil hasbeen changed, you’ll need to reset your system.To
do that, turn theignition switchto the “ON”position with the engine
stopped. Fully depress and release the accelerator pedal 3 times within
5 seconds.
If the “CHANGEOIC’ light comeson and stays on for 5 seconds, it did
not reset. You’ll need to reset the system again.
Engine Coolant Heater (EngineBlock Heater)
An engine coolant heater can’bea big help if you have to park outside in
very coldweather, 0 F (-18 C) or colder. If your vehiclehas this option,
see “Engine Coolant Heater” in the Index.
What to Do with Used Oil
Did you know that used engine oil contains certain elements that may be
unhealthy for your skin and could evencause cancer? Don’t let used oil
stay on your skinfor very long. Clean your skinand nails withsoap and
water, or a good hand cleaner. Wash or properly throw away clothing or
260
3‘
I
rags containing used engine oil. (See the manufacturer’s warnings about
the use and disposal of oil products.)
Used oil can be a real threat to the environment. If you change your own
oil, be sure to drain all free-flowingoil from the filter before disposal.
Don’t ever dispose of oil by putting.it in the trash, pouring it on the
ground, into sewers, or into streams or bodies of water. Instead, recycle it
by taking it to a place that collects used oil.If you have a problem
properly disposing of your used oil, ask yourdealer, a service station or a
local recyclingcenter for help.
AIR CLEANER
Refer to the
Maintenance Schedule
to determine when to
replace the air filter.
cc
See “Scheduled Maintenance Services” inthe Index.
261
-NOTICE:
If the air cleaner is off, a backfire can cause a damaging engine
fire:And, dirt can easily getinto your engine, whichwill damage
it. Always have the air cleaner in place when you’re driving.
I
tll
I AUTOAUTIC .TRANsIMISSIONFLUID
‘Whento Check and Change
A good time to check yourautomatic transmission fluid level is whenthe
engine oil is changed. Refer to theMaintenance Schedule to determine
when to change your fluid.See “Scheduled Maintenance Services” in
the Index.
How to Check
Because this operation can be a little difficult, you may choose to have
this done at .a Cadillac dealership Service Department.
If you do it yourself, be sure to follow allthe instructions here, or you
cou.ld get a false reading on thedipstick.
II
i
il
3 I‘
Too
NOTICE:
much or too little fluidcan damage your.transmission. Too
much can mean that some of the fluid could come out andfall
on hot engine parts orexhaust system, starting a fire. Be sure to
get an accurate reading if you check your transmission fluid.
I
Wait at least 30 minutes before checking the transmission fluid levelif
you have been driving:
When outside temperatures are above 90°F (32OC).
At high speed for.quite a while.
262
CI)
r
In heavy traffic -- especially in hot weather.
r
0
While pulling a trailer.
To get the right reading, the fluid should be at normal.operating
temperature, which is180"F .to-200"F (82' C to 93 " C).
To check transmission fluid hot:Get the.vehicle warmed up by driving
about 15 miles (24 km)when outside temperatures are above 50°F
(10" C). If it's colder than 50°F (10" C), drive the vehicle in"D" (3rd
Gear) until the engine temperature gage moves and then remains steady
for ten minutes. Then follow the hot check procedures.
To check transmission fluid cold:A cold check ismade after the vehicle
has been sitting for eight hours or more with the engine off and is used
only asa reference. Let the engine run atidle for five minutes if outside
temperatures are 50 "F (10 "C) or more. If it's colder than 50" F (10 " C),
you may haveto idle the engine longer. Should the fluid levelbe low
during a cold checkj you must perform a hot check before adding fluid.
This will give youa more accurate reading of the fluid level.
To check thefluid hot or cold
ec
0
0
0
0
Park your vehicle on a level place.
With the parking brake applied, place the shift lever in "P"(Park).
With your foot on the brakepedal, move the shift leverthrough each
gear range, pausing for about threeseconds in each range. Then,
position the shift lever in "P"(Park).
Let the engine run at idle for threeminutes or more.
263
Then, without shutting off the engine, follow these steps:
1. Pull out the
dimtick and wiDe
it with a clean rag
or paper towel.
I
I
2. Push it back in allthe way, wait three seconds and then pull it backout
again.
3. Check both sides
of the dipstick,
and read the
lower level.The
fluid level mustbe
in the COLD area
for a cold checkor
in the HOT area
or cross-hatched
area for a hot
check.
-
1
T
L
l
- i
4. If the fluid level is inthe acceptable range, push the dipstick back in
all the way.
264
I
T
L
r
How to AddFluid
Refer to theMaintenance Schedule to determinewhat kind of
transmission fluid to use. See “Recommended Fluids and Lubricants” in
the Index.
If the fluid level is low, add only enough of the properfluid to bring the
level up to theCOLD areafor a cold checkor the HOT area for a hot
check. It doesn’t take much fluid, generally less than a int. Don’t overfill.
We recommend you use only fluidlabeled DEXRON -111or
DEXRON@-IIE,because fluids withthat label are made especially for
your automatic transmission. Damage caused by fluid other than
DEXRON@-I11or DEXRON@-IIE
is not covered by your new vehicle
warranty.
0 After adding fluid, recheck the fluid level asdescribed under “HOW
to
Check.”
0 When the correct fluid level is obtained, push the dipstick back in all
the way.
8
REARAXLE
When to Check and Change Lubricant
Refer to theMaintenance Schedule to determinehow often to check the
lubricant and when to change it. See “Periodic Maintenance Inspections”
in the Index.
How to Check Lubricant
If the level is below the bottom of the filler plug hole, you’llneed to add
some lubricant. Add enough lubricant to raise the level to thebottom of
the filler plug hole.
265
What to Use
Standard Differential
Use Axle Lubricant (GM Part No. 1052271) or S A E 8OW-90 GL-5 gear
lubricant.
ENGINE COOLANT
The following explains your cooling system
and how to add coolant when
it is low. If you havea problem with engine overheating, see “Engine
Overheating” in the Index.
The propercoolant for your Cadillac will:
I
cI
Give freezing protection down to -34 F (-37 C).
Give boiling protection up to 262 F (128 C).
Protect against rust and corrosion.
I
1
Help keep the proper engine temperature.
Let the warning lights work as they should.
What to Use
Use a mixture of one-half clean water (preferably distilled) and one-half
antifreeze that meets “GM Specification 1825-M,” which won’tdamage
aluminum parts. You can also usea recycled coolant conforming to GM
Specification 1825-M witha complete coolant flush and refill. Use GM
Engine Coolant Supplement (sealer) with anycomplete coolant change.
If you use this mixture, you don’t need to add anything else.
31
r
!I
267
Adding Coolant
Your cooling system when
hot is under a lot of pressure. If the “LOW
COOLANT” light shouldappear, you need to add coolant. If it doesn’t
the coolant is at the proper fill level.
To Check Coolant
I
When your engine is cold,the coolant level should be atthe base of the
filler neck.
To Add Coolant
If you need more coolant, add the proper mix at thesurge tank, but only
when the engine is cool.
268
d l
When replacing the pressure cap, make sure it is tight.
SURGE TANK PRESSURE CAP
NOTICE:
Your surge tank capis a 15 psi (105 kPa) pressure-type cap and
must be tightly installed to prevent coolantloss and possible
engine damage from overheating. Be sure the arrows on the cap
line up with the
overflow tube on the radiator filler neck.
When you replace your surge tank pressure cap, an GM cap is
recommended.
THERMOSTAT
Engine coolant temperature is controlled by a thermostat in the engine
coolant system. The thermostat stops the flow of coolant through the
radiator until the coolant reaches a preset temperature.
When you replace your thermostat, an AC@thermostat is recommended.
269
POWER STEERING FLUID
I
How To Check Power Steering Fluid
Unscrew the cap and wipe the dipstick witha clean rag. Replace the cap
and completely tighten it. Then remove the cap again and look at the
fluid levelon thedipstick.
When the engine compartment is hot, the level should be at the
“H” mark.
When the engine compartment is cool, the level should be at the
“C” mark.
What to Add
Refer to the Maintenance Schedule to determine what kind of fluid to
use. See “Recommended Fluids and Lubricants” in the Index.
I
NOTICE:
When adding power steering fluidor making a complete fluid
change, alwaysuse the proper fluid. Failure touse the proper
fluid can cause leaks and damage
hoses and seals.
WINDSHIELD WASHERFLUID
b Add
Open thecap labeled
“WASHER FLUID
ONLY.” Add washer
fluid untilthe bottle is
full.
271
NOTICE:
.
When usingconcentrated washer fluid, .followthe
manufacturer‘s instructions. for adding
water.
. .
Don’t, mixwater with ready-to-use-washerfluid. Water can
cause thesolustionto freeze and damage your washerfluid
tank and other parts
of the waihersystem. Also, water
doesn’t clean as well as washer fluid.-
1
Fill your .washerfluid tank only 3/4 full when it’s very cold.
This allows for expansion, which could
damage the tank if it
is completely full.
-0
Don’t use radiatorantifreeze in your. windshield washer.It
can damage your washer system and paint.
.
.
.
.
Brake Master .Cylinder
Your brake master cylinder ishere. .Xtis filled with. DOT-3..brake fluid.
.There are,onlytwo reasons why.the brakefluid level in your
master
cylinder mightgo down. The-fixstis that the brake
fluid goesdown toan
acceptable level during normal brake liningwear. When new Iiningsare
272
put in, the fluid levelgoes back up. The other reason is that fluid is
leaking out of the brake system. If it is, you should have yourbrake
system fixed,since a leak means that sooner or later your brakes won’t
work well, or won’t workat all. So, it isn’t a good idea to “topoff” your
brake fluid. Adding brake fluid won’tcorrect a leak. If you add fluid when
your liningsare worn, then you’ll havetoo much fluid whenyou get new
brake linings. You should add (or remove) brake fluid, as necessary, only
when work isdone on the brake hydraulic system.
Refer to theMaintenance Schedule to determinewhen to check your
brake fluid. See “Periodic Maintenance Inspections” in the Index.
To Check BrakeFluid
273
I
You can checkthe brakefluid without takingoff the cap. Just lookat the
windows on the brakefluid reservoir.The fluid levels shouldbe above
“MIN.” If they aren’t, have your
brake system checkedto see if there is a
leak.
After work is done on the brake hydraulic system, makesure thelevels
are above “MIN” and below the topof each window.
131
What to Add
When you do need brake fluid, use onlyDOT-3 brake fluid -- such as
Delco Supreme ll@(GM Part No.1052535). Use new brake fluid from a
sealed container only, and always clean the brakefluid reservoircap
.beforeremoving it.
NOTICE:
DOT-5 silicone brake fluid can damage your vehicle. Don’t
use it.
Don’t let someone put in thewrong kind of fluid. For
example, just a few drops of mineral-based oil, such as
engine oil, in your brake system can damage brake system
parts so badlythat they’ll haveto be replaced.
Brake fluid can damage paint, so be careful not to spill brake
fluid on your vehicle.If you do, washit off immediately. See
“Appearance Care” in theIndex.
Brake Wear
I
Your Cadillac has front-wheel disc brakes and rear drum brakes.
Disc brake padshave built-in wearindicators that make a high-pitched
warning sound when the brake padsare worn and new pads are needed.
The sound may comeand go or be heardall the time your vehicle is
moving (except when youare pushing on the brakepedal firmly).
274
NOTICE:
Continuing to drive with worn-out brake pads could result
in
costly brake repair.
Some driving conditions or climates may cause a brake squeal when the
brakes are first applied or lightly applied. This does not mean something
is wrong with your
brakes.
Brake linings should always be replaced as complete axle sets.
Rear Drum Brakes
Your rear drum brakes don’t have wearindicators, but if you ever hear a
rear brake rubbing noise, havethe rearbrake linings inspected. Also, the
rear brake drums should be removed and inspected each time the tires
are removed for rotation or changing. When you havethe front brakes
replaced, have the rearbrakes inspected, too.
Brake Pedal Travel
See your dealer if the brakepedal does not return tonormal height, or if
there is a rapid increase in pedal travel. This could be a sign ofbrake
trouble.
Brake Adjustment
Every time you make a moderate brake stop, your disc brakes adjust for
wear. If you rarely make a moderate or heavier stop, then your brakes
275
might not adjust correctly. If you drive inthat way, then -- very carefully-make a few moderate brake stops about every 1000 miles (1600 km), so
your brakes will adjust properly.
Every time you make a brake stop, your discbrakes adjust for wear.
Every time you applythe brakes moderately, with or without the vehicle
moving, your brakes adjust for wear.
As youmake brake stops, your disc
brakes automatically adjust for wear.
If your brake pedal goes down farther than normal, your rear drum
brakes may need adjustment. Adjust them by backing up and firmly
applying the brakes a few times.
Replacing Brake System Parts
nl
I
I
a
01
The braking system ona modern vehicle is complex.Its many parts have
to be of top quality and work welltogether if the vehicle isto have really
good braking. Vehicles we designand test have top-quality GM brake
parts in them, as yourCadillac does when it is new.When you replace
parts of your braking system -- for example, whenyour brake linings wear
down and you have to have new ones put in -- be sure you get new
genuine GM replacement parts. If you don’t, yourbrakes may no longer
work properly. For example, if someone puts in brake linings that are
wrong for your vehicle,the balance between your front and rear brakes
can change, for the worse. The braking performance you’ve come to
expect can change in manyother ways if someone puts in the wrong
replacement brake parts.
01
BATTERY
Every new Cadillac has a Delco Freedom@battery. You never haveto
add water to one of these. When it’s time for a new battery, we
recommend a Delco Freedom@battery. Get one thathas the catalog
number shown on the original battery’s label.
276
n
Khicle Storage
If you’re not going to drive your vehiclefor 25 days or more, take off the
black, negative (-) cable from the battery. This will help keep your battery
from running down.
Contact your dealer to learn how to prepare your vehiclefor longer
storage periods.
H X O G E N BULBS
EXTERIOR M
I
P HOUSINGS
NOTICE:
Your Cadillac’s lamp housings are designed with small vents
so
moisture will be removed when the lights are on, or after driving
for a short time.If an excessive amount of moisture
is present
which does not clear, see your Cadillac dealership for service.
277
A
Cornering Lamp Bulb Removal
Here’s how to change the bulb:
Open the hood
and remove the
screw securing
cornering lamp
housing.
0
278
Gently pullout
the cornering
lamp.
r
i
0.
0
Remove the
socket by
.rotating it
counterclockwise
slightly, then
gently pushand
rotate bulb
counterclockwise
and remove it.
Once you have replaced the bulb just reverse the steps to reassemble
the cornering lamp.
Halogen HeadlightBulb Removal
Here’s how to change the bulb:
0
279
Rotate the
headlight housing
socket
counterclockwise
to unlock the
socket from the
lamp housing.
Gently remove
headlight housing
socket and bulb.
Disconnect the
socket from the
harness by
separating locking
clip.
J
I
U
Li
I
280
0
Install new bulb
and socket and
connect the wiring
harness. Make sure
that harness is
locked to bulb
socket.
NOTICE:
Do not touchglass portion of the new halogen bulb! The oil
from you fingerswill shorten the life of your
new halogen bulb.
Install the headlight housing socket into the headlamp assembly.
TMLLIGHT BULB REPLACEMENT
Remove the upper
screw fromthe
bezel.
281
Pull the upper
portion from the
extension housing,
then gently liftup
to remove the
bezel.
282
n
if,
.
I
I
.
I
I
Gently tilt the top
portion of taillight
housing out first,
and then gently
remove it.
0
Press the bulb
socket housing
lever and rotate the
socket housing
counterclockwise to
remove it.
f
U
0
To remove the bulb,
push it in and
rotate it
counterclockwise.
Install bulb and
socket into taillight
housing by turning
it clockwise. Be
sure it locks into
place.
285
0
Once you have
installed the new
bulb and socket
into thehousing,
just reverse the
steps to assemble
the taillight. Make
sure when installing
the chrome bezel
that you insert the
two prongs at the
bottom first.
CENTER HIGH MOUNTED STOP LAMP
BULB REPLACEMENT
I
3
I p i
I
i
286
r
Replace the bulb.
WIPER BLADE REPLACEMENT
Position the windshield wiperson the windshield inthe “mid” wipe
position. To do this, turn theignition key to Accessory and turn thewipers
on. Then with the door open, turn the ignition key to off.
I
Using a small
screwdriver insert into
the slot as shownand
gently press down to
release the wiper blade
from the arm.
Do the same with the passenger side wiperblade assembly.
287
I
To install the wiper blade align the wiper arm pin withthe hole on the
wiper blade assembly andsnap it into place.
If you onlywant to replace the wiper insert, follow these steps:
Disconnect the
wiper insert by
pulling the end of
the insert. Then
pull itfrom the
blade housing
retaining tab.
0
0
U I
- 1
Now pull the insert from the blade housing.
Reinstall the new insert by aligning the blade housing tabs and the
edge of the insert. Make sure that theinsert is connected to all the
housing tabs.
Install the wiper blade assembly to the wiper arm.
n
288
I
-
LOADING YOUR VEHICLE
\
TIRE-LOADING INFORMATION
VEHICLE CAP. W T .
OCCUPANTS
RR. TOTAL
LBS.
KG
FRT.
CTR.
MAX. LOADING& GVWR SAME ASVEHICLE
CAPACITY
WEIGHT
XXX
COLD
TIRE
TIRE SIZE
SPEED
PRESSURE
RTG
PSVKPa
FRT.
RR.
SPA.
IF TIRES ARE HOT. ADD 4PSV28KPa SEE
OWNER'S
MANUAL
FOR ADDITIONAL
INFORMATION
GEN GME
I
labels oflybuf vehicle show how much weight it may
properly carry.
The Tire-Loading Information label found on the driver's door tells you
the propersize, speed rating and recommended inflation pressures for
the tires on your vehicle. It also gives youimportant information about
the number of people that can be in yourvehicle and the total weight that
you can carry. This weight is called the Vehicle Capacity Weight and
includes the weight of all occupants, cargo, and all nonfactory-installed
options.
IWO
289
MFD BY GENERAL MOTORS CORP
DATEGVWRGAWR
FRT GAWR RR
THIS VEHICLE CONFORMS TO ALL APPLICABLE U.S. FEDERAL MOTOR VEHICLE
SAFETY, BUMPER, AND THEFTPREVENTION
STANDARDS
IN EFFECT ON THE
DATE OF MANUFACTURE SHOWN ABOVE.
\\
GEN GME
r'tr
The otherlabel isthe Certification label, found on the rear edge of the
driver's door. It tells you the gross weight capacityof your vehicle, called
the GVWR (Gross Vehicle WeightRating). The GVWR includes the
weight of the vehicle, all occupants, fuel and cargo. Never exceed the
GVWR for your vehicle, or the Gross Axle Weight Rating (GAWR) for
either thefront or rear axle.
And, if you do have a heavy load, you should spread it out. Don't carry
more than 200 pounds (90 kg) in your trunk
ni
L
290
.
NOTICE:
Your warranty does not cover parts or components that fail
because of overloading.
If you put things inside your vehicle-- like suitcases, tools, packages,
or
anything else -- they will go asfast as the vehicle goes. If you have to stop
or turnquickly, or if there is a crash, they’ll keep going.
TIRES
We don’t make tires. Your new vehicle comes with high qualitytires made
by a leading tire manufacturer. These tires are.warranted by the tire
manufacturers and their warranties are delivered with every new Cadillac.
If your spare tireis a different brand than your road tires, you will havea
tire warranty folder from each of these manufacturers.
291
I
I
Inflation = Tire Pressure
I
The Tire-Loading Information label which islocated on thedriver’s door
shows the correct inflation pressuresfor your tires, when they’re cold.
“Cold” means your vehicle has been sitting for at least three hours or
driven no more than a mile.
I
J
292
r
NOTICE:
Don’t let anyone tell you that underinflation or overinflation is
all right. It’s not.If your tires don’t haveenough air
(underinflation) you can get:
0
Too much flexing
0
Too much heat
0
Tire overloading
Bad wear
0
Bad handling
0
Bad fuel economy.
If yourtires have too muchair (overinflation), you can get:
Unusual wear
0
Bad handling
0
Rough ride
Needless damage from road hazards.
When to CheckCheck yourtires once a month or more.
Don’t forget your compact spare tire. It should be at60 psi (420 kPa).
c-
How to CheckUse a good quality pocket-type gage to check tire
pressure. Simply looking at thetires will not tell you the pressure,
especially if you haveradial tires -- which maylook properly inflated even
if they’re underinflated.
If your tires have valve caps,be sure to put them
back on. They help
prevent leaks by keeping out dirt and moisture.
Your tire pressures are:
0 Front and Rear - 30 psi (210 kPa)
293
3ptional Limousine Packages:
'0 Front and Rear - -35,psi (241Wa)
Recommended tiresize is:
'Michelin X W 4 P235/70R15
4 Goodyear GA P235/70R15 (Trallermg Option)
~.
.
0
T145/80D16 (Comnact soare)
Tire Inspectionand Rotation
To make your tires lastlonger, havethem inspected and rotated at the
mileages recommended in the Maintenance Schedule. See "Scheduled
Maintenance Services'! in the Index.
with compact Ispare
with fullsize spare
"
4
Use .this rotation patte
After-thetires have b
.
.
294
U
When It’s Timefor New .Tires
One way to tell when
it’s time for new tires is
to check the treadwear
indicators, which will
appear when yourtires
have only2/32 inch
(1.6 mm) or less of
tread remaining.
You need a new tire i f
0 You can see the indicators at threeor more places around the tire.
0 You can see cord or fabric showing through the tire’s rubber.
The tread or sidewall iscracked, cut or snagged deep enough to show
cord or fabric.
The tire has a bump,.bulge or split.
295
The tirehas a puncture, cut, or other damage that can’t be repaired
well because of the size or location of the damage.
Buying New Tires
To find out what kind and size of tires you need, look at the Tire-Loading
Information label.
The tires installed on your vehiclewhen it was new hada Tire
Performance Criteria Specification (TPC Spec) number on each tire’s
sidewall. When you get new tires, get ones with that same TPC Spec
number. That way, your vehiclewill continue to have tires that are
designed to give proper endurance, handling, speed rating, traction, ride
and other things during normal service on your vehicle.If your tires have
an all-season tread design, the TPCnumber will be followed by a “MS”
(for mud and snow).
If you ever replace your tires with those not having a TPCSpec number,
make sure they are thesame size, load range, speed rating and
construction type (bias,bias-belted or radial) as your originaltires.
ni
- 1
Uniform Tire Quality Grading
The following information relates to thesystem developed by the United
States National Highway TrafficSafety Administration which grades tires
by treadwear, traction and temperature performance. (This applies only
to vehicles soldin the United States.)
Treadwear
The treadwear grade is a comparative rating based on the wear rate of
the tirewhen tested under controlled conditions on a specified
government test course. For example, a tiregraded 150 would wearone
and a half (1 1/2) times as wellon thegovernment course as a tire graded
100. The relative performance of tires depends upon the actual
conditions of their use, however,and may depart significantly from the
norm due tovariations in driving habits, service practices
and differences
in road characteristics and climate.
Traction - A, B, C
The traction grades, from highest to lowest are: A, B, and C. They
represent the tire’s abilityto stop on wet pavement as measured under
controlled conditions on specified government test surfaces of asphalt
and concrete. A tiremarked C may have poor traction performance.
Warning: The traction grade assigned to this tire is based on braking
(straight-ahead) traction tests and does not include cornering (turning)
traction.
Temperature - A, B, C
The temperaturegrades are A (the highest), B, and C, representing the
tire’s resistance to thegeneration of heat and its abilityto dissipate heat
when tested under controlled conditions on a specified indoor laboratory
test wheel. Sustained high temperature can cause the material of the tire
to degenerateand reduce tire life, and excessive temperature can lead to
sudden tire failure. The gradeC corresponds to alevel of performance
which all passenger car tires must meet under the Federal Motor Vehicle
Safety Standard No. 109. Grades B and A represent higher levels of
performance on the laboratory test wheel than the minimum required
by law.
297
I
Warning: The temperature grade forthis tire is established for a tire that
is properly inflated and not overloaded. Excessive speed, underinflation,
or excessive loading,either separately or in combination, can cause
heat
buildup and possible tire failure.
These grades are molded on thesidewalls of passenger car tires.
While the tiresavailable as standard oroptional equipment on General
Motors vehicles may vary with respect
to these grades, all suchtires meet
General Motors performance standardsand have been approved for use
on GeneralMotors vehicles. All passenger type(P Metric) tires must
conform to Federal safety requirements in addition to these grades.
ni
Wheel Alignmentand Tire Balance
I
The wheels on your vehiclewere aligned and balanced carefully
at the
factory to give you the longest tire life and best overallperformance.
In most cases, you willnot need to have your wheels aligned again.
However, if you notice unusual tire wear or your vehicle pullingone way
or the other, the
alignment may need to be reset. If you notice your
vehicle vibrating when driving
on a smooth road, your wheelsmay need
to be rebalanced.
Wheel Rephcement
I
I
Replace any wheelthat is bent, cracked or badly corroded. If wheel nuts
keep coming loose,the wheel, wheel bolts,and wheel nuts should be
replaced. If the wheel leaksair, replace it (exceptsome aluminum wheels,
which can sometimes be repaired). See your Cadillac dealer if any of
these conditions exist.
Your dealer will knowthe kind of wheel you need.
Each new wheel should havethe same load carrying capacity,diameter,
width, offset,and be mounted the same way as the oneit replaces.
If you need to replace any of your wheels, wheel bolts,
or wheel nuts,
replace them only with newGM original equipment parts. This way, you
will be sureto have the right wheel, wheel bolts,
and wheel nuts for your
Cadillac model.
298
-
NOTICE:
The wrong wheel canalso cause problems with bearing life,
brake cooling, speedometer/odometer calibration, headlight
aim, bumper height, vehicle ground clearance, and tire or tire
chain clearance to the body and
chassis.
Used Replacement Wheels
299
Tire Chains
NOTICE:
Use tire chains only where legaland only when youmust. Use
only SAE Class “S” type chains that are the proper
size for your
tires. Install them on the reartires and tighten them as tightly
as possible withthe endssecurely fastened. Driveslowly and
follow the chainmanufacturer‘s instructions. If you can hear
the chainscontacting your vehicle, stop and retighten them. If
the contact continues, slow downuntil it stops. Driving toofast
with chains on will damage your vehicle.
- 1
APPEARANCE CARE
n
1
Remember, cleaning products can be hazardous. Some are toxic. Others
can burst into flame if you strike a match or get them on a hot part of the
vehicle. Some are dangerous if you breathe their fumes in a closed space.
When you use anything from a container to clean your Cadillac,be sure
to follow the manufacturer’s warnings and instructions. And always open
your doors or windows when you’recleaning the inside.
”I
li
11.11
3
300
Never use these to clean your vehicle:
0
Gasoline
0
Benzene
Naphtha
Carbon Tetrachloride
0
7
Acetone
0 Paint Thinner
0 Turpentine
Lacquer Thinner
0 Nail Polish Remover
They can all be hazardous -- some more than others -- and they can all
damage your vehicle,too.
NOTICE:
Don't use anyof these unless this manual says you can. In
many
uses, these will damage your vehicle:
Laundry Soap
Bleach
0
'ReducingAgents
CLEANIN% THE INSIDE OF YOUR
Use a vacuum cleaner often to get rid of dust and loose dirt. Wipe vinyl
or leather with a clean, damp cloth.
Your Cadillac dealer has two GM cleaners, a solvent-type spot lifter and a
foam-type powdered cleaner. They will clean normal spots and stains very
well. Do not use them on vinyl or leather.
301
1
Here aresome cleaning tips:
Always read the instructions on thecleaner label.
Clean up stains as soon as you can -- before they set.
Use a clean cloth or sponge, and change to a clean area often. A soft
brush may be used if stains are stubborn.
Use solvent-type cleaners in a well-ventilatcd area only. If you use
them, don’t saturate .the stained area.
If a ring forms after spot cleaning, clean the entire areaimmediately
or it will set.
Using Foam-Type Cleaneron Fabric
Vacuum and brush the area to remove any loose dirt.
Always clean a whole,trimpanel or section. Mask surrounding trim
along stitch or welt lines.
Mix Multi-Purpose Powdered Cleaner following the directions on the
container label.
Use suds only and apply witha clean sponge.
Don’t saturate the material.
Don’t rub it roughly.
As soonas you’ve cleaned the section, use a sponge to remove
the suds.
Rinse the section with a clean, wet sponge.
Wipe off what’s left witha slightly damp papertowel or cloth.
Then dry it immediately witha blow dryer or a heat lamp.
NO.TICE:
nl
oi
r
Bexareful with.a hair dryer or heat lamp.
You could scorch the
fabric.
c
-1
Wipe with a clean,cloth:
&
302
.i
r_
Using Solvent-Type Cleaneron Fabric
First, see if you have to use solvent-type cleaner at all. Some spots and
stains will clean off better with just water and mild soap.
If you need to use a solvent:
0 Gently scrape excess soil from the trim material with a clean, dull
knife or scraper. Use very little cleaner, light pressure and clean cloths
(preferably cheesecloth). Cleaning should start at the outside of the
stain, “feathering” toward the center. Keep changing to a clean
section of the cloth.
0 When you clean a stain from fabric, immediately dry the area with an
air hose, hair dryer, or heat lamp to help prevent a cleaning ring. (See
the previous NOTICE.)
Special Cleaning Problems
Greasy or Oily Stains
Such asgrease, oil, butter, margarine, shoe polish, coffee with cream,
chewing gum,cosmetic creams, vegetable oils, wax crayon, tar and
asphalt.
Carefully scrape off excess stain.
Follow the solvent-type instructions described earlier.
Shoe polish, wax crayon, tar and asphalt will stain if left on a vehicle
seat fabric. Theyshould be removed assoon as possible. Be careful,
because the cleaner will dissolve them and may cause them to spread.
Non-Greasy Stains
Such ascatsup, coffee (black), egg;fruit, fruit juice, milk, soft drinks,.
wine, vomit, urine and blood.
Carefully scrape off excess stain, then sponge the soiled area with cool
water.
0 If a stain remains, follow the foam-type instructions described earlier.
303
I
If an odor lingers after cleaning vomit or urine, -treat the areawith a
waterbaking soda solution: 1 teaspoon (5 ml) of baking soda to 1cup
(250 ml) of lukewarm water.
If needed, clean lightly with solvent-typecleaner.
CombinationStains
I Such as candy, icecream, mayonnaise, chilisauce and unknown stains.
Carefully scrape off excess stain, then clean with cool water and allow
to dry.
I
If a stain remains, clean it with solvent-typecleaner.
Use warm water and a clean cloth.
Rub with a clean, damp cloth to remove dirt. You may have to do it
more than once.
Things like tar,.asphalt and shoe polish will stain if you don't get them
off quickly.Use a clean clofh and a solvent-type vinyl cleaner.
i
Cleaning Leather
I
31
Use a soft cloth-withlukewarm water and,amild soap or saddle soap.
For stubborn stains, use a mild solution .of 10% isopropyl alcohol
(rubbing alcohol) and 90% water.
Never use oils, varnishe.s,solvent-based or tabrasivecleaners, furniture
polish or'shoe polish on leather.
.a Soiled leather should be cleaned immediately. If dirt is allowed to
work into finish, it can harm the leather.
Cleaning theTop of the Instrument Panel
Use only mildsoap and water to clean the .top surfaces of the instrument
panel. Sprays containing silicones or waxes may.causeannoying
reflections in the windshield and even make it difficultto see through the
-windshieldunder certain conditions.
304
I
a'
ni
I
-1
L j j
r
Care Of Wood Panels
Use a clean cloth moistened in warm soapywater, (use mild dish
washing soap). Dry the wood immediately with a clean cloth.
CARE OF SAFETYBELTS
Keep belts clean and dry.
GLASS
Glass should be cleaned often. GM Glass Cleaner (GM Part No.
1050427) or a liquid household glass cleaner will remove normal tobacco
smoke and dust films.
Don’t use abrasive cleaners on glass, because they may cause scratches.
Avoid placingdecals on theinside rear window, since they may have
to be
scraped off later. If abrasive cleaners are used on theinside of the rear
window, an electric defogger element may be damaged. Any temporary
license should not be attached across the defogger grid.
CLEANIING THE OUTSIDE OF THE
WINDSHIELDAND WIPER BLADES
If the windshield is not clear after using the windshield washer, or if the
wiper blade chatters when running, wax or other material may be on the
blade or windshield.
Clean the outside of the windshield withThe windshield is clean if beads
do not form when you rinse it withwater.
305
Clean the blade by wiping vigorously witha cloth soaked in full strength
windshield washer solvent.Then rinse the blade with water.
Wiper blades should be checked on a regular basis and replaced when
worn.
CLEANING THE OUTSIDE OF YOUR
CrnILUC
The paint finish on your vehicleprovides beauty, depth of color, gloss
retention anddurability.
Washing Your Whicle
The best way to preserve your vehicle’s finishis to keep it cleanby
washing itoften with lukewarm or cold water.
Don’t wash your vehicle in
the direct rays of the sun. Don’t usestrong
soaps or chemical detergents. Use liquid hand, dish or car washing (mild
detergent) soaps. Don’t usecleaning agents that contain acid or
abrasives. Allcleaning agents should be flushed promptly and not allowed
to dry on thesurface, or they could stain. Drythe finish with a soft, clean
chamois or a 100% cotton towel to avoid surface scratches and water
spotting.
High pressure vehicle washesmay cause water to enteryour vehicle.
Finish Care
Occasional waxing or mild polishingof your Cadillac may be necessary to
remove residue from the paint finish. You can get GM approved cleaning
products from your dealer. (See “Appearance Care and Materials” in
the Index.)
Your Cadillac has a “basecoat/clearcoat” paint finish. The clearcoat gives
more depth and gloss to thecolored basecoat. Always use waxes and
polishes that arenon-abrasive and made for a basecoat/clearcoat paint
finish.
306
I
NOTICE:
Machine compounding or aggressive polishing on a
basecoat/clearcoat paintfinish may dull thefinish or leave swirl
marks.
NOTICE:
Using certainglass cleaners ,and cleaning solvents on plastic
lenses can producestress cracks. Use only a mild detergent and
water to clean theselenses.
WHITE SIDEWALL TIRES
Your Cadillac dealer has a GM White Sidewall Tire Cleaner. You can use
a stiff brush with the cleaner.
WEATHERSTRIPS
Silicone grease on weatherstrips will make them last longer, seal better,
and not stick or squeak. Apply siliconegrease with a clean cloth at least
every six months. During very cold,damp weather more frequent
application may be required. (See “Recommended Fluids & Lubricants”
in the Index.)
SHEETMETAL D M G E
If your vehicle isdamaged and requires sheet metal repair or
replacement, make sure thebody repair shop applies anti-corrosion
material to theparts repaired or replaced to restorecorrosion protection.
FOREIGN MATERLAL,
Calcium chloride and other salts, icemelting agents, road oil and tar, tree
sap, bird droppings, chemicals from industrial chimneys, and other
foreign matter can damage your vehicle’s finishif they remain on painted
307
I
surfaces. Use cleaners that aremarked safe for painted surfaces to
remove foreign matter.
FINISH D M G E
D/
Any stone chips, fractures or deep scratches in the finish should be
repaired right away. Bare metal will corrode quickly and may develop
into a major repair expense.
Minor chips and scratches can be repaired with touch-up materials
available from your dealer or other service outlets.Larger areas of finish
damage can be corrected in your dealer's body
and paint shop.
UNDERBODYWNTENN/'E
I
Chemicals used for ice and snow removaland dust control can collecton
the underbody. If these are not removed, accelerated corrosion (rust) can
occur on theunderbody parts such asfuel lines, frame, floor pan, and
exhaust system eventhough they have corrosion protection.
At least every spring, flushthese materials from the underbody with plain
water. Clean any areas where mud and other debris can collect. Dirt
packed in closedareas of the frame should be loosened before being
flushed. Yourdealer or an underbody vehicle washing system cando this
for you.
CHEMICAL PANT SPOTTING
Some weather and atmospheric conditions cancreate a chemical fallout.
Airborne pollutants can fall upon and attack
painted surfaces on your
vehicle. This damage can take two forms: blotchy, ringlet-shaped
discolorations, and small irregulardark spots etched into the paint surface.
Although no defect in the paint job causes this, Cadillac will repair, at no
charge to theowner, the surfaces of new vehicles damaged by this fallout
condition within 12 months or 12,000 miles (20 000 km) of purchase,
whichever comes first.
308
ai
A P P E G A C E CAREMATERLZS CIiART
w
DESCRIPTION,
NUMBER
I
1052277 12 OZ. (0.354L)
SPRAY-A-SQUEAK
USAGE
WEATHER STRIPS-STOPS
SQUEAKS ON,
METAL-TO-METAL AND
METAL-TO-RUBBER
CO.NTACT
WHITE SIDEWALL
TIRE CLEANER
REMOVES OLD WAXES,
POLISHES, TAR AND ROAD
01L
REMOVES RUST AND
CORROSION ON CHROME
AND STAINLESS' STEEL
CLEANS WHITE AND
BLACK TIRES
VINYL/LEATHER
CLEANER
SPOT AND STAIN REMOVAL
ON LEATHER OR VINYL
FABRIC CLEANER
SPOT AND STAIN REMOVAL
ON CLOTH AND FABRIC
1050427 23 OZ.(0.680L)
GLASS CLEANER
GLASS CLEANING AND
SPOT CLEANING ON VINYLS
1050429 6 LB. (2.72KG)
MULTI-PURPOSE
POWDERED
CLEANER
CLEANS VINYL AND CLOTH
ON DOOR TRIM, SEATS,
AND CARPET-ALSO, TIRES
AND MATS
.16
OZ. (0.473L)
1050172
TAR AND ROAD OIL
REMOVER'
C.HROME CLEANER
AND POLISH
1050173 16 OZ.(0.473L)
10501
74
16
OZ. (0.473L)
32 02. (0.946L)
1050214
1050244 16 OZ.(0.473L)
I
~~
1052349 12 OZ.(0.354L)
1050.729 8 OZ.(0.237L)
1052870 16 OZ. (0.473L)
1051
398
8'02.
(Oi237L)
GREASE FOR HOOD,
TRUNK AND DOOR HINGES
AND LATCHES
VINYL TOP CLEANER CLEANING OF VINYL TOPS
EXTERIOR WASH
WASH-WAX (CONC.)
SPOT AND STAIN REMOVAL
SPOT LIFTER
ON CLOTH A,ND FABRIC
LUBRIPLATE
(WHITE GREASE)
GM OPTIKLEEN
MAGIC MIRROR
CLEANER POLISH
309
WINDSHIELD WASHER
SOLVENT AND
ANTI-FREEZE
EXTERIOR CLEANER AND
POLISH,
KEHICLE IDENTIFICATIONNUMBER W N )
1
El
lG6DW52PXRR700001
1 G 6 DW52'P
lGMl
A
X P R 7 0 0 0 0 1
7
NATl
PRODUCTION
SEQUENCE
NUMBER
1 = USA
MANUFACTURER
G = GENERAL
MOTORS
- ASSEMBLYPLANT
I
R = ARLINGTON,TEXAS
MAKE
6 = CADILLAC
-
CARLINE/SERIES
DW = BROUGHAM
VIN BODY CODE = BODYTYPE
5 = 69 SEDAN 4DOOR/
I
MODEL YEAR
R = 1994
-
-.
Ll
I
CHECK DIGIT
4 WINDOW NOTCHBACK
- ENGINE CODE
P = 5.7 LITER VB
U!
- RESTRAINTSYSTEM:
2
-
310
ACTIVE(MANUAL)BELTSWITH
DRIVER AND PASSENGERS
INFLATABLE RESTRAINT SYSTEM
31
r_
This is the legal identifier for your CadillaciIt appears on a plate in the
front corner of the. instrument panel, on thedriver’s side.You can see it if
you look through the windshield from outside your vehicle.The VIN also
appears on the Vehicle Certification and Service Parts labels and the
certificates of title and registration.
Engine Identification
The eighth character in yourVIN is the engine code. This code will help
you identify yourengine, specifications, and replacement parts.
SERVICE PARTS IDENTD?ICATIONLABEL
You’ll find this label on theunderside of the trunk lid. It’s very helpful if
you ever need to orderparts. On this label is:
your VIN,
the model designation,
0 paint information, and
a list of all production options and special equipment.
Be sure thatthis label is not removed from the vehicle.
0
ADD-ON ELECTHCALEQUIPMENT
NOTICE:
Don’t add anything electrical to your Cadillac
unless you check
with your dealer first. Some electrical equipment can damage
your vehicle and the damage wouldn’t be covered
by your
warranty. Some add-on electrical equipment can keep other
components from workingas they should.
311
FUSES AND CIRCUIT BREAKERS
The wiring circuitsin your vehicleare protected from short circuits by a
combination of Mini Fuses, CircuitBreakers, and Maxi Fuses. This
greatly reduces the chance of fires caused.by electrical problems..
If you ever have a problem on theroad and don’t havea spare fuse, you
can “borrow” one,of thecorrect value. Select a feature thatyou can get
along without tha.t isthe same value you need -- like the radio or cigarette
lighter -- and use its fuse. Besure to use a fuse with the same amperage
rating number on it (ie. lOA, 20A, etc.). Replace it as soon as you can.
Instrument PanelFuse Block
E
6
1
1
r-‘ I
To gain accessto the fuse block.
Remove the
instrument panel side
cover.
LJI!
I
312
- MIR DEFG (10 AMP)
- SIDEVIEW MIRROR DEFOGGERS
2-5 - NOT USED
- T/SIG (15 AMP)
- CCM BAT (10 AMP)
- CENTRAL CNTRL. MOD. (CCM)
35 - PWR MIR 110 AMP)
1
18 - CCM IGN 3 10 AMP)
6
DETERRENT MOD.
- DOOR LOCKS
PWR (30 AMP)
-- RAP
- OUTSIDE REMOTE CNTRL.
RETAINED ACCESSORY PWR. (RAP)
REARVIEW MIRRORS SWITCHES
PWR. RELAY
PWR. SEAT BACK LUMBAR CNTRLS.
20 - AIC COMP (10 AMP)
36
TRK
PDWN 115 AMPI
_
_
- N C COMPRESSOR RELAY
- TRUNK LID PULL-DOWN UNIT
- PARWNEUTRALANDBACKUP
SWITCH ASSEMBLY
FLASHER
-- TURN
EBTCMlTPS (10 AMP)
ELECTRONIC BRAKE AND TRACTION
-
7
-
CNTRL. MOD. (EBTCM)
THROlTLE POSITION SENSOR
(TIPS) INTERFACE MODULE
9
--
10 -
-
11 -
-
-
12
13
---
-
-15 14
16 -
17 -
-
RECEIVER AND THEFT
34
'
19
-
......
- PRIMARY ELECTRICAL ENGINE
-
--
COOLING FAN RELAY
~
~~~~
37 - HAZARD LTS (20 AMP)
- HAZARDLAMPFLASHER
RETAINED ACCESSORY PWR. (RAP) 39 PWR LUMB (20 AMP)
- PWR. SEAT BACK PNEUMATIC
WIPER RELAY
RETAINED ACCESSORY PWR. (RAP)
CNTRL. MOD.
HVAC MOD. 25 AMP)
22WIPER RELAY
- Nc ELECTRILL CNTRL. MOD.
- RADIO POWER ANTENNA RELAY
RADIO (10 AMP)
40 - HTD SEAT (20 AMP)
23 TRK REL (10 AMP)
RADIORECEIVER
- REAR COMPARTMENT LID
- DRIVERS HEATED SEAT
WIPER (25 AMP)
RELEASE SW.
CNTRL. MOD.
WINDSHIELD WIPEWASHER
STARTER
10
AMP
24
- PASSENGERHEATEDSEAT
- THEFT D E L R E N ? RELAY INFLAT.
II/P INDC (10 AMP)
CNTRL. MOD.
INFLATABLERESTRAINT
RESTRAINT DIAGNOSTIC ENERGY 41 CORNR LTS (10 AMP)
DIAGNOSTIC ENERGY RESERVE
RESERVE (WITH SENSOR) MOD.
- INSTRUMENTCLUSTER:
(WITH SENSOR) MODULE
25 HVAC ION (10 AMP)
- RADIOCNTRL.
- INSTRUMENT PANEL GAGE
INSTRUMENT PANEL CLUSTER
- TURN SIGNAL SWlTCt-I
CLUSTER
INDICATORS
42 - I/P DIM LTS (10 AMP)
- HVAC.FOWER MOD.
ELC IGN 1 (10 AMP)
- HEADLIGHT SWITCH
26
ELC SENS (20 AMP
AUTOMATIC LEVEL CNTRL. SENSOR
INTERIOR LIGHTS
- AUTOMATIC L w E L ANTRL. SENSOR
CHIME (10 AMP)
DIMMING CNTRL.
- REAR COMPARTMENT COURTESY
WARNING ALARM CRUISE CNTRL.
TAIL LTS (10 AMP)
LAMP
RELEASE
SWITCH
.
.- - ... . - . .
REAR TAIL LIGHTS
27 &NT LTS (15 AMP)
REAR WINDOW DEFOG. RELAY
REAR SIDE MARKERL.IGHTS
- DELAYED INTERIOR LIGHTS (DIL)
INSULE REAR V I M MIRROR (DDB)
LICENSE LAMP
RELAY
CATALYTIC CONVERTER TEMP
STOP LTS (20 AMP)
28 FRY CIG (1 0 AMP)
ALARM (JAPAN ONLY)
FRONT
CIGAR
LIGHTERS
STOP LAMP SWITCH
CCM ION 1 (10 AMP)
29
RR
CIG
(20
AMP)
PWR LK (20 AMP)
CENTRAL CNTRL. MOD. (CCM)
REAR CIGAR LIGHTERS
DOOR LOCK RELAY
AIR BAG (15 AMP)
EBTCM
25
AMP)
30 1 NOT USED
INFLATABLERESTRAINT
- ELECTR6NIC BRAKE &TRACTION CIB
C/B 2- RAP RELAY (30 AMP)
DIAGNOSTIC ENERGY RESERVE
CNTRL. MOD. (EBTCM)
- RETAINED ACCESSORY PWR. (RAP)
(WITH SENSOR) MOD.
31 PARK LTS (20 AMP
RELAY
GEN (10 AMP)
- FORWARD LAMP WIRING RELAY
C/B 3 - PWR ST (30 AMP)
ENGINE ELECTRICAL GENERATOR
32- HORN (25AMP)
- DRIVERS PWR. SEAT SW.
SECONDARY ELECTRICAL ENGINE
33 HVAC BAT (10 AMP)
- PASSENGERPWR.SEATSW.
- WARNING ALARM
COOLING FAN RELAY
- MEMORY SEAT MOD.
- INSTRUMENT CLUSTER
MEM SEAT (10 AMP)
C/0 4 - RR DEFG (30 AMP)
DRIVER'S SEAT MEMORY MOD.
HEADLAMP SWITCH
- REARDEFOGGERRELAY
DRIVER SEAT ADJUSTER CNTRL.
RADIO RECEIVER ALARM
C/B 5 - HD LTS (30AMP)
MOD.
HEATER ANDN C CNTRL.
- HEADLIGHTRELAY
ENGINE OIL LEVEL INDICATOR
HEATEDPASSENGERSEAT
- DAYTIME RUNNING UGHTS (DRL)
CNTRL~MOD.
CNTRL MOD.
8 - RAP WPR (25 AMP)
-
- REMOTE CARL. DOOR LOCK
21
RAP BATT (25 AMP)
-
-
-
-
-
-
-
313
Underhood (UIH) Electrical Center
I
The U/H electrical center is located on the passenger side wheel housing
in the engine compartment.
Remove the cover to
gain access.
314
FUSE USAGE CHART
0
FOR MORE INFORMATION, SEE OWNER’S MANUAL
BODY 1 (SO AMP)
I/P FUSE BLOCK
UNDERHOOD (U/H) ELECTRICAL CENTER
11 - I/P FUSE BLOCK CIRCUIT
- #l
I/P
i I i D C (10 AMP)
- #12 ELC.IGN.1 (10 AMP)
BREAKER
#3 PWR. SEAT CIRCUIT
BREAKER (30 AMP)
#36 TRUNK PULL-DOWN
(15 AMP)
#37 HAZARD LTS. (20 AMP)
#39 PWR. LUMBAR (20 AMP)
#40 HEATED SEAT (20 AMP)
#44 STOP LTS. (20 AMP)
#45 PWR. LOCK (20 AMP)
BODY 2 (50 AMP)
-
4
-
-
3
-
-
-
#26 ELC. SENS. (20 AMP)
#27 D/INT LTS. (1 5 AMP)
#28 FRT CIG. (10 AMP)
#29 RR. CIG. (20 AMP)
#30 EBTCM (25 AMP)
#33 HVAC BAT (10 AMP)
#34 CCM BAT (10 AMP)
#35 PWR. MIR. (10 AMP)
#2 CIRCUIT BREAKER RAP RLY (30 AMP)
ION 1 (50 AMP)
I/P CONCEALED FUSE
RKE/UTD SA
I/P FUSE BLOCK
#6 T/SIS-ICA
#7 EBTCMDPS (10 AMP)
#8 RAP WPR. (25 AMP)
#9 RADIO (10 AMP)
#10 WIPER (25 AMP)
56
7
8
-
#18
#19
#20
#25
CCM IGN 3 (10 AMP)
RAP PWR. (30 AMP)
A/C COMF! (10 AMP)
HVAC IGN (10 AMP)
ABSRC
-
BRAKEPRESSURE
MODULATOR VALVE (BPMV)
NOT USED
SCNDRY CLG FAN (40 AMP)
CNTRL. RELAY
PRIMRY CLG FAN (40 AMP)
PRIMARY COOLING FAN
CNTRL. REIAY
9 LEVEL CNTRL. (30 AMP)
- AUTOMATIC LEVEL CNTRL.
AIR COMR
-
10
13 12
- ENGINE (30 AMP)
- #13 PCM/FUEL PUMP (15 AMP)
- #14 AIR PUMP (20 AMP)
315
#32 HORN (25 AMP)
EMPTY
PCM FUEL PUMP 115 AMP)
FUEL PUMP RELA?
- FUEL PUMP AND ENGINE OIL
PRESSURE INDICATOR SWITCH
- POWER TRAIN CONTRL.
14
MDL (PCM)
-
AIR PUMP (20 AMP)
-
PCM IGN (10 AMP)
- SECONDARY AIR IN (AIR)
15
PUMP RELAY
- IGN COIL
- ELECTRONIC TRANS.
- (PCM) POWER TRAIN
(60AMP)
-- SECONDARY COOLING FAN
-
- #5 HDLTS (20AMP)
- #31 PARK LTS. (20 AMP)
ION 3 (40 AMP)
I/P FUSE BLOCK
- #16 GEN. (10 AMP)
- #17 MEM. SEAT (10 AMP)
I/P FUSE BLOCK
- #21 RAP BAT (25 AMP)
- #22 HVAC MDL. (25 AMP)
-
#13 CHIME (10 AMP)
#14 CCM IGN 1 (10 AMP)
#15 AIR BAG (15 AMP)
#24 STARTER, U/H ELC. CNTR.
#15 PCM/IGN (10AMP)
#16 INJ 1 (10AMP)
#17 EMISSIONS (10 AMP)
#18 INJ 2 (10 AMP)
CNTRL. MDL.
16- INJ
~
17
1 110AMP)
- FUEL I‘NJ 1 , 4 , 6 , 7
-
EMISSIONS (10 AMP)
- (A.I.R.) PUMP‘RELAY .
- MASS AIR FLOW (MAF)
-
SENSOR
HEATED OXYGEN SENSOR’S
EVAPORATIVE EMISSIONS
CANNISTER PURGE
SOLONOID VALVE
18- INJ 2 (10 AMP)
-
FUEL INJ 2 , 3 , 5 , 8
Headlights
The headlight wiring isprotected by a circuit breaker in the light switch.
An electrical overload will cause the lights to go on and off, or in some
cases to remain off. If this happens, have yourheadlight wiring checked
right away.
Windshield Wipers
The windshield wipermotor is protected by a circuit breaker and a fuse.
If the motor overheats due to heavy snow, etc.,the wiper will stop until
the motor cools. If the overload is causedby some electrical problem and
not snow, etc.,be sure to get it fixed.
Power Windowsand Other Power Options
Circuit breakers in the fuse panel protect the power windowsand other
power accessories. Whenthe current load is too heavy, the circuit breaker
opens and closes, protecting the circuit untilthe problem is fixed or goes
away.
316
fll
.
.BULB.CILL4RT
You can get these from your Cadillac dealer .
.DESCRIPTION
.
BULB NO
Ash Tray Illumination ..................................
1445
2057
BackupLights .........................................
1141
Center High Mounted Stop Light ........................
2057
Cornering Light .......................................
S214-2
Courtesy Light .Front Door ............................
S214-2
Courtesy Light .Rear Door ............................
192
CourtesyMap Light .....................................
2057NA
. Front Parking & Directional Signal ....................
194
Front Side Marker Light .................................
Glove Box .............................................
194
.Headlight High Beam ......................
906/HB4 (H2990 4)
Headlight Low Beam .......................
905/HB3 (K17903)
License Plate Light .....................................
194
2057
Parking Light ..........................................
194
Side Marker Lights .....................................
2057
Stop, Tail. & Directional Signal Light .....................
. TrunkLight ......................................... 5 92081
-93
Underhood Light ........................................
194
Vanity Mirror Light .....................................
.
.
.
317
NOR",
PARTS
2MAINTENNf'E REPUCEMENT
Qi
......................... AC Type A1096C
.................. ...............................
25096932
Air Cleaner Element
Battery ............ ................................
.
78A-72
. ........................ ACType GF-624K
.................. ...............................
25121976
Engine Oil Filter ... ...........................
AC Type PF51
.................. ............................... 25012760
PCV Valve . . . . . . . . ........................
AC Type CV895C
.................. ...............................
25095452
Fuel Filter Element
........................ AC Type 41-906
.................................................. 5614244
Spark Plugs (Gap .035)
Serpentine DriveBelt
..............................
10186120
Upper Radiator Hose
..............................
10237347
Lower Radiator Hose
..............................
10237353
........................
10237349
SurgeTankCap
10244485
Thermostat
...................................
.......................................
10128336
Lower Radiator Hose (H.D.)
318
n
I
31
I
EMISSION CONTROL SYSTEMS
Air Injection . . . . . . . . . . . . . . . . Air Injection Reaction Pump (AIR)
EGR Valve
Exhaust Gas Recirculation .........................
Catalytic Converter ........... Dual Bed, Oxidizing and Reducing
Evaporative Emission Control . . . . . . . . . . . . . . . . Charcoal Canister
Crankcase Emission .............. Positive Crankcase Ventilation
Closed Loop
Electronic System ..............................
E m U S T SYSTEM
Single with CrossoverPipe
Type ...............................
One-Reverse Flow
Muffler ..................................
One-Straight Through
Resonator .............................
Stainless Steel
Exhaust Pipe ..................................
Aluminized Steel
Intermediate Pipe ...........................
Tail Pipe ...................................
Aluminized Steel
ELECTIUCAL SYSTEM
Voltage ................................................
12
Ground ...........................................
Negative
Generator ......................................... 140Amp
Integral Solid State
Regulator ................................
AIR CONDITIONING SYSTEM
Refrigerant-R-134a ...........................
3.125 lb (1.4 kg)
Not all air conditioning refrigerants are thesame. If the air
conditioning system inyour vehicle needs refrigerant, be sure the
proper refrigerant is used. If you’re not sure, ask yourCadillac
dealership.
321
FLUID CAPACITIES
Auto Trans (4L60) Pan Removal . . . . . . . . . . . . . . . . . . . 5 qts. (4.7 L)
Auto Trans (4L60) Overhaul (245mm Torque Conv.) . . 8 qts. (7.9 L)
Auto Trans (4L60) Overhaul (298mm Torque Conv.) 11 qts. (10.6 L)
Engine Oil & Filter Change .....................
5.0 qts. (4.7 L)
Engine Cooling .............................
17.6 qts. (16.6 L)
Fuel Tank ................................
. 2 3 gallons (87.4 L)
2 qts. (1.9L)
Power Steering ..................................
Rear Axle ....................................
4.3 pts. (2.0 L)
2.5 qts. (2.4 L)
Washer Solvent. ...............................
ti
t
- 1
TIGHTEN TORQUE
15 Nom (11 lb. ft.)
Spark Plug ................................
19 Nom (14 lb.ft.)
Oil Filter ..................................
Oil Pan Drain Plug ..........................
41 Nom (30 lb. ft.)
135 Nom (100 lb.ft.)
Wheel Lug Nut. ..........................
35 Nom (26 lb.ft.)
Rear Axle Filler Plug ........................
VEHICLE DIMENSIONS
Shipping Weight ..........................
4410 Ibs. (1999.9 kg)
121.5 in (3085 mm)
Wheel Base ...............................
.224 in (5696 mm)
Length ....................................
Height ..................................... .57 in (1451mm)
Width ...................................... .77 in (1952 mm)
61.7 in (1568 mm)
Front Tread ................................
60.7 in (1542 mm)
Rear Tread ................................
I
322
NOTES
NOTES
rn
U
c
L
1
r
- ..
Y
I
NOTES.
t
NOTES
NOTES
NOTES
I
NOTES
332
NOTES
i
j
We employ technlclans certified by the
National Institute for
AUTOMOTIVE
SERVICE
EXCELLENCE
Let us show you their credentials
Catalog Number H-3122
Part Number3542649
ci
r
TOLL-FREEHOTLINE
1-800-882-1112
-
Roadside Service represents the spirit of luxury leadership at Cadillac
We hopetheneedneverarises,but
if it does,
MotorCarDivision.
Roadside Serviceis there for you!! Roadside Service covers you on the
road,farfromhome,
all dayandnight,weekendsandholidays.
THERE ARENO MEMBERSHIP OR ENROLLMENT CHARGES.
Any Cadillac is eligible under this program.
- ROADSIDE SERnCE AVAIUBILITYTYPE
~
DAILY INCLUDING
HOLIDAYS
24 Hours
8 a.m. - 12 midnieht
OF ASSISTANCE
Phone Advisor
Dealer Technician
Towing
3attery Jump Start
Lockout Assistance
Fuel Delivery
Tire Chanee
~
~
~
~
~~~~
24 hours
just one of
your
Cadillac
Owner
Cadillac
Roadside
Service
is
PrivilegesSm that leads
to peace of mind.
1
=
Cadillac Owner Privilegessm
-
-
RoadsideServiceprovidesseveralCadillacOwnerPrivilegesSm at "no
charge", throughout your 1994 Cadillac Warranty Period 48 Months
or 50,000 Miles/80,000 Kilometers.
-
-
EMERGENCY ROAD SERVICE is performed on site for the .
following situations:
0
TOWING SERVICE
BATI'ERY JUMP START
LOCK OUT ASSISTANCE
FUEL DELIVERY
FLAT TIRE CHANGE(8 Covers change only)
* Tire
replacement/warranty
coverage
must be
determined by a Cadillacdealerorappropriate
tire manufacturer.
0
0
0
0
0
-
-.
'
b
i
'.
a
a
....
.
.
?,
--
2
P-'
3
P
I
What Will Roadbide ServiceCost You ? ? 3
There is no cost to call the toll-free Roadside Service number. Many
times Roadside Advisorscan assist you over the phone.
There is no cost for Roadside Serviceif the repair is under warranty or
the provided serviceis one of the covered Emergency Road Services.
If adealershipServiceTechniciantravels
to yourlocation,andthe
reDair is not covered under warranty, there is a nominal service fee to
is
cover the technician'stravel to andfromyourlocation.Labor
charged at one and half times the Cadillac dealership retail labor rate,
with a 30 minute minimum. There is also a charge for any parts used
and a mileagefee if the technician travels beyond
30 miles.
F
-
I
How Do You Pay For Roadside Service? ? ?
Payment is due at the time services are performed if it is determined
they are non-warranty related. Payment may be made bycash, personal
check or any major credit card honored by the participating Cadillac
dealership, tow service or locksmith.
In some instances where warranty determination cannot be made, the
charges must stillbe paid. Retain the bill and submit it to an authorized
CadillacdealershipServiceDepartmentforreview.
If therepair is
determined to becoveredbywarrantythedealer
will expedite
reimbursement directlyto you.
I
i
P
4
Where Is Roadside Service Available? ? ?
Whereveryoudrive
in theUnitedStatesorCanada,anadvisor
is
available to assist you over the phone.
If needed, a dealer technician
will travel to your location within a 30 miles/50 kilometers radius, of a
participating Cadillac dealership. If beyond this radius, we will arrange
to have your car towed to the nearest Cadillac dealership.
How Do You Reach Roadside Service? ? ?
Dial the
toll-free
Roadside
Service
number:
experienced Roadside Service Advisor
following information:
0
0
0
0
1-8001882-1112. An
will assist you and request the
A description of the problem
Name, homeaddress, home telephone number
Location of your Cadillac, and number you are
callingfrom
The model year, vehicle identification number,
and date of delively
5
w h o Will Repair Your Cadillac At Roadside ? ? ?
In many cases, the advisor at the Roadside Service Center can provide
instructions to get you back on the road.
To resolve
more
complex
problems,
the advisor will page
an
experienced Cadillac dealership Service Technician. The technician
will
call you and evaluate the possible cause.If a roadside repairis possible,
the technician will come to your location and provide a permanent or
temporary repair.
m a t I Your Cadillac Is In An Unsafe LocationOr
On Al!imited AccessHighway ? ? ?
If your car is located inan area that is determined to be unsafe (by you,
the advisor or the technician) or if the vehicle is on a limited access
freewayorregulatedhighway,theadvisor
will arrangeto towyour
Cadillac to a safe location, where servicecan be performed. Additional
assistance will be provided if necessary.
WIiat If Your Cadillac CannotBe Repaired
At Roadside ? ? ?
If your car cannot be repaired at roadside within a reasonable period
of
time (approximately 45 minutes) or requires the resourcesof a Cadillac
dealership service facility,the advisorwill arrange atow service for you.
Towing may also be necessaryafterthetechnicianhasattempted
a
repair, but determines thatyour car cannot be repaired at roadside.
Tow services are providedbyindependentcompanies,
so therefore,
Cadillac is not responsible for thetow company. During the 48 months
or 50,OOO miles/80,000 kilometers warranty period, towing services are
covered for any disablement.
6
c
d
I
I2 I
ai
k
What I You Have Di tculty Hearing Or Speaking
And eed Roadside A?-ervice ? 3 3
n/
RoadsideService is prepared to assistownerswhohavehearing
has installed special
difficulties or are speechimpaired.Cadillac
TelecommunicationDevicesfortheDeaf(TDD)intheRoadside
Service Center.
Any customer who has access
to a TDD or a conventional teletypewriter
can communicate with Cadillac by dialing from the United States or
Canada: 1-800-TDD-CMCC or 1-800-833-2622 - daily, 24 hours.
What If You Do NotSpeak English Fluently ? ? ?
Cadillacoffersamulti-lingualapproach
inassistingyou.Roadside
Advisors are conversant in a numberof languages and utilize the AT&T
Language Line Interpreter available 24-hours a day. Just another way
Cadillac says "we care".
7
3
Our Cadillac Dealer Technician network is reat&
and able to assist Cadillac customers roabide.
at
r
=senace
TOLL-FREEHOTLINE
1-800-882-1112
i
8
+--T
u
i
Lu
1
I
Gold Key Courtesy Transportation
One of your Cadillac Owner Privilegesis Gold Key Courtesy
Transportation. It’s one more example of Cadillac’s commitment to
provide the servicesyou expect and deserve as a Cadillac owner.
Gold Key Courtesy Transportation helps you get where you need to be
when your Cadillac is in the dealership for warranty service. Every
Cadillac dealer can help meet your
transportation needs with courtesy
vehicles, rental cars, taxis or shuttle service.*
*Please ask about the specific Gold Key Courtesy Transportationbenefits
offered by your Cadillac Dealer.
1
Courtesy Vehicle
Gold Key Courtesy Transportation provides you with
a late model
Cadillac or other GM vehicle if your car requires two or more hoursof
warranty repairs and must be kept overnight.
Your dealer will provide you witha courtesy vehicle if one is available.
However, in some instancesit may be necessary to arrange for alternative
transportation. If this is the case, your dealer will reimburse you for
rental fees up to $30 a day for a maximum of five days.
r
P-U
2
Shuttle Service or Taxi
c
Warranty work can frequently be handled inone day, but there is no
reason for you to wait around. Cadillac helps eliminate inconvenience to
you with transportation alternatives.
Gold Key Courtesy Transportation provides shuttle servicefor same day
warranty work. Your Cadillac Dealer can get you where you need to be
with minimal interruptionof your daily schedule.
Another option is a taxi. If the warranty repairs require two or more
hours and require your Cadillacto be kept overnight, the Gold
Key
up to $30
Courtesy Transportation plan allows you to be compensated
for a taxi. Be sure to get receiptsfor your Service Advisorso you can
be reimbursed.
a
r
P-
3
I
P
Plan Ahead When Possible
Whenever possible, schedule an appointment for your vehicle'swarranty
work. Your Cadillac Dealer can then prepare to meet your alternative
transportation needs and minimize inconveniencestypically associated
with warranty repairs.
r
4
0wner Responsibilities
There are only two things which you will be responsible
for during the
use of your courtesy vehicle. You are required to provide insurance
coverage and replenish the fuel used.
In many cases your own auto insurance policy may provide primary
coverage for the courtesy vehicle, similar to rental car agreements. Please,
check with your insurance company tobe certain what's covered.
a
Gold Key Courtesy Transportation---Just one more way your Cadillac
Dealer is committed to you.
5
1
Cadillac
Gold Key Courtesy Transportation
I
Alternatives*
Duration of
Warranty Repair
Same Day Repair
Overnight Repair
(2.0 hours minimum
warranty repair required)
Courtesy
Customer
Transportation Type Charge/Responsibility
Shuttle Service
No charge.
Courtesy Cadillac
(if available)
No charge; must provide
insurance coverage and
replenish fuel used.
Courtesy Cadillacor other No charge; must provide
GM make loaner vehicle insurance coverage and
replenish fuel used.
Rental Vehicle
If no dealer loaner
is
available, you havethe
option of renting a
vehicle from an outside
agency and being
reimbursed up to $3O/day
(5 days maximum).
Taxi Cab ride
Reimbursed for actual
expenses up to$30.
Personallyarranged ride
No charge; reasonable
fuel expenditures
reimbursed.
Shuttle Service
No charge.
*Please ask about the specijic Gold Key Courtesy Transportationbenejts
oflered by your Cadillac Dealer.
6
4%
I
I
I -
I
I
I
"1
8
Lu
1OWNER ASSISTANCE
This sectionwill explain how
to contact Cadillacif you need assistance.It also tells
you how to obtain service publicationsand how to report any safety defects.
This section includesthe following:
f!
Customer Satisfaction Procedure
Customer Assistancefor HearinglSpeech. Impaired
State Warranty Enforcement Laws
Special Policy AdjustmentPrograms Beyond The Warranty Period
Central Office Addresses
MediatiodArbitration Program
Reporting Safety Defects
Product Service Publications (PSPs)
Owner’s Manuals and Service Manuals
CUSTOMER SATISFACTION PROCEDURE
F
1
I
I
For prompt assistance, please have
the following information available to give the
Consumer Relations Representative:
- Your name, address and home and business telephone numbers
- Vehicle Identification Number (this is available fromthe vehicle registration
or title, or the plate attached to theleft top of the instrument panel andvisible
through the windshield.)
- Dealership name and location
- Vehicle deliverydate and present mileage
- Nature of concern
In order give
to your inquiry
prompt attention, please call the appropriate toll free
number listed.However,
if youwish
to writeCadillac,pleasesendall
correspondence to the respective United States, Canada or GM OverseasCentral
Office address listed on the following page.
When contacting Cadillac, please remember that your problem will likely be
resolved in the dealership, using dealership facilities, equipment and personnel.
That is why wesuggest you followStep One first.
I
CUSTOMER ASSISTANCEFOR THE HEARINGOR
SPEECH IMPAIRED
To assist owners who have hearing difficulties, Cadillac has installed special
Telecommunication Devices for the Deaf (TDD) equipment in its Coosumer
Relations Center. Any hearing or speech impaired customer who has accdssto a
can communicate with Cadillac
by
TDD or a conventional teletypewriter(TTY)
dialing: 1-800-TDD-CMCC. (TDD users in Canada can dial 1-800-263-3830).
STATE WARRANTY ENFORCEMENT LAWS
Laws in manystates pernit owners to obtain a replacement vehicle or a refund of
the purchase price under certain circumstances. The provisions of these laws vary
from state tostate. To the extent allowed by state law, General Motors requires
that you first provide us withwritten notification of any service difficulty you have
experienced so that we have an opportunity to make any needed repairs before
you are eligible for the remedies providedby these laws. Yourwritten notification
should be sent to the Cadillac Customer Relations Center. Please see Page =for
the address.
Lfll
.--
-
SPECIAL POLICY ADJUSTMENT PROGRAMS BEYOND
THE WARRANTY PERIOD
Cadillac isproud of the protection afforded by its warranty coverages.In order to
achieve maximum customer satisfaction, there may be times when Cadillacwill
establish a special policy adjustment program to pay all or part of the cost of
certain repairs not covered by the warranty or to reimburse certain repair
expenses you may have incurred. From time to time, check with your Cadillac
Dealership or theCadillac Customer Relations Center to determine whether any
special policy adjustment program is applicable to your vehicle.
When you make an inquiry, you willneed to give the year, model and mileage of
your vehicleand your vehicleidentification number (VIN).
ZONE AND CENTRAL OFFICE ADDRESSES
h
h
-
UNITED STATES
Consumer Relations Center
Cadillac Motor Car Division
2860 Clark
Detroit, Michigan 48232
1-800-458-8006 (24Hours)
1-800 -ALL&
(Allantes only)
GM NORTH AMERICAN SALES
1908 Colonel Sam Drive
Oshawa, Ontario L1H 8P7
1-416-644-4112
Fax: 416-644-4866
Telex: 821-06981215
c-
CANADA
Consumer Relations Department
General Motors of Canada Limited
Oshawa, Ontario L1J 526
1-800-263-3777 (ENGLISH)
1-800-263-7854 (FRENCH)
3
GM PARTICIPATION IN BETTERBUSINESS BUREAU
MEDIATION/ARBITRATION PROGRAM*
Both Cadillac Motor Car Division and your Cadillac dealer are committed to
making sure you are completely satisfied with your new vehicle. If a situation
arises where you feel your concern has not been adequately addressed, our
experience has shown that the Customer Satisfaction Procedure described on
Page 1is very successful.
There may be instances wherean impartial third-party can assist in arriving
at a
solution to a disagreement regarding vehicle
repairs or interpretation of the New
Vehicle Limited Warranty. To assist in resolving these disagreements, Cadillac
voluntarily participates in BBB AUTO LINE.
BBB AUTO LINE is an out-of-court program administered by the Better
Business Bureau system to settle disputes between customers and automobile
manufacturers. This program is available
free of charge to customers whoown or
lease a GM vehicle.
If you are not satisfied after following the Customer Satisfaction Procedure, you
may contact the BBB usingthe toll-free telephone number or theaddress listed
below:
BBB AUTO LINE
Council of Better Business Bureaus
4200 Wilson Boulevard
Suite 800
Arlington, Virginia 22203
Telephone
1-800-955-5100
To file a claim, you willbe asked to provide your nameand address, your Vehicle
Identification Number (VIN), and a statement of the nature of your complaint.
Eligibility is limitedby vehicle age and mileage, andother factors.
We prefer that you utilizethe Customer Satisfaction Procedure before you resort
to AUTO LINE, but you maycontact the BBB at any time.The BBB willattempt
to resolve the complaint by serving as an intermediary between you and Cadillac.
If this mediation is unsuccessful, an informal hearing will be scheduled where
eligible customers may present their case to an impartial third-party arbitrator.
The arbitratorwill make a decision which you may accept
or reject. If you accept
the decision, GM will be bound by that decision. The entire dispute resolution
procedure should ordinarilytake about forty daysfrom the time you filea claim
until a decision is made.
Some state laws mayrequire you to use this program before filing a claim witha
state-run arbitration program or in the courts. For further information, contact
the BBB or the Cadillac Consumer Relations Center.
NOTE: This program may not be available in all states, depending on state law.
to change eligibility limitations andor to
General Motors reserves theright
discontinue its participation in this program.
4
I
B
-
c--
.
.
-
_
I
P-
+-
-
REPORTING SAFETY DEFECTS TO THE UNITED
STATES GOVERNMENT
If you believe that your vehicle has a defect which could cause a crash or could
cause injury or death, you should immediately inform the National Highway
Traffic SafetyAdministration (NHTSA), inaddition to notifying General Motors.
If NHTSA receives similar complaints,it may open an investigation,and if it finds
that a safety defect exists ina group of vehicles, it may order a recall and remedy
campaign, However, NHTSA cannot become involved in individual problems
between you, your dealer, or GeneralMotors.
To contact NHTSA, you may either call the Auto Safety Hotline toll-Free at
1-800-424-9393 (or 366-0123in the Washington,D.C. area) or write to
NHTSA, U.S. Department of Transportation, Washington, D.C. 20590. You can
also obtain other information about motor vehicle safety from the Hotline.
REPORTING SAFETY DEFECTS TO THE CANADIAN
GOVERNMENT
If you live in Canada, and you believe that your vehicle has a safety defect, you
should immediately notify Transport Canada, in addition to notifying General
Motors of Canada Ltd. You may write to Transport Canada at Box 8880, Ottawa,
Ontario K1G 352.
REPORTING SAFETY DEFECTS TO GENERAL MOTORS
In addition to notifying NHTSA(or Transport Canada) in a situation like this,we
certainly hope you’ll notify us. Please call us at our Consumer Relations Center,
1-800-458-8006,
or in Canada call,
1-800-263-3777,
(English) or
1-800-263 -7854 (French), or write: Cadillac Motor Car Division, Consumer
Relations Center, 2860 Clark AvenueDetroit, MI 48232.
-I
SERVICE PUBLICATIONS
c_.
__
Information on how to obtain Product ServicePublications,subscriptions,
Indexes and summaries as described belowis applicable onlyin the fifty U.S.
states (and the District fo Columbia) and only for cars and light trucks with
GVWR less than 10,000 pounds (4 536 kg).
In Canada, information pertaining to Product Service Bulletins and Indexes can
be obtained by writing to:General Motors of Canada Limited,Service
Publications Department, 1908 Colonel Sam Drive Oshawa,Ontario L1H 8P7.
Cadillacregularly sends its dealers usefulservicebulletins
about Cadillac
products. Cadillac monitors product performance in the field. We then prepare
bulletins for servicing our products better, Now, you can get these bulletins too.
5
I
Bulletins cover various subjects.
Some pertain to the proper use andcare of your
vehicle. Some describe costly repairs.Others describe inexpensiverepairs which,
if done on time with the latest parts, mayavoid future costly repairs. Some
bulletins tell a technician how to repair a new or unexpected condition. Others
describe a quicker way to fix your vehicle. They can help
a technician service your
vehicle better.
Most bulletins apply to conditions affecting a small number of vehicles Your
Cadillac dealership or a qualified technicianmay have to determine if a specific
bulletin applies to your vehicle.
You can subscribe to all Cadillac bulletins. Thisway you’llget them as they come
out. You can wait a while and get an index to the bulletins. You can also get
individual bulletins. However,you’ll need the index to identify them.
n;
Subscriptions
You can subscribe to all Cadillac Product Service Publications (PSPs). Thiswill
include bulletins for all cars sold by Cadillac and will not be limited to PSPs
applicable to any particular model. When you buya subscription, you will receive
the PSPs in periodic mailings shortly after they come out. You can purchases a
subscription by sending a check or money order to Cadillac Service Publications,
Post OfficeBox 07130,Detroit, Michigan 48207, along with
the order form located
on page 11. You may get additional subscription ordering forms by calling the
toll-free number shown in this section or your can find them at participating
dealerships.
Individual PSPs
I
If you don’t wantto buy allthe PSPs issued byCadillac for all models in
the model
year, youcan buy individual PSPs such
as those which maypertain to a particular
model. To do this, you willfirst need to see our index of PSPs. It provides avariety
of information. Here’s whatyou’ll find in the index and how you can getone.
‘ I
What You’ll find in the Index:
+
+
+
A list of all PSPs published by Cadillac ina model year (1991or later). PSPs
covering all modelsof Cadillac carsare listed inthe same index.
Ordering information so you can buy the specific PSPs you may want.
Price information for PSPs you may want to buy.
How You Can Get an Index:
Indexes are published periodically. Most of the PSPs which could potentially
apply to the most recent Cadillac models willby listed in the last quarterly
publication for that model year. This means you
may want to wait until the end of
;IE I
a
6
i
-
the model year before ordering an index ifyou are interested in buying PSPs
pertaining to a current model year vehicle.
Some PSPs pertaining to a particular model year vehicle maybe published on later
years, and these would be listed in the later year’s index. When you order anindex
for a model year that is not over yet, we’ll send you the most recently published
quarterly issue. You can specify an index for an earlier model year, but not before
1991.
Cut out the orderform, fill it out, and mail it. We will see to it that an index is
mailed to you. There is no charge for indexes for the 1991- 1994 model years.
Toll-Free Telephone Number
If you want an additional ordering form for an index or a subscription, just call
- toll-free and we’ll be happy to send you one. Automated recording equipment
will take your name and
mailing
1-800-551-4123.
address.
The number to call
is
Copies at Participating Dealers
--
Copies of Indexes and individual PSPs are atyour Cadillac dealership. You can
ask to see them.
A VERY IMPORTANT REMINDER: These PSPs are meant for technicians.
They are not meant for the ‘do-it-yourselfer’. Technicians have the equipment,
tools, safetyinstructions, and training to doa job quickly and safely.
Cadillacreserves the right to change these procedures without notice after
November, 1991.
Cadillac Owner’s Manuals and Service Publications
c _
You can get these by using the order form. Additionally, past model Owner’s
Manuals and Service Information Manuals are available for a minimum of ten
model years and frequently much longer. Credit card orders may be placed using
the toll-free number 1-800- 782-4356. High quality
three hole punched
looseleaf copies of out of print older model manuals ar available, also. You may
receive afree listing of either by using the orderform.
7
SERVICE MANUALS
(Available after May, 1994)
m
I
MODEL
DESCRIPTION
FORM NO.
YEAR
1994
H-3112
1994
H-3116
1994
H-3146
1994 and
Prior
CPCH-094
I
I
I
I
I
I
I
I
I
I
PRICE
EACH
DeViIle/Concours/EIdorado/SeviIle
Service Information Manual
I
LITERATURE
90.00
Quick Reference Specifications Guide.
(All Models)
OrderFormforPastModelServiceManuals
FORM NO.
1994
H-3122
Fleetwood
Owner
1994
H-3124
Deville Owner Information
1994
H-3125 Information
Owner
Concours
1994
H-3126Owner
Seville
1994
H-3 1 Information
28Owner
Eldorado
DESCRIPTION
1994
3542671
Maintenance
Booklet
Coupon
1994
3542647
Warranty
Booklet
1994 and
Prior
CPCH-094
I
FREE
PRICE
EACH
I $15.00
I 15.00
I 15.00
I 15.00
I 15.00
1 4.00
Information
Information
(All Models)
Order Form forPastModelOwner’s
7.00
I
OWNER‘S
MODEL
YEAR
I
Literature
~~
I
2.00
I
FREE
I
aI
cf
a
~.
NOTE: Owner Literature Portfolios, Vehicle and Owner Information Labels and
Gold Keys are available by contacting your Cadillac dealership.
n
aI
8
PRODUCT SERVICE PUBLICATIONS INDEXES
I
YEAR
1
FORM NO.
I
Index (Includes applicable bulletin summaries)
To review all product service publications (PSPs)
for a specific model year vehicle, it is
necessary to order the index for that model
year and all subsequent model year indexes.
H-2855
H-2955
1993
1-1-3055
I
I
I
1994
1990
I
H-3155
1
I
H-27528
I
I
I
Bound PSP Edition - includes
index plus complete PSPs
1
I
1991
DESCRIPTION
1
H-2852B
Bound PSP Edition - includes
index plus complete PSPs
IFREE
I
I
20.00
20.00
~~
NOTE: For 1992 Model Year and Later, Product Service Publications
can only be purchased individually.
INDIVIDUAL PRODUCT SERVICE PUBLICATIONS
(Refer to PSP Index for Form Number)
YEAR
1991
thru
1994
1
I
I
FORM NO.
DESCRIPTION
1
I
See details
on
PSP
Index
First Individual
PerPSP
_
_
_
~
~
~
~~
~~~~
Order
PRICE
EACH
I
$4.00
~~~~
Each Additional PSP In Same Order
I
I
ANNUAL
PRODUCT
SERVICE
PUBLICATION
SUBSCRIPTION
DESCRIPTION
1994
H-3158
H-2134
I
PRICE
EACH
Subscription to all Product Service
Publications released by Cadillac
throughout the Model Year (September 1
through August 31). PSP’s mailed quarterly.
3-Ring Binder for Product Service
Publications. Includes set of Index Tabs.
9
10.00
NOTE: Please fill in order form and MAIL TO:
Cadillac Service Publications
Post Office Box 07130, Detroit, Michigan 48207
ORDER TOLL FREE: 1-800-782-4356
Monday-Friday 8:OO A.M.-6:00 P.M. EST
If further information is needed, write to the address shown above or call 1-800-782-4356.
Orders cannot be returned without prior authorization. A re-stocking fee may apply.
:Prices are subject lo change without nolice and without incurring obligation.
Orders for Individual Product Service Publications cannot be filled without the
appropriate bulletin numbers. These numbers may be found
In the PSP Index. Your
first Product Service Publication costs $4.00; each addillonal PSP costs $2.00.
Handling Charge
Please allow adequate time for postal service.
NOTE: Dealers and Companies please provide dealer or company name, and also the name of the person
to whose attention the shipment should be sent. For purchases outside U.S.A. please write to the above
address for quotation.
1
1
(ATTENTION)
(CUSTOMER NAME)
(STREET ADDRESS-NO P.O.
(APT. NO.)
BOX NUMBERS)
DAYTIMETELEPHONE
NO. CODE
0
0
0
AREA
(
Check or Money Order payable to Helm, Inc.
(USA funds only - do not send cash.)
MasterCard
Account
Number:
Expiration
Date molyr:
VISA
Discover Card
mm] 0 m l
(CUSTOMER SIGNATURE)
Check here if your billing address is different
from your shipping address shown.
.
.
.FLEETWOOD INDEX
.
.
.
.
.
c-
.
.
.
A
Acc (Ignition Key Position) ...........................
86
Adding
274
Brake Fluid .....................................
Electrical Equipment .........................
152.311
Engine Coolant .............................
227.266
Engineoil ......................................
256
Power Steering Fluid .............................
271
TransmissionFluid ...............................
265
260
Additives. Engine Oil ...............................
178
Adjustment. Brake .................................
Adult Safety Belt Usage ..............................
20
Air Bags ...........................................
30
Aircleaner .......................................
261
Air Cleaner & PCV Filter Replace ......... See Maint . Book
147
Air Conditioner ....................................
Air Outlets ........................................
146
Airsystem ........................................
146
Alarm. How To Turn Off Theft ........................
82
Alcohol. Driving Under TheInfluence Of .............. 167
Alcohol& Gasoline .................................
247
AMAX ..........................................
153
AM Radio Reception ...............................
152
AM Stereo Radio Reception .........................
153
Antenna. Cleaning Radio ............................
164
Antifreeze ........................................
266
Antilock Brakes ....................................
173
Antilock Brake System Warning Light ................. 133
Anti-TheftTips .....................................
81
Appearance .......................................
300
Appearance Care. Service and ........................
245
Wearing A Safety BeltUnder Your ................ 28
Armrest. Storage ...................................
129
Ashtrays ..........................................
126
Assist Handles .....................................
128
Astroroof .........................................
125
Audio Systems. Comfort Controls and ................. 146
Automatic Air Conditioning System ................... 147
Automatic Door Locks ...............................
71
Automatic Overdrive ................................
92
Automatic Transmission ..............................
90
Arm.
1
I
!
Automatic Transmission Fluid ........................
Axle. Rear ........................................
262
265
Baby Restraint ......................................
50
Battery ...........................................
276
Battery Cables. Starting With .........................
215
Beam. Headlight. High-Low Switch ................... 107
Belt
Lap ............................................
39
Lap-Shoulder ....................................
21
RearSeat ....................................
41. 42
Blizzard. If You’re Caught In A .......................
199
Block Heater. Engine ................................
89
BloodAlcoholLevel ................................
167
Boat. Towing A ....................................
201
Brake
Adjustment .................................
178.275
Fluid ..........................................
273
Lining Replacement. HowTo Drive After ............ 276
Master Cylinder .................................
272
Parking .........................................
94
Pedal Travel ................................
178.275
Brake System. Antilock. Warning Light ................ 133
Brake System Warning Light .........................
132
140
Brake To Shift Light ................................
177.274
Brakewear ...................................
Brakes.Antilock ...................................
173
Brakes. Rear ......................................
275
Brakes.Trailer .....................................
207
172
Braking ...........................................
179
BrakinginEmergencies .............................
Braking If Your Engine Stops ........................
172
“Break.1n”.NewVehicle .............................
85
Break-In Schedule. When Towing A Trailer ............. 202
317
Bulb Chart ........................................
Bulb. Center High Mounted Stop Lamp ................ 286
Bulb. Cornering Lamp Removal ......................
278
Bulbs. Halogen Removal ............................
279
281
Bulbs. Taillight Replacement .........................
Bulbs. Turn Signal ..................................
317
C
.........................
Cables. Battery. Starting With
Camper. Towing A ..................................
Capacities.Fluid ...................................
Car Jack Instructions ...............................
2
215
201
322
235
i3 I
31
nl
n
3
Comfort Controls and Audio Systems.................. 146
Compact Disc Music System .........................
160
Compact Disc Player. CareOf Your ................... 164
242
Compact S are Tire ................................
Contents. able Of ...... See “Frontof Owner Info. Manual”
171
Control Of A Vehicle ...............................
184
Control. Loss Of ...................................
67
Controls. FeaturesAnd ...............................
Convenience Net .....................................
74
124
Convex Outside Mirror ..............................
Coolant. Engine: Proper SolutionTo Use ............... 266
136
Coolant. Engine. Warning Light ......................
223
Coolant. Safety Warnings About......................
89
Coolant Heater. Engine ..............................
225
Cooling System ....................................
Cooling System Service................... See Maint. Book
Corrosion Protection ................... See WarrantyBook
110
Cruise Control .....................................
................... 113
Cruise Control. Change Speed With
114
Cruise Control. Get OutOf ..........................
114
Cruise Control On Hills .............................
115
Cruise Control. Timing Off ..........................
141
Cruise Engaged Light ...............................
179
Curves. Driving Qg ..................................
. . . . . .-
f
,
.
.
.
.
.
,
.
.
.
.
.
. . . .”-:
,
~
D
.
Damage To Finish ..................................
308
Damage To Sheet Metal .............................
307
DamageWarnings ....................................
2
Daytime Running Lights (Canada Only) ............... 118
Dead Battery.
WhatTo Do If You Have A .............. 214
-.
166
Defensive Driving ..................................
150
Defogger.RearWindow .............................
149
Defogging .........................................
149
Defroster .........................................
Delco Cassette and Compact Disc Music System........ 160
151
Delco System ......................................
DEXRON I11 ......................................
265
322
Dimensions. Vehicle .................................
Disabled. How To Have Your Cadillac TowedIf It Is ..... 219
190
Disposal. Used Oil .................................
139
Door Aiar Light
....................................
.
........................................
Door
Lbcks 69
Dowil HilIs and Mountains. Driving ................... 194
Downshifting .......................................
92
Driving
At Nigh
..........
Defensive
.......... 166
.
n
I
.
.
.
1
.
.
.
.
Drunken .......................................
167
Hill and Mountain ...............................
194
248
In A Foreign Country ............................
In Cities ........................................
190
On Snow Or Ice .................................
197
In The Rain .....................................
187
InWinter .......................................
196
On A Long Trip . . . . . . . . . . . . . . . . . . . . . . . . . . . . . . . . .192
On The Freeway .................................
191
OnCurves ......................................
179
Through Deep Standing Water ......................
88
With A Trailer ...................................
208
Drunken Driving ................................... 167
123
Electric Outside Mirror Control ......................
Electrical Equipment. Adding ....................
152.311
Electronic Climate Control ..........................
147
Electronic Level Control ............................
143
Electronic Solar Sensor .............................
150
Emergencies. Braking in .............................
179
Emergencies. Steering In ............................
180
Emergency Starting. Discharged Battery ............... 214
Emergency Towing .................................
219
Engine
Block Heater .................................... 89
266
Coolant ........................................
Coolant Heater ...................................
89
Coolant Temperature Warning Lights ............... 136
Exhaust ........................................ 100
Oil ............................................
254
Oil Additives ....................................
260
Oil Pressure Light ...............................
137
Oil.When To Change .............................
260
Overheating ....................................
223
86
StartingYour ....................................
Warning Light About Need For Service ............. 142
Englishwetric Button ...............................
130
247
Ethanol In Gasoline ................................
100
Exhaust. Caution ...................................
100. 200
Exhaust. Dangerous Gas In ......................
100
Exhaust. Engine ....................................
Expectant Mothers. Use Of Safety BeltsBy .............. 38
Explanation of Maintenance Service ........ See Maint. Book
Express Down Window (Driver’sSide) ................. 103
191
Expressway Driving .................................
65
Extender. Safety Belt ................................
5
Exterior Appearance ................................
300
Explanation of Maintenance Service ........ See Maint. Book
F
Fabric, Foam-we Cleaner On .......................
302
Fabric, Solvent-Type Cleaner On ......................
303
Fanspeeds ........................................
148
Fasteners, Replacement .............................
246
Features And Controls ...............................
67
Fetus, Risk To ..From Safety BeltUse .................. 38
Filling Your Fuel Tank ..............................
251
Filter, Oil .........................................
318
Finish Care ........................................
306
Finish Damage .....................................
308
First Gear, When To Use .............................
93
Flashers, Hazard Warning ...........................
213
Flat Tire ..........................................
231
Flat Tire, Changing A ...............................
232
Flooded Engine, Starting A ...........................
87
Floor Mats ........................................
129
Fluids & Lubricants, Recommended ........ See Maint. Book
Fluid Capacities ....................................
322
Fluid, Brake .......................................
273
Fluid, Power Steering ...............................
270
Fluid, Transmission .................................
262
FM Stereo Radio Reception .........................
152
Foam-%e Cleaner On Fabric ........................
302
Fog: Getting It Off the Windshield ....................
149
Foreign 0 eration ..................................
248
Francais, uide En ....................
See “Introduction”
Freedom Battery, Delco .............................
276
Freeing Car From Sand, Mud, Ice or Snow ............. 244
FreewayDriving ...................................
191
French Language Manual ............... See “Introduction”
Front Brakes: Brake Wear Indicators .................. 177
Front Seatbacks,Reclining,Power ......................
9
Front Towing Hook-Ups .............................
221
Fuel ..............................................
246
FuelDoor,Locking .................................
251
FuelEconomy .....................................
248
FuelGage .........................................
144
Fuel Tank, Filling Your ..............................
251
Fuse Replacement ..................................
3 12
Fuses And Circuit Breakers ..........................
312
I
I
8
r
r_
U
r
6
,
i
I
.
.
i
1
.
.
.
.
.
.
G
Garage Door Opener (Option) ....................... 128
90
Gear Positions ......................................
Gearshift Lever. PositionsOf . . . . . . . . . . . . . . . . . . . . . . . . . . 90
247
Gasoline ..........................................
251
Gasoline Tank. Filling Your ..........................
305
Glass Cleaning .....................................
GloveBox .......................................... 73
Graphic Symbols . . . . . . . . . . . . . . . . . . . . . . . . . . . . . . . . . . . . . 3
Guard Against Theft . . . . . . . . . . . . . . . . . . . . . . . . . . . . . . . . . 81
Guide En Francais .....................
See “Introduction”
H
HalogenBulbs .....................................
277
Halogen Headlight Bulb Removal .....................
279
Hazard Warning Flashers ............................
213
Headlight High-LowBeam ..........................
107
Headlight On Warning ..............................
116
Head Restraints .....................................
11
Heater ............................................
147
Heater. Engine Block ................................
89
Heater. Engine Coolant ..............................
89
High-Low Headlight Beam ..........................
107
High Speed. Shifting When Your Engine Is Running At ... 92
Highway Hypnosis ..................................
193
Hill and Mountain Roads ............................
194
Hills. Parking On ................................... 210
Holding A Baby In Your Car .......................... 48
Hood. Don’t Open If You See Steam .................. 223
Hood Release .....................................
253
Horn .............................................
104
Hot Coolant. Warning Light For ......................
136
Hot Engine. Safety Warnings About ................... 223
How The Air Bag System Works .......................
33
How To Obtain Roadside Service ...... See Roadside Service
How To Operate Your Sound System .................. 153
How To Order
Owner Manual ................... See Owner Assistance
Maintenance Coupon Book ........ See Owner Assistance
Service Manual ...................See Owner Assistance
Warranty Book ................... See Owner Assistance
How To Use This Manual ..............................
1
How To Wear Safety Belts Properly .....................
20
Hydroplaning .....’. ................................
189
I
244
1.ce. If You’re Stuck In ...............................
311
1:dentification Label. Service Parts .....................
1:dentification Number. Vehicle (VIN) ................. 310
101
1Idling Your Engine ..................................
231
1:fA Tire Goes Flat .................................
85
1Ignition Key Positions ................................
:lluminated
Entry
System
.............................
73
1
hdicator.
Bulbs
For
Turn
Signal
......................
317
1
177
1hdicators. Front Brake Wear ........................
1hdicators. Warning. On Instrument Panel .............. 132
50
1[nfant Restraint .....................................
292
1[nflation. Pro er Tire ...............................
1[nformation !
i
!ystem On Instrument Panel .............. 130
1hspection.Tire ....................................
294
130
1hstrument Panel ...................................
[nstrument
Panel
Warning
Lights
.....................
132
1
301
1[nterior Cleaning ....................................
1[ntroduction ...... See “Frontof Owner Information Manual”
.
J
Jacking And Removing Flat Tire ......................
Jump Starting ......................................
233
214
K
Keyless Entry. Remote ...............................
Keys ..............................................
Keys.Ignition .......................................
KilometerIndicator ................................
76
67
68
130
L~.ILPHousings xwx1u1 ...........................
277
LampMonitors ....................................
119
Lane Change AndTUrn Signal Indicator ................ 105
LapBelt ...........................................
39
Lap-Shoulder Belt ...................................
21
Larger Children and Safety Belt ........................
61
Leaking. Of .Exhaust Into Your Car ................ 100. 200
Leather.Cleaning ..................................
304
Light. Air Bag ......................................
32
Light. Brake To Shift ..................................
140
Light.ChangeOil ..................................
139
Light.Charge ......................................
138
Light. Coolant Temp ................................
136
Light.CruiseEngaged ..............................
141
8
r
L
I
,
Mirrors, Rear Seat Vanity ............................
124
Mobile Telephone, Adding A .....................
152,311
Monitors, Lamp ....................................
119
Mountain Drivlng ..................................
194
MTBE In Gasoline .................................
247
Mud, If You’re Stuck In .............................
244
N
“ N (Neutral) Gear Position ..........................
NewVehicle “Break-In” ..............................
Night, Driving At ...................................
NightVision .......................................
Notices About Damage ................................
0
..................................
Occupant Restraint
Octane Required For Your Car .......................
Odometer .........................................
Odometer And Speedometer .........................
Odometer, Trip ....................................
Off (Ignition Key Position) ............................
Off Road Recovery .................................
Oil Additives, Engine ...............................
Oi1,Engine ........................................
Oil, What Kind of Oil to Use .........................
Oil, When To Change Your Engine ....................
Oil Life Indicator. ..................................
OilQuality ........................................
Oil Thickness (Viscosity) ............................
Operating Record .......................
See Maint.
Operation In Foreign Countries ......................
Outside Air .......................................
Outside Temp ......................................
Outside Mirrors ....................................
Overdrive, Automatic ................................
Overheated, Engine .................................
Owner Check & Services ................. See Maint.
92
85
185
186
2
20
246
131
131
131
86
181
260
254
257
260
145
257
258
Book
248
146
147
123
92
223
Book
- 1
,
U1
I
P
“P” (Park) Position ..................................
Paint S otting, Chemical ............................
Park, S ifting Into ...................................
Parking Brake ......................................
Parking On Hills ...................................
Parking Over Thin s That Burn ........................
Parking with aTrai er ...............................
K
f
10
90
308
96
94
210
99
210
GI
I
n
In
Lj.
I
Replacing Brake System Parts ........................
276
ReplacingSafetyBelts ...............................
65
Replacing Tires ....................................
295
ReplacingWheels ..................................
298
Restarting Your Car When It’s Moving ................. 86
Restraint. Infant ....................................
50
Restraint. Occupant .................................
20
Restraint Systems. Checking Your ......................
65
Restraints.Child ....................................
50
Restraints. Head ....................................
11
Restraints. Larger Children ...........................
61
Reverse Gear Position ...............................
91
Road. Your Driving and the ..........................
166
Roads.Hilland Mountain ...........................
194
Rocking Your Car Out Of Snow. Ice. Sand Or Mud ...... 244
Rotation. Tire .....................................
294
Rotate. If You’re Stuck And Your Rear Wheels Can’t ..... 93
Run (Ignition Key Position) ........................... 86
Running Your Engine While Parked ................... 101
S
Safety Belt Extender .................................
65
Safety Belt Reminder Light ........................
13’20
Safety Belt Replacement. Need For
.................... 65
Safety Belt Use During Pregnancy .....................
38
Safety Belt UsageBy Adults ........................... 20
Safety Belt Usage By Children ......................... 47
SafetyBelts ........................................
13
Safety Belts. Center Front. Adult Passenger .............. 39
Safety Belts. Center Rear Passenger’s Position ........... 41
305
Safety Belts. Cleaning ...............................
Safety Belts. How To Wear Properly ....................
20
Safety Belts. Torn ....................................
66
Safety Belts. Rear Seat ............................
41. 42
Safety Belts. Replacing After A Crash .................. 65
Safety Belts. Right Front. Adult Passenger ............... 39
Safety Belts: They’re For Everyone .....................
13
SafetyBelts.Twisted .................................
29
Safety Belts. Why To Wear ............................
15
Safety Cautions ......................................
1
Safety Defects
Reporting to Canadian Gov’t ....... See Owner Assistance
Reporting to General Motors ....... See Owner Assistance
Reporting to U.S.Gov’t ............ See Owner Assistance
1
Safety Warnings ......................................
244
Sand. If You’re Stuck In .............................
Schedule IMaint. Serv....................
See Maint. Book
Schedule I1Maint. Serv................... See Maint. Book
I
- 1
P
E 1’
.
.
.
.
.
.
.
.
h
-
.
.
Schedule Maint. Serv., Explanation of ...... See Maint . Book
9
Seatback Recliner ....................................
13
SeatBelt ...........................................
8
Seat. Memory ........................................
7
Seat, Power ..........................................
6
Seats ...............................................
6
Seat Controls ........................................
93
Second Gear, When To Use ...........................
Securing A ChildRestraint, Center Rear Seat ............ 54
Securing A ChildRestraint, Rear Outside . . . . . . . . . . . . . . . 52
Securing A ChildRestraint, Right Front Seat ............ 57
Securing Owner Manual Portfolio ......................
73
72
Security Lock, Rear Door .............................
Selecting the Right Schedule .............. See Maint. Book
Service and Appearance Care ........................ 245
Service Center Inspec. & Serv.............. See Maint . Book
Service Engine Soon Light ........................... 142
Service Publication ..................See Owner Assistance
311
Service Parts Identification Label .....................
Service Station Checks ................... See Maint. Book
Servicing Your Cadillac With Air gag System ............ 37
Setting The Clock ..................................
163
Setting The Trip Odometer ..........................
131
Sheet Metal Damage ................................
307
Shift Lever, Positions Of ..............................
90
Shifting Into Park ...................................
96
Shifting Out of Park .................................
98
24
Shoulder Belt Tightness Adjustment ....................
105
SignalingTurns ....................................
184
Skidding ..........................................
Slippery Surfaces, Driving On ........................
198
Smaller Children, Use Of Lap-Shoulder Belt ............. 48
Snow, If You’re Stuck In Deep ........................
199
Snow Or Ice, Driving On ............................
197
Snowstorm, If You’re Caught In A Bad ................ 199
303
Solvent-Type Cleaner On Fabric ......................
Sound Equipment, Adding .......................
152, 311
Sound System ......................................
151
Sound System, How to Operate Your .................. 153
Spare Tire .....................................
242, 243
Specifications ......................................
319
Speedometer And Odometer .........................
131
Stains, Removing ......................................
303
Start (Ignition Key Position) ..........................
86
Starting Your Engine ................................
86
Starting Your Car If The Battery Is “Dead” ............. 214
Steam From Hot (Overheated) Engine ................. 223
179
Steering ...........................................
102
Steering.Power .....................................
13
Steering In Emergencies .............................
180
SteeringTi s ......................................
179
Steering&eel.Tilt
................................ 102
Steering WithoutPower Assist .........................
179
Stereo Sound Systems ...............................
151
StorageArmrest ...................................
129
Storing Your Vehicle ................................
277
Stuck. If Your Ignition Key Is...........................
86
Stuck. If Car Is .In Sand. Mud. IceOr Snow ............ 244
Subscribingto Cadillac Product Serv
....See Owner Assistance
Sunglasses. Wearing At Night ........................
186
Supplemental Inflatable Restraint System ............... 30
Surge Tank Pressure Cap ............................
269
Symbols Used On Your Vehicle .........................
3
2'
,
~
.-. . ..
.
.I
......
ri
.
....
Table Of Contents ....... See "Front of Owner Info.Manual"
.Ullight Bulb Replacement ...........................
281
Tamper-Resistance Of Odometer .....................
131
'Tape Player Care ...................................
163
Tem .erature, Engine, Warning Light .................. 136
The ..............................................
81
Theft Deterrent System (Option) ......................
82
Thermostat ........................................
269
Third Gear, When To Use ............................
93
Tilt Steering Wheel ..................................
102.
Time, Setting The ..................................
163
Tire Chains ........................................
300
Tire, Flat ..........................................
231
TireInflation ......................................
292
Tire Ins ection and Rotation .........................
294
Tires -- hading ....................................
289
Tire Quality Grading ................................
297
Tires ..............................................
291
Tires, When It's Time For New Tires .................. 295
Tires, White Sidewall, Cleaning .......................
307
ToneControl,Automatic ............................
156
Torn Safety Belts ....................................
66
Torque Lock ........................................
98
Towmg A Trailer ...................................
201
TowingYourCadillac ...............................
219
Traction Control Disable Switch ......................
177
Traction Control System Lights .......................
134
%-action Control System .............................
175
Trademarks,GM ....................................
245
....................................... 201
Trailer
Trailer Towing Package ...............................
94
Transmission,Automatic .............................
90
4
262
TransmissionFluid ..................................
Transmission Gear Positions ............................. 90
See Maint. Book
Transmission Service .....................
178
Travel, Brake Pedal .................................
131
Trip Odometer .....................................
140
Tkunk Ajar Light ...................................
74
Tnxnk Release, Remote ..............................
75
Tnulk, AutomaticPull-Down Feature ....................
Turn Signal andLane Change Indicator................ 105
107
Turn Sigd/Headlight Beam Lever ....................
117
Wlight Sentinel ...................................
29
TwisW Safety Belts..................................
Tl[irio ldren WearingTheSameSafetyBelt ............. 63
U
UnderbodyMaintenance ............................
Underhood Lit ...................................
Uniform Tire uality Grading........................
UnleadedGasoline .................................
UpholsteryCare ...................................
UrbanDnving .....................................
Used Oil, How To Dispose Of ........................
8
308
118
297
246
302
190
260
V
In
Vanity Mirrors, Front Seat ...........................
Vanity.Mirrors,Rear Seat ............................
Vehicle Dama -eWarnings .............................
Vehicle Ident' 'cation Number(VIN)..................
VehicleStorage ....................................
Vehicle Symbols ......................................
Vents .............................................
Vinyl,Cleaning .....................................
d
124
124
2
310
277
3
146
304
W
warning
Light, Antilock Brake System ......................
Light, Brake Svstem ..............................
133
132
Wear Indicators, Front Brake ........................ 177
Weatherstrips, Cleaning .............................
307
187
Wet Road Driving ..................................
Wheel Alignment And Tire Balance ................... 298
Wheel Nut Torque ..................................
239
Wheel Replacement ................................
298
307
White Sidewall Tires, Cleaning .......................
15
Why Safety Belts Work ...............................
Why Wear Safety Belts? ..............................
15
Windows,Power ...................................
103
Windshield
109
Washer .........................................
Washer Fluid ....................................
271
Wipers .........................................
108
196
Winter Driving .....................................
287
Wiper Blade Replacement ...........................
Working On Your Car ...............................
245
Worn Tires ........................................
295
Wrecker Towing .....................................
219
1
I1
I IIIIl1IIllIl11Ill11
H-3122
ilt;
I
5 I'
n