1
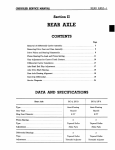
CHRYSLER SERVICE MANUAL
BRAKES—17
REAR AXLE
There is no basic design change in the rear axle and
sure grip differential except the larger diameter
pinion shaft is now used on all models for 1959. The
Service Procedures will remain the same on the Rear
Axle and Sure Grip Differential as specified in the
1958 Chrysler and Imperial Service Manual, D16350.
Section III
BRAKES
DATA AND SPECIFICATIONS
MODELS
MC-1
TYPE
DRUM DIAMETER
MC-2, MC-3, MY-1
Total Contact (Floating Shoe) Hydraulic
... ,
11 in.
LINING
Type
Attachment
Width
Thickness
12 in.
Moulded Asbestos
Cyclebond
2Y2 in.
l
%i in-
BRAKE SHOE RETURN SPRING TENSION USING
FISH SCALE HOOKED AT TOE OF SHOE
35 to 45 lbs. required to break contact
between shoe and push rod
BRAKE PEDAL FREE PLAY
% in. to J^ in.
(in models with Power Brakes)
WHEEL CYLINDER BORE
Front—Upper and Lower
Rear
1% in.
1K m -
MASTER CYLINDER BORE
V/% in.
PISTON CLEARANCE
.003 in. to .0065 in.
HAND BRAKE
MODELS
MC-1, MC-2, MC-3, MY-1
TYPE
Internal Expanding
LOCATION
Propeller Shaft at Rear of Transmission
DRUM DIAMETER.
LINING TYPE
Length
Width
Thickness
Clearance
7 inch
,
Moulded and Compressed Asbestos
13.06 inch
2 in.
% m.015 in. to .020 in.
18—BRAKES
CHRYSLER SERVICE MANUAL
TOTAL CONTACT SERVICE BRAKES (Figs. 19 and 20)
Servicing procedures outlined in the 1958 Chrysler
and Imperial Service Manual, D-16350, will apply
to the 1959 models with the exception of the removal
and installation of the new brake shoe retainer.
All brake shoes have a coil spring type guide. The
guide retainer pin extends through the dust shield,
the web of the shoe, a flat washer, the coil spring and
the cupped retainer.
Removal — While holding retainer pin in dust
shield, push retainer toward brake shoe, turning the
retainer to unlock it from the pin.
Remove retainer, spring and washer from pin.
Remove retainer pin from dust shield.
Installation — Insert retainer pin through the dust
shield and brake shoe. Install washer, spring and retainer on retainer pin.
While holding retainer pin in dust shield, push retainer toward brake shoe, turning the retainer to
lock it on the pin.
MASTER CYLINDER
The master cylinder used with power brakes has an
adjustable pushrod. A new master cylinder assembly
is used on Chrysler Models without power brakes.
The new master cylinder has a non-adjustable
push rod-and-piston stop which is permanently attached to the piston. The boot retainer is also a part
of the assembly. The assembly is attached to the
mounting face of the master cylinder body with two
UPPER CYLINDER
ADJUSTING C A M
.- SHOE AND UNING
DUST SHIELD-v.
— SHOE RETAINER
SHOE RETURN
SPRING
:
SUPPORT-^
SHOE RETURN
SPRING
-ADJUSTING CAM
SHOE RETAINE
CONNECTING
TUBE
LOWfi? CYLINDER
Fig. 19 —Total Contact Brake Assembly (Front)
CYLINDER ASSEMBLY
SHOE RE'
SPRINGS
ADJUSTING CAMS
DUST SHIELD
SHOE RETAINERS
SUPPORT
ANCHORS
SHOE AND ^**z~~LINING
Fig. 20 — Total Contact Brake Assembly (Rear)
CHRYSLER SERVICE MANUAL
screws. No attempt should be made to disassemble
this push rod and piston.
The combined action of the piston return spring
and the pressure in the master cylinder is sufficient
to hold the brake pedal in the "off" position, without
a pedal return spring and pedal stop. The brake
pedal should never be pulled back beyond the limit
controlled by the piston stop. A minimum pull of 50
pounds could pull the piston off the push rod.
PISTON TYPE POWER BRAKE UNIT
The 1959 Chrysler and Imperial Models will have
both the "Bellows Type" Power Brake as well as the
"Piston, Type." The servicing procedure for the "Bellows Type" is the same as that in the 1958 Chrysler
and Imperial Service Manual. The servicing procedure for the "Piston Type" is outlined below:
The piston type power brake is an oval-shaped
air-vacuum unit (Fig. 21) mounted on the engine
side of the dash panel and is connected mechanically
to the brake pedal linkage through the power unit
push rod.
A yoke at the end of the piston rod is in contact
with the power lever pin of the reactionary linkage.
The valve operating rod is located at the center of
piston rod and is always in contact with a ramp at
the upper end of the valve trigger arm of pedal linkage. A control valve operating rod (Fig. 21) moves
within the piston rod to actuate the vacuum valve
and poppet.
The mechanical contact between the power unit
BRAKES—19
and the brake linkage exists only when the power
unit is assisting in a brake application. In the event
there is a loss of engine vacuum, the brake pedal is
free to function independent of the power unit to
apply the brakes in the conventional manner.
PEDAL LINKAGE ADJUSTMENTS (ON CAR)
It should seldom be necessary to adjust the brake
pedal trigger arm. Adjustment, however, may be
necessary, occasionally, to eliminate the following
conditions:
If the pedal pressure releases slowly, adjust by
rotating the adjustment screw in a counter-clockwise direction. A time delay (noted during a fast
brake application), can usually be corrected by making a clockwise adjustment on the adjusting screw.
Should the pedal vibrate (booster chatter), turn the
adjusting screw in a counter-clockwise direction.
NOTE: Rotation of adjustment screw should be
limited to plus or minus 90 degrees about original
setting.
ASSEMBLY OF PEDAL LINKAGE IN PEDAL BRACKET
CAUTION
Use extreme care during assembly or handling of
the linkage as the power brake pedal trigger arm is
easily damaged.
After reinstalling the brake pedal linkage in the
pedal bracket, a wooden wedge should be placed between the power brake lever and the forward edge
of the triangular hole in the pedal bracket (if power
VACUUM
VACUUM HOSE
VACUUM CHAMBER
VACUUM TUBE /
VALVE PASSAGE /
RETURN SPRING
GASKET
SPRING
SEAL
VALVE ROD
RETURN SPRING
AIR
CLEANER
ATMOSPHERIC
VACUUM VALVE OPERATING £
CHAMBER
ROD
DIRECTION
VALVE
ATMOSPHERIC VALVE
(PORT
OPEN)
(PORT CLOSED)
Fig. 21 — P o w e r Brake Unit (Sectional View)
57x176
CHRYSLER SERVICE MANUAL
20—BRAKES
ARBOR
(TOOL)
f-<
^
GAUGE
BLOCK
(TOOL)
57x17
Fig. 22 - Power Brake Unit (Exploded View)
unit has been removed). This will prevent the trigger arm from extending beyond the extremities of
the bracket.
LUBRICATION
Except for an occasional few drops of SAE 10W Engine Oil on the power brake lever pin bushings, the
brake pedal linkage requires no further lubrication.
The power unit will require no lubrication under
normal usage.
PEDAL FREE PLAY ADJUSTMENT
After the master cylinder, booster, and pedal linkage are completely installed (and wooden wedge removed), a free play adjustment check should be
made at no vacuum as follows:
NOTE: Removing vacuum hose and pressing the
brake pedal several times will aid in obtaining the
no vacuum condition.
Insert the blade of a screw driver between the
rubber collar of the power brake trigger pivot and
the rear side of elongated hole in the power brake
lever, forcing them apart.
NOTE: If the brake pedal and the power brake lever
are not wedged apart, a false free play setting (which
includes booster valve travel) will be measured at
the pad end of the pedal.
Check free play with linkage in this position by
pushing lightly at the pad end of the brake pedal.
Pedal free play travel should be between 1/32 and
Vs inch. If pedal free play movement does not come
within the required limits, adjustment is made by
lengthening or shortening the push rod as required.
ALTERNATE METHOD OF MEASURING PEDAL
FREE PLAY
Remove master cylinder push rod end pin. Using
light finger pressure, move push rod forward until
contact is made with the master cylinder piston. Attempt to insert the push rod pin through the
power lever and push rod end hole. If the push rod
must be pulled back to allow passage of the push rod
end pin, free play is present.
If the push rod must be pushed further into the
master cylinder to allow passage of push rod end
pin, no free play is present and an adjustment must
be made at the push rod.
POWER BRAKE
a. Removal (Fig. 22)
Place a wood wedge between power brake lever and
CHRYSLER SERVICE MANUAL
BRAKES—21
forward edge of triangular hole in pedal bracket, to
prevent trigger arm from extending beyond extremities of bracket.
NOTE: If pedal linkage is allowed to extend through
hole in dash panel the trigger arm may be damaged.
Disconnect vacuum hose at power unit. Remove
attaching bolts at dash panel and carefully remove
power unit assembly.
END PLATE
SPRING
RETAINER PLATE
POPPET DIAPHRAGM
APPLYING
DIAPHRAGM
VALVE ROD
APPLYING PIN
TUBE AND
PLATE
ASSEMBLY
VALVE
ROD
SEAL
SPRING
RETAINER
WASHER
NOTE: Use care to prevent loss of the pedal linkage
cross pin.
PISTON
SPRING
b. Disassembly
Scribe across flange of cylinder and end plate as a
guide to correct assembly (Fig. 23).
ROD END
SCREW (4)
VACUUM HOSE
VALVE ROD
57x201
Fig. 24 — Disassembly of Tube and Plate Assembly
NOTE: Do not clamp yoke in vise during any operation.
Install a new vacuum cylinder gasket and connect
vacuum hose. Align vacuum cylinder and end plate
scribe marks and assembly.
Remove the cylinder shell and gasket, disconnecting the vacuum hose from the air cleaner cover.
c. Installation
Position the power brake unit on dash panel of car
so that its axis inclines down toward front of car.
(Fig. 28)
CAUTION
The vacuum tube must be in the lowest quadrant
(Fig. 4 ) . Make certain the bead at outer diameter of
diaphragm is in the annular groove of the tube and
plate assembly.
Install valve rod poppet and applying diaphragm.
NOTE: Before installing the vacuum cylinder, make
the following test.
Depress the valve rod and at the same time, try
to blow through the vacuum hose. Failure to blow
through the hose indicates the poppet assembly is
properly seated.
VACUUM CYLINDER
AIR CLEANER
COVER
NUT (4)
END PLATE
MATING MARKS
AIR CLEANER
HAIR
NOTE: As yoke passes through dash panel, be sure
that it engages pedal linkage correctly by sliding over
nylon bushings on power brake lever cross pin. Install and connect master cylinder.
Replace four hex nuts and lockwashers, tighten
nuts securely, and release pedal. Install vacuum hose
and hose clips, operate engine and check pedal free
play. Refer adjustment on "pedal free play."
d. Lubrication
The power unit will require no lubrication under
normal use. If the unit is disassembled for overhaul
or repair, all oil seals and " 0 " rings must be suitably
coated with silicone grease before assembly.
RETAINING PINS
STOP WASHER
GASKET
PISTON ROD
BOLT AND
LOCKWASHER (4)
SCREWS (3)
END PLATE
57 x 200
57x202
Fig. 23 — Removal of Air Cleaner and
Vacuum Cylinder)
Fig. 25 — Removal of Vacuum Piston, Spring and Piston Rod
CHRYSLER SERVICE MANUAL
22—BRAKES
PISTON
LEATHER PACKING
EXPANDER SPRING
RETAINER PLATE
COTTON WICK
INSPECTION PORT SCREW
GASKET
PISTON ROD SEAL
SCREW AND SEAL WASHER (4)
MOUNTING RING
SPRING
PISTON PLATE
EXPANDER SPRING
SCREW (6)
W
GASKET
END PLATE
57x203
Fig. 26 — Disassembly of Vacuum Piston
57x204
PEDAL LINKAGE
Fig. 27 — Removal of Mounting Ring, Seal
and Washer
a. Removal from Pedal Bracket (Power Unit Installed)
Remove pedal return spring, master cylinder push
rod end pin and power brake pedal lever shaft.
Rotate pedal linkage assembly counter-clockwise
while withdrawing power lever cross pin from booster unit yoke.
Scribe across the tube plate and piston plate to
insure correct assembly. Remove the vacuum rod
applying pin, and tube and plate assembly (Fig. 24).
Remove the retainer plate, spring and valve as an
assembly. Remove the nylon button and the valve
rod seal. Remove the valve rod snap ring and remove
the washer and spring. Remove the valve rod from
the piston rod end.
PEDAL TRIGGER ARM
Remove the piston rod retaining pins from the
piston and separate the piston and piston rod. Remove the piston rod and rubber stop washer (Fig.
25).
Refer to Figure 26 and disassemble the piston.
Separate the mounting ring from the end plate
(Fig. 27). Remove the retaining spring, seal retainer, piston seal and rubber gasket. Remove the inspection port screw from the mounting ring.
b. Cleaning and Inspection
Clean all rubber parts in alcohol. Thoroughly wash
all metal parts. If inspection reveals nicks or scratches on the piston rod, valve seat at end of valve rod,
POWER BRAKE
CYLINDER ASSEMBLY
POWER LEVER PIN
RETURN SPRING \
•——YOKE
POWER LEVER
PEDAL MOUNTING
BRACKET
TRIGGER
*~^" PIVOT BOLT
MASTER CYLINDER
ASSEMBLY
W
PUSH ROD
END PIN
FRONT OF DASH PANEL
!
^.
MASTER CYLINDER PUSH ROD
Fig. 28 — Power Brake Unit Installed
:
TRIGGER
ADJUSTING
SCREW
BRAKE PEDAL
SHAFT
ACCESSORY BELT DRIVES—23
CHRYSLER SERVICE MANUAL
or valve seat at center of piston plate, replace parts.
Replace an excessively worn leather packing or
piston rod leather seal.
c. Assembly
Be sure all metal parts are clean and thoroughly dry.
Refer to Figure 26 and assemble piston plate as follows: With ribbed portion up, position the leather
packing and piston plate. Install the wick, expander
spring and wick retainer plate.
NOTE: Dip the wick in vacuum cylinder oil prior to
installation.
Refer to Figure 27 and assemble the mounting
ring and end plate as follows:
Insert the end plate mounting plate screws in the
end plate and install the rubber gasket. Apply silicone grease to outer face of gasket around center
hole. Position the piston rod seal and retainer and
retaining spring. Coat the bearing surface of mounting1 ring with silicone grease and install the mounting ring (ribbed portion up).
Slide the piston rod stop washer on the piston rod.
CAUTION
Before inserting the piston rod through the leather
seal, cover approximately 1*4 inches of the piston
rod with scotch tape to prevent the sharp edges of
the piston rod from damaging the seal.
Insert the piston rod through the seal and position
the piston spring on the end plate. Insert the piston
rod into the piston and install the retaining pins
(Fig. 25).
Insert the valve rod in the piston and install the
valve rod spring, washer and snap ring. Install the
valve rod seal and valve rod nylon button.
Position the retainer plate, spring, and poppet on
the piston. Install the tube and plate assembly.
NOTE: Pedal is slotted to provide clearance for removal of brake pedal assembly.
d. Installation of Pedal Linkage in Pedal Bracket
CAUTION
Use extreme care during assembly or handling of the
linkage, as the power brake pedal trigger arm is easily damaged.
After reinstalling brake pedal linkage in pedal
bracket, a wooden wedge should be placed between
power brake lever and forward edge of triangular
hole in pedal bracket (if power unit has been removed). This will prevent trigger arm from extending beyond extremities of bracket.
SERVICE DIAGNOSIS
PEDAL RELEASES SLOWLY AFTER APPLICATION
OR BRAKE PEDAL VIBRATES (BOOSTER CHATTER)
LACK OF POWER ASSISTANCE (WHEN COLD)
NOTE: This condition only occurs when the car has
Pedal trigger arm improperly adjusted. Rotate linkage adjusting screw in counter-clockwise direction.
See paragraph "Adjustments."
been setting for a long period of time ( storage ). Unit
must be disassembled, cleaned of all old lubricants,
seals and diaphragm must be softened with silicone
grease before unit will function properly.
DELAY IN APPLICATION (NOTED DURING FAST
BRAKE APPLICATION)
Pedal trigger arm improperly adjusted. Rotate the
linkage adjusting screw in a clockwise direction. See
paragraph ''Adjustments."
LEAKS IN BOOSTER (Whistle when Brake is Applied)
a. Air leaks in vacuum lines.
b. Leaks in power cylinder. Recondition complete
power cylinder assembly.
Section IV
ACCESSORY BELT DRIVES
The satisfactory performance of the belt driven accessories depends on the maintenance of the proper
belt tension. If the specified tensions are not main-
tained, belt slippage may cause engine overheating,
lack of power steering assist, loss in air conditioning
capacity, air suspension height control failure, re-