1
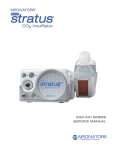
EGA-500 SERIES SERVICE MANUAL 1 FUJINON® is a trademark of FUJIFILM Corporation OLYMPUS® is a registered trademark of OLYMPUS Corporation. PENTAX® is a registered trademark of Hoya Corporation. ENDO STRATUS®, ENDO SMARTCAP®, ENDOGATOR®, DEFENDO® and Y-OPSY® are registered trademarks of MEDIVATORS Inc. MEDIVATORS® is a registered trademark of MEDIVATORS Inc. 50098-307 Rev A © 2014 MEDIVATORS Inc. All rights reserved. This publication is protected by copyright. Copying, disclosure to others or the use of this publication is prohibited without the express written consent of MEDIVATORS Inc. MEDIVATORS reserves the right to make changes in the specifications shown herein without notice or obligation. Contact your MEDIVATORS representative or MEDIVATORS customer service for more information. 2 Table of Content Theory of Operation ................................................................................. 5 Indication of Use ...................................................................................... 5 Contraindications ..................................................................................... 5 Warnings & Cautions ................................................................................ 6 Technical Specifications ........................................................................... 9 Mechanical Specifications ........................................................................ 9 Accessory Items ..................................................................................... 10 Controls & Connections .......................................................................... 11 Setup & Operation .................................................................................. 14 Care & Maintenance ............................................................................... 17 Electromagnetic Compatibility (EMC) Information .................................. 18 Cover Removal ...................................................................................... 21 EGA-500 Components ........................................................................... 23 Control Board ......................................................................................... 24 Power Supply ......................................................................................... 25 Pump tray & Water Bottle Warmer ......................................................... 26 Troubleshooting ..................................................................................... 26 Unit will not power one ...................................................................... 26 Power switch flashing ....................................................................... 28 Water heater switch illuminates blue rather than green .................... 29 Pump stops running when pump head is rotated slightly .................. 29 Motor speed does not stop completely when knob is turned to zero 29 Component Replacement ....................................................................... 31 Pump Head Replacement ...................................................................... 32 Pump Head Mounting Plate Replacement ............................................. 33 3 Motor & Driver Board Replacement ........................................................ 34 Power Supply Replacement ................................................................... 36 Control Board Replacement ................................................................... 38 Power Switch & Boot Replacement ........................................................ 39 H2O Heater Switch Replacement ........................................................... 40 Prime Switch Replacement .................................................................... 41 Motor Switch Control Replacement ........................................................ 41 Foot Pedal Switcher Replacement ......................................................... 43 Parts List ................................................................................................. 44 Disposal ................................................................................................. 44 Warranty ................................................................................................. 45 4 Theory of Operation The MEDIVATORS® ENDO STRATUS® Irrigation Pump works by turning a peristaltic-roller-type pump head to move liquid through a tube set and into a GI endoscope system. The pump head will not operate if the pump head is open, and will cease to operate if the pump head is opened while the motor is activated. The unit incorporates a “prime” feature which allows the unit to operate for a pre-set period of time. This feature can be canceled while in progress by pressing the foot pedal or Prime button again. The water bottle warmer is intended to maintain the warmth of the water in a sterile water bottle that has been pre-warmed. It is controlled by dual temperature sensors for redundancy and safety. There is a heating element integrated into the water bottle holder which then radiates heat through the bottle and into the water. The temperature of the water bottle holder is maintained at a maximum of 37°C ± 3°C. Definitions: Throughout this document the ENDO STRATUS Irrigation Pump may be referred to as “unit”, “machine” or “device” mL/min – milliliters per minute (flow) VAC – Volts Alternating Current (electrical potential) kPa – kilo Pascal (pressure) W – Watts VA – Volt Amps Hz – Hertz (frequency) Indications for Use: Federal (USA) law restricts this device to sale by or on the order of physician. The ENDO STRATUS Irrigation Pump is indicated for GI endoscopic irrigation with room temperature or warm water for use with washing catheters, integral GI endoscope water jet channels and GI endoscope working channels. The device contains a heated water bottle cradle that is intended to maintain a sterile water bottle for GI endoscopic irrigation at a maximum temperature set point of 37°C with a tolerance of ± 3°C. Contraindications: The device should only be used for GI endoscopic procedures requiring irrigation of the gastrointestinal tract and should not be used for any other treatments or procedures. The device is not intended for use with or exposure to magnetic resonance imaging (MRI) systems. Do not use the device in an environment where it could be exposed to MRI systems. 5 Warnings and Cautions Signal Words WARNING: = Indicates a potentially hazardous situation which if not avoided, could result in death or serious injury. CAUTION: = Indicates a potentially hazardous situation which, if not avoided, may result in minor or moderate injury. It may also be used to alert against unsafe practices or potential equipment damage. Safety Symbols Attention i Refer To Operating Instructions Warning: Dangerous Voltage Equipotentiality DO NOT Allow Fingers to Contact Moving Parts Hot Surface 6 MR Unsafe Warnings To reduce risk of electrical shock, do not remove cover. Refer servicing to qualified service personnel. To avoid the risk of electric shock, this equipment must only be connected to a supply mains with protective earth ground. The ENDO STRATUS® Irrigation Pump is not suitable for use in the presence of a flammable anesthetic mixture with oxygen. The ENDO STRATUS irrigation pump shall be sold only by prescription for use by physicians/clinicians who are trained regarding the amount of water to use for irrigation and infusion. Always watch for abnormal flow rates and adjust the flow rate as necessary. If an unusual flow rate remains after adjustments have been made, then stop the procedure and investigate. Only qualified medical personnel in an acceptable medical facility should operate the ENDO STRATUS irrigation pump. The ENDO STRATUS irrigation pump should be connected to a properly grounded receptacle marked “Hospital Grade” or “Hospital Only,” otherwise grounding reliability cannot be achieved. Extreme precaution must be taken when handling liquids around electrical equipment. DO NOT operate the ENDO STRATUS Irrigation Pump if liquid has been spilled on the unit. The ENDO STRATUS irrigation pump should not be used adjacent to or stacked with other equipment other than another ENDO STRATUS device. Electromagnetic or other interference may occur between the ENDO STRATUS irrigation pump and other electronic devices. If stacked or adjacent use is necessary, the equipment or system should be observed to verify normal operation in the configuration in which it will be used. The ENDO STRATUS irrigation pump should only be used in conjunction with other equipment whose safety against leakage currents has been established. The instructions contained in the operating manuals of any equipment to be used in conjunction with the ENDO STRATUS irrigation pump must be followed to avoid any possible hazard from incompatibility. The instructions for use described in this manual MUST be followed. Otherwise, compromised safety, malfunction, injury to the operator and/or patient, or costly damage to the unit and other equipment may occur. The ENDO STRATUS irrigation pump must be connected to an appropriate power source when loss of power source would result in an unacceptable risk. 7 Caution If emergency or abnormal function occurs, immediately turn off the power to the unit. Field-servicing of the ENDO STRATUS® Irrigation Pump is limited to the replacement of the power cords, water bottle holder and heater assemblies, pump heads, foot pedals and fuses. Remove power from the device before initiating any field servicing of the replacement parts. There are no user serviceable parts inside the ENDO STRATUS irrigation pump unit. Repairs to the ENDO STRATUS irrigation pump should only be performed by qualified service personnel. Do not use the device if the enclosure is damaged or enclosure integrity has been compromised. Do not attempt to operate the device before reading and understanding all sections of this manual. Medical electrical equipment needs special precautions regarding EMC and needs to be installed and put into service according to the EMC information provided in “Electromagnetic Compatibility (EMC) Information Tables” Section. Portable and mobile radio frequency (RF) communications equipment can affect medical electrical equipment. Do not expose the device to sources of electromagnetic interference such as CT equipment, diathermy equipment, cellular phones, RFID tags and metal detectors. Product Features Built in water bottle warmer maintains water at up to 37°C with an allowable tolerance of ± 3°C “Prime” feature runs pump for 20 seconds with automatic timer Includes side water bottle clip for traditional water bottle holder Safety feature prevents pump from running when pump head is open Robust motor design for consistent performance Water bottle holder is angled for easier access to water bottle and tubing 8 Technical Specifications Electrical Specifications Input Voltage 100-240 VAC Input Frequency 50-60 Hz Power Consumption 110 VA Fuse Rating M10AL250V Medium acting, 10 amp, low breaking capacity, 250 volt Replace fuses only with those of same type and rating Certifications IEC-60601-1, IEC-60601-1-2, IEC-60601-2-18 Classifications Class 1 Type B Water Bottle Warmer 20W resistive element with dual temperature sensors IP Rating (Ingress Protection) IP24 Warning: Grounding reliability can only be achieved when connected to a receptacle marked “Hospital Grade”. Mechanical Specifications Physical Dimensions: Height 4-3/4 inches 121 mm Width 7-3/4 inches 197 mm Depth 13-3/4 inches 349 mm Weight 10.5 pounds 4.8 kg Flow Rates: Auxiliary Water Channel 0-300 ml/min* Biopsy Channel 0-650 ml/min* *These values are approximate and are based on an average flow obtained with three different manufacturer’s GI endoscopes with biopsy channel diameters ranging from 2.8 mm - 4.2 mm and auxiliary water channel diameters ranging from 0.8mm - 0.1 mm. User results may vary depending on scope used, channel size and working channel length. 9 Controls and Connections Front Panel Note: All status indicator lights will be green during normal operation. (The appearance of your device may differ slightly from picture shown above) 1. On/Off Push Button Turns main power ON or OFF to the unit 2. H2O Heater On/Off Push to turn water warmer on or off 3. Pump Flow Control The Flow Control Knob is a continuous variable flow control that has settings between 0 and 100% flow. The lowest knob setting corresponds to no flow while the max flow control setting represents 100% flow. It contains bracketed visual iterations to represent flow magnitude in increasing increments of approximately 10%, however the flow control knob response is not entirely linear. Incremental flow control knob increases between 50-100% have a larger impact on flow rate response as compared to incremental changes between 050%. Flow Rates: Auxiliary Water Channel 0-300 ml/min* Biopsy Channel 0-650 ml/min* *These values are approximate and are based on an average flow obtained with three different manufacturer’s GI endoscopes with biopsy channel diameters ranging from 2.8 mm-4.2 mm and auxiliary water channel diameters ranging from 0.8 mm-1.0mm. User results may vary depending on scope used, channel size and working channel length. 10 CAUTION: The MEDIVATORS® ENDO STRATUS® Irrigation Pump is intended for use only by physicians/clinicians who are trained regarding the amount of water to use for irrigation and infusion during GI endoscopic procedures. 4. Foot Pedal Switch Connection A pneumatic switch that is activated when air pressure is applied to the switch via the Foot Pedal. 5. Prime Button When pressed, pump will run for a period of 20 seconds. The cycle can be canceled at any time by either pressing the foot pedal or Prime Button again. 6. Pump Head Refer to “Component Replacement, Pump Head Replacement” Section for assembly instructions 11 Rear Panel Connections (The appearance of your device may differ slightly from picture shown above) 1. Water Warmer Connection Power connection for water bottle warmer 2. Equipotentiality (Earth Ground) 3. AC Power Connection AC power input 100-240 VAC, 50-60HZ WARNING: Use only the hospital grade power line cord supplied with this unit. Connect only to a power receptacle marked as hospital grade. 4. Fuse Receptacle WARNING: Replace only with type and rating marked M10AL250V 5. Water Bottle Holder and Warmer The Water Bottle Holder contains the heating element and an integral hold-down bracket to secure the water bottle in place. 12 Setup and Operation Initial Setup 1. Before beginning, inspect the MEDIVATORS® ENDO STRATUS® Irrigation Pump for any signs of damage. 2. Install the pump head onto the device by aligning the flat shaft on the front of the device with the slotted hole in the pump head and rotate the pump head until it locks in place. 3. Assemble the water bottle holder and warmer assembly in the following manner: Note: The following supplies are necessary and can be found in a bag attached to the water bottle holder (see figure 1): a - Short Screws (2) b - Long Screws (2) c - Large Hex Key d - Small Hex Key Figure 1 13 Attach the water bottle holder to the base tray using the (2) small screws and small hex key. See figure 2. Figure 2 Place the MEDIVATORS® ENDO STRATUS® Irrigation Pump on the base tray and install the (2) long screws using the large hex key. See figure 3. Figure 3 Adjust the water bottle hold-down bracket to fit the water bottles used by your facility. This is done by loosening the nut on the back and sliding the bracket up or down so it contacts the water bottle and then tightening the nut. 4. Plug the Water Warmer Cable into the receptacle marked “Water Warmer” on the back of the unit. 5. Place the ENDO STRATUS irrigation pump on a flat surface such as an endoscope accessory cart or other suitable working surface. 14 6. Before connecting the power cord to the hospital grade wall receptacle, make sure the power is off to the device, and no accessories are connected. 7. Connect the power cord to the back of the device. Pre-Procedure setup 1. Place the Foot Pedal on the floor and insert the foot pedal cord into the designated front panel receptacle. 2. Insert a water bottle containing sterile water into the water bottle holder CAUTION: Use of irrigation fluid other than sterile water can pose an infection risk to patients. Adjust the hold-down bracket by loosening the knob, lowering the bracket until it contacts the top of the bottle and then tightening the adjusting screw. After initial setup, if the same size and type of bottle is used, it should require no further adjustment. 3. Open a sterile pouch of the 100130 MEDIVATORS® ENDOGATOR® Irrigation Tubing or 100609 MEDIVATORS ENDOGATOR Hybrid Tubing. Read and follow its instructions for use. CAUTION: The MEDIVATORS ENDO STRATUS Irrigation Pump EGA-500 and EGA-500E is intended to be used only with specific models of compatible tubing sets, connectors and accessories identified in the table in Section IV or officially recommended by MEDIVATORS. Use of the device with accessories not identified in the accessories table or officially recommended by MEDIVATORS may result in incompatibility and/or the risk of cross contamination and infection transmission. 4. Connect the tubing to the water bottle. 5. Open the pump head and place the tubing into the pump head rollers so that the water flow will be from right to left facing the pump. Note: The device is equipped with a safety feature so that the pump will not operate if the pump head is open. 6. Turn the flow rate indicator to its lowest speed and turn the unit on. 7. Perform the following procedure to ensure the tubing is fully filled with sterile water each time before connecting to a GI endoscope: A. Direct the end of the tube into a receptacle capable of catching expelled water. B. Depress the foot switch and turn up the flow rate adjustment to the desired level based on the irrigation connection to the GI endoscope. PRIME FUNCTION: The prime function allows the user to perform this feature with the assistance of an automatic timer in lieu of pressing the foot pedal. Pressing the prime button will run the pump for a period of 20 seconds. If at any time the prime cycle needs to be stopped the button can be pressed again, or the foot pedal can be pressed. 15 CAUTION: Read and become familiar with all manufacturer’s instructions on warming ovens and water bottles regarding maximum fluid temperatures. Never exceed 40°C during water pre-warming. Shutdown 1. Press the Power Button to turn the unit off. The light should extinguish. 2. After the procedures are complete for the day, remove the tubing from the pump head and discard the tubing and water bottle. Note: MEDIVATORS® ENDOGATOR® Irrigation tubing may be used for 24 hours. Care and Maintenance Cleaning Before cleaning ensure the power to the unit is turned off and the electrical cord unplugged. The outside surface of the MEDIVATORS ENDO STRATUS® Irrigation Pump can be cleaned with a damp cloth, 70% isopropyl alcohol solution, or a 10% bleach with water solution as often as deemed necessary. Do not use abrasive or harsh cleaners. Do not allow liquid to enter the unit. To disinfect the outside surface, use a mild disinfectant according to the manufacturer’s instructions. Do not sterilize the unit by any means. Pump Head Maintenance If liquids are spilled onto the pump head, it should be removed and cleaned with a mild detergent. Remove any tubing from the pump head prior to removal for cleaning. The same cleaning procedure should be used to limit the build-up of dust (which can become electrostatically charged and/ or heated by friction). 16 Electromagnetic Compatibility (EMC) Information Medical electrical equipment needs special precautions regarding EMC and needs to be installed and put into service according to the EMC information provided in this section. Portable and mobile RF communications equipment can affect medical electrical equipment. Do not expose the device to sources of electromagnetic interference such as CT equipment, diathermy equipment, cellular phones, RFID tags and metal detectors. The use of accessories, transducers and/or cables other than those specified, with the exception of those sold by the manufacturer as replacement parts for internal components, may result in increased emissions or decreased immunity of the equipment or system. The equipment or system should not be used adjacent to or stacked with other equipment. If adjacent or stacked use is necessary, the equipment or system should be observed to verify normal operation in the configuration in which it will be used. EMC Tables Table 1 – Guidance and MANUFACTURER’S Declaration ELECTROMAGNETIC EMISSIONS For All ME EQUIPMENT and ME SYSTEMS Guidance and Manufacturer’s Declaration - Emissions The EGA-500 / EGA-500E is intended for use in the electromagnetic environment specified below. The customer or user of the EGA-500/EGA-500E should ensure that it is used in such an environment. Emissions Test Compliance Electromagnetic Environment-Guidance The EGA-500/EGA-500E uses RF energy only for its internal function. Therefore, its RF RF Emissions Group 1 emissions are very low and are not likely to CISPR 11 cause any interference in nearby electronic equipment. RF Emissions Class A The EGA-500/EGA-500E is suitable for use in all establishments, other than domestic, and those Harmonics IEC Class A directly connected to the public low-voltage 61000-3-2 power supply network that supplies buildings Flicker IEC Complies used for domestic purposes. 61000-3-3 17 Table 2 – Guidance and MANUFACTURER’S Declaration Electromagnetic IMMUNITY For All ME EQUIPMENT and ME SYSTEMS Guidance and Manufacturer’s Declaration – Electromagnetic Immunity The EGA-500 / EGA-500E is intended for use in the electromagnetic environment specified below. The customer or user of the EGA-500/EGA-500E should ensure that it is used in such an environment. EN/IEC Compliance Immunity 60601 Test Electromagnetic Environment - Guidance Level Test Level ± 6kV ± 6kV Floors should be wood, concrete or ceramic tile. ESD EN/IEC Contact Contact If floors are synthetic, the r/h should be at least 61000-4-2 ± 8kV Air ± 8kV Air 30%. EFT EN/IEC ± 2kV Mains ± 2kV Mains Mains power quality should be that of a typical 61000-4-4 ± 1kV I/Os ± 1kV I/Os commercial or hospital environment. ± 1kV ± 1kV Surge Differential Differential Mains power quality should be that of a typical EN/IEC ± 2kV ± 2kV commercial or hospital environment. 61000-4-5 Common Common >95% Dip >95% Dip for for 0.5 Cycle Mains power quality should be that of a typical 0.5 Cycle 60% Dip for Voltage commercial or hospital environment. If the user of 60% Dip for 5 Cyclers Dips/ the EGA-500/EGA-500E requires continued 5 Cyclers 30% Dips for Dropout 30% Dips for operation during power mains interruptions, it is 25 Cycles En/IEC recommended that the EGA-500E be powered 25 Cycles >95% Dip 61000-4-11 >95% Dip for from an uninterruptible power supply or battery. for 5 5 Seconds Seconds Pwer Frequency 50/60Hz Power frequency magnetic fields should be that Magnetic 3A/m 3A/m of a typical commercial or hospital environment. Field EN/IEC 61000-4-8 18 Table 3 – Guidance and MANUFACTURER’S Declaration Electromagnetic IMMUNITY For ME EQUIPMENT and ME SYSTEMS That Are Not LIFE-SUPPORTING Guidance and Manufacturer’s Declaration – Electromagnetic Immunity The EGA-500 / EGA-500E is intended for use in the electromagnetic environment specified below. The customer or user of the EGA-500/EGA-500E should ensure that it is used in such an environment. EN/IEC Immunity Compliance 60601 Test Electromagnetic Environment - Guidance Test Level Level Portable and mobile communications equipment should be separated from the EGA-500/EGA-500E by no less than the distances calculated/listed below: D=(3.5/V1) (Sqrt P) Conducted RF EN/IEC 61000-4-6 3 Vrms 150 kHz to 80 Mhz Radiated RF EN/IEC 61000-4-3 3 Vrms 80 MHz to 2.5 GHz D=(3.5/E1) (Sqrt P) 80 to 800 MHz (V1)Vrms = 3 Vrms (E1)V/m = 3 V/m D=(7/E1)(Sqrt P) 800 MHz to 2.5 GHz Where P is the max power in watts and D is the recommended separation distance in meters. Field strengths from fixed transmitters, as determined by an electromagnetic site survey, should be less than the compliance levels (V1 and E1). Interference may occur in the vicinity of equipment containing a transmitter. Table 4 – Recommended Separation Distances Between Portable and Mobile RF Communications Equipment and the ME EQUIPMENT Or ME SYSTEM For ME EQUIPMENT and ME SYSTEMS That Are Not LIFE-SUPPORTING Recommended Separations Distances for the EGA-500/EGA-500E The EGA-500 / EGA-500E is intended for use in the electromagnetic environment in which radiated disturbances are controlled. The customer or user of the EGA-500/EGA-500E can help prevent electromagnetic interference by maintaining a minimum distance between portable and mobile RF communications equipment and the EGA-500/EGA-500E as recommended below, according to the maximum output power of the communications equipment. Separation (m) 150kHz Separation (m) 80 to Separation (m) Max Output Power to 80MHz 800MHz 800MHz to 2.5 GHz (Watts) D=(3.5/V1)(Sprt P) D=(3.5/E1)(Sprt P) D=(7/E1)(Sprt P) 0.01 .1166 .1166 .2333 0.1 .3689 .3689 .7378 1 1.1666 1.1666 2.3333 10 3.6893 3.6893 7.3786 100 11.6666 11.6666 23.333 Type Power cable Approved accessories Manufacturer/Model Interpower/86610610 19 Maximum length 3.7m Cover Removal Tools Required: 5/64”Allen Wrench Phillips Screwdriver Procedure Remove the power cord from the wall outlet. Disconnect the Water Bottle Heater Cable from the back of the machine. Remove Water Bottle Warmer by removing the retaining screws (4). See figure 1. Remove the water bottle hanger bracket from left side of the unit. See figure 2. Figure 1 Figure 2 Figure 3 Figure 4 20 Gently pull the Water Bottle Warmer Bracket away from the machine and lift the pump from the tray. See figure 3. Remove the two cover retaining screws. Each screw is located on the left and right side near the back. See figure 4. Gently lift the cover off. See figure 5. Figure 5 21 EGA-500 Components Internal Pump Layout 1 2 7 6 3 4 5 8 9 10 11 Figure 1 1. Main Power switch 2. Foot Pedal activation switch 3. Pump speed potentiometer 4. H2O switch 5. Priming switch 6. 24 Volt Power Supply 7. Power Entry Module 8. Ground test point 9. Pump Motor 10. Control Board 11. Motor Controller Board 22 Control Board 1 2 3 4 5 6 7 Figure 2 12 11 10 List of connections 1. Motor Power ( Power to motor controller) 2. Power In (24VDC from power supply) 3. Water Heater power 4. Water Heater Temp Probes 5. Pump Head Reed switch 6. Foot Pedal switch 7. Unused 8. Power Switch Light 9. Pump Priming switch 10. Water Heater switch 11. Motor interface 12. Motor speed (connects to speed potentiometer) 23 9 8 Power Supply Description The Power Supply is a 150 watt medical grade power supply that is capable of operating at input voltages from 100 VAC to 240 VAC. The Power Supply outputs 24 VDC to the Control Board. It has an indicator LED that indicates proper operation. Wire Power Supply Terminal 1. Ground (Green and yellow) Ground 2. Neutral (white) ACN 3. Hot (100 VAC to 240 VAC) (Black) ACL 4. Ground DC (Black) COM (Note location in figure 2) 5. +24 VDC (Yellow) +V (Note location in figure 2) 6. Indicator LED N/A 24 Pump Tray and Water Bottle Warmer 1. Tray 2. Water Bottle Warmer Assembly 3. Water Bottle Warmer Cable 25 Troubleshooting Unit will not power on (Perform the steps below in the specified order) 120/240 VAC present Tools Required: Digital Multi Meter (DMM) Phillips screwdriver Note: Disconnect the power cord from the wall outlet before completing the following steps. 1. Remove the cover as outlined in “Cover Removal” Section. 2. Verify that the Power Switch on the front of the machine was fully depressed causing it to latch on. If the switch does not remain latched once it is fully depressed replace the Power Switch. 3. Verify all wires are securely connected at the Power Supply, Control Board and Power Entry Module. 4. Verify the voltage at the wall outlet is correct (100 VAC to 240 VAC). 5. Verify the fuse is functional. The fuse is located in the Power Entry Module on the back of the unit. See figure 1. Remove the fuse and test resistance with a digital multimeter. Replace if necessary. Remove fuse and test with voltmeter. Figure 1 26 6. Connect the machine to power and verify the correct voltage (100 VAC to 240 VAC) is present at the power supply input terminals. See figure 2 connections 2 and 3. If the correct voltage is not present, check the Power Entry Module and power cord. Figure 2 List of Connections 1. Ground 2. Neutral 3. +115/230 VAC 4. Ground DC 5. +24 VDC 6. Indicator LED Note: Disconnect the power cord from the wall outlet before completing the following steps. 7. Check continuity of the Power Switch: a. Unplug the Power Switch wire from the Power Entry Module. b. Disconnect the Power Switch wire from the Power Supply see figure 2 item 3. c. Connect a DMM between the two wires. See figure 3. d. Depress the Power Switch on the front of the unit and verify that it latches ON. An acceptable reading is 25 ohms or less. If you get a reading greater than 25 ohms replace the Power Switch. 27 Figure 3 8. Connect the machine to power and verify the green LED is lit on the power supply. See figure 2 Item 6. If not, replace the power supply. 9. Using a DMM verify there is 24VDC at the P11 connector (+24 VDC Power Supply Harness). If 24V DC is present replace the Control Board. Power Switch Flashing (Perform the check listed below in the specified order) A flashing Power switch indicates an incorrect operating voltage. 1. Verified the Power Switch latches in the ON position. 2. Unplug the machine from the wall outlet and check continuity of the Power Switch: a. Unplug the Power Switch wire from the Power Entry Module. b. Disconnect the Power Switch wire from the Power Supply. See “Troubleshooting, Unit will not power on” Section, figure 2 item 3. c. Connect a DMM between the two wires. See figure 3 in “Troubleshooting, Unit will not power on” Section. d. Depress the Power Switch on the front of the unit. An acceptable reading is less than 25 ohms. If you get a reading greater than 25 ohms replace the Power Switch. 3. Connect the machine to power and verify the green LED on the Power Supply is lit. See “Troubleshooting, Unit will not power on” Section, figure 2 item 6. If not, replace the Power Supply. 4. Using a DMM verify there is 24VDC at the P11 connector that routes from the Power Supply to the Control Board. If 24VDC is present replace the Control Board. 28 Water Heater Switch Illuminates Blue Rather Than Green In normal operation, when the Water Heater Switch is activated, the switch should be illuminated green in color. If the color changes to blue this is an indication of an error in the Water Bottle Warmer Circuit. Verify the Water Bottle Warmer Cable is connected to the rear of the machine. If plugged in, verify there is no damage to the pins. Replace the Water Bottle Warmer Assembly with a known good assembly, if the light turns green; replace the water bottle heater assembly. If the above steps do not solve the problem, replace the Control Board. Pump stops running when pump head is rotated slightly The motor is disabled when the Pump Head is opened. This is accomplished by a magnetic reed switch built into the Pump Head mounting bracket. The removable portion of the Pump Head has a magnet that must align with the sensor on the mounting bracket. If there is intermittent performance of the motor when the Pump Head is rotated clockwise or counter clockwise the Reed Switch on the Pump Head Mounting Plate could be defective. Ensure the reed switch cable is connected to J14 on the Control Board and the wires are fully inserted into the connector. If not, press the wires into the connector and connect the connector to the Control Board. Remove the J14 connector from the Control Board and measure the resistance between the two terminals with a DMM. While the Pump Head is closed, the resistance should be near 0 ohms, with the Pump Head open, the resistance should be infinite. With the Pump Head closed and locked into the mounting bracket, rotate the Pump Head clockwise and counter clockwise. If the resistance changes, the reed switch is not making sufficient connection with the Pump Head. Replace the Pump Head Assembly. Note: The Pump Head and Pump Head Mounting Bracket must be replaced as a set. Motor speed does not stop completely when knob is turned to zero 1. Verify the wiring of potentiometer assembly is not loose or disconnected at the crimp terminals. If there is a problem with the wiring, replace the potentiometer assembly. 2. Test by connecting a known good potentiometer assembly to J9 on the Control Board, and adjusting the motor speed from 0 to 100 and back to 0. If the motor stops when turned fully to zero, replace the original potentiometer assembly. 29 Water Bottle Warmer is not functioning Replace the Water Bottle Warmer Heater. Component Replacement Water Bottle Warmer Heater Replacement Tools Required: 1/4” Nut driver or wrench Phillips screwdriver Water Bottle Heater Removal 1. Disconnect the Water Bottle Warmer Cable at the back of the EGA-500. 2. Remove Water Bottle Warmer by removing the retaining screws (4). Refer to figure 1. Figure 1 3. Turn the Water Bottle Warmer over and remove the four retaining nuts and washers. 4. Remove retaining bracket. 5. Make note of orientation of defective heater. It’s important to apply replacement heater in the correct orientation. See figure 2. 30 Figure 2 6. Peel off defective heater. 7. Remove old adhesive from bottle heater plate. Water Bottle Heater Installation 1. Remove paper backing from adhesive side of heater and attach to bottle heater plate, making note to apply in the correct orientation. 2. Attach retaining bracket and secure with the four retaining nuts and washers. 3. Connect the Water Bottle Warmer Assembly to the Tray. 4. Connect the Water Bottle to the back of the EGA-500. Pump Head Replacement Pump Head Removal Disconnect the pump head by depressing the Pump Head Release Switch. Refer to figure 1. Rotate the head counterclockwise to release. Figure 1 31 Pump Head Installation Adjust the motor shaft so it is angled at the 10 o’clock position. See figure 2. Pump head release lever Figure 2 Insert the pump shaft over the motor shaft and turn the Pump Head clockwise to lock it into position. Move the Pump Head clockwise and counterclockwise to verify that it is locked into position. Pump Head Mounting Plate Replacement Tools Required 3/32 inch hex wrench Pump Head Mounting Plate Removal Remove the cover as outlined in “Cover Removal” Section. Remove the Pump Head per instruction in “Component Replacement, Pump Head Replacement” Section. Disconnect the pump reed switch plug from the J1 connection on the Control Board. Remove the pins from the J1 connector. Note the position of the pins in the plug for installation. Remove the three pump head screws, refer to figure 1. Remove the Pump Head Mounting Plate. 32 Figure 1 Pump Head Mounting Plate Installation Insert the reed switch wires through the opening in the front of the machine. Set the Pump Head Mounting Plate in place and secure with three screws. See figure 1 in the previous section. Insert the reed switch pins into the connector. The pins must be inserted into the connector in the proper orientation. Connect the Pump Head per instructions in “Component Replacement, Pump Head Replacement” Section. Attach the cover and secure with two (2) 5/64 hex screws. Install the Water Bottle Hanger to the left side of the Unit. Motor and Driver Board Replacement Tools Required 5/64 inch hex wrench 9/32 inch socket or wrench Loctite 262 or equivalent 1/4 inch socket or nut driver Motor Removal Note: The Motor and Motor Control Board must be replaced as a set. Disconnect power cord from the wall outlet. Remove the cover as outline in “Cover Removal” Section. 33 Remove the Pump Head as outlined in in “Component Replacement, Pump Head Replacement” Section. Disconnect the reed switch connector from J1 on the Control Board. Use a 3/32 inch hex wrench to remove the (3) screws form the Pump Head Mounting Plate. See in “Component Replacement, Pump Head Replacement” Section. Do not attempt to remove the reed switch cable from the machine. Disconnected all of the cables from the Motor Controller Board. Using a 5/64 inch hex wrench, loosen the set screw closest to the motor on the Motor Shaft Adapter. See figure 1. Loosen this set screw. Figure 1 Use a 5/16 inch nut driver or socket to remove the mounting nuts (4) that secure the Motor Mount Bracket to the chassis. Slide the Motor Bracket and Motor toward the rear of the machine and remove from the machine. Using a 9/32” socket or wrench and a hex wrench remove the mounting screws (4) from the Motor. Discard the Motor but retain the mounting bracket for installation of the new Motor. Remove the 1/4 inch nuts (2) that secure the Motor Driver Mounting Plate to the chassis. Remove the Motor Driver Board and Mounting Plate from the machine. Motor installation Install the new Motor onto the Motor Mount Bracket using the hex bolts and 9/32” nuts (4 each). Insert the Motor and Motor Mounting Bracket into the unit. Align the shaft of the Motor onto the Motor Shaft Adapter. Do not yet tighten the set screw. Attached and tighten the Motor Bracket mounting nuts (4). 34 Apply Loctite 262 or equivalent to the set screw, thread the set screw into the motor shaft adapter and tighten. Install the Motor Driver Board and Mounting Plate onto the chassis and secure with ¼ inch nuts (2). Reconnect the wiring harnesses (3) to the Motor Driver Board. Route the Reed Switch wires from the Pump Head Mounting Plate through the front of the machine and under the Motor Mounting Bracket. Insert the pins from the Reed Switch Cable into the connector making sure they are oriented properly. Secure the Pump Head Mounting Plate to the Chassis with the 3/32 inch hex screws (3). See figure 1 in “Component Replacement, Pump Head Replacement” Section. Attach the Reed Switch Connector to J1 on the Control Board. Reattach the pump head per in “Component Replacement, Pump Head Replacement” Section. Attach the cover and secure with two (2) 5/64 hex screws. Install the Water Bottle Hanger to the left side of the Unit. Power Supply Replacement Tools Required 3/32 hex wrench Screwdriver Power Supply Removal 1. Disconnect the power cord from the wall outlet. 2. Remove the machine cover. Refer to “Cover Removal” Section. 3. Remove the +24 VDC wiring harness from the J11 ‘Power IN” on the control board. 4. Remove the hex screws (4) that secure the Power Supply Mount to the chassis. See figure 1. 35 Figure 1 5. Lift the Power Supply Assembly from the machine taking care to not strain the 115/230 VAC input wires and the ground wire. 6. Remove the 115/230 VAC input wires, ground wire and the +24 VAC output wires from the Power Supply. See figure 2. Figure 2 Wire Power Supply Terminal 1. Ground (Green and yellow) Ground 2. Neutral (white) ACN 3. Hot (100 VAC to 240 VAC) (Black) ACL 4. Ground DC (Black) COM (Note location in figure 2) 5. +24 VDC (Yellow) +V (Note location in figure 2) 6. Indicator LED N/A 36 7. Remove the screws (4) that mount the Power Supply to the mounting bracket. Power Supply Installation 1. Use the four hex screws to secure the Power Supply to the mounting bracket. 2. Attach the 115/230 VAC input wires, ground wire and the +24 VAC output wires to the Power Supply. See figure 2 in the previous section. 3. Set the Power Supply Assembly in place and secure to the chassis with hex screws (4). See figure 1 in the previous section. The power supply attaches into the lower set of holes (4) on the side of the chassis. 4. Attach the +24 VAC output harness to the J11 ‘Power IN’ connector on the Control Board. 5. Install the cover per instructions in “EGA-500 Component” Section. Control Board Replacement Tools required: Phillips screwdriver Control Board Removal 1. Disconnect the power cord from the wall outlet. 2. Remove the machine cover. Refer to instructions in “Cover Removal” Section. 3. Remove all of the wiring harness connections from the Control Board. Mark the connections to assure proper reassembly, you can also refer to “EGA-500 Components” Section, figure 2. 4. Remove the Motor Harness connection from the Motor Driver Board. See figure 1. Figure 1 37 5. Remove the mounting screws (4) that secure the Control Board to the chassis. 6. Remove the Control Board from the machine. Control Board Installation Note: Use proper ESD precautions when handling the Control Board. 1. Remove the Control Board from the packaging and set into the machine. Use care to orient the board the same as the previous board. 2. Using the original mounting screws (4) secure the board to the chassis. 3. Connect the Motor Harness to the Motor Driver Board. See figure 1 in the previous section. 4. Attach all of the wiring harnesses to the control board. Refer to “EGA-500 Component” Section, figure 2 for connection locations. 5. Attach the cover and secure with two (2) screws. 6. Install the Water Bottle Hanger to the left side of the Unit. Power Switch and Boot Replacement Tools required: 7/8 inch wrench Power Switch and Boot Removal 1. Disconnect the unit from power (wall outlet). 2. Remove the cover as outlined in “Cover Removal” Section. 3. Remove the black wire that routes from the Power Switch to the Power Entry Module. 4. Remove the black wire that routes from the Power Switch to the ACL connection on the Power Supply. 5. Remove the Power Switch LED connector from the J6 ‘Power Switch’ connector on the Control Board. 6. Remove the mounting nut that secures the Power Switch to the chassis. 7. Remove the Power Switch and Boot Assembly from the machine. Power Switch and Boot Installation Note: The Power Switch and Boot must be replaced as a set. Never operate the machine without a Boot installed on the Power Switch. Never operate the machine if the Boot is torn or punctured. 1. Install the new Boot over the end of the Power Switch. 38 2. Insert the Power Switch wires and the LED wires through the opening in the front of the chassis and through the mounting nut. 3. Thread the mounting nut onto the Power Switch and tighten securely. 4. Connect the power wire with the spade connection to the top connector on the Power Entry Module. 5. Connect the power wire with the ring terminal to the ACL connector on the Power Supply. 6. Connect the LED connector to the J6 ‘Power Switch’ connection on the Control Board. 7. Attach the cover and secure with two (2) 5/64 hex screws. 8. Install the Water Bottle Hanger to the left side of the Unit. H2O Heater Switch Replacement H2O Heater Switch Removal Tools required: 7/8 inch wrench 1. Disconnect the unit from power (wall outlet). 2. Remove the cover as outlined in “Cover Removal” Section. 3. Remove the J15 ‘H2O Heater Switch’ connector from the Control Board. 4. Unthread the mounting nut to that secures the Water Heater Switch to the chassis. 5. Remove the H2O Heater Switch Assembly from the machine. Water Heater Switch installation 1. Insert the wires and connector for the H2O Heater Switch through the opening in the front of the chassis and through the mounting nut. 2. Thread the mounting nut onto the H2O heater Switch and tighten securely. 3. Attach the H2O Heater Switch connector to the J15 ‘H2O Heater Switch’ connector on the Control Board. 4. Attach the cover and secure with two (2) 5/64 hex screws. 5. Install the Water Bottle Hanger to the left side of the Unit. 39 Prime Switch Replacement Prime Switch Removal Tools required: 7/8 inch wrench 1. Disconnect the unit from power (wall outlet). 2. Remove the cover as outlined in “Cover Removal” Section. 3. Remove the J10 ‘Pump Prime Switch’ connector from the Control Board. 4. Remove the mounting nut to that secures the Prime Switch to the chassis. 5. Remove the Prime Switch Assembly from the machine. Prime Switch installation 1. Insert Prime Switch wires and connector through the opening in the front of the chassis and through the mounting nut. 2. Thread the mounting nut onto the Prime Switch and tighten securely. 3. Connect the Prime Switch connector to the J10 ‘Pump Prime Switch’ connector on the Control Board. 4. Attach the cover and secure with two (2) 5/64 hex screws. 5. Install the Water Bottle Hanger to the left side of the Unit. Motor Speed Control Assembly Replacement Tools Required: 5/64 inch hex wrench 7/16 inch wrench Motor Speed Control Assembly Removal 1. Disconnect the unit from power (wall outlet). 2. Remove the cover as outlined in “Cover Removal” Section. 3. Use a 5/64 inch hex wrench to loosen the set screws (2) on the Motor Speed Control Knob and remove the knob. 4. Use a 7/16 inch wrench to remove the mounting nut that secures the Motor Speed Control rheostat Assembly to the chassis. 40 5. Disconnect the Motor Speed Control Assembly harness from the J9 ‘Motor Speed’ connector on the Control Board. 6. Remove the Motor Speed Control rheostat Assembly from the machine. Motor Speed Control Assembly Installation 1. Install the Motor Speed Control Assembly into the opening on the front of the chassis and secure with the mounting nut. 2. Install the Motor Speed Control Assembly Switch harness onto the J9 ‘Motor Speed’ connector on the Control Board. 3. Turn the Motor Speed Control Assembly Switch fully clockwise then install the knob with the indicator line set to 100 and tighten the set screws to secure the knob. See figure 1. Once the knob has been tightened rotate the shaft counterclockwise and clockwise. Verify that every time the knob is turned completely clockwise the indicator line is pointing at 100 on the scale. Figure 1 4. Attach the cover and secure with two (2) 5/64 hex screws. 5. Install the Water Bottle Hanger to the left side of the Unit. 41 Foot Pedal Switch Replacement Tools Required: 7/8 inch wrench or socket Foot Pedal Switch removal 1. Disconnect the unit from power (wall outlet). 2. Remove the cover as outlined in “Cover Removal” Section. 3. Disconnect the Foot Switch tube from the Foot Switch Connection on the front of the machine. 4. Remove the Foot Switch wiring harness from the J13 ‘Foot Pedal’ connection on the Control Board. 5. Use a 7/8 inch wrench to unthread the plastic nut from the front of the Foot Pedal switch. 6. Remove the Foot Pedal Switch from the machine. Foot Switch Installation 1. Insert the Foot Pedal Switch through the opening in the front of the machine. Note: the two pegs on the switch fit into the two matching holes in the faceplate. 2. Thread the plastic nut onto the Foot Switch and tighten until snug using a 7/8 inch wrench. Take care not to over tighten. 3. Connect the Foot Switch wiring harness to the J13 ‘Foot Pedal’ connection on the Control Board. 4. Attach the cover and secure with two (2) 5/64 hex screws. 5. Install the Water Bottle Hanger to the left side of the Unit. 42 Parts List Part Number EGA-1015 EGA-1046C EGA-1052 EGA-4010 EGA-4011 EGA-4012 EGA-4025 EGA-4028 EGA-7014 EGA-7015 EGA-7016 Description Fuse, 250V 10A Med. Acting Control Board Motor Speed Control Knob Motor and Driver Board Power Switch Boot Prime Switch Assembly Motor Speed Control Assembly Foot Pedal Input Switch H2O Heater Switch Power Switch Water Warmer Input Connector Power Cord (US) Foot Pedal Pump Head Disposal No special care is needed when disposing of the device. 43 Limited Warranty Limited Warranty Subject to the terms below, MEDIVATORS Inc. (the “Company”) warrants that its products (the “Products”) will conform to the Company’s written specifications (where applicable) and will be free from defects in material and workmanship under normal use and service for the following periods (the “Warranty Period”): Endoscope reprocessors and associated equipment, and Irrigation Pumps: fifteen (15) months from date of shipment from the Company or one (1) year from the date of installation, whichever occurs first. Consumables, accessories, and Product service parts, including, but not limited to, endoscope hook-ups, filters, printers, printer supplies, test strips, accessory bags, and service parts for products: ninety (90) days from the date of installation or one hundred and twenty (120) days from the date of shipment, whichever occurs first. Disposable Products: warranted for single use. The Warranty Period will not in any case exceed the expiration date on the Product label. The warranty does not cover, and the Company will have no warranty obligation whatsoever with respect to, any damage to a Product caused by or associated with: (i) external causes, including without limitation, accident, vandalism, acts-of-God, power failure or electric power surges, (ii) abuse, misuse or neglect of the Product by the customer or use of unauthorized third party filters or other consumables and accessories, (iii) usage not in accordance with product instructions, (iv) the customer’s failure to perform required preventive maintenance, or (v) servicing or repair not authorized by the Company. Limitation of Remedy The warranty obligation of the Company hereunder is limited to (at its option) (i) the repair or replacement of the defective Products or any parts it deems defective, or (ii) a refund of the purchase price. This will be customer’s exclusive remedy for a covered defect. In order to recover under the warranty, the customer must notify the Company in the state (if in the U.S.A.) or the country of installation, of the defect (describing the problem in reasonable detail) prior to the expiration of the Warranty Period and within thirty (30) days of discovery of the defect. Upon receiving the Company’s official “Returned Material Authorization” (RMA), the customer must promptly return the defective part or Product to the Company (or the service center indicated on the RMA), freight and insurance prepaid. The Company will not be responsible for any damage during shipment. Warranty Disclaimer THE WARRANTY ABOVE IS THE COMPANY’S ENTIRE WARRANTY OBLIGATION TO THE PURCHASER OF PRODUCTS. IT IS IN LIEU OF ALL OTHER WARRANTIES OF THE COMPANY, EXPRESS OR IMPLIED, INCLUDING, WITHOUT LIMITATION, WARRANTY OF MERCHANTABILITY OR FITNESS FOR A PARTICULAR PURPOSE, AND THE COMPANY DOES NOT REPRESENT OR WARRANT THAT ANY PRODUCT WILL MEET CUSTOMER’S REQUIREMENTS. THE COMPANY’S RESPONSIBILITY FOR DEFECTS IN A PRODUCT IS LIMITED SOLELY TO REPAIR, REPLACEMENT OR REFUND OF THE PURCHASE PRICE AS SET FORTH IN THIS WARRANTY STATEMENT. TO THE EXTENT PERMITTED BY LAW, THE COMPANY SHALL NOT, UNDER ANY CIRCUMSTANCES, BE LIABLE TO CUSTOMER FOR CONSEQUENTIAL, INCIDENTAL, INDIRECT, PUNITIVE OR SPECIAL DAMAGES OR LOSSES, INCLUDING WITHOUT LIMITATION, DAMAGES ARISING OUT OF OR IN CONNECTION WITH ANY 44 MALFUNCTIONS, DELAYS, LOSS OF PROFIT, INTERRUPTION OF SERVICE, OR LOSS OF BUSINESS OR ANTICIPATORY PROFITS, EVEN IF THE COMPANY HAS BEEN APPRISED OF THE LIKELIHOOD OF SUCH DAMAGES OCCURRING. This Warranty gives the customer of Products specific legal rights, and customers may also have other rights which vary from jurisdiction to jurisdiction. In no event shall the Company’s liability exceed the original purchase price of the covered Product. No representative or agent of the Company has any authority to bind the Company to any other representation or warranty with respect to the Products, and the customer accepts the Products subject to all of the terms above. 45 46 47 48