Download Service Today July August 2009 Issue
Transcript
SERVICE
TODAY
www.partsnow.com
A PARTS NOW! PUBLICATION
THRIVE OR
SURVIVE?
Profit From Our Training Now!
BUY ONE
GET ONE
1/2
OFF
Save hundreds of dollars on Printer Repair Classes from
the #1 Trainer! Enroll your technicians in any laser printer
repair class taking place from now until Sept. 30th, 2009
and they’ll each receive a second class of equal or lesser
value for 1/2 price! Offer applies to our online training as
well as hands-on classes at the Parts Now! training facility.
See details on page 2 and
contact your account rep today!
Also in this issue:
• HP LaserJet 4250/4350 Formatter Installation Tips and Tricks
• Parallel Firmwire Update Procedure
• HP DesignJet 1050/1055 Main PCA Board Update
JULY/AUGUST 2009, VOL. 18, NUMBER 3
TRAINING
SCHEDULE
BUY ONE
GET ONE
1/2
OFF
JULY
Monday 27th
Tuesday 28th
$500
$500
AUGUST
Monday 3rd
Tuesday 4th
Wednesday 5th
Thursday 6th
Friday 7th
Monday 10th
Tuesday 11th
$374
$399
$399
$399
$449
$500
$500
SEPTEMBER
Monday 14th
Tuesday 15th
Wednesday 16th
Thursday 17th
Friday 18th
$374
$399
$399
$450
$525
Save hundreds of dollars on Printer Repair
Classes from the #1 Trainer! Enroll your technicians
in any laser printer repair class taking place from
now until Sept. 30th, 2009 and they’ll each receive
a second class of equal or lesser value for 1/2 price!
Offer applies to our online training as well as hands-on
classes at the Parts Now! training facility.
DESCRIPTION
LOCATION
Advanced Level Monochrome Printer Repair for Copier Techs
Advanced Level Color Printer Repair for Copier Techs**
Middleton, WI
Middleton, WI
DESCRIPTION
LOCATION
HP LJ 4000 / 4050 / 4100
HP LJ 4200 / 4300
HP LJ P4014 / P4015 / P4515 - NEW
HP LJ M3027mfp / M3035mfp*
HP LJ 4345mfp / M4345mfp*
Advanced Level Monochrome Printer Repair for Copier Techs
Advanced Level Color Printer Repair for Copier Techs**
Middleton,
Middleton,
Middleton,
Middleton,
Middleton,
Middleton,
Middleton,
DESCRIPTION
LOCATION
HP LJ P3005/2400
HP LJ 4200/4250/4300/4350
HP LJ P4014/P4015/P4515 - NEW
HP CLJ 4600/4650/5500/5550
DesignJet Fundamentals*
Middleton,
Middleton,
Middleton,
Middleton,
Middleton,
WI
WI
WI
WI
WI
WI
WI
WI
WI
WI
WI
WI
* A previous monochrome laser printer course is a prerequisite for this class.
** Color theory is also a prerequisite for this class.
PARTS NOW! OFFERS NEW P4015 TRAINING
Parts Now! is keeping training current by adding HP’s new LaserJet P4015/4015/4515 series to our Advanced Level
Printer Repair Course for Copier Techs. This replaces the older LaserJet 8150/8100/8000/5Si series. Starting in June,
2009 the Advanced Level Monochrome Printer Repair Course for Copier Techs will incorporate the following models:
• HP LaserJet P4015/P4014/P4515 Series
• HP LaserJet 4200/4250/4300/4350 Series
• HP LaserJet 4100/4050/4000 Series
These models constitute the most common printers encountered by techs in the field, and a great entry point for copier
dealers who are starting out in printer repair. For customers who need training on the HP LaserJet
8100/8150/8000/5Si, or other models, Parts Now! training can be customized to your need.
The Advanced Level Monochrome Printer Repair Course is complimented by a one day Advanced Level Color Printer Repair
Course which includes the following common models:
• HP Color LaserJet 4600/4650 Series
• HP Color LaserJet 4700/CP4005 Series
Parts Now! has been providing training on HP
and Lexmark printers since 1991, offering unbiased
real world solutions on printer repair.
Call your representative at 1-800-886-6688 for more information.
2
COMPANY
NEWS
Parts Now!
Takes Quality to the Next Level
Keeping Business Printing…. Profitably
Remember being advised, “never
buy a car made on a Friday”?
It was a way of pointing out how
inconsistent product quality can
be. Today, Parts Now! operates
its business under a quality management system based on ISO
standards to help us make products consistently each and every
time. ISO is the International
Organization for Standards –
the largest, most respected
quality standards organization in
the world. We first earned our
ISO 9001:2000 certification in
2006. We’re proud to announce
we’ve achieved another milestone
in our quality journey: ISO
9001:2008 certification.
We are the only laser printer
parts remanufacturer to
achieve this certification.
Because we operate with higher
standards, we improve upon the
critical factors that contribute
to our customers’ real cost of
doing business — like the failure
rate of inferior parts, the speed
of repairs, the elimination of a
return trip due to a faulty part.
The quality systems Parts Now!
has in place cover every process
from the inspection of raw materials in receiving through the
manufacture of refurbished laser
printer parts, to the tracking of
shipping accuracy and measuring
customer satisfaction.
One of the biggest quality investments we make is in the selection of our component suppliers.
We do an exhaustive search for
suppliers who share our commitment to quality. Even after a
component supplier meets these
criteria, we continue to inspect
shipments to ensure consistency.
We perform 100% functional
testing and monitor customer
feedback so we can implement
a corrective action if necessary.
And we don’t hesitate to reject
a shipment in receiving if these
criteria are not continually met
on a regular basis.
For example, recently, we
received 4,000 precisionengineered gears for use in our
remanufactured fusers. Just as
we do with all incoming components, we closely scrutinized the
shipment to make certain the
gears all met our exacting specs.
Upon close examination, we
noticed that some gears had a
slightly pitted surface – a seemingly subtle imperfection, but one
that we know can result in premature failure. So we quarantined the entire shipment and
sent it back to the manufacturer
in Europe. Then, we worked
closely with the manufacturer
to help resolve the problem,
so now we’re receiving the
quality components we depend
upon to build premium-quality
refurbished fusers.
We first safeguard our process
from poor or non-conforming
parts – all gears, rollers, exit
guides and sleeves are qualified
to OEM performance standards.
From there, dis-assembly,
rebuild, inspection, testing,
labeling and shipping all follow a
consistent process. We analyze
data to track any errors, correct
the process, and prevent nonconforming products from reaching customer as well as prevent
the problem from re-occurring.
The last process in the cycle
is most important: measuring
customer satisfaction. We want
to know whether you would recommend Parts Now! to a colleague based on your experience
with us. The answer matters.
Because if you’re not satisfied,
all the certifications in the world
don’t add up to much.
3
TECH TIP
How Do You Handle the
Rejection of the Main PCA?
By Cesar Jump
Rejection is never easy.
Take the HP Design Jet 1050C,
1050C Plus, 1055CM, and
the 1055CM Plus for example.
When the Main PCA is rejected
in these printers, one has to
wonder what it will take to gain
acceptance.
It can be very frustrating when,
on power up, the printer doesn’t
boot and instead continuously
spins the hard disk. The printer
won’t come to a ready state
even after replacing the Main
PCA. Rejection hurts. But, there
is a solution that you won’t find
in the service manual. It will
save you time and money.
On the 1000 series of plotter
there are two versions of the
main PCA. The newer board
enables the printer to print postscript, thereby creating a ‘Plus’
version of the plotter. The old
version is no longer available.
For example:
• Design Jet HP 1050C
becomes a HP 1050C Plus
• HP 1055CM becomes a HP
1055CM Plus.
4
We would like to thank printer
technician Ray Parker from
ROMCO, for bringing this situation to our attention. On a
recent call to Tech Support, Ray
reported a problem with the HP
Design Jet 1055CM Plus (model
C6075B). The Main PCA board
(C6074-60406) he received had
1 connector on the left hand
bottom side of the board compared with two connections on
the old board. When the new
Main PCA was replaced, the
printer would not come to a
ready state. Ray could hear
the hard disk spinning, but
nothing else. It was noisy,
and definitely not reassuring.
The problem is easily resolved
by replacing all three parts:
the Main PCA, Firmware DIMM
and the Memory Kit. You may be
asking yourself, is it necessary to
replace all 3 parts? The answer
is yes, the new parts that are
available unfortunately are not
compatible with any of the old
parts from the “A” version of the
plotter. So if any of the parts go
bad and you have an “A” version
printer that has not been previ-
ously upgraded, you will have
to replace the 3 parts with
part numbers listed below:
1. Main PCA, P/N C607460406 (Newer style of
board, B-Level)
2. Firmware DIMM, or Boot
ROM HP Design Jet 1050C,
HP Design Jet 1055CM Plus
p/n C6075-60286,
(PostScript) Version: A.52.02
3. Memory DIMM, Kit, P/N
C6074-60410 128MB
Upgrading all three parts has
its benefits, as well. The plotter
will get an upgrade, it will now
print PostScript print jobs,
and the plotter maximum
memory capacity will increase
to 256 MB.
After the parts have been
installed you are required to
reload the latest software
and drivers and also perform
a “firmware upgrade.”
In order to let the printer know
that you have replaced the Main
PCA, use the Service Test and
Utilities menu, and perform the
following instructions:
1. Once the message “Ready”
is in the display on the front
panel, scroll to the “printer
Set-up Options” icon and
press the “Menu” key.
2. Locate the “Printer Setup
Options” menu, use the
“Arrow” keys to scroll to the
“Utilities” menu display and
press the “Enter” key.
3. Once inside the “Utilities”
menu, press the “Up” and
“Enter” key together. You are
now in the “Service Tools”
menu. Make sure that you
have highlighted the “Recover
Printheads.”
4. Use the “Arrow” keys to scroll
to the “Service Utilities” menu
and press the “Enter” key.
5. In the “Service Utilities”
submenu, scroll
to “Printer Model Type”
and press “Enter.”
6. When the following message
appears on the front panel,
you must select which printer
model you would like to set.
Select the HP DJ 1055CM
and press “Enter”.
7. Then the following message
will appear asking you to
confirm the selection.
Select “Accept.”
8. Once the Model Type
selection has been made,
the following message will
be displayed on the front
panel “Printer Model
Selection Done”.
5. Once inside the “Utilities”
menu, press the “Up” and
“Enter” keys together. You are
now in the “Service Tools”
menu. Make sure that “recover Printheads” are highlighted.
6. Use the “Arrow” keys
to scroll the “Service
Calibrations” menu and
press the “Enter” key.
9. Print the Configuration Print
and check if the printer Model
Type has been “Set” correctly.
7. Use the “Arrow” keys to
scroll through the “Service
Calibrations” selections.
Accuracy Calibrations:
8. Press the “Enter” key to begin
a specific calibration when the
required “Service Calibration”
is highlighted.
1. Now run the “Accuracy
Calibration.” You need
to enter in “Service
Calibrations.”
2. Once the message “Ready” is
displayed on the front-panel,
scroll to the “Printer Setup
Options” icon and press
“Enter.”
3. Once inside the “Printer Setup
Options” menus, use the
“Arrow” keys to scroll to the
“Utilities” menu display and
press the “Enter” Key.
9. In order to get the best print
out possible on the media
and can be recorded in the Emodule’s EEROM thus this
step will make insure that the
image printed is “beautiful
image” and all this information
is saved in the EEROM
permanently stored.
4. Note: Make sure that you are
in full menu mode because
otherwise you will not be able
to access the “Service tools”
submenu.
5
TECH TIP
HP LJ 4250/4350 Formatter
Installation Tips and Tricks
By Jim Bethke
Installing the formatter boards on
the HP 4250 and 4350 series
is a little more involved than on
previous models. To ensure that
the printer works properly when
you are finished with the installation, follow these steps.
grade. That means the 4350
printer could think it is now a
4250 version printer.
A Replacement
Formatter Board
If you install a replacement
formatter, please complete
the following steps to ensure
a proper formatter installation:
• Turn the printer on and then
wait for five minutes after the
printer reaches the Ready
state. (Please note the five
minute wait is required to
allow for NVRAM settings to
be written to the new formatter from the DC controller.)
• Then turn the printer off.
• Turn the printer back on, and
then wait five minutes after
the printer reaches the
Ready state.
• Print a configuration page to
verify against original settings
of the page you printed earlier.
• Perform an NVRAM
initialization.
• Then use the control-panel
display to open the service
menu and specify the total
page count, the maintenance
count, the service ID, the
cold reset paper size, and
the serial number.
• Reset the printer display
language to the customer’s
choice.
A New Formatter Board
If you are installing a new
formatter board, the following
instructions will help you install it
correctly. Failure to follow these
instructions could possibly result
in a printer configuration down-
6
After installing a new formatter,
please complete the following
steps:
Network Versions
of Formatters
In some cases involving the network versions of the formatters,
you can install the formatter
board correctly and it will not
come up with the network settings. There are a couple of
things to try before doing a
warranty claim.
• Ensure the memory dimm is
installed on the formatter; this
is a 16mb dimm that is needed for the network functions to
work properly. If the memory
dimm is not installed, it can
cause the network functions
not to work.
Another step to try is to enable
the network settings through
the control panel. The procedure
for this is similar to the
maintenance reset.
• Turn the printer off.
• Turn the printer on, press
and hold the “Select” button,
when “00MB” first appears on
the display. Continue holding
down the “Select” button until
all three control panel lights
flash and then remain on.
• Press the “Up Arrow”
button to scroll to “Embedded
LAN Enable”.
• Press the “Select” button
one more time to enable
the network.
In some cases after trying to
flash the firmware, you may get
a “Resend RFU through USB”
message in your display. If this
occurs, first try resending the
firmware through the USB port.
If that does not work you could
try the following reset procedure.
• Turn the printer power off.
• Power on the printer and
watch for the memory
count to begin.
• Hold down the STOP button
when you see the memory
counts begin. Continue holding
down the STOP button until all
three printer control panel lights
flash once and then remain on.
• Press the SELECT
(Checkmark) button
and then the MENU button.
• Scroll down until you see
“Clear All RFU Errors”.
• Press the SELECT button
twice until the highlighted
cursor is the letter “C”
in the word “Clear.”
• Scroll down until you see
“Set Run mode to Manual”.
• Press the SELECT button twice
until the highlighted cursor is
on the letter “R” in the word
“Run mode”.
This might take up to 10 seconds.
“
After repairing laser
printers for 18 years,
it takes a really tough
problem to stump me.
That’s when I call Parts
Now! Tech Support.
”
• Scroll down until you
see “Set RFU Error Off”.
• Press the SELECT button
twice until the highlighted
cursor is on the letter
“S” in the word “Set”.
• Turn the printer off and
power up the printer.
Correct reinstallation of the
formatter is critical to the operation of the printer. By following
these steps, you can save time
and money by reducing warranty
calls to your sales representatives and eliminating the need
for a return trip.
EDITOR
Larry Nelson
CONTRIBUTING WRITERS
Anna Schryver
Jim Bethke
Aaron Caspary
Cesar Jump
Service Today is a Parts Now!
publication with a mission to
serve as a technical resource
for printer repair technicians.
Chris Jackson, Owner
CHRIS JACKSO N PRINTER SERVICES
7
TECH TIP
Parallel Firmware
Update Procedure
Downloading the File
To download the RFU (Remote
Firmware Update) file:
1. Go to www.HP.com and select
the “Software & Driver
Download” link on the
website.
2. Choose the “Download Drivers
and Software”, and then type
in the model of printer you
are working on and press
enter.
3. This will display a list of the
different models available.
Select your model from the
list and you should be looking
at a webpage with a list of
different operating systems.
Depending on the model of printer you are working on, the file
can be found in two different
places on the page. Scroll down
to the bottom of the list of all of
the operating systems.
• If you see “Cross Operating
System (BIOS, Firmware,
Diagnostics, etc.)”, select this
link and you will have the
choice to download the file for
Windows, Mac, or UNIX.
• If “Cross Operating System
(Bios Firmware Diagnostics,
etc.)” does not appear, it might
be listed when you choose an
operating system.
8
• Please note that not all printers have the capability to
upgrade the firmware.
4. The files come in a zipped
format. Run this file and it
will unzip the file. Additional
software may be required.
The unzipped folder will
include the .RFU file and a
ReadMe file. Locate the folder that was placed on your
system, and remember to
completely read the readme
file before proceeding.
Updating Firmware
Through the Parallel Port:
Once you have gone to
www.HP.com and downloaded
the Windows Firmware file, open
or run it and the file should unzip
using an unzipping program.
Note that the file for this procedure is different than the HP
Easy Firmware Upgrade Utility.
You will have the two files
opened to a folder in the C:
drive on your computer. The
first being a .RFU file (not a
.EXE file), the other will be
a ReadMe.TXT file. Please
note that some experience
with DOS is recommended.
By Aaron Caspary
1. To make this process easier,
first open the folder on the
C: drive where the files were
saved to by the unzipping
program. WinZip is the
most common application
for this.
2. Once you have located
these files on the C: drive,
open another window
for the C: drive.
3. Move only the .RFU file
directly into the C: drive.
This can be done by copying
and pasting, or also by dragging and dropping the file
into the C: drive. The reason
for doing this is to simplify
the command that will need
to be entered into DOS.
4. Next rename the .RFU filename to something that is
easier to remember such as
Fred.rfu or the model number such as 4200.rfu.
Whatever you decide, know
that DOS has a restriction
of 8 characters for the filename, plus the file extension, in this case .RFU.
5. The printer must be hooked
up using an IEEE 1284 BiTronics Parallel cable, and
the driver does not need to
be installed on the computer
for the upgrade to work.
6. Prior to beginning the upgrade,
restart your computer.
7. Check the parallel cable on both the
computer and also on the printer.
Make sure it is seated properly.
8. Close down all programs that are running
in the background on your computer.
Don’t attempt this if your area is
experiencing frequent power outages.
** It is important to note that if for any reason
the upgrade is unable to complete, there is
a chance that the printer may not be able
to recover. If anything prevents the firmware
update from completing, such as a cable
coming unplugged, a power outage, blue
screen on your computer, etc,. then a
firmware DIMM, or possibly a formatter
depending on your model, may need to
be replaced.**
9. Open up a DOS Command prompt.
The easiest way is to click on the
“Start” button then select “Run…”
A window will appear and just type
“CMD”, or you can type out
“COMMAND” and press enter.
10. A DOS window will appear to get the
root directory type CD\, and press
enter. (This is not necessary; I like
to do it because it cleans thing up.)
11. Type in the command C:\>Copy/B
C:\Fred.rfu LPT1, and press the enter
key. Pay close attention not to put extra
spaces in the command because DOS
does not like extra spaces. Do not
power-down your machine until completed. This may take up to 10-15 minutes.
INTRODUCING LEXMARK
COMPATIBLE TONER
Why choose Lexmark Toner from Parts Now!?
•
•
•
•
•
Exclusively American-made toner
Superior quality
2-year, 100% satisfaction warranty
Excellent print performance
ISO-Certified quality processes
Part Number
1380200-PN
1380520-PN
1382100-PN
Long Description
Lexmark 4019/4028/4029 Compatible Black Toner 7K
Lexmark 4019/4028/4029 Compatible Black Toner HI-YLD 9.5K
Lexmark 4039-10/12/16/Optra L/Optra R
Compatible Black Toner, 7K
1382150-PN Lexmark 4039-10/12/16/Optra L/Optra R
Compatible Black Toner, HI-YLD 14K
69G8256-PN Lexmark Optra E Compatible Black Toner 3K
10S0150-PN Lexmark E210 Compatible Black Toner 2K
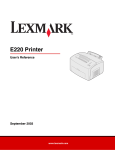
12S0300-PN Lexmark E220 Compatible Black Toner 2.5K
13T0101-PN
Lexmark E310/312 Compatible Black Toner HI-YLD 6K
08A0477-PN Lexmark E320/322 Compatible Black Toner HI-YLD 6K
12A7305-PN Lexmark E321/E323 Compatible Black Toner, HI-YLD 6K
34035HA-PN Lexmark E330/E332/E340/E342
Compatible Black Toner, HI-YLD 6K
E352H21A-PN Lexmark E350/E352 Compatible Black Toner, HI-YLD 9K
17G0154-PN Lexmark M410/M412 Compatible Black Toner, HI-YLD 15K
1382620-PN Lexmark Optra S 125X/16XX/1855/24XX
Compatible Black Toner, 7.5K
1382625-PN Lexmark Optra S 125X/16XX/1855/24XX
Compatible Black Toner, HI-YLD 17.6K
12A0825-PN Lexmark Optra SE 3455 Compatible Black Toner, 23K
12A5745-PN Lexmark Optra T61X Compatible Black Toner, HI-YLD 25K
12A7315-PN Lexmark T420 Compatible Black Toner, HI-YLD 10K
12A8325-PN Lexmark T430 Compatible Black Toner, HI-YLD 12K
12A6735-PN Lexmark T520/522 Compatible Black Toner, HI-YLD 20K
12A6765-PN Lexmark T620/622 Compatible Black Toner, HI-YLD 30K
12A7362-PN Lexmark T630/632/634 Compatible Black Toner, HI-YLD 21K
12A7365-PN Lexmark T632/634 Compatible Black Toner, HI-YLD 32K
64035HA-PN Lexmark T640/642/644 Compatible Black Toner, HI-YLD 21K
64435XA-PN Lexmark T644 Compatible Black Toner, HI-YLD 32K
12B0090-PN
Lexmark W820 Compatible Black Toner, 30K
18S0090-PN Lexmark X215 Samsung ML-1510/17XX
Compatible Black Toner, 3.2K
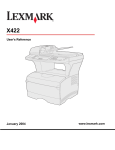
12A4715-PN Lexmark X422 Compatible Black Toner, HI-YLD 12K
X644H11A-PN Lexmark X642/644/646 Compatible Black Toner, HI-YLD 21K
X644X11A-PN Lexmark X644/646 Compatible Black Toner, HI-YLD 32K
The printer should say receiving update,
and eventually should restart on its own
once it comes back up to ready.
9
WORLD EXPO – DON’T MISS THE INDUSTRY’S
EXCITING NEW MANAGED PRINT SUMMIT!
Join us a day early for an exciting pre-expo event
ONLY
$99!
Managed Print Summit
Mandalay Bay Resort & Casino
Tuesday, August 18, 2009 | 8:30 a.m. – 5 p.m.
Managed print solutions are no longer a trend – they’ve become a core component of the document printing industry.
The full-day Managed Print Summit will serve as a front runner event to World Expo, putting the spotlight on managed print
and allowing attendees to learn from a lineup of the most knowledgeable and experienced experts in the managed print field.
The Summit will feature speakers presenting on a variety of managed print topics of interest to both newcomers and
veterans alike. The morning session will focus on print management topics of interest to all attendees, and the afternoon
will feature two tracks: one focused on introductory-level topics, and the other targeted toward those who are more
experienced in managed print, but want to gain more focused knowledge.
For more information and to register, visit http://worldexpo.rechargermag.com Use promo code AD9W03
EDUCATION TOPICS
Servicing the LJ
P4015/4014/4515
W2 Wed., Aug. 19th, 2009
1:00 PM—2:00 PM • S42
The Value of Training
Your Service Techs
W3 Wed., Aug. 19th, 2009
4:00 PM—5:00 PM • S43
The LaserJet P4015, P4014
and P4515 series printers
replaced the LaserJet 4250
and LaserJet 4350 a year
and a half ago, and are now
starting to need post warranty
service. This class will look at
how these units are different
from the LaserJet 4250
series and what you need to
know to service them. We'll
also cover common failure
info and tear into the printer.
People talk about the value
of training, but struggle to
find the time. This seminar
will address the value of training and how it can improve
techs and service calls, which
provides you with a return on
investment. We'll also look at
the many training products
out there - which are really
helpful and which are more
likely a waste of time.
PDI+ Certification
T1 Thur., Aug. 20th, 2009
8:30 AM—9:30 AM • S44
Where do you find a good
tech? CompTIA launched their
PDI+ certification exam
in January of 2008 and it has
been growing over the last
year. New initiatives in Canada
that will soon require techs to
be PDI+ certified to do warranty work will likely drive the U.S.
market in adopting the same
requirements. This class will
look at PDI+, what it is, how
could it benefit you.
Service Talk - LJ
2400/P3005/M3027mfp/
M3035mfp Series
T2 Thur., Aug. 20th, 2009
1:00 PM—2:00 PM • S41
What do the P3005,
M3027mfp and M3035mfp
have in common? They're
all based on the same print
engine. However, that's where
the similarities end and the
differences begin. This
seminar will look at these
similar machines and tie
in the LJ 2400 due to its
closeness in function.
READER’S CHOICE AWARDS!
Vote by July 31, 2009!
The 2009 Recharger Magazine Readers Choice Awards voting period is now open.
Please vote at www.rechargermag.com to recognize the best and brightest in our industry.
We appreciate being nominated in two quality categories:
PARTS NOW! THE QUALITY LEADER IN SUPPLIES
Recognizes the components suppliers with the highest levels
of customer satisfaction for the quality of their products.
PART NOW! THE BEST ARTICLE
Recognizes the most useful article contributed to Recharger Magazine last year
10
thank
you for
your
vote!
PRINTER
SPOTLIGHT
Lexmark T640/T642/T644 Series
Model Name
Model Number
Release Date
Print Speed
Max DPI
Duty Cycle
Memory Std/Max
T640
4061-000 (010)
June 2005
35 ppm
2400
250,000 pgs/month
64MB/576MB
T642
4061-200 (210)
June 2005
45 ppm
2400
250,000 pgs/month
T642 64MB/576MB
T642n/dn/dtn 128MB/640MB
T644
4061-400 (410)
June 2005
50 ppm
2400
250,000 pgs/month
128MB/640MB
Fuser
Cassette Pickup Roller
Charge Roller ASM, Dual
Transfer Roller
Maintenance Kit
Toner Cartridge 6K Pages
21K Pages
32K Pages
40X2592
40X0070 (qty 2)
40X0127
40X0130
56P4240
64035SA
64035HA
N/A
40X2592
40X0070 (qty 2)
40X0127
40X0130
56P4240
64035SA
64035HA
N/A
40X2592
40X0070 (qty 2)
40X0127
40X0130
56P4240
64035SA
64035HA
64435XA
Display Panel
Interconnect Card
System Board - Network
System Board - Non Network
40X0195
40X0147 (1 slot)
40X3460 (ID# Q0016031)
40X3459 (ID# Q0016034)
40X0195
40X0148 (2 slot)
40X3462 (ID# Q0016032)
40X3461 (ID# Q0016035)
40X0195
40X0148 (2 slot)
40X3464 (ID# Q0016033)
40X3463 (ID# Q0016036)
The system board has a label with a board ID and barcode.
Use the first 8 numbers to identify the board with the part number in the above chart.
Please use caution when replacing any one of the following components:
• Display panel assembly (or upper front cover)
• System board assembly
• Interconnect card assembly
Use only OEM parts and replace one component at a time. Replace the required component and perform a POR before replacing a second component listed above. If this procedure is not followed, the printer will be rendered inoperable. Never replace
two or more of the components listed above without a POR after installing each one or the printer will be rendered inoperable.
Do not install and remove components listed above as a method of troubleshooting components. Once a component has been
installed in a printer, it cannot be used in another printer.
To reset the maintenance count:
•
•
•
•
•
•
•
•
Press and hold the CHECK button and the > RIGHT ARROW button while turning on the printer
Release the buttons when performing self test is in the display
Configure menu will show in the top line of the display
Scroll to reset maintenance cnt and select that
Reset maintenance control counter will appear on the display and then go back to resetting maintenance counter
Press the back button
Scroll to exit configure menu and select that
Resetting printer appears on the display and goes back to ready
Parts Now! Offers Lexmark Compatible Toner!
11
PRSRT STD
U.S. Postage
PAID
We’re eager
to answer your
questions, provide
the information
you’re looking
for and hear your
comments on
how we’re doing.
Madison, WI
Permit No. 367
CONTACT US
General
800.886.6688
[email protected]
The Now! Team
800.886.6688, ext 4100
[email protected]
Technical Support
800.886.6688, ext 1523
[email protected]
Service Technician Training
800.886.6688, ext 1127
[email protected]
Managed Print Solutions
800.886.6688, ext 1127
[email protected]
Core Buy Back
Canada Sales
[email protected]
877.246.2133, ext 1362
[email protected]
JULY/AUGUST 2009, VOL. 18, NUMBER 3
US Headquarters
Canada
Parts Now!
3150 Pleasant View Rd
Middleton, WI 53562
Local: 608.203.1500
Toll-free: 800.886.6688
Fax: 608.203.1460
Parts Now! Canada
32 rue Richelieu, Canada
Lacolle, Quebec J0J 1J0
Local: 450.246.2133
Toll-free: 877.246.2133
Fax: 450.246.2913
US West Coast
Canada West Coast
Parts Now!
21053 Alexander Court, Unit B
Hayward, CA 94545
Toll-free: 800.886.6688
Fax: 510.785.9611
21000 Westminster, Hwy. #2130
Richmond, B.C. V6V 2S9, Canada
Local: 450.246.2133
Toll-free: 877.246.2133
Fax: 604.303.7441


