1
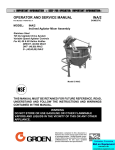
MODULAR ELECTRIC TILTING SKILLET
MODELS 1600& 1800
PARTS & SERVICE MANUAL
TABLE OF CONTENTS
ELECTRIC
1. OPERATING INSTRUCTIONS
2. INSTALLING TILT PAN SUPPORT
1
1
3. HOW TO REPLACE THE THERMOSTAT
4. HOW TO CALIBRATE THERMOSTAT
5. HOW TO REMOVE ELEMENTS
1
2
2
6. TILT PAN ASSEMBLY
7. EXPLODED VIEW OF MECHANICAL PARTS, MODEL 1600
8. EXPLODED VIEW OF MECHANICAL PARTS, MODEL 1800
3
4
6
9. ELECTRIC RELAY BOX, MODEL 1600
10. ELECTRIC RELAY BOX, MODEL 1800
11. WIRING DIAGRAM 208/240V 3 PHASE 60 Hz
8
9
10
12. WIRING DIAGRAM - 220/380V 3 PHASE 4 WIRE 50 Hz
13. WIRING DIAGRAM 480V A C 3 PHASE 60 Hz
14. TROUBLE SHOOTING GUIDE
11
12
13
15. CABINET BASE 36
16. CABINET BASE - 48
14
15
5219A Printed in U S A
OPERATING INSTRUCTIONS
MODEL 1600 & 1800 TILTING SKILLET (ELECTRIC)
1. Turn circuit breaker switch inside left hand door to on (up)
2. Be sure skillet is in full down position Set the thermostat at the desired temperature
3. To assure even heating temperatures allow the skillet to cycle once for approximately 30 minutes
before adding food
4. Add food Set the timer for the desired cooking period
5. Place the pan support in position (see separate instructions) Place pan on support Insert handle and
crank clockwise to tilt skillet to desired position for removal of food
INSTALLING THE TILT SKILLET PAN SUPPORT
1. With both hands hold pan support in front of the upright supports The cutouts on each side must
be facing upward and the jointed links must be allowed to fall free (see diagram)
2. Place the stud which is located on the left hand upright support into the hole in the left hand side
of the pan support. After engaging the left hand side push the right hand side in until spring
loaded pin on the right hand support engages hold in pan support (see diagram).
3. Rotate the pan support up to a near vertical position Shift both hands to the lower most links and
simultaneously engage their slotted ends to the studs at the base of each upright support (see
diagram)
4. Allow the pan support to drop back to a horizontal position where it will automatically lock When
removing the pan support, reverse the sequence of installation
HOW TO REPLACE THERMOSTAT (ELECTRIC)
1. Tip skillet pan to 45° angle Remove control box cover
2. Remove bottom cover and raceway
3. Remove nuts between heat shields. Remove both clamp
plates.
4. Remove nuts from two bolts under control box. Remove
sealing strip from control box.
5. Remove dial knob from control box. Detach wires. Remove
two screws on face of control panel. Slide thermostat out.
Remove thermostat probe from bottom of skillet
6. Replace thermostat and probe and reverse the procedure.
1
CALIBRATION OF THERMOSTAT
1. Be sure the pan is empty and clean before calibrating
2. Locate the center of the pan by marking diagonal lines on griddle surface
3. Place thermometer *kit part no. 10- 6328, at the intersection of diagonal lines.
Check that magnets on thermometer extend through holes in circular base plate and are in complete contact with griddle surface.
4. Set thermostat at 350°F and remove the knob to allow access to calibrating screw in the center of shaft.
5. Observe the thermometer as skillet heats up When thermometer indicates 340°F, turn calibrating screw clockwise or counter
clockwise, as required, until pilot light adjacent to thermostat goes out (A clockwise adjustment will lower the set point A counter
clockwise adjustment will raise the set point).
*Available from Market Forge
HOW TO REMOVE ELEMENTS
(Optional steps 1-5 to remove pan )
1. Tilt skillet pan to a 45° angle and remove the counterbalance spring at rear
2. Remove element wires from control box in front
3. Support skillet pan at 45° angle Remove roll pin from under skillet using a drive pin and hammer
4. Set skillet pan level Loosen bolts underneath counter top Remove hinge blocks from front
5. Tip skillet pan upside down Pan is quite heavy (23 gal, -145lbs,40gal, -210 Ibs ) and may require two men
6. Remove bottom cover, and both heat shields When bottom cover is removed terminals are exposed Remove
wiring
7. Remove bottom clamp plates These are held by 36 nuts on studs on the 23 gallon skillet, 46 nuts on studs on 40 gallon
skillet with lock washers
8. Elements are now exposed Remove spacers between elements and mark their location
9. Replace the detective element and reverse the procedure
10. Important: In replacing the elements, clamp plates are tourqued to 4 tourque foot pounds Use a tourque wrench
of 0-15 Ibs or less.
2
TILT PAN ASSEMBLY ELECTRIC
PARTS LIST
MODEL 1600
MODEL 1800
ITEM
PART NO
PART NO
1
2
91-1530
10-2336
91-1530
10-2336
CIamp Therm Bull)
Hex Nut 1/ 4 20'
3
4
5
6
7
8
10-2508
91-1581
91-1548
10-6260
10-6493
10-6278
10-2508
91-1726
91-15
10-68
1068
10-6886
Lockwasher 1/ 4"
Tilting Skillet Sub Pan Assy
Spacer Htg Elem
Htg Elem Outer 208V
Htg Elem Outer 240V
Htg Elem Outer 480V
9
10
10-2330
91-1510
91-1510
10-2330
91-1770
91-1772
Hex Nut =8/ 32*
Clamp Plate Assembly Right
Clamp Plate Assembly Left
11
12
91-1507
91-1505
91-1769
91-1764
Shield Htg Elem. L & R H
Cover Htg. Elem Wires
13
14
15
16
17
91-1605
91-1679
10-2518
10-1779
10-1747
91-1765
91-1679
10-2518
10-1779
10-1747
Heat Deflector Assembly
Assembly - Sealtite Conduit 3/ 4
Lockwasher =8*
Slotted Hex Hd. Type A =10 x 1/ 2
Rd. Hd Mach Screw =8
32 x 5/ 8 Lg.*
18
91-1534
91-1534
19
91-1603
91-1603
20
10-6296
10-6861
21
10-6297
10-6862
22
10-6277
10-6863
*These parts should be purchased locally
DESCRIPTION
Raceway Control Wires
Heat Deflector Raceway
Htg Elem Inner 208V
Htg Elem Inner 240V
Hig Elem Inner 480V
PARTS LIST
ITEM
1
2
3
4
5
6
7
8
9
10
PARTS NO
10-2330
10-2518
10-2541
91-1626
10-5016
10-6307
10-1717
10-4261
91-1626
10-1845
DESCRIPTION
Hex Nut =8 32*
Lockwasher =8*
Push On Speed Nut Tinneman
Control Box Frt. Bott. & Supp.
Signal Light Red
Control Knob
Rd. Hd. Mach Screw =8
Plug Button 7/8
Control Box Top & Sides
Rd Hd Type "F" #8
32 x 1/4 Lg. Ground Wire
11
12
13
10-5869
91-1674
10-6276
14
15
16
17
18
19
20
21
ITEM
44
45
46
47
48
49
51
52
53
54
10-2089
10-2746
91-1682
10-1946
DESCRIPTION
A Frame Casting
Fitting In Piece A Frame
Assembly Ctrbal Sping Link
Pivot Pin Lift Lever
Lift Lever Assembly
Hex Hd Cap Screw 5/16
18x2 1/4 Lg. *
1/4 x 20 Hex Head Cap Screw*
Extension Spring
Assembly Saginaw Screw
Roll Pin
Cut Off Micr. Switch
Mounting Strap - Cut off Sw.
Thermostat
55
56
57
90-8731
90-8755
90-8710
Shoulder Screw
Sag. Screw Lever
Special Bolt 1/2 13
91-1523
10-0060
10-2355
91-1536
90-3490
91-1537
90-4417
10-2050
Cover Handle
Plastic Knob
Acorn Nut Nl Pl. 3/8 16*
Frt. Hinge Assembly L. H
Post Skillet Hinge
Frt. Hinge Assembly R H.
Timer Assembly 60 Min.
Hex Hd. Cap Screw 3/8
16 x 7/8 Lg.*
58
59
60
61
62
63
64
10-0069
91-1512
10-2448
90-3040
10-2747
10-2336
10-1814
65
90-3042
Friction disc
Cover Assembly
Nylon Washer
Cover
Torsion Spring
Hex Nut 14 20 *
Hex Hd Cap Screw 1/4 *
20 x 3/4 Lg.
Retaining Rod
22
23
10-2503
10-1735
24
25
90-4414
10-2073
66
67
68
69
70
71
91-1565
91-1513
91-1580
91-1539
91-1502
10 1836
26
27
28
29
30
10-2400
10-6247
10-2500
10-2308
10-2042
Lockwasher 3/8 *
Phil. Rd. Hd. Screw Type "A"
#8x3/8 Lg. *
Timer Casing Assembly
Hex Hd. Cap Screw 1/4
20 x 1/2" Lg. *
Plain Washer 1/4*
Name Plate
Lockwasher 1/4 *
Hex Nut 1/4 20*
Hex Hd. Cap Screw 5/16
18 x 1" Lg. *
72
73
74
75
76
10-2521
10-2332
10-2408
91-1515
10-1726
31
32
33
34
35
10-2405
10-2511
91-1558
91-1585
10-1784
77
78
79
80
81
10-2431
10-2340
10-2505
91-1606
10-1832
36
37
38
39
40
41
42
43
10-2501
10-2300
10-1678
91-1552
91-1595
90-8757
90-4037
90-8732
82
83
84
10-2378
10-5396
10-1837
85
86
87
10-2375
10-2509
A-91-1695
Plain Washer 5/16*
Lockwasher 5/16*
Spring Support Rod
Rear Stiffening Channel
Rd-. Hd. Mach. Screw 1/4
20 x 1-1/4 Lg. *
Lockwasher
Hex Nut 1/2 13 *
Drive Pin
Pivot Pin - Lift Lever
Connecting Link -Gas
Housing Sag Screw
Crank Assembly
Brake Bracket
*These parts should be purchased locally.
5
PART NO
90-8754
91-1550
91-1518
91-1547
91-1542
10-2117
Lever Spring Tension
Hinge Support Assembly
Tilling Skillet Pan Sub Assembly
Hinge Post Assembly
Cabinet Top
Rd. Hd. Mach. Screw #8
32 x 1/2 Lg *
Lockwasher #8'*
Hex Nut #8 32*
Plain Washer #8 *
Assembly Relay Box
Rd. Hd. Mach. Screw #10
32 x 5/8 Lg*
Plain Washer #10*
Hex Nut #10 32*
Lockwasher #10 *
Support Bracket
Rd. Hd. Mach. Screw #8 *
32 x 1/2 Nl. PI.
Hex Nut #8 32 Nl PI. *
Hevi- Duty Transformer
Rd. Hd. Mach. Screw #10*
32 x 3/4 Nl. PI.
Hex Nut #10 32 Nl. PI. *
Lockwasher # 10 *
Support Plate Transformer
PARTS LIST
ITEM
1
2
3
4
5
6
7
PARTS NO
10-2330
10-2518
10-2541
91-1626
10-5016
10-6307
10-1717
8
9
10
10-4261
91-1625
10-1845
11
12
13
14
15
16
17
18
19
20
21
10-5869
91-1674
10-6276
91-1523
10-0060
10-2355
91-1536
90-3490
91-1537
90-4417
10-2050
22
23
10-2503
10-1735
24
25
90-4414
10-2073
26
27
28
29
30
102400
10-6247
10-2500
10-2308
10-2042
31
32
33
34
35
10-2405
10-2511
91-1740
91-1585
10-1784
36
37
38
10-2501
10-2300
10-2610
39
40
41
42
43
90-8755
91-1595
90-8757
10-2503
90-8732
DESCRIPTION
Hex Nut =8 32*
Lockwasher =8*
Push On Speed Nut Tinneman
Control Box Frt. Bott & Supp.
Signal Light Red
Control Knob
Rd Hd Mach. Screw =8
32 x 3/8 Lg *
Plug Button 7/8
Control Box Top & Sides
Rd Hd.Type "F" #8
32 x 1/4 1 g Ground Wire
Cut Off Micr. Switch
Mounting Strap Cut Off Sw.
Thermostat
Cover Handle
Plastic Knob
Acorn Nut Nl. PI.,3/8 16*
Frt. Hinge Assembly • L. H.
Post - Skillet Hinge
Frt. Hinge Assembly - R. H.
Timer Assembly 60 Min.
Hex Hd. Cap Screw 3/8
16x7/8 Lg*
Lockwasher 3/8"
Phil. Rd. Hd. Screw Type "A"
#8 x 3/8 Lg. *
Timer Casing Assembly
Hex Hd. Cap Screw 1/4
20 x 1/2" Lg. *
Plain Washer 1/4*
Name Plate
Lockwasher 1/4*
Hex Nut 1/4 - 20*
Hex Hd. Cap Screw 5/16
18 x 1" Lg. *
Plain Washer 5/16*
Lockwasher 5/16*
Spring Support Rod
Rear Stiffening Channel
Rd. Hd. Mach. Screw 1/4
20 x 1-1/4 Lg.Lockwasher
Hex Nut 1/2 -13 *
Driv-Lok Hi-Alloy Shear Proof Pin
3/8D x 2Lg. Type A
Saginaw Screw Lever
Connecting Link Gas
Housing - Sag Screw
Lockwasher 3/8 *
Brake Bracket
ITEM
44
45
46
47
48
49
PART NO.
90-8754
91-1550
91-1518
91-1547
91-1736
90-4037
50
51
52
53
54
55
56
57
58
59
60
61
62
63
64
10-2307
DESCRIPTION
A Frame Casting
Filling-In Piece A Frame
Assembly Ctrbal, Spring Link
Pivot Pin Lift Lever
Lift Lever Assembly
Crank Assembly
Saginaw Screw
Hex Nut 5/16 18*
10-2746
91-1682
10-1683
90-8731
Extension Spring
Assembly Saginaw Screw
Roll Pin
Shoulder Screw
90-8710
10-0069
91-1728
10-2448
91-1729
10-2747
10-2308
10-1814
65
66
67
68
69
70
71
90-3042
91-1565
91-1513
91-1722
91-1731
91-1502
10-1836
72
73
74
75
76
10-2521
10-2332
10-2408
91-1515
10-1726
77
78
79
80
81
102431
102340
10-2505
91-1606
10-1832
82
83
84
10-2378
10-5396
10-1837
85
86
87
10-2375
10-2509
A-91-1695
Special Bolt 1/2 13
Friction Disc
Cover Assembly
Nylon Washer
Cover
Torsion Spring
Hex Nut 1/4 20*
Hex Hd. Cap Screw 1/4 *
20 x 3/4 Lg
Retaining Rod
Lever Spring Tension
Hinge Support Assembly
Tilting Skillet Pan Sub Assembly
Hinge Post Assembly
Cabinet Top
Rd. Hd. Mach. Screw #8
32 x 1/2 Lg. *
Lockwasher #8*
Hex Nut #8 32*
Plain Washer #8*
Assembly • Relay Box
Rd. Hd. Mach. Screw #10
32 x 5/8 Lg. *
Plain Washer #10*
Hex Nut #10 • 32*
Lockwasher #10*
Support Bracket
Rd. Hd. Mach. Screw #8 *
32 x 1/2 Nl. PI.
Hex Nut #8 32 Nl. PI.*
Hevi-Duty Transformer
Rd. Hd. Mach. Screw #10*
32 x 3/4 Nl. PI.
Hex Nut #10 32 Nl. PI. *
Lockwasher #10*
Support Plate - Transformer
*These parts should be purchased
locally
ELECTRIC RELAY BOX-MODEL 1600
PARTS LIST
ITEM
PART NO.
1
10-1845
2
91-1556
3
4
DESCRIPTION
ITEM
PART NO.
Rd. Hd.Type "F"#8
32 x 1/4 Lg. Ground Wire
Cover 208/230V x 240V
12
13
14
102332
10-2521
10-5020
Hex Nut #8-32*
Lockwasher #8
Conduit Bushing 1/2*
91-1607
10-1759
Cover 480V
Rd. Hd. Mach. Screw #10
32 x 3/8 Lg.
15
16
17
10-2340
10-2505
10-6295
Hex Nut #10 32*
Lockwasher #10*
Strain Relief Grip-Str. 3/4 Male
5
10-5944
6
10-5476
Contactor 40 Amp 110V
For 480V Electric
Contactor 40 Amp 240V/415V
18
19
20
10-5164
10-5243
10-2652
Handy Box Cover
Conduit Chase Nipple 1/2
Fiber Washer 1/2
7
10-5476
Coil 10-5471
Contactor 40 Amp 208V/230V
Coil 10-5470
21
22
10-5163
10-1836
Handy Box
Rd. Hd. Mach. Screw #8
32 x 1/2 Lg.
8
9
10
10-5069
10-5070
10-6280
Term. BIk.
Term. BIk. End
Circuit Brkr.
23
24
25
91-1515
91-1604
10-5220
Assembly - Relay Box
Support Bracket - Circuit Breaker
Connector - Ground
11
10-2408
Plain Washer #*8
26
10-6494
Circuit Brkr. Mtg. Plates
*This can be purchased locally.
8
DESCRIPTION
ELECTRIC RELAY BOX MODEL 1800
PARTS LIST
ITEM
PART NO.
1
10-1845
2
91-1844
3
DESCRIPTION
ITEM
PART NO.
Rd. Hd. Type"F" #8
32 x 1/4 Lg. Ground Wire
Cover 208/230V and 240V
8
9
10
10-6494
10-6280
10-2408
DESCRIPTION
Circuit Brkr. Mtg. Plates
Circuit Brkr.
Plain Washer #8*
91-1845
10-1759
Cover 480V
Rd. Hd. Mach. Screw #10
32 x 3/8 Lg.
11
12
13
10-2332
10-2521
91-1604
Hex Nut #8- 32"
Lockwasher #8*
Support Bracket - Circuit Brkr.
4
10-5476
10-5943
10-5944
Contactor 40 Amp 208V
Contactor 40 Amp 240V
Contactor 40 Amp 110V
14
15
16
10-6295
10-2505
10-2340
Strain Relief Grip - Str. 3/4 Male
Lockwasher #10*
Hex Nut #10 32*
5
6
10-5069
10-5070
10-1836
Term. BIk.
Term. BIk. End
Rd. Hd. Mach. Screw #8
17
18
19
10-5163
10-5164
10-5243
Handy Box
Handy Box Cover
Conduit Chase Nipple 1/2
7
10-5220
32 x 1/2 Lg.
Connector — Ground
20
10-2652
10-1836
Fiber Washer 1/2
Rd. Hd. Mach. Screw ^8
32 x 1/2 Lg.
* This can be purchased locally.
9
©
WIRING DIAGRAM - 208/240 VOLTS A. C. 3-PHASE 60 Hz - TILTING SKILLET ELECT.
10
WIRING DIAGRAM 220/380 VOLTS AC 3-PHASE 4-WIRE 50 Hz - TILTING SKILLET - ELECT.
11
TROUBLE SHOOTING GUIDE
ELECTRIC
Problem
Uneven heating
Signal light out
Unit fails to heat
Cause
Open heating element
Uneven tourquing of
clamp plates which
hold elements
Remedy
Replace element
Retourque bottom
of skillet
Thermostat out of
calibration or defective
Burnt out bulb
Broken thermostat
Circuit breaker out
Loose electrical
connection
Malfunction of
interlock switch
Contactor doesn't
pull in
Calibrate or replace
Replace
Replace
Reset or replace
Repair
Replace
Replace coil in contactor
Check thermostat
13
CABINET BASE
ITEM NO.
1
2
PART NO.
90-2663
10-2511
DESCRIPTION
Panel MTG Bracket
Washer
ITEM NO.
11
12
PART NO.
102422
909062
3
4
5
10-2147
90-2657
10-0631
Hex. Nut
Rear Panel St. Steel
Leg
13
14
15
909057
10-5561
90-3210
Door Handle
Magnetic Latch
Bracket Magnetic Latch
6
7
90-2661
90-2662
90-3185*
Side Panels R. & L. St. Steel
Side Panel St. Steel (Gas Model)
Double Washer
16
17
18
10-0494
10-0453
10-0257
Feature Strip
Cabinet Hinge Left Bottom
Stem Bumper
8
9
10
90-9023
10-0454
10-1869
Ass'y. - 36" x 33" Modular Frame
Cabinet Hinge R. Bottom
No. 6-32 x 1/2" Round Head
19
10-0636
Leg with Flange (Only on Tilting
Skillet)
Machine Screw
Note: Items marked with an asterisk (*) can be purchased locally.
DESCRIPTION
Washer
Door Ass'y. St. Steel
CABINET BASE
ITEM NO.
1
2
PART NO.
91-1784
91-1872
3
4
5
10-0636
90-2663
10-2147
6
7
8
9
10
11
DESCRIPTION
Frame Ass'y
Feature Strip Tilt Skillet
ITEM NO.
12
13
PART NO.
10-0454
10-1869
DESCRIPTION
Hinge R.H.
Flat Hd. Screw
Hold Down Feet
Panel Clips
Screws
14
15
16
10-2545
90-2661
90-2661
Nut
Side Panels
Side Panels
10-2405
10-2307
91-1968
Washers
Hex Nut
Feature Strip 60 Gal. Kettle
17
18
19
91-2013
10-1722
10-5561
Bracket for Magnetic Catch
Rd. Hd. Screw
Magna-Tite
90-2993
90-3154
10-0453
Door Ass'y. L.H.
Door Ass'y. R.H.
Hinge L.H.
20
21
10-1722
90-2657
Mach. Scr. Rd. Hd.
Rear Panel