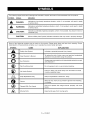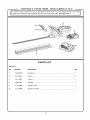
1
OPERATOR'S
MANUAL
MANUEL DEL OPERADOR
[I:RR FTSHRN I
40V LITHIUM-ION
CORTASETOS
CORDLESS
INALAMBRICO
HEDGE
TRIMMER
LITIO-ION 40V
Model No.
138. 99017
NQmero de modelo
138. 99017
A
Alt
WARNING:
To reduce the risk
of injury, the user must read and
understand
the operator's manual
before using this product.
A
411
ADVERTENCIA:
Para reducirel
riesgo de lesiones, el usuario debe Jeer
y comprender
el manual dei operador
antes de usar este producto.
Customer Help Line: 1-888-288-7098
Tel_fono de atenci6n al consumidor: 1-888-266-7096
Sears Brands Management
Corporation,
Hoffman
Estates, IL 60179 USA
Visit the Craftsman
web
page: www.craftsman.com
Visite et sitio web de Craftsman:
www.craftsman.com
Save this manual for future reference
Guarde
este
manual
para
futuras
consulta
218549
ENGLISH
ESPANOL
•
Warranty ...................................................................
2
•
Garantfa ............. Intges seccion ................................ 2
•
Introduction ...............................................................
2
•
Introducci6n .............. Inlges seccion .......................... 2
•
General Safety Rules ................................................
3
•
Reglas de seguridad generales ............................. 3-4
•
Specific Safety Rules ............................................. 4-5
•
Reglas de seguridad especfficas ........................... 4-5
•
•
Symbols ................................................................
6-7
Features ....................................................................
8
•
Sfmbolos ................................................................
•
Caracteffsticas ..........................................................
•
Assembly ...................................................................
8
•
Armado .....................................................................
•
Operation .............................................................
9-10
•
Funcionamiento ....................................................
•
Maintenance ............................................................
11
•
Mantenimiento ....................................................
•
Illustrated parts list ..................................................
12
•
Figura numeras (itustraciones) ................................. i-ii
•
Figure numbers (illustrations) .................................. i-ii
6-7
8
8
9-11
11-12
CRAFTSMAN ®FOUR YEAR FULL WARRANTY
FOR FOUR YEARS from the date of purchase this product is warranted against any defects in material or
workmanship. FOR TWO YEARS from the purchase date a supplied battery pack or charger is warranted against
material or workmanship defects. With proof of purchase, a defective product will be replaced free of charge.
For warranty
This warranty
This warranty
Sears Brands
coverage details to obtain free replacement, visit the web site: www. craftsman, corn
is void if this product is ever used while providing commercial services or if rented to another person.
gives you specific legal rights, and you may also have other rights which vary from state to state.
Management Corporation, Hoffman Estates, IL 60179
GARANT|A COMPLETA
DE CUATRO AltOS CRAFTSMAN ®
Esta soplador tiene garantfa por cualquier defecto en material o mano de obra DURANTE CUATRO ANOS desde
la fecha de compra. Las bateffas y el cargador tienen garantfa por cualquier defecto durante dos a¢_odesde la fecha
de compra. Los productos defectuosos se remplazaran sin cargo.
Para conocer los detalles sobre la cobertura de la garantia para obtener
web: www.craftsman.com.
un remplazo
gratuito, visite el sitio
La garantfa pierde validez si este producto se utiliza mientras se prestan servicios comerciales o si se alquila a otra persona.
Esta garantfa le otorga derechos legales especificos yes posible que tambien tenga derechos que varian segOn el estado.
Sears Brands Management
Corporation,
Hoffman Estates, IL 60179
2 -- English
This
tool
hasmany
features
formaking
itsusemore
pleasant
and
enjoyable.
Safety,
performance,
and
dependability
have
been
given
toppriority
inthedesign
ofthisproduct
making
iteasy
tomaintain
and
operate.
Esta
herramienta
ofrece
numerosas
caracterfsticas
para
hacer
ma.s
agradable
yplacentero
suuso.
Enel
dise_o
deeste
producto
sehaconferido
prioridad
alaseguridad,
eldesempe¢_o
ylafiabilidad,
porIocual
se
facilita
sumanejo
ymantenimiento.
,_
Disconnect Hedge Trimmer - remove battery from
hedge trimmer when not in use, before servicing,
when changing accessories, such as blade and
the like.
WARNING"
Read and understand all
instructions. Failure to follow all instructions
listed below may result in electric shock, fire,
and/or serious personal injury.
READ ALL INSTRUCTIONS
•
Do Not Overreach -- Keep proper
balance at all times. Proper footing
enables better control of the hedge
unexpected situations. Do not use
unstable support.
•
Do not operate in poor lighting.
•
Keep hands, face, and feet at a safe distance from
moving parts. Do not touch or try to stop the cutting
blades when they are moving.
•
Do not use hedge trimmer if switch does not
turn it on or off. A hedge trimmer that cannot be
controlled with the switch is dangerous and must
be repaired.
•
Avoid Accidental Starting -- Be sure switch is
in the locked or off position before plugging into
power cord. Carrying hedge trimmers with your
finger on the switch or plugging the power cord
into a hedge trimmer with the switch on invites
accidents.
Protect your lungs. Wear a face or dust mask
if the operation is dusty. Following this rule will
reduce the risk of serious personal injury.
•
Avoid Dangerous Environments -- Do not use the
hedge trimmer in damp or wet locations. Do not
operate the hedge trimmer in rain.
Dress Properly -- Do not wear loose clothing or
jewelry. Contain long hair. Loose clothes, jewelry,
or long hair can get caught in moving parts.
•
Maintain Hedge Trimmer with Care -- Follow
instructions for lubrication and changing
accessories, keep handles dry, clean and free from
oil and grease. Keep cutting blades sharp and
clean. Properly maintained hedge trimmers with
sharp cutting edges are less likely to bind and are
easier to control and reduce risk of injury.
Know your hedge trimmer. Read and understand
the operator's manual and observe the warnings
and instruction labels affixed to the hedge
trimmer.
Stay alert -- watch what you are doing and
use common sense when operating a power
hedge trimmer. Do not use hedge trimmer while
tired or under the influence of drugs, alcohol,
or medication. A moment of inattention while
operating power hedge trimmers may result in
serious personal injury.
Do not allow children or untrained individuals
use this unit.
to
Use Safety Glasses -- always wear eye
protection with side shields marked to comply
with ANSI Z87.1.
•
•
•
Wear heavy long pants, long sleeves, boots, and
gloves. Do not wear loose fitting clothing, short
pants, sandals, or jewelry of any kind. Do not go
barefoot.
•
Secure long hair so it is above shoulder level to
prevent entanglement in any moving parts.
•
Keep Children Away -- keep all bystanders,
children, and pets at least 50 feet away.
•
Use Right Appliance - do not use appliance
any job except that for which it is intended.
•
Don't Force Hedge Trimmer. It will do the job
better and less with likelihood of risk of injury at
the rate for which it was designed
for
footing and
and balance
trimmer in
on a ladder or
Check for misalignment or binding of moving
parts, breakage of parts, and any other condition
that may affect the hedge trimmer's operation. If
damaged, have the hedge trimmer serviced before
using. A guard or any other part that is damaged
should be carefully checked to determine that it will
operate properly and perform its intended function.
Many accidents are caused by poorly maintained
hedge trimmers.
3 -- English
• Keep
thehedge
trimmer
and
itshandle
dry,
clean• Hedge
trimmer
service
must
beperformed
only
by
and
free
from
oiland
grease.
Always
use
aclean qualified
repair
personnel.
Service
ormaintenance
cloth
when
cleaning.
Never
use
brake
fluids,
performed
byunqualified
personnel
may
result
in
gasoline,
petroleum
based
products,
orany
strong ariskofinjury.
solvents
toclean
your
hedge
trimmer.
Following• When
servicing
ahedge
trimmer,
use
only
thisrule
willreduce
therisk
ofloss
ofcontrol
and identical
replacement
parts.
Follow
instructions
deterioration
oftheenclosure
plastic.
theMaintenance
section
ofthismanual.
Use
ofin
• Toavoid
therisk
ofelectric
shock,
donotoperate unauthorized
parts
orfailure
tofollow
Maintenance
unitindamp
orwetlocations.
instructions
may
create
ariskofshock
orinjury.
• Use
only
accessories
that
arerecommended
bythe
manufacturer
foryour
model.
Accessories
that
may
besuitable
forone
hedge
trimmer
may
create
a
riskofinjury
when
used
onanother
hedge
trimmer.
• Before
starting
thehedge
trimmer,
make
sure BATTERY SAFETY
theblade
isnotincontact
with
any
object. • Battery operated units do not have to be plugged
into an electrical outlet; therefore, they are always in
• Stop
theunit,
remove
thebattery,
and
make
sure
theblade
has
stopped
before
setting
the
operating condition. Be aware of possible hazards
unit
down.
even when unit is not operating.
•
Remove the battery pack before making any
Never
cut
any
m
aterial
with
a
diameter
larger
than
2/3in.
adjustments, cleaning, storing, or removing material
DANGER!
Risk
ofcut.Keep
hands
away
from from the unit, or when not in use.
blades.
Donotattempt
toremove
cutmaterial• A battery pack must be recharged only with the
orhold
material
tobecutwhen
blades
are
specified charger for the battery pack. A charger that
moving.
Keep
both
hands
onhandles
when
may be suitable for one type of battery pack may
power
ison.Make
sure
battery
isremoved
and create a risk of fire when used with another battery
thetrigger
isreleased
when
clearing
jammed pack. Use battery pack only with charger listed.
material
from
blades.
Donotgrasp
theexposed
reduce the risk of explosion and possible injury,
cutting
blades
orcutting
edges
when
picking
up • To
DO NOT place battery units or their batteries near
orholding
theunit.
fire or heat.
Blades
coast
after
unit
isturned
off.
•
Do not mutilate the battery pack. Released
Always
stop
themotor
when
cutting
isdelayed electrolyte is corrosive and may cause damage to
orwhen
walking
from
one
cutting
location
to
the eyes or skin. It may be toxic if swallowed.
another.
•
Batteries can explode in the presence of a source
• Keep
unit
clean
ofgrass
clippings
and
other
of ignition, such as a pilot light. To reduce the risk
of serious personal injury, never use any cordless
materials.
They
may
become
lodged
inthe
product in the presence of open flame. An exploded
cutting
blades.
battery pack can propel debris and chemical. If
• Store
Idle
Hedge
Trimmer
Indoors-When
notinuse,
product
should
bestored
indoors exposed, flush with water immediately.
inadry,
locked
upplace--out
ofthereach
of • For use with Craftsman 40 V lithium-ion battery
children.
packs (#29111 2Ah and #29131 4Ah). Refer to your
battery owners manual for further information.
Replace
scabbard
cover
when
unitisnotin
use.
•
Do not charge unit in a damp or wet location.
Following this rule will reduce the risk of electric
Never
douse
orsquirt
theunit
with
water
orany shock.
other
liquid.
Keep
handles
dry,
clean,
and
free
from
debris.
Clean
after
each
use;
see
storage For best results, your battery unit should be charged
instructions.
in a location where the temperature is more than
50°F (10°C) but less than 100°F (38°0). Do not store
Secure
theunit
while
transporting.
outside or in vehicles.
4 -- English
Under
extreme
usage
ortemperature
conditions,
• When
battery
pack
isnotinuse,
keep
itaway
battery
pack
leakage
may
occur.
Ifliquid
comes from
other
metal
objects
like:
paper
clips,
coins,
incontact
with
your
skin,
wash
immediately
with keys,
nails,
screws,
orother
small
metal
objects
that
can
make
aconnection
from
one
t
erminal
soap
and
water,
then
neutralize
with
lemon
juice
orvinegar.
Ifliquid
gets
into
your
eyes,
flush
toanother.
Shorting
thebattery
pack
terminals
them
with
clean
water
foratleast
10minutes, together
may
cause
sparks,
burns,
orafire.
then
seek
immediate
medical
attention. • Save
these
instructions.
Refer
tothem
frequently
• Donotcrush,
drop
ordamage
battery
pack.
Do and
use
them
toinstruct
others
who
may
use
notuse
abattery
pack
orcharger
that
has
been thishedge
trimmer.
Ifyouloan
someone
this
dropped
orreceived
asharp
blow.
Adamaged hedge
trimmer,
loan
them
these
instructions
battery
issubject
toexplosion.
Properly
dispose also.
ofadropped
ordamaged
battery
immediately.
• Donotdispose
ofbatteries
inafire.
The
cell
may
explode.
Batteries
should
berecycled.
Consult
your
local
waste
authority
forinformation
regarding
available
recycling
and/or
disposal
options.
CALIFORNIA
PROPOSITION
65
,_k WARNING:
This product and some dust created by power sanding, sawing, grinding, drilling, and
other construction activities may contain chemicals, including lead, known to cause cancer, birth defects or
other reproductive harm. Wash hands after handling. Some examples of these chemicals are:
• lead from lead-based
• crystalline
paints,
silica from bricks and cement and other masonry products,
• arsenic and chromium
from chemically-treated
and
lumber.
Your risk from these exposures varies, depending on how often you do this type of work. To reduce your
exposure to these chemicals: work in a well ventilated area, and work with approved safety equipment, such
as those dust masks that are specially designed to filter out microscopic particles.
SAVE THESE INSTRUCTIONS
5 --
English
The following
SYMBOL
signal
words
and meanings
are intended
to explain
the levels of risk associated
SIGNAL
MEANING
,_
DANGER:
Indicates
imminently
or
serious an
injury,
,_
WARNING:
Indicates
potentially
or
serious ainjury,
hazardous
situation,
which,
,_,
CAUTION:
Indicates
moderate
hazardous
situation,
which,
CAUTION
(Without
Some of the following
interpretation
of these
Alert Symbol)
Indicates
which,
if not
avoided,
if not avoided,
Read
Indicates
Manual
To reduce
operator's
Eye Protection
Wet Conditions
No Hands
Keep
Alert
Operate
t/_
Moving
a potential
in property
their
damage.
meaning.
Proper
personal
with side shields marked
to rain or use in damp
Failure
keep your injury.
hands
in
seriousto personal
Away
Keep all bystanders
the
Wearblades.
non-slip,
With Two Hands
hands.
Hold and
Parts
Keep hands
6 --
English
injury hazard.
the
risk before
of injury,using
user this
must
read and understand
manual
product,
Do not expose
Gloves
(_
result in death
may result in minor or
that may result
with
AlwaysANSI
wearZ87.t.
eye protection
Symbol
Bystanders
in death
EXPLANATION
Alert Symbol
Operator's
will result
could
if not avoided,
a situation
NAME
Safety
O
Safety
situation,
symbols
may be used on this product.
Please study them and learn
symbols will allow you to operate the product better and safer.
SYMBOL
O
ainjury.
potentially
hazardous
with this product.
at least
heavy-duty
operate
away
to comply
locations.
from
the blade will
result
50 ft. away.
protective
gloves
the
hedge
trimmer
away from
moving
parts.
when
properly
handling
with
both
Some of the
interpretation
following
symbols
may be used on this product.
Please study them and learn their
of these symbols wilt allow you to operate the product better and safer.
SYMBOL
NAME
Electric
meaning.
Proper
EXPLANATION
Shock
can
Failure
result
to use
in electric
in dry conditions
shock.
and to observe
safe practices
This product
uses nickel-cadmium
(Ni-Od) and lithium-ion
(Li-ion) batteries.
Local, state, or federal laws may prohibit
Recycle
Symbols
disposal
of batteries
waste authority
and/or disposal
V
Volts
Voltage
hrs
Hours
Time
m
Direct Current
Type or a characteristic
no
No Load Speed
Rotational
Per Minute
Revolutions,
._/rain
71
English
in ordinary
for information
options.
speed,
trash.
regarding
Consult
available
your
IocaI
recycling
of current
at no toad
strokes,
surface
speed,
orbits
etc., per minute
PRODUCT
SPECIFICATIONS
Motor ...................................................................
40 V DC
Blade Length ..........................................................
24 in.
Cutting Capacity ....................................................
2/3 in.
Cutting Speed ................................................
Weight(without
1600 cuts/min
battery pack) ....................... 5.5 Ibs (2.5 Kg)
KNOW YOUR HEDGE TRIMMER
TRIGGER SWITCH AND LOCK OFF BUI-FON
See Figure 1, page L
The trigger switch, located beneath the rear handle, and
the lock-off button, located behind the front handle, must
be depressed simultaneously to allow blade rotation.
Lock-off switch may be released once hedge trimmer is
running.
The safe use of this product requires an understanding
of the information on the tool and in this operator's
manual as well as a knowledge of the project you
are attempting. Before use of this product, familiarize
yourself with all operating features and safety rules.
ROTATING HANDLE
GUARD
The guard helps to deflect chips or other debris away
from the operator's hands.
The handle of your hedge trimmer rotates 90 degrees to
the left or right for control and precision trimming.
ADJUSTABLE
AUXILIARY
HANDLE
The adjustable auxiliary handle adjusts to 3 positions
for better comfort and control.
UNPACKING
,_WARNING:
If any parts are damaged or
missing, do not operate this product until the
parts are replaced. Failure to heed this warning
could result in serious personal injury.
This product requires no assembly.
•
Carefully remove the product and any accessories
from the box. Make sure that all items listed in the
packing list are included.
•
Inspect the product carefully to make sure no
breakage or damage occurred during shipping.
•
Do not discard the packing material until you have
carefully inspected and satisfactorily operated the
product.
•
_,WARNING:
,_
WARNING:
Do not connect to power
supply until assembly is complete. Failure to
comply could result in accidental starting and
possible serious personal injury.
If any parts are damaged or missing, please call
1-888- 266-7096 for assistance.
PACKING
LIST
Hedge Trimmer
Scabbard
Operator's
Manual
40v Battery
40v Charger
8 --
Do not attempt to modify
this product or create accessories not
recommended for use with this product. Any
such alteration or modification is misuse and
could result in a hazardous condition leading to
possible serious personal injury.
English
,_WARNING:
Do not allow familiarity with this
product to make you careless. Remember that
a careless fraction of a second is sufficient to
inflict serious injury.
,_WARNING:
,_,WARNING:
Do not use any attachments
or accessories not recommended by the
manufacturer of this product. The use of
attachments or accessories not recommended
can result in serious personal injury.
Before each use, inspect the entire product for damaged, missing, or loose parts such as screws, nuts,
bolts, caps, etc. Tighten securely all fasteners and
caps and do not operate this product until all missing
or damaged parts are replaced by qualified repair
personnel. Call 1-888-266-7096 to obtain replacement parts. Part installation should only be performed
by qualified repair personnel.
APPLICATIONS
You may use this product for the purpose listed below:
Trimming
and shaping hedges and shrubbery
IMPORTANT: For complete charging instructions,
refer to the Operator's Manuals for the Craftsman 40
volt battery pack and charger.
TO INSTALL / REMOVE
BATTERY PACK
See Figure 2, page L
,_
When placing battery pack in the tool,
be sure raised rib on battery pack aligns with the
bottom of the tool and latches into place properly.
Improper installation of the battery pack can cause
damage to internal components.
Always wear safety goggles or
safety glasses with side shields that comply
with ANSI Z87.1 when operating power tools.
Failure to do so could result in objects being
thrown into your eyes, resulting in possible
serious injury.
•
CAUTION:
WARNING:
Always remove battery pack
from the product when you are assembling
parts, making adjustments, cleaning, or when
not in use. Removing battery pack will prevent
accidental starting that could cause serious
personal injury.
To remove:
Place the power switch in the OFF position.
Locate the latch on the front of the battery pack and
depress to release the battery pack from the hedge
trimmer.
•
Remove battery pack from the hedge trimmer.
,_,WARNING:
Battery tools are always in
operating condition. Therefore, switch should
always be locked with hands free of the lock-out
button when not in use. Remove battery pack
when transporting or carrying hedge trimmer to
avoid accidental starting, which may result in
serious injury.
BATTERY
PROTECTION
FEATURES
Craftsman 40 V lithium-ion batteries are designed with
features that protect the lithium-ion cells and maximize
battery life. Under some operating conditions, these
built-in features may cause the battery and the tool it is
powering to act differently from nickel-cadmium batteries. During some applications, the battery electronics
may signal the battery to shut down, and cause the
tool to stop running.
To reset the battery and tool, place the power switch in
the OFF position; then start the unit and resume normal operation. If placing the power switch in the OFF
position does not reset the battery and tool, the battery
pack is depleted.If depleted, the battery pack will begin
charging when placed on the lithium-ion charger.
STARTING
See
Figure
AND STOPPING
3, page
THE HEDGE TRIMMER
i.
To start:
•
Remove the scabbard.
To install:
•
Press and hold the lock-out button.
•
Place the power switch in the OFF position.
•
Depress the switch trigger.
•
Place the battery pack in the hedge trimmer. Align
raised rib on battery pack with groove in the hedge
trimmer's battery port.
•
Release the lock-out button. Continue to depress
the switch trigger for extended operation.
•
Make sure the latch on the battery pack snaps in
place and that the battery pack is secured in the
hedge trimmer before beginning operation.
9 -- English
To stop:
•
Release
trimmer.
CUI-rlNG
the switch
trigger
to stop the hedge
,_DANGER:
Never cut near electric cords
or lines. If blade jams on any electrical cord
or line, DO NOT TOUCH THE BLADE! IT
CAN BECOME ELECTRICALLY
LIVE AND
VERY DANGEROUS. Continue to hold the
Upon release of the switch trigger, the locked-out
button will automatically reset to the locked-out
position.
hedge trimmer by the insulated rear handle
or lay it down and away from you in a safe
manner. Disconnect the electrical service to the
USING THE ROTATING REAR HANDLE
See Figure 4, page L
•
Place the hedge trimmer on a flat and even
surface and disconnect from the power supply.
•
Make sure that you released the triggers.
•
Press the lock button and begin turning the rear
handle. Release the lock button and turn the
handle 90 degrees to either side until it clicks into
place and the button pops out.
•
To turn the handle back to center, press the lock
button again, turn the handle slightly, release the
lock button and continue turning the handle until it
locks into place.
USING THE ADJUSTABLE
damaged line or cord before attempting to free
the blade from the line or cord. Contact with
the blade, other conductive parts of the hedge
trimmer, or live electric cords or lines will result
in death by electrocution or serious injury.
WARNING:
Clear the area to be cut before
each use. Remove all objects such as cords,
lights, wire, or loose string which can become
entangled in the cutting blade and create a risk
of serious personal injury.
•
Before starting the hedge trimmer, hold the unit
with both hands with the cutting blades directed
away from you. Always use the hedge trimmer
properly.
•
Do not force the hedge trimmer through heavy
shrubbery. This can cause the blades to bind and
slow down. If the blades slow down, reduce the
pace.
•
Do not try to cut stems or twigs that are larger
than 2/3 in. thick, or those obviously too large to
feed into the cutting blade. Use a non-powered
hand saw or pruning saw to trim large stems.
•
If blades do become jammed, stop the motor,
allow the blades to stop and remove the battery
pack before attempting to remove the obstruction.
•
If desired, you can use a string to help cut your
hedge level. Decide how high you want the
hedge. Then, stretch a piece of string along the
hedge at this height. Trim the hedge just above
this guide line of string. Trim the side of a hedge
so that it will be slightly narrower at the top. More
of the hedge will be exposed when shaped this
way, and it will be more uniform.
•
Always hold hedge trimmer with both hands when
operating. Use a firm grip on the handles. The
unit is used for cutting in either direction in a slow,
sweeping action from side to side.
•
Wear gloves
growth.
•
When trimming new growth, use a wide sweeping
action, so that the stems are fed directly into
the cutting blade. Older growth will have thicker
stems and will be trimmed easiest by using a
sawing movement.
AUXILIARY HANDLE
See Figure 5, page L
•
Place the hedge trimmer on a flat and even
surface and disconnect from the power supply.
•
•
Make sure that you released the triggers.
Press the side lock button on the handle and
begin moving forward or backwards. Release the
lock button and continue moving the handle until
it locks into place.
HOLDING THE HEDGE TRIMMER
See Figures 6, pages ii.
•
,_
TIPS
The unit has both a front adjustable auxiliary
handle and a rotating rear handle. With the blade
directed away from you, hold the unit by both
handles.
WARNING:
Always keep both hands on the
hedge trimmer handles. Never hold shrubs with
one hand and operate hedge trimmer with the
other. Failure to heed this warning can result in
serious injury.
10 --
English
when
trimming
thorny
or prickly
_,WARNING:
When servicing, use only
identical replacement parts. Use of any other
parts may create a hazard or cause product
damage.
,_,WARNING:
For easier operation and longer blade life, lubricate
the hedge trimmer blade before and after each use.
Lay the hedge trimmer on a flat surface. Apply light
weight machine oil along the edge of the top blade.
NOTE: If you will be using the hedge trimmer for
an extended time, it is advisable to oil the blade
_,WARNING:
Do not at any time let brake
fluids, gasoline, petroleum-based products,
penetrating oils, etc., come in contact with
plastic parts. Chemicals can damage, weaken
or destroy plastic which may result in serious
personal injury.
Replacement parts should only be installed by qualified repair personnel.
BATTERY PACK REMOVAL
FOR RECYCLING
Remove the battery pack from the hedge trimmer.
•
Avoid using solvents when cleaning plastic parts.
Most plastics are susceptible to damage from various
types of commercial solvents and may be damaged
by their use. Use clean cloths to remove dirt, dust,
oil, grease, etc.
AND PREPARATION
periodically.
•
•
•
Stop the hedge trimmer.
Remove the battery pack.
Lubricate the hedge trimmer as described above.
•
Reinstall the battery pack and resume use.
CLEANING
•
•
THE HEDGE TRIMMER
Remove the battery pack.
Slide the scabbard over the blade.
•
Clean dirt and debris from the body of the hedge
trimmer, using a damp cloth with a mild detergent.
NOTE: Do not use any strong detergents on the
plastic housing or the handle. They can be damaged
by certain aromatic oils such as pine and lemon, and
by solvents such as kerosene.
Upon removal, cover the
battery pack's terminals with heavy-duty
adhesive tape. Do not attempt to destroy or
disassemble battery pack or remove any of
its components. Batteries must be recycled
or disposed of properly. Also, never touch
both terminals with metal objects and/or body
parts as short circuit may result. Keep away
from children. Failure to comply with these
warnings could result in fire and/or serious
injury.
TRANSPORTING
Always allow the blades of the
hedge trimmer to come to a stop and remove
the battery pack before lubricating. Failure to
do so could result in accidental starting causing
possible serious personal injury.
•
MAINTENANCE
,_,WARNING:
,_, WARNING:
To avoid serious personal
injury, always remove the battery pack from
the product before inspecting, cleaning or
performing any maintenance.
GENERAL
THE BLADE
See Figure 7, page ii.
Always wear eye protection
with side shields marked to comply with ANSI
Z87.1. Failure to do so could result in objects
being thrown into your eyes resulting in
possible serious injury.
_IkWARNING:
LUBRICATING
•
Moisture can cause a shock hazard. Wipe off any
moisture with a soft dry cloth.
•
Use a small brush or the air discharge of a small
vacuum cleaner brush to clear dust or debris from
the air vents on the motor housing.
STORING THE HEDGE TRIMMER
See Figure 8, page ii.
•
Clean the hedge trimmer thoroughly before storing.
Store the hedge trimmer in a dry, well-ventilated
place that is inaccessible to children. Keep away
from corrosive agents such as garden chemicals
and de-icing salts.
•
Always place the scabbard
before storing.
AND STORING
Always place the scabbard on the blade before
storing or transporting the hedge trimmer. Use
caution to avoid the sharp teeth of the blade.
Clean the hedge trimmer thoroughly
before
storing. Store the hedge trimmer indoors in a dry
place_hat is inaccesslele to children. Keep away
from corrosive agents such as garden chemicals
and de-icing salts.
11 --
English
on the cutting blades
,..
CRAFTSMAN
40 V HEDGE
TRIMER
- MODEL
NUMBER
138. 99017
]
The
model
number
found
on a label parts.
attached
to the parts,
motor call
housing.
Always mention the model !
number
when
callingwill
to be
order
replacement
To order
1-888-266-7096
PARTS LIST
Key Part
No.
Number
Description
Qty
1
34991887
Scabbard ..............................................................................................
1
2
3221675A
Screw ...................................................................................................
2
3
34101887
Guard ...................................................................................................
1
4
34981887
Hedger ................................................................................................
1
5
31103996
Battery Pack ........................................................................................
1
6
31101998
Battery Charger ...................................................................................
1
12
See this section for all of the figures referenced in the
operator's manual.
Consulte esta seccion para ver todas las figuras a las que se hace
referencia en el manual del operador.
Fig.1
. •
A
F
_7' _2_i
,,I.
_"_/'_'
"~"
Ai/*"
/
/__/
B- Scabbard (funda)
/_/
__
C-Guard (protection)
D _liary
handle
(Mango auxiNarajustdble)
E - Lock button for rotating handle
(Botch de bloqueo para la manijagiratoria, )
F- Lock-out button (boton del seguro)
G- Rear Handle with overmold
H
(mango traserocon sobremoldeado)
H- Switch trigger (gatillo)
I - Side lock button (Bot6nde bloqueo lateral)
Fig.2
_
_... _
.....
"
A- Battery pack(paquete de baterfas)
B- Battery port (receptaculopara baterias)
__
'+ '
Fig.3
A
A- Lock-out button (botch del seguro)
B- Switch trigger (gatillo del interruptor)
C" Latches(pestillos)
Fig,4
Fig.5
A - Lockbutton for rotating handle
(Bot6n debloqueopara la manija giratoria)
A- Side lock button (Boton de bloqueo latera 0
Fig,6
Fig.7
PROPER OPERATING POSITION
POSICI(_NCORRECTA PARA EL MANEJO DE
LA HERRAMIENTA
Fig.8
A- Scabbard (funda)
_k
iADVERTENCIAt Lea y comprenda todas
las instrucciones.
El incumpiimiento de las
instrucciones se_aladas abajo puede causar
descargas electricas, incendios y lesiones
serias.
LEA TODAS
•
No estire el cuerpo para alcanzar mayor distancia.
Mantenga una postura firme y buen equilibrio en
todo momento. La postura firme y el buen equilibrio
permiten un mejor control de la podadora de setos
en situaciones inesperadas. No utilice la unidad al
estar en una escalera o en un soporte inestable.
LAS INSTRUCCIONES
Familiarfcese con la podadora de setos. Lea y
comprenda el manual del operador y observe
las advertencias y etiquetas de instrucciones
adheridas a la podadora de setos.
No utilice este producto si no hay luz suficiente.
Permanezca alerta -- preste atenci6n a Io
que este haciendo y aplique el sentido comtJn
al utilizar podadora de setoss electricas. No
utilice la podadora de setos siesta cansado
o se encuentra bajo los efectos de alguna
droga, alcohol o medicamento. Un momento
de inatenci6n al utilizar una podadora de setos
electrica puede causar lesiones corporales
serias.
•
No permita que utilicen esta unidad ni_os ni
personas carentes de la debida instrucci6n para
su manejo.
•
Use gafas de seguridad -- Use siempre
protecci6n ocular con la marca de cumplimiento
de la norma ANSI Z87.1.
•
Protejase los pulmones. Use una careta o
mascarilla contra el polvo si la operacion genera
mucho polvo. Con el cumplimiento de esta regla
se reduce el riesgo de lesiones serias.
•
Vfstase adecuadamente -holgadas ni joyas. Rec0jase
largo. Las ropas holgadas,
largo pueden engancharse
No vista ropas
el cabello siesta.
las joyas y el cabello
en las piezas moviles.
•
Pongase pantalones, mangas largas, botas y
guantes gruesos. No se ponga ropa holgada,
pantalones,, sandales, cortos ni joyerfa de ningOn
tipo. No camine descalzo.
•
Rec6jase el cabello si Io tiene largo, de manera
que le quede arriba de los hombros para evitar
que se enrede en las piezas en movimiento.
•
Mantenga a todos los circunstantes, ni_os y
animales por Io menos a 15 metros (50 pies) de
distancia.
•
Use el aparato adecuado -- no use el aparato
para ningOn otro fin que no sea el previsto.
•
No fuerce la recortadora de setos. Funcionara.
mejor y habra menos riesgo de lesiones si se usa
a la velocidad para la que fue diseC_ada.
Desconecte la recortadora de setos: desconecte
la recortadora de setos del paquete de bater[as
cuando no la use y antes de proporcionarle
servicio cuando le cambie accesorios (por ejemplo,
la hoja y otros similares).
Mantenga las manos, cara y pies a una distancia
segura de toda pieza en movimiento. No toque ni
trate de detener las hojas de corte cuando esten
moviendose.
No utilice la podadora de setos si el interruptor
no enciende o no apaga. Una podadora de setos
que no puede controlarse con el interruptor es
peligrosa y debe repararse.
Evite un arranque accidental de la unidad.
AsegQrese de que el interruptor este en la
posici6n de aseguramiento o de apagado antes
deconectarlo al cable de alimentaci6n. Llevar las
podadora de setoss con el dedo en el interruptor
oplugging the cable de alimentaci0n en la
podadora de setos con el interruptor puesto es
causa comQn de accidentes.
•
Evite los entornos de trabajo peligrosos. No use la
podadora de setos en lugares humedos o mojados.
No utilice en la Iluvia la podadora de setos.
•
Cuide la recortadora de setos: siga las
instrucciones para lubricar y cambiar accesorios;
mantenga los mangos secos, limpios y libres de
aceite y grasa. Las podadora de setoss de corte
bien cuidadas, con bordes bien afilados, tienen
menos probabilidad de atascarse en la pieza de
trabajo y son mas faciles de controlar y reduzca el
riesgo de lesiones.
•
Revise para ver si hay desalineaci6n o atoramiento
de piezas moviles, ruptura de piezas o toda otra
condici0n que pueda afectar el funcionamiento
de
la podadora de setos. Si se da¢_a la podadora de
setos, Ilevela a servicio antes de volver a utilizarla.
Es necesario inspeccionar cuidadosamente
la proteccion o cualquier parte da¢_ada para
asegurarse de que funcione y desempe_e
correctamente la funcion a la que esta destinada.
Numerosos accidentes son causados por
podadora de setoss mal cuidadas.
3--Espa_ol
Mantenga
lapodadora
desetos
yelmango
secos,•
limpios
ysinaceite
nigrasa.
Siempre
utilice
un
paso
limpio
para
lalimpieza
delaunidad.
Nunca
utilice
fluidos
para
frenos,
gasolina,
productos
a
base
depetrdleo
nisolventes
fuertes
para
limpiar
lapodadora
desetos.
Con
elcumplimiento
de
•
esta
regla
sereduce
elriesgo
deuna
perdida
de
control
yeldeterioro
delalojamiento
deplastico
de
launidad.
Para
evitar
elriesgo
deuna
descarga
electrica,
no
utilice
launidad
enlugares
hOmedos
omojados.
S01o
utilice
accesorios
recomendados
porel
fabricante
para
cada
modelo
enparticular.
Accesorios
que
pueden
seradecuados
para
una
podadora
desetos
pueden
significar
unriesgo
delesiones
siseemplean
conotra
podadora
de
setos.
:t
Im]=1
Elservicio
delapodadora
desetos
s01o
debe
ser
efectuado
porpersonal
dereparacion
calificado.
Todo
servicio
omantenimiento
efectuado
por
personal
nocalificado
puede
significar
unriesgo
delesiones.
AIdarservicio
auna
podadora
desetos,
sOlo
utilice
piezas
derepuesto
identicas.
Siga
lasinstrucciones
se_aladas
enlaseccion
Mantenimiento
deeste
manual.
Elempleo
de
piezas
noautorizadas
oelincumplimiento
delas
instrucciones
demantenimiento
puede
significar
unriesgo
dedescarga
electrica
odelesiones.
JIJ:11DTIB]I
•
Antes de encender la podadora de setos,
asegurese de que la hoja no este en contacto con
ningun objeto.
•
Apague la unidad, retire el paquete de bater(as y
asegurese de que se haya detenido la hoja antes
de poner en reposo la unidad.
•
Nunca corte ningQn material de un diametro
superior a 16.9 mm (2/3 pulg.).
•
Riesgo de cortadura. Mantenga las manos lejos
de las hojas. No intente retirar material cortado
ni sujetar material por cortar mientras esten
moviendose las hojas. Cuando este encendida la
unidad mantenga ambas manos en los mangos.
AI retirar material atorado en las hojas, asegurese
de que el paquete de baterfas este desmontado de
la unidad y el gatillo no este oprimido. AI recoger
o sostener la unidad no sujete las hojas de corte
expuestas ni los filos de corte.
•
Las hojas continQan moviendose
despues de apagarse la unidad.
por inercia
•
Siempre detenga el motor al retardar un corte o al
caminar de un lugar donde este cortando a otro.
•
Mantenga la unidad fibre de recortes de cesped y
otros materiales. Pueden alojarse en las hojas de
corte.
Guarde en el interior la recortadora de setos
que no este usando - Cuando no esta en uso, la
podadora debe guardarse en el interior, en un
lugar seco y cerrado con Ilave, lejos del alcance de
los ni_os.
•
Nunca moje ni rode con agua ni con ningOn otro
Ifquido la unidad. Mantenga secos, limpios y sin
basura los mangos. Limpie la unidad despues
de usarla; vea el apartado Instrucciones para
guardar la unidad.
•
Mantenga asegurada
transporta.
la unidad mientras la
SEGURIDAD EN EL USO DEL PAQUETE
DE BATER(AS
Las podadora de setoss de baterfas no necesitan
conectarse a una toma de corriente; por Io tanto,
siempre estan en condiciones de funcionamiento.
Este consciente de los posibles peligros incluso
si no esta encendida la unidad.
•
Retire el paquete de baterfas antes de ajustar,
limpiar, guardar o quitar material de la unidad, o
cuando no la tenga en uso.
•
SOlo debe cargarse el paquete de baterfas
con el cargador especificadoparael
mismo. Un
cargadorquepuede
seradecuado para un tipo de
paquete de baterfas puede significar un riesgo
de incendio si se emplea con otro paquete
de bater(as. Cargue el paquete de baterfas
solamente con el cargador indicado.
•
Con el fin de reducir el riesgo de explosiones y
lesiones, NO coloque las unidades de baterfas ni
las baterfas mismas cerca del fuego o del calor.
Coloque de nuevo la funda cuando no tenga en
uso la unidad.
4--Espa_ol
• Nodesarme
elpaquete
debaterfas.
El
•
electrolito
emitido
escorrosivo
ypuede
causar
daSos
enlosojos
yenlapiel.
Puede
ser
t6xico
siseingiere.
• Lasbaterfas
pueden
explotar
enpresencia
defuentes
deinflamaciOn,
como
lospilotos
degas.
Para
reducir
elriesgo
delesiones
serias,
nunca
use
unproducto
inalambrico
en •
presencia
dellamas
expuestas.
Laexplosi6n
deunpaquete
debaterfas
puede
lanzar
fragmentos
ysustancias
qufmicas.
Siha
quedado
expuesto
alaexplosi6n
deuna
pila,
la.vese
deinmediato
conagua.
• Usar
con
paquetes
debaterfas
deion-litio •
Craftsman
de40V(#29111
de2Ahy#29131
de4Ah).
Consulte
elmanual
depropietarios
debaterfas
para
tener
ma.s
informacion.
• Nocargue
launidad
enlugares
mojados
o
hQmedos.
Con
elcumplimiento
deesta
regla
sereduce
elriesgo
deunadescarga
electrica.
• Para
Iograr
resultados
6ptimos,
launidad
de
•
baterfas
debe
cargarse
enunlugar
donde
la
temperatura
sea
superior
a10°C(50
°F),pero
inferior
°C(100
°F).
No
guarde
launidad
alaire
fa38
ibre
nien
elinterior
de
vehfculos.
Encondiciones
extremas
deuso
o
temperatura
elpaquete
debater[as
puede
emanar
Ifquido.
SielIfquido
Ilega
atocarle
la
piel,
lavese
deinmediato
con
agua
yjab6n,
ydespues
neutralice
losefectos
con
jugo
delim6n
ovinagre.
Sileentra
Ifquido
enlos
ojos,
laveselos
con
agua
limpia
perIomenos
10minutes,
ydespues
busque
deinmediato
atenci6n
medica.
CALIFORNIA
- PROPUESTA
DE LEY NUM.
Noaplaste,
deje
caer
oda_e
labaterfa.
Nunca
utilice
una
baterfa
ocargador
que
sehacafdo,
aplastado,
recibido
ungolpe
contundente
oha
sido
da_ado(a)
dealguna
manera.
Las
baterfas
da_adas
pueden
sufrir
explosiones.
Deseche
de
inmediato
toda
pilaque
haya
sufrido
una
cafda
o
cualquier
da¢_o.
Nodeseche
lasbater[as
enelfuego.
Las
bater[as
pueden
estallar.
Debe
reciclarse
lasbaterfas.
Consulte
alas
autoridades
reguladoras
de
desechos
para
obtener
informacion
enrelaci6n
conlasalternativas
dereciclado
ydesecho
disponibles.
Cuando
noeste
usando
elpaquete
debaterfas,
mantengalo
alejado
detodo
objeto
metalico
como:
clips,
monedas,
Ilaves,
clavos,
tornillos
y
otros
objetos
metaJicos
peque_os
que
puedan
establecer
conexion
entre
ambas
terminales.
Establecer
una
conexion
directa
entre
lasdos
terminales
delpaquete
debaterfas
puede
causar
chispas,
quemaduras
oincendios.
Guarde
estas
instrucciones.
Consdfltelas
con
frecuencia
yempleelas
para
instruir
aotras
personas
que
puedan
utilizar
esta
podadora
de
setos.
Sipresta
aalguien
esta
podadora
desetos,
facilftele
tambien
lasinstrucciones.
65
,_ iADVERTENCIA! El polvo provocado por la utilizacion de herramientas electricas puede contener
sustancias quimicas reconocidas por el Estado de California como causantes de c_tncer, malformaciones
congenitas y otras anomalias reproductivas:
• plomo de las pinturas a base de plomo,
• silicio cristalino
• arsenico
de los ladrillos, del cemento y de otros productos
y cromo de la madera quimicamente
de mamposterfa,
y
tratada.
El riesgo de la exposici6n a estos compuestos varia, segQn la frecuencia con que se realice este tipo de
trabajo. Para reducir la exposicion personal a este tipo de compuestos: trabaje en _treas bien ventiladas, y
con equipo de seguridad aprobado, tal como las caretas para el polvo especialmente
dise_adas para filtrar
particulas microsc6picas.
GUARDAR
ESTAS INSTRUCCIONES
5--Espa_ol
Las siguientes
relacionados
palabras
de se5alizaci6n
y sus significados
tienen
el objeto
SiMBOLO
SEI_AL
SIGNIFICADO
A
PELIGRO:
Indica
situaci6nserias.
peligrosa
muerte una
o lesiones
A
ADVERTENCIA:
Indica una
situaci6n serias.
peligrosa
muerte
o lesiones
A
PRECAUCI(_N:
Indica una situaci6n
peligrosa
lesiones menores o teves.
PRECAUCION:
(Sin et simbolo de alerta
da5os materiales
Es posible
aprender
que se empleen
en esta producto
para mayor
seguridad
SiMBOLO
algunos
al manejar
Proteccion
posible,
posibte,
de seguridad.)
de los siguientes
la cual,
si no se evita,
la cual, si no se evita,
la cual,
simbolos.
Le suplicamos
causara
la
causar
la
podria
si no se evita,
Indica una situaci6n
DENOMINACI(_N
Indica
del
Simbolo
Mantenga
presentes
ocular
posible
podria
causar
que puede
producir
estudiarlos
y
las manos
a Ias personas
/ EXPLICACI(_N
de lesiones
ocular
con protecei6n
lateral
de la norma
ANSI Z87.1.
No exponga
ht3medos.
Ia unidad
Si no mantiene
causarfi
serias
tesiones
tas manos
corporales.
atejadas
a la Iluvia
Mantenga
a los circunstantes
t5
m (50 pies).
Guantes
P6ngase maneje
cuando
guantes lasprotectores
hojas.
Use Ias dos manos
Sujete
Piezas m6viIes
Mantenga
6--Espa_ol
y opere
personales.
el
et riesgo
manual dedellesiones,
operador el usuario
antes dedebe
usar leer
estey
Siempre
p6ngase
protecci6n
con
la marca
de cumplimiento
de no acercar
alejadas
un peligro
Para
reducir
comprender
producto.
Alertadecondiciones
hQmedas
_
de riesgo
este producto.
de seguridad
Lea et manual
operador
O
inminente,
NOMBRE
Alerta
O
los niveles
su
significado
A
de expticar
con este producto.
la podadora
tas manos
ni
la use
antideslizantes
lejos de piezas
lugares
de la hoja de corte,
a una distancia
de setos
en
minima
se
de
de use pesado
con ambas
manos,
en movimiento.
Es posible que se empleen en esta producto
algunos de los siguientes
simbolos.
aprender su significado
para mayor seguridad
al manejar este producto.
SIMBOLO
NOMBRE
Descarga
S[mbolos
eIectrica
de reciclado
DENOMINACI()N
Voltaje
hrs
Horas
Tiempo
m
Corriente
no
Velocidad
.../min
Pot minute
y
producirse una descarga
secas y no se observan
Este producto contiene baterias de niqueFcadmio
(Ni-Cd) o iones de litio (Lidon). Es posible que atgunas leyes
municipaIes, estatates o federales prohiban desechar las
baterias de nJqueFcadmio en la basura normal. Consulte
a las autoridades
regutadoras de desechos para obtener
informaci6n en retaci6n con las alternativas de reciclado y
desecho disponibtes.
Volts
en vacb
estudiartos
/ EXPLICACION
practicas seguras de trabajo, puede
Si no se usa la unidad en condiciones
electrice.
V
continua
Le suplicamos
Tipo o caracterJstica
Velocided
de rotaci6n,
Revoluciones,
por minuto
7--Espa_ol
de corriente
carreras,
en vacJo
vetocidad
superficial,
6rbitas,
etc.,
ESPEClFICAClONES
DEL
PRODUCTO
Motor
....................................................
40V,corr.
cont. Velocidad
decorte
...........................
1600
cortes
porminuto
Longitud
delahoja
...........................
609
mm(24
pulg.)Peson
(sin
paquete
debaterfas)
...................
2,5kg(5,5
lb.)
Capacidad
decorte
..........................
16.9
mm
(2/3
pulg.)
FAMILIARiCESE
CON
LAPODADORA
DESETOSINTERRUPTOR
Vea la figura 1, pagina L
Para usar este producto con la debida seguridad
se debe comprender la informaci6n indicada en la
podadora de setos misma yen este manual, y se debe
comprender tambien el trabajo que intenta realizar.
Antes de usar este producto, familiarfcese con todas
las caracterfsticas de funcionamiento y normas de
seguridad del mismo.
PROTECClON
La protecci6n ayuda a desviar esquirlas u otros residuos
lejos de las manos del usuario.
DE GATILLO Y BOTON DE BLOQUEO
El interruptor de gatillo, ubicado debajo de la manija
posterior, y el bot6n de bloqueo, ubicado detras de la
manija frontal, deben presionarse simultaneamente para
permitir la rotaci6n de las cuchillas. Se debe soltar el
interruptor de bloqueo una vez que la cortadora de orillas
este en funcionamiento.
MANIJA GIRATORIA
La manija de su cortadora de orillas gira 90 grados
hacia la izquierda o la derecha Io que permite un control
excelente y un recorte preciso.
MANGO AUXILIAR AJUSTABLE
El mango auxiliar ajustable tiene 3 posiciones para aportar
una mayor comodidad y control.
DESEMBALAJE
Este producto ha sido enviado completamente
ensamblado.
•
Cretire el producto y los accesorios de la caja
cuidadosamente.
AsegOrese de que esten
incluidos todos los artfculos que aparecen en la
lista de embalaje.
•
Inspeccione cuidadosamente
el producto para
asegurarse de que no se produjo ninguna
ruptura o da¢_o durante el envfo.
•
No se deshaga del material de embalaje
que haya inspeccionado cuidadosamente
utilizado satisfactoriamente
el producto.
•
hasta
y
,_
iADVERTENCIA!
,_
iADVERTENClA! No conecte el suministro
electrico hasta que haya terminado de montar
el aparato. De Io contrario, podrfa provocar un
arranque accidental y posibles lesiones fisicas
graves.
si falta o esta daSada
alguna pieza, no utilice este producto hasta
tenerlas todas completas. Le fait d'utiliser
ce produit meme s'il contient des pieces
endommagees ou s'il lui manque des pieces peut
entratner des blessures graves.
,_IiADVERTENCIA!
No intente modificar
este producto ni hacer accesorios no
recomendados para la misma. Cualquier
alteraci6n o modificaci6n constituye maltrato, el
cual puede causar una condici6n peligrosa, y
como consecuencia posibles lesiones corporales
serias.
Si hay partes daSadas o faltantes, Ilame al
1-888- 266-7096 para solicitar ayuda.
CONTENIDO
DE LA CAJA
Podadora de setos
Funda
Manual del operador
Baterfa de 40 v
Cargador de 40 v
8--Espa5ol
_,
,i_,
iADVERTENCIA! No permita que su
familarizacion con este producto Io vuelva
descuidado. Tenga presente que un descuido
de un instante es suficiente para causar una
lesion grave.
Para conectar:
•
Coloque
•
Coloque el paquete de baterfas en la podadora
de setos. Alinee la costilla realzada exterior del
paquete de baterfas con la ranura interior del
receptaculo para baterfas de la podadora de
setos.
iADVERTENOIA! Siempre pongase
proteccion ocular con protecci6n lateral
con la marca de cumplimiento de la norma
ANSI Z87.1. Si no cumple esta advertencia,
los objetos que salen despedidos pueden
producirle lesiones serias en los ojos.
el interruptor
de alimentaci0n
en OFF.
Antes de empezar a utilizar la unidad, asegQrese
de que los pestillos situados en ambos lados del
paquete de baterfas entren completamente en
su lugar con un chasquido, y de que el paquete
quede bien fijo en la podadora de setos.
No utilice ningOn
aditamento o accesorio no recomendado por
el fabricante de este producto. El empleo de
aditamentos o accesorios no recomendandos
_11= iADVERTENCIA!
podrfa causar lesiones serias.
Antes de cada uso, inspeccione todo el producto
para detectar algL_n da_o, partes faltantes o sueltas,
como tornillos, tuercas, pernos, tapas, etc. Ajuste
firmemente todos los sujetadores y las tapas y no
active este producto hasta que todas las partes
faltantes o da_adas sean reemplazadas. Llame al
1-888-266-7096
o comunfquese con un centro de
servicio autorizado para recibir asistencia.
USOS
Este producto puede emplearse
enumerados abajo:
•
PRECAUClON:
AI colocar el paquete de baterfas
en la podadora de setos, asegQrese que la costilla
realzada del mismo quede alineada con la parte
inferior de la podadora de setos y de que los pestillos
entren adecuadamente en su lugar. Si no se instala
debidamente el paquete de baterfas pueden da¢_arse
los componentes internos.
Para el desmontaje:
• Coloque el interruptor
•
Retire la baterfa del cortasetos.
para los fine
,_,
Para ver las instrucciones de carga completas,
consulte el manual del operador de los paquetes
de baterfas y cargadores enumerados en las
Instrucciones de seguridad importantes.
Y MONTAR
EL PAQUETE
DE
Vea la figura 2, pbgina L
,_
en OFF.
Localice los pestillos situados en el costado del
paquete de baterfas y oprfmalos en ambos lados
para liberar este de la podadora de setos.
Recortar y dar forma a setos y arbustos
PARA DESMONTAR
BATER|AS
de alimentacion
•
iADVERTENClA! Retire siempre el
paquete de baterfas de la podadora de setos
antes de instalar las piezas, realizar ajustes.
limpiarla o cuando no la utilice. Retirar el
paquete de baterfas evitara que la unidad se
accione accidentalmente
y provoque lesiones
graves.
9--Espa5ol
iADVERTENCIA!
Las podadora de setoss
que funcionan a baterfas siempre estan en
condiciones de funcionamiento.
Por Io tanto, el
interruptor de bloqueo debe estar asegurado
y las manos deben estar alejados del boton
de bloqueo cuando la unidad no este en uso.
Retire el paquete de baterfas al transportar o
trasladar la podadora de setos a fin de evitar
arranques accidentales que pueden causar
lesiones serias.
CARACTERJSTICAS
DEPROTECCION
DE LAS
USO DEL MANGO GIRATORIO TRASERO
BATER|AS
Vea la figura 4, pagina L
Las baterfas de iones de litio de CRAFTSMAN de 40 V
esta.n dise¢_adas con caracterfsticas que protegen las
celdas de iones de litio y maximizan la duracion de las
baterfas. En ciertas condiciones de funcionamiento,
estas caracterfsticas
integradas pueden hacer que la
baterfa y la podadora de setos que esta. encendiendo
act0en de manera diferente a la mayorfa de las
baterfas nfquel-cadmio. Durante algunas aplicaciones,
el sistema electronico de la baterfa puede indicar a
la baterfa que se apague y hacer que la podadora de
setos deje de funcionar.
Para reiniciar la baterfa y la herramienta ponga el
interruptor de alimentacion en OFF; a continuaci6n arranque el aparato y reanude el funcionamiento
normal.
Si poner el interruptor de alimentaci6n en OFF no reinicia la baterfa y la herramienta significa que la baterfa
esta. agotada. En este caso, la baterfa comenzara a
cargarse cuando la coloque en el cargador de ion-litio.
ENCENDIDO Y APAGADO
PODADORA
DE SETOS
Vea la figura 3, pagina L
Coloque el cortasetos en una superficie plana y
lisa y desconectelo del suministro electrico.
•
•
AsegQrese de que suelta los gatillos.
•
Para girar el mango desde atr_ts hacia el centro
pulse de nuevo el boton de bloqueo,
gire
ligeramente el mango, suelte el boton de bloqueo
y continQe girando el mango hasta que se quede
fijo en su lugar.
Pulse el boton de bloqueo y comience a girar el
mango trasero. Suelte el boton de bloqueo y gire
el mango 90 grados para cualquier lado hasta que
se coloque en su lugar haciendo clic y el boton
salte hacia.
USO DEL MANGO AUXILIAR AJUSTABLE
Vea la figura 5, pagina L
•
Coloque el cortasetos en una superficie plana y
lisa y desconectelo del suministro electrico.
•
AsegOrese de que suelta los gatillos.
•
Pulse el bot6n de bloqueo del mango y comience
a mover hacia delante o hacia atra.s. Suelte el
boton de bloqueo y continQe moviendo el mango
hasta que se quede fijo en su lugar.
Para encendido:
•
Retire la funda.
•
Oprima y no suelte el bot6n del seguro.
SUJECION DE LA PODADORA
•
Oprima el gatillo del interrupter.
Vea la figura 6, pagina ii.
•
Suelte el bot6n del seguro. Para accionar
unidad contintJe oprimiendo el gatillo.
DE SETOS
la
La unidad dispone de un mango delantero y
uno trasero. Teniendo la hoja apuntando en la
direccion opuesta a usted sujete la unidad por
ambos mangos. Con ta cuchilla en una direccion
alejada de usted, sujete ta unidad por los dos
mangos.
Para apagado:
•
Suelte el gatillo cuando desee apagar la podadora
de setos.
•
AI soltar el gatillo, el bot6n del seguro regresa
automaticamente
a la posicion de aseguramiento.
_i=
10--Espa_ol
iADVERTENCIA! Siempre mantenga
ambas manos en los mangos de la podadora
de setos. Nunca sujete los arbustos con
una mano mientras maneja la podadora de
setos con la otra. Si no tiene en cuenta esta
advertencia podrfa causar lesiones graves.
SUGERENClAS
PARA
CORTAR
_
,_
•
•
•
No intente cortar tallos o ramas mas gruesas
de 16.9 mm (2/3 pulg.), ni aquellas demasiado
gruesas para entrar en los entredientes de las
hojas de corte. Para podar tallos gruesos utilice
una sierra de podar manual o de motor.
•
Si se atascan las hojas, apague el motor, permita
que se detengan las hojas y retire el paquete de
baterfas antes de intentar quitar la obstruccion.
•
Si Io desea, puede utilizar un cordon para
ayudarse a cortar el seto a nivel. Decida que tan
alto desea el seto. Despues estire el cordon a Io
largo del seto, a esta altura. Pode el seto justo
arriba de esta Ifnea de gufa del cordon. Pode el
costado del seto de manera que quede levemente
mOts angosto en la parte superior. Cuando se le
da forma de esta manera al seto, mOts 6trea del
mismo queda expuesta, y quedarOt mas uniforme.
•
AI utilizar la podadora de setos siempre sujetela
con ambas manos. Sujete firmemente ambos
mangos. La unidad se utiliza para cortar en
cualquier direcciOn con un movimiento lento de
barrido de lado a lade.
PELIGRO:
Nunca realice cortes cerca de
cordones o Ifneas electricas.Si la hoja se atora
en un cordon o Ifnea electrica, iNO LA TOQUE!
PUEDE CARGARSE DE ELECTRICIDAD Y
SER MUY PELIGROSA. ContinQe sujetando la
podadora de setos por el mango trasero, el cual
esta aislado, o dejela reposar lejos de usted, de
alguna forma segura. Desconecte el servicio de
corriente electrica conectado a la Ifnea o cordon
da¢_ado antes de intentar liberar de este(a) la
hoja. El contacto con la hoja, con otras piezas
conductoras de la podadora de setos o con
cordones o Ifneas de corriente electrica puede
producir la muerte por electrocucion o lesiones
serias.
iADVERTENClA!
Siempre despeje el area
de trabajo antes de poner a funcionar la podadora
de setos. Retire todos los objetos como cordones,
luces, alambre, o cordones aflojadas, los cuales
pueden enredarse en la hoja de corte y presentar
un riesgo de lesiones graves.
Antes de encender la podadora de setos, sujete
la unidad con ambas manos, con las hojas de
corte apuntando en la direccion opuesta a usted.
Siempre use correctamente la podadora de setos.
Pongase
guantes cuando corte ramas espinosas.
AI podar el renuevo de los setos, aplique un
movimiento de barrido, de manera que las hojas
de corte Ileguen directamente a los tallos. El
renuevo viejo tiene tallos ma.s gruesos y se poda
mejor aplicando un movimiento de aserrado.
No fuerce la podadora de setos al estar recortando
arbustos espesos. Tal accion podrfa causar un
atascamiento y una disminuci6n en la velocidad
de las hojas. Si se disminuye la velocidad de las
hojas, aminore el paso.
llVl
I:I 1/ / :11IllVil1:11
/ I[O]
MANTENIMIENTO
,_
,_
AI dar servicio a la unidad, solo utilice piezas de repuesto identicas.
El empleo de piezas diferentes puede causar
un peligro o daOar el producto.
iADVERTENClA!
Siempre pongase
protecci6n ocular con protecciOn lateral con
la marca de cumplimiento de la norma ANSI
Z87.1. La inobservancia de esta advertencia
Evite el uso de solventes cuando limpie las partes de
pla.stico. La mayoria de los pla.sticos son susceptibles al da¢_ode numerosos tipos De solventes
comerciales y se pueden da_ar si se utilizan en ellos.
Utilice telas limpias para remover la suciedad, polvo,
aceite, grasa, etc.
,_
puede permitir que los objetos lanzados
hacia los ojos puedan provocarle lesiones
graves..
,_
GENERAL
iADVERTENClA!
iADVERTENClA!
Para evitar lesiones
corporales serias, siempre retire el paquete
de baterias de la podadora de setos al limpiaria o darle mantenimiento.
iADVERTENCIA!
No permita en ningOn
momento que fluidos para frenos, gasolina, productos a base de petr61eo, aceites
penetrantes, etc., Ileguen a tocar las piezas
de plastico. Las sustancias qufmicas pueden
da_ar, debilitar o destruir el plastico, Io cual
a su vez puede producir lesiones corporales
serias.
Las piezas de repuesto s61o debe instalarlas el
personal de reparaciOn cualificado.
11--Espa5ol
REMOCION
Y PREPARACION
•
Apague
DE BATER|AS
•
Retire el paquete de bateffas.
•
Lubrique la podadora
arriba.
•
Vuelva a instalar el paquete de baterfas y reanude
el trabajo.
,_k
DEL PAQUETE
PARA EL RECICLADO
iADVERTENCIA!
AI retirar el paquete
de baterfas, cubra las terminales del mismo
con cinta adhesiva reforzada. No intente
destruir o desarmar el paquete de baterfas, ni
de desmontar ninguno de sus componentes.
Las baterfas deben reciclarse o desecharse
debidamente. Asimismo, nunca toque ambas
terminales con objetos meta.licos y partes del
cuerpo, ya que puede producirse un corto
circuito. Mantengase fuera del alcance de los
ni_os. La inobservancia de estas advertencias puede causar incendios
corporales serias.
TRANSPORTE
•
de setos como se explica
DE LA PODADORA
•
Retire el paquete de baterfas.
•
Con un movimiento
funda sobre esta.
y lesiones
DE SETOS
de deslizamiento
coloque la
•
Y ALMACENAMIENTO
Siempre coloque la funda en esta antes de
guardar o de transportar la podadora de setos.
Tenga precauci6n y evite tocar los afilados dientes
de la hoja de corte.
Limpie la podadora de setos completamente antes
de guardarla. Guarde la podadora de setos en el
interior, en un lugar seco inaccesible a los ni_os,
Evite que la unidad entre en contacto con agentes
corrosivos como las sustancias qufmicas para el
jardfn y las sales para derretir el hielo,
LUBRICACION
LIMPIEZA
la podadora de setos.
DE LA HOJA DE CORTE
Limpie toda la tierra y la basura del cuerpo de la
podadora de setos con un paso humedecido con
un detergente suave.
NOTA: No aplique ningQn detergente fuerte al
alojamiento de plastico ni al mango. Pueden resultar
daSados por ciertos aceites aroma.ticos como los
de pino y lim6n, asf como por solventes como el
queroseno.
•
La humedad puede causar un riesgo de descarga
electrica. Limpie toda humedad depositada con un
paso suave seco.
•
Con un cepillo peque_o o con el aire de una
aspiradora peque¢_a limpie el polvo y la basura de
las aberturas de aire del alojamiento del motor.
LUBRICACION
DE LA HOJA DE CORTE
Vea la figura Z pagina ii
Vea la figura 8, pagina ii
_lb
iADVERTENCIA!
Permita que se detengan
las hojas de la podadora de setos y retire el
paquete de baterfas antes de lubricaciOn. De Io
contrario la unidad puede ponerse en marcha
accidentalmente,
con el consiguiente riesgo de
lesiones corporales serias..
Para facilitar el manejo de la unidad y prolongar la
vida de servicio de la hoja, siempre lubrique esta
antes y despues de utilizar la podadora de setos.
•
Retire el paquete de bateffas de la podadora de
setos.
•
Deposite la podadora de setos en una superficie
horizontal. Aplique aceite de baja viscosidad para
ma.quina a Io largo del filo de la hoja superior.
•
Limpie completamente la podadora de setos antes
de guardarla. Guarde la podadora de setos en
un espacio bien ventilado inaccesible a los nitros.
Evite que la unidad entre en contacto con agentes
corrosivos como las sustancias qufmicas para el
jardfn y las sales para derretir el hielo.
•
Siempre coloque la funda en estas antes de
guardar la podadora de setos.
NOTA: Siva a estar utilizando la podadora de setos
durante un perfodo de tiempo prolongado, se recomienda aceitar la hoja peri6dicamente.
12--Espaffol