1
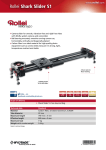
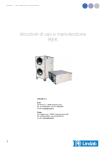
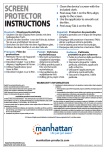
1.
2.
3.
4.
ung
Damit Ihre Schutzfolie fachgerecht und sorgfältig angebracht werden kann, bitten
wir Sie, die nachfolgenden Anweisungen zu befolgen:
Montageanleit
• Um einen ersten Eindruck von der Folie zu bekommen, was die Form und
Passgenauigkeit betrifft, empfehlen wir Ihnen, diese im unveränderten Zustand
einmal auf das Display Ihres Gerätes zu legen.
assembly instr
• Tischdecken oder Ähnliches sind auf Grund der möglichen statischen Aufladung
als Unterlage nicht geeignet.
• Als Hilfsmaterial verwenden Sie bitte eine Scheckkarte oder Ähnliches. Überziehen Sie die Kante der Scheckkarte mit einem weichen Tuch.
uctions
i
mode d’emplo
1) Achten Sie vor der Anbringung darauf, dass die Oberfläche, die Sie mit der Schutzfolie schützen möchten, sorgfältig gereinigt wird und sich keine Staubkörner mehr
auf dem Display befinden. Nehmen Sie sich dafür ausreichend Zeit, denn das Display muss, um ein einwandfreies Ergebnis zu erzielen, staubfrei sein. Sie können
hier zum Entfernen eines Staubkornes gerne auch ein Stück Tesafilm verwenden.
Zur Reinigung der Oberfläche empfehlen wir Ihnen ein Mikrofasertuch. Bitte benutzen Sie auf keinen Fall Papiertücher oder ätzende Reinigungsmittel.
2) Lösen Sie zunächst die Trägerfolie mit der Abzieh-Lasche (auf der Abzieh-Lasche
ist der Folien Typ bzw. der Name des Geräte Displays eingraviert) zwei bis drei
Zentimeter ab und knicken Sie diese nach hinten. Bitte achten Sie während der
Montage darauf, dass die eigentliche Schutzfolie nicht geknickt wird und die Klebeseite dabei nicht berührt wird.
3) Setzen Sie nun die freigelegte Unterseite der Displayschutzfolie an den Rand des
Gerätedisplays. Bitte achten Sie darauf, dass die Folie nicht unter den Geräterahmen gelegt bzw. platziert wird. Ziehen Sie nun die Trägerfolie weiter ab und
streichen Sie dabei mit der Karte langsam und mit gleichmäßigem Druck über die
Schutzfolie auf dem Display. Am unteren Displayrand angelangt, entfernen Sie die
Trägerfolie vollständig.
4) Die Displayschutzfolie ist jetzt komplett auf dem Display angebracht. Eventuell
entstandene Lufteinschlüsse können Sie mit der Karte oder einem Rakel aus der
Folie streichen. Hierbei erzielen Sie ein optimales Ergebnis, wenn Sie von innen
nach außen streichen. Bitte benutzen Sie dafür keine scharfen oder spitzen Gegenstände! Bei Bedarf, Folie entfernen und Vorgang wiederholen. Zum Schluss noch
einmal mit einem Mikrofasertuch nachpolieren - Fertig.
Wichtiger Hinweis:
Nach dem Auftragen der Schutzfolie könnten eventuell kleine Luftbläschen sichtbar
sein. Wenn es sich dabei nicht um eingeschlossenen Staub handelt, verschwinden diese Luftbläschen innerhalb von max. 72 Stunden, da die Folie sich nach dem Auftragen
noch selbständig weiterglättetet.
www.atfolix.com
1.
2.
3.
4.
1.
2.
3.
4.
Please adhere to the following instructions to ensure that your protective foil can be
properly and carefully attached:
Afin d’appliquer correctement et soigneusement votre film protecteur, veuillez lire et
respecter à la lettre les instructions suivantes:
• We recommend that you initially place the foil on the screen of your device in its
unaltered state to get a first impression of its shape and fit.
• Pour vous assurer que la forme et les dimensions du film protecteur sont
adéquates, nous vous recommandons dans un premier temps de placer le film
sur l’écran de votre appareil, sans le décoller de sa feuille de support.
• Table-cloths or similar materials are not suitable, due to their possible static
charge.
• Use a bank card or similar item as a tool. Cover the edge of the card with a soft
cloth.
1) Carefully clean the surface that is to be protected by the foil and ensure that there
are no more dust particles on the screen before attaching the foil. Take sufficient
time, because the screen must be dust-free to achieve a good result. Use adhesive
tape to remove single dust particles. We recommend a micro-fibre cloth for
cleaning the surface. Never use paper tissues or corrosive cleaning agents.
2) Detach approximately two to three centimetres of the carrier foil using the pull-off
flap (the foil type or the name of the device screen is engraved on the pull-off flap)
and fold it backwards. Take care that the actual protective foil is not folded and that
the adhesive side is not touched.
3) Place the exposed bottom of the screen-protection foil against the edge of the
device screen. Please ensure that the foil is not installed or placed below the frame
of the device. Pull off more of the carrier foil and use the card to brush slowly over
the protective foil, exerting even pressure. Completely remove the carrier foil once
the bottom edge of the screen has been reached.
4) The screen protection foil is now completely attached to the screen. Any air bubbles
created can be brushed out from under the foil, using the card or a squeegee. Best
results are achieved when brushing from the inside towards the outside. Do not
use any sharp or pointed objects! Where necessary, remove the foil and repeat the
process. Then polish with a micro-fibre cloth to finish.
Important note:
Small air bubbles may still be visible after the protective foil is attached. If these bubbles are not made by enclosed dust, they will disappear within 72 hours at the most,
as the foil continues to smoothe itself following application.
• En raison de leur risque électrostatique, les nappes et autres surfaces du même
type ne doivent pas servir de support.
• Pour vous aider, veuillez utiliser une carte bancaire ou objet similaire. Recouvrez
les bords de la carte à l’aide d’un chiffon souple.
1) Avant d’appliquer le film protecteur, veillez à ce que la surface que vous souhaitez
protéger soit bietn nettoyée et qu’il n’y ait aucune poussière à la surface de l’écran.
Pour un résultat impeccable, prenez votre temps lors du nettoyage de l’écran afin
d’éliminer les moindres poussières.
Pour ce faire, n’hésitez pas à utiliser un morceau de scotch. Pour nettoyer la
surface, nous vous recommandons d’utiliser un chiffon en microfibres. N’utilisez
surtout pas de mouchoirs ni de nettoyants corrosifs.
2) Décollez ensuite la feuille de support à l’aide de la languette (languette sur laquelle
est gravée le type de film ou le nom de l’appareil) de deux ou trois centimètres
et pliez-la vers l’arrière. Veillez à ce que le film protecteur ne se plie pas et faites
attention de ne pas toucher la face collante.
3) Placez ensuite la partie dégagée du film protecteur sur le bord de l’écran. Veillez à
ce que le film ne soit pas placé sous le cadre de l’appareil. Décollez encore un peu
la feuille de support, lissez doucement le film à l’aide de la carte et appliquez-le
uniformément sur l’écran. Une fois arrivé au niveau du bord inférieur de l’écran,
enlevez la feuille de support dans son intégralité.
4) Le film protecteur est maintenant intégralement appliqué sur l’écran. Si des
bulles d’air se sont créées, vous pouvez les évacuer en lissant le film à l’aide de
la carte ou d’une petite raclette. Vous obtiendrez un résultat optimal en lissant de
l’intérieur vers l’extérieur.
N’utilisez pas d’objets coupants ou pointus ! Si besoin, retirez le film et répétez
l’opération. Pour finir, passez un dernier coup de chiffon microfibres sur le film – et
le tour est joué.
Note importante:
Après application du film protecteur, il se peut que de petites bulles d’air apparaissent.
S’il ne s’agit pas de petites poussières coincées entre l’écran et le film, ces bulles d’air
disparaîtront d’elles-mêmes dans un délai max. de 72 heures après l’application du
film.