1
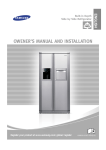
ENGLISH SIDE BY SIDE REFRIGERATOR RM25***** OWNER’S MANUAL AND INSTALLATION CONTENTS SAFETY WARNING SIGNS···················································································2 OperaTING INSTRUCTIONS···········································································4 SETTING UP THE REFRIGERATOR·························································································· 4 MAJOR FEATURES······························································································································· 4 CONTROL PANEL··································································································································· 5 DIGITAL PANEL········································································································································ 6 TEMPERATURE CONTROL············································································································· 7 ICE and COLD WATER DISPENSER······················································································· 7 SHELVES AND BINS····························································································································· 8 FOOD STORAGE GUIDE··················································································································· 9 Arctic Select ZoneTM Drawer GUIDE··································································· 11 Fresh Select ZoneTM Drawer GUIDE····································································12 REMOVING THE FREEZER ACCESSORIES·····································································13 REMOVING THE FRIDGE ACCESSORIES· ·····································································13 REMOVING THE ARCTIC SELECT ZONE ACCESSORIES·····································15 REMOVING THE FRESH SELECT ZONE ACCESSORIES·······································15 CLEANING THE ACCESSORIES································································································16 CHANGING THE INTERIOR LIGHT··························································································17 WATER FILTER·······································································································································19 DOORS· ·······················································································································································19 installation INSTRUCTIONS· ······························································· 20 INSTALLATION OF THE REFRIGERATOR ·········································································20 ADJUSTING THE HEIGHT BETWEEN THE DOORS····················································22 REMOVING THE REFRIGERATOR DOORS· ·····································································25 REATTACHING THE REFRIGERATOR DOORS· ·····························································26 checkING the water dispenser line······································································33 INSTALLATION OF THE WATER DISPENSER LINE·····················································33 BEFORE YOU CALL FOR SERVICE························································································38 Register your product at www.samsung.com/global/register DA99-01225J(EN).indd 1 2007.3.8 11:27:29 AM SAFETY WARNING SIGNS • Before operating the appliance, please read and retain this manual thoroughly for your reference. • Because the following operating instructions cover various models, the characteristics of your refrigerator may differ slightly from those described in this manual. Warning • The appliance is not intended for use by children or infirm persons without adult supervision. • Children should be supervised to ensure that they do not play with the appliance. • This refrigerator must be properly installed and located in accordance with the manual before it is used. • Use this appliance only for its intended purpose as described in this instruction manual. • We strongly recommend that any servicing be performed by a qualified individual. • This product is intended only for the storage of food in a domestic environment. CAUTION/WARNINGS USED OTHER SIGNS USED Represents something you must NOT do. Warning Represents something you must NOT disassemble. Indicates that a danger of death or serious injury exists. Represents something you must NOT touch. Represents something you must follow. Caution Indicates that you must disconnect the power plug from the socket. Indicates that a risk of personal injury or material damage exists. Represents that a ground is needed to prevent electric shock. It is recommended that this should be han-dled by a service center. Because these warning signs are to prevent injury to from users or other persons, please follow safety warning signs. After reading the warning signs, keep them in a safe place for future reference. Warning SIGNS Do not use a cord that shows cracks or abrasion damage along its length or at either end. Do not use mechanical devices or any other means to accelerate the defrosting process, other than those recommended by the manufacturer. Do not damage the refrigerant circuit. Do not place or use electrical appliance inside the refrigerator/freezer, unless they are of a type recommended by the manufacturer. Do not plug several appliances into the same multiple receptacle. • This could cause overheating and the risk of fire. Make sure that the power plug is not squashed or damaged by the back of the refrigerator. • A damaged power plug may overheat and cause fire. Do not directly spray water inside or outside the refrigerator/ freezer. • There is a risk of electric shock. Do not use aerosols near the refrigerator. Do not disassemble or repair the refrigerator by yourself. • There is a risk of explosion or fire. Do not bend the power cord excessively or place heavy articles on it. • You run the risk of causing a fire, malfunctions and/or personal injury. • This constitutes a fire hazard. If the power cord is damaged, have it replaced immediately by the manufacturer or its service agent. Do not insert the power plug with wet hands. Pull the power plug out of the socket before changing the refrigerator’s interior light. Do not put a container filled with water on the refrigerator. If you wish to dispose of the refrigerator, throw it away by first removing the doors and seals. Do not install the refrigerator in a damp place or a place where it may come in contact with water. The refrigerator must be grounded. • You may receive an electric shock. • Otherwise, there is a risk of electric shock. • If spilled, there is a risk of fire or electric shock. • Do so in a way that it is not possible for a child to remain trapped inside. • You must ground the refrigerator to prevent any power leakages or electric shocks caused by current leakage from the refrigerator. • Deteriorated insulation of the electrical parts may cause electric shock or fire. Do not store volatile or flammable substances in the refrigerator. Never use gas pipes, telephone lines or other potential lightening rods as ground. • The storage of benzene, thinner, alcohol, ether, LP gas and other such products may cause explosions. • Improper use of the ground plug can result in a risk of electric shock. DA99-01225J(EN).indd 2 2007.3.8 11:27:30 AM CAUTION SIGNS Do not overfill the refrigerator with food. If the refrigerator is not to be used for a long period of time, pull out the power plug. • When you open the door, an item may fall out and cause personal injury or material damage. • Deterioration in the insulation may cause fire. Do not put bottles or glass containers in the freezer. • The appliance is not intended for use by young children or infirm persons without supervision. Young children should be supervised to ensure that they do not play with the appliance. • If the key is provided with refrigerator, the keys should be kept out of the reach of children and not in the vicinity of the appliance. • Do not place the equipment directly under the sunlight, etc. • The appliance must be positioned so that the plug is accessible after installation. • If the power cord is damaged, it must be replaced by the manufacturer, a certified service agent or a qualified service personnel. • If you have a long vacation planned, empty the refrigerator and turn it off. Wipe excessmoisture from the inside and leave the doors open. Otherwise, odor and mold may develop. • There is no need to disconnect the refrigerator from the power supply if you will be away for less than three weeks. But, Remove all the food if you are going away for the three weeks or more. Unplug the refrigerator and clean it, rinse and dry • Most power failures that are corrected in an hour or two will not affect your refrigerator temperatures. However, you should minimize the number of door openings while the power is off. But should the power failure last more than 24hours, remove all frozen food. • When the contents freeze, the glass may break and cause personal injury. If the wall socket is loose, do not insert the power plug. • There is a risk of electric shock or fire. Do not disconnect the power cord by pulling on it. •Damage to the cord may cause a short-circuit, fire and/or electric shock. • If the power cord is damaged, it must be replaced by the manufacturer, a certified service agent or qualified service personnel. Do not store articles on the top of the appliance. • When you open or close the door, the articles may fall and cause personal injury and/or material damage. Do not store pharmaceutical products, scientific materials and temperature-sensitive products in the refrigerator. • Products that require strict temperature controls must not be stored in the refrigerator. Do not let children hang on the door because a serious injury may occur. If you sense chemical odor or smoke, pull out the power plug immediately and contact your SAMSUNG Electronics service center. Do not re-freeze frozen foods that have thawed completely. Do not touch the inside walls of the freezer or products stored in the freezer with wet hands. SAFETY WARNING SIGNS SAFETY WARNING SIGNS DANGER Risk of child entrapment. Before you throw away your old refrigerator or freezer • It may cause frostbite. Do not insert your hands into the bottom area under the appliance. • Take off the doors • Leave the shelves in places so that children may not easily climb inside. Never put fingers or other objects into the dispenser hole and ice chute. It may cause personal injury or material damage. Do not use a wet or damp cloth when cleaning the plug. Remove any foreign matter or dust from the power plug pins. • Otherwise there is a risk of causing a fire. • If the refrigerator is disconnected from the power supply, you should wait for at least five minutes before plugging it back in. If this appliance contains isobutane refrigerant (R600a)then the following warnings are applicable. R600a is a natural gas with high environmental compatibility however, it is also combustible. When transporting and installing the appliance, care should be taken to ensure that no parts of the refrigerating circuit are damaged. Refrigerant squirting out of the pipes could ignite or cause an eye injury. If a leak is detected, avoid any naked flames or potential sources of ignition and air the room in which the appliance is standing for‑several minutes. • In order to avoid the creation of a flammable gas-air mixture if a leak in the refrigerating circuit occurs, the size of the room in which the appliance may be sited depends on the amount of refrigerant used. The room must be 1m3 in size for every 8 g of R600a refrigerant inside the appliance. The amount of refrigerant in your particular appliance is shown on the identification plate inside the appliance. • Never start up an appliance showing any signs of damage. If in doubt, consult your dealer. • Any sharp edges may cause personal injury. DA99-01225J(EN).indd 3 2007.3.8 11:27:31 AM SETTING UP THE refrigerator Once you have performed the following steps, your refrigerator should be fully operational. If‑not, check the power supply and electricity source. If you have any questions, contact your Samsung Electronics service center. Place the refrigerator in an appropriate location with reasonable clearance between the wall and the refrigerator. (refer to installation instructions in this mannal) Set the temperature control to the coldest temperature and wait for an hour. The freezer should get slightly chilled and the motor should run smoothly. When the refrigerator is plugged in, the interior light should come on when you open the doors. Once the refrigerator temperature is sufficiently low, you can store food in the refrigerator. After starting the refrigerator, it takes a few hours to reach the appropriate temperature. - You can arrange the Power cable with this Cable tie, after you plug in the refrigerator. - If the refrigerator is not to be used for a long period of time, you can also arrange the power cable with this cable clamp is located in the top of the refrigerator as shown. Cable clamp Cable tie MAJOR FEATURES TDM System (Time-Divided-Multi-Evaporator system) • Each compartment has an evaporator. Also Microprocessors and a refrigerant-control-valve control the refrigeration cycle. The 4 evaporators enable improved efficiency and humidity in the fridge. Food odor from the refrigerator does not affect food in other compartments because the cooler and air flow systems are separate. Multi-Flow System • Cool air circulates through multiple vents on every shelf level. This provides even distribution of cooling inside cabinets to keep your food fresh longer. Door Alarm • Beeper reminds you that the door is open. Xtra FreshTM • Optimized humidity control keeps vegetables & fruits fresh. Arctic Select ZoneTM Drawer • Arctic Select Zone Drawer is convertible from freezer to refrigerator by TDM system. You can select Power Freeze, Freeze, Soft Freeze, or Cool according to foods. Fresh Select ZoneTM Drawer • You can select Soft Freeze, Chill, Cool or Fresh according to the food stored. In Cool and Fresh, the humidity is controlled by TDM system. DA99-01225J(EN).indd 4 2007.3.8 11:27:33 AM OperaTING INSTRUCTIONS CONTROL PANEL Fridge Button Set the desired temperature of the fridge compartment or select/cancel the Power Cool by pressing this button. Temperature Range of Fridge Compartment : 1°C ~ 7°C (Recommended Setting Temperature: 3°C) The fridge temperature bars shift in 5 steps according to the temperature setting of the fridge compartment. Freezer Button Set the desired temperature of the freezer compartment or select/cancel the Power Freeze by pressing this button. Temperature Range of Freezer Compartment : -25°C ~ -15°C (Recommended Setting Temperature: -19°C) The freezer temperature bars shift in 5 steps according to the temperature setting of the freezer compartment. Fresh Select Zone Button Functions are selected in the order of Soft Freeze → Chill → Cool → Fresh. Arctic Select Zone Button Functions are selected in the order of Power Freeze → Freeze → Soft Freeze → Cool. Light Button Use this button to turn the dispenser light on and off. Cubed / Crushed Button Use this button to choose Cubed or Crushed Ice. Ice off Button Use this button to turn the Icemaker off. Filter Change Button After changing the water filter, press Cubed and Crushed buttons simultaneously and hold 3 seconds. Child Lock Button Press Ice Off and Light buttons simultaneously and hold 3 seconds. All buttons will be locked and will not work. Water and ice dispenser levers also will not work. NOTE Press the “ Ice Off” Button and perform the “Child Lock” function, then the heater for sweat is off. sweat appears around the cover dispenser or beverage station with this function, press these butIf tons for 3 seconds again. Then, the light will turn off and the sweat control function will be performed. DA99-01225J(EN).indd 5 2007.3.8 11:27:34 AM DIGITAL PANEL • The upper left part of display shows the Freezer compartment information. Freezer The two digit number indicates the current freezer temperature. T here are 5 level bars that indicate the current freezer setting temperature from -25°C ~ -15°C. (5 bars is coldest setting) The “Power Freeze” indicator shows that the Power freeze function is working. • Fridge The upper right part of display shows the Fresh Food compartment information. The two digit number indicates the current fridge temperature. There are 5 level bars that indicate the current freezer setting temperature from 1°C ~ 7°C. (5 bars is coolest setting) The “Power Cool” indicator shows that the Power Cool function is working. Arctic Select Zone • The lower left part of display shows the lower left drawer compartment information. “Power Freeze” speeds up the freezing process. It works for about two and half hours. “Freeze” is the working freezing temperature, that is, the same temperature set with the Freezer button. “Soft Freeze” keeps foods fresh at about -5°C. “Cool” is working refrigerating temperature. Fresh Select Zone • The lower right part of display shows the lower right drawer compartment information. “Soft Freeze” keeps foods fresh at about -5°C. “Chill” keeps foods fresh at about -1°C. “Cool” is the working refrigerating temperature, that is, the same temperature set with the Fridge button. “Fresh” keeps veggies and fruits fresh. DA99-01225J(EN).indd 6 2007.3.8 11:27:35 AM TEMPERATURE CONTROL Freezer Fridge • The freezer temperature can be set between -25°C and -15°C. • Press the Freezer button repeatedly until the desired set temperature is shown in the temperature display. • The temperature display changes in sequence between -25°C and -15°C. The next step to -25° C is “Power Freeze”. When the display reaches “Power Freeze”, it returns to -15°C. • After five seconds, the display reverts to the actual freezer temperature, which changes as the freezer reaches the new temperature. • The refrigerator temperature can be set between 1°C and 7°C. • Press the Fridge button repeatedly until the desired temperature is shown in the temperature display. • The temperature display changes in sequence and reverts in the same way as the freezer. • If you select “Power Cool”, the inside temperature of the fridge will decrease for about two and a half hours. • After “Power Cool ”finishes,it automatically returns to fridge setting temperature. Power Freeze • If you select “Power Freeze” the inside temperature of the freezer will decrease for about two and a half hours. • After “Power Freeze ”finishes,it automatically returns to freezer setting temperature. • W hen ice cream is stored above -15°C in freezer, it may melt. • T he temperature of the freezer or the fridge rises from frequent openings and from warm food. This Warning may cause the digital display to blink . The digital display will stop blinking when the freezer and refrigerator return to the normal temperature. OperaTING INSTRUCTIONS Power Cool ICE and COLD WATER DISPENSER Water Dispenser Ice Dispenser The ice maker produces 8 cubes at once and about 120 cubes a day automatically. This quantity may be influenced by factors such as the freezer temperature, Power Freeze function and the number of door openings. When your refrigerator is plugged in, the Cubed ice mode is automatically selected . The capacity of the water tank is approximately 1L. Cold Water • Push the water dispenser lever with a cup. • If you have just installed the refrigerator, throw away the first six glassfuls of water to flush out impurities in the water supply system. Press the Ice Type button to choose cubed ice, crushed ice or Ice off to stop making ice. • cubed ice • Crushed ice Push • Ice off Push the ice dispenser lever with a cup. • Place a cup to the dispenser lever line to prevent the ice from dropping out. CAUTION Push NOTE If you have a long vacation or business trip and won’t use the water or ice dispensers, close the water valve. Otherwise, water leakage may occur. Preparing for Vacation Never put fingers or any other objects in the dispenser opening. It may cause injury. CAUTION Set the type of ice to the ICE OFF position and shut off the water supply to the refrigerator. DA99-01225J(EN).indd 7 2007.3.8 11:27:36 AM SHELVES and bins Freezer & Fridge Water Filter Dairy Bin Door Bin Ice Bucket Ice Chute Spill Proof Glass Shelf Foldable Shelf Tempered Glass Shelf Beverage Station TM (on some models) Egg Container (on some models) Drawer Door Bin Door Bin (Tilt Pocket) Drawer Arctic Select ZoneTM and Fresh Select ZoneTM Upper Drawer Upper Drawer Drawer Drawer DA99-01225J(EN).indd 8 2007.3.8 11:27:37 AM Food Storage guide 8 5 1 3 10 6 OperaTING INSTRUCTIONS 7 4 2 9 13 11 14 12 FROZEN FOOD STORAGE IN FREEZER Ice Chute Do not put your fingers, hands or any other unsuitable objects in the chute or ice-maker bucket, as this may result in personal injury or material damage. Warning Door Bin (Tilt Pocket) • Can be used for small packages of frozen food Tempered glass Shelf • Can be used to store all types of frozen food. Drawer • Can be used to store meat and dry foods. Stored food should be wrapped securely using foil or other suitable wrapping materials or containers. NOTE • To get Best performance of product - Do not place foods too closely in front of the vents at the rear of the appliance as it can obstruct free air circulation in the freezer compartment. - Wrap the food up properly or place it in airtight containers before put it into the fridge, freezer - Do not put any newly introduced food for freezing near to already frozen food. • Do not place carbonated or fizzy drinks in the freezer compartment • Please observe maximum storage times and expiry dates of frozen goods. DA99-01225J(EN).indd 9 2007.3.8 11:27:38 AM Food Storage guide FRESH FOOD STORAGE IN FRIDGE Tempered Spill Proof glass Shelf • Can be used to store all types of chilled food. • Safe and break resistant. • Circular marks on the glass surface are a normal phenomenon. Egg Container (on some models) • Put eggs in the container and place them on the shelf. Fruit & Vegetable Drawer • Is used to store fruits and vegetables. • This drawer is airtight. Optimized humidity control design helps to preserve the freshness of stored vegetables and fruits. Dairy compartment • Can be used to store butter or margarine. Gallon Door Bins • Can be used to store foods in small packages, such as milk and yogurt. Beverage Station • C an be used to store the frequently used items, such as canned beverages and snacks and allows access to these items without opening the refrigerator door. NOTE • Bottles should be stored tightly together so that they do not fall out. • T he appliance might not operate consistently (possibility of defrosting of contents or temperature becoming too warm in the frozen food compartment) when sited for an extended period of time below the cold end of the range of temperatures for which the refrigerating appliance is designed. • Do not store food which goes bad easily at low temperature, such as bananas, melons. • Y our appliance is frost free, which means there is no need to manually defrost your appliance, as this will be carried out automatically. • T emperature rising during the defrost can comply with ISO requirement. But If you want to prevent an undue rise in the temperature of the frozen food while defrosting the appliance, please wrap the frozen food in several layers of newspaper. • Any increase in temperature of frozen food during defrosting can shorten its storage life. • If you have a long vacation planned, empty the refrigerator and turn it off. Wipe excess moisture from the inside and leave the doors open. Otherwise, odor and mold may develop. Warning • If condensation may forms inside the refrigerator, simply wipe away the condensation with a dry cloth or towels. 10 DA99-01225J(EN).indd 10 2007.3.8 11:27:42 AM Arctic Select ZoneTM Drawer GUIDE Convertible Function • By pressing the “Arctic Select Zone” button, you can select the proper temperature function for your foods. Power Freeze • You can use “Power Freeze” function to freeze foods faster. • Power Freeze works for about two and a half hours continuously, then returns to freezer setting temperature automatically after finishing. ☞ Do not put bottles and glass containers in the freezer ☞ Freezing speed may be influenced by many factors such as the size and weight of foods, the space of foods, the number times the door is opened, etc. ☞ If it is selected “Cool”, move the fresh food to fridge before the “Power Freeze” works, because of returning freezing temperature after finishing this function. OperaTING INSTRUCTIONS • It changes in sequence Power Freeze, Freeze, Soft Freeze and Cool. Freeze • “Freeze” function keeps the freezer setting temperature. For example, if the Freezer is adjusted to -19°C, the Arctic Select Zone will be adjusted to the same temperature. Soft Freeze • You can use the “Soft Freeze” function to help keep meat and fish fresh for longer than in the fridge. • At -5°C, meat can be stored safely for longer, while remaining soft enough to be easily sliced. ☞D o not put bottles and glass containers in the Arctic Select Zone Drawer during “Soft Freeze”, because the temperature is -5°C. Cool • You can use “Cool” function to store more fresh foods. • “Cool” temperature is about 3°C. - If “Freeze” or “Soft Freeze” is selected, move the frozen foods to the freezer before the “Cool” works. Upper Drawer • The drawer can be converted to store either fresh or frozen food. Drawer • The drawer can be converted to store either fresh or frozen food. 11 DA99-01225J(EN).indd 11 2007.3.8 11:27:43 AM Fresh Select ZoneTM Drawer GUIDE Fresh Function • B y pressing the “Fresh Select Zone” button, you can select proper temperature function for your foods. • It changes in sequence Soft Freeze, Chill, Cool and Fresh. Soft Freeze • You can use “Soft Freeze” function to help keeping meat and fish fresh for longer than the Fridge. • At -5°C, meat can be stored safely for longer, while remaining soft enough to be easily sliced. - Do not put bottles and glass containers or foods that have a high water content in the Fresh Select Zone. Drawer, because the “Soft Freeze” temperature is -5°C. Chill • You can use “Chill” function to help keep fresh at about -1°C. • At -1°C, near the water Freezing temperature, foods can be stored safely for longer than the refrigerating temperature. - Do not put bottles and glass containers or foods that have a high water content in the drawer, because the “Chill” temperature is below 0°C. Cool • “Cool” function keeps the fridge setting temperature. For example, if the Fridge is set to 3°C, the Fresh Select Zone will be the same. • Also in this function the humidity of this compartment is high by TDM system. - If you put foods that contain a lot of water without lids or wrapping paper, water droplets may form on the side wall, because of high humidity. Fresh • You can use “Fresh” function to help keep vegetables and fruits fresher. • “Fresh” temperature is about 4°C. The humidity is kept high to store veggies and fruits by the TDM system. Upper Drawer • The humidity in the drawer is high when fresh food is stored in “Cool” or “Fresh” mode. Drawer • You can also store bottles in “Fresh” mode. The humidity in the drawer is kept high in “Cool” and “Fresh” mode. 12 DA99-01225J(EN).indd 12 2007.3.8 11:27:44 AM REMOVING THE FREEZER ACCESSORIES Tray Shelf (on some models) Ice Bucket • Pull the shelf out as far as • Remove the bucket by lifting it goes. Then lift it up and remove it. up and pulling out. front Leg cover Door Bin • Remove two screws. • Lift it up and pull the cover. • T o reattach the front leg • Hold the door bin with both hands and then lift it up. • Remove the drawer by pulling it out and slightly lifting it up. NOTE • Do not use excessive force when removing the cover. It may cause an injury. REMOVING THE FRIDGE ACCESSORIES 5 Spill Proof Glass Shelf Pull the shelf out as far as it will go. Then lift it up and • gently remove it. OperaTING INSTRUCTIONS cover, attach it closely to the refrigerator, then slide it down. Drawer Foldable Shelf ❶ Slide the glass shelf ( A ) under the glass shelf ( B ). ❷ Tilt up the glass shelves ( A & B ) as shown below and lift up 4the shelves with both hands. ❸ Hold the raised glass shelves ( ❶ NOTE 7 2 A & B ) and pull out with care. ❷ ❸ • When you assemble the Foldable Shelf, follow the contrary order. Vegetable & Fruit Drawer • Remove the drawer by holding the handle, pulling the drawer out, drawer bottom smoothly with the other hand. and then lifting up the side of the Gallon Door Bin • Hold the bin with both hands and remove it by lifting it up. 13 DA99-01225J(EN).indd 13 2007.3.8 11:27:46 AM REMOVING THE FRIDGE ACCESSORIES Beverage Station TM (on some models) To open the Beverage StationTM, hold the Beverage StationTM door handle and pull it downward. • The Beverage StationTM is convenient and reduces energy consumption, because you do not need to open the‑refrigerator door to access stored beverages and snacks. • It is recommended that you use the Beverage StationTM for storing most frequently needed foods When the door is opened, it can be used as a tray to support items, such as beverage bottles and glasses. • Do not scratch the surface of the door. Warning NOTE TM TM • The door of the Beverage Station should never be removed. The Beverage Station cannot function if its door is missing. TM • When closing the Beverage Station door, be careful not to put your hands or fingers around the door frame where they‑can be caught or‑injured. • When you use the open door as a tray, do not place heavy objects on it. Do not allow children to hang on the door because there is a risk of personal injury or material damage. TM • When you open the beverage station door, be careful not to hit children head. • Before removing the freezer and fridge accessories, please remove the food. 14 DA99-01225J(EN).indd 14 2007.3.8 11:27:47 AM Open the Arctic Select Zone Door. Hold the front side of upper drawe, and pull it out. Pull the front side of upper cover out. Pull the front side of cover out. Lift the front side of basket first, and take it out carefully (using both hands). NOTE OperaTING INSTRUCTIONS REMOVING THE ARCTIC SELECT ZONE ACCESSORIES • Empty the basket before taking it out. REMOVING THE FRESH SELECT ZONE ACCESSORIES Open the Fresh Select Zone Door. Hold the front side of upper drawer, and pull it out. Pull the front side of upper cover out. Pull the front side of cover out. Lift the front side of basket first, and take it out carefully (using both hands). NOTE • Empty the basket first before taking it out. 15 DA99-01225J(EN).indd 15 2007.3.8 11:27:50 AM CLEANING THE ACCESSORIES Interior • Clean the accessories with a mild detergent, then wipe out with a dry cloth. • After washing the accessories, make sure that they are dry before using them again. Exterior • Wipe the digital panel and display panel with a clean cloth. • The doors, handles and cabinet surfaces should be cleaned with a mild detergent and soft cloth, then wiped off with a dry cloth. - Do not use Benzene, Thinner or CloroxTM for cleaning. - Do not spray water directly on the surface of the refrigerator while cleaning. Rear • Use a vacuum cleaner to remove dust once or twice a year. Warning • Do not remove cover, risk of shock. Ice and water dispenser • Use a damp cloth to clean the ice and water dispenser. Then wipe it out with a dry cloth. • To keep the drainage grid dry, do not touch the ice and water dispenser. Beverage StationTM (on some models) • Use a damp cloth to clean the Beverage StationTM. Then wipe it out with a dry cloth. Rubber door seals • If the rubber door seals are dirty, the door will not close properly, and the refrigerator will not be able to function efficiently. Clean the doors with a mild detergent and damp cloth. Then wipe with a dry cloth. Warning CAUTION • Do not spray the refrigerator with water while it is plugged in, as it may cause an electric shock. • Do not clean it with benzene, thinner or car detergent. It may cause a fire. • Wipe excess moisture from the inside and leave the doors open. - Otherwise, odor and mold may develop. 16 DA99-01225J(EN).indd 16 2007.3.8 11:27:51 AM CHANGING THE INTERIOR LIGHT Warning CAUTION Before changing the interior light, unplug the refrigerator from the power supply. If you have difficulty in changing the light, contact your service center. Light bulbs may be hot. Upper Push both sides of the upper lamp cover, marked ➞ around the top of cold air duct, then pull out the air duct. Push both sides of the bottom lamp cover, marked ➞ on the air duct, then pull out. After changing the bulb, reattach the bottom light cover, then the upper light cover. OperaTING INSTRUCTIONS INTERIOR LIGHT IN THE FRIDGE 17 DA99-01225J(EN).indd 17 2007.3.8 11:27:55 AM CHANGING THE INTERIOR LIGHT Before changing the interior light, unplug the refrigerator from the power supply. If you have difficulty in changing the light, contact your service center. Warning Light bulbs may be hot. CAUTION INTERIOR LIGHT IN THE FREEZER The freezer light is located in the bottom of the auger motor case. Push the center of the light cover’s upper side, and then pull down the light cover. Change the bulb with a new one. rear hook Reattach the light cover. First, align the rear hook of light cover to light case, and then push the front hook. rear hook front hook To replace the freezer and the fridge light bulbs, please contact SAMSUNG dealer. Use replacement bulb size E26, maximum 40 watts. NOTE INTERIOR LIGHT IN ARCTIC & FRESH SELECT ZONE The Arctic & Fresh Select Zone light is located in the bottom of partition in the refrigerator. Open the door of the compartment where you want to replace the lamp, and empty it of all food. Check the lamp-cover attached to the lower part of Partition in the refrigerator. Replace the lamp with a new one. Fit the rear hook of cover lamp into the groove first, and lift it to fit onto the front hook into the groove. rear hook Push the front side of the lamp cover inside refrigerator to separate the front hook. Push it down to separate. rear hook front hook NOTE To replace the freezer and the fridge light bulbs, please contact SAMSUNG dealer. Use replacement bulb size E14, maximum 30watts. 18 DA99-01225J(EN).indd 18 2007.3.8 11:28:0 AM WATER FILTER The water “Filter Indicator” light • “Filter Indicator” light lets you know when it is time to change your water filter cartridge. The light will change from green to orange. This tells you that it is almost time to change the current cartridge. It is recommended that you replace the cartridge when the light changes to red or every six months. (see “Install the water filter” section for more information) Using the dispenser without the water filter • You cannot use the water and ice dispenser without a water filter cartridge. • To order more water filter cartridges, contact your authorized Samsung dealer. Water Dispenser and Ice Maker will not function without Water Filter installed. Doors OperaTING INSTRUCTIONS Ordering replacement filters The refrigerator doors have a special door opening and closing feature to make sure that the doors close all the way and are securely sealed. When opening the door, it will only open so far. After reaching a certain point, it will remain open. When the door is partially open, it will close automatically. 19 DA99-01225J(EN).indd 19 2007.3.8 11:28:1 AM Installation of the REFRIGERaTOR Checking the Dimensions of your Entrance Door Check the dimensions of your entrance door to determine whether the refrigerator can pass through it. Model Dimension (mm) RM25***** Width without hinge Case Height with hinge with handle Depth without door 908 mm 1744 mm 1778 mm 895 mm 770 mm Selecting the Location for the Refrigerator • Select a location with easy access to the water supply. • Select a location with enough space for the refrigerator. • Select a location without direct exposure to sunlight. • Select a location with a level floor or close to it. NOTE • Before disassembling the freezer door, the water supply line needs to be disconnected. (If not, the water supply line may be damaged.) • See “Removing the Freezer Door” on the 25 page. Allow sufficient space for air circulation of the internal cooling system. • When the refrigerator does not have enough space, the internal cooling system may not work correctly. 10 cm 5 cm 1 cm NOTE • Allow clearance to the right, left, back and top when installing the refrigerator. This has the advantage of reducing power consumption. • Do not install the refrigerator where the temperature will go below 10°C. 20 DA99-01225J(EN).indd 20 2007.3.8 11:28:1 AM Installation of the REFRIGERaTOR 908 507 630.6 1391.0 • Be careful when you open the door in full swing. It might come in contact with its adjaCaution cent units. 1617.0 Door View Side View Front View LEVELLING If the front of the appliance is slightly higher than the rear, the door can be opened and closed easier. The appliance tilts down to the right. Turn the right adjusting leg in the direction of the arrow with a flat head screwdriver until the appliance is level. The appliance tilts down to the left. Turn the left adjusting leg in the direction of the arrow with a flat head screwdriver until the appliance is level. Warning installation INSTRUCTIONS NOTE To get the maximum energy efficiency, you had better give enough clearance of the back side. To get more space remove the box in the Freezer and the Fridge,the partition and the upper box in the Arctic Select Zone, the upper box in the Fresh Select Zone since it does not effect satisfactory thermal and mechanical characteristics. • Allow sufficient space to install the refrigerator on a flat surface. - If your refrigerator is not level, the internal cooling system may not work correctly. 21 DA99-01225J(EN).indd 21 2007.3.8 11:28:3 AM adjusting the HEIGHT between the doors Please level the refrigerator first The doors will be uneven if the refrigerator is not level. Case 1) Freezer door is lower than the refrigerator door. DIFFERENCE OF HEIGHT Insert a flat-blade screwdriver (-) (➀) into a slot of the control lever (➁), turn it clockwise and level the refrigerator. ➀ DRIVER(-) ➁ CONTROL LEVER Insert a flat-blade screwdriver (-) (➀) into a slot of the control lever (➁), turn it clockwise and level the refrigerator. DIFFERENCE OF HEIGHT Case 2) Freezer door is higher than the fridge door ➀ DRIVER(-) ➁ CONTROL LEVER NOTE Do not make small adjustments with the control lever, Please refer to the next page. 22 DA99-01225J(EN).indd 22 2007.3.8 11:28:4 AM adjusting the HEIGHT between the doors Making small adjustments between doors. If the door of fridge is lower than that of the freezer, adjustment part NOTE When you turn counter clockwise ( ) or installation INSTRUCTIONS 1) If you open the Fresh Select Zone Door (➀), you can see the hinge-mid (➁). 2) Insert enclosed hex wrench (➂) into the shaft (➃) of the hinge mid. 3) Please adjust the height difference between the doors turning the hex wrench (➂) clockwise ( counter clockwise ( ). ), the door goes up. 4) After adjusting the doors, please insert enclosed fastener-ring (➄) using a plier (➅) in the gap between the hinge-grommet (➆) and the hinge-mid (➇). The number of the fastener-ring to insert depends on the gap. NOTE Four fastener-rings are enclosed with the refrigerator. 23 DA99-01225J(EN).indd 23 2007.3.8 11:28:6 AM adjusting the HEIGHT between the doors If the Arctic Select Zone Door is lower than the Fresh Select Zone Door. adjustment part Arctic Select Zone Fresh Select Zone 1) Locate the height-adjuster (➀) in the Arctic Select Zone. Unscrew the four phillips screws (➁) slightly to loose the door. ➁ ➀ 2) Unscrew the adjuster-phillips screw (➂) two times turns to rotate the adjuster. ➂ 3) Find the best adjuster-level to align the door gap. CASE) The gap is about 2mm (0.08inch) as shown below. gap Arctic Select Zone Door Fresh Select Zone Door reference plane - Rotate down the adjuster-face with +2.0 number to reduce the door gap. - The number of the adjuster to rotate depends on the gap. After adjustment, tighten the screws (➁ & ➂ ) in reverse order. NOTE The adjuster in the Fresh Select Zone can be used in the same way. 24 DA99-01225J(EN).indd 24 2007.3.8 11:28:8 AM REMOVING the refrigerator doors Removing the Front Leg Cover FRONT LEG COVER RIB HOOK Removing the Freezer Door NOTE • Lift the door straight up. • Be careful not to pinch the water tubing and wire harness on the door. • Place doors on a protected surface. 1) With the door closed, remove the upper hinge cover (➀) using a screwdriver, and then remove the water tube by pressing the coupler-ring (➁) and pulling the water tube (➂) away. NOTE installation INSTRUCTIONS Unscrew two phillips screws from the front leg cover. Pull the front leg-cover down with both hands and remove it by lifting it up with the upper rib. Then, disengage the lower hooks. Do not cut the water tube. Separate it from the coupler. 25 DA99-01225J(EN).indd 25 2007.3.8 11:28:9 AM REMOVING the refrigerator doors Removing the Freezer Door 2) Disengage the hooks on the connector - cover (➃) protecting the connector and open it. Push the lever-hook (➄) on the connector and disconnect the wires. 3) Pull and open the latch (➅), and take off the door hinge (➆) along the arrow. Be careful when removing the door to ensure that it does not fall on you. 4) Remove the door from the lower hinge(➇)carefully lifting the door(➈). 5) Remove the phillips screw(➉)and two hex head screws ( 11 )from the lower hinge 26 DA99-01225J(EN).indd 26 2007.3.8 11:28:10 AM REMOVING the refrigerator doors Removing the Fridge Door 1) With the door closed, remove the upper hinge cover (➀) using a screwdriver. 3) Remove the door from the lower hinge (➃) by lifting the door (➄). 4) Remove the phillips screw (➅) and two hex head screws (➆) from the lower hinge. installation INSTRUCTIONS 2) Pull and open the latch (➁), and take off the door hinge (➂) along the arrow. 27 DA99-01225J(EN).indd 27 2007.3.8 11:28:11 AM REMOVING the refrigerator doors How to Disassemble the Arctic Select Zone Door 1) Open the Arctic Select Zone Door. 2) Take out the box in the Arctic Select Zone Door. 3) Locate the eight phillips screws in the Arctic Select Zone. Unscrew the six phillips screws. And unscrew the two phillips screws(➀) three times turns to lift the door up. (You don’t need to unscrew the adjuster-phillips screw(➁).) 4) Remove the door carefully from the rail lifting up the door with both hands. NOTE 5) Slide the rail carefully to the inside. When you assemble the Arctic Select Zone Door, follow the contrary order. 28 DA99-01225J(EN).indd 28 2007.3.8 11:28:14 AM REMOVING the refrigerator doors How to Disassemble the Fresh Select Zone Door 1) Open the Fresh Select Zone Door. 2) Take out the box in the Fresh Select Zone. 4) Remove the door carefully from the rail lifting up the door with both hands. NOTE 5) Slide the rail carefully to the inside. installation INSTRUCTIONS 3) Locate the eight phillips screws in the Fresh Select Zone. Unscrew the six phillips screws. And unscrew the two phillips screws(➀) three times turns to lift the door up. (You don’t need to unscrew the adjuster-phillips screw(➁).) When you assemble the Fresh Select Zone Door, follow the contrary order. 29 DA99-01225J(EN).indd 29 2007.3.8 11:28:16 AM Reattaching the refrigerator doors Reattaching the Freezer Door 1) Reattach a phillips screw (➀) and two hex head screws (➁) to the hinge completely. 2) Place the hole in the bottom of the door (➃) over the hinge (➂). 3) Insert the upper hinge shaft (➄) into the hole (➅). After levelling between the hinge brackets (➆). Reattach and close the latch (➇) along the arrow. Connect the water tube (➈) and the wires (➉). Then, place the water tube(➈) on the hanger ( 11 ) NOTE Be sure to insert the water tube and push to the end. 4) Put the connector (12 ) in the guide (13 ) of the connector-cover and close it. 5) Put the front part of the upper hinge cover (14 ) on the front part of the upper hinge (15 ) and reattach it from the front of the upper hinge cover first. 6) Reattach a phillips screw to the hinge cover ( 16 ). 30 DA99-01225J(EN).indd 30 2007.3.8 11:28:18 AM Reattaching the refrigerator doors Reattaching the Fridge Door 1) Reattach a phillips screw (➀) and two hex head screws (➁) to the hinge completely. 2) Place the hole in the bottom of the door (➃) over the hinge (➂). 4) Put the front part of the upper hinge cover (➈) on the front part of the upper hinge (➉) and reattach it from the front part of the upper hinge cover first. installation INSTRUCTIONS 3) Insert the upper hinge shaft (➄) into the hole (➅). After levelling between the hinge brackets (➆). Reattach and close the latch (➇) along the arrow. 5) Reattach a phillips screw to the hinge cover ( 11 ). 31 DA99-01225J(EN).indd 31 2007.3.8 11:28:19 AM Reattaching the refrigerator doors Reattaching the Front Leg Cover FRONT LEG COVER RIB HOOK Hold the front leg-cover with both hands and insert it by sliding the hooks along the guide at the bottom. Then, lift up the leg-front-cover a little bit and snap the upper ribs into the locking tabs. Tighten two phillips screws to the front leg cover. 32 DA99-01225J(EN).indd 32 2007.3.8 11:28:20 AM checking the water dispenser line 1) In order to operate the ice maker properly, water pressure of 1.4 ~ 8.5kgf/cm2 (0.14~0.83Mpa, 19.9~120.9psi, 1.37~8.3bar) is required. In this range a 100 cc paper cup can be filled in 10 seconds. 2) The water filter removes particles. It does not sterilize or destroy any micro-organisms. 3) If the refrigerator is installed in an area with low water pressure (1.4kgf/cm2, 0.14Mpa, 19.9psi, 1.37bar), you should install a booster pump to compensate for the low pressure. 4) Ensure the water storage tank inside the refrigerator is preperly filled initially. Push the water dis penser lever until the water runs from the outlet. A universal water supply kit is available at extra cost from your dealer. The refrigerator NOTE manufacturer recommends using a water supply kit containing copper tubing. installation INSTRUCTIONS Checking the Parts Installation OF the water dispenser line (Case 1) Connecting to water supply line - Shut off the main water supply line and turn the Ice maker to the off position. - Locate the nearest cold drinking water line. - Follow the instructions in the ice maker installation kit. 1. Cold Water line 2. Pipe Clamp. 3.Copper (or Plastic) line 4.Compression Nut 5.Compression Sleeve 6.Shut Off Valve 7.Packing Nut. 33 DA99-01225J(EN).indd 33 2007.3.8 11:28:21 AM Installation OF the water dispenser line Connect the water line to the refrigerator - Slip the compression nut and plastic ferrule through the plastic tube. - After inserting the sleeve, tighten the compression nut onto 1/4” compression fitting(union). NOTE Do not overtighten the compression nut. Compression Nut Ferrule - S lip the compression ferrule and nut on copper (or plastic) tubing as shown. Tighten the comperssion nut onto the compression fitting(union). - Turn water on and check for any leakege. NOTE Sleeve Compression fitting Ferrule Compression Nut Waterline must be connected to drinkable water only (Case 2) Check the water supply line Connect the water pipe with coupler and tap. - Close the main water tap. - Connect coupler “A” to the tap. - Every join should be protected with sealing tape. WARRANTY INFORMATION CAUTION The water line must be connect-ed to the cold water pipe. If it is connected to the hot water pipe, it may cause the purifier to malfunction. This water line installation is not covered by the refriger-ator or ice maker manufacturer's warranty. Follow these instructions carefully to minimise the risk of expensive water damage. COUPLER “A” Note: If the coupler does not fit on the current tap, go the nearest authorised service dealer and purchase the right couplers fittings. TAP Connect the water line to the refrigerator. - Remove the compressor cover of the refrigerator. - Connect the water line to the valve, as shown in the figure. - When connected, check if there is any leakage. If any, repeat the connection. - Reattach the compressor cover of the refrigerator. WATER LINE CONNECTION NUT COMPRESSOR COVER OF REFRIGERATOR 34 DA99-01225J(EN).indd 34 2007.3.8 11:28:22 AM Installation OF the water dispenser line Secure the water line. - Using clip ”A”, fix the water line to the wall (the back of refrigerator). - When the water line is secure, make sure whether the water line is not excessively bent, pinched or squashed. Complete the installation of the water supply line. - Power on the refrigerator and press the lever on the right of the dispenser until water runs out through the water line and all air has been empty. - At this time, check for any possible leakages at the join point in the water line. After securing the water line, move the refrigerator to the required location. Once the refrigerator is in position, do not move possibly. CLIP A WATER LINE Install the water filter. 1) As shown, open the cartridge cover by pulling and pushing up at the front 2) Remove the water filter from the box then position the arrow of the cartridge in line with the cartridge cover. Under the high water pressure, water may drip from the water filter’s case. NOTE If you put the small tray beneath the filter cover hole, it will be helpul to clean the shelf. 3) Insert the filter as shown and Push until you hear a click. NOTE Be sure to align the filter cartridge hook and housing. installation INSTRUCTIONS The water filter cartridge is located at the upper right corner of the Fridge compartment. NOTE When the display in the control panel indicates “filter change”, it is recommended that the filter cartridge be changed. 4) Close the filter cartridge cover. After changing the filter cartridge, throw away the first six glassfuls of water to flush out NOTE trapped air. Do not push and pull the water cartridge repeatedly, as water pressure will make the water spurt. 35 DA99-01225J(EN).indd 35 2007.3.8 11:28:24 AM Installation OF the water dispenser line Remove any residual matter inside the water supply line after installing filter. 1) Turn on the main water supply & shut-off the valve of the water supply line. 2) Run water through the dispenser until the water runs clear (6~7 minutes). This will clean the water supply system and clear air from the lines. 3) Additional flushing may be required in some households. 4) Open the fridge door and check if water leaks around the water filter. NOTE ICE WATER A newly-installed water filter cartridge may cause water to briefly spurt from the dispenser. Check the amount of water supplied to the ice tray. 1) T o remove :Set the type of ice to the “Ice Off” position. Lift up (①) and pull out (➁) the ice bucket in the freezer. To replace :When replacing the drawer, be sure to press it firmly into place. If it does not go all the way back, remove it and rotate the drive mechanism 1/4 turn. Then push the drawer back again. 2)Throw away the first few batches of ice to allow the water line to clear. Be sure nothing interferes with the sweep of the feeler arm. When the bin fills to the level of the feeler arm, the icemaker will stop producing ice. It is normal for several cubes to be joined together. If ice is not used frequently, old ice cubes will become cloudy, taste stale and shrink. ICE BUCKET Rotate Feeler Arm Drive Mechanism Place the ice tray at the originally provided posistion by manufacturer in order to achieve NOTE optimal ice-freezing. 36 DA99-01225J(EN).indd 36 2007.3.8 11:28:25 AM Installation OF the water dispenser line 3) Important Facts About Your Dispenser : Do not add ice from trays or bags to the storage bin. It may not crush or dispense well. Avoid overfilling glass with ice and use of narrow or extra-tall glasses. Backed-up ice can jam the chute or cause the door in the chute to freeze shut. If ice is blocking the chute, poke it through with a wooden spoon. Beverages and foods should not be quick-chilled in the ice storage bin. To keep dispensed ice from missing the glass, put the glass close to, but not touching, the dispenser opening. Some crushed ice may be dispensed even though you selected CUBES. This happens occasionally when a few cubes accidentally get directed to the crusher. After crushed ice is dispensed, some water may drip from the chute. 4) Water Supply to the Icemaker : The icemaker must be connected to a cold water line. 5) Start the Icemaker : Set the type of ice to the "Cubed Ice" or "Crushed Ice" position. The icemaker will not begin to operate until it reachs its operating of -12°C or below. It will then begin operation automatically if the type of ice is in the "Cubed Ice" or "Crushed Ice" position. Warning • If there is no water supply, turn off the icemaker to save energy. • In lower water pressure conditions, the water valve may turn on up to 3 times to make sure enough water reaches the icemaker. • Allow the appliance to stand for 2hours after installation. Use only the ice maker provided with the refrigerator. installation INSTRUCTIONS NOTE 37 DA99-01225J(EN).indd 37 2007.3.8 11:28:25 AM BEFORE YOU CALL FOR SERVICE... Problem Possible Causes What To Do • Check that the power plug is properly connected. • Is the temperature control on the display panel • Try setting it to a lower temperature. set to the correct temperature? • Is the refrigerator in direct sunlight or located • Move the refrigerator to the proper locanear a heat source? tion. • Is the back of the refrigerator too close to the wall? • Is the temperature control on the display panel • Try setting it to a warmer temperature. The food in the refrigset to the correct temperature? erator is frozen • Is the temperature in the room too low? • Did you store the food with a high water content in the coldest part of the refrigerator. • Check that the floor is levelled and stable. Unusual noises or • Is the back of the refrigerator too near to the • Move the refrigerator to the proper locasounds are heard wall? tion. • Was anything dropped behind or under the • Remove the foreign object. refrigerator? • A “ticking” sound may be heard from inside the refrigerator. This is normal and occurs because various accessories contract or expand. • Anti-condensators are installed in the front The front corners and corners of the refrigerator to prevent condensides of the cabinet sation. are hot; condensation • Condensation can occur when you leave the occurs door open for a long time. • Normal state • Did you stop the ice making function? Ice is not dispensed • Is there any ice in the storage unit? • See the control panel. • Is the water pipe connected and the shut-off • See the ice container. valve open? • See the valve. • Is the freezer temperature too warm? • Did you wait for 12 hours after installation of • Set the temperature lower. the water supply line before making ice? You can hear water bub- • The bubbling comes from the refrigerant cirbling in the refrigerator culating in the refrigerator and is normal. • Normal state There is a bad smell in • Wrap strong smelling food so that it is airtight. the refrigerator Throw away any rotten food. Frost forms on the wall of the freezer • Allow sufficient space between stored food for efficient air circulation. • Is the air vent blocked? • Is the door closed properly? • Is the water pipe connected and the shut-off No water is supplied valve open? • Is the water supply pipe crushed? • Is the water tank frozen because the refrigerator temperature is too low? Select a warmer setting on the display panel. Door/ drawer does not • Leveling legs need adjusting • See installation of the refrigerator close by itself The refrigerator does not work sufficiently or at all • Disconnected power plug 38 DA99-01225J(EN).indd 38 2007.3.8 11:28:25 AM BEFORE YOU CALL FOR SERVICE... Possible Causes Small or hollow cubes Water filter clogged. Door left open. Temperature control was not set cold enough. Slow ice cube freezing Orange glow in the freezer Defrost heater is on. Icemaker turned off or water Cube dispenser does not supply turned off. work(on some models) Ice cubes are frozen to icemaker feeler arm. Water has poor taste/odor (on some models) Water in first glass is warm (on some models) What To Do • Replace the filter cartridge with a new cartridge or with plug. • Check to see if package is holding door open. • See about the controls. • This is normal. • Turn on icemaker or water supply. • Remove cubes and move the feeler arm to the ON position. Irregular ice clumps in storage container. • Break up and discard remaining clumps. • Freezer may be too warm. Adjust the freezer control to a colder setting, one position at a time, until clumps do not form. Dispenser is LOCKED. Water dispenser has not been used for a long time. • Press and hold the CHILD LOCK for 3 seconds. • Dispense water until all water in system is replenished. Normal when refrigerator is first installed. • Wait 24 hours for the refrigerator to completely cool down. Water dispenser has not been used for a long time. • Dispense water until all water in system is replenished. Water system has been drained. • Allow several hours for replenished supply to chill. Water dispenser does not Water supply line turned off or • See Installing the water line. not connected. work(on some models) Water filter clogged. • Replace filter cartridge or remove filter and install plug. Air may be trapped in the water • Press the dispenser arm for at least two minutes. system. Dispenser is LOCKED. • Press and hold the CHILD LOCK pad for 3 seconds. Water spurting from dis- Newly-installed filter cartridge. • Run water from the dispenser for 3 minutes (about one and a half gallons). penser (on some models) Water in reservoir is frozen. • Call for service. Water is not dispensed (on some models) but Refrigerator control setting is • Set to a warmer setting. too cold. icemaker is working installation INSTRUCTIONS Problem Ice cubes stuck in icemaker. • Turn off the icemaker, remove cubes, and turn the (Green power light on icemak- icemaker back on. er blinking). Water on kitchen floor or on bottom of freezer No water or ice cube production Drain in the bottom of the freezer clogged. • See Care and cleaning. • Check the filter lock. Water filter clogged. Dispenser is LOCKED. • Replace filter cartridge or remove filter and install plug. • Press and hold the CHILD LOCK pad for 3 seconds. Cubes jammed in chute. Supply line or shutoff valve is clogged. • Poke ice through with a wooden spoon. • Call a plumber. 39 DA99-01225J(EN).indd 39 2007.3.8 11:28:26 AM Ambient Room Temperature Limits This appliance is designed to operate at the ambient temperatures specified by its temperature class marked on the rating plate. Temperature Symbol Class Extended Temperate Ambient Temperature Maximum Minimum SN 32°C (90°F) 10°C (50°F) Temperate N 32°C (90°F) 16°C (61°F) Subtropical ST 38°C (100°F) 18°C (64°F) T 43°C (109°F) 18°C (64°F) Tropical NOTE: The internal temperature may be affected by such factors as the location of the appliance, ambient temperature and the frequency with which you open the doors. Adjust the temperature as required to compensate for these factors. English Correct Disposal of This Product (Waste Electrical & Electronic Equipment) (Applicable in the European Union and other European countries with separate collection systems) This marking shown on the product or its literature, indicates that it should not be disposed with other household wastes at the end of its working life. To prevent possible harm to the environment or human health from uncontrolled waste disposal, please separate this from other types of wastes and recycle it responsibly to promote the sustainable reuse of material resources. Household users should contact either the retailer where they purchased this product, or their local government office, for details of where and how they can take this item for environmentally safe recycling. Business users should contact their supplier and check the terms and conditions of the purchase contract. This product should not be mixed with other commercial wastes for disposal. Contact SAMSUNG WORLD WIDE If you have any questions or comments relating to Samsung products, please contact the SAMSUNG customer care center. Samsung Electronics America, Inc. 105 Challenger Road Ridgefield Park, NJ 07660-0511 1-800-SAMSUNG (7267864) www.samsung.com DA99-01225J(EN).indd 40 2007.3.8 11:28:26 AM