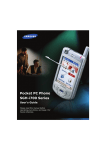
1
Pocket PC Phone
SGH-i750 Series
User’s Guide
Please read this guide before operating
your phone, and keep it for future
reference.
* Depending on the software installed or your service provider or country,
some of the descriptions in the guide may not match your phone exactly.
* Depending on your country, your phone and accessories may appear
different from the illustrations in this guide.
3
ft 1
Dra
14
03.
.
6
200
xx
0Xx
I75
Contents
Important safety precautions . . . . . . . . . . . . 5
Using the Application Launcher
. . . . . . . . . 31
Viewing the phone screen on a TV . . . . . . . 31
CHAPTER 1: Getting started
Using an optional memory card . . . . . . . . . 32
What’s in the box? . . . . . . . . . . . . . . . . . . . 7
Adding and removing programmes . . . . . . . 33
Getting to know your phone . . . . . . . . . . . . 8
Backing up data . . . . . . . . . . . . . . . . . . . . 37
Installing the battery . . . . . . . . . . . . . . . . 12
Resetting your phone . . . . . . . . . . . . . . . . 38
Installing the SIM card . . . . . . . . . . . . . . . 13
Managing memory . . . . . . . . . . . . . . . . . . 40
Charging your phone . . . . . . . . . . . . . . . . 14
Managing certificates . . . . . . . . . . . . . . . . 41
Using the online help . . . . . . . . . . . . . . . . 42
CHAPTER 2: The basics
Using the Today screen . . . . . . . . . . . . . . . 19
CHAPTER 3: Entering information
Customising your phone . . . . . . . . . . . . . . 24
Entering text using the input panel . . . . . . . 43
Key lock (Keyguard) . . . . . . . . . . . . . . . . . 30
Writing on the screen . . . . . . . . . . . . . . . . 51
1
Contents
Drawing on the screen . . . . . . . . . . . . . . . 54
Finding information . . . . . . . . . . . . . . . . . . 72
Entering text using the keypad . . . . . . . . . 56
Recording a message . . . . . . . . . . . . . . . . 59
CHAPTER 6: Your phone
Using My Text . . . . . . . . . . . . . . . . . . . . . 61
Entering your PIN . . . . . . . . . . . . . . . . . . . 74
Checking you are connected
CHAPTER 4: Synchronising
information
Installing ActiveSync
. . . . . . . . . . . 75
Turning the phone functions on or off . . . . . 75
Accessing the Dialler screen . . . . . . . . . . . . 76
. . . . . . . . . . . . . . . . 63
Using the SmartDialler feature . . . . . . . . . . 77
Customising connection settings . . . . . . . . 64
Making a call . . . . . . . . . . . . . . . . . . . . . . 77
Connecting your phone to a computer . . . . 65
Ending a call . . . . . . . . . . . . . . . . . . . . . . 78
Synchronising information . . . . . . . . . . . . . 65
Advanced calling features . . . . . . . . . . . . . 78
Customising synchronisation settings . . . . . 66
Answering or rejecting a call . . . . . . . . . . . 82
Adjusting the ringer volume . . . . . . . . . . . . 82
CHAPTER 5: Navigating through
applications
Options during a call . . . . . . . . . . . . . . . . . 83
Using the status bar and command bar . . . . 70
Call related features . . . . . . . . . . . . . . . . . 85
Using pop-up menus . . . . . . . . . . . . . . . . . 71
Customising your phone . . . . . . . . . . . . . . 89
Using the application buttons . . . . . . . . . . . 72
2
Switching quickly to Vibration mode . . . . . . 82
Contents
CHAPTER 7: Message, Internet, and
Messenger
Pictures . . . . . . . . . . . . . . . . . . . . . . . . . 156
Inbox: Sending and receiving E-mail or SMS
messages . . . . . . . . . . . . . . . . . . . . . . . 102
R2VS
Internet Explorer . . . . . . . . . . . . . . . . . . 109
CHAPTER 10: Extra programmes
WAP . . . . . . . . . . . . . . . . . . . . . . . . . . . 114
MSN Messenger . . . . . . . . . . . . . . . . . . . 120
MMS . . . . . . . . . . . . . . . . . . . . . . . . . . . 124
CHAPTER 8: Pocket outlook
Windows Media player . . . . . . . . . . . . . . . 156
. . . . . . . . . . . . . . . . . . . . . . . . . . 163
Games . . . . . . . . . . . . . . . . . . . . . . . . . 164
Calculator . . . . . . . . . . . . . . . . . . . . . . . 165
World Clock . . . . . . . . . . . . . . . . . . . . . . 166
BCR . . . . . . . . . . . . . . . . . . . . . . . . . . . 167
VoiceSignal . . . . . . . . . . . . . . . . . . . . . . 170
Calendar . . . . . . . . . . . . . . . . . . . . . . . . 131
Remote Control . . . . . . . . . . . . . . . . . . . 174
Contacts . . . . . . . . . . . . . . . . . . . . . . . . 136
Picsel Browser . . . . . . . . . . . . . . . . . . . . 177
Notes . . . . . . . . . . . . . . . . . . . . . . . . . . 140
Pocket Excel
Tasks . . . . . . . . . . . . . . . . . . . . . . . . . . 142
Pocket Word . . . . . . . . . . . . . . . . . . . . . 185
. . . . . . . . . . . . . . . . . . . . . 182
Terminal Services Client . . . . . . . . . . . . . 190
CHAPTER 9: Multimedia
File Explorer
Camera . . . . . . . . . . . . . . . . . . . . . . . . . 145
SIM Manager . . . . . . . . . . . . . . . . . . . . . 193
MyItems . . . . . . . . . . . . . . . . . . . . . . . . 151
Regional Settings . . . . . . . . . . . . . . . . . . 195
. . . . . . . . . . . . . . . . . . . . . 192
3
Contents
Ringtone Manager . . . . . . . . . . . . . . . . . 196
SIM Toolkit . . . . . . . . . . . . . . . . . . . . . . 197
CHAPTER 11: Getting connected
Beaming using infrared connections . . . . . 198
Beaming with Bluetooth . . . . . . . . . . . . . 200
Connecting to an OBEX FTP server . . . . . . 204
Connecting to the Internet or your network 205
ModemLink . . . . . . . . . . . . . . . . . . . . . . 207
Connecting to wireless networks . . . . . . . 208
Selecting data call type . . . . . . . . . . . . . . 209
CHAPTER 12: Appendix
Troubleshooting . . . . . . . . . . . . . . . . . . . 210
Regulatory notices . . . . . . . . . . . . . . . . . 212
4
Important safety precautions
Switching off near all medical equipment
Read these guidelines before using your
wireless phone. Failure to comply with them
may be dangerous or illegal.
Switch your phone off near medical equipment.
Hospitals or health care facilities may be using
equipment that could be sensitive to external RF
energy. Follow any regulations or rules in force.
Drive safely at all times
Interference
Do not use a hand-held phone while driving;
park the vehicle first.
All wireless phones may be subject to
interference, which could affect their
performance.
Switching off when refuelling
Do not use the phone at a refuelling point
(service station) or near fuels or chemicals.
Switching off in an aircraft
Wireless phones can cause interference. Using
them in an aircraft is both illegal and
dangerous.
Special regulations
Meet any special regulations in force in any area
and always switch off your phone whenever it is
forbidden to use it, or when it may cause
interference or danger (in a hospital for
example).
Water resistance
Your phone is not water-resistant. Keep it dry.
5
Sensible use
Use only in the normal position (held to the
ear). Avoid unnecessary contact with the
antenna when the phone is switched on.
Emergency call
Key in the emergency number for your present
location, then press
. Give all the necessary
information as accurately as possible. Do not
end the call until given permission to do so.
Keeping small children away from your
phone
Keep the phone and all its parts including
accessories out of reach of small children.
Accessories and batteries
Use only Samsung-approved accessories and
batteries. Use of any unauthorised accessories
could damage your phone and may be
dangerous.
6
Use only Samsung-approved batteries and
recharge your battery only with Samsungapproved chargers.
Qualified service
Only qualified service personnel may repair your
phone.
For more detailed safety information, see
page 214.
CAUTION
RISK OF EXPLOSION IF A BATTERY IS REPLACED
BY AN INCORRECT TYPE.
DISPOSE OF USED BATTERIES ACCORDING
TO THE INSTRUCTIONS.
1
Getting started
Congratulations on the purchase of your new
Pocket PC Phone! This chapter helps you set up
your phone, charge the phone’s batteries, and
familiarise yourself with the different
components of your phone.
What’s in the box?
Your package contains the following items;
Some accessories may not match your package.
Travel charger
CD-ROMs*
Quick Reference Guide
Extra stylus pen
*. One CD-ROM contains Microsoft ActiveSync
software, Add-on software and applications, and
the other contains User’s Guide in PDF format.
In addition, you can obtain the following
accessories for your phone from your local
Samsung dealer:
PDA phone with
a stylus pen
Battery
• PC link CD
• PC data link cable
• Travel charger/adapter
• Desktop charger
• Memory card (microSD) • Car charger/adapter
• Stylus pen
• TV out cable
• Simple hands-free car kit
• Standard/Extended batteries
7
Getting started
Getting to know your phone
Rear view
Front view
Infrared port/
LED indicator
Touch screen
Programme
button 2
(Contacts)
Volume keys
Application
Launcher key
Programme
button 1
(Record key)
Send key
Alphanumeric
keys
Special
function keys
8
Earpiece
Programme
button 3
(Messaging)
Programme
button 4 (Smart
menu key)
Cancel key
Delete key
End key
Navigation keys
(Up/Down/Left/
Right)
OK/Confirm key
Microphone
Memory
card slot
Stylus pen
Headset jack
Power/Lock
key
Camera key
SIM card slot
Flash
Camera lens
Battery
RESET key
Battery lock
Charging/
Communication port
Getting started
Keys of your phone
Key
Description
Opens the associated application or
menu.
: Contacts
: Messaging
Displays the list of actions
available for the current command
bar (Smart menu key).
Cancels the operation or returns to
the previous status or application.
Moves up or down and left or right
through any of the applications,
records, or options.
Confirms your selection or executes
the selected application.
Opens the Application Launcher.
Deletes characters when entering
text.
Key
Description
• Opens the Dialler screen.
• Sends or answers a call.
• Activates the Speakerphone
feature when held down during a
call.
• Ends a call.
• Returns the phone to Idle mode.
• Press and hold to turn the phone
functions off or on.
• Enters alphanumeric characters.
• Selects options when they are
numbered.
Changes case when entering text
using the keypad.
• Enters or exits Vibration mode
when pressed and held.
• Enters a space when entering text
using the keypad.
9
Getting started
Key
Description
• Turns on the camera.
• Takes a photo in Camera mode or
records a video in Camcorder
mode.
• Press this key halfway down to
adjust the focus.
• Turns on your phone’s power when
slide down and held.
• Turns on or off the backlight when
slide down and held.
• Activates or deactivates Sleep
mode when slide down.
• Locks the function keys and the
touch screen when slide to the
middle or unlocks the keys and
screen when slide up.
10
Key
Description
• Opens the voice recorder
application to allow you to record
a voice memo.
• Records a voice memo when
pressing and holding.
• Adjusts the system volume.
• Adjusts the voice volume during a
call.
• Adjusts the media volume in Media
player.
• Mutes the call ringer when a call
comes in.
Using a stylus pen
Your phone has many of the same functions as a
portable personal computer, but does not have a
keyboard or a mouse. Use the stylus pen
provided with your phone to access, run, or
enter information through the touch screen.
Getting started
Pull the stylus pen out of the stylus pen holder.
When you are not using the stylus pen, insert it
into the stylus pen holder.
Note: To prevent scratches, do not use an actual pen,
pencil or other sharp objects to tap or write on
the screen. The stylus pen tip can also be used
to press the RESET key for resetting the
phone.
Stylus pen
holder
Use the stylus pen to:
Tap: Softly touch the screen once with the
stylus pen to select or execute an application or
command. Tapping works like a mouse click on
a computer.
Drag: Hold the stylus pen on the screen and
drag it across the screen to select text or move
a progress bar or scroll bar.
Tap-and-hold: Tap and hold the stylus pen on
an item to see a list of actions available for that
item. Tap the action you want to perform on the
pop-up menu that appears.
11
Getting started
Installing the battery
2. Press the battery down until it clicks into place.
Your phone is powered by a rechargeable Li-ion
battery. Use only approved batteries and
chargers. Ask your local Samsung dealer for
further details.
Installing the battery
1. Put the battery on the back of the phone, lining
it up with corresponding slot on the phone.
Make sure that the battery is securely locked
before switching the phone on.
Removing the battery
To remove the battery, pull the battery lock out
to release the battery and lift the battery away,
as shown.
Battery lock
12
Getting started
Note: Your phone has a built-in backup battery that
maintains data storage when the main battery
is removed. When fully charged, the backup
battery will maintain stored data for 1 hour. If
the main battery is removed from the phone
for more than 1 hour, your data which are not
backed up will be lost. For details about the
backup, see page 37.
• The SIM card and its contacts can be easily
damaged by scratches or bending, so be
careful when handling, inserting, or removing
the card.
• When you open the SIM card slot to install or
remove the SIM card, always make sure that
the phone’s power is switched off.
Inserting the SIM card
1. Open the phone and slide the card cover open.
Installing the SIM card
When you subscribe to a cellular network, you
are provided with a plug-in SIM card loaded
with your subscription details, such as your PIN,
any optional services available, and many
others details.
• Keep all miniature SIM cards out of the reach
of small children.
13
Getting started
2. Insert and slide the SIM card under the two
holders, ensuring that the gold coloured
contacts of the card face down into the phone,
as shown.
Charging your phone
While charging your phone, the system sounds
the charging alert tone. Then the Charging icon
(
) displays on the status bar of the screen.
Using the travel charger
1. Plug the connector of the travel charger into
the bottom of the phone. Check that the arrow
on the connector is facing up, as is the phone.
3. Slide the cover closed.
Removing the SIM card
1. Open the phone and the card slot cover,
referring to step 1 in “Inserting the SIM card.”
2. Slide the card out of the holders.
14
Getting started
2. Plug the charger into a standard AC wall outlet.
3. The LED on the charger shows the status of the
battery being charged.
• Red: the battery is charging.
• Green: the battery is fully charged.
• Orange: the charger is not plugged in
correctly.
4. When charging is finished, unplug the charger
from the AC wall outlet and from the phone by
pressing the PUSH button on the connector
and pulling the connector out.
Conserving battery power
You can conserve power by the following
methods:
• Switch the phone to Sleep mode when you
don’t use it. Slide the Power key down for
approximately 1.5 seconds to activate Sleep
mode.
• Turn off the backlight. Slide the Power key
down and hold.
• Adjust the power settings and backlight
settings. For details, see page 16 and page
17.
• Close multiple applications running on your
phone. Multitasking will consume your battery
faster and can cause your phone’s system to
react slowly.
Note: Closing multimedia applications, such as
camera or Media player, allows your phone to
recover some of its battery.
15
Getting started
Low battery warning
Your phone displays the Battery Low icon (
)
and a warning message when the battery gets
low. If this happens, charge the battery using
the travel charger.
If the phone is nearly out of battery power, it
shows the “Main Battery Very Low” message. In
this case, you cannot perform a synchronisation
without connecting the phone to a power source
and the phone doesn’t give you any instructions
for saving data. Connect the charger to the
phone immediately.
Note: You must back up data in case of power cutoff.
For details, see page 37.
Adjusting the power settings
You can conserve battery power by adjusting
the Power settings. During standby, the phone
goes to Sleep mode after a specified period of
time of inactivity, so very little power is being
consumed. This helps to preserve programmes
and data stored in the RAM.
When the battery gets very low, the phone
turns off the backlight to reduce the power
consumption.
16
A lower setting increases the usable battery
time. A higher setting decreases the usable
battery time and allocates it for standby usage.
Getting started
To adjust the power setting:
3. Tap
1. From the Start menu, tap Settings → System
tab → Power.
Using the backlight
2. Select the power settings:
In the Battery tab, you can check the
remaining amount of battery power.
In the Wireless tab, you can turn the phone
functions on or off. You can also turn Bluetooth
on or off.
In the Advanced tab, you can set whether or
not the phone turns off the backlight after the
specific period of time when the phone is
inactive and the main battery is being used as
the power source, or when connected to an
external power.
In the LCD Off tab, you can set the length of
time the display turns on after a call is
established. After the specified time, the
display turns off.
.
You can turn off or on the backlight of the
screen and keypad to reduce the power
consumption. Simply sliding the Power key
down and holding will turn on or off the
backlight.
Note: Sliding the Power key down for approximately
1.5 seconds will force your phone in or out of
Sleep mode.
You can adjust the lighting time and the
brightness for the backlight.
To adjust the backlight setting:
1. From the Start menu, tap Settings.
2. In the System tab, tap Backlight.
For details, see the online help.
17
Getting started
3. Select the backlight settings:
In the Brightness tab, select the brightness
level.
In the Keyboard tab, set whether or not the
keypad backlight turns off automatically, if not
used for the specified period of time. You can
also set the keypad backlight to turn off in
daytime, defined as 7 am ~ 6 pm.
For details, see the online help.
4. Tap
In the Battery Power tab, set whether or not
the phone turns off the backlight automatically,
if not used for the specified period of time.
In the External Power tab, set whether or not
the phone turns off the backlight automatically,
if not used for the specified period of time,
when connected to an external power.
18
.
2
The basics
This chapter explains basic information about
using your phone, such as customising your
phone and using online help.
Using the Today screen
You will see the Today screen when you first
turn on your phone’s power. You can also
display it by tapping Start → Today from any
application.
On the Today screen, you can see important
information for the day, at a glance.
Tap to open the Start menu
and switch to a programme.
Tap to open
the Clock &
Alarms screen.
Tap to view
your day
information at
a glance.
Status icons
show a
specific
status of
your phone.
Tap to enter
the owner
information.
Tap to view
the status
of a
Bluetooth
and Wi-Fi
connection.
Tap to create
a new item.
19
The basics
Status bar
Icon
On the top line of the screen, the status bar
displays icons to show your phone’s current
status. The following icons may appear:
Icon
Description
Shows the current time. When you tap
this icon, a pop-up message shows the
current time and date, an upcoming
appointment, and the battery status:
•
•
•
: Main battery is full.
: Main battery is low.
: Main battery is very low.
•
: Main battery is charging.
Tap and hold this icon to change the
clock type to Analog or Digital.
Adjusts the levels of the system
volume and the ringer volume. You
can also turn the sound off or switch to
Vibration mode.
appears. If you
If you select Off,
appears.
select Vibrate,
20
Description
Appears when you’re roaming outside
of your home area and logged onto a
different network.
Shows the signal strength. When you
tap this icon, you can show the
connection to your mobile phone
service provider is on and customise
the connection settings. You can also
turn on or off the phone functions.
When you are outside a service area or
in a limited service area,
appears.
In that case, you cannot use mobile
services, but you can make emergency
calls.
When the phone functions are
switched off,
appears.
Appears when you are outside a
service area. When it appears, you
cannot make or receive calls. When
the SIM card is not installed in your
phone, this icon is greyed.
The basics
Icon
Description
Appears when connection with a GPRS
network is active. When you tap this
icon, a pop-up message shows the
connection profile you are currently
using and customise the connection
settings.
Appears when connection with a
computer is active. When you tap this
icon, a pop-up message shows the
connection to your computer is on and
customise the connection settings.
Appears when synchronisation is
processing.
Appears when connection with another
device or a network is inactive.
Indicates that a new instant message
has been received.
Appears when a new e-mail or SMS
message has been received.
Appears when a new MMS message
has been received.
Icon
Description
Indicates that your phone is charging.
Appears when a call is in progress.
Appears when there is a call you have
missed. Tap to view the details of the
missed call.
Appears when a Bluetooth headset is
connected to your phone.
Appears when Wi-Fi connection is
enabled.
Appears when more status icons need
to be displayed than there is room to
display them. Tap to view all of status
icons.
Appears when your phone has some
problem; for example, when you have
entered an incorrect number. Tap to
show a command.
21
The basics
Creating new information from the
Today screen
From the Today screen, you can create new
information, including:
• Appointments
• Contacts
• Excel workbooks
• Messages
• Notes
• Tasks
• Word documents
On the Today screen, tap New at the bottom of
the screen, and then select the type of the new
item you want to create.
For more information on creating these items,
see the appropriate instructions for each task in
this guide. For example, to create a new
appointment, see “Creating an appointment” on
page 132.
22
You can add or remove the programmes that
are displayed on the New menu by tapping
Start → Settings → Personal tab → Menus →
New Menu tab.
Accessing information from the Today
screen
From the Today screen, you can access
information, including:
• time and date
• owner information
• unread e-mails or SMS messages
• tasks that need to be completed
• upcoming appointments
• unread MMS messages
• unread push messages
• the status of a Bluetooth and Wi-Fi connection
For more information on changing the items
displayed, see page 23.
The basics
Customising the Today screen
You can customise the Today screen in the
following ways: change the background image
(wallpaper) and select the information you want
displayed and in what order.
To use your own background image, tap the
Use this picture as the background check
box and tap Browse to locate the file you
want. Choose a folder and file type. Then tap
the image you want to use.
To change the background image:
3. Tap
.
1. From the Start menu, tap Settings →
Personal tab → Today → Appearance tab.
To customise the information you want
displayed:
2. Select the desired theme for the background.
1. From the Start menu, tap Settings →
Personal tab → Today.
2. In the Items tab:
Tap to delete
the selected
theme.
• clear a check box to remove its information
from the Today screen.
• select an item and tap Move Up or Move
Down to change its position.
• customise the further task and appointment
information by tapping Options...
23
The basics
• tap the Today timeout check box and then
select the number of hours from the dropdown list. If you don’t use your phone after
the specified length of time has elapsed, the
screen switches to the Today screen.
Customising your phone
You can customise the phone settings to suit the
way you work.
Setting the time and date
When you turn on your phone’s power for the
first time, you are guided through setting the
time. Set the time again if:
• the battery is completely discharged.
• you perform a hard reset of your phone.
1. From the Start menu, tap Settings → System
tab → Clock & Alarms → Time tab.
3. Tap
24
.
The basics
2. Select your location and time zone from the
drop-down list.
4. Tap the down arrow in the Date field to display
a calendar.
Tap to select
your location
and time zone.
3. Tap the hour, minutes, or seconds, then tap the
up or down arrow to change the time setting.
Note: You can change the time and date format in
Regional Settings. See page 195.
5. Tap a day on the calendar to select the current
date.
You can tap the left or right arrow at the top of
the calendar to move backward or forward
through the calendar.
25
The basics
6. Tap
.
7. Tap Yes to save your time and date settings.
2. Tap a check box on the left to activate the
alarm and set the alarm as needed.
You can set the time and date for a location
you’re visiting by selecting the Visiting option.
Setting alarms
You can use the alarm clock by setting a wakeup alarm in the Alarms tab. You can set up to 3
alarms.
1. From the Start menu, tap Settings → System
tab → Clock & Alarms → Alarms tab.
Tap <Description> and enter a description of
the alarm, and tap the day(s) of the week you
want.
Tap
to set the alarm options, such as Play
sound and Display message, and tap the time
field to set the time for the alarm to sound.
3. Tap
26
.
The basics
Entering owner information
Using a security password
Owner Information identifies the owner or user
of the phone. Name, company, address, phone
number, e-mail address, and note information
fields are available.
You can assign a security password to protect
your phone from unauthorised use.
1. From the Start menu, tap Settings →
Personal tab → Owner Information. You can
also enter the owner information by tapping Tap
here to set owner information on the Today
screen.
2. From the Identification tab, fill in each input
field.
3. If you want to attach notes, tap the Notes tab
and enter notes.
4. Tap
.
Note: You can display the owner information or
notes, or both when you are back from Sleep
mode or when you turn on the phone’s power.
In the Options tab, tap the item you want.
Once a password is enabled, the password is
required each time you access the Password
application, wake up your phone, reboot the
system, or synchronise information using
ActiveSync.
To set the password:
1. From the Start menu, tap Settings →
Personal tab → Password → Password tab.
2. Tap the Prompt if device unused for check
box and select the length of time of inactivity
the phone waits before asking you for the
password.
You can choose from 0 minute to 24 hours.
3. Select a password type, 4 digit or alphanumeric
password in the Password type field.
4. Enter a password in the Password field.
27
The basics
5. If necessary, tap the Hint tab and enter a
password hint in case you forget your
password.
6. Tap
.
7. when a confirmation message displays, tap
Yes.
To choose reminder types and sounds:
1. From the Start menu, tap Settings →
Personal tab → Sounds & Notifications.
2. Choose the options. The options you choose
here apply throughout the phone.
Setting sounds and notifications
Your phone reminds you in various ways when
you have something to do, receive an incoming
call or message, tap the screen, or press the
buttons on the phone. For example, if you’ve set
up an appointment in Calendar, or an alarm in
Clock & Alarms, you are notified in any of the
following ways:
• A message box appears on the screen.
• A sound, which you can specify, is played.
• The LED indicator flashes.
• Your phone vibrates.
28
In the Sounds tab, select the actions for which
you want to hear sounds.
The basics
In the Notifications tab, set the notifications
for different events.
For details, see the online help.
3. Tap
.
Note: You can adjust the system volume by tapping
on the status bar and then move the slider
under the
icon.
To realign the screen:
1. From the Start menu, tap Settings → System
tab → Screen → General tab.
2. Tap Align Screen to begin the realignment
process.
3. Tap the cross-hair object as it appears at each
location. Be precise when you tap the crosshair object.
Realigning the screen
4. Tap
When you turn on your phone’s power for the
first time, you are guided through the alignment
process. Realign your screen if:
Customising the application buttons
• your phone does not respond accurately to
your screen taps.
• you perform a hard reset of your phone.
.
Customising the application buttons allows you
to associate different applications with the
programmable buttons on your phone.
To reassign a button:
1. From the Start menu, tap Settings →
Personal tab → Buttons → Program Buttons
tab.
29
The basics
2. Tap the button you want to reassign.
In addition, you can customise extra buttons on
the Buttons screen.
Tap the Up/Down Control tab to adjust the
delay and repeat rates of the Up/Down control.
For details, see the online help.
Key lock (Keyguard)
When you close the phone, your phone
automatically locks the function keys and the
touch screen to keep any accidental key presses
from affecting the current phone performance.
And the Key Lock icon ( /
) appears at the
top left of the screen.
3. Select the application you want to assign to the
selected button from the Button assignment
drop-down list.
4. Tap
30
.
To unlock the function keys and the touch
screen, slide the Power key to the middle.
To lock the function keys and the touch screen
again, slide the Power key up.
The basics
Using the Application Launcher
Using the Application Launcher, you can view
the applications on your phone categorised by
type, and quickly access the application you
want.
To open the Launcher:
Press
. You can also open the Launcher by
tapping Programs → Launcher from the Start
menu.
To customise the Launcher, tap Setting. Change
the position of categories and applications,
create a new category, and move an application
within a group or to another group.
To view the screen vertically, tap Rotate. You
can view and use all applications in Landscape
mode.
Viewing the phone screen on a
TV
You can view the display of your phone on a TV
screen by connecting the phone and TV with an
optional TV out cable.
This enables you to enjoy your photos, videos,
music, and movies stored in the phone’s
memory with your family or friends through the
TV.
31
The basics
1. Connect your phone to the TV with the TV out
cable.
Match cable connector and TV port colours.
2. Switch the TV to External Output mode.
The screen switched to TV out mode and the
phone screen appears on the TV screen.
Your phone has an expansion slot compatible
with a range of a memory card, which are
primarily used to back up or transfer files and
data.
To insert a memory card:
Notes:
1. Open the phone and slide the card cover open.
• Depending on your particular TV model, the location
and shape of the TV ports may vary.
• Do not connect the cable with a wet hand.
2. Carefully slide the memory card into the slot,
as shown, with the label side face up.
3. If necessary, change the TV out mode.
To change the TV out mode, from the Start
menu, tap Settings → System tab → TV Out
Type and select the TV out mode.
4. Tap
.
5. Access the application you want and open files.
32
Using an optional memory card
The basics
Guidelines for using a memory card
Follow the instructions that come with the
memory card or contact your memory card
manufacturer for more information.
• Some memory cards consume larger amounts
of power. To avoid draining the battery
completely when using a memory card,
connect your phone to an AC wall outlet
whenever possible.
• If the battery is very low, do not save data to
a memory card. This may result in the loss of
data.
• Do not turn your phone off when you are in
the middle of performing an operation, such
as saving data to your memory card.
• Keep your memory card in a protective case
when not in use to protect it from dirt and
moisture.
Adding and removing
programmes
Programmes added to your phone at the factory
are stored in ROM (Read Only Memory). You
cannot remove this software, and you’ll never
accidentally lose ROM contents. ROM
programmes can be updated using special
installation programmes with a *.xip extension.
All other programmes and data files added to
your phone after factory installation are stored
in RAM (Random Access Memory).
You can install any programme created for your
phone, as long as your phone has enough
memory. The most popular place to find
software for your phone is on the Pocket PC
website (http://www.microsoft.com/
windowsmobile/pocketpc).
33
The basics
Adding programmes using ActiveSync
You can install a programme downloaded from
the Internet or included on the supplied
software CD-ROM by performing a
synchronisation between your phone and the
computer. For more information on the
synchronisation, see page 62.
First you need to determine what your phone
and processor type are so that you know which
version of the software to install.
1. From the Start menu, tap Settings → System
tab → About.
2. In the Version tab, make a note of the
information in the Processor field.
3. Download the programme to your computer (or
insert the CD or disk that contains the
programme into your computer).
34
You may see a single *.xip, *.exe, or *.zip file,
a Setup.exe file, or several versions of files for
different device types and processors. Be sure
to select the programme designed for the
Pocket PC and your unit processor type.
4. Read any installation instructions, Read Me
files, or documentation that comes with the
programme. Many programmes provide special
installation instructions.
5. Connect your phone to your computer and
make sure that ActiveSync is activated.
6. Double-click the *.exe file on the computer.
If the file is an installer, the installation wizard
will begin. Follow the instructions on the
screen. Once the software has been installed
on your computer, the installer will
automatically transfer the software to your
phone.
The basics
If the file is not an installer, you will see an
error message stating that the programme is
valid, but it is designed for a different type of
computer. You will need to move this file to
your phone. If you cannot find any installation
instructions for the programme in the Read Me
file or documentation, use ActiveSync Explore
to copy the programme file to the Program
Files folder on your phone. For more
information on copying files using ActiveSync,
see Microsoft ActiveSync Help on your
computer.
7. Once installation is complete, tap Start →
Programs, and then tap the programme icon
to open it.
1. From the Start menu, tap Settings → System
tab → About.
2. In the Version tab, make a note of the
information in the Processor field.
3. Download the programme to your phone
straight from the Internet using Internet
Explorer on your phone.
You may see a single *.xip, *.exe, or *.zip file,
a setup.exe file, or several versions of files for
different device types and processors. Be sure
to select the programme designed for the
Pocket PC and your unit processor type.
Adding a programme directly from the
Internet
4. Read any installation instructions, Read Me
files, or documentation that comes with the
programme. Many programmes provide special
installation instructions.
First, you need to determine what your phone
and processor type are so that you know which
version of the software to install.
5. Tap the file, such as a *.xip or *.exe file. The
installation wizard will begin. Follow the
directions on the screen.
35
The basics
6. Once installation is complete, tap Start →
Programs, and then tap the programme icon
to open it.
Removing programmes
Adding a programme to the Start
menu
1. From the Start menu, tap Settings → System
tab → Remove Programs.
Once you have installed new programmes on
your phone, you can add any of them to the
Start menu so that you can quickly open them
from the Today screen. You can register up to 7
programmes in the Start menu.
1. From the Start menu, tap Settings →
Personal tab → Menus.
2. Tap the check box for the programme you want
to add.
36
If you do not see the programme listed, you
can either use the File Explorer application on
your phone to move the programme to the
Start Menu folder, or use ActiveSync on the
computer to create a shortcut to the
programme and place the shortcut in the Start
Menu folder.
3. Tap
.
2. Select the programme you want to delete, and
then tap Remove.
3. When a confirmation message appears, tap
Yes.
The programme will be removed from your
phone.
4. Tap
.
If the programme does not appear on the list of
installed programmes, locate it from the
Programs screen, tap and hold the icon, and
then tap Delete on the pop-up menu.
You can also remove all programmes and data
stored in RAM with a hard reset. For details, see
page 39.
The basics
Backing up data
Your phone is equipped with an application for
data backup and restoration to protect against
loss of your important data or configurations
due to power cutoff or a hard reset.
Backing up data
1. From the Start menu, tap Programs → Mits
Backup.
You make selections by selecting or clearing
the check boxes associated with a particular
folder or file. When you select a drive's check
box, all files and folders on the drive are
selected.
If you want to work with individual files and
folders on a drive, tap the plus sign (+) on the
left of the drive icon. You can now select or
clear individual directories and files by tapping
their associated check boxes.
6. Tap Backup to start backup.
2. In the Backup tab, specify the backup file
name in the Backup file name box.
7. When backup has been completed, tap Ok.
3. Tap
next to the Path box and select the
location to be used for saving backup files.
8. To confirm the backup, open File Explorer and
check for the backup file.
4. Tap OK.
5. From the file directory, choose the data you
want to back up:
Setting automatic backup
You can set the phone to automatically back up
data when the battery is low.
1. From the Mits Backup screen, tap Menu → Low
Battery Monitor.
37
The basics
2. Tap the Enable auto backup in Low Battery
check box.
3. Specify the battery level at which to indicate
update in the Battery Limit field.
4. Tap Restore.
4. To alert you of the need to back up data, tap
the Show before backup check box.
5. When the restoration has been completed, tap
Ok.
5. Tap
next to the File box, select the location
to be used for saved backup files, and tap OK.
6. To apply the restored data or settings to your
phone, tap OK to perform a soft reset.
6. Tap OK.
Restoring data
You can restore the files you have previously
backed up.
1. In the Restore tab, tap
next to the Restore
file box and locate a backup file.
2. Tap OK.
38
3. From the data location directory, choose the
location on which you want to restore the
backup file.
Resetting your phone
You can perform a soft reset or a hard reset – a
soft reset restarts your phone and a hard reset
switches the battery off. During a soft reset,
some data may be lost in programmes that are
open. However, cutting power (a hard reset)
wipes out new programmes you have added,
i.e., the phone will only have the software that
was present when you bought it.
The basics
You can return the phone to its factory settings
and remove all of the programmes and data you
have added by resetting the system.
Performing a soft reset
If your phone responds slowly, stops
responding, or freezes, try a soft reset. A soft
reset causes the phone to restart and re-adjust
memory allocation. Unsaved data in open
windows may be lost.
To perform a soft reset:
Press the RESET key inside the hole on the right
of the phone with your stylus pen.
Performing a hard reset
To perform a hard reset:
Follow the soft reset procedure on the previous
section while also sliding the Power key down
and holding.
Resetting the phone
To reset the phone’s system:
From the Start menu, tap Settings → System
tab → Clear Memory → Clear Memory. Write
“yes” in the input field and tap Yes.
After about 5 seconds, the phone reboots and
then begins alignment process.
WARNING!
Resetting will delete all your programmes and
data you have added.
RESET key
inside the hole
39
The basics
Managing memory
Memory provides information about the amount
of the available system memory and the
memory card. You can also view a list of
currently operating programmes.
Memory on your phone is shared between
storage memory and programme memory.
Storage memory is used to store the
information you create and the programmes
you install. Programme memory is used to run
programmes on your phone.
1. From the Start menu, tap Settings → System
tab → Memory.
2. In the Main tab, adjust the memory by moving
the slider.
The blue bar
indicates unused
space of memory.
Note: Multitasking will reduce storage memory
on your phone and can cause your
phone’s system to react slowly.
The phone automatically manages the allocation
between storage and programme memory, but
you can manually adjust memory allocation.
To view and change memory allocation:
40
In the Storage Card tab, you can view the
amount of available memory on the SafeStore
or Storage Card folder.
The basics
In the Running Programs tab, you can view
the list of programmes that are currently
operating, and stop any of them.
For details, see the online help.
3. Tap
.
Managing certificates
On your phone you can add and delete public
key certificates. Certificates help establish your
identity when you log on to a secured network
or establish the identity of other computers,
such as servers, with which you connect.
To manage personal certificates:
Personal certificates help establish your identity,
when you log on to a secured network, such as
a corporate network.
The list displays the name of the certificate
issuer and expiration date.
2. To view more details, tap the certificate on the
list.
To manage root certificates:
Root certificates help establish the identity of
servers with which you connect. This helps
prevent unauthorised users from accessing your
phone and information.
1. From the Start menu, tap Settings → System
tab → Certificates → Root tab.
The list displays the name of the certificate
issuer and expiration date.
2. To view more details, tap the certificate you
want.
1. From the Start menu, tap Settings → System
tab → Certificates → Personal tab.
41
The basics
Using the online help
Your phone is supported by additional
information available online, or on the CD-ROM
that came with your phone.
For information on: See this source:
Connecting to and
synchronising with a
computer
For information on: See this source:
Programmes on your
phone
The User’s Guide and
online help. To view the
online help, tap Start →
Programs → Help.
Additional
programmes that can
be installed on your
phone
The supplied CD-ROM.
Last-minute updates The Read Me files,
and detailed technical located in the Microsoft
ActiveSync folder on the
information
computer and on the
supplied software CDROM.
Up-to-date
information on your
phone
42
The User’s Guide or
Microsoft ActiveSync Help
on your computer. To
view the Microsoft
ActiveSync Help, click the
ActiveSync icon on the
Windows task bar, click
Open Microsoft
ActiveSync → Help →
Microsoft ActiveSync
Help.
http://
www.microsoft.com/
windowsmobile/pocketpc.
3
Entering
information
You have several options for entering new
information:
• Use the input panel to enter text, either by
using the onscreen keyboard or another input
method.
• Write directly on the screen.
• Draw pictures on the screen.
• Use the keypad on the phone.
Entering text using the input
panel
When you place the cursor in a text input field,
a default input panel automatically appears.
Use the input panel to enter information in any
programme on your phone. You can either type
using the onscreen Keyboard or write using
Block Recognizer, Letter Recognizer, or
Transcriber. You can also enter information
using the keypad on your phone.
• Speak into your phone’s microphone to record
a message.
• Use Microsoft ActiveSync to synchronise or
copy information from a computer to your
phone. For more information on ActiveSync,
see Microsoft ActiveSync Help on a computer.
43
Entering information
Tips for using the input panel
• To change the input method, tap the up arrow
next to the Input Panel button (
,
,
,
or
) on the command bar and select the
method you want to use.
• To change the default input method, tap the
up arrow next to the Input Panel button and
tap Options... → Input Method tab. Then
select an input mode from the Input method
drop-down list.
• When you use the input panel, your phone
anticipates the word you are typing or writing
and displays it above the input panel. When
you tap the displayed word, it is inserted into
your text at the insertion point. The more you
use your phone, the more words it learns to
anticipate.
Tap to change the
input method.
• To show or hide the input panel, tap the Input
Panel button.
44
Tap here if this is
the right word.
Entering information
Note: To change word suggestion options, such as
3. Enter a character, symbol, or number.
the number of words suggested at one time,
tap the up arrow next to the Input Panel
button → Options... → Word Completion tab,
or from the Start menu, tap Settings →
Personal tab → Input → Word Completion
tab.
Typing with the onscreen keyboard
You can enter text directly on the screen by
tapping characters, numbers, and symbols on
the onscreen keyboard.
1. From any application, tap the up arrow next to
the Input Panel button.
2. Tap Keyboard to display a keyboard on the
screen.
Clears your input.
Starts a new line.
Tap 123 to open the numeric and symbolic
keyboard.
Tap Tab to insert either spaces only or tabs and
spaces.
Tap Shift to enter a single upper case letter or
symbol.
45
Entering information
Tap Ctl when pressed in conjunction with
another key as in computing to perform a
special operation.
Tap áü to use special Alphabet in Unicode that
are used for languages other than English.
Note: Using Unicode characters reduces the
maximum number of characters which can be
entered to approximately half in length, and
splits your message into several messages if
your message exceeds the maximum number
of characters allowed for a message.
If you want to use larger keys, tap the up
arrow next to the Input Panel button, tap
Options... → Input Method tab, select
Keyboard in Input method, and then select
Large keys.
4. What you enter appears in the text area.
46
Writing with Letter Recognizer
With Letter Recognizer, write characters,
numbers, and symbols on the screen using the
stylus pen as you would on paper. Create words
and sentences by writing in upper case (ABC),
lower case (abc), and symbols (123) in specific
areas.
1. From any application, tap the up arrow next to
the Input Panel button.
2. Tap Letter Recognizer to see a writing area.
3. Write a character or symbol between the
dashed line and baseline for Letter
Recognizer to work effectively.
Entering information
4. What you write on the screen are converted to
text and inserted in the text area.
Note: If the character you want to write has more
Clears your input.
Tap to move the
cursor.
Tap to open the
symbol list.
Tap to view specific
instructions.
Write a character between the hatch marks
labelled ABC to enter text in upper case.
Write a character between the hatch marks
labelled abc to enter text in lower case.
Write a number or symbol between the hatch
marks labelled 123.
than one line, write the character without
lifting the stylus pen. If a separate line is
drawn, it will be recognised as a separate
character. For details about writing characters,
tap
.
Writing with Block Recognizer
If you know Graffiti® writing from Palm Inc., use
the Block Recognizer to write characters,
numbers, and symbols using the stylus pen.
Create words and sentences by writing
characters and numbers in specific areas. The
first character in a sentence is automatically
capitalised.
1. From any application, tap the up arrow next to
the Input Panel button.
47
Entering information
2. Tap Block Recognizer to see a writing area.
3. Write a word, character, or symbol between the
hatch marks.
Note: When you tap once on the writing area, abc or
123 changes to
so that you can write a
symbol.
4. What you write on the screen are converted to
text and inserted in the text area.
Writing with Transcriber
Clears your input.
Tap to move the
cursor.
Tap to open the
symbol list.
Tap to view specific
instructions.
Write a character between the hatch marks
labelled abc.
Write a number or symbol between the hatch
marks labelled 123.
48
With Transcriber, you can write anywhere on the
screen. Unlike Letter Recognizer or Block
Recognizer, it accepts joined-up handwriting
and converts it into text, instead of entering a
character at one time. Pause and let Transcriber
change the written characters to the entered
characters.
1. From any application, tap the up arrow next to
the Input Panel button.
2. Tap Transcriber.
Entering information
3. The Transcriber Intro screen displays. Tap
If necessary, tap Help to use the Help
application.
.
You can use the following tools:
Tap
To
Set the transcriber options.
4. Write anywhere on the screen.
Show the demonstration of writing.
Open the list of punctuation marks,
symbols, and numbers.
Change the input mode to A, a, or
123.
Insert a space.
Start a new line.
Move the cursor to the left.
Move the cursor to the right.
Clear your input.
View specific instructions.
Note: Dragging the stylus pen leftward clears the last
input.
5. What you write on the screen will be converted
to text.
49
Entering information
Editing text
Each input programme provides cursor keys to
move through text and a backspace key so that
you can correct spelling and grammar, or insert
additional information.
3. You can cut, delete, copy, or paste text by
tapping and holding the selected words and
then tapping an editing command on the popup menu, or by tapping the command on the
Edit menu.
Alternatively, you can use your stylus pen to
make an insert. After you have made an insert,
you can use any of the input methods described
above to add additional text at the insertion
point.
If you want to edit or format entered text, you
must select it first.
1. Tap the stylus pen next to the text you want to
select until the insertion point appears.
2. Drag the stylus pen across the text you want to
select.
If you accidentally cut or delete text on the
screen, tap Edit or tap and hold the screen.
Then select an option, such as Undo or Undo
Typing, and try again.
50
Entering information
Writing on the screen
2. Write anywhere on the screen.
In any programme that accepts writing, such as
the Notes programme, and in the Notes tab in
Calendar, Contacts, and Tasks, you can use your
stylus pen to write directly on the screen. Write
the way you do on paper. You can edit and
format what you’ve written and convert the
information to text at a later time.
Writing on the screen
1. Tap the Pen button ( ) to switch to the
Writing mode. This action displays lines on the
screen to help you write.
Note: Some programmes that accept writing may
not have the Pen button. See the
documentation for that programme to find out
how to switch to the Writing mode.
3. Tap Tools and then Recognize.
51
Entering information
4. If you want to convert only certain words,
deselect the Pen button and select the word.
Then, select the Pen button again and tap
Recognize on the Tools menu. Or, tap and
hold the selected words and then tap
Recognize on the pop-up menu. If a word is
not recognised, it is left as writing.
To select the text, deselect
the Pen button and then
drag your stylus pen over
the word to be recognised.
52
Select the Pen button and
tap Recognize on the
Tools menu. The writing is
turned into text.
5. If the conversion is incorrect, you can select
different words from a list of alternatives or
return to the original writing. To do so, tap and
hold the incorrect word (tap one word at a
time). On the pop-up menu, tap Alternates...
A menu with a list of alternate words appears.
Tap the word you want to use, or tap the
writing at the top of the menu to return to the
original writing.
Entering information
You can cancel recognition by tapping Edit,
then selecting Undo Recognize. Your input
returns to the original writing.
Tips for getting good recognition
• Write neatly.
• Write on the lines and let descenders, e.g.,
the tails of a g or a q, go below the line. Write
the cross of the “t” and apostrophes below the
top line so that they are not confused with the
word above. Write periods and commas above
the bottom line.
• For better recognition, try increasing the
zoom level to 300% using the Tools menu.
• Write the characters of a word closely and
leave big gaps between words so that the
phone can easily tell where words begin and
end.
• Hyphenated words, foreign words that use
special characters such as accents, and some
punctuation cannot be converted.
• If you add writing to a word to change it (such
as changing a “3” to an “8”) after you attempt
to recognise the word, the writing you add will
not be included if you attempt to recognise
the writing again.
Editing writing
If you want to edit or format writing, you must
select it first.
1. Tap the stylus pen next to the text you want to
select until the insertion point appears.
53
Entering information
2. Drag the stylus pen across the text you want to
select.
Drawing on the screen
You can draw on the screen in the same way
that you write on the screen. The difference
between writing and drawing on the screen is
how you select items and how they can be
edited. For example, selected drawings can be
resized, while writing cannot.
Creating a drawing
1. Cross three ruled lines on your first stroke. A
drawing box appears.
3. You can cut, delete, copy, or paste written text
in the same way you work with entered text:
tap and hold the selected words and then tap
an editing command on the pop-up menu, or
tap the command on the Edit menu.
54
Entering information
2. Subsequent strokes in or touching the drawing
box become part of the drawing. Drawings that
do not cross three ruled lines will be treated as
writing.
Selecting a drawing
If you want to edit or format a drawing, you
must select it first.
1. Tap and hold the stylus pen on the drawing
until the selection handle appears.
Ruled line
The drawing box
indicates the
boundaries of the
drawing.
Selection
handle
To select multiple drawings, deselect the Pen
button and then drag to select the drawings
you want.
55
Entering information
2. You can cut, copy, and paste the selected
drawings by tapping and holding them and
then tapping an editing command on the popup menu, or by tapping the command on the
Edit menu.
To resize a drawing, make sure the Pen button
is not selected, and drag a selection handle.
Note: You may want to change the zoom level so that
you can more easily work on or view your
drawing. Tap Tools → Zoom and then a zoom
level.
Entering text using the keypad
You can enter text by pressing the keys on the
phone, labelled with the alphabet characters.
From any application, tap the up arrow next to
the Input Panel button and tap T9.
Changing the text input mode
• Press and hold
to switch to T9 mode,
ABC mode, or Number mode.
• Press and hold
mode.
to switch to Symbol
Using T9 mode
T9 is a predictive text input mode that allows
you to enter any character with one key press.
This text input mode is based on a built-in
dictionary.
56
Entering information
Entering a word in T9 mode
Other T9 mode operations
1. Enter a character using the keypad,
. Press each key only once for each
character.
Example: To enter Hello, press
,
, and
.
,
• Press
to enter periods or apostrophes
automatically.
to
• Press
and then
until a basic
punctuation mark you want appears.
,
• Press the Left or Right navigation key to move
the cursor.
2. Enter the whole word before editing or deleting
the characters.
• Press
to insert a space.
• Press
to change case.
3. If the word displays correctly, go to step 4.
• Press and hold a number key to enter a
number.
If the word doesn’t display correctly, press
to display alternative word choices for the keys
that you have pressed.
Example: Both Of and Me use
4. Press
word.
and
• Press
to delete a character.
.
to insert a space and enter the next
57
Entering information
Using ABC mode
Entering a word in ABC mode
ABC mode allows you to enter characters by
pressing the key labelled with the character you
want repeatedly until it displays.
1. Press the key labelled with the character you
want:
Characters in order displayed
Key
Upper case
.
, -
?
! ’ @ : 1
C
2
a
b
c 2
D E
F
3
d
e
f
3
G
I
4
g
h
i
4
L
k
J
H
5
j
M N
O
6
m n
o 6
P
Q
R
S
p
q
r
T
U
V
8
t
u
v 8
W
X
Y
Z
w
x
y z
0
K
- Twice for the second character
Lower case
A B
7
9
l
- And so on
2. Enter other characters in the same way.
3. Press
word.
5
s
- Once for the first character
to insert a space and enter the next
Other ABC mode operations
7
9
• To enter the same character twice or to enter
a different character on the same key, wait for
the cursor to move to the right automatically,
or press the Right navigation key. Then, enter
the next character.
• Press the Left or Right navigation key to move
the cursor.
58
Entering information
• Press
to insert a space.
• Press
to change case.
• Press and hold a number key to enter a
number.
• Press
to delete a character.
Using Symbol mode
Symbol mode enables you to enter symbols.
When you select this mode, a symbol list
displays.
1. Press the Up or Down navigation key to display
more symbol sets.
2. Press the number key corresponding to the
symbol you want.
Using Number mode
Number mode enables you to numbers. Press
the keys corresponding to the digits you want.
Recording a message
In any programme where you can write or draw
on the screen, you can also quickly capture
thoughts, reminders, and phone numbers by
recording a message. In Calendar, Tasks, and
Contacts, you can include a recording in the
Notes tab. In the Notes programme, you can
either create a stand-alone recording or include
a recording in a written note. If you want to
include the recording in a note, open the note
first. In the Inbox programme, you can add a
recording to an e-mail message.
Creating a recording
1. Hold your phone’s microphone near your mouth
or other source of sound.
2. From the Start menu, tap Programs → Notes.
59
Entering information
Note: You can also quickly create a recording by
pressing the Record key on the left side of
the phone.
To add a recording to an existing note, tap the
note before recording.
3. Tap
and then
to make your recording.
4. Tap
to stop recording.
5. If you add a recording to an existing note, the
recording icon (
) appears in the note. When
appears.
the Pen button is selected,
If you create a stand-alone recording, the
recording icon appears in the note list.
Reviewing a recording
Tap a recording note from the note list, or tap a
note containing a recording and tap the
recording icon in the note. The recording plays.
You can adjust the sound volume by tapping
and then moving the slider.
Recording
toolbar
60
Tap to show
or hide the
Recording
toolbar.
Entering information
Using My Text
When using Messaging or MSN Messenger, use
My Text to quickly insert preset messages into
the text entry area. To insert a message, tap My
Text and select the message you want from the
pop-up menu.
To edit a My Text message, tap Tools → Edit My
Text... Select the message you wish to edit and
make desired changes.
61
4
Synchronising
information
Microsoft®
ActiveSync®,
Using
you can
synchronise the information on your computer
with the information on your phone.
Synchronisation compares the data on your
phone with your computer and updates both
computers with the most recent information.
For example:
• Keep Pocket Outlook data up-to-date by
synchronising your phone with Microsoft
Outlook data on your computer.
• Synchronise Microsoft Word and Microsoft
Excel files between your phone and computer.
Your files are automatically converted to the
correct format.
Note: By default, ActiveSync does not automatically
synchronise all types of information. Use
ActiveSync options to turn synchronisation on
and off for specific information types.
62
With ActiveSync, you can also:
• Back up and restore your phone data.
• Copy (rather than synchronise) files between
your phone and computer.
• Control when synchronisation occurs by
selecting a synchronisation mode. For
example, you can synchronise continually
while connected to your computer or only
when you choose the synchronise command.
• Select which information types are
synchronised and control how much data is
synchronised. For example, you can choose
how many weeks of past appointments you
want synchronised.
WARNING!
ActiveSync synchronises two devices using most
recent information. Therefore, if you delete specific
data from the phone after a synchronisation, and
then perform a synchronisation again, the
corresponding data on the computer will be deleted.
Be careful not to lose your important data.
Synchronising information
Installing ActiveSync
Before you can begin synchronisation with your
computer, you must install ActiveSync on your
computer from the supplied CD-ROM. You can
also download Microsoft ActiveSync 3.8 from
the Microsoft website (http://
www.microsoft.com).
To install ActiveSync on your computer:
1. Insert the CD-ROM into the CD-ROM drive of
your computer.
Alternatively, double-click the downloaded
ActiveSync installer.
2. Follow the instructions on the screen for
installing Microsoft ActiveSync.
For more help, click Microsoft ActiveSync
Help during installation.
3. After installation is complete, the ActiveSync
New Partnership Wizard helps you connect your
phone to your computer, set up a partnership
so that you can synchronise information
between your phone and your computer and/or
server, and customise your synchronisation
settings.
Note: After installing ActiveSync, a window appears
prompting you to connect for the partnership
setting. See page 65 for more information on
connecting the phone and a computer.
Important: To prevent synchronisation problems,
select Synchronize with Microsoft Exchange Server
and/or this desktop computer only if you are certain
that your company is running Microsoft Mobile
Information Server 2002 or later, and you know the
server name. Otherwise, select Synchronize with
this desktop computer instead. For more
information, contact your network administrator or
service provider.
63
Synchronising information
Your first synchronisation process will
automatically begin when you finish using the
wizard.
2. Change the connection settings.
After the first synchronisation, take a look at
Calendar, Contacts, and Tasks on your phone.
You will notice that your information has been
copied to the phone. Disconnect the phone from
the computer and you are ready to go!
Customising connection
settings
To establish a connection between your
computer and the phone, you must enable the
connection(s) you want to use in the ActiveSync
programme. By default, all connections are
enabled.
1. From the ActiveSync window on your computer,
select File → Connection Settings...
64
3. Click OK.
Synchronising information
Connecting your phone to a
computer
To connect the phone to your computer, you can
choose either of the following ways:
• Using the PC data link cable
Note: If your computer doesn’t have an infrared port,
you can purchase a USB-IrDA adapter.
Synchronising information
• Using the infrared (IR) port
To start ActiveSync:
Connecting with the PC data link cable
1. Connect your phone to a computer.
Connect one end of the PC data link cable to the
bottom of your phone and the other end into the
USB port on your computer.
For more information on connecting the phone
and a computer, see “Connecting your phone to
a computer."
The connection is established and the Microsoft
ActiveSync window appears. The
synchronisation automatically begins.
2. If you are using a USB connection, the
ActiveSync window on the computer
automatically appears and the synchronisation
begins.
Connecting via the infrared (IR) port
Align the infrared ports on your phone and the
computer. Once the connection is established,
appears on the Windows task bar.
If you are using an infrared connection, from
the Start menu, tap Programs → ActiveSync
and then tap Tools → Connect via IR...
65
Synchronising information
To end the connection, disconnect the PC data
link cable or remove the phone out of the
infrared range.
Shows the
synchronisation
status.
Shows types of
information to be
synchronised.
Once the synchronisation is complete, the
phone stays connected to the computer. If any
change is made, ActiveSync automatically
begins synchronisation. You can start
synchronisation at any time by tapping Sync. To
stop synchronisation, tap Stop.
Open the file directory on the phone by tapping
Explore from the Microsoft ActiveSync window.
You can copy a file quickly and easily from the
phone to the computer, or vice versa.
66
Customising synchronisation
settings
Using the Options tool, you can customise
various setting options for synchronisation with
a computer and a server, and set the
synchronisation schedule.
Note: To set the synchronisation options, you first
need to disconnect your phone from the
computer.
Setting PC synchronisation
1. In ActiveSync on your phone, tap Tools →
Options... → PC tab.
2. Select your computer name in the Use this PC
field.
Synchronising information
3. Select one or both of the following:
• Select Use mobile schedule to sync with
this PC if you want to synchronise with the
selected computer above at scheduled
intervals.
• Select Sync with this PC during manual
sync if you want the phone to synchronise
with the selected computer above every time
you synchronise manually.
4. Tap Options...
5. Select the connection type to be used when the
phone is connected with a computer via a PC
data link cable.
You can also set whether or not the connection
will be terminated after completing the
synchronisation.
6. When finished, tap
.
8. Start synchronising your phone with the
computer.
Note: For more information on the conditions that
must be met on the computer and to change
synchronisation options, see Microsoft
ActiveSync Help on the computer.
Setting server synchronisation
You can synchronise information automatically
as items arrive only if your company is running
Microsoft Exchange Server with Exchange
ActiveSync.
Note: You can also set up a connection to
synchronise remotely with a server when you
first create a partnership between your phone
and your computer.
7. Set up a work connection.
67
Synchronising information
1. In ActiveSync on your phone, tap Tools →
Options... → Server tab.
2. In the Sync with this server field, enter the
name of the Microsoft Exchange Server to
which you want to connect.
3. Tap Options...
4. In the Connection tab, enter the user name,
password, and domain name.
If you want the device to save your password
so that you need not enter it when connecting,
tap the Save password check box.
5. If items change on both your phone and server,
conflicts will arise during synchronisation. To
change the rules for resolving, tap the Rules
tab and select desired options in each field.
6. Tap
68
.
7. Tap the This server uses an SSL connection
check box to use an SSL (Secured Sockets
Layer) protocol for server access.
8. Select the types of information, such as
Calendar, Contacts, or Inbox, that you want to
synchronise with the server.
9. To change synchronisation settings, select the
type of information and tap Settings... Note
that there are no synchronisation settings for
Contacts.
10.When finished, tap
.
11.Set up a work connection.
12.Begin synchronisation on your phone.
Synchronising information
Changing the synchronisation
schedule
Using ActiveSync, you can schedule
synchronisation of your phone on two separate
schedules. Use the peak times schedule to
synchronise during working hours or other
times when you experience higher mail
volumes. Use the off-peak schedule to
synchronise during times when you experience
lower mail volumes. When you are roaming, you
can synchronise manually to reduce roaming
charges, or you can synchronise using the
mobile schedules.
1. In ActiveSync on your phone, tap Tools →
Options... → Mobile Schedule tab.
2. Set each option:
To synchronise periodically during peak times,
select the frequency of synchronisation in the
Peak times list.
To synchronise periodically during off-peak
times, select the frequency of synchronisation
in the Off-peak times list.
To synchronise while roaming, select a
frequency in the Roaming list.
Note: The power-off timer is reset each time the
phone synchronises. If you set a
synchronisation schedule that is more frequent
than the time set for the phone to
automatically power off, the phone will never
turn off to save battery power.
To set the days and hours for peak times, tap
Peak Times...
To synchronise information automatically as
items are sent, select the Sync outgoing
items as they are sent check box.
3. When finished, tap
.
69
5
Navigating through
applications
You can navigate through your phone’s
applications in three ways:
• tap
• tap and hold
• press, or press and hold an application button
Tap the screen with the pointed tip of your
stylus pen to open applications and make
selections. For example, tap the Start menu to
see a list of applications available.
Tap and hold an area on the screen to see a
pop-up menu.
Press, or press and hold an application button
on the front panel to quickly open an
application.
70
Using the status bar and
command bar
The status bar is located at the top of the
screen. It displays the active programme,
current time, and status icons, and allows you
to switch to programmes and close screens. You
can add the programmes to be displayed on the
Start menu. For details, see page 36.
Status bar
Navigating through applications
Use the command bar at the bottom of the
screen to perform tasks in programmes. The
command bar includes menu names, tool
buttons, and the Input Panel button.
To create a new item in the current programme,
tap New.
To see the name of a tool button, tap and hold
the stylus pen on the button. Drag the stylus
pen off the button so that the command is not
carried out.
Input Panel button
New button
Menu names
Tool buttons
Using pop-up menus
With pop-up menus, you can quickly choose an
action for an item. For example, you can use the
pop-up menu in the contact list to quickly delete
a contact, make a copy of a contact, beam a
contact, or send an e-mail message to a
contact. The actions in the pop-up menus vary
from programme to programme.
To access a pop-up menu, tap and hold the
stylus pen or press and hold the OK/Confirm
key on the item name that you want to perform
the action on.
When the menu appears, lift the stylus pen, and
tap the action you want to perform. Tap
anywhere outside the menu to close the menu
without performing an action.
71
Navigating through applications
Using the application buttons
Your phone has 4 programmable buttons on the
front panel of the phone.
The Find application on your phone helps you to
quickly locate information.
Pressing, or pressing and holding an application
button allows you to quickly access an
application.
1. From the Start menu, tap Programs → Find.
You can assign your favourite programmes to
the programmable buttons; from the Start
menu, tap Settings → Personal tab → Buttons
→ Program Buttons tab. For details, see
page 29.
72
Finding information
2. Enter the data name you want to find in the
Find field and select a data type by tapping the
Type field.
3. Tap Go to start the search.
Note: To quickly find information that is taking up
storage space on your phone, select Larger
than 64 KB from the Type field.
Navigating through applications
4. The name of the file will appear in the box
entitled Results.
Tap to view
information
you want.
73
6
Your phone
As well as all the standard features of a mobile
phone, such as mailbox and call history, there
are several dialling features unique to your
phone. For example, you can take notes while
talking, dial directly from Microsoft Contacts and
easily transfer contacts between your SIM card
and the RAM of your phone.
Additionally, like with a conventional mobile
phone, you can easily use one hand to access
and navigate through the important features of
your phone and make calls.
74
Entering your PIN
Most SIM cards are preset with a PIN (Personal
Identification Number), provided by your
service provider, which you need to enter
whenever you use your phone. Enter the PIN
and tap Enter.
Your phone
Note: If your PIN is entered incorrectly three times,
the SIM card will be blocked and your phone
asks for PIN Unblocking Key (PUK). If that
occurs, you can unblock it with the PUK from
your service provider.
Checking you are connected
The default settings for your phone are
programmed with the assumption that you want
to use your phone. So, providing you have
inserted a SIM card, your phone will activate
your mobile phone connection to your service
provider’s network.
The icon indicates that you are connected to
the network of your service provider. A full
and as the
strength signal is indicated by
strength of the signal diminishes so will the
number of vertical bars in the icon, with no bars
indicating no signal.
Turning the phone functions on
or off
As indicated previously, your phone will turn on
when you install the battery and insert a SIM
card. However, you can choose to turn off your
phone and just use the Pocket PC features at
any time – and then turn it back on when you
want.
Note: In many countries you are required by law to
turn off your phone when you fly. Turning off
the screen of your phone doesn’t actually turn
off your phone; you must turn off your
wireless connection to your operator’s
network.
75
Your phone
Turning the phone functions off
• Press and hold
.
From the Dialler screen, with the phone closed,
you can access Call History and Speed Dial.
• Tap
on the status bar and then Turn on
flight mode in the dialogue box.
When the phone is turned off,
status bar of the screen.
appears on the
Turning the phone functions on
• Press and hold
.
• Tap
on the status bar and then Turn off
flight mode in the dialogue box.
When the phone is turned on,
status bar of the screen.
appears on the
Accessing the Dialler screen
Press
on the front panel of the phone to
access the Dialler screen. You can also access
the screen by tapping Programs → Phone from
the Start menu.
76
Tap to turn off the
microphone for the
currently active call.
Tap to make Tap to open the
a note for the Contacts list.
current call.
Tap to activate the
Speakerphone
feature.
Your phone
Using the SmartDialler feature
SmartDialler lets you find a number and dial
without having to memorise the whole phone
number. When you press a number on the
keypad, corresponding phone numbers or
names from Call History or Contacts will be
displayed.
4. If the name has more than one number, press
the Left or Right navigation key to select one.
5. Press
to make a call.
Making a call
To make a call using SmartDialler:
You can make a phone call using the number
keypad.
1. Open the phone.
Making a call from the Dialler screen
2. When you press a number on the keypad, the
screen displays the phone numbers in Call
History, starting with the numbers you enter,
and the names in Contacts or Call History,
starting with the characters you enter.
1. On the Dialler screen, enter a phone number by
tapping the Dialler screen keypad or by
pressing the number on the keypad.
3. Scroll to the phone number or name you want
to call.
2. Enter the full phone number or select a number
from the screen.
3. Tap Talk or press
to make a call.
4. While dialling, if the number is already in
Contacts, the corresponding name displays.
77
Your phone
5. When a call is connected, the call duration time
displays.
During a call, you can use the several call
options. For details, see page 83.
Ending a call
Once an incoming or outgoing call is
proceeding, you can tap End or press
end the call.
to
Note: To adjust the volume during a call, press the
Volume keys on the left side of your phone to
increase or decrease the volume level.
Making a call using voice dialling
You can make a phone call by saying the name
or number that has been assigned to a contact
card in Contacts. For details on voice dialling,
see page 171.
Note: To use the Voice dial feature, the name and
number that you want to dial must be in
Contacts. For details about Contacts, see
page 136.
78
Advanced calling features
You can make a call from Contacts, Speed
Dial, and Call History. With your phone, you
can also make an international call or
emergency call.
Making a call from Contacts
You can make a call from Contacts in the
following way:
Your phone
1. On the Dialler screen, tap
contact.
and select a
Making a call from Speed Dial
Speed Dial is a list you can create of oftendialled numbers. Information on adding a
number to Speed Dial is detailed on page 87.
By memorising the position in the Speed Dial
list, you can dial the number simply by entering
that number.
For example:
In the picture below, “David Boelen” is at
position 5. To dial his number, simply tap and
hold
on the Dialler screen; if the number
holds a position of 10 or more, tap the first
number, and then tap and hold the second to
dial.
2. Tap the phone number you want to call.
Alternatively, if you don’t remember the position
of a number in the Speed Dial list, use the
method below:
79
Your phone
1. On the Dialler screen, tap Speed Dial.
Making a call from Call History
1. On the Dialler screen, tap Call History.
The following icons are available on the call
history:
•
: Incoming calls
•
: Outgoing calls
•
: Missed calls
2. Tap the category field and select the category
from the drop-down list.
Tap to add a
new contact.
2. In the list of the Speed Dial numbers, tap the
position number on the left of the number you
want to call, or scroll to the number and then
.
press
80
3. Tap the icon on the left of the number you want
to call, or select the number and then press
.
Making an international call
1. Tap and hold
on the Dialler screen, or
press and hold
on the keypad until the +
sign appears. The + replaces the international
prefix for the country from which you are
calling.
Your phone
2. Enter the full phone number you want to dial. It
includes the country code, the area code
(without the leading zero), and the phone
number.
Making an emergency call
Enter the international emergency number 112,
.
then tap Talk or press
Notes:
• Your phone provides the international emergency
number 112. This number can normally be used to
make an emergency call in any country, with or
without a SIM card inserted, if you are within a
mobile phone network’s service area.
• Some mobile phone service providers may require
that a SIM card be inserted, and in some cases that
the PIN has been entered as well.
• In some cases, other emergency numbers may also
be accessed. Your mobile phone service provider
may save additional local emergency numbers on
the SIM card.
3. Tap Talk or press
.
81
Your phone
Answering or rejecting a call
Adjusting the ringer volume
When someone calls you, the phone alerts you
by ringing or vibrating, depending on the ringer
type you have set. To change the ringer type,
see page 28.
• To answer a call, tap Answer, or press
• To reject a call, tap Ignore, or press
.
When a call comes in, you can silence the ringer
by pressing either of the Volume keys.
You can adjust the ringer volume by tapping
on the status bar and then moving the slider
under
.
.
Note: If you reject a call, the busy tone is sent out.
Depending on the network service provider,
you may be guided to the voicemail server of
the other person.
Switching quickly to Vibration
mode
When you are in Vibration mode, incoming calls,
alarms, or messages will cause the phone to
vibrate. This feature is best used in situations
where the phone might disturb others, such as
in a meeting, at a library, or in a theatre.
To enter Vibration mode on the Today screen,
)
press and hold
. The Vibration icon (
appears on the status bar.
To exit Vibration mode, press and hold
82
again.
Your phone
4. To end the second call and go back to the first,
tap End or press
.
Options during a call
Your phone provides a number of control
functions that you can use while a call is in
progress.
Setting up conference calling
1. Put a call on hold, dial a second number, and
wait for it to be picked up. Alternatively, accept
a second incoming call when you already have
one in progress.
Using the Speakerphone feature
Use the phone as a speakerphone to talk and
listen with the phone a short distance away.
During a call, tap
, or press and hold
.
Putting a call on hold
1. If another person is trying to call you when you
are talking on the phone, the screen below will
pop out.
2. Tap Answer to take the second call and put the
first on hold.
2. Tap Conference.
3. If the conference connection is successful, the
word “Conference” will appear at the top of the
Dialler screen.
4. To add additional people to your conference
call, tap Hold, key in the number, and then tap
Resume to return and continue.
3. To swap back and forth between two callers,
tap Swap.
83
Your phone
Making a note
Viewing a note
Regardless of whether you call from the Dialler,
Contacts, Call History, Speed Dial, or SIM
Contacts, you can make a note during a call.
• Tap Call History on the Dialler screen. Tap
and hold the call, and then from the pop-up
menu, tap View Note. (
indicates a note.)
After you have finished the note, it will be saved
as an attachment to your call in one of the Call
History folders. You can also access the note in
the Calls folder in Notes.
• Go to Notes, and then tap the name of the
file from the list.
1. On the Dialler screen, tap
the screen.
at the bottom of
2. Use any of the input methods to record your
note and then tap
. You can finish your note
during or after the call.
84
Note: When you want to create a contact for this
caller, see “Adding and transferring contact
information” on page 85. The call and file
names will be amended to the name of the
new contact; the file will be unaffected.
Your phone
Call related features
Accessing your voicemails
The first speed dial location defaults as your
voicemail server. When you insert your SIM card
into your phone, it will automatically detect and
set as the voicemail server number of your
service provider.
To access your voicemail server and listen to the
messages, tap and hold
on the Dialler
screen.
Note: You can check and change the voicemail and
SMS server numbers. On the Speed Dial
screen, tap Voice Mail → Voice Mail and SMS
→ Get Settings...
Adding and transferring contact
information
There are a number of ways in which telephone
numbers and contacts can be entered and
stored, and there are also a number of ways to
make a phone call. It is therefore important to
be able to transfer those contacts between the
programmes used to make calls.
Places where contacts can be entered into
your phone and stored
• Your SIM card: You can exchange your SIM
card between your phone and other devices;
while using other devices, you can create one
or more new contacts on the SIM card.
• Microsoft Contacts.
• Call History: New contact numbers can be
found in incoming calls or missed calls.
85
Your phone
Why transfer numbers?
• In the event you lose your SIM card while
using it in another device, your SIM numbers
will be backed up on to your phone.
• If you want to transfer a number to Speed
Dial, it must be in Contacts, not on the SIM
card.
• If you are using your SIM card in another
device, you may need the numbers stored in
Microsoft Contacts.
• Transferring numbers to Microsoft Contacts
allows you to create more detailed records.
Microsoft Contacts: Adding and
transferring Contacts
1. To create a contact, see page 136.
2. Tap and hold the contact to open the pop-up
menu.
86
3. To transfer the contact to SIM, select Save To
SIM and then tap Save To SIM in the next
screen. when a confirmation message appears,
.
tap Yes and then
To transfer the contact to Speed Dial, select
Add to Speed Dial... from the pop-up menu.
On the Speed Dial screen, add the contact
details, select a location, and tap
.
Note: By default the Location option will assign you
the next available position in the Speed Dial
list. If you want to put a number in a position
that is already occupied, a confirmation
message appears to ask you if you want to
overwrite the setting.
Your phone
Setting up the Speed Dial list
Managing your Call History
You can assign frequently-used phone number
in Contacts to the location 2 through 99. The
location 1 in the Speed Dial list is preset for the
voicemail server number.
The Call History details all incoming, outgoing,
and missed calls, and also provides a summary
of total calls. The Call History can also tell you
when a call was initiated, how long it lasted, and
provides easy access to any notes taken during
a call.
To add a contact to the Speed Dial list:
1. On the Dialler screen, tap Speed Dial.
2. Tap New and then select a number from the
Contacts list.
3. From the Location field, select a location by
tapping the up or down arrow or typing on the
onscreen keyboard.
4. Tap
.
To edit location assignments, tap the contact
from the Speed Dial list.
On the Dialler screen, tap Call History. If
necessary, select the category of the call history
to be displayed on the list, from the top left of
the screen.
Tap and hold
to display the
pop-up menu
of actions.
The time
you
received
or made
a call
87
Your phone
Viewing the details of calls
When you tap the call you want to view, a popup window displays the time and date you
received or made a call and the duration of a
call.
Deleting a call history
To delete a call from the Call History list, tap and
hold the call, and then select Delete from the
pop-up menu.
To delete all calls, tap Tools → Delete all calls.
Then tap Yes.
Viewing call timers
You can view the total call time, the recent call
time, and the number of calls you received and
made. You can set the time that the oldest calls
are automatically deleted from the Call History
list.
88
You can also easily erase the recent call time
records at any time by tapping Reset. This
option is convenient for estimating your usage.
To set limits on the size of your Call History:
1. On the Call History screen, tap Tools → Call
Timers...
2. Select a period of time under Delete call
history items older than.
3. Tap
.
Your phone
Customising your phone
You can personalise the settings of your phone,
the services you have, and the network to which
you are connected. You can also view the cost of
your calls, if your SIM card supports it.
2. In the Phone tab, select a ringer type, ringer
melody, and keypad tone from each drop-down
list.
Phone settings
You can change a ringer type, ringer melody,
and keypad tone to your preferences.
Downloading ringtones is also available.
Selecting the ringer type and tone, and
keypad tone
1. On the Dialler screen, tap Tools → Options...
You can also access the screen by tapping the
Start menu → Settings → Personal tab →
Phone.
For a ringer melody, you can preview the tone
by using the Play and Stop tools next to the
list.
3. Tap
.
89
Your phone
Downloading ringtones
You can connect to the Internet and then
download ringtones that are compatible with the
.WAV or .MID format by using ActiveSync on
your computer. For details about ActiveSync,
see page 65.
Extra phone settings
You can also customise additional settings for
the phone, such as an answering option and
extra tones.
• Connect Tone: allows you to set whether or
not your phone sounds an alert tone when
your call is connected.
• Minute Minder Tone: allows you to set
whether or not your phone sounds an alert
tone every minute during a call.
3. Tap
.
1. On the Dialler screen, tap Tools → Options...
You can also access the screen by tapping the
Start menu → Settings → Personal tab →
Phone.
Security settings
2. In the Etc tab, select the option you want in
each field.
Note: Your first PIN will be given to you by your
• Answer Key: allows you to select how to
answer an incoming call, by pressing any
buttons, by pressing
only, or by opening
the phone.
90
• Slide down to end call: allows you to set
whether or not your phone ends a call by
closing the phone.
You can set up various security options to
restrict the use of your phone.
service provider.
Your phone
Enabling PIN
When this feature is enabled, you must enter
your PIN each time you turn on your phone’s
power.
4. Re-enter the new PIN for confirmation and tap
Enter.
5. Tap OK.
1. On the Dialler screen, tap Tools → Options...
You can also access the screen by tapping the
Start menu → Settings → Personal tab →
Phone.
Enabling caller ID
2. In the Phone tab, tap the Require PIN when
phone is used check box under Security.
1. On the Dialler screen, tap Tools → Options...
You can also access the screen by tapping the
Start menu → Settings → Personal tab →
Phone.
3. Enter the PIN and then tap Enter.
4. Tap
.
Changing the PIN
You can change your current PIN to a new one.
When you make a call, you can set your phone
number to be displayed or hidden from the
person that you are calling.
2. In the Services tab, tap Caller ID → Get
Settings... (retrieving settings may take a few
minutes).
1. Under Security, tap Change PIN.
3. Select No one to hide your caller ID or
Everyone to display it to all.
2. Enter the old PIN and tap Enter.
4. Tap
.
3. Enter a new PIN and tap Enter.
91
Your phone
Network settings
Selecting a network
You can set the phone to automatically or
manually select a network when you are
roaming out of a service area.
1. On the Dialler screen, tap Tools → Options...
You can also access the screen by tapping the
Start menu → Settings → Personal tab →
Phone.
Finding a network
1. On the Dialler screen, tap Tools → Options...
You can also access the screen by tapping the
Start menu → Settings → Personal tab →
Phone.
2. In the Network tab, tap Find Network
(retrieving settings may take a few minutes).
2. Tap the Network tab, and then select either
Automatic or Manual in the Network
selection field (retrieving settings may take a
few minutes when you select Manual).
3. If you select Manual, the list of available
networks displays.
4. Select a network you want and tap OK.
Note: You can enable this function when the
network status is currently out of network
service and you want to conduct a search.
The current network displays in the Current
network field.
3. Tap
92
.
You are connected to that network.
5. Tap OK.
Your phone
Setting preferred networks
Call barring
1. On the Dialler screen, tap Tools → Options...
You can also access the screen by tapping the
Start menu → Settings → Personal tab →
Phone.
This service allows you to restrict your incoming
or outgoing calls.
2. Tap the Network tab → Set Networks
(retrieving settings may take a few minutes).
3. Select a network and re-priorities the order for
network usage by tapping Move Up or Move
Down.
4. Tap
.
To activate or deactivate call barring:
1. On the Dialler screen, and tap Tools →
Options... You can also access the screen by
tapping the Start menu → Settings →
Personal tab → Phone.
2. In the Services tab, tap Call Barring → Get
Settings... (retrieving settings may take a few
minutes).
Note: If there are many mobile phone service
providers available to you, enable this function
to select a lower fee network.
93
Your phone
3. Select the call type you want to restrict and tap
.
• International: International calls cannot be
made.
• International except to home country:
When abroad, calls can be made only to
numbers within the current country and to
your home country, which is the country
where your home network provider is
located.
• Off: Call barring is deactivated; all calls can
be made and received normally.
4. Enter the barring password provided by your
service provider and tap
.
To change the barring password:
You can choose to restrict your calls with the
following choices:
• All calls: No calls can be made or received.
• When roaming: Calls cannot be received
when you are using your phone outside of
your home service area.
94
You can set and change the call barring
password obtained from your service provider.
1. On the Dialler screen, tap Tools → Options...
You can also access the screen by tapping the
Start menu → Settings → Personal tab →
Phone.
Your phone
2. In the More tab, tap Call Barring Password
→ Get Settings.
3. Enter the old password, then a new one, and
re-enter for confirmation.
3. Either tap the Forward all incoming phone
calls check box and enter the number to which
the calls will be forwarded in the box below, or
select one or all of the other categories and
enter numbers.
4. Tap OK.
Call forwarding
This service allows you to forward your
incoming calls to another phone number.
To activate or deactivate call forwarding:
1. On the Dialler screen, tap Tools → Options...
You can also access the screen by tapping the
Start menu → Settings → Phone.
2. In the Services tab, tap Call Forwarding →
Get Settings... (retrieving settings may take a
few minutes).
95
Your phone
You can choose to forward all calls to the same
number or specify a number based on the
following conditions:
2. In the Services tab, tap Call Waiting → Get
Settings... (retrieving settings may take a few
minutes).
• No answer: If you do not answer your
phone, all calls are forwarded.
3. Select Notify me or Do not notify me.
• Unavailable: If your phone is turned off or
your phone is out of the network service
area, all calls are forwarded.
• Busy: When you are on the phone, all calls
are forwarded.
4. Tap
.
Call waiting
This service allows you to receive another call
while you have a call in progress.
To activate or deactivate call waiting:
1. On the Dialler screen, tap Tools → Options...
You can also access the screen by tapping the
Start menu → Settings → Personal tab →
Phone.
96
Once you have activated the Call Waiting
service, you will receive an alert tone when you
receive a second call during a call.
4. Tap
.
Voicemail and SMS
When you insert the SIM card into your phone,
it automatically detects and sets your voicemail
and SMS servers by default. However, you can
view the settings if you want.
Accessing your voicemail and SMS server
numbers
1. On the Dialler screen, tap Tools → Options...
You can also access the screen by tapping the
Start menu → Settings → Phone.
Your phone
2. In the Services tab, tap Voice Mail and SMS
→ Get Settings... (retrieving settings may
take a few minutes).
3. Check the server numbers in each field.
Note: You can also view your voicemail and SMS
server numbers by tapping Voice Mail on the
Speed Dial screen and then tap Voice Mail and
SMS.
Sending a message on the Dialler screen
On the Dialler screen, tap Tools → Send Text
Message. For details about creating a message,
see page 106.
Checking your voicemail
The first speed dial location defaults as your
voicemail server. Tap and hold
on the
Dialler screen, or press and hold
on the
keypad.
4. Tap
.
97
Your phone
Viewing the cost of calls
Setting the maximum cost
This network feature lets you check the cost of
your last call and all calls. You can also set the
maximum cost to limit the cost of your calls to a
certain amount of charging units or units of
currency, and the price per unit. When the max
cost is active, calls can be made only as long as
the preset max cost is not exceeded.
On the Phone (Call Cost) screen, tap Set max.
cost. When the max cost you have set is
reached, the counter stops at its maximum
value and you can no longer make any calls
until you reset the counter.
Viewing call cost may not be available,
depending on particular SIM cards. For more
information, contact your service provider.
On the Phone (Call Cost) screen, tap Set. This
price per unit is applied when calculating the
cost of your calls.
To view the cost of calls:
On the Dialler screen, tap Tools → Options... →
Cost tab. You can also access the screen by
tapping the Start menu → Settings →
Personal tab → Phone → Cost tab.
Resetting the cost records to zero
1. On the Dialler screen, tap Tools → Options...
→ Cost tab.
2. Tap Reset counters.
98
Changing the currency unit per call
Band selection
For the phone to make and receive phone calls,
it must be registered with one of the available
networks. Your phone can handle combined
GSM 900/1800 or GSM 1900 network.
The country where your phone was purchased
determines the default band that it uses. When
you travel abroad, you must remember to
change to an appropriate band.
Your phone
1. On the Dialler screen, tap Tools → Options...
You can also access the screen by tapping the
Start menu → Settings → Personal tab →
Phone.
2. In the More tab, select an appropriate band in
the drop-down list.
3. Tap Set and then Yes.
4. Tap
3. Select Enable SIM lock or Disable SIM lock
and tap Set.
4. If enabled, enter a password in the Old
password field and the Confirm Password
field.
5. Tap OK.
6. Tap
when a confirmation message appears.
.
SIM lock
When this option is enabled, your phone only
works with the current SIM card.
To enable or disable the SIM lock feature:
1. On the Dialler screen, tap Tools → Options...
You can also access the screen by tapping the
Start menu → Settings → Personal tab →
Phone.
Fixed Dialling Numbers (FDN) mode
When this option is enabled, your phone
restricts your outgoing calls to a limited set of
phone numbers, which are stored on the SIM
card.
1. On the Dialler screen, tap Tools → Options...
You can also access the screen by tapping the
Start menu → Settings → Personal tab →
Phone.
2. In the More tab, tap SIM Lock → Get
Settings.
99
Your phone
2. In the More tab, tap FDN Mode → Get
Settings.
3. Enter the old PIN2, then a new one, and reenter the new PIN2 for confirmation.
3. Select Enable fixed dialling mode or
Disable fixed dialling mode and tap Set.
4. Tap OK.
5. Tap
when a confirmation message appears.
4. If enabled, enter PIN2 and tap OK.
5. Tap
when a confirmation message appears.
PIN2 change
This option allows you to change your current
PIN2 to a new one. You must enter the current
PIN2 before you can specify a new one.
1. On the Dialler screen, tap Tools → Options...
You can also access the screen by tapping the
Start menu → Settings → Personal tab →
Phone.
2. In the More tab, tap Change PIN2 → Get
Settings.
100
Cell Broadcast (CB) message
This service allows you to receive text messages
on various topics, such as the weather or traffic.
Cell Broadcast (CB) Messages display as soon as
they are received, provided that:
• the CB message feature is set to Enable.
• the message channel is currently active on
the channel list.
To enable or disable the CB message feature:
1. On the Dialler screen, tap Tools → Options...
You can also access the screen by tapping the
Start menu → Settings → Personal tab →
Phone.
Your phone
2. In the More tab, tap CB Message → Get
Settings.
3. Tab Enable or Disable in the Receive field.
4. If enabled, select the languages in which CB
messages display in the Language field and
select the channels from which you receive CB
messages in the Element field.
5. Tap
.
101
7
Message, Internet,
and Messenger
Inbox: Sending and receiving
E-mail or SMS messages
Use Inbox to send and receive e-mail messages
in either of these ways:
• Synchronise e-mail messages with Microsoft
Exchange or Microsoft Outlook on your
computer.
• Send and receive e-mail messages by
connecting directly to an e-mail server
through an Internet service provider (ISP) or
a network.
You can also use Inbox to send and receive
SMS messages.
Synchronising E-mail messages
E-mail messages can be synchronised as part of
the general synchronisation process. You will
need to enable Inbox synchronisation in
ActiveSync. For information on enabling Inbox
synchronisation, see Microsoft ActiveSync Help
on the computer.
During synchronisation
• Messages are copied from the mail folders of
Exchange or Outlook on your computer to the
ActiveSync folder in Inbox on your phone. By
default, you will receive messages from only
the past five days, and only the first 100 lines
of each message.
• E-mail messages in the Outbox folder on your
phone are transferred to Exchange or
Outlook, and then sent from those
programmes.
• E-mail messages in folders must be selected
in the ActiveSync window on your computer in
order to be transferred.
102
Message, Internet, and Messenger
Connecting directly to an E-mail
server
In addition to synchronising e-mail messages
with your computer, you can send and receive
e-mail messages by connecting to an e-mail
server. You’ll need to set up a remote
connection to a network or an ISP, and a
connection to your e-mail server.
When you connect to the e-mail server, new
messages are downloaded to the Inbox folder
on the phone. Also messages in the Outbox
folder on the phone are sent, and messages
that have been deleted on the e-mail server are
removed from the Inbox folder on the phone.
Messages that you receive directly from an
e-mail server are linked to your e-mail server
rather than your computer. When you delete a
message on your phone, it is also deleted from
the e-mail server the next time you connect
based on the settings you selected in
ActiveSync. See “Setting server
synchronisation” on page 67.
You can work online or offline. When working
online, you read and reply to messages while
connected to the e-mail server. Messages are
sent as soon as you tap Send, which also saves
space on your phone. When working offline,
once you’ve downloaded new message headers
or partial messages, you can disconnect from
the e-mail server and then decide which
messages to download completely. The next
time you connect, Inbox downloads the
complete messages you’ve marked for retrieval
and sends the messages you’ve composed.
Creating an E-mail account
After you have set up an e-mail server, you
need to create a new account to be used for
receiving and sending e-mails.
Note: The SMS and ActiveSync accounts are preset
by default.
103
Message, Internet, and Messenger
To create a new account:
1. From the Start menu, tap Messaging.
9. Tap Yes to download e-mail messages from the
new account.
2. Tap Accounts and select New Account...
Using the message list
3. Enter your e-mail address and tap Next.
Messages you have received are displayed on
the message list. By default, the most recently
received messages are displayed first in the list.
4. When the auto configuration is complete, tap
Next.
5. Enter the user information, such as your name,
user name, and password, and tap Next.
6. Select the account type, POP3 or IMAP4, and
enter an account name. Then tap Next.
7. Enter the server information, such as incoming
mail server, outgoing mail server, and domain
name.
By tapping Options, you can set further
options, such as connection interval and
connection profile.
8. When finished, tap Finish.
104
Reading an E-mail or SMS message
1. Tap Accounts and then select the account
from which you want to view messages.
Select a
message
box.
Select the
sort order of
messages.
Message, Internet, and Messenger
To connect to the selected account, tap
.
Your phone makes a connection to the e-mail
server. After sending or receiving e-mail
messages, if any, it switches to offline.
To send or receive e-mail messages at any
time, tap
.
2. Select a message box from the top left of the
screen.
3. Tap the message you want to read. Unread
messages are displayed in bold.
Tap to view
the recipient’s
address.
Tap and
hold an
attachment
to save it.
If the message has an attachment, tap and
hold the file on the bottom and then select
Save As to save the file to your phone.
To reply to or forward the message, tap
To delete the message, tap
4. Tap
.
.
to close the message.
Downloading a full message
When you connect to your e-mail server or
synchronise with your computer, by default,
you’ll receive messages from only the last five
days, and only the first 100 lines of each new
message. The original messages remain on the
e-mail server or your computer.
You can mark the messages that you want to
retrieve in full during your next synchronisation
or e-mail server connection. On the message
list, tap and hold the message you want to
retrieve. On the pop-up menu, tap Mark for
Download. The icons in the Inbox give you
visual indication of message status.
105
Message, Internet, and Messenger
Setting downloading options
You specify your downloading preferences when
you set up the account or select your
synchronisation options. You can change them
at any time:
• Change options for Inbox synchronisation
using ActiveSync options. For more
information, see Microsoft ActiveSync Help.
• Change options for direct e-mail server
connections in Inbox on your phone. Tap
Tools → Options... In the Accounts tab, tap
the account you want to change. You can
remove an account by tapping and holding
the account and then selecting Delete.
Deleting a message
To delete a message, tap and hold it from the
message list and then select Delete from the
pop-up menu.
106
The deleted messages remain in the Deleted
Items folder. To delete messages from the
phone’s memory permanently, tap Tools →
Empty Deleted Items. When a confirmation
message appears, tap Yes.
Creating an E-mail or SMS message
1. From the Inbox, tap New.
Tap to show or
hide the complete
header.
Message, Internet, and Messenger
2. Tap the down arrow at the header field and tap
the Account field and then select an account
type.
3. In the To field, enter either e-mail address or
an SMS number of one or more recipients,
separating them with a semicolon. You can also
select a name from the contact list by tapping
the Contacts button ( ).
4. In the Subj field, enter the subject of the SMS
or e-mail message.
5. Compose your message.
To enter preset messages, tap My Text and
select a message.
6. When you’ve finished composing the message,
tap Send.
If you are working offline, the message is
moved to the Outbox folder and will be sent
the next time you connect.
Notes:
• Whether you want to send or receive an e-mail or
an SMS, you can swap it by tapping Accounts and
selecting an account.
• If you are creating an SMS message and want to
know if it was delivered, tap Tools → Options... →
Request message delivery notification before
sending the message.
For an e-mail, you can record a voice message
by tapping the Record button (
). You can
also attach a file by tapping Tools → Add
Attachment...
107
Message, Internet, and Messenger
Managing messages and folders
By default, messages are displayed in one of
five folders for each account you have created:
Deleted Items, Drafts, Inbox, Outbox, and
Sent Items.
The Deleted Items folder contains messages
that have been deleted on the phone. The
behavior of the Deleted Items and Sent
Items folders depends on the options you have
chosen. In the message list, tap Tools →
Options... In the Message tab, select your
options.
If you want to organise messages into
additional folders, tap Tools → Manage
Folders... → New to create a new folder. To
rename a folder, tap Rename. To delete a folder,
tap
.
Note: You cannot rename or delete the default
folders.
108
Folder behavior with a direct
connection to an E-mail server
The behavior of the folders you create depends
on whether you are using ActiveSync, SMS,
POP3, or IMAP4.
• If you use ActiveSync, e-mail messages in the
Inbox folder in Outlook will automatically be
synchronised with your phone. You can select
to synchronise additional folders by
designating them for ActiveSync. The folders
you created and the messages you moved will
then be mirrored on the server. For example,
if you move two messages from the Inbox
folder to a folder named “Family”, and you
have designated “Family” for synchronisation,
the server creates a copy of the ‘Family’ folder
and copies the messages into that folder. You
can then read the messages while away from
your computer.
• If you use SMS, messages are stored in the
Inbox folder of SMS category.
Message, Internet, and Messenger
• If you use POP3 and you move e-mail
messages to a folder you created, the link is
broken between the messages on the device
and their copies on the mail server. The next
time you connect, the mail server will see that
the messages are missing from the device
Inbox and delete them from the server. This
prevents you from having duplicate copies of
a message, but it also means that you will no
longer have access to messages that you
move to folders created from anywhere
except the device.
• If you use IMAP4, the folders you created and
the e-mail messages you moved are mirrored
on the server. Therefore, messages are
available to you anytime you connect to your
mail server, whether it is from your phone or
computer. This synchronisation of folders
occurs whenever you connect to your mail
server; create new folders, or rename/delete
folders when connected.
Internet Explorer
Use Microsoft® Pocket Internet Explorer to view
Web HTML, cHTML and WAP pages. You can
browse in either of these ways:
• During synchronisation with your computer,
download your favourite links and mobile
favourites that are stored in the Mobile
Favorites folder in Internet Explorer on the
computer.
• Connect to an Internet service provider (ISP)
or network and browse the Web. To do this,
you’ll need to create a connection first as
described on page 205.
• When connected to an ISP or network, you
can also download files and programmes from
the Internet.
109
Message, Internet, and Messenger
To open Internet Explorer:
From the Start menu, tap Internet Explorer.
Address bar
Tap to go to
the entered
address.
• In the Address bar, enter the web address
you want to visit and then tap
. Tap the
down arrow in the Address bar to choose one
from previously entered addresses. If you do
not see the Address bar, tap View → Address
Bar.
• Tap
to display the list of favourites and
then tap on what you want to open.
• Tap View → History to open the list of the
web addresses you have accessed. Tap on the
page you want to go.
2. Tap a link on the browser to open the
associated web page.
While processing,
of the browser.
Browsing the Internet
1. To connect and start browsing, do one of the
followings:
110
appears on the top right
Note: To add a favourite link while using the Internet
Explorer, go to the page you want to add, tap
and hold on the page, and tap Add to
Favorites.
Message, Internet, and Messenger
Using the browser tools
On the bottom of the Internet Explorer browser,
the following tool buttons are available to help
you browse the Internet:
Tap
To
Return to the previous page.
Refresh the page.
Open the homepage.
Open the Favorites folder.
Using Mobile Favorites
If you are using Microsoft Internet Explorer 5.0
or later on your computer, you can download
mobile favourites to your phone.
Note: Only items stored in the Mobile Favorites
folder in Internet Explorer on your computer
will be synchronised with your phone. This
folder was created automatically when you
installed ActiveSync.
Both your computer and your phone are
updated with changes made to either list each
time you synchronise. Unless you mark the
favourite link as a mobile favourite, only the link
will be downloaded to your phone, and you will
need to connect to your ISP or network to view
the content. For more information on
synchronisation, see Microsoft ActiveSync Help
on the computer.
During synchronisation, the list of favourite
links in the Mobile Favorites folder on your
computer is synchronised with Internet Explorer
on your phone.
111
Message, Internet, and Messenger
Viewing Mobile Favorites and Channels
1. Tap
to display the list of favourites.
You’ll need to synchronise with your computer
again to download the page to your phone, or
connect to the Internet to view the page.
Creating a mobile favourite
1. In Internet Explorer on your computer, click
Tools → Create Mobile Favorite...
2. To change the mobile favourite name, enter a
new name in the Name box.
3. In the Update box, select a desired update
schedule.
Note: If you did not specify an update schedule, you
2. Tap the page you want to access. You are
moved to the Web page.
You’ll see the page that was downloaded the
last you synchronised with your computer. If the
page is not on your phone, the favourite will be
dimmed.
112
will need to manually download content to
keep the information updated on your
computer and phone. Before synchronising
your phone, tap Tools → Synchronize... in
Internet Explorer on your computer. You will
see the last time the contents were
downloaded to the computer. Click
Synchronize to manually download other
contents, if needed.
Message, Internet, and Messenger
4. Click OK. Internet Explorer downloads the
latest version of the page to your computer.
5. Limit the number of downloaded linked pages.
In Internet Explorer on the computer, click
Favorites; then click Mobile Favorites and
find the mobile favourite you want to change.
Finally, right-click the mobile favourite and then
Properties; in the Download tab, specify 0 or
1 for the number of linked pages you want to
download.
6. Synchronise your phone with the computer.
Mobile favourites that are stored in the Mobile
Favorites folder in Internet Explorer are
downloaded to the phone.
Saving device memory
Mobile favourites take up storage memory on
your phone.
To minimise the amount of memory used:
• In the ActiveSync window on your computer,
click Options → Favorites → Settings →
Customize tab. You can then deselect
Synchronize Images, Synchronize Sound
and/or Synchronize offline content pages,
to stop images and sounds, or some mobile
favourites from being downloaded to the
phone. For more information, see Microsoft
ActiveSync Help.
• Limit the number of downloaded linked pages.
In Internet Explorer on the computer, click
Favorites; then click Mobile Favorites and
find the mobile favourite item you want to
change. Finally, right-click the mobile
favourite and then Properties. In the
Download tab, specify 0 or 1 for the number
of linked pages you want.
113
Message, Internet, and Messenger
Using AvantGo Channels
AvantGo is a free interactive service that gives
you access to personalised content and
thousands of popular websites. You can
subscribe to AvantGo channels directly from
your phone. Then, synchronise your phone with
the computer, or connect to the Internet to
download the contents. For more information,
visit the AvantGo website.
Signing up for AvantGo
1. In the ActiveSync window on the computer,
tap Options.
4. When synchronisation is complete, tap the
AvantGo Channels link in the list of favourites
to see a few of the most popular channels.
WAP
Using WAP, you can browse the WAP (Wireless
Application Protocol) sites on your phone.
Changing a network setting for WAP
You can change a network setting for using the
WAP sites.
Follow the instructions below.
2. In the Sync Options tab, tap the AvantGo
check box.
1. Visit http://www.samsungmobile.com.
3. Tap OK.
2. Choose a country corresponding with the
country code of your SIM card.
The synchronisation starts to download
AvantGo information to your phone.
3. Click WAP/MMS setting below the Login box.
4. Choose WAP.
114
Message, Internet, and Messenger
5. Click Model and enter your phone's model
number.
6. Click Carrier and choose either GPRS or CSD.
7. Enter your mobile phone number.
After you follow the above steps, you will
receive an OTA provisioning message. Please
note that receiving an OTA message depends on
network conditions. Your mobile phone can
receive a maximum of three OTA provisioning
messages a day.
5. If you are not sure of a value you would like to
change, tap Finish without modifying
anything.
Connecting to a web site
1. From the Start menu, tap WAP.
Address bar
Tap to go to the
entered address.
If you have any difficulty making a connection
to the web, follow the instructions below.
1. From the Start menu, tap Settings → the
Connections tab → Connections.
2. Choose a connection profile you have saved.
Toolbar
3. Tap Edit...
4. Tap Next to check if all values are entered
correctly.
115
Message, Internet, and Messenger
2. To open one of your favourite sites, tap
on
the toolbar and then select a WAP site in the
list. You can also enter an address of Website in
the Address bar and tap
.
While processing,
of the browser.
appears on the top right
3. While you are navigating through the WAP
pages, you can use the following options by
tapping icons on the toolbar:
Tap
To
Display the list of favourites.
Search for a word in the current page.
Go to the previously visited page.
Go to the next page.
Go to the homepage.
Stop loading the current page.
Refresh the current page.
116
Opening multiple windows
You can open multiple URLs at the same time in
different windows. WAP provides options to
clone a page, open a new window and close a
window.
To open a new window, on the WAP screen, tap
View → Window → New Window.
To open a new window with the same contents
as the current window, on the WAP screen, tap
View → Window → Clone Page.
To move to the other window, tap View →
Window → Window List. Select the window you
want.
To close the current window, on the WAP
screen, tap View → Window→ Close Window.
Message, Internet, and Messenger
Using Favorites
To open a page from Favorites:
You can store your favourite WAP site and then
access them easily. Categorising them enables
you to find them more quickly.
1. On the WAP screen, tap
on the toolbar. The
favourites under the selected category are
listed.
To add a favourite:
1. On the WAP screen, tap Menu → Favorites →
Add To Favorites. You can also access this
→ Add/Delete tab →
feature by tapping
Add.
2. Enter a name for the favourite site and the URL
of the site, and select a category from the list
under which you want to save the favourite.
3. Tap Add.
2. Select a category, if necessary, and select the
site you want.
117
Message, Internet, and Messenger
To delete a Favorites site:
1. On the WAP screen, tap
→ Add/Delete tab.
2. Select the site you want to delete and tap
Delete.
Tap to change
the sort order
of the URLs.
3. Tap Yes.
Using the history
The history list keeps track of all of the WAP site
you visited.
To view the history:
On the WAP screen, tap Menu → History. The
History screen displays all of the recently visited
URLs.
The history entries are displayed by page title or
page URL according to your choice.
To open a page in the history, select the entry
you want.
To clear all entries in the history, tap and hold
an entry and select Clear All from the pop-up
menu.
To add a history entry to the Favorites list, tap
and hold the page and select Add to Favorites.
118
Message, Internet, and Messenger
Setting WAP options
Display options
You can select the following display options:
To hide or display the toolbar on the WAP
screen, tap View → Display → Toolbar.
To hide or display the address bar, tap View →
Display → Address Bar.
Statistics
WAP provides statistical information about the
data transfer over the web server. To view the
statistical information, on the WAP screen, tap
View → Statistics.
The information about the pages viewed,
objects fetched, and the average page size are
displayed.
To wrap the contents within the width of the
screen, on the WAP screen, tap View → Display
→ Fit to screen. You have to refresh the screen
after selecting this option.
You can also view the statistical information as a
chart in the Chart tab.
To enable or disable graphics contents in your
browser skin, on the WAP screen, tap View →
Display → Image.
You can view the current connection settings for
WAP. You can change an active profile or edit a
profile.
Connection settings
To access this feature, on the WAP screen, tap
Menu → Tools → Options → Preference tab.
119
Message, Internet, and Messenger
Cache/Cookie
Viewed pages can be cached for faster
downloads, Cookies store information related to
a session. You can select to enable or disable
cache or cookie.
To access this feature, on the WAP screen, tap
Menu → Tools → Options → Cache/Cookie tab.
You can also clear cache or delete cookie on this
screen.
Using WAP help
On the WAP screen, tap Menu → Help → Online
Help. You can access the online help for the
WAP features.
MSN Messenger
MSN® Messenger on your phone is an instant
messaging programme that lets you:
• see who is online.
• send and receive instant messages.
• have instant message conversations with
groups of contacts.
To use MSN Messenger, you must have a
Microsoft Passport™ account, Hotmail account,
or a Microsoft Exchange e-mail account. If you
have a Hotmail® or MSN account, you already
have a Passport. Once you have obtained either
a Microsoft Passport or a Microsoft Exchange
account, you are ready to set up your account.
Note: Sign up for a Microsoft Passport account at
http://www.passport.com. Get a free Microsoft
Hotmail e-mail address at http://
www.hotmail.com.
120
Message, Internet, and Messenger
To open MSN Messenger:
From the Start menu, tap Programs → MSN
Messenger.
4. To sign in, tap the screen, or tap Tools → Sign
In... on the MSN Messenger main screen.
Setting up
Before you connect, you must set up the instant
messaging account(s) to use. For MSN
Messenger Service, you must enter a Microsoft
Passport or Hotmail account. For Exchange
Instant Messaging, you must enter an Exchange
account.
To set up an account and sign in:
1. On the MSN Messenger main screen, tap Tools
→ Options....
2. In the Accounts tab, enter your Microsoft
Passport, Hotmail account, or Exchange
account information.
5. Tap Sign in.
For details, see the online help.
3. Tap
.
121
Message, Internet, and Messenger
To change from your exchange instant
messaging to your MSN Messenger service, and
sign in:
1. On the MSN Messenger main screen, tap Tools
→ Options... → Accounts tab.
2. Tap Enable MSN Messenger Service, enter
your Microsoft Passport or Hotmail account
information.
3. Tap Settings... and then tap MSN Messenger
Service under Sign in using this account
.
first. Tap
4. Tap
to save the changes.
5. To sign in, tap the screen, or tap Tools → Sign
In... on the MSN Messenger main screen.
Note: If you already use MSN Messenger on your
computer, your contacts will show up on your
device without being added again.
122
Working with contacts
The MSN Messenger screen shows all of your
messenger contacts at a glance, divided into
Online and Not Online categories.
From this view, while connected, you can start
a chat by tapping a contact in the list.
If you tap and hold a contact in the list, a popup menu displays. You can send e-mails, block
the contact from chatting with you, or delete
the contact from your list using the pop-up
menu.
Note: To see others online without being seen, on the
MSN Messenger screen, tap Tools → My Status
→ Appear Offline. If you block a contact, you
will appear offline to that contact, but will
remain on the blocked contact’s list. To
unblock a contact, tap and hold the contact
and select Unblock from the pop-up menu.
Message, Internet, and Messenger
Chatting with contacts
Tap a contact name to open a chat window.
Enter your message in the text entry area at the
bottom of the screen, or tap My Text to enter a
preset message, and tap Send. To invite
another contact to a multi user chat, in the
Tools menu, tap Invite... and tap the contact
you want to invite.
To switch back to the main window without
closing a chat, tap
. To revert back to your
chat window, tap Chats and select the person
whom you were chatting with.
To know if the contact you are chatting with is
responding, look for the message under the text
entry area.
Using the Tools menu, you can add or block a
contact, customise my text, and invite a
contact.
For more information on using MSN Messenger,
see the online help by tapping the Start menu →
Programs → Help.
Tap to send
a message.
123
Message, Internet, and Messenger
MMS
With MMS, you send and receive multimedia
messages via Multimedia Message Service
(MMS). In addition to the familiar text content
of text messages, multimedia messages can
contain images, video clips, and audio clips.
MMS is sent as a multimedia presentation in a
single entry, not as a text file with attachments.
MMS provides support for e-mail addressing, so
that messages can be sent from phone to
e-mail, or vice versa.
This function is available only if the phone is
supported by your service provider. Only phones
that offer the MMS features can receive and
display the multimedia messages.
To open MMS:
From the Start menu, tap MMS. The MMS main
screen displays.
124
Changing a network setting for MMS
You can change a network setting for sending
and receiving MMS messages.
Follow the instructions below.
1. Visit http://www.samsungmobile.com.
2. Choose a country corresponding with the
country code of your SIM card.
3. Click WAP/MMS setting below the Login box.
4. Choose MMS.
5. Click Model and enter your phone's model
number.
6. Click Carrier and choose either GPRS or CSD.
7. Enter your mobile phone number.
Message, Internet, and Messenger
After you follow the above steps, you will
receive an OTA provisioning message. Please
note that receiving an OTA message depends on
network conditions. Your mobile phone can
receive a maximum of three OTA provisioning
messages a day.
If you have any difficulty making a connection
to the web, follow the instructions below.
1. From the Start menu, tap Settings → the
Connections tab → Connections.
2. Choose a connection profile you have saved.
3. Tap Edit...
Sending a multimedia message
You can create and send a message containing
text, photos, audio, and/or videos stored in your
phone.
Creating and sending a message with one
media file
1. On the MMS main screen, tap Send Photo,
Send Audio, or Send Video.
2. Select the photo, audio, or video you want and
tap Menu → Insert to insert the selected file
to the message.
4. Tap Next to check if all values are entered
correctly.
5. If you are not sure of a value you would like to
change, tap Finish without modifying
anything.
125
Message, Internet, and Messenger
Notes:
• You can create and insert a new item to a
message. Tap Camera in Send Photo, tap Menu
→ Record in Send Audio, or tap Camcorder in
Send Video.
• The maximum size allowed for a message may
differ, depending on the outgoing message size
you have specified. To change the outgoing
message size, tap Setting from the MMS main
screen.
3. Enter your message in the text box.
If you want to preview the message you
created, tap Menu → Preview.
4. When you have finished composing the
message, tap Send.
If you want to save the message in the Drafts
folder, tap Menu → Save Message.
126
5. On the MMS Recipient screen, enter the
recipient’s phone numbers or e-mail addresses.
You can retrieve numbers or addresses from
Contacts by tapping TO..., CC..., or BCC...
If you want to change the message options,
such as priority and expiry time, tap Option.
For details, see page 129.
6. Enter the message subject in the Subject field.
7. Tap Done to send the message.
Creating and sending a message with a
combination of media files
1. On the MMS main screen, tap Compose.
2. Tap
and enter your message, and tap
3. Tap
and select the photo you want to
insert, and tap Menu → Insert.
4. Tap
and select the audio you want to
insert, and tap Menu → Insert.
.
Message, Internet, and Messenger
5. Tap
and select the video you want to insert,
and tap Menu → Insert.
6. To add a new page, tap
. You can move to
another page by tapping Menu → Previous
Page or Next Page. You can also set the page
to automatically move to the next by tapping
Menu → Page Duration.
7. When you have finished composing the
message, tap Send.
If you want to save the message in the Drafts
folder, tap Menu → Save Message.
8. On the MMS Recipient screen, enter the
recipient’s phone numbers or e-mail addresses.
You can retrieve numbers or addresses from
Contacts by tapping TO..., CC..., or BCC...
If you want to change the message options,
such as priority and expiry time, tap Option.
For details, see page 129.
9. Enter the message subject in the Subject field.
10.Tap Done to send the message.
Receiving multimedia messages
When a new multimedia message comes in, the
message is stored in Message Box.
To open Message Box, on the MMS main screen,
tap Message Box.
When you access Message Box, the list of
multimedia messages is displayed with the
information about the sender and subject. In
the Detailed view mode, the received date and
expiry time of the message are displayed.
The messages can be sorted in any of the fields
displayed, by clicking on the corresponding
column head.
Viewing messages
You can access the messages you sent, you
received, and you composed but not sent yet.
1. On the MMS main screen, tap Message Box.
The messages in Message Box are displayed.
127
Message, Internet, and Messenger
If you want to find a message you sent or
composed but not sent, tap the drop-down
arrow at the top left and select Sent Items or
Drafts.
2. Select the message you want to read and tap
Menu → View.
Indicates
attachments to
this message.
3. While viewing the message, you can use the
following options:
• To reply to the sender, tap
→ Reply.
, or tap Menu
• To reply to all recipients, tap
Menu → Reply All.
, or tap
• To forward the message, tap
Menu → Forward.
, or tap
• To delete the message, tap
→ Delete.
, or tap Menu
• To download the message from the MMS
server, tap Menu → Download.
• To extract attachments from the messages
and save them in your phone, tap Menu →
Save Objects.
• To view the previous or next page, tap
or
, or tap Menu → Next Page or Previous
Page.
4. Tap
128
or Close to close the message.
Message, Internet, and Messenger
Configuring MMS settings
Profile settings
Sending options
On the MMS main screen, tap Setting → Profile
tab.
You can change the default settings for sending
MMS messages. On the MMS Recipient screen,
before sending a message, tap Option.
• Delivery Report: When this option is
selected, the network informs you whether or
not your message has been delivered.
• Read Reply Report: When this option is
selected, your phone sends a read-reply
request along with your message to the
recipient.
• Delivery After: Selects the time delay before
messages are sent.
• Priority: Selects the priority level of your
messages.
• Class: Selects a message class.
• Profile: Displays the current connection
profile. To change the profile, tap Edit Profile.
• Creation Mode: Selects an MMS creation
mode.
Free: You are able to send messages using
unsupported formats.
Restricted: You are not able to send messages
using unsupported formats.
Warning: You are able to send messages using
unsupported formats, but the phone will inform
you when you send messages with unsupported
formats.
• Outgoing Message Size: Selects a maximum
size of attached items allowed for messages.
• Expiry: Selects the length of time messages
are stored in the MMS server.
129
Message, Internet, and Messenger
Configuration
On the MMS main screen, tap Setting →
Configuration tab.
• Home Reception: Determines if your Phone
retrieves new messages automatically when
you are in your home service area.
• Roaming Reception: Determines if your
Phone retrieves new messages automatically
when you are roaming in another network.
• Reject Anonymous: Rejects messages from
unknown senders.
• Message Class Allowed: Selects a message
class you want to receive.
130
8
Pocket outlook
Calendar
Microsoft® Pocket Outlook includes Calendar,
Contacts, Tasks, Inbox, and Notes. You can
use these programmes individually or together.
For example, e-mail addresses stored in
Contacts can be used to address e-mail
messages in Inbox.
Use Calendar to schedule appointments,
including meetings and other events. You can
check your appointments in one of several
views (Agenda, Day, Week, Month, and Year)
and easily switch views by using the icons on
the command bar of the Calendar main screen.
Using ActiveSync®, you can synchronise
information in Microsoft Outlook or Microsoft
Exchange on your computer with your phone.
You can also synchronise this information
directly with a Microsoft Exchange server. Each
time you synchronise, ActiveSync compares the
changes you made on your phone and computer
or server and updates both with the latest
information. For information on using
ActiveSync, see Microsoft ActiveSync Help on
the computer.
To open Calendar:
From the Start menu, tap Programs →
Calendar. You can view the list of appointments
that you have created in the Agenda view.
131
Pocket outlook
Creating an appointment
4. Enter or change other desired information. You
will need to hide the input panel to see all
available fields.
1. On the appointment list, tap New.
Select Yes
to last the
appointment
all day.
Tap the down
arrow to
choose from
predefined
text.
Tap to select
the repeat
interval to set
how often the
event repeats.
5. To assign the appointment to a category, hide
the input panel and tap the Categories field
and then select a category from the list. In the
calendar list, you can display appointments by
category.
You can also create a new category or delete it
in the Add/Delete tab.
6. To prevent other people from viewing the
appointment, tap the Sensitivity field and
select Private. The private appointment is
marked with a key icon when you view it.
2. Tap first to select the field and enter a subject
and a location.
3. If needed, tap the date and time to change
them.
132
Note: This feature is available only when you are
using a Microsoft Exchange server e-mail
account.
7. To add notes, tap the Notes tab. You can enter
text, draw, or create a recording. Note is a
good place for maps and directions.
Pocket outlook
8. When finished, tap
appointments.
to return to the list of
Note: If you select Remind me in the Reminder field
of an appointment, your phone will remind you
according to the options set in the Start menu
→ Settings → Personal tab → Sounds &
Notifications.
Viewing and editing an appointment
You can view your appointments in the different
views: Agenda, Day, Week, Month, or Year and
edit the appointments. By default, the Calendar
first appears in the Agenda view, which provides
the most detail about your appointment.
Note: You can customise the Calendar display, such
as changing the first day of the week, by
tapping Options... from the Tools menu on the
Calendar main screen. For details, see the
online help.
1. In the appointment list, select the date of the
appointment in the date field at the top of the
screen.
Tap to
select the
day of the
week.
Tap to
display the
calendar.
Tap to display
the summary
screen for the
appointment.
OR
Tap and hold
to display a
pop-up menu
of actions.
Tap to go to
today’s date.
Tap to see
the week
previous or
next week.
Select your calendar view mode from
Agenda, Day, Week, Month, and Year.
133
Pocket outlook
2. Select the calendar view using the five icons on
the command bar at the bottom of the screen.
4. Tap Edit and edit the appointment information.
5. Tap
to save the changes.
3. Tap the appointment you want to view.
A summary screen is displayed.
Indicates a
reminder icon.
Indicates a private
appointment icon.
Shows summary
information for the
appointment.
Creating meeting requests
You can use Calendar to set up meetings with
users of Outlook or Pocket Outlook. The meeting
request will be sent automatically either when
you synchronise Inbox or when you connect to
your e-mail server.
Scheduling a meeting
1. Create an appointment.
Shows a note, if
you created one.
2. In the appointment details, scroll to and tap
the Attendees field.
3. From the list of e-mail addresses you have
saved in Contacts, select e-mail addresses of
the meeting attendees you want and tap
.
134
Pocket outlook
4. Messaging automatically creates a meeting
request and sends it to the attendees the next
time you synchronise with your computer. Any
textual notes entered in the Notes tab
(excluding writings or recordings) will be also
sent.
Deleting an appointment
Note: If you are sending the meeting request
3. Tap Yes to permanently delete the
appointment.
through a connection to an ISP or the network,
rather than through synchronisation with your
computer, tap Tools → Options... →
Appointments tab. In Send meeting requests
via, tap the service you want to use to send
the meeting request.
For more information on sending and receiving
meeting requests, see the Calendar online help
and Inbox online help.
1. In the appointment list, tap and hold the
appointment you want to delete.
2. Select Delete Appointment from the pop-up
menu.
Beaming an appointment
1. In the appointment list, tap and hold the
appointment you want to beam.
2. Select Beam Appointment from the pop-up
menu.
3. When using the infrared connection, align the
infrared ports according to the instructions on
page 198 so that they are unobstructed and
within a close range.
135
Pocket outlook
Contacts
Contacts maintains a list of your friends and
colleagues so that you can easily find the
information you’re looking for, whether you’re at
home or on the road. Using the device’s infrared
(IR) port, you can quickly share Contacts
information with other device users.
To open Contacts:
From the Start menu, tap Contacts. You can
view the list of the contacts that you have
created.
Creating a contact
You can create a new contact in Contacts and on
the SIM card.
Creating a contact in Contacts
1. In the contact list, tap New.
136
2. Enter a name and other contact information.
You will need to scroll down to see all available
fields.
Note: If you enter a name with more than 2 words,
the middle word will be recorded as a middle
name. If your contact has a double first or last
name, tap the down arrow in the Name field
and enter the names in the proper box.
3. To assign the contact to a category, scroll to
and tap the Categories field and then select a
category from the list. In the contact list, you
can display contacts by category.
You can also add a new category or delete it in
the Add/Delete tab.
4. To add notes, tap the Notes tab. You can enter
text, draw, or create a recording.
5. When finished, tap
list.
to return to the contact
Pocket outlook
Creating a contact on the SIM card
1. In the contact list, tap Tools → SIM Manager.
The SIM Manager application displays.
2. Tap
to create a new SIM entry.
3. On the New SIM Entry screen, enter the name
of the person you want to add.
If necessary, tap Change Index to change the
location number.
4. Enter the number you want to store in the
Phone number field.
5. Tap Save.
Viewing and editing a contact
When you access Contacts, the contact list
displays the names of your contacts
alphabetically, along with an abbreviation for
the primary contact number or E-mail address,
such as the person’s work phone number (w) or
mobile phone number (m).
Note: To change the way information is displayed in
the list, tap Tools → Options... → List view
settings.
137
Pocket outlook
1. In the contact list, tap the Find a name box and
enter the name you want to view, or scroll to
the contact.
Category
field
Tap and enter a
name to quickly
find it in the list.
Tap to quickly
locate the
contacts
alphabetically.
Tap this field to
see additional
numbers, if
several are
stored.
Note: When you enter the first few letters of the
name you want to view, the names in Contacts
are listed, highlighting the name that most
closely matches your input. Entering a name in
T9 mode or ABC mode will not support this
feature.
2. Tap the contact. A summary screen is
displayed.
Tap to dial
the number.
If the contact is assigned to a certain category,
tap the category field and select the category
from the drop-down list. A list of contacts
placed in that category displays.
138
Tap to send
an e-mail
message.
Pocket outlook
3. Tap Edit and edit the contact information.
4. Tap
to save the changes.
Making a call from the contact list
1. In the contact list, tap and hold the contact you
want to call.
2. Tap Call Work, Call Home, or Call Mobile.
You can also call the contact while viewing the
selected contact’s information. Tap the phone
number you want to call.
Sending a message to a contact
1. In the contact list, tap and hold the contact to
which you want to send a message. To select
multiple contacts, tap and drag.
2. On the pop-up menu, tap Send Email, Send
MMS, or Send Text Message, depending
upon the type of message to send.
Note: To send an e-mail message, you must have an
e-mail address configured for the contact. To
send a text message, you must have a text
message number for the contact, which is
usually the mobile phone number.
Deleting a contact
Note: If you delete a contact on your phone and
synchronise Contacts with your computer, you
also delete the contact in Outlook on your
computer.
1. In the contact list, tap and hold the contact you
want to delete.
If the contact is assigned to a certain category,
tap the category field and select the category
from the list.
139
Pocket outlook
2. Tap Delete Contact.
Creating a note
3. Tap Yes to permanently delete the contact.
1. On the Notes screen, tap New.
You can also delete the contact by selecting
Delete Contacts from the Tools menu.
Notes
Quickly capture thoughts, reminders, ideas,
drawings, and phone numbers with Notes. You
can create a written note or a recording. You
can also include a recording in a note.
To open Notes:
From the Start menu, tap Programs → Notes.
You can view the list of your notes that you
have created.
Tap to add a
recording to
the note.
Tap to write
on the screen.
2. Create your note by writing, drawing, typing,
using the keypad, and/or recording. For more
information about, see Chapter 3.
140
Pocket outlook
Viewing and editing a note
2. A summary screen is displayed.
When you access the Notes application, the
note list displays the first line of each note you
create. This makes it easy to locate and review
your notes. You can easily sort notes on the
note list.
1. In the note list, tap the note you want to view.
If the note is assigned to a certain category,
tap the category field and select the category
from the list.
Category
field
Tap to change
the sort order
of the list.
3. Tap Edit and edit the note information.
4. Tap
to save the changes.
Deleting a note
1. In the note list, tap and hold a note and select
Delete from the pop-up menu.
You can also tap Tools → Delete Note while
viewing the note.
2. Tap Yes to permanently delete the note.
Tap to view the
note details.
OR
Tap and hold to
display a pop-up
menu of actions.
141
Pocket outlook
Tasks
Tasks is a convenient place to create reminders
of the things that you have to do. A task can be
entered to occur once or repeatedly, depending
on the demands of the task.
To open Tasks:
From the Start menu, tap Programs → Tasks.
You can view the list of tasks that you need to
do.
Creating a task
1. On the Tasks screen, tap New.
To quickly create a task with only a subject, tap
Tap here to add a new task box at the top of
the screen. Then enter your task information
and tap the screen. If you cannot see the box,
tap Entry Bar on the Tools menu.
142
2. Enter a description of the task.
3. To set a reminder for the task, tap the Due
field and set a due date. Then tap the
Reminder field and select Remind me. You
will be reminded at 8:00 in the morning on the
due date.
Note: To be automatically reminded of new tasks
with a due date, in the task list, tap Tools →
Options... → Set reminders for new items.
4. To assign the task to a category, scroll to and
tap the Categories field and then select a
category from the list. In the task list, you can
display tasks by category.
You can also add a new category or delete it in
the Add/Delete tab.
Pocket outlook
5. To prevent other people from viewing the task
information, tap the Sensitivity field and
select Private. The private task is marked with
a key icon when you view it.
Note: This feature is available only when you are
using a Microsoft Exchange server e-mail
account.
6. To add notes, tap the Notes tab. You can enter
text, draw, or create a recording.
7. When finished, tap
.
Viewing and editing a task
1. In the task list, tap the task you want to view.
If the task is assigned to a certain category, tap
the category field and select the category from
the list.
Category field
High
priority ( )
Normal priority
(no indicator)
Low priority
( )
Tap and hold
to display a
pop-up menu
of actions.
Select the
sort order of
tasks.
When the due
date of the
task has
passed, the
colour of the
task changes
to red.
When you access the Tasks application, the task
list displays. The task list shows your “things to
do” list.
Note: To change the way information is displayed in
the list, tap Tools → Options...
143
Pocket outlook
2. A summary screen is displayed.
Indicates a
reminder icon.
Tap to show and
hide additional
summary
information.
When a task is
completed, tap
this check box to
indicate that the
item is done.
Shows a note,
if you created.
3. Tap Edit and edit the task information.
4. Tap
to save the changes.
Completing or deleting a task
1. To mark a task as completed, in the task list,
tap the check box next to the task.
144
2. To delete a task, in the task list, tap and hold
the task.
3. On the pop-up menu, tap Delete Task. The
next time you synchronise, the task will be
deleted from the computer.
4. Tap Yes to permanently delete the task.
9
Multimedia
Camera
Taking a picture
1. From the Start menu, tap Camera to turn on
the camera.
With the built-in camera on your phone, you can
take pictures of people or events while on the
move. You can view and edit photos. Your phone
supports JPEG, GIF, PNG, and BMP pictures.
To open Camera:
From the Start menu, tap Camera, or press and
hold
on the right side of the phone.
You can switch to Landscape mode by tapping
, or pressing
.
145
Multimedia
2. Adjust the camera settings using the following
onscreen icons or using the keypad.
Icon Key
Description
Selects an image resolution.
Press
to change the colour tone or apply a
special effect to the image.
Selects an image quality setting:
(Best),
(High),
or
(Economy).
You can also access camera options by tapping
Menu, or pressing
. See page 147.
Adjusts the image brightness:
from
(+3) to
(-3) or
(Auto).
3. Tap
, press the OK/Confirm key, or press
and hold
to take a photo. The taken photo
displays on the preview screen.
Adjusts the white balance:
(Auto),
(Daylight),
(Cloudy),
(Tungsten),
or
(Fluorescent).
4. To save the photo, tap Save or press the OK/
Confirm key. The photo is saved in the My
Pictures folder.
Changes the flash setting:
(Auto),
(Forced), or
(Off).
Changes a storage location:
(Phone’s memory) or
(Storage Card).
146
Tap the up arrow or down arrow on the right
side of the screen, or press the Up or Down
navigation key to zoom in or out.
To delete it and return to the Camera preview
screen, tap Cancel.
To send the photo via MMS, tap MMS. See
page 125.
Multimedia
Using the auto focus function
• Brightness: Allows you to adjust the image
brightness.
In Camera mode, press
halfway down to
automatically adjust the focus. The colour of the
focus frame changes briefly to green and back
to white. If the red focus frame appears, try
again to adjust the focus.
• Photo Effect: Allows you to apply a special
effect.
Options available in Camera mode
• Go to: Allows you to move to Camcorder
mode or the My Pictures folder in MyItems.
When you tap Menu from the Camera preview
screen, the following options are available:
• Settings: Allows you to configure Camera
mode. See “Configuring Camera mode.”
• Shot Mode: Allows you to change the camera
shooting mode. If you select BCR Shot, see
the BCR application. See page 167.
Viewing photos
• Resolution: Allows you to select an image
resolution.
• Quality: Allows you to select an image quality
setting.
• Self Timer: Allows you to set a time delay
before the camera takes a photo.
To view all of your photos, tap
at the bottom
of the screen or press
from the Camera
preview screen. The My Pictures folder in
MyItems opens and displays the photos you have
taken.
• White Balance: Allows you to customise the
white balance to make your photo warmer or
cooler, depending on lighting conditions.
• Flash: Allows you to change the flash
settings.
147
Multimedia
Configuring Camera mode
Recording a video
From the Camera preview screen, tap Menu →
Settings to access the following options for
Camera mode.
1. From the Start menu, tap Camera to turn on
the camera.
• Default image directory: Allows you to select
the default memory location.
2. Switch to Camcorder mode by tapping
the bottom right of the screen, or press
• File name prefix: Allows you to set the
default name prefix for photos.
• Shutter sound: Allows you to select the
sound produced when you press the camera
shutter.
• Timer sound: Allows you to select the sound
produced when the timer counts down.
• Multi-shot number: Allows you to select the
number of shots the camera will take in Multi
Shot mode.
• Auto save: Allows you to set the camera to
automatically save photos after taking.
148
at
.
3. Adjust the camcorder settings using the
onscreen icons or using the keypad.
Icon Key
Description
Selects an image resolution.
Selects an image quality
setting:
(Best),
(High),
or
(Economy).
Adjusts the image brightness:
from
(+3) to
(-3) or
(Auto).
Adjusts the white balance:
(Auto),
(Daylight),
(Cloudy),
(Tungsten),
or
(Fluorescent).
Multimedia
Icon Key
Description
Changes the flash setting:
(Auto),
(Forced), or
(Off).
Changes a storage location:
(Phone’s memory) or
(Storage Card).
Turns audio on or off:
(Audio on) or
(Audio off).
Tap the up arrow or down arrow on the right
side of the screen, or press the Up or Down
navigation key to zoom in or out.
Press
to change the colour tone or apply a
special effect to the image.
You can also access camcorder options by
tapping Menu, or pressing
. See page 150.
4. Tap
, press the OK/Confirm key, or press
and hold
to start recording.
To pause recording, tap
To resume recording, tap
.
.
5. When you have finished recording, tap
,
press the OK/Confirm key, or press and
hold .
6. To save the video, tap Save or press the OK/
Confirm key. The video is saved in the My
Videos folder.
To delete it and return to the Camcorder
preview screen, tap Cancel.
To send the video via MMS, tap MMS. See
page 125.
149
Multimedia
Using the auto focus function
• Brightness: Allows you to adjust the video
image brightness.
In Camcorder mode, press
halfway down to
automatically adjust the focus. The colour of the
focus frame changes briefly to green and back
to white. If the red focus frame appears, try
again to adjust the focus.
• Self Timer: Allows you to set a time delay
before the camera records a video.
Options available in Camcorder mode
• Movie effect: Allows you to apply a special
effect.
When you tap Menu from the Camcorder
preview screen, the following options are
available:
• Go to: Allows you to move to Camera mode
or the My Videos folder in MyItems.
• Resolution: Allows you to select an image
resolution.
• Quality: Allows you to select an image quality
setting.
• White Balance: Allows you to customise the
white balance to make you video image
warmer or cooler, depending on lighting
conditions.
• Flash: Allows you to change the flash
settings.
150
• Sound on/Sound off: Allows you to turn
audio on or off.
• Settings: Allows you to configure Camcorder
mode. See “Configuration Camcorder mode.”
Playing videos
To access all of your videos, tap
at the
from the
bottom of the screen or press
Camcorder preview screen. The My Videos folder
in MyItems opens and displays the videos you
have recorded.
Multimedia
Configuring Camcorder mode
MyItems
On the Camcorder preview screen, tap Menu →
Settings to access the following options for
Camcorder mode:
In MyItems, you can access photos, videos,
sounds you have stored in your phone.
• Default video directory: Allows you to select
the default memory location.
Photos
• File name prefix: Allows you to set the
default name prefix for videos.
• Start sound: Allows you to select the sound
produced when the camcorder start
recording.
• End sound: Allows you to select the sound
produced when the camcorder ends
recording.
• Auto save: Allows you to set the camcorder
to automatically save a video after recording.
Viewing photos
1. From the Start menu, tap MyItems → Photo
tab.
The photos you have taken display with the file
name and time and date when it was taken.
2. Tap the photo you want to view.
3. To view the previous or next photo, tap the left
arrow or right arrow on the screen.
4. Tap
to return to the photo list.
151
Multimedia
Viewing a slide show
A slide show is a sequential presentation of each
photo in the current folder.
1. While viewing a photo, tap
, or tap Menu →
Slide Show to view a slide show.
2. To stop the slide show, tap the screen and then
.
Options available while viewing a photo
• Tap
or
to zoom in or out.
• To view the photo in actual size, tap
the photo to the screen, tap
.
. To fit
Deleting a photo
1. On the My Pictures screen, tap and hold the
photo you want to delete.
2. Tap Delete from the pop-up menu.
3. When a confirmation message appears, tap
Yes.
152
If you want to delete the photos you select, tap
the image field of the photos and a check mark
will appear. Then tap and hold the screen and
select Delete from the pop-up menu, or tap
Menu → File → Delete.
Editing a photo
You can edit the photos using general editing
tools.
1. From the My Pictures screen, select the photo
you want to edit and tap Menu → Edit.
2. Edit the photo by tapping Tools, Edit, and
editing tool icons at the bottom of the screen.
• Use
to rotate the image 90 degrees
counterclockwise.
• Use
to crop the image.
Tap
and then draw a box with the stylus
pen around the area you wish to crop. Tap
once inside the box you have drawn and your
photo will be cropped.
Multimedia
Tap
on the zoom panel to return to Best
Fit view mode.
Best fit view
Crop icon
• Use
to open the zoom panel.
By default your image is in Best Fit view
mode when you open the image.
Pan around the red boxed area to focus a
portion of the picture into view. Press panel
buttons to zoom in or out of the area
highlighted by the red box.
Zoom icon
For details, see the online help.
3. Tap
.
4. When a confirm message appears, tap Yes to
save the edited photo.
153
Multimedia
Sending a photo
Deleting a video
You can send a photo to another phone via
MMS, e-mail, or the infrared (IR) port.
1. From the My Videos screen, tap and hold the
video you want to delete.
From the My Picture screen, tap Menu → Send
→ a sending method.
2. Tap Delete from the pop-up menu.
• If you want to send a photo via MMS, see
page 125.
3. When a confirm message appears, tap Yes.
• If you want to send a photo via the infrared
(IR) port, see page 198.
If you want to delete the videos you select, tap
the image field of the videos and a check mark
will appear. Then tap and hold the screen and
select Delete from the pop-up menu, or tap
Menu → File → Delete.
Videos
Sending a video
Playing videos
You can send a video via MMS, e-mail, or the
infrared (IR) port.
1. From the Start menu, tap MyItems → Video
tab.
From the My Videos screen, tap Menu → Send →
a sending method.
• If you want to send a photo via e-mail, see
page 106.
The videos you have recorded display with the
file name and time and date when it was saved.
2. Tap the video you want to play.
154
• If you want to send a video via MMS, see
page 125.
• If you want to send a video via e-mail, see
page 106.
Multimedia
• If you want to send a video via the infrared
(IR) port, see page 198.
Sounds
Playing sounds
1. From the Start menu, tap MyItems → Sound
tab.
The sounds display with the file name and time
and date when it was recorded.
2. Tap the sound you want to play.
3. To stop playing, tap
.
Deleting a sound
1. From the My Music screen, tap and hold the
sound file you want to delete.
If you want to delete the sound files you select,
tap the image field of the sound files and a
check mark will appear. Then tap and hold the
screen and select Delete from the pop-up
menu, or tap Menu → File → Delete.
Sending a sound
You can send a sound via MMS, e-mail, or the
infrared (IR) port.
From the My Music screen, tap Menu → Send →
a sending method.
• If you want to send a sound via MMS, see
page 125.
• If you want to send a sound via e-mail, see
page 106.
• If you want to send a sound via the infrared
(IR) port, see page 198.
2. Tap Delete from the pop-up menu.
3. When a confirm message appears, tap Yes.
155
Multimedia
Pictures
Using Pictures, you can view photos stored in
the My Pictures folder on your phone or a
memory card, if inserted into the phone.
To open Pictures:
From the Start menu, tap Programs →
Pictures. The photos display in Thumbnail mode.
• To view photos in a memory card, tap
.
• To view photos in the My Pictures folder, tap
.
• To view a slide show of photos, tap
. You
can set the length of time each photo remains
on the screen by tapping Tools → Options... →
Slide Show tab. For details, see the online
help.
• To edit a photo, tap the photo you want. The
photo opens in Edit mode. See “Editing a
photo” on page 152.
156
• To set a photo as wallpaper for the Today
screen, while viewing the photo, tap Tools →
Set as Today Wallpaper...
Windows Media player
Your phone is equipped with Microsoft Windows
Media Player 10 for Pocket PC. With Windows
Media Player, you can play Windows Media
Audio, Windows Media Video, and MP3 audio
files that are stored on your phone, a memory
card, or on the Web (network).
To open Windows Media Player:
From the Start menu, tap Programs →
Windows Media.
The Library screen opens. For more information
on using libraries, see page 159.
Multimedia
About DRM, licenses, and protected
files
Some digital media files, such as songs
downloaded from online stores, are encrypted
to prevent the files from being unlawfully
distributed or shared. Content providers use a
technology called Digital Rights Management
(DRM), to encrypt the files. During the
encryption process, the content provider
creates a license which specifies how and when
the file can be used.
For example, a content provider could create a
license that allows you to play a certain file on
your computer, but not on your phone. Or, a
license that allows you to play a certain file on
your phone, but only for a month, or perhaps
only a certain number of times. Files that have
licenses associated with them are called
protected files.
If you want to copy a protected file from your
computer to your phone, use the desktop Media
Player to synchronise the file to your phone. This
will ensure that the license is copied along with the
protected file. In the desktop version of Windows
Media Player 10 or later, you can use ActiveSync
to automatically copy your audio files, video files,
and play lists to your phone every time you
connect.
Copy media files using the desktop
player
In addition to ActiveSync (page 65), you can
use the desktop player to copy media files.
Using the desktop player ensures that licenses
are copied with protected files.
Make sure that you have Windows Media Player
10 or later versions on your computer.
Depending on the version of your desktop
player, the procedure to copy files may vary.
157
Multimedia
Selecting synchronisation mode
When you synchronise your phone with
Windows Media Player on a computer for the
first time, you need to set up synchronisation
for your phone.
1. Connect your phone to your computer.
2. Open Windows Media Player on your computer.
The Device Setup Wizard starts.
3. Select a synchronisation method:
• Automatic: The player synchronises content
to the device when you connect it to your
computer or when you change
synchronisation settings.
• Manual: You can select specific files or play
lists you want to synchronise each time you
want changes to the content on your phone.
158
You can switch between automatic and manual
synchronisation.
To change the synchronisation method:
1. In Windows Media player on your computer,
click Sync.
2. Click Sync Settings.
3. In the Synchronization Settings dialogue
box, clear or select the Synchronize device
automatically check box to select the mode
you want.
4. Click OK.
Using automatic synchronisation
If you set automatic synchronisation from the
Device Setup Wizard, the synchronisation
automatically begins when you connect your
phone to the computer.
Multimedia
Using manual synchronisation
Using libraries
If you set manual synchronisation from the
Device Setup Wizard, you must specify the
content you want to synchronise before starting
synchronisation.
A library is a file list provided by Windows Media
Player to retrieve media files in the phone’s
memory or a memory card.
1. Connect your phone to the computer.
2. Open Windows Media Player on the computer.
3. Click Library, click <List Name> List, and
then click Sync List.
If necessary, to clear the list before beginning,
click Sync List, and then click Clear List.
4. Drag items from the Contents or Details pane
in your library to the List pane to add them to
the list of items to be synchronised.
5. In the List pane, verify that the items you have
selected to synchronise will all fit on the device.
6. Click Start Sync.
The Library screen contains categories, such as
My Music, My Videos, My TV, and My Playlists.
Using the Library screen, you can sort your
content by criteria, such as artist name, album
title, or genre.
From the Windows Media Player main screen,
tap Menu → Library.
On the Library screen, you can use the following
options by tapping Menu.
• Queue Up: Adds the selected file to the end
of the current play list.
• Delete from Library: Deletes the selected file
from the library.
• Library: Allows you to select the library that
you want to view (for example, the library of
files stored on your phone or a memory card).
159
Multimedia
• Update Library...: Adds new files to the
library by searching your phone or a memory
card. Tap Search to start searching for new
media files and add them to the
corresponding library. When adding files has
been finished, tap Done.
• Open File...: Allows you to search for media
files you want to play from the file system.
• Properties: Displays information about the
selected file.
Playing music and video files
If you have copied media files in your phone’s
memory or memory card, you can play them
from Windows Media Player.
Playing media files from a library
1. On the Library screen, if necessary, tap Menu
and select Library and then select the
memory that you want to use.
2. Select a category, such as My Music or My
Videos.
160
3. Scroll to the library you want to play and tap
Play.
Note: If the file does not appear in a library, on the
Library screen, tap Menu → Open File... On
the File System screen, select the file you want
to play.
The player screen displays and the selected file
plays.
Multimedia
To play the files in the play list randomly or
repeatedly, tap Menu → Shuffle/Repeat.
Playing media files on a network
1. On the Windows Media Player screen, tap
Menu → Open URL...
2. Enter a URL in the URL field.
Or, scroll to a URL that you have used in the
History field.
3. Tap OK.
Note: To play streaming media files, you must be
connected to a network. For more information
on creating a remote connection between your
portable phone and a network, see the
Connection online help.
Setting up a play list
You can add media files on the Library screen to
a temporary play list. It lists the currently
playing file, as well as any files that have been
queued up to play next.
Creating a play list
1. On the Library screen, select the category you
want and scroll to the file you want to play.
2. If the file does not appear on the list, tap Menu
→ Update Library... You can also select
Open File... to display the File System screen
and search for the files you want.
3. Select a file and tap Menu → Queue Up.
4. Repeat from step 1 to add more files.
5. Tap
to return to the player screen.
161
Multimedia
Viewing the play list
• To go to the library, tap
On the Windows Media Player screen, tap Now
Playing.
• To delete the selected file from the current
. You can also tap Menu →
play list, tap
Delete from Playlist.
The Now Playing screen displays.
Indicates
the file now
playing.
.
• To display the file information, tap
.
• To clear the play list, tap Menu → Clear Now
Playing.
Changing Windows Media Player
settings
You can customise the appearance and
functionality of Windows Media Player. On the
Windows Media Player screen, tap Menu →
Options...
You can use the following options:
Using the play list
• To change the play order, tap
or
. You
can also tap Menu → Move Up or Move
Down.
162
• Playback: Selects the options for playback.
You can select the way time is displayed on
the player screen, or whether or not to pause
playback when you launch another
programme, and resume playback after a
phone call.
Multimedia
• Audio/Video: Selects the viewing options for
playing videos, such as shrinking oversized
videos and playing videos in a full screen.
• Network: Changes network connection
settings to be used for playing streaming
videos.
• Library: Selects whether the player screen or
the Library screen is displayed when you open
Windows Media Player.
• Skins: Changes the appearance of the player
screen by selecting a new skin.
• Buttons: Assigns Windows Media Player
functions to the keys on your phone to quickly
control playback without having to use the
menus.
R2VS
Samsung R2VS is a suite of audio enhancement
technologies designed to improve the quality of
mobile audio, e.g., cellular phone sound quality.
The R2VS feature provides great audio
performance with 3D sound effect and 5-band
graphic equaliser allowing both a headset and
speaker to deliver natural 3D sound image in
rich and clear tones.
To open R2VS:
Tap
on the bottom right of the Today
screen. You can also open it by tapping the
Start menu → Settings → System tab → R2VS.
Tap to
activate
R2VS.
Move the slider
to set 3D sound
effect gain.
Select a preset
equalizer.
Move the slider
to set equalizer
gain for each
band.
163
10
Extra programmes
Games
Your phone includes fun games, such as
Jawbreaker and Solitaire in the Games
application.
To open Games:
From the Start menu, tap Programs → Games.
Note: For details about game, see the online help.
Playing jawbreaker
1. On the Games screen, tap Jawbreaker.
2. On the Jawbreaker screen, tap Game → New
Game → Yes. The game starts.
164
Tap Info to view statistics or information about
the game.
You can set the game options by tapping
Options... from the Game menu.
Playing solitaire
On the Games screen, tap Solitaire → New. The
game starts.
When you want to restart the game, tap New.
To stop the game, tap
at the top right of the
screen.
You can set the game options by tapping
Options... from the Tools menu.
Extra programmes
Calculator
The calculator allows you to perform general
mathematical functions, such as addition,
subtraction, multiplication, and division.
3. Tap the math function.
4. Enter the second number.
5. To view the result, tap =.
You can use the calculator to:
You can use the following buttons on the
screen:
• perform basic calculations.
• C: Clears the number you entered.
• store and retrieve values.
• MC: Clears any value that is stored in the
calculator’s memory.
Using the calculator
1. From the Start menu, tap Programs →
Calculator.
2. Enter the first number by using the Calculator
buttons on the screen.
• MR: Recalls the stored value from memory
and inserts it into the current calculation.
• M+: Adds the current number to the value
stored in the calculator’s memory.
To clear the displayed numbers, tap C.
To clear the last digit entered in a multi digit
entry, tap the arrow at the right of the entry
box.
165
Extra programmes
World Clock
The World Clock enables you to check the time
and date in many cities all over the world.
To open World Clock:
From the Start menu, tap Programs → World
Clock.
166
• To change the view mode, tap Menu and
select the view mode you want.
• To change the city, tap the city next to the
clock. Then select the city you want to display
and tap Select.
• To move to the world map, tap
. Tap the
place on the map you want to check the time
and date.
Extra programmes
BCR
2. Select the option you want.
The Bizcard Recognition (BCR) application
allows you to take a photo of a name card and
extract contact information from the card, and
save it as a new contact in Contacts.
• Language: Selects a language in which BCR
recognises name cards. If you select
European, the following languages are
available: German, French, Italian, Spanish,
and Portuguese.
Note: To read Russian name cards, you must install
• Blur detection: Sets BCR to detect blurred
name card images.
Paragon S/W supplied with your phone.
To open BCR:
From the Start menu, tap Programs → BCR.
• Memory: Sets the name card photos to be
saved automatically after the photo is taken.
3. Tap
.
Changing BCR settings
Before using this progrmme, you can change
the settings for using BCR.
1. From the BCR screen, tap Setting.
167
Extra programmes
Taking a name card photo
You can take a name card photo and save it as a
new contact in Contacts.
1. From the BCR screen, tap Capture Image.
The camera turns on in Landscape mode.
Notes:
• Hold the phone firmly while taking the name
card photo.
• Be careful not to let any shadows on the
name card.
• Place the name card on level, evenly lit place
and photograph it.
• Depending on the shooting environment, the
result of the name card conversion may not be
satisfying.
2. To change the shooting mode, tap Menu →
Shot Mode.
To change the camera settings, use the
onscreen icons.
•
•
168
: Changes the focus setting:
Focus) or
(Auto Focus).
: Changes the flash setting:
(Forced), or
(Off).
(Fixed
(Auto),
Extra programmes
3. Center the name card within the green frame
and press
or tap
to take the photo.
Notes:
• Using
to take a photo will cause less
, thereby
movement than tapping
producing a clearer photo that BCR will
recognise better.
• The Vibration icon (
) may appear on the
screen to indicate small vibrations or low
lighting conditions when the shutter is
released.
you have finished, tap OK to convert all name
cards you have photographed.
5. After converting, the contact card preview
displays.
4. If you are in Single Shot mode, your phone
automatically recognises the photographed
name card and converts it to contact card
format.
If you are in Multi Shot mode, your phone
allows you to take photos of additional name
cards. Tap MORE to take more photos. When
6. Tap File → Save or Save all to save the
contact card(s).
169
Extra programmes
The photos taken in Single Shot mode are
saved in the SafeStore/My BizPicture/Single
folder.
The photos taken in Multi Shot mode are saved
in the SafeStore/My BizPicture/Multi folder.
Selecting and converting name card
photos from the file directory
You can convert a single name card photo or all
of the photos in a folder at one time.
1. From the BCR screen, tap Load image or
Load Image Folder.
VoiceSignal
VoiceSingal is a speech recognition application
that enables you to launch applications or dial
contacts by speaking an associated command or
name into the microphone.
To open VoiceSignal:
From the Start menu, tap Programs →
VoiceSignal.
When the phone prompts you with displaying
“Say a command,” say one of the commands:
• Call [person’s name or phone number]
2. Select the folder in which the name card
photo(s) is saved from the drop-down list.
• Lookup [person’s name]
3. Select the image or folder you want from the
file directory.
Voice tips
4. Tap the image you want or tap OK.
170
• Open [application]
• Speak clearly, naturally, and continuously. Try
to avoid hesitations, such as “er” and “um”, at
the beginning and in the middle of phrases.
Extra programmes
• If in a very noisy environment, use the
headset. If not using the headset, address the
internal microphone at the bottom of the
phone at a distance of about 10-20 cm from
your mouth.
1. From the Start menu, tap Programs →
VoiceSignal. The VoiceSingal main screen
opens and the phone says “Say a command.”
• Speak when VoiceSignal is ready to listen.
• If VoiceSignal doesn’t clearly hear what you
said, try repeating your voice command. If
problems persist, try the Adaptation setting to
optimise the speech engine for your voice.
Voice dialling
You can make a phone call by saying the name
or number that has been assigned to a contact
card in Contacts.
Note: To use the Voice dial feature, the name and
number that you want to dial must be in
Contacts. For details about Contacts, see
page 136.
2. Say “Call.” You can also “Call” and then a
person’s name or number stored in Contacts
after a beep sounds; for example, say “Call
James Bond.” You can also say a phone number
you want to call.
171
Extra programmes
3. Say the full name of the contact card, the first
name followed by the last name.
3. Say the full name of the contact card, the first
name followed by the last name.
4. If there are similar names, the phone displays
the 3 best candidates.
4. If there are similar names, follow step 4 in
“Voice dialling” on page 171.
5. At a prompt, say “Yes” to dial, or say “No” until
you hear the name you want.
5. If you cannot find what you want, tap Repeat
to try again.
6. If you cannot find what you want, tap Repeat
to try again.
Opening applications
Searching for contacts
You can launch applications on your phone by
saying the name of the application.
You retrieve contact information for any name in
Contacts by saying that name. Your phone
displays the information.
1. From the Start menu, tap Programs →
VoiceSignal. The VoiceSingal main screen
opens and the phone says “Say a command.”
1. From the Start menu, tap Programs →
VoiceSignal. The VoiceSingal main screen
opens and the phone says “Say a command.”
2. Say “Open.” You can also say “Open” and then
the name of the application that you want to
open; for example, say “Open Contacts.”
2. Say “Lookup.” You can also say “Lookup” and a
person’s name after a beep sounds.
172
Extra programmes
Note: To specify applications to be launched by
voice, tap Settings → Application
Launcher from the VoiceSignal main
screen.
3. If there are similar names, follow step 4 in
“Voice dialling” on page 171.
4. If you cannot find what you want, tap Repeat
to try again.
Configuring voice recognition settings
You can configure the settings for using
VoiceSingal. When the VoiceSingal main screen
opens, tap Settings to access the following
options:
• Choice Lists: You can set whether or not the
phone will display the best candidates when
there are similar names in Contacts.
• Sensiitivity: You can adjust the sensitivity in
which your phone recognises a voice command.
Change the setting if your phone has difficulty
recognising your voice command.
• Digit Dialling: You can adapt your phone to
recognise your voice style and pronunciation
for each digit or return the default settings.
• Sound: You can configure the sound settings
for voice command.
• Language: Depending on the language your
phone supports, you can change the language
of the VoiceSignal application. When you
change the language setting, the language
used for voice recognition, prompts, name
and number playback, and display text will be
changed.
• Application Launcher: You can select
applications you want to launch by voice
command.
• Contacts Update: You can set VoiceSingal to
automatically or manually update contact
cards in Contacts or update Contacts
immediately.
173
Extra programmes
• About: You can view information about the
VoiceSignal programme.
Remote Control
With the Remocon application, you can control
and operate infrared supported TVs, DVDs,
VCRs, casette players, or other devices.
Notes:
• Before opening Remote Control, you must
deactivate the IrDA service.
• Your phone may not be able to learn a remote
control devices depending on the model.
• Your phone cannot learn universal remote
controllers, which are able to control several
devices.
To access Remote Control:
From the Start menu, tap Programs → Remote
Control.
174
Adding a device
1. Align the infrared port on your phone with the
infrared port on the remote control of the
device.
2. From the Remote Control main screen, tap
Options → Add device.
3. If you select By brand, select the device type
you want to control and then a manufacturer
from the brand list.
4. If you select Manually, select the device type
you want to control, and tap Next. Enter the
device name.
5. Tap Done to add the device.
Extra programmes
Learning a device
If you add a device using the By brand option,
the device has already been programmed. Tap a
button on the screen to remotely control the
device.
If you add a device using the Manually option,
you need to learn the device as follows:
1. From the Remote Control main screen, select
the device you have set.
The Remote Control Keypad screen for
operating the device displays.
2. Align the infrared port on your phone with the
infrared port on the remote control of the
device.
3. Tap any button to learn the buttons on the
device.
You can also add a new button and learn the
button by tapping Options → Learn button.
4. Tap the button that you want to programme.
For example, if you want your phone to learn
“Power,” tap it first.
5. Tap Next.
6. Press the corresponding button on the remote
control of the device you add. For example, if
you tapped Power on your phone, press the
power button on your remote control.
7. If you want to continue the learning for
additional buttons on your remote control,
repeat from step 3.
Adding a button
You can add buttons to the device you have
aleardy programmed.
1. On the Remote Control Keypad screen, tap
Options → Add button.
2. Tap an empty space where you want to add a
new button.
175
Extra programmes
3. Select a button and tap Done.
Resetting a device
Using a device
You can reset the remote control settings of a
device or all devices you have set up.
1. From the Remote Control main screen, select
the device you have set.
2. Tap a remote button on the screen.
Tap to return
to the main
screen.
Tap to scroll
through the
buttons.
To delete a device from the device list:
1. From the Remote Control main screen, tap
Options → Delete device.
2. Select the device you want to delete and tap
Delete.
3. Tap Yes.
4. Tap OK to confirm the deletion.
To reset all of the devices:
1. From the Remote Control main screen, tap
Options → Reset all.
2. Tap Yes.
176
Extra programmes
Picsel Browser
Picsel Browser enables you to browse document
on thin-client computing platforms or access the
Internet using the HTML browser. Use Picsel
Browser to do the following:
Opening a document
1. Tap the Picsel Browser Menu icon (
bottom right of the screen.
) on the
• View content on your phone without any fileconversion or loss of contents.
• Access HTML websites.
To open Picsel Browser:
From the Start menu, tap Programs → Picsel
Broswer. By default, the Picsel Browser help
opens.
Viewing a document
Picsel Browser supports most common desktop
document formats including PDF, MS Word,
Excel, PowerPoint, and so on.
2. Tap the Folder View icon (
).
3. Select the directory you want to open.
The name of the current folder’s path location
is shown at the top of the screen and the
folders and documents on the selected folder
appear.
177
Extra programmes
4. Tap the document you want to open.
While viewing the document, tap
the control bar.
Returns to the
previous
directory level.
to open
Zooms in or out.
Fits the document
to the length.
Documents look like sheets of paper in various
other colours, depending on their type.
The following document formats are supported:
178
•
: Adobe PDF
•
: Microsoft Word
•
: Microsoft Power •
Point
: Microsoft Excel
•
: Plain Text
: JPEG/PNG images
•
: HTML
•
Moves to
the next
page.
Fits the document
to the width.
Goes to the
default page.
Scrolls through
Moves to the
previous page. pages.
Extra programmes
• To move through the document, tap and hold
the stylus pen, and draw a line on the screen
in the direction you want.
• To rotate the screen 90 degrees
counterclockwise, tap
and then
.
• To fit the width of the page on the screen, tap
and then
.
Opening a document by entering the file
path or URL
1. On the Picsel Browser screen, tap
• To zoom in or out of the document, tap and
drag the slider on the left of the screen. You
can also zoom in or out by double-tapping
and dragging upward or downward.
2. Tap the Enter URL icon (
.
).
3. Enter the file path or URL address in the Go To
Address box.
You can enter or select one of preset URL
components on the screen.
4. Tap OK to open the document or the website.
179
Extra programmes
Viewing history
Changing the file list view
1. On the file directory screen, tap
Picsel Browser shows you previously visited
documents as a small thumbnail image, and the
document’s name, location, and the date of
your visit.
.
2. Select the appropriate icon.
Switches to
another
programme
without
exiting the
Picsel
Browser.
Opening a document in history
1. On the Picsel Browser screen, tap
2. Tap the History View icon (
.
).
3. Tap the document you want to open twice.
Changing the order of the history list
Switches to
List view
mode.
Lists by file
name.
Lists by
file type.
180
Switches to Icon
view mode.
1. On the History screen, tap
.
2. Tap the appropriate icon.
•
: lists by date.
•
: lists by file path or URL.
•
: lists by file name.
Extra programmes
Making and viewing bookmarks
Deleting a bookmark
Picsel Browser keeps a list of documents you
have bookmarked.
1. On the Picsel Browser screen, tap
2. Tap the Bookmark View icon (
Making a bookmark
).
The documents you have bookmarked appear.
1. While viewing the document, tap
.
3. Tap the document you want to delete.
2. Tap the Bookmark this page icon (
).
3. Enter a bookmark name.
4. Tap
.
5. Tap Yes to confirm the deletion.
4. Tap OK.
Changing Picsel Browser settings
Viewing a bookmark
1. On the Picsel Browser screen, tap
2. Tap the Bookmark View icon (
.
.
).
The documents you have explicitly added with
a bookmark appear.
3. Tap the document you want to view twice.
1. On the Picsel Browser screen, tap
Preferences icon (
).
→ the
2. Set each tab and change the settings as
needed:
• Home: Selects the item what is displayed on
the startup screen of Picsel Browser when
you launch it.
181
Extra programmes
• Preferences: Selects the page options and
set the period of times after which thumbnail
images and descriptions of pages are purged
from the history memory. You can customise
the keys to be used when viewing a
document.
• Internet: Sets the options for Internet
connections and character setting.
• Compatibility: Selects the compatibility
mode with which the Picsel Browser opens
when connecting to the Web.
• Files: Selects file types Picsel Browser will
support.
• About: Displays the information of the Picsel
Browser.
3. Tap
182
.
Pocket Excel
Pocket Excel works with Microsoft Excel on your
computer to give you easy access to copies of
your workbooks. You can create new workbooks
on your phone, or you can copy workbooks from
your computer to your phone. Synchronise
workbooks between your computer and your
phone so that you have the most up-to-date
content in both locations.
Creating a workbook
1. From the Start menu, tap Programs →
Pocket Excel.
2. Tap New to create a new workbook. You’ll see
either a blank workbook or template,
depending on what you’ve selected in the
Options dialogue box.
Extra programmes
4. Enter the value or text and tap
panel.
in the input
Text is automatically aligned to the left.
5. You can edit and format data by tapping Edit,
Format, and Tools. For more details, see the
online help.
6. Tap
to save the workbook.
The workbook is automatically saved as a
Pocket Excel workbook named Book1.
Depending on how many workbooks you have
created since opening Pocket Excel, you may
want to rename it.
Note: To open the Options dialogue box, on the
file list, tap Tools → Options...
3. Select a cell. If the cell is not visible, tap Tools
→ Go To... Enter the reference (example:A4)
and tap OK.
183
Extra programmes
Using Pocket Excel workbooks
Tips for working in Pocket Excel
Pocket Excel contains a list of the files stored on
your phone. Tap a file in the list to open it. To
delete a file, make copies of a file, or send a file,
tap and hold the file in the list. Then select the
appropriate action from the pop-up menu.
Pocket Excel provides fundamental spreadsheet
tools, such as formulas, functions, sorting, and
filtering. To display the toolbar, tap View →
Toolbar.
Note the following when working with large
worksheets in Pocket Excel:
Note: If your workbook contains sensitive
information, you can protect it with a
password. To do so, open the workbook; tap
Tools → Password... Every time you open the
workbook, you will need to enter the
password, so choose one that is easy for you
to remember but hard for others to guess.
184
• View in the Full screen mode to see as much
of your worksheet as possible. Tap View →
Full Screen. To exit the Full screen mode, tap
View → Full Screen again.
• Show or hide window elements. Tap View and
then tap the elements you want to show or
hide.
• Freeze panes on a worksheet. First select the
cell where you want to freeze panes. Tap
View → Freeze Panes. You might want to
freeze the top and leftmost panes in a
worksheet to keep the row and column labels
visible as you scroll through a sheet. To exit,
tap View → Unfreeze Panes.
Extra programmes
• Split panes to view different areas of a large
worksheet. Tap View → Split. Then drag the
split bar to where you want it. To remove the
split, tap View → Remove Split.
• Show or hide rows and columns. To hide a row
or column, select a cell in the row or column
you want to hide. Then tap Format → Row or
Column → Hide. To show a hidden row or
column, select the cells on both sides of the
hidden row or column and tap Format → Row
or Column → Unhide.
Pocket Word
Pocket Word works with Microsoft Word on your
computer to give you easy access to copies of
your documents. You can create new documents
on your phone, or you can copy documents
from your computer to your phone. Synchronise
documents between your computer and your
phone so that you have the most up-to-date
content in both locations.
Use Pocket Word to create documents, such as
letters, meeting minutes, and trip reports.
Creating a document
1. From the Start menu, tap Programs →
Pocket Word → New.
A blank document appears. Or, if you’ve
selected a template for new documents in the
Options dialogue box in the Tools menu, that
template appears with appropriate text and
formatting already provided.
185
Extra programmes
Note: To open the Options dialogue box, on the
file list, tap Tools → Options...
2. Enter information.
Note: You can change the zoom magnification by
tapping View → Zoom. Then select the
percentage you want. Select a higher
percentage to enter text and a lower one to
see more of your document.
3. Tap
to save the document.
Using a Word document
Pocket Word contains a list of the files stored on
your phone. Tap a file in the list to open it.
Note: If you’re opening a Word document created on
a computer, select Wrap to Window on the
View menu so that you can see the entire
document.
You can open only one document at a time;
when you open a second document, you’ll be
asked to save the first.
You can save a document you created or edited
in a variety of formats, including Word (.doc),
Pocket Word (.psw), Rich Text Format (.rtf), and
Plain Text (.txt).
To delete a file, make copies of a file, or send a
file, tap and hold the file in the list. Then, select
the appropriate action on the pop-up menu.
Using text input mode in a Word
document
You can enter information in Pocket Word in one
of four modes (typing, writing, drawing, and
recording), which are displayed on the View
menu.
186
Extra programmes
Each mode has its own toolbar, which you can
show or hide by tapping Show/Hide Toolbar
( ) on the command bar.
Typing mode
Using the input panel, enter text into a
document. For more information on entering
text, see Chapter 3.
To format existing text and/or to edit text, first
select the text. You can select text as you do in
an MS-Word document, using your stylus pen
instead of the mouse to drag through the text
you want to select. You can search for or replace
a word in a document by tapping Edit → Find/
Replace...
Writing mode
In the Writing mode, use your stylus pen to
write directly on the screen. Ruled lines are
displayed as a guide, and the zoom
magnification is higher than in the Typing mode
to allow you to write more easily.
Toolbar
Tap to show or
hide the toolbar.
187
Extra programmes
To switch to the Writing mode, tap View →
Writing.
With the Space
button selected,
drag to insert space.
An arrow appears
showing the space
direction and size.
Tap to highlight
the selected text.
Pen
Space
button button
Tap to select formatting
options, such as pen
weight and line colour.
For more information on writing and selecting
writing, see Chapter 3.
188
Note: If you cross three ruled lines in a single stylus
stroke, the writing becomes a drawing, and
can be edited and manipulated as described in
the following section. Written words are
converted to graphics (metafiles) when a
Pocket Word document is converted to a Word
document on your computer.
Drawing mode
In the Drawing mode, use your stylus pen to
draw on the screen. Gridlines appear as a guide.
When you lift your stylus pen off the screen
after the first stroke, you’ll see a drawing box
indicating the boundaries of the drawing. Every
subsequent stroke within or touching the
drawing box becomes part of the drawing.
Extra programmes
To switch to the Drawing mode, tap View →
Drawing.
Recording mode
In the Recording mode, embed a recording into
your document.
To switch to the Recording mode, tap View →
Recording.
Resize an object
by dragging the
selection handles.
Select Shape on the popup menu to convert
objects to proper shapes.
Tap to select
formatting
options, such as
line weight, fill
colour, and line
colour.
For more information on drawing and selecting
drawings, see Chapter 3.
For more information on recording, see
“Recording a message” in Chapter 3.
Changing options
To change defaults for creating and storing
Pocket Word documents, in the document list,
tap Tools → Options...
• Default template: Selects a template to be
used for new documents. You can change this
default when creating specific documents.
Only documents saved in the Templates
folder are listed.
• Save to: Selects a location for storing
documents.
• Display in list view: Selects the type of
documents you want displayed in the
document list.
189
Extra programmes
Terminal Services Client
2. To connect to a server you have previously
connected to, tap the server in the Recent
servers box.
Using Terminal Services Client, you can log
onto a computer that is running Terminal
Services or Remote Desktop and use all of the
programmes that are available on that
computer from your phone. For example,
instead of running Microsoft Pocket Word, you
can run the computer version of Microsoft Word
and access all of the .doc files on that computer
from your phone.
3. Tap Connect.
Connecting to a terminal server
Note: If the network administrator has configured
Start a remote connection to the server via your
wireless modem connection or network
(Ethernet) card.
1. From the Start menu, tap Programs →
Terminal Services Client.
190
To connect to a new server, enter the server’s
name in the Server box.
Tap the Limit size of server desktop to fit
on this screen check box only when using
applications that have been specifically sized
for use with the phone.
Terminal Services Client to reconnect to
disconnected sessions, and you previously
disconnected from a Terminal Server without
ending the session, the Terminal Services
Client reconnects to that session.
Extra programmes
Disconnecting without ending a session
Navigating within terminal services client
The following commands must be accessed from
the Start menu in the Terminal Services window
used to access the computer’s commands. Do
not use the Start menu on your phone.
Once connected to the server, the computer’s
screen may more than fill your phone’s screen.
If scroll bars are displayed on the server’s
screen, you will see more than one set of scroll
bars on your phone:
1. In the Terminal Services Client window, tap
Start → Shutdown.
2. Tap Disconnect.
Note: If the network administrator has configured
Terminal Services Client to reconnect to
disconnected sessions, you will be reconnected
to this session the next time you connect to
this server.
Disconnecting and ending a session
1. In the Terminal Services Client window, tap
Start → Shutdown.
• One to scroll information on the computer,
and one to scroll the computer display
through the Terminal Services window in
Terminal Services Client.
• To ensure you are scrolling the computer
display through Terminal Services Client, use
the four directional buttons at the bottom of
the Terminal Services Client screen.
• To better-fit information on your phone’s
screen, tap the Limit size of server desktop
to fit on this screen check box. For the best
effect, programmes on the computer should
be maximised.
2. Tap Log Off.
191
Extra programmes
File Explorer
The File Explorer application allows you to open
an explorer window similar to a desktop
Windows based system. The explorer window
allows you to navigate through your phone to
locate desired folders and files.
1. From the Start menu, tap Programs → File
Explorer.
Folder
category
Tap to change
the sort order
of the list.
Tap and hold
to display a
pop-up menu
of actions.
You can also quickly manage, delete, copy, or
edit any files and folders on your phone. You
can create new folders.
2. If you want to see the files or folders in the
SafeStore or Storage Card folder, tap .
To view the files or folders in the phone’s
memory, tap .
To open a file on a network, tap
path and tap OK.
192
. Enter the file
Extra programmes
3. Tap the folder category (labelled My
Documents by default) and then the folder
that you want to view.
4. To open an item, tap it.
To quickly copy, rename, or delete an item, tap
and hold. To select multiple items, tap and
drag. Then, tap and hold the selected items. On
the pop-up menu, tap Copy, Rename, Delete,
and etc.
SIM Manager
The SIM Manager application enables you to
view the contact list stored in the SIM card and
to copy the contact(s) from the SIM card to the
contact list on your phone. You can also create a
new contact in the SIM card, or edit and delete
the contact.
Viewing SIM contacts
You can view the contact list, including the
name, phone number, and location number of
contacts in the SIM card.
1. From the Start menu, tap Programs → SIM
Manager.
193
Extra programmes
2. The contact list displays on the SIM Manager
screen.
Tap the category
to change the sort
order of the list.
Copying a contact from the SIM card
to Contacts
You can copy a contact or all contacts stored in
the SIM card to Contacts on your phone.
1. On the SIM Manager screen, tap the check box
next to the contact name you want to copy to
your phone.
If you want to copy all contacts, tap Tools →
Tick All.
2. Tap Tools → Copy To Contacts.
3. If necessary, change the category of the
number by tapping Change(M/H/W).
Creates a
new entry.
Refreshes the
SIM contacts.
4. Tap Start Copy...
5. Tap
.
6. To verify that your contacts have been copied
to your phone, go to Contacts and search for
the added contacts.
194
Extra programmes
Using SIM Manager options
On the SIM Manager screen, tap Tools. You can
save the selected contact number as an own
number, delete the selected or all numbers in
the SIM card, and move the SMS messages
from SIM to phone, or vice versa. You can
connect to service numbers, such as emergency
numbers and voicemail server numbers, if your
SIM card supports it.
From the Start menu, tap Settings → System
tab → Regional Settings.
Tap to select your
region to set the
default number
formats.
Regional Settings
Using Regional Settings, you can view number
formats, currency, and time and date formats
appropriate to the countries in question. You
can also change the clock to 24 hour display.
Note: For details about using Regional Settings, see
the online help.
To change the clock to 24 hour display:
1. On the Regional Settings screen, tap the Time
tab.
2. Select a time style in the Time style field.
3. Tap
.
195
Extra programmes
To customise further:
Tap the tabs at the bottom of the screen and
select the option you want in each field. The
items available are determined by the region
selected on the Region tab.
Tap to select a
ringtone
category.
Ringtone Manager
The Ringtone Manager application allows you to
manage your ringtones in the phone’s memory
and in a memory card. You can also set a
ringtone as your call ringer melody.
To open Ringtone Manager:
From the Start menu, tap Programs →
Ringtone Manager.
196
Tap to play or
stop your
current call
ringer melody.
Tap to display
ringtones in
the phone’s
memory.
Tap to display
ringtones in a
memory card.
Tap to refresh
the list.
Extra programmes
Playing a ringtone
1. Access the ringtone category you want by
or
.
tapping
You can display uncategorised ringtones in the
phone’s memory by tapping the category title
bar and selecting Uncategorised.
2. Select a ringtone.
3. To play the selected ringtone, tap Menu →
Play.
SIM Toolkit
The SIM Toolkit service is available if you use a
SIM AT card that provides additional services,
such as news, weather, sports, entertainment,
and location services. Available services may
vary, depending on your service provider’s
plans.
For details, see your SIM card instructions or
contact your service provider.
4. To stop the ringtone, tap Menu → Stop.
Using ringtone options
To set the selected ringtone as your call ringer,
tap Menu → Set as ringtone.
To move the selected ringtone to another
category, tap Menu → Move category.
To create, rename, or delete a category, tap
Menu → Edit category.
197
11
Getting connected
You can use your phone to exchange
information with other mobile devices as well as
your computer, a network, or the Internet. You
have the following connection options:
• Use the infrared (IR) port on your phone to
send and receive files between two devices.
• Exchange information between devices with
Bluetooth capabilities without a physical
connection.
Beaming using infrared
connections
Your phone can send and receive files to and
from other IR devices. In most cases, you can
also receive files from your computer when it is
equipped with an infrared port. The two devices
must be aimed at each other approximately four
inches apart.
If you have difficulty getting the two devices to
send or receive data, try the following:
• Connect to your Internet service provider
(ISP) or the network at your company. Once
connected, you can send and receive e-mail
and instant messages, browse the Internet or
intranet, and synchronise information using
ActiveSync.
• Transfer only one file at a time. No more than
25 contacts should be transferred at once.
• Connect to your computer to synchronise
remotely. Once connected, you can
synchronise information such as your Pocket
Outlook data. For details on ActiveSync, see
Chapter 4 “Synchronising information.”
• Adjust the room lighting or move to another
location. Some types of lighting may interfere
with transmission.
198
• Make sure that the infrared port windows are
clear and free of any dirt or obstructions and
that there are no obstacles between the
infrared port windows.
Getting connected
• By default your phone detects incoming IR
transmissions and prompts you to accept
them. If you do not want your phone to
receive data, take the following steps:
1. From the Start menu, tap Settings →
Connections tab → Beam.
2. Clear the Receive all incoming beams
check box.
Receiving data using the infrared port
1. Make sure that the Receive all incoming
beams check box is selected.
2. Align the infrared port on your phone with the
infrared port on another device.
3. Have the other device send the data to your
phone. Your phone will automatically receive
the data.
4. When prompted to receive an incoming data,
tap Yes.
Note: If someone attempts to send you data via an
infrared connection from an older device, you
may be prompted to accept it. In that case,
before the data is sent from the other device,
prepare your phone by tapping Receive an
infrared beam at the bottom of the Beam
screen.
Sending data using the infrared port
1. Locate the item you want to send, such as an
appointment in Calendar, a task in Tasks, a
contact in Contacts, or a file in File Explorer.
2. Tap and hold the item and select Beam
followed by the type of item, such as Contacts
or Task, etc.
3. Align the infrared port on your phone with the
infrared port on the device.
4. When finished, tap OK.
199
Getting connected
Beaming with Bluetooth
Bluetooth is a short-range wireless
communications technology. Devices with
Bluetooth capabilities can exchange data over a
distance of about 10 meters (30 feet) without
requiring a physical connection.
2. In the Mode tab, tap the Turn on Bluetooth
check box to turn on the Bluetooth radio so
that you can use Bluetooth features.
Unlike infrared, you don’t need to line up the
phone with another device to beam information
with Bluetooth.
Activating Bluetooth
1. From the Start menu, tap Settings →
Connections tab → Bluetooth.
3. Tap
200
.
Getting connected
You can set the options in each tab.
• In the Devices tab, you can search for
Bluetooth devices and connect to them.
• In the COM Ports tab, you can select a COM
port for sending or receiving data. You can
also tap the Secure Connection check box to
exchange data in a secure manner. For
details, please refer to the online help.
• In the AV tab, you can change the settings for
connecting with a Bluetooth stereo headset.
For details, please refer to the stereo
headset’s guide.
• In the OBEX tab, you can change the settings
for using the OBEX FTP server. For details,
please refer to the OBEX FTP client device’s
guide.
• In the HID tab, you can change the settings
for using the Bluetooth keyboard. For details,
please refer to the Bluetooth keyboard’s
guide.
Connecting the phone with other
devices
1. From the Start menu, tap Settings →
Connections tab → Bluetooth.
2. In the Devices tab, tap New... to let the
phone search for available Bluetooth devices.
3. Tap the device from the list to establish the
connection and tap Next.
4. Enter an 1- to 16-digit Bluetooth PIN code and
tap Next. When the owner of the other device
enters the same PIN code, the connection is
established.
Receiving data with Bluetooth
1. Make sure that the Receive all incoming
beams check box is selected. To check it, from
the Start menu, tap Settings → Connections
tab → Beam.
201
Getting connected
2. Make sure that your phone is within 10 meters
(about 30 feet) of the device beaming the
information and that the Make this device
discoverable to other devices check box is
selected in the Mode tab.
3. When prompted to receive an incoming data,
tap Yes.
Notes:
• When unknown Bluetooth devices try to send data
to your phone while in Sleep mode, your phone will
be activated. This consumes battery power. If you
don’t use Bluetooth radios, clear the Make this
device discoverable to other devices check
box to save battery power.
• VNOTE and VMSG files you have received from
other Bluetooth devices via Bluetooth will not
display on your phone. You need to move those
files to a PC with Microsoft Outlook or Outlook
express to see the files.
202
Sending data with Bluetooth
1. Locate the item you want to send, such as an
appointment in Calendar, a task in Tasks, a
contact in Contacts, or a file in File Explorer.
2. Tap and hold the item and select Beam
followed by type of item, such as Contact or
Task, etc.
3. Tap the device from the list to which you want
to send the beam.
The item is sent to the device you selected.
Note: If the device to which you want to send
does not appear on the list, make sure that
it is turned on, tap the Make this device
discoverable to other devices check box,
and within 10 meters (30 feet) of your
phone. Also, make sure that your Bluetooth
radio is turned on.
Getting connected
Using a Bluetooth stereo headset
Using a Bluetooth stereo headset, you can play
the audio files or converse with the person on
the phone without holding the phone to your
ear.
Note: It is recommended that you don’t use other
applications or multimedia features, such as
camera and Media player, for better sound
quality, while using a Bluetooth stereo
headset.
2. From the Start menu, tap Settings →
Connections tab → Bluetooth.
3. In the AV tab, select the name of the headset.
4. Tap and hold the headset and select Connect
to establish the connection with your phone
and the Bluetooth stereo headset.
Disconnecting with Bluetooth stereo
headset
Tap and hold the headset and select Disconnect
from the pop-up menu.
Connecting your phone with a Bluetooth
stereo headset
1. Create Bluetooth bonding between your phone
and Bluetooth stereo headset.
For further information on making a Bluetooth
bonding, see the Bluetooth stereo headset’s
guide.
203
Getting connected
Connecting to an OBEX FTP
server
You can access the FTP servers via Bluetooth
profile (OBEX) so that you can exchange files
between your phone and the FTP servers on
other Bluetooth devices, and manage files.
Accessing an OBEX FTP server
1. Make sure that Bluetooth is turned on and the
Make this device discoverable to other
devices check box is selected.
2. From the Start menu, tap Programs → OBEX
FTP.
3. To search for Bluetooth devices, tap Yes.
If necessary, tap Menu → Search for FTP
server to search for Bluetooth devices.
After searching, a list of devices to which you
can connect displays.
204
4. Select the device of an OBEX FTP server and
tap OK.
5. If the owner of the device wants to pair with
your phone and enters a Bluetooth PIN code, a
message prompting you to add the server to
your device list appears. Tap Yes.
6. Enter the same PIN code in the Passkey field
and tap Next.
When the same PIN code is entered on your
phone, pairing is complete.
7. When a message appears to confirm the server
access, tap Yes.
8. If necessary, change the display name of the
server.
9. Tap Finish. You are connected to the OBEX FTP
server.
Getting connected
Once you are connected to the OBEX FTP server,
you can delete files on the server, create a
folder, and move or copy files to the phone, or
vice versa. For details, see the OBEX FTP server
device’s guide.
Disconnecting with an OBEX FTP
server
Connecting to my ISP
1. Obtain the following information from your ISP:
ISP server phone number, user name, and
password.
2. From the Start menu, tap Settings →
Connections tab → Connections.
From the OBEX FTP server, tap Menu →
Disconnect.
Connecting to the Internet or
your network
You can connect to your Internet service
provider (ISP) and use the connection to send
and receive E-mail and instant messages and to
browse the Internet. You can also connect to
any private network, such as a corporate
network you use at work.
205
Getting connected
3. In My ISP, tap Add a new modem
connection.
4. Create a modem connection. To view detailed
information for any screen while changing the
setting, tap
.
5. When connection is successfully configured,
run Internet Explorer to begin browsing the
Internet. Your phone will automatically begin
connecting.
Note: To set up a network card or wireless network
connection to your ISP, add a new connection
under My Work Network.
Connecting to work
1. Obtain the following information from your
network administrator: server phone number,
user name, and password.
2. From the Start menu, tap Settings →
Connections tab → Connections.
206
3. In My Work Network, set up a modem, VPN
server connection, or proxy server. To view
detailed information for any screen while
changing the settings, tap
.
4. When connection is successfully configured,
run Internet Explorer to begin browsing the
Internet. Your phone will automatically begin
connecting.
Ending a connection
To disconnect, do one of the following:
• When connected via dial-up or VPN, tap the
Connection icon (
) on your status bar, and
then tap Disconnect.
• When connected via a cable, detach your
phone from the computer by disconnecting
the cable.
• When connected via a modem or a network
(Ethernet) card, remove the card from your
phone.
Getting connected
ModemLink
Using ModemLink, you can use your phone as
an external modem for another device or
computer.
1. Connect your phone to the device with which
you want to use your phone as a modem.
2. From the Start menu, tap Settings →
Connections tab → ModemLink.
3. To enable ModemLink, tap ModemLink on the
Switch USB path to ModemLink or
ActiveSync field.
4. If you select ModemLink, the USB path will
switch to ModemLink.
5. Tap
.
207
Getting connected
Connecting to wireless
networks
Your phone is equipped with Wi-Fi, standards
for wireless local area networks (WLANs), which
allows the phone to connect local wireless
networks, or access the Internet wirelessly. WiFin is faster and has a greater range than
Bluetooth wireless technology. Wi-Fi can
achieve connection speeds of up to 11 Mbps,
which easily allows you to share large files or
quickly surf the Internet with your phone.
Configuring Wi-Fi connection settings
To connect your phone to a wireless network,
you first need to set the TCP/IP addresses
required to identify the phone on the network.
1. From the Start menu, tap Settings →
Connections tab → Network Cards.
208
2. Tap Wi-Fi from the Tap an adapter to modify
settings: section.
3. Select User server-assigned IP address to
use the IP address automatically assigned from
the server. Skip to step 7.
Select Use specific IP address to set the
network addresses manually. Continue the next
step.
4. Enter the IP address, Subnet mask, and Default
gateway.
5. Tap the Name Servers tab.
6. Enter the DNS addresses and the WINS
addresses.
7. Tap
.
Getting connected
Activating or deactivating Wi-Fi
1. From the Start menu, tap Settings →
Connections tab → Wi-Fi.
2. Tap Wi-Fi Enabled or Wi-Fi Disabled. The
button changes to Wi-Fi Disabled or Wi-Fi
Enabled.
3. Tap
.
Selecting data call type
2. Select the data call type you want.
Analogue or ISDN defines whether the phone
uses an analogue (Analogue) or digital (ISDN)
connection. This setting depends on both your
GSM network operator and ISP (Internet
Service Provider), because some GSM networks
do not support certain types of ISDN
connections. For details, contact your ISP. If
ISDN connections are available, they establish
connections more quickly than analogue
methods.
A data (Circuit Switched Data) call enables data
transmission rates to a maximum of 9.6 Kbps.
For availability and subscription to data
services, contact your network operator or
service provider.
To select a data call type:
1. From the Start menu, tap Settings →
Connections tab → Circuit switched data
call type.
209
12
Appendix
Troubleshooting
210
Problem
Solution
The phone does not
turn on.
The battery is completely
discharged. Recharge it
fully.
“Invalid or missing
SIM card. You can
still make
emergency calls if
your service
provider supports
it” displays.
Check that the SIM card has
been correctly installed.
Problem
Solution
The bars next to
disappear.
• If you have just turned on
your phone, wait about 2
minutes, until your phone
finds the network and
receives a signal from the
network.
• If you are in a tunnel or in
an elevator, the phone
may not be able to
receive the network signal
properly. Move to an open
place.
• This may appear when
you move between
different service areas. It
is normal.
The phone does not
work properly or
does not work at
all.
Remove the battery from
the phone and insert it back
into the phone. Turn it on
again.
Reset your phone.
Appendix
Problem
Solution
Problem
Solution
Images on the
screen cannot be
seen.
This may happen when you
use the phone in direct
sunlight. Use the phone in
the shade or in normal
indoor lighting conditions.
The display is not
clear.
In direct sunlight, you may
not see the display clearly.
Moving to a place with
different lighting should
solve this problem.
Lines appear on the
display.
This may happen if the
battery is not fully charged
when you use the phone for
the first time, when you
turn on the phone’s power
after not using it for a long
time, or if you remove the
battery carelessly. This will
not affect the life span or
operation of your phone.
Remove the battery from
the phone and insert it back
into the phone. Turn it on
again.
Reset your phone.
I frequently cannot
make or receive
calls, or calls are
cut off without
apparent reason.
This may happen when your
connection to a network is
unstable. Move to another
place try again.
211
Appendix
Regulatory notices
Regulatory agency identification
numbers
For regulatory identification purposes your
product is assigned the model number PW10xx.
The following accessories have been evaluated
for use with your phone. Their assigned model
numbers listed below can identify these
approved accessories. To ensure continued
reliable and safe operation of your phone, use
only the accessories listed below with your
PW10xx.
212
Accessories
Model number
Pocket PC Phone
PW10xx
Cradle
PW15x
External Battery
Pack
PW16x
Notes:
• The above “x” may be any alphanumeric character
or blank denoting external cosmetic changes.
• This product is intended for use with certified Class
2, rated 5 V dc, minimum 1A power supply units.
SAR certification information
This phone meets European Union (EU)
requirements concerning exposure to radio
waves.
Your mobile phone is a radio transmitter and
receiver. It is designed and manufactured so as
not to exceed the limits for exposure to radiofrequency (RF) energy, as recommended by the
EU Council. These limits are part of
comprehensive guidelines and establish
permitted levels of RF energy for the general
population. The guidelines were developed by
independent scientific organisations through the
periodic and thorough evaluation of scientific
studies. The limits include a substantial safety
Appendix
margin designed to ensure the safety of all
persons, regardless of age and health.
In general, the closer you are to a base station,
the lower the power output of the phone.
The exposure standard for mobile phones
employs a unit of measurement known as SAR
(Specific Absorption Rate). The SAR limit
recommended by the EU Council is 2.0W/Kg.*
Before a new model phone is made available for
sale to the public, compliance with the European
R&TTE Directive must be shown. This directive
includes as one of its essential requirements the
protection of the health and safety of the user
and any other person.
The highest SAR value for this model phone was
0.217 w/Kg.
SAR tests are conducted using standard
operating positions with the phone transmitting
at its highest certified power level in all tested
frequency bands. Although the SAR is
determined at the highest certified power level,
the actual SAR level of the phone while
operating can be well below the maximum
value. This is because the phone is designed to
operate at multiple power levels so as to use
only the power required to reach the network.
European union notice
Products with CE marking comply with the
R&TTE Directive (99/5/EC), the EMC Directive
(89/336/EEC) and the Low Voltage Directive
(73/23/EEC) issued by the Commission of the
European Community.
Compliance with these directives implies
conformity to the following European Norms (in
brackets are the equivalent international
standards):
*The SAR limit for mobile phones used by the public is 2.0 watts/kilogram (W/kg)
averaged over ten grams of body tissue. The limit incorporates a substantial
margin of safety to give additional protection for the public and to account for any
variations in measurements. The SAR values may vary depending on national
reporting requirements and the network band.
213
Appendix
• EN 60950 (IEC 60950) - Safety of Information
Technology Equipment
• ETS 300 342-1 (June 1997) - Electromagnetic
compatibility and Radio spectrum Matters
(ERM); ElectroMagnetic Compatibility (EMC)
for European digital cellular
telecommunications system (GSM 900MHz,
GSM 1800MHz, and GSM 1900MHz); Part 1:
Mobile and portable radio and ancillary
equipment
• GSM11.10
• ANSI/IEEE C.95.1-1992- specific absorption
rate in mobile phone emission condition for
body health
• FCC part 15 and part24
• prENV50166-2, 1995 for SAR
• SAR: 0.217 mW/10g
Important safety information
Retain and follow all product safety and
operating instructions. Observe all warnings on
the product and in the operating instructions.
To reduce the risk of bodily injury, electric
shock, fire, and/or damage to the equipment,
observe the following precautions:
General precautions
Heed service markings: Except as explained
elsewhere in the Operating or Service
documentation, do not service any product
yourself. Service needed on components inside
these compartments should be done by an
authorised service technician or provider.
Damage requiring service: Unplug the product
from the electrical outlet and refer servicing to
an authorised service technician or provider
under the following conditions:
• Liquid has been spilled or an object has fallen
into the product.
214
Appendix
• The product has been exposed to rain or
water.
• The product has been dropped or damaged.
• There are noticeable signs of overheating.
• The product does not operate normally when
you follow the operating instructions.
Avoid hot areas: The product should be placed
away from heat sources such as radiators, heat
registers, stoves, or other products (including
amplifiers) that produce heat.
Avoid wet areas: Never use the product in a
wet location.
Avoid pushing objects into product: Never
push objects of any kind into cabinet slots or
other openings in the product. Slots and
openings are provided for ventilation. These
openings must not be blocked or covered.
Mounting Accessories: Do not use the product
on an unstable table, cart, stand, tripod, or
bracket. Any mounting of the product should
follow the manufacturer’s instructions, and
should use a mounting accessory recommended
by the manufacturer.
Avoid unstable mounting: Do not place the
product with an unstable base.
Use product with approved equipment: This
product should be used only with personal
computers and options identified as suitable for
use with your equipment.
Adjust the volume: Turn down the volume
before using headphones or other audio
devices.
Cleaning: Unplug the product from the wall
outlet before cleaning. Do not use liquid
cleaners or aerosol cleaners. Use a damp cloth
for cleaning, but NEVER use water to clean an
LCD screen.
215
Appendix
Safety precautions for power supply
unit
Use the correct external power source: A
product should be operated only from the type
of power source indicated on the electrical
ratings label. If you are not sure of the type of
power source required, consult your authorised
service provider or local power company. For a
product that operates from battery power or
other sources, refer to the operating
instructions that are included with the product.
Handle battery packs carefully: This product
contains a Lithium Polymer battery.
There is a risk of fire and burns if the battery
pack is handled improperly. Do not attempt to
open or service the battery pack. Do not
disassemble, crush, puncture, short external
contacts or circuits, dispose of in fire or water,
or expose a battery pack to temperatures of
higher than 60°C (140°F).
216
Note: Danger of explosion if battery is incorrectly
replaced. Replace only with specified batteries.
Dispose of used batteries according to the local
regulations or reference guide supplied with
your product.
Other important safety information
• Only qualified personnel should service the
phone or install the phone in a vehicle. Faulty
installation or service may be dangerous and
may invalidate any warranty applicable to the
device.
• Check regularly that all wireless phone
equipment in your vehicle is mounted and
operating properly.
• Do not store or carry flammable liquids, gases
or explosive materials in the same
compartment as the phone, its parts or
accessories.
Appendix
• For vehicles equipped with an air bag,
remember that an air bag inflates with great
force. Do not place objects, including both
installed or portable wireless equipment in the
area over the air bag or in the air bag
deployment area. If wireless equipment is
improperly installed and the air bag inflates,
serious injury could result.
• Switch off your phone before boarding an
aircraft. The use of wireless phones in aircraft
may be dangerous to the operation of the
aircraft, and is illegal.
• Failure to observe these instructions may lead
to the suspension or denial of telephone
services to the offender, or legal action, or
both.
Care and maintenance
Your phone is a product of superior design and
craftsmanship and should be treated with care.
The suggestions below will help you fulfill any
warranty obligations and allow you to enjoy this
product for many years.
• Keep your phone and all its parts and
accessories out of the reach of small children
and pets. They may accidentally damage
these things or choke on small parts.
• Keep the phone dry. Precipitation, humidity
and liquids contain minerals that corrode
electronic circuits.
• Do not use the phone with a wet hand. Doing
so may cause an electric shock to you or
damage to the phone.
• Do not use or store the phone in dusty, dirty
areas, as its moving parts may be damaged.
• Do not store the phone in hot areas. High
temperatures can shorten the life of electronic
devices, damage batteries, and warp or melt
certain plastics.
217
Appendix
• Do not store the phone in cold areas. When
the phone warms up to its normal operating
temperature, moisture can form inside the
phone, which may damage the phone’s
electronic circuit boards.
• Use only the supplied or an approved
replacement antenna. Unauthorised antennas
or modified accessories may damage the
phone and violate regulations governing radio
devices.
• Do not drop, knock or shake the phone.
Rough handling can break internal circuit
boards.
• If the phone, battery, charger or any
accessory is not working properly, take it to
your nearest qualified service facility. The
personnel there will assist you, and if
necessary, arrange for service.
• Do not use harsh chemicals, cleaning solvents
or strong detergents to clean the phone. Wipe
it with a soft cloth slightly dampened in a mild
soap-and-water solution.
• Do not paint the phone. Paint can clog the
device’s moving parts and prevent proper
operation.
• Do not put the phone in or on heating
devices, such as a microwave oven, a stove or
a radiator. The phone may explode when
overheated.
• If your phone has a flash or light, do not use it
too close to the eyes of people or animals.
This may cause damage to their eyes.
218
Microsoft End User License Agreement
• You have acquired a device (“DEVICE”) that
includes software licensed by Samsung
Electronics Co., Ltd. from an affiliate of
Microsoft Corporation (“MS”), for use in
connection with wireless network services
provided under separate agreement between
you and a wireless telecommunications
provider (“Mobile Operator”). Those installed
software products of MS origin, as well as
associated media, printed materials, and
“online” or electronic documentation
Appendix
(“SOFTWARE”) are protected by international
intellectual property laws and treaties. The
SOFTWARE is licensed, not sold. All rights
reserved.
• IF YOU DO NOT AGREE TO THIS END USER
LICENSE AGREEMENT (“EULA”), DO NOT USE
THE DEVICE OR COPY THE SOFTWARE.
INSTEAD, PROMPTLY CONTACT SAMSUNG
ELECTRONICS CO., LTD. FOR INSTRUCTIONS
ON RETURN OF THE UNUSED DEVICE(S) FOR
A REFUND. ANY USE OF THE SOFTWARE,
INCLUDING BUT NOT LIMITED TO USE ON
THE DEVICE, WILL CONSTITUTE YOUR
AGREEMENT TO THIS EULA (OR
RATIFICATION OF ANY PREVIOUS
CONSENT).
• SOFTWARE includes software already installed
on the DEVICE (“DEVICE Software”) and MS
software contained on the CD-ROM disk
(“Companion CD”).
GRANT OF SOFTWARE LICENSE
This EULA grants you the following license:
DEVICE Software. You may use the DEVICE
Software as installed on the DEVICE. All or
certain portions of the DEVICE Software may be
inoperable if you do not have and maintain a
service account with an appropriate Mobile
Operator, or if the Mobile Operator's network
facilities are not operating or configured to
operate with the DEVICE software.
COMPANION CD. Additional software for your
personal computer is included with your
DEVICE, and you may install and use the
Microsoft® ActiveSync® component on one (1)
or more computers to exchange information
with one (1) or more computing devices that
contain a compatible version of the Microsoft®
phone 2003 Software. For other software
component(s) contained in the Companion CD,
you may install and use such components only
in accordance with the terms of the printed or
online end user license agreement(s) provided
with such component(s). In the absence of an
219
Appendix
end user license agreement for particular
component(s) of the Companion CD, you may
install and use only one (1) copy of such
component(s) on the DEVICE or a single
computer with which you use the DEVICE.
Microsoft® Outlook® 2002. If Microsoft
Outlook 2002 is included with your Device, the
following terms apply to your use of Microsoft
Outlook 2002: (i) regardless of the information
contained in “Software Installation and Use”
section of the online EULA you may install one
(1) copy of Microsoft Outlook 2002 on one (1)
computer to use, exchange data, share data,
access and interact with the DEVICE, and (ii)
the EULA for Microsoft Outlook 2002 is between
the Company and the end user - not between
the PC manufacturer and end user.
DESCRIPTION OF OTHER RIGHTS
AND LIMITATIONS
• Speech/Handwriting Recognition. If the
SOFTWARE includes speech and/or
handwriting recognition component(s), you
220
should understand that speech and
handwriting recognition are inherently
statistical processes; that recognition errors
are inherent in the processes; and that errors
can occur in the component's recognition of
your handwriting, and the final conversion
into text. Neither Samsung Electronics Co.,
Ltd. nor its suppliers shall be liable for any
damages arising out of errors in the speech
and handwriting recognition processes.
• Limitations on Reverse Engineering,
Decompilation and Disassembly. You may
not reverse engineer, decompile, or
disassemble the SOFTWARE, except and only
to the extent that such activity is expressly
permitted by applicable law notwithstanding
this limitation.
• Single DEVICE. The DEVICE Software is
licensed with the DEVICE as a single
integrated product. The DEVICE Software
installed in read only memory (“ROM”) of the
DEVICE may only be used as part of the
DEVICE.
Appendix
• Single EULA. The package for the DEVICE
may contain multiple versions of this EULA,
such as multiple translations and/or multiple
media versions (e.g., in the user
documentation and in the software). Even if
you receive multiple versions of the EULA, you
are licensed to use only one (1) copy of the
DEVICE Software.
• NOTICE REGARDING THE MPEG-4 VISUAL
STANDARD. The SOFTWARE may include
MPEG-4 visual decoding technology. MPEG LA,
L.L.C. requires the following notice:
USE OF THIS SOFTWARE IN ANY MANNER
THAT COMPLIES WITH THE MPEG 4 VISUAL
STANDARD IS PROHIBITED, EXCEPT FOR USE
DIRECTLY RELATED TO (A) DATA OR
INFORMATION (i) GENERATED BY AND
OBTAINED WITHOUT CHARGE FROM A
CONSUMER NOT THEREBY ENGAGED IN A
BUSINESS ENTERPRISE, AND (ii) FOR
PERSONAL USE ONLY; AND (B) OTHER USES
SPECIFICALLY AND SEPARATELY LICENSED BY
MPEG LA, L.L.C.
If you have questions regarding this Notice,
please contact MPEG LA, L.L.C., 250 Steele
Street, Suite 300, Denver, Colorado 80206;
Telephone 303 331.1880; FAX 303 331.1879
• Rental. You may not rent or lease the
SOFTWARE.
• Software Transfer. You may not permanently
transfer any of your rights under this EULA
with regard to the DEVICE Software or
Companion CD, except as permitted by the
applicable Mobile Operator. In the event that
the Mobile Operator permits such transfer,
you may permanently transfer all of your
rights under this EULA only as part of a sale
or transfer of the DEVICE, provided you retain
no copies, you transfer all of the SOFTWARE
(including all component parts, the media and
printed materials, any upgrades, this EULA
and, if applicable, the Certificate(s) of
Authenticity), and the recipient agrees to the
terms of this EULA. If the SOFTWARE is an
upgrade, any transfer must include all prior
versions of the SOFTWARE.
221
Appendix
• Termination. Without prejudice to any other
rights, Samsung Electronics Co., Ltd. or MS
may terminate this EULA if you fail to comply
with the terms and conditions of this EULA. In
such event, you must destroy all copies of the
SOFTWARE and all of its component parts.
• Security Updates. The SOFTWARE may
include digital rights management technology.
If SOFTWARE does contain digital rights
management technology, content providers
are using the digital rights management
technology (“Microsoft DRM”) contained in the
SOFTWARE to protect the integrity of their
content (“Secure Content”) so that their
intellectual property, including copyright, in
such content is not misappropriated. Owners
of such Secure Content (“Secure Content
Owners”) may, from time to time, request MS,
Microsoft Corporation or their subsidiaries to
provide security related updates to the
Microsoft DRM components of the SOFTWARE
(“Security Updates”) that may affect your
ability to copy, display and/or play Secure
222
Content through Microsoft software or third
party applications that utilize Microsoft DRM.
You therefore agree that, if you elect to
download a license from the Internet which
enables your use of Secure Content, MS,
Microsoft Corporation or their subsidiaries
may, in conjunction with such license, also
download onto your DEVICE such Security
Updates that a Secure Content Owner has
requested that MS, Microsoft Corporation or
their subsidiaries distribute. MS, Microsoft
Corporation or their subsidiaries will not
retrieve any personally identifiable
information, or any other information, from
your DEVICE by downloading such Security
Updates.
• Consent to Use of Data. You agree that MS,
Microsoft Corporation and their affiliates may
collect and use technical information gathered
in any manner as part of product support
services related to the SOFTWARE. MS,
Microsoft Corporation and their affiliates may
use this information solely to improve their
Appendix
products or to provide customized services or
technologies to you. MS, Microsoft
Corporation and their affiliates may disclose
this information to others, but not in a form
that personally identifies you.
• Internet Gaming/Update Features. If the
SOFTWARE provides, and you choose to
utilize, the Internet gaming or update
features within the SOFTWARE, it is necessary
to use certain computer system, hardware,
and software information to implement the
features. By using these features, you
explicitly authorize MS, Microsoft Corporation
and/or their designated agent to use this
information solely to improve their products
or to provide customized services or
technologies to you. MS or Microsoft
Corporation may disclose this information to
others, but not in a form that personally
identifies you.
• Internet-Based Services Components. The
SOFTWARE may contain components that
enable and facilitate the use of certain
Internet-based services. You acknowledge
and agree that MS, Microsoft Corporation or
their affiliates may automatically check the
version of the SOFTWARE and/or its
components that you are utilizing and may
provide upgrades or supplements to the
SOFTWARE that may be automatically
downloaded to your Device.
• Links to Third Party Sites. The SOFTWARE
may provide you with the ability to link to
third party sites through the use of the
SOFTWARE. The third party sites are not
under the control of MS, Microsoft Corporation
or their affiliates. Neither MS nor Microsoft
Corporation nor their affiliates are responsible
for (i) the contents of any third party sites,
any links contained in third party sites, or any
changes or updates to third party sites, or (ii)
webcasting or any other form of transmission
received from any third party sites. If the
SOFTWARE provides links to third party sites,
those links are provided to you only as a
convenience, and the inclusion of any link
223
Appendix
does not imply an endorsement of the third
party site by MS, Microsoft Corporation or
their affiliates.
• Additional Software/Services. The
SOFTWARE may permit Samsung Electronics
Co., Ltd., MS, Microsoft Corporation or their
affiliates to provide or make available to you
SOFTWARE updates, supplements, add-on
components, or Internet-based services
components of the SOFTWARE after the date
you obtain your initial copy of the SOFTWARE
(“Supplemental Components”).
• If Samsung Electronics Co., Ltd. provides or
makes available to you Supplemental
Components and no other EULA terms are
provided along with the Supplemental
Components, then the terms of this EULA
shall apply.
• If MS, Microsoft Corporation or their affiliates
make available Supplemental Components,
and no other EULA terms are provided, then
the terms of this EULA shall apply, except that
the MS, Microsoft Corporation or affiliate
224
entity providing the Supplemental
Component(s) shall be the licensor of the
Supplemental Component(s).
• Samsung Electronics Co., Ltd., MS, Microsoft
Corporation and their affiliates reserve the
right to discontinue any Internet-based
services provided to you or made available to
you through the use of the SOFTWARE.
UPGRADES AND RECOVERY MEDIA
• DEVICE Software. If the DEVICE Software is
provided by Samsung Electronics Co., Ltd.
separate from the DEVICE on media such as a
ROM chip, CD ROM disk(s) or via web
download or other means, and is labeled “For
Upgrade Purposes Only”, you may install one
copy of such DEVICE Software onto the
DEVICE as a replacement copy for the
existing DEVICE Software and use it in
accordance with this EULA, including any
additional EULA terms accompanying the
upgrade DEVICE Software.
Appendix
• COMPANION CD. If any Companion CD
component(s) is provided by Samsung
Electronics Co., Ltd. separate from the
DEVICE on CD ROM disk(s) or via web
download or other means, and labeled “For
Upgrade Purposes Only”, you may (i) install
and use one copy of such component(s) on
the computer(s) you use to exchange data
with the DEVICE as a replacement copy for
the existing Companion CD component(s).
COPYRIGHT
All title and intellectual property rights in and to
the SOFTWARE (including but not limited to any
images, photographs, animations, video, audio,
music, text and “applets,” incorporated into the
SOFTWARE), the accompanying printed
materials, and any copies of the SOFTWARE, are
owned by MS or its suppliers (including
Microsoft Corporation). You may not copy the
printed materials accompanying the
SOFTWARE. All title and intellectual property
rights in and to the content which may be
accessed through use of the SOFTWARE is the
property of the respective content owner and
may be protected by applicable copyright or
other intellectual property laws and treaties.
This EULA grants you no rights to use such
content. All rights not specifically granted under
this EULA are reserved by MS and its suppliers
(including Microsoft Corporation).
EXPORT RESTRICTIONS
You acknowledge that SOFTWARE is subject to
U.S. export jurisdiction. You agree to comply
with all applicable international and national
laws that apply to the SOFTWARE, including the
U.S. Export Administration Regulations, as well
as end-user, end-use and destination
restrictions issued by U.S. and other
governments. For additional information, see
http://www.microsoft.com/exporting/.
225
Appendix
PRODUCT SUPPORT
Product support for the SOFTWARE is not
provided by MS, its parent corporation,
Microsoft Corporation, or their affiliates or
subsidiaries. For product support, please refer
to Samsung Electronics Co., Ltd. support
number provided in the documentation for the
DEVICE. Should you have any questions
concerning this EULA, or if you desire to contact
Samsung Electronics Co., Ltd. for any other
reason, please refer to the address provided in
the documentation for the DEVICE.
NO LIABILITY FOR CERTAIN DAMAGES
EXCEPT AS PROHIBITED BY LAW, MS SHALL
HAVE NO LIABILITY FOR ANY INDIRECT,
SPECIAL, CONSEQUENTIAL OR INCIDENTAL
DAMAGES ARISING FROM OR IN CONNECTION
WITH THE USE OR PERFORMANCE OF THE
SOFTWARE. THIS LIMITATION SHALL APPLY
EVEN IF ANY REMEDY FAILS OF ITS ESSENTIAL
PURPOSE.
226
FOR APPLICABLE LIMITED WARRANTIES AND
SPECIAL PROVISIONS PERTAINING TO YOUR
PARTICULAR JURISDICTION, PLEASE REFER TO
YOUR WARRANTY BOOKLET INCLUDED WITH
THIS PACKAGE OR PROVIDED WITH THE
SOFTWARE PRINTED MATERIALS.
Declaration of Conformity (R&TTE)
For the following product:
GSM900/GSM1800/GSM1900 with Bluetooth and WLAN
(Product description)
Pocket PC phone
(Model name)
SGH-i750
Manufactured at:
(Factory name, address*)
- Samsung Electronics Co., Ltd, 94-1 Imsoo-Dong, Gumi City, Kyung-Buk, Korea, 730-350
: EN 60950-1:2001
: EN 301 489-01 v1.4.1 (08-2002)
EN 301 489-07 v1.2.1 (08-2002)
EN 301 489-17 v1.2.1 (08-2002)
: EN 50360:2001
EN 50361:2001
: EN 301 511 v9.0.2 (03-2003)
EN 300 328 v1.6.1 (11-2004)
to which this declaration relates, is in conformity with the following standards and/or other
normative documents.
Safety
EMC
SAR
Network
We hereby declare that [all essential radio test suites have been carried out and that] the above
named product is in conformity to all the essential requirements of Directive 1999/5/EC.
(Name and signature of authorised person)
Yong-Sang Park / S. Manager
The conformity assessment procedure referred to in Article 10 and detailed in Annex[IV] of
Directive 1999/5/EC has been followed with the involvement of the following Notified
Body(ies):
BABT, Balfour House, Churchfield Road,
Walton-on-Thames, Surrey, KT12 2TD, UK
Identification mark: 0168
The technical documentation kept at:
Samsung Electronics QA Lab.
which will be made available upon request.
(Representative in the EU)
Samsung Electronics Euro QA Lab.
Blackbushe Business Park, Saxony Way,
Yateley, Hampshire, GU46 6GG, UK
2006.01.17
(Place and date of issue)
* It is not the address of the Samsung Service Centre. For the address or the phone number of Samsung Service
Centre, see the warranty card or contact the retailer where you purchased your phone.