1
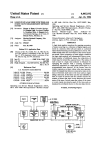
ET1290 Crimp Machine
Set Up and Operating Manual
Table of Contents
SECTION
PAGE
Specifications and Equipment ..................................................................................................................................................3
Set-Up and Operating Instructions............................................................................................................................................4
Crimping Procedures ................................................................................................................................................................5
Calibration ................................................................................................................................................................................6
Maintenance ............................................................................................................................................................................6
Crimp Machine Components ....................................................................................................................................................7
Die Cage Components ..............................................................................................................................................................8
Safety
Instructions
Read and understand the
operator’s manual before
attempting to operate any
equipment.
WARNING
Aeroquip hose, hose
fittings and assembly equipment should be used only
with other Aeroquip hose,
hose fittings and assembly
equipment and Weatherhead
hose, hose fittings and
assembly equipment should
be used only with
Weatherhead hose, hose fittings and assembly equipment. Do not combine or use
Aeroquip or Weatherhead
hose, hose fittings and
assembly equipment with
each other, i.e. Aeroquip hose
with Weatherhead fittings, or
with hose, hose fittings or
assembly equipment supplied
by another manufacturer.
EATON HEREBY DISCLAIMS
ANY OBLIGATION OR LIABILITY (INCLUDING INCIDENTAL AND CONSEQUENTIAL DAMAGES) ARISING
FROM BREACH OR CONTRACT, WARRANTY OR TORT
(UNDER NEGLIGENCE OR
STRICT LIABILITY THEORIES)
SHOULD AEROQUIP OR
WEATHERHEAD HOSE FITTINGS OR ASSEMBLY
EQUIPMENT BE USED
INTERCHANGEABLY OR
WITH ANY HOSE, FITTINGS
OR ASSEMBLY EQUIPMENT
SUPPLIED BY ANOTHER
MANUFACTURER, OR IN
THE EVENT THAT PRODUCT
INSTRUCTIONS FOR EACH
SPECIFIED HOSE ASSEMBLY ARE NOT FOLLOWED.
2
WARNING
Failure to follow
process and product instructions and limitations could
lead to premature hose
assembly failures, resulting
in property damage, serious
injury or death.
Aeroquip and Weatherhead
fitting tolerances are engineered to match Aeroquip
and Weatherhead hose tolerances. The combination or
use of Aeroquip or
Weatherhead hose and hose
fittings with each other, i.e.
Aeroquip hose with
Weatherhead fittings or with
hose or fittings supplied by
another manufacturer may
result in the production of
unreliable and/or unsafe
hose assemblies and is neither recommended nor
authorized by Eaton.
Safety Instructions
1. PREVENT UNAUTHORIZED OPERATION.
Do not permit anyone to
operate this equipment
unless they have read and
thoroughly understand this
manual.
2. WEAR SAFETY GLASSES.
3. AVOID PINCH POINTS.
Do not rest your hand on
the crimp ring. Keep your
hands clear of all moving
parts. Do not allow anyone,
other than the operator,
close to the equipment
while it is in operation.
4. MAINTAIN DIES WITH
CARE. Dies used in the
ET1290 crimp machine are
hardened steel, offering
the best combination of
strength and wear resistance for long life.
Hardened dies are generally brittle and care should
be taken to avoid any
sharp impact. Never
strike a die with a hardened instrument.
5. USE ONLY SPECIFIED
AEROQUIP/WEATHERHEAD PRODUCTS.
Make hose assemblies
using only Aeroquip and
Weatherhead hose and fittings specified for this
assembly equipment.
8. DO NOT OVER
PRESSURIZE. Do not
exceed the 10,000 psi
hydraulic pressure supplied to the machine.
NOTE: All components used
to connect the pump and
crimp cylinder must meet
the criteria set forth in the
Material Handling Institute
Specification #IJ100 for
hydraulic jacking applications.
9. DIE CHANGE. DO NOT
INSERT/REMOVE DIES
WHILE THE POWER IS
ON OR MACHINE IS IN
OPERATION.
10. SECURE THE EQUIPMENT TO A STABLE
WORK SURFACE.
Prior to operation, secure
the crimp machine to a
stable work surface to
prevent the equipment
from tipping.
6. VERIFY CORRECT CRIMP
DIAMETERS.
Check and verify correct
crimp diameters of all fittings after crimping. Do not
11. UNPLUG THE POWER
put any hose assemblies
SUPPLY WHEN NOT
into service if the crimp
IN USE.
diameters do not meet
Eaton crimp specifications. 12. KEEP WORK
AREA CLEAN.
7. Make sure all dies are
Cluttered areas and
completely in place and
benches invite accidents.
the cage is positioned
properly on the pressure
plate.
EATON ET1290 Crimp Machine Set Up and Operating Manual E-EQCR-TM005-E November 2006
Specifications and Equipment
ET1290
Crimp Machine
Machine w/110V Power Unit:
Crimper Dimensions:
30.75" W x 40.125" D x 41.25" H
Weight:
1035 lbs.
Pump Requirements
Reservoir Capacity: 50 cubic inches or more (820 cc)
Pressure Rating:
10,000 psi (690 bar)
Machine w/220V Power Unit:
Crimper Dimensions:
30.75" W x 40.125" D x 41.25" H
Weight:
1035 lbs.
Pump Requirements
Reservoir Capacity: 50 cubic inches or more (820 cc)
Pressure Rating:
10,000 psi (690 bar)
Table Top Machine:
Crimper Dimensions:
20" W x 41.25" D x 14.5" H
Weight:
910 lbs.
Pump Requirements
Reservoir Capacity: 50 cubic inches or more (820 cc)
Pressure Rating:
Die Cages
10,000 psi (690 bar)
Accessories
MASTER DIE INSERT SETS
FT1390 DIE CAGES
M-SERIES DIE CAGES
ET1295DC-14S
ET1295DC-15S
ET1295DC-16S
ET1295DC-18S
ET1295DC-20S
ET1295DC-21S
ET1295DC-23S
ET1295DC-46S
ET1295DC-82S
ET1295DC-M070S
ET1295DC-M090S
ET1295DC-M120S
ET1295DC-M150S
ET1295DC-M180S
ET1295DC-M210S
ET1295DC-M240S
ET1295DC-M280S
ET1295DC-M320S
ET1295DC-M370S
ET1295DC-M420S
ET1295DC-M465S
ET1295DC-M520S
ET1295DC-M550S
ET1295DC-M570S
ET1295DC-M690S
FT1390-200-14
FT1390-200-15
FT1390-200-16
FT1390-200-20
FT1390-200-21
FT1390-200-23
FT1307-200-M070
FT1307-200-M090
FT1307-200-M120
FT1307-200-M150
FT1307-200-M180
FT1307-200-M210
FT1307-200-M240
FT1307-200-M280
FT1307-200-M320
FT1307-200-M370
FT1307-200-M420
FT1307-200-M465
FT1307-200-M520
FT1307-200-M550
FT1307-200-M570
FT1307-200-M690
FT1209 DIE CAGES
FT1209-200-14
FT1209-200-15
FT1209-200-16
FT1209-200-18
FT1209-200-20
FT1209-200-21
FT1209-200-23
FT1209-200-46
FT1209-200-82
Bench Top Rack - A rack that can
hold 12 sets of die inserts. This can
be mounted to a bench top.
ET1295C-0029
Hanging Rack - A rack that can hold
12 die inserts. This can be hung from
the FT1209, FT1307, FT1340, FT1360
and FT1390 Crimp Machines.
ET1295C-0027
Insert Holder - An insert holder for
one set of die inserts. This can be
mounted to the front or side of a
crimp machine. ET1295C-0025
Lubrication - A can of Never-seez to
lubricate the dies. FT1092
Note: Insert Sets include 8 dies with
insert pins.
EATON ET1290 Crimp Machine Set Up and Operating Manual E-EQCR-TM005-E November 2006
3
Set-Up and Operating
Instructions
Set-Up
110V/220V Power Unit:
1. Remove the plug from the
hydraulic reservoir vent and
replace it with the vent cap
supplied with the unit.
Operating
Instructions
2. Caution: Provide electrical service with a dedicated
circuit (per the crimp machine
electrical requirements) to
eliminate the possibility of a
low voltage situation.
Caution: Failure to do so will
cause cavitation and damage
to the pumping mechanism.
Hand tighten the vent cap.
3. Never use an extension
cord, always plug directly
into the power outlet.
Loading and Unloading
Die Cages
Adjustable Backstop
(Figure 3)
Select proper die cage for
style and size of desired
hose. Refer to the current
Crimp Specifications Manual
on the Eaton website for
complete and detailed crimp
specification information for
each hose and fitting style. To
load the die cage, press and
hold the footswitch until the
crimp cylinder reaches the
“full retract” position and
stops. The die cage may be
inserted or removed in this
position. (See figure 1.)
1. Turn off the power to the
machine.
2. Insert the die cage.
3. Loosen the thumbscrew
on the backstop.
4. Place the fitting against
the locator cone. Pushing
it too hard will compress
the spring, which will
affect the accuracy of the
position.
Figure 1
5. Slide the backstop to the
desired position.
6. Tighten the thumbscrew.
7. Turn the power on.
Caution:
Figure 2 shows a die
cage that is installed improperly. When inserted properly,
the cage is flush against the
pressure plate. If the die
cage is at an angle to the
pressure plate, lift it up and
realign properly.
Figure 2
Figure 3
4
EATON ET1290 Crimp Machine Set Up and Operating Manual E-EQCR-TM005-E November 2006
Crimping Procedures
Establishing Crimp
Settings
The adjustment knob in the
middle of the machine
determines the crimp diameter for each combination of
hose, fitting and die cage/die
insert. The numbers on the
dial and barrel of the
machine are for selecting
target settings and not
crimp diameters. Settings
between 160 and 550 can
be achieved with this crimp
machine. Consult the target
setting chart for the ET1290
crimp machine for the initial
setting.
Crimping Procedures
Refer to the current Crimp
Specifications Manual on the
Eaton website for complete
and detailed crimp specification information for each
hose and fitting style.
1. Select and load the proper
die cage/die insert according
to the current Crimp
Specifications Manual on the
Eaton website.
2. Rotate the adjustment
knob/barrel indicator to the
proper setting (see Example).
Example:
Position the adjustment knob at
a setting of 500. Activate the
hydraulic pump and attempt a
crimp. If the dies crimp the fitting, measure the crimp diameter and decrease the machine
setting (rotate the adjustment
knob upward) by the same
amount in thousandths of an
WARNING:
Maintain clear distance from all moving parts.
There are 25 marks on the
dial (0-24) and 15 marks on
the barrel (175-525 by 025
increments). The top of the
barrel corresponds to a 160
setting. When the adjustment knob is rotated to the
top most position on the
crimper, and the “0” mark is
located as shown in Figure
4, the machine setting is
160. Each complete downward rotation of the adjustment knob increases the
target setting by 025; each
mark around the dial corresponds to a 001 change in
target setting. For example,
to achieve a target setting of
250, the adjustment knob is
rotated until the top of it
corresponds to the 250
mark on the barrel, and the
0 mark on the dial is lined
up with the center, vertical
mark on the barrel (see
Figure 5). One more full
downward rotation of the
3. Position the fitting to
the proper crimping position
within the die cage/die
insert according to the
Crimp Specifications Manual
on the Eaton website.
5. When the fitting is fully
crimped, all movement in the
machine will stop and the
black guard around the piston
(pinch point hat) will move up
and completely cover the red
indicator ring (see figure 4
and figure 5) located on the
adjustment knob.
4. Press and hold the foot
switch in the forward position.
5. The foot switch may be
toggled back and forth as
required to reposition the fitting.
Barrel
Dial
Red Indicator Ring
Figure 4
Adjustment Knob
Figure 5
This is accomplished by
pressing and holding the
foot switch in the release
position until the machine is
completely retracted.
7. Verify that the correct
crimp diameter and crimp
length is achieved.
6. Release the hydraulic
pressure and remove the
crimped hose assembly.
Note: The use of a 10,000
psi hydraulic power source
is required to operate the
ET1290 crimp machine. If
lower rated power units are
utilized, improper crimping
may result.
inch that you wish to decrease
the crimp diameter (a smaller
target setting number means a
smaller crimp diameter). If the
dies do not crimp the fitting,
decrease the machine setting
by 050 increments until the dies
touch the fitting and the resultant crimp diameter can be
measured.
dial would result in a target
setting of 275. If the
desired target setting is 265,
the dial would instead be
rotated downward 15
“marks” on the dial, or
approximately 2/3 of a turn,
past the 250 target setting.
Figure 6
For proper crimping procedure,
refer to the Crimp Specification
Manual on the Eaton website.
For a target crimp diameter of
0.990 inches and a machine
setting of 250 produces a crimp
diameter of 1.004 inches, subtract the target crimp diameter
(0.990 inches) from the diameter you measured (1.004 - 0.990
= 0.014). Subtract 014 from the
machine setting (250-014=236)
and change the machine setting to 236. Crimp the fitting
again and measure the crimp
diameter. If the crimp diameter
is too large, repeat this
process. If the crimp diameter
is too small, repeat the process
but instead add the difference
to the machine setting.
EATON ET1290 Crimp Machine Set Up and Operating Manual E-EQCR-TM005-E November 2006
5
Calibration
WARNING:
Maintain clear distance from all moving parts.
The ET1290 Crimp Machine
is factory calibrated. A TTC8 or WeatherGRIP –8 fitting
crimped with an FT1307200-M240 die cage or the
Set
Screw
Master Die Cage with the
M240 die insert and a
machine setting of 260
should result in a socket
diameter of 1.000
+/- 0.003 inches.
If excessive wear occurs in
the crimp ring, or any of the
functional components are
replaced, a minor recalibration may be necessary. This
can be accomplished by first
loosening the two #8-32 set
screws in the adjustment
knob (see Figure 7) and then
performing the crimp
described above.
If the actual measured crimp
diameter is, for example,
1.010 inches instead of 1.000
inches, the black dial piece
can be rotated inside the
adjustment knob (leaving
the adjustment knob exactly
where it is positioned) until
the number “0” on the dial
lines up with the center vertical line on the barrel.
Then rotate the adjustment
knob and dial together until
the “0” mark on the dial is
once again lined up with the
center vertical line on the
barrel. Repeat the crimp
procedure until the 1.000
inch crimp diameter is
achieved.
Figure 7
Maintenance
Intervals
Procedures
DIE CAGE LUBRICATION
MACHINE MAINTENANCE PROCURES
Every 50 crimps
Relube sliding
surfaces of dies
Every 500 crimps Remove old
grease and
relube
Every 1000 crimps Die cage
maintenance
1. Sliding surfaces must be kept free of dirt and other abrasive materials.
2. All exposed black metal surfaces should be coated occasionally with a light film of oil
to prevent corrosion.
3. Periodically check the oil level in the fluid reservoir of the hydraulic power unit.
Maintain the oil level of pump manufacturer’s hydraulic oil as needed.
CRIMP RING MAINTENANCE
DIE CAGE MAINTENANCE PROCEDURES
Every 500 crimps Remove old
grease and
relube
Every 2000 crimps Remove old
grease;.
Inspect for
wear or
damage and
relube if okay.
1. Lubricate the die cage.
For maximum service. Die cages require lubrication at 50-crimp intervals with NEVER-SEEZ (Eaton part
number FT1092). FT1092 is an 8-ounce container that will provide sufficient lubricant
for approximately 5,000 crimps.
Periodically remove NEVER-SEEZ residue that has built-up on the sides of the dies and the crimp ring
during the crimping process. NEVER-SEEZ residue becomes contaminated with metal and plating chips
and airborne contaminants, which can cause premature wear of the dies and crimp ring. It should carefully be removed without mixing it with newly applied NEVER-SEEZ.
2. Die cage maintenance should be performed at 1000-crimp intervals or every six months, which ever occurs
first. Die cages should be clean of grease and debris and inspected for worn or damaged components.
a. The sliding surface of the dies should appear smooth with no apparent galling. Galled dies
must be replaced. Individual dies in a cage can be replaced without replacing all eight dies.
b. Replace springs that show any sign of damage or collapse (are shorter than other springs).
c. The spring plate should appear smooth with no apparent galling.
Galled spring plates must be replaced.
d. Inspect remaining components and replace those that are badly worn.
3. Reassemble components and liberally apply NEVER-SEEZ to the die surface
which slides along the spring plate. Torque the die cage bolts to 50in.-lbs.
4. Ensure that all dies slide in and out freely.
NOTE: Use NEVER-SEEZ lubricant
(Eaton part number FT1092).
6
NOTE: Completely retract the crimp ring when checking the oil level.
EATON ET1290 Crimp Machine Set Up and Operating Manual E-EQCR-TM005-E November 2006
Crimp Machine Components
9
5
6
3
8
1
4
2
24
7
23
22
21
20
19
16
18
17
13
12
15
14
11
10
ITEM
PART NUMBER
DESCRIPTION
QUANTITY
1
2
3
4
5
6
7
8
9
10
11
12
13
14
15
16
17
18
19
20
21
22
23
24
ET1290C-0002
ET1290C-0012
ET1290C-0003
ET1290C-0001
ET1290C-0007
FF90625
ET1280C-0014
FF90626
ET1290C-0015/ET1290C-0017
FT1289-2-2-15
FT1289-2-2-14
FT1289-3-15
FT1289-3-13
FT1303-3-76
FF9339-08-245
FT1340-3-4-6
FT1340-3-4-2
FT1340-3-4-4
FT1340-3-4-5
FT1340-3-4-3
FT1340-3-4-1
222003-6-405
ET1290C-0022
222003-8-325
Barrel
Washer
Adjustable Knob
Dial Indicator
Pinch Point Hat
1/4-20 x 3/8" Button Head Cap Screw
5/16-18 Button Head Cap Screw
Set Screw
Red Shroud/Yellow Shroud
Crimp Ring Insert
Retaining Ring
Pressure Plate
Push Bars
Shoulder Bolts
Cap Screws
Locator Cone
Spring
Bushing
Thumb Screw
Locator Plate
Shoulder Bolt
Cap Screws
Middle Support
Cap Screws
1
1
1
1
1
4
1
2
1
1
1
1
4
2
4
1
1
1
1
1
1
4
1
4
EATON ET1290 Crimp Machine Set Up and Operating Manual E-EQCR-TM005-E November 2006
7
Die Cage Components
7
6
12
2
13
3
8
9
10
11
5 or 4
1
FT1209 Die Cage Breakdown
DETAIL
QTY
PART NUMBER
DESCRIPTION
1
2
3
4
5
6
7
8
9
10
11
12
13
3 pc
1 pc
4 pc
1 pc
1 pc
2 pc
2 pc
2 pc
2 pc
1 pc
8 pc
1 pc
1 pc
FT1209-2-9-1
FT1209-2-9-2
FT1209-2-9-3
FT1209-2-9-4
FT1209-2-9-4-1
FT1209-2-9-4-2
FT1209-2-9-4-3
FT1209-2-9-4-4
FT1209-2-9-4-5
FT1209-2-9-5
21057-7
FT1209-2-9-7
FT1209-2-9-8
BHCS 5/16-18x3.90 long
Front Plate
Spacer
Back Plate Assembly (Details 5 through 9)
Back Plate
Roll Pin .09 dia x .50 long
Rod
Spring
Roll Pin .125 dia x .75 long
Shoulder Screw
Roll Pin .25 dia x .62 long
Spring
BHCS 5/16-18x3.50 long
8
EATON ET1290 Crimp Machine Set Up and Operating Manual E-EQCR-TM005-E November 2006
Die Cage Components
1
4
9
2
8
3
6
7
5
FT1307 Die Cage Breakdown
DETAIL
QTY
PART NUMBER
DESCRIPTION
1
2
3
4
5
6
7
8
9
8 pc
8 pc
1 pc
1 pc
3 pc
4 pc
1 pc
1 pc
1 pc
21057-7
FT1209-2-9-7
FT1307-2-9-3
FT1307-2-9-4
FT1307-2-9-5
FT1307-2-9-6
FT1307-2-9-7
FT1307-2-9-8
FT1307-2-9-10
Roll Pin .25 dia x .62 long
Spring
Spring Plate
Front Plate
BHCS 5/16-18x2.56 long
Spacer
Nut
Back Plate
BHCS 5/16-18x3.00 long
2
4
9
10
11
6
7
7
5
13
8
12
3
1
FT1390 Die Cage Breakdown
DETAIL
QTY
PART NUMBER
DESCRIPTION
1
2
3
4
5
6
7
8
9
10
11
12
13
1 pc
1 pc
1 pc
1 pc
4 pc
1 pc
1 pc
3 pc
1 pc
8 pc
1 pc
8 pc
8 pc
FT1390-2-9-1
FT1390-2-9-2
FT1390-2-9-3
FT1390-2-9-4
FT1390-2-9-5
FT1390-2-9-6
FT1390-2-9-7
FT1209-2-9-1
FT1209-2-9-5
FT1209-2-9-7
FT1209-2-9-8
21057-7
FT1209-200-size
Back Plate (lower)
Back Plate (upper)
Front Plate (lower)
Front Plate (upper)
Spacer
Shoulder Screw (long)
Latch Assembly
BHCS 5/16-18 x 3.90 long
Shoulder Screw (short)
Spring
BHCS 5/16-18 x 3.50 long
Roll Pin .25 dia. x .62 long
Dies
EATON ET1290 Crimp Machine Set Up and Operating Manual E-EQCR-TM005-E November 2006
9
Die Cage Components
6
11
8
12
16
14
1 14
15
3
13 2 13 9 12
16
10
ET1295-001 (2-Piece Assembly)
DETAIL
QTY
PART NUMBER
DESCRIPTION
1
2
3
4
5
6
7
8
9
10
11
12
13
14
15
16
17
1
1
8
8
8
16
8
1
2
4
8
16
2
2
16
4
8
ET1295C-0006
ET1295C-0007
ET1295C-0001
ET1295C-0003
ET1295C-0004
120-70188-46
ET1295C-0005
FT1209-2-9-5
ET1295C-0012
ET1295C-0009
FF9339-04-20S
ET1295C-0017
ET1295C-0011
ET1295C-0010
ET1295C-0013
222003-1-6-6S
FF9339-04-12S
Back Plate (Split)
Front Plate (Split)
Master Die
Plunger Pin
Set Screw
Roll Pin
Spring
Shoulder Screw
Rotation Pin
Connecting Block
Cap Screw
Dowel Pin
Front Locating Pin
Rear Locating Pin
Spring
Cap Screw
Cap Screw
10
EATON ET1290 Crimp Machine Set Up and Operating Manual E-EQCR-TM005-E November 2006
17
4
7
5
Die Cage Components
11
8
12
10
13
1
6
3
2
12 9
14
4
7
5
ET1295-011 (1-Piece Assembly)
DETAIL
QTY
PART NUMBER
DESCRIPTION
1
2
3
4
5
6
7
8
9
10
11
12
13
14
1
1
8
8
8
16
8
1
2
4
8
16
16
8
ET1295C-0021
ET1295C-0022
ET1295C-0001
ET1295C-0003
ET1295C-0004
120-70188-46
ET1295C-0005
FT1209-2-9-5
ET1295C-0012
ET1295C-0009
FF9339-04-20S
ET1295C-0017
ET1295C-0013
FF9339-04-12S
Back Plate
Front Plate
Master Die
Plunger Pin
Set Screw
Roll Pin
Spring
Shoulder Screw
Rotation Pin
Connecting Block
Cap Screw
Dowel Pin
Spring
Cap Screw
EATON ET1290 Crimp Machine Set Up and Operating Manual E-EQCR-TM005-E November 2006
11
Eaton
14615 Lone Oak Road
Eden Prairie, MN 55344
USA
Tel: 952 937-9800
Fax: 952 974-7722
www.hydraulics.eaton.com
Eaton
20 Rosamond Road
Footscray
Victoria 3011
Australia
Tel: (61) 3 9319 8222
Fax: (61) 3 9318 5714
Eaton
Dr.-Reckeweg-Str. 1
D-76532 Baden-Baden
Germany
Tel: (49) 7221 682-0
Fax: (49) 7221 682-788
© 2006 Eaton Corporation
All Rights Reserved
Printed in USA
Document No. E-EQCR-TM005-E
November 2006