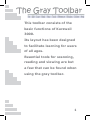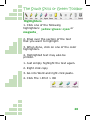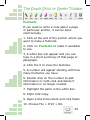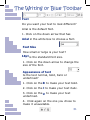
1
Friendly User’s Guide to Kurzweil 3000
Learn how to read at your own pace
with useful tools all done on one
computer program.
Heidi St.Onge
Author and Illustrator: Heidi St.Onge.
Contact Information:
Cell: 514-718-6562
E-mail Address:
[email protected]
Address:
2361 Lotbinière,
St.Lazare, Québec
J7T 2Z5
Copyright © 2009 by Heidi St.Onge
All Rights reserved.
Trademarks: Friendly User’s Guide to Kurzweil 3000 is a registered
trademark of Kurzweil Educational Systems, Inc.
ISBN number: 1486350279
Acknowledgements
As author and illustrator of my book, “Friendly User’s Guide to
Kurzweil 3000“, I would like to personally thank Ray Kurzweil for
inventing Kurzweil 3000, a reading, study skill and writing computer
program.
My personal experience with this program motivated me to design
a simplar version of the Kurzweil 3000 training manual. My editors,
Catherine Ross and Kathy Toohy were strong promoters of this special
project.
Table of Contents
Chapter 1
Summary of the Gray Toolbar
File Icon on the Gray Toolbar
Edit Icon on the Gray Toolbar
Scan Icon on the Gray Toolbar
Read Icon on the Gray Toolbar
View Icon on the Gray Toolbar
Tools Icon on the Gray Toolbar
Reference Icon on the Gray Toolbar
Window Icon on the Gray Toolbar
Online Icon on the Gray Toolbar
Help Icon on the Gray Toolbar
page
page
page
page
page
page
page 1
2 to page 3
4 to page 5
6 to page 7
8 to page 9
10 to page 12
13 to page 15
page 16
page 17
page 18
page 19
Chapter 2
Summary of the Red or Main Toolbar
New Icon on the Red or Main Toolbar
Open Icon on the Red or Main Toolbar
Save Icon on the Red or Main Toolbar
Print Icon on the Red or Main Toolbar
Scan Icon on the Red or Main Toolbar
Read Icon on the Red or Main Toolbar
Pause Icon on the Red or Main Toolbar
Definition Icon on the Red or Main Toolbar
Synonym Icon on the Red or Main Toolbar
Syllables Icon on the Red or Main Toolbar
Chapter 3
Summary of the Yellow or Reading Toolbar
Voice Icon on the Yellow or Reading Toolbar
Words Per Minute on the Yellow or Reading Toolbar
Zoom on the Yellow or Reading Toolbar
Pages on the Yellow or Reading Toolbar
Chapter 4
Summary of the Green or Study Skills Toolbar
Erase Icon on the Green or Study Skills Toolbar
Highlight on the Green or Study Skills Toolbar
Footnote on the Green or Study Skills Toolbar
Chapter 5
Summary of the Blue or Writing Toolbar
Font Icon on the Blue or Writing Toolbar
page
page
page
page
page
page
page
page
page
page
page
20
21
21
21
21
21
22
22
22
22
22
page
page
page
page
page
23
24
24
24
25
page
page
page
page
26
27
28
29
page 30
page 31
iii
Font Size Icon on the Blue or Writing Toolbar
page 31
Appearance of text Icon on the Blue or Writing Toolbar page 31
Alignment Icon on the Blue or Writing Toolbar
page 32
Spacing Icon on the Blue or Writing Toolbar
page 33
Spell check on the Blue or Writing Toolbar
page 34
iv
The Gray Toolbar
This toolbar consists of the
basic functions of Kurzweil
3000.
Its layout has been designed
to facilitate learning for users
of all ages.
Essential tools for scanning,
reading and viewing are but
a few that can be found when
using the gray toolbar.
1
The Gray Toolbar
File
File
New =
1.Text File
2.Image File,
Open
Close
Save
Save As
Save Page Range,
Configure Library
Import
Export
Extract Annotations
Extract Highlights to Column Notes
Extract Column Notes to Outline
Extract Text
Join
2
r
The Gray Toolbar
Open with Editor =
1.Microsoft WordPad
2.Microsoft Word
Send To =
1.Recipient (As Text)
2. Recipient (As Attachment)
Print
Properties
Audio Files =
1.Create Audio Files
2.Audio Spooler Monitor
Recent Files = varies as to what has
been opened in Kurzweil
Change User
Exit
3
The Gray Toolbar
Edit
Edit
Copy
Paste
Select All
Image Selector
Insert Page Break
Line Spacing =
1.Single
2.Double
3.Triple
Text Alignment =
1. Left
2. Center
3. Right
Insert Picture
Picture Properties
Field Text
4
r
The Gray Toolbar
Enable Editing
Move Existing Page
Correct Recognition =
1. Change Underlying Word
2. Edit Underlying Text
Find =
1. Text
2. Object
3. Replace Text
4. Homophone 2
5. Confusable 2
5
The Gray Toolbar
Scan
Start New Scan
Rescan
Insert Page
Insert Image
Delete Page
Corrections
Re-Recognize Page
Use Color
Double Sided
Two Page Mode
Scan Repeatedly
Scanner Setup =
1. Select Scanner
2. Scanned Page Size
3. Scanner Optimization
6
r
The Gray Toolbar
Image Fill =
1. White
2. Black
3. Other
Zone Editor
Header and Footer Editor
7
The Gray Toolbar
Read
Back
Start Reading
Forward
Reading Speed =
1. Increase
2. Decrease
Silent Reading
Read Mode =
1. Continuous
2. Self-Paced
3. Word by Word
Read Unit =
1. Word
2. Phrase Line
3. Sentence
4. Paragraph
5. Heading
8
r
The Gray Toolbar
6. Highlight
Languages =
1. English
2. Spanish
3. French
4. German
5. Italian
6. Portuguese
7. Finnish
Read the Web
9
The Gray Toolbar
View
Fix to =
1. Text Width
2. Text Height
3. Width
4. Height
5. Page
Zoom =
1. In 10%
2. Out 10%
3. To 100%
4. To my Zoom
Rotate =
1. Left
2. Right
3. Invert
10
r
The Gray Toolbar
Page =
1. First
2. Last
3. Previous
4. Go To
5. Set Number
Thumbnails =
1. Page Thumbnail
2. Thumbnail View
Thumbnail Size =
1. Jumbo
2. Largest
3. Large
4. Medium
5. Small
6. Smallest
Page View =
1. Remember
2. Forget
11
The Gray Toolbar
Annotations =
1. Show Notes
2. Show Voice Notes
3. Show Highlighting
4. Show Circles
5. Show Bookmarks
Magnify Spoken Word
12
r
The Gray Toolbar
Tools
Highlight =
1. Erase
2. Yellow Highlight
3. Green Highlight
4. Blue Highlight
5. Pink Highlight
6. Orange Highlight
7. Gray Highlight
8. Red circle
9. Blue Circle
10. Homophone 2
11. Confusable 2
13
The Gray Toolbar
Note =
1. Add Footnote
2. Add Sticky Note
3. Add Bubble Note
4. Add Text Note
5. Close Footnote
6. Add Voice Note
7. Delete Note
8. Default Note Options
Bookmarks
Spell Check
Ranked Spelling
Vocabulary Lists
Fill in the Blanks
Pronunciations
Usage Log
Options
Lock Features
14
r
The Gray Toolbar
Customize =
1. Toolbars
Apply Toolbar Set =
1. 0Classic
2. 1Basic
3. 2Content Reading
4. 3Documentation Preparation
5. 4Fluency Training
6. 5Language Learning
7. 6Pleasure Reading
8. 7Proof Reading
9. 8Study Skills Training
10. 9Test Preparation
11. 10Test Taking
12. 11Vocabulary Building and
Right Mouse Button
Right Mouse Button
15
The Gray Toolbar
Reference
Select Word =
1. Definition
2. Synonym
3. Syllable
4. Encarta Look-up
5. Picture
Look Up Word I Type
Spell Word
Select Dictionary =
1. Choose the dictionary that you want
Picture Dictionary =
1. None
2. Setup
16
r
The Gray Toolbar
Window
Cascade
Tile Horizontally
Tile Vertically
Arrange Icons
Close =
1. All Windows
2. Reference Windows
17
The Gray Toolbar
Online
Search For Books
Search For Magazines
Online Reference Lookup
Online Reference History
News From KESI
Updates
18
r
The Gray Toolbar
Help
Help Topics
Next Tip of the Day
Previous Tip of the Day
How to Videos
Update Registration Info
About Kurzweil 3000
19
The Main or the Red Toolbar
The commands within this
toolbar relate to the
scanning of documents and
reading tools.
Any written material such
as books, essays etc. can
be transferred into
Kurzweil 3000 and set up
to be read to people of any
age.
20
The Main or the Red Toolbar
New
Click New if you want to write an essay or
have a reading document read to you.
Open
Click Open to open a document you
wrote or a reading document so
Kurzweil 3000 can read it.
Save
Click Save to save your document in
Kurzweil.
Print
Click Print to print the text you
wrote or the highlighted parts of the
document.
Scan
Click Scan to be able to scan your
papers into Kurzweil 3000 so you
can have the document read back
to you.
21
The Main or the Red Toolbar
Read
When you click Read it starts the
reading of your text or document.
Pause
When you click Pause Kurzweil stops
reading and it will automatically
show where you have stopped.
Definition
Highlight the word that you don’t
understand and click Definition .
Synonym
Highlight the word you want to
find a similar meaning for and
click Synonym.
Syllables
Highlight the word that you want to
break down so it is easier to
pronounce and then click Syllables .
22
The Reading or the Yellow Toolbar
The yellow toolbar allows the
user to choose various features
related tothe reading of the
printed material.
The voice characteristics, speed
of reading and size of words are
a fewof the options to select
from.
23
The Reading or the Yellow Toolbar
Voice
1. Find the drop down menu that says WW
Kate?
2. Click on the down arrow to choose the
reading voice.
Words per Minute
1. The first set of up and down arrows
determine how fast or slow you want
Kurzweil 3000 to read to you.
2. Start at 120 words per minute and that
will determine whether to make the
program read faster or slower.
3. Type in the number of words per minute
you want the program to read to you.
Zoom
1. Do you want the words on the page
smaller or larger?
2. The second set of arrows helps you
determine the size of your text.
3. Click the up arrow to make the text look
bigger.
4. Click the down arrow to make the text
look smaller.
24
The Reading or the Yellow Toolbar
Pages
1. The white bar shows what page you are
on.
2. The grey bar shows the total number of
pages for that document.
3. Click the up arrow to go to the next
page.
4. Click the down arrow to go back a
page.
25
The Study Skills or Green Toolbar
The green toolbar displays
commands used for study
skills.
The focus is on the use of
an eraser, highlighters as
well as the encouragement
in learning how to use
footnotes within Kurzweil
3000.
26
The Study Skills or Green Toolbar
Erase
1. When you click the Erase tool you
make it available to use.
2. So when the Erase tool is available
to use drag over the parts you want to
erase from your highlighted sections.
3. When you are done click the Erase
tool to make it not in use.
27
The Study Skills or Green Toolbar
Highlighters
1. Click one of the following
highlighters: yellow, green , cyan or
magenta .
2. Drag over the section of the text
that you want to highlight.
3. When done, click on one of the color
highlighters.
4. Highlighted text may also be
printed.
1. Just simply highlight the text again.
2. Right click copy
3. Go into Word and right click paste.
4. Click File >Print > OK
28
The Study Skills or Green Toolbar
Footnote
If you want to write a note about a page
or particular section, it can be done
electronically.
1. Click at the end of the section where you
want to make a footnote.
2. Click on Footnote to make it available
to use.
3. A white box will appear and you can
type in a short summary of that page or
paragraph.
4. Click the X to close the footnote.
5. A number will appear starting with how
many footnotes you have.
6. Double click on the number to add
information or right click and delete if
information is no longer needed.
7. Highlight the parts in the white box.
8. Right click Copy.
9. Open a Word document and click Paste.
10. Choose File > Print > OK.
29
The Writing or Blue Toolbar
This toolbar focuses mainly
on the qualities of the writing
tool.
Features such as writing fonts,
word alignment and paragraph
spacing are easily accessible
and simple to implement by
the user.
30
The Writing or Blue Toolbar
Font
Do you want your text to look different?
Arial is the default font.
1. Click on the down arrow that has
Arial in the white box to choose a font.
Font Size
How small or large is your text?
18pt is the standard font size.
1. Click on the down arrow to change the
size of the font.
Appearance of text
Is the text normal, bold, italic or
underlined?
1. Click on the B to make your text bold.
2. Click on the I to make your text italic.
3. Click on the U to make your text
underlined.
4. Click again on the one you chose to
make it unavailable.
31
The Writing or Blue Toolbar
Alignment
Decide whether to left align, right, center or
justify.
Click on the Left Aligned drop down
menu and choose how you want your text
aligned.
1. Click Left Aligned to make your text
start aligning on the left of the page.
2. Click Right Aligned to make your text
start aligning on the right of the page.
3. Click Center Aligned to make your
text start aligning in the middle of the
page.
4. Click Justified Aligned to make your
text appear justified on the page.
32
The Writing or Blue Toolbar
Spacing
How are your paragraphs spaced: Single,
1.5, Double, At Least, Exactly or Multiple?
The standard spacing is Single Spaced.
Click on
to choose how
you want your text to be spaced in your
paragraphs.
1. Click on Single Spaced so there is no
space in between lines.
2. Click on 1.5 Spaced so there will be 1.5
spacing between lines.
3. Click on Double Spaced so there is one
blank line between the lines.
4. Click on At Least Spaced so there is at
least space between lines.
5. Click on Exactly Spaced so there is
exactly space between lines.
6. Click on Multiple Spaced so there are
multiple spaces between lines.
33
The Writing or Blue Toolbar
Spell Check
Click on
to be able to check and
correct your spelling mistakes.
34
Index
D
Definition
22
4-5
27
2-3
31
29
E
Editing
Erase F
Filing Fonts Footnotes
Help Highlighting N
NewDocument
0
Online
OpenDocument
P
19
28
Viewing
Voice 10-12
24
W
21
18
21
Zoom 25
22
21
22
8-9
16
21
6-7
21
33
34
22
22
T
Window
WordsperMinute
R
Read Reading
Reference
TextAlignment
32
TextAppearance
31
Tools 13-15
V
H
Pages Pause Print S
Save Scan ScanIcon
Spacing
SpellCheck
Syllables
Synonyms
Z
17
24
24
Keeners will succeed
Useful tools to help with reading comprehension
Really easy to get the concept
Zoom levels to view your text
Wonderful study tools
Everyone can learn how to read
Imagine having a personal reader
Learn all of this on a computer program
“I nave been giving tutorials on this
program for a year and it is quite
rewarding to help someone.”
1486350279