1
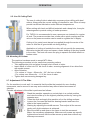
®
TAP 30
DRILLING MACHINE
OPERATOR’S MANUAL
BEFORE USE, ENSURE EVERYONE USING THIS MACHINE READS AND UNDERSTANDS
ALL SAFETY AND OPERATING INSTRUCTIONS IN THIS MANUAL .
Serial #............................................
Date of Purchase............................
HOLEMAKER TAP 30 DRILLING MACHINE
IMPORTED & DISTRIBUTED BY
INDUSTRIAL TOOL & MACHINERY SALES
18 BUSINESS ST
YATALA QLD 4207 AUSTRALIA
T
F
E
W
07 3287 1114
07 3287 1115
[email protected]
www.industrialtool.com.au
WARRANTY TERMS
In addition to any warranties or conditions implied by applicable Statute or Regulations, Industrial
Tool & Machinery Sales warrants all of it’s products against defective workmanship and faulty
materials for a period of twelve (12) months from the date of purchase, unless otherwise stated.
At our option we will repair or replace, free of charge, any item on the condition that:
• The complete machine or tool is returned, freight prepaid to ITM or one of it’s authorised
service agents as directed by ITM, and is found to have a material or constructional defect.
• The machine or tool has not been subject to misuse, neglect or damage by accident.
• The fault is not a result of normal “wear and tear”.
• Written permission has been received from ITM prior to commencement of repair.
• Repairs, tampering or modification carried out by unauthorised personnel will void all warranty.
• Consumable items such as cutting tools, pilot pins, saw blades, grinding wheels etc. are NOT
covered by warranty.
Our goods come with guarantees which cannot be excluded under the Australian Consumer
Law. You are entitled to replacement or refund for a major failure and to compensation for other
reasonably foreseeable loss or damage. You are also entitled to have the goods repaired or
replaced if the goods fail to be of acceptable quality and the failure does not amount to a major
failure.
2
HOLEMAKER TAP 30 DRILLING MACHINE
TABLE OF CONTENTS
1.
1.1.
1.2.
1.3
1.4
1.5
Safety Instructions
Read And Save All Instructions For Future Reference
Safety Requirements
Special Safety Requirements
Specifications
Package Contents
-4-4-4-6-7-7-
2.
2.1.
2.2.
2.3.
2.4.
2.5.
2.6.
2.7.
2.8.
2.9.
Operation
Operating Tips
Stopping and Starting the Machine
Speed Control
Gear Selection Per Cutter Sizes
Use Of Cutting Fluid
Mounting Of Cutters
Adjustment Of The Slide
Tips For Keeping Your Machine In Correct Working Order
Extension Cable Selection
-8-8-8-9-9-9- 10 - 10 - 11 - 13 -
3.
Solutions For Drilling Problems
- 13 -
4.
Trouble Shooting
- 15 -
5.
Parts Breakdown
- 16 -
6.
Electrical Circuit
- 20 -
3
SAFETY INSTRUCTIONS
READ OPERATOR’S MANUAL BEFORE YOU
START TO WORK WITH THE MACHINE.
1. Safety Instructions
The HMTAP30 Magnetic Base Drilling Machine should be used only to applications stated in
the manual. Using in other applications may lead to personal injury and machine damage.
1.1. Read And Save All Instructions For Future Reference
When using electric tools, basic safety precautions should always be followed to reduce risk of
fire, electric shock and personal injury.
1.2. Safety Requirements
1.
2.
Keep Work Area Clean
Consider Work Area Environment
Do not expose power tools to rain.
Do not use power tools in damp or wet locations.
Keep work areas well lit.
Do not use tool in presence of flammable liquids or gases.
3. Guard against Electric Shock
Prevent body contact with grounded surfaces. For example: pipes, radiators, ranges,
refrigerator enclosures.
4. Keep Children Away
Do not let visitors contact tool or extension cord.
5. Store Idle Tools
When not in use, tools should be stored in dry and high or locked-up place, out of reach of
children.
6. Do Not Force Tool
It will do the job better and safer at the rate for which it was intended.
7. Use Right Tool
Do not force small tool or attachment to do the job of a heavy-duty tool.
Do not use tool for purpose not intended - for example; do not use a circular saw for
cutting tree limbs or logs.
8. Dress Properly
Do not wear loose clothing or jewellery; they can be caught in moving parts.
Rubber gloves and non-skid footwear are recommended when working outdoors.
Wear protective hair covering to contain long hair.
9. Use Safety Glasses
Also use face or dust mask if cutting operation is dusty.
10. Do Not Abuse Electrical Cord
Never carry tool by cord or yank it to disconnect from receptacle.
Keep cord from heat, oil and sharp edges.
11. Secure Work
4
SAFETY INSTRUCTIONS
12.
13.
14.
15.
16.
17.
18.
19.
Use clamps or a vice to hold work. It is safer than using your hand and it frees both hands
to operate tool.
Do Not Overreach
Keep proper footing and balance at all times.
Maintain Tools with Care
Keep tools sharp and clean for better and safer performance.
Follow instructions for lubricating and changing accessories.
Inspect tool cords periodically and if damaged, have repaired by authorized service facility.
Inspect extension cords periodically and replace if damaged.
Keep handles dry, clean and free from oil and grease.
Disconnect Tools
Unplug when not in use, before servicing and when changing accessories, such as blades,
bits and cutters.
Remove Adjusting Keys and Wrenches
Form habit of checking to see that keys and adjusting wrenches are removed from tool
before turning it on.
Avoid Unintentional Starting
Do not carry plugged-in tool with fingers on switches.
Be sure switches are off when plugging in.
Outdoor Use Extension Cords
When tool is used outdoors, use only extension cords intended for use outdoors and so
marked.
Stay Alert (Do not use when taking medications that may cause drowsiness.)
Watch what you are doing. Use common sense. Do not operate tool when you are tired.
Check Damaged Parts
Before further use of the tool, a guard or other part that is damaged should be carefully
checked to determine that it operates properly and perform its intended function. Check
for alignment of moving parts, binding of moving parts, breakage of parts, mounting and
any other conditions that may effect its operation. A guard or other part that is damaged
should be properly repaired or replaced by an authorized service centre. Do not use this
tool if switches do not turn it on and off. Have defective switches replaced by authorized
service centre.
WARNING! SAFETY RULES MUST BE CLOSELY OBSERVED.
5
SAFETY INSTRUCTIONS
1.3. Special Safety Requirements
1.
2.
3.
4.
5.
6.
7.
8.
9.
10.
11.
12.
13.
14.
Read and follow operator’s manual thoroughly. If you cannot locate your operator’s
manual contact ITM (www.industrialtool.com.au) for an additional FREE copy.
DO NOT touch rotating cutter or parts.
Always stop machine completely and unplug from power source before changing cutters,
cleaning clips, refilling lubrication or performing adjustments.
Never wear loose clothing or gloves when working near cutting area or machine arbor.
Always wear eye protection. Any tool can shatter.
Always use safety chain or strap provided with machine.
Always use proper tooling, keep cutters securely fastened.
DO NOT use dull or broken cutters.
Beware of ejected slugs at end of cut, they become HOT during the cut.
Magnet will not hold properly on thin materials under 3/8” (9.5mm), rough or dirty surfaces.
Keep all safety features functioning and working properly.
Keep bottom of magnet burr free and clear of chips and debris.
To reduce the risk of electrical shock, DO NOT remove or alter electrical panels or use
machine in damp areas.
Use only authorized service centres for repairs.
HMTAP30 drilling machine must be connected to “protected power source” which is properly
grounded.
Improperly connecting the grounding wire can result in the risk of electrical shock. Check
with a qualified electrician if you are in doubt as to whether the outlet is properly grounded.
Do not modify the plug provided with the tool. Never remove the grounding prong from the
plug. Do not use tool if the cord or plug is damaged, have it repaired before using. If the plug
will not fit the outlet, have a proper outlet installed by a qualified electrician. The TAP30 must
be plugged into an appropriate outlet, properly installed and grounded in accordance with all
codes and ordinances. If in doubt of proper grounding, call a qualified electrician.
6
SAFETY INSTRUCTIONS
1.4. Specifications
Motor Unit
Voltages
Normal Full Load Output
Magnet Size
Magnet Force At 20°C With 25mm Plate Thickness.
The use on any material less than 25mm thick will progressively
reduce the magnetic performance. If possible, substitute
material should be positioned under the magnet and work piece
to equate to a suitable material thickness. If this is not possible,
an alternative secure method of restraining the machine MUST
be used.
230V / 60Hz
2000W
210 x 105 x 70
mm
1850kgf
Overall Dimensions
Height - maximum extended
Height - minimum
Width (including Hand wheel)
Length Overall
Stroke
Net Weight
Maximum hand/arm vibration magnitude (measured at handle
during operation in accordance with ISO5349, using a 22mm
cutter through 13mm MS plate)
Estimate of likely daily vibration exposure. Operation 30 holes
@ 2 minute/hole.
Average noise level during cutting at operators ear position.
750mm
490mm
205mm
300mm
260mm
26.5kg
0.82m/s2
0.29m/s2 A(8)
89dB(A)
1.5. Package Contents
•
•
•
•
•
•
•
Operator’s Manual
Coolant Bottle
Safety Chain
Arbor--MT3 (3/4” bore)
Drill Drift
4mm Hexagon Key
3mm Hexagon Key
7
OPERATION
2. Operation
2.1. Operating Tips
•
•
•
•
•
Keep the inside of the cutter clear of swarf. It restricts the operating depth of the cutter.
Ensure that the coolant bottle contains sufficient cutting oil to complete the required
operating duration. Refill as required.
Occasionally depress the pilot to ensure cutting fluid is being correctly metered.
Apply light pressure when commencing to cut a hole until the cutter is introduced into
the work surface. Excessive pressure is undesirable, it does not increase the speed of
penetration.
Always ensure that the slug has been ejected from the previous hole before
commencing to cut the next.
G
G
(Right)
•
•
•
(Wrong)
Always cut overlapping holes as illustrated above –do not use excessive pressure and
ensure cutting fluid is reaching teeth of the cutter.
If the slug sticks in the cutter, move the machine to a flat surface, switch on the magnet
and gently bring the cutter down to make contact with the surface. This will usually
straighten a cocked slug and allow it to eject normally.
Cutter breakage is usually caused by insecure anchorage and a loosely fitting slide.
(Refer to routine maintenance instructions).
2.2. Stopping & Starting The Machine
Before starting the motor, always make sure to turn on the magnetic switch
first. When the magnet is activated, the motor can be started with start button.
Stopping the motor must always be done with the stop switch. Never stop the
machine with the main current / magnetic switch. It is dangerous, and can also
cause damage to the electronics of the machine.
8
OPERATION
2.3. Speed Control
The machines are equipped with a mechanical four-speed gearbox. Select the required
speed by pressing-in, shifting and engaging. Change the speed only when the machine
is not running, and support the gear-changing by slightly rotating the spindle.
Position
1
2
3
4
RPM (no load)
45 - 90 rpm
90 - 160 rpm
125 - 400 rpm
300 - 570
In load condition each gear has
65~75% efficiency defendant on
working situations. So following RPM
is expected per each gear.
1st : 58 ~ 68
2nd : 104 ~ 120
3rd : 215 ~ 248
4th : 384 ~ 425
G
1st 45-90
1 st
2nd 90-160
2 nd
3rd 215-400
4th 300-570G
3 rd
4 th
G
2.4. Gear Selection Per Cutter Sizes
In case of cutting normal mild steel with cutters under 35mm dia. 2nd gear is
recommendable. And for cutters over 40mm dia. 1st gear should be selected.
For cutters around 36 ~ 39 mm dia. it depends on situation. Specially the
material to be cut is very important.
9
OPERATION
2.5. Use Of Cutting Fluid
The use of cutting fluids is absolutely necessary when drilling with steel
cutters. Always use the correct cutting oil intended for use. Other oils may
provide insufficient lubrication under different temperatures.
When cutting with hard and difficult materials and a deep hole, it may be
advantageous to provide cutting oil under pressure.
For TAP30 it is recommended to use a pressure can instead of a regular
oil tank. The pressure canister has a hose with a quick coupling and the
valve on the pressure canister can be used to regulate the oil supply.
Cutting oil (or paste) must always be supplied through the centre of the
cutter so that the oil goes inside out during drilling.
Application of cutting oil outside the cutter will not provide the necessary
lubrication inside the cutter and cause a faster heating of the plug formed
in the cutter. The heat will cause the plug to expand and often result in a
broken cutter.
2.6. Mounting Of Cutters
The machine has been made to accept MT3 Arbor.
The following procedure is to be used when mounting cutters:
• Take appropriate pilot and place through hole in shank of cutter.
• Insert shank of cutter into 3/4” dia. bore of arbor, ensuring alignment of two drive flats
with socket screws.
• Arbor Selection
- For cutters of 11mm ~ 60mm dia. : 3/4” dia. bore of arbor.
- For cutters over 60mm dia. : 1 1/4” dia. bore of arbor.
• Tighten both screws using hexagon key.
2.7. Adjustment Of The Slide
For the machine to work well, it is essential that the slide that controls the core feeding
movements, can be moved in an easy and controlled way without lateral movement or
vibration.
Periodic adjustment of the slide is performed as follows:
•
•
•
•
•
10
Stand the machine upwards on a steel plate in a vertical position
and raise the slide up to the highest possible position by turning the
capastan arm.
Clean the slide and apply thin machine oil on the sliding surfaces.
Loosen the 2 screws that hold the bearing bracket and lower the
slide to the lowest position.
Starting by adjusting the middle screws. Then adjust all the screws
gently until slight resistance is achieved.
Move the slide up and down a few times to test the movement.
Make the necessary adjustments. Make sure all screws are equally
tightened and ensure that the slide moves up and down without any
sideways movement.
OPERATION
2.8. Tips For Keeping Your Machine In Correct Working Order
In order to ‘get the best life’ out of your magnetic drill machine, always keep in good working
order. A well maintained machine is a happy machine.
A number of items must always be checked on magnetic drilling machines.
Always before starting any job, make sure the machine is in good working order and that there
are no damaged or loose parts. Any loose parts must be tightened.
Before proceeding with any maintenance work, be certain that the power supply is
disconnected.
Visual check on machine for
damage
Operation of machine
Check of magnetic base
Check of brush wear
Check Alignment of machine
Check of grease
Check armature
Everyday
X
Once a Week
Once a Month
X
X
X
X
X
X
Visually check the machine for damage.
Machine must be checked before operation for any signs of damage that will affect the
operation of the machine. Particular notice must be taken of the mains cable, if the machine
appears to be damaged it should not be used failure to do so may cause injury or death.
Check operation of the machine.
The machines operation must be checked to ensure that all components are working correctly.
Machines Carbon Brushes.
The Machines Brushes should be checked to make sure there is no abnormal wear present.
This should be checked at least once a week if used frequently. If the brush has worn more than
2/3 the original length the brushes should be changed. Failure to do so may cause damage to
the machine.
Machines Magnetic base.
Before every operation the magnetic base should be checked to make sure that the base is flat
and there is no damage present. An uneven magnet base will cause the magnet not to hold as
efficiently and may cause injury to the operator.
Adjustment of slide and bearing bracket Alignment.
An essential requirement of the machine is that the slide can move in a smooth and controlled
manner, free of lateral movement and vibration.
This situation can be maintained by periodic adjustment of the slide and is accomplished.
11
OPERATION
Check machines grease.
The gearbox grease should be checked once a month to ensure all moving components
are covered to prevent wear. The grease should be changed at least once a year to ensure
you gain the best from the machine.
Check Armature of the machine.
This should be checked at least 1 per month to see that there are visual signs of damage
to the body or to the commutator. Some signs of wear will be seen on the commutator over
a period of time. This is normal as this is the part that comes in contact with the brushes
but any signs of abnormal damage and the part should be replaced.
The motor on this machine has brushes. The brushes
should be checked regularly to detect any abnormal
wear.
With regular use brushes should be checked at least
once per week.
Brushes that are worn more than 2/3 of its normal
length, should be replaced. Failure to do so may cause
motor damage or repairs of larger scope.
The brushes on the left is just an illustration and
therefore differ in appearance.
With regular use, the armature should be checked at
least once per month. Look for visible damage or wear to
the armature body and the commutator (commutator are
brass plates which the brushes are touching).
The brushes will naturally wear on the commutator. This
is normal. Look for damages in plates that have lifted or
loose brass boards. Change the aramature if damage or
excessive wear is found.
If much coal dust is found on the commutator, use
compressed air to low clean.
The armature on the left is just an illustration and
therefore may differ in appearance.
12
OPERATION
2.9. Extension Cable Selection
The machines are factory fitted with a 2 metre length of cable having three conductors
1.5mm² LIVE, NEUTRAL and EARTH.
If it becomes necessary to fit an extension cable from the power source, care must be taken
in using a cable of adequate capacity. Failure to do so will result in a loss of traction by the
magnet and a reduction of power from the motor. Assuming a normal AC supply of the correct
voltage, it is recommended that the following extension lengths shall not be exceeded:
For 230v supply: 26metres of 3 core x 1.5mm² or
17metres of 3 core x 1.0mm²
3.0. Solutions For Drilling Problems
13
SOLUTIONS FOR DRILLING PROBLEMS
14
TROUBLE SHOOTING
Neither Magnet or Motor is
working
•
•
•
•
•
•
The magnetic switch is not powered
Damaged or defective wiring
Damaged or defective fuse
Faulty magnetic switch
Defective control box
Faulty power supply
Magnet is active, but motor
does not turn
•
•
•
•
•
•
Damaged or defective wiring
Brushes are stuck or too worn
Faulty magnetic switch
Defective stop/start switch
Defective control box
Defective armature or field
Motor runs but magnet is not
getting activated
•
•
Faulty magnet
Defective control box
The cutter breaks and/or
making holes larger than the
size of the cutter
•
•
•
•
•
Clearance in the machines controls and/or slide function
Bent or sprung shaft
Curved centre point
Faulty or insufficient magnetic holding power
Contact between the magnet and workpiece
The motor is pulling heavily
and/or stops
•
•
•
Bent or warped shaft
Bearing bracket adjusted incorrectly
Contamination between spindle and bearing bracket
Noise in the motor/gearbox
•
•
•
Worn bearing between gearbox and motor
Damaged drives in the gearbox
Low amount of grease in the gearbox
The motor scores, brush fires
and little or no power
•
•
•
Damaged Armature
Damaged Field
Damaged or Worn Brushes
The motor does not start or
stop
•
•
•
•
Damaged or defective wiring
Contaminated reader
Defective or loose magnet in reader for speed control
Damaged or defective brushes
Heavy feed motion
•
•
•
Slide adjustments are tightened too hard
The slides, sliding surfaces are too dry
Shaft/Rack are contaminated
Magnetic holding power is too •
low
•
•
•
•
Damaged or deceptive wiring
The work area/surface is not clean and/or dry
The work area/surface has poor magnetic ability
The work area/surface is not flat
The work area/surface is too thin (thinner than 10mm)
Motor only runs at maximum
RPM
•
•
Damaged or defective wiring
Faulty control box
The operator receives an
electric shock
•
•
•
Damaged or defective wiring
Faulty magnet
The motor is heavily polluted
Fuse blows when magnet is
activated
•
•
•
•
Damaged or defective wiring
Faulty magnet switch
Defective control box
Faulty magnet
Fuse blows when starting the
motor
•
•
•
•
•
Damaged or defective wiring
Defective armature and/or field
Motors running too fast
Worn brushes
Defective control box
15
PARTS BREAKDOWN
G
G
G
+7$33$57 G
G
16
12G
3$5712G
G 3$57 1$0(G
4
W\G
G
+7$3$G
G 61$35,1*57:G
G
G
+7$3$G
G %($5,1*B.<.==G
G
G
+7$3$G
G 63,1'/(G
G
G
+7$3$G
G +(;62&.(7+($'6&5(:0/G
G
G
+7$3$G
G *($5%2;G
G
G
+7$3$G
G *($5&+$1*(5$66
<G
G
G
+7$3$G
G 1,''/(%($5,1*.<.=G
G
G
+7$3$G
G 7+,5'3,1,21G
G
G
+7$3$G
G 7+,5'*($5G
G
PARTS BREAKDOWN
12G
3$5712G
G 3$57 1$0(G
4
W\G
G
+7$3$G
G 1,''/(%($5,1*.<.=G
G
G
+7$3$G
G %($5,1*171//8G
G
G
+7$3$G
G 61$35,1*67:G
G
G
+7$3$G
G 0$,1*($5G
G
G
+7$3$G
G 61$35,1*57:G
G
G
+7$3$G
G .(<;;;5G
G
G
+7$3$G
G 3,13,/G
G
G
+7$3$G
G %($5,1*.%&==G
G
G
+7$3$G
G 6(&21'3,1,21G
G
G
+7$3$G
G .(<;;;5G
G
G
+7$3$G
G 6(&21'*($5G
G
G
+7$3$G
G %($5,1*1.G
G
G
+7$3$G
G ,11(5&29(5G
G
G
+7$3$G
G *($5&283/,1*$G
G
G
+7$3$G
G %($5,1*171//8G
G
G
+7$3$G
G 61$35,1*67:G
G
G
+7$3$G
G %($5,1*+.9G
G
G
+7$3$G
G ),5673,1,21G
G
G
+7$3$G
G ),567*($5.(<G
G
G
+7$3$G
G +.9),567*($5 G
G
G
+7$3$G
G 61$35,1*67:G
G
G
+7$3$G
G %($5,1*.%&==G
G
G
+7$3$G
G *($5&283/,1*%G
G
G
+7$3$G
G $50$785()$1G
G
G
+7$3$G
G )$1%86+,1*G
G
G
+7$3$G
G $50$785($66
<G
G
G
+7$3$G
G $50$785(%86+,1*G
G
G
+7$3$G
G %($5,1*171==&G
G
G
+7$3$G
G +(;62&.(7+($'6&5(:0/G
G
G
+7$3$G
G 67$725G
G
G
+7$3$G
G +286,1*G
G
GG
+7$3$G
G &$5%21%586++2/'(5$66
<G
G
G
+7$3$G
G +286,1*&$3G
G
G
+7$3$G
G +(;62&.(7+($'6&5(:0/G
G
G
+7$3$G
G +(;62&.(7+($'6&5(:0/G
G
G
+7$3$G
G 3*&29(5G
G
G
+7$3$G
G 0$*1(75,1*3&%G
G
G
+7$3$G
G 0$*1(75,1*G
G
17
PARTS BREAKDOWN
G
G
G
+7$33$57 G
G
18
12G
3$5712G
G 3$57 1$0(G
4
W\G
G
+7$3%G
G 02725*($5%2;$66
<G
G
G
+7$3%G
G +(;62&.(7+($'6&5(:0/G
G
G
+7$3%G
G +(;62&.(7+($'6&5(:0/G
G
G
+7$3%G
G *,%675,3G
G
G
+7$3%G
G 1870G
G
G
+7$3%G
G 25,1*$66(0%/('6723%2/7G
G
G
+7$3%G
G 6/,'(G
G
G
+7$3%G
G 62&.(76(76&5(:0/G
G
G
+7$3%G
G 3*&29(5G
G
G
+7$3%G
G :,5(+26(G
G
G
+7$3%G
G 5$&.*($5G
G
G
+7$3%G
G 6/,'(%$5G
G
PARTS BREAKDOWN
G
+7$3%G
G &22/$17+$1*(5G
G
G
+7$3%G
G +(;62&.(7+($'6&5(:0/G
G
G
+7$3%G
G &22/$177$1.$66
<G
G
G
+7$3%G
G +$1'/($66
<G
G
G
+7$3%G
G +$1'/(3,1,21G
G
G
+7$3%G
G %86+,1* G
G
G
+7$3%G
G +$1'/(B&2//$5 G
G
G
+7$3%G
G +(;62&.(7+($'6&5(:0/G
G
G
+7$3%G
G 3$1+($'('6&5(:0/ G
G
G
+7$3%G
G :$51,1*3$1(/ G
G
G
+7$3%G
G 0$,13&%G
G
G
+7$3%G
G 6&5(:0/ G
G
G
+7$3%G
G &$%7</(&$%/($66
< G
G
G
+7$3%G
G +(;62&.(7+($'6&5(:0/G
G
G
+7$3%G
G +(;62&.(7+($'6&5(:0/G
G
G
+7$3%G
G &$%/(*5$1'$66
< G
G
G
+7$3%G
G (/(&7520$*1(7 G
G
G
+7$3%G
G 3$1+($'('6&5(:0/G
G
G
+7$3%G
G &21752/3$1(/ G
G
G
+7$3%G
G 0$,1)5$0(G
G
G
+7$3%G
G $5%256833257(5G
G
G
+7$3%G
G +(;62&.(7+($'6&5(:0/G
G
G
G
19
ELECTRICAL CIRCUIT
G
G
G
G
G
G
G
G
G
G
G
G
G
G
G
G
G
G
G
G
G
WARNING - THIS APPLIANCE MUST BE EARTHED!G
G
G
Insulation Resistance TestG
:LWKWKHPDJQHWVZLWFKLQWKH21SRVLWLRQDSSO\DYROWDJHRINYEHWZHHQWKHOLYH
FRQQHFWLRQRQWKHPDLQVSOXJDQGWKHIUDPHRIWKHPDFKLQHIRUDGXUDWLRQRI
VHFRQGV7KHUHDGLQJREWDLQHGVKRXOGQRWIDOOEHORZLQILQLW\6KRXOGDIDXOWEH
LQGLFDWHGLWOWUVDGHQWPFCPFTGEVKHKGFG
20