Transcript
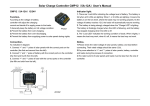
SRG1224/10- PWM solar controller
User Manual
Function:
According to the voltage of battery, controller will adjust the charge current and decide if it is necessary to
supply the loads with electricity.
1. Generally keep the battery on full voltage state.
2. Prevent the battery from over-charging.
3. Prevent the battery from over-discharging.
4. Prevent the battery from supplying electricity to solar panels during nights.
Connection:
According to indications in the picture:
1. Connect “+” and “-” poles of battery (the 3rd and 4th ports from the left).
2. Connect “+” and “-”poles of solar panel (the 1st and 2nd ports from the left).
3. Connect “+” and “-” poles of load (the 5th and 6th ports from the left).
Indicator light:
1. Three indication lights of voltage indicate the different voltages of battery. It indicates the voltage en ough
when three lights are all illumining. When one or two lights are illuminating, it indicates that the voltage of
battery is on the low side. On such situation the loads may be not normally operate, which is the common
state. After the voltage of battery reaches at least 12.6v, the loads will automatically work.
2. The battery is strongly charged when one charging indication light is illumining. The battery is floatingly
charged when the charging indication light is flickering; The battery has stopped being charged when it is not
light.
3. When one loading indication light is light, the loads can start to work. When it is not light, the loads can’t
normally work.
Warning:
1. Please check the rated voltage of solar panel, battery and loads before connecting. Their rated voltage
should be 12v.
2. Pay more attention to “+”and “-” poles on the correct ports of solar panel, battery, controller and loads
during the connecting process.
3. The rated current of solar panel and loads should be kept lower than controller’s.