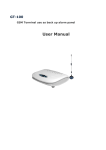
Download GSM Single Display Payphone 201 User Manual
Transcript
GSM Single Display Payphone 201 User Manual Contents Caution, Storage, Basic Features………………………………………………………….…... 3 I. The sketch of telephone……………………………………………………………………...4 II. Install SIM card…………………………………………………………………….…..….5 III. Power on…………………………………………………………………………….……5 IV. Power off…………………………….…………………………………………………... 6 V. Menu Tree...………………………………………………………………………………..6 Select gateway…………………………………………………………………………...7 Make calls………………………………………………………………………………7 Force the dialed telephone number to be transmitted direct………………………………………………....8 Receive incoming calls………………………………………………………………………………..... 8 Read, forward and delete short messages……………………….. ………………………………………..9 Writing and sending short message……………………………………………………………………… 10 Notes: the edit of short message………………………………………………………………………………..... 12 Inquire the dialed calls and the information for sent message ……………………………………………...12 Inquire information for received calls……………………………………………………………………..…….13 Inquire missed calls…………………………………………………………………………………… 14 Inquire call charge statistics……………………………………………………………………………………. 14 Clear call lists…………………………………………………………………………………………………... 15 Clear call statistic………………………………………………………………………………………………. 15 Telephone book………………………………………………………………………………………………… 16 Hot keys………………………………………………………………………………………………………... 17 Menu keypad tones…………………………………………………………………………………………….. 17 Ringing tones level…………………………………………………………………………………….……….. 17 Settings……………………………………………………………………………………………….…………18 I. Enter the Settings Procedures……………………………………………………………………………………..18 II. Setup the phone parameters……………………………………………………………………………...………18 1
Modify Setup information…………………………………………………………………………….…….18 2
Short Message Centre setup…………………………………………………………………………...……19 3
Network Management System Centre Setup..........................................................................................…...20 4
Set‐up Prefix for Barred No……………………………………………………………………………..….20 5
Set‐up for IDD Prefix, DDD Prefix, LOCAL Prefix and Mobile Phone Prefix…………………………....21 6
Setup for Tariff and GNP……………………………………………………………………………...……22 7
Change Owner Pin..................................................................................................................................…...26 8
Setup Currency Types……………………………………………………………………………...……….26 9
Setup Date & Time..................................................................................................................................…...27 10
Set up the Gateway Number and parameter.........................................................................................…...27 1
Inquire IMEI code and software version and hardware version……………………………………..………….31 2
Change User Pin………………………………………………………………………………………….……..32 Lock keyboard for charging from the customers………………………………………………………….…….32 3
25. Setup local phone number…………………………………………………………………………….…………32 VIII. Appendix……………………………………………………………………………………………...34 1
2
Technical Specification………………………………………………………………………………………........34 Troubleshooting…………………………………………………………………………………………………...34 Caution: 1
This phone should not be used at garage, oil storage, chemical plant or near to any inflammable or explosive substance. 2
This telephone should be avoided in the hospital. It will interfere with medical electronic equipments such as pacemaker and audiphones. 3
If it is found that the telephone is not successful in login onto network, please check whether the SIM card or antenna is well installed. 4
The telephone does not identify the old SIM card of 5V and 1.8V. 5
It is forbidden to touch the antenna when the phone is being used. (Being making calls or receiving calls), otherwise the telephone will be damaged. This kind of damage is beyond the range of warranty. 6
When the telephone is being used, it should be placed where signal is strong enough. In order to ensure good voice quality, the telephone should be far from other electronic equipment. 7
Don’t use chemic substance to clean the telephone, but use dry soft cloth to clean it. 8
Don't disassemble the telephone by yourself. If there is any problem, please contract the authorized personnel. Storage: 1
2
3
The telephone that is packed or not could piled up no more than 10 layers. The telephone should be saved in the ventilate and dry place. Don’t knock the telephone to avoid breaking the case. Basic Features: 1
For making calls, the users can lift the handset or press “Hand Free” button, the LCD will shows “PRESS OK TO REDIAL”, then dial upon hearing the dialing tone. When LCD shows “PRESS OK TO REDIAL”, press “OK” key and the phone will dial the last dialed numbers. 2
During a call, press “UP” or “DOWN” key to adjust the voice volume. While pressing “Hand Free” during a call will disconnected the call. 3
When there is incoming calls, the telephone rings and displays the incoming call number Lift the telephone or press “Hand Free” to answer it. Press “CANCEL” to reject the calls. 4
Press “MENU” key to go into the list of menu. 5
After enter menu, press “UP” key and “DOWN” key to scroll the content you are viewing, press “OK” key to confirm your operation, press “BACK” key to cancel your operation and return to the previous menu. During the edit of the input, press “CANCEL” key to cancel the last character of the inputting line, press “DELETE” key to delete the whole inputting line. 6
Press the corresponding key to enter the entry of menu. For example, for menu “4:PHONE BOOK”, Press “4” key to enter “PHONE BOOK”. 7
For selecting gateway, press “GATEWAY” key will display the list of gateways. Press “F1” and “F2” to scroll up and down the list of gateways, then press “CONFIRM” to select the gateway. I. The sketch of the telephone Hand‐Free The Facade Of the Phone Bottom Of the Phone II. Install SIM card 1
Screw off the screw of SIM card case, and open the cover. 2
Slide back the SIM card door and lift it up. 3
Slide the SIM card into the SIM door making sure that the clipped corner of the SIM card lines up with the clipped corner of the SIM holder. 4
Close the SIM card door and slide it to lock the SIM card in place. 5
Replace the cover of SIM card case and fixes it with a screw. III. Power on Connect the input end of the power adapter to main power socket, and the output end connects to the power supply port of telephone. The telephone begins to search for the network, and the LCD shows “SEARCHING FOR NETWORK”, “INITIALIZATION”, “READ SIM PHONEBOOK” in turn. When the LCD shows icons operator name, time and the signal, etc., login is finished. When the telephone is connected to external power supply through power adapter, LCD displays as follows: Time 01/01/2000 01:40 Date When there is no external power supply and batteries are being used, the icon ‘ the icon ’ with be replaced by STANDBY 01/01/2000 01:40 01/01/2000 01:40 Notice:Please recharge the battery when the warning icon for batteries appears. Otherwise the telephone will be halted. Then all the telephone’s functions will be ended. If the telephone has been halted, please connect the telephone to external power supply and push the switch to “ON” side, the telephone will work normally. IV. Power off Shut off the main power and push the power switch to “OFF” side, the telephone will be turned off and the LCD is cleared. V. Menu Tree NOTICE: In main menu, users can’t enter “SETTINGS” menu unless input the correct setting password.. In “CALL REGISTER” menu, user’s password is valid for erasing “CALL LISTS”, erasing “CALL STATISTICS”, “Reset Accumulated Charges” and “Menu‐Locking” enable and disable. Please notice that user’s password and setting password are not the same. The default settings password is “30459086” and the default user’s password is “64139025” NETWORK NAME STANDBY 01/05/2005 15:12 1. Select gateway a) In standby status, press “Gateway” the LCD display as following SELECT GATEWAYNO.1 12345678 b) Press “F1” and “F2” to select gateway. Press “CONFIRM” to save the selection. NO.1 is the serial code of the gateway and “12345678” is gateway’s number. If the number of gateway is not setup, “<NULL>” will be shown replacing “12345678”. 2. Make calls a) Lift the handset or press “Hand Free” button, the LCD shows “PRESS OK TO REDIAL”, dial upon hearing the dialing tone b)On completion of dialing digits, press “OK” to send the dialed telephone number. If there is no dialing for continuous 6 seconds, and the dialed number is 2 digits or is more than 2 digits, the telephone will send out the number automatically. The LCD shows number sending indication. If the number dialed is less than 2 digits and there is not any dialing for continuous 6s, the telephone will return to standby status. CALLING … 12345678 c) If the dialed number is a barred one, the LCD shows “BARRED NO.” and returns to standby status. BARRED NO. 12345678 c) If the dialed number is transmitted directly and gateways aren’t been used, the telephone starts timing and recording charge for the call as soon as the called is answered. If the dialed number is transmitted through gateway, the LCD displays “CALLING GATEWAY X”, “CONNECTED GATEWAY”, “SENDING PASSWORD” in turn. When the gateway is connected, LCD displays “SENDING CALLED NO.”, “SENDING #” to send the dialed number, and then “PRESS F1 TO SPEAK” will be displayed. When the dialed part answers the call, press “REPORT”, the phone start timing and recording charges. The LCD displays accumulated call times “XX”, the tariff “XX.XX/XXs”, current call charge “USD:XX.XX”, call duration “h:mm:ss” and accumulated call charge “FEE:XX.XX”.the as following example. 02 0.00/60s USD: 0.00 0:00:12 FEE: 3.00
12345678 During a call, press the numeral key or “*” or “#” to output corresponding Dual Tone Multiple Frequency (DTMF); During a call, press “Up” or “Down” to adjust volume. d)Flap hook unit or press “Hand Free”, the line will be disconnected. 3. Force the dialed telephone number to be transmitted direct. If the customers want to transmit their dialed call direct and don’t use gateway, they can press “11” before pressing their telephone number. For example, the telephone number the customer wants to dial is 87654321 and it is setup to be transmitted through gateway, the customer should dial 1187654321. 4. Receive incoming calls a)When there is incoming calls, the telephone rings and displays the incoming call number Lift the telephone or press “Hand Free” to answer it. Also you can press “Cancel” to reject it. 12345678 b)When the call is connected, the telephone begins timing and recording charges bill. The LCD shows accumulated call times “XX”, the tariff “XX.XX/XXs”, current call charge “USD: XX.XX”, call duration “h:mm:ss” , and accumulated call charge “FEE:XX.XX”. 0:00:12 02 0.00/60s USD: 0.00 FEE: 3.00 12345678 c) During a call, press “Up” or “Down” to adjust the volume; d) If there is an incoming call and its number isn’t displayed on LCD, when it is being answered, the incoming call number will be displayed as “0000”. 5. Read, forward and delete short messages When a short message is received, the phone will send out a short ring tone to indicate the arrival of the new short message. The icon “ ”will be displayed on the LCD. a) Press “1” to enter menu “1:READ MESSAGES” to read short message lists. 1:READ MESSAGES 01/03 2:WRITE MESSAGES 3:CALL REGISTER j b) Press “Up” and “Down” to select the short message the users want to read. The selected one will be market with “→” on the left. →01: SMS UNREAD 02: SMS READ 03: SMS READ j c) Press “OK” to read it. d) Press “Up” and “Down” to look through the short message and the correlative information, such as the sender’s telephone number, sending date and sending time. e) Press “OK” to enter reply and forward menu. 1
REPLY 2
FORWARD 0. BACK f) Press “1” to enter the edit of the replying short message. When the short message is not empty, press “OK”, the LCD displays as follows. SEND TO: 12345678 i) Press “OK”, the LCD display as follows. SEND?YES:OK N0:BACK ii) Press “OK” to send short message, press “Back” to return to the edit of short message. g) Press “2” to enter the edit of the short message that the users want to forward. On the completion of edit, press “OK” to send it. h)In short message lists status or when short message is read, press “Cancel” or “Delete” to delete message. The LCD will display as follows. ERASE MESSAGES 0: NO 1:YES Press “0” to cancel the operation and return to short message lists. Press “1” to confirm the delete operation and return to short message lists. MESSAGES ERASED 6. Writing and sending short message Users can write a message that is not longer than 160 English characters, each line for the text area can input of 20 characters. Short message center must be set up for sending or receiving short message. (Please refer to Settings below on page 19 for SMS center setting). 1:READ MESSAGES 00/02 2:WRITE MESSAGES 3:CALL REGISTER j a) Press “2” to enter menu “2: WRITE MESSAGE” to enter the text area for writing messages. When the phone enters the text area, the LCD displays as below. ABC _ b)Input the contents of the short message through keyboard (For details please refer to “Notes: the edit of short message” on page below). On the completion of writing messages, press “OK”, the LCD will display as follows: SEND TO: 12345678 c) Input the telephone number of the receiver. Press “OK”, the LCD displays as: SEND?YES:OK N0:BACK Press “OK” to send this message; press “Back” to return to the edit of short message. d) If the short message is sent successfully, the LCD displays “DONE” and return to the up‐level menu, otherwise the LCD displays “FAILED” and then returns to the edit of short message. DONE FAILED Notes: The edit of short message. a)During the writing of short messages, the cursor is flashing. Press “Back” to return to cancel the edit and return to the up‐level menu. b) Press “123/ABC”to switch among three inputting modes: capital letter (ABC), small letter (abc) and digit (123). c) Punctuations inputting: In the inputting text area (capital letter and small letter), press “1”continuously, the optional punctuations will be displayed in turn.( Pressing one time is for spacing. Pressing second time onwards will display the punctuations characters. The later punctuations can be input in the same way.), Here is the punctuations characters ( . ? ! , @ & : ; “” – ( ) ‘’ / $ % ¥ ) d) Press respectively“*<” and “#>” to move cursor to right and left. Press “Up” and “Down” to move cursor to the up line and the down line. e) Press “Cancel” to delete the character before the cursor HELLO,ERIC! 7. Inquire the dialed calls and the information for sent message. a)Enter menu press “3” to enter menu “3:CALL REGISTER” then press “1” for “1:DIALED NUMBERS”. 1:READ MESSAGES 00/02 2:WRITE MESSAGES 3:CALL REGISTER j 1:DIALED NUMBERS 2:RECEIVED CALLS 3:MISSED CALLS j b) The LCD shows the information of dialed calls and sent short message. For dialed calls, it shows the information: call date, call time, call duration and call charge and call number. 01: 04/05/2000 10:50 0:00:40 USD: 36.00 12345678 For sent short message, it shows the information: sending date, sending time and charge. “****” indicate this entry is the information of a short message. 01: 04/05/2000 10:50 0:00:00 USD: 1.50 **** c) Press “OK” to redial the dialed call. 8. Inquire information for received calls a) Enter menu press “3” for “3: CALL REGISTER” then press “2” for “2:RECEIVED CALLS” 1:DIALED NUMBERS 2:RECEIVED CALLS 3:MISSED CALLS j b) The LCD shows information of last call: date and time, call duration, call charge and call numbers. 01:06/05/2000 10:50 0:00:35 USD: 655.00 12345678 c) Press “OK” to redial the being inquired telephone number. 9. Inquire missed calls a) If there are some missed incoming calls that have not been inquired, the LCD shows “X MISSED CALLS” (X refers to the count of missed incoming calls). Enter menu “3: MISSED CALLS” 1:DIALED NUMBERS 2:RECEIVED CALLS 3:MISSED CALLS j c) The LCD shows information of missed calls: call date and call time and telephone number. 12345678 d) Press “OK” to call the being inquired telephone number. 10. Inquire call charge statistics a)Enter menu “4: CALL STATISTICS” to inquire the information for the statistic of dialed calls: all calls, IDD (international long‐distance) call, DDD (domestic long‐distance) calls, mobile calls, local calls, received calls and sent short messages. 2:RECEIVED CALLS i3:MISSED CALLS 4:CALLSTATISTICS j b) The LCD shows the accumulations of call charge and call duration. c) Press “Down” to inquire the accumulations of call charge and call duration for all calls, IDD, DDD, mobile telephone, local fixed, incoming calls, sent SMS in turn. ALL CALLSCOSTS: 5.64DURAS: 0000:01:40 11. Clear call lists a) Select menu “5: ERASE CALL LISTS” 5: ERASE CALL LISTS j b) The LCD shows “ENTER PASSWORD”, input an 8‐digit user password (the initial user’s password is 64139025). ENTER USER PIN******** d) Press “OK”. If the password is error, it indicates “PIN ERROR” and returns to the previous menu. If the password is correct, the LCD shows as follows: ERASE CALL LISTS? YES:1 NO:0 e) Press “1” to erase call lists (outgoing calls, incoming calls and missed calls), press “0” to cancel the operation and return to the up‐level menu. 12. Clear call statistic a) Enter menu “6: ERASE STATISTICS” 5: ERASE CALL LISTS 6: ERASE STATISTICS j b) The LCD shows “ENTER USER PIN”. Input an 8‐digit user’s password (the initial user’s password is 64139025). ENTER USER PIN ******** c) Press “OK”. If the password is error, it will display “PIN ERROR” and then returns to the up level menu. If the user’s password is correct, the LCD will show as follows: ERASE STATISTICS?YES:1 NO:0 d) Press “1” to erase call statistics and then return to the up‐level menu. Press “0” to cancel the operation ant return to the up‐level menu. 13. Telephone book The telephone book can save 30 entries including name and telephone number. 4: PHONE BOOK i 5: KEYPAD TONES 6:RINGINT TONES j a) Enter the menu “4: PHONE BOOK”. b) Press “UP” or “DOWN” to select the entry that you want to edit (The selected entry will be marked with a “Æ” on its left). Æ01:JACK i02:ANNA 03:SMISH j c) Press “Menu” to enter the edit of the selected entry. The LCD shows: d) Press “UP” or “DOWN” to select what you want to edit:name or telephone number (the entry selected by you will be marked with a “Æ” on its left). Press “Cancel” to cancel one character and press “Delete” to cancel the whole input line during your edit. On the completion, press “OK” to save your edit. e) Dial the telephone number in the Phone Book i) Enter the menu “4: PHONE BOOK” ii) Press “UP” or “DOWN” Select the entry that you want to call. (The entry you selected will be marked with a “Æ” on the left). Æ01:JACK i02:ANNA 03:SMISH j iii) Press “OK” to call it. 14. Hot keys Press a single digital key to call the corresponding entry that is saved in telephone book. For example, press “1” to call the first entry of the Phone Book, and press “2” to call the second entry. 10 entries can be called by this way that is saved in telephone book from the first to the tenth. Process as follows: a) Lift up the handset or press “Hand‐Free”. b) Press the appropriate digital key (1 – 0). c) Press “OK”. 15. Menu keypad tones a) Enter menu “5:KEYPAD TONES”. b) Press “1”, the keypad tone will be on. Press “0”, the keypad tone will be off. KEYPAD TONES 1:ON 0:OFF 1 16. Ringing tones level Two levels is optional. a) Enter menu “6:RINGING TONES LEVEL”. b)Press “1”, ringing tone will be setup as high. Press “0”, ringing tone will be setup as low. RINGING TONE LEVEL 0:LOW 1:HIGH 1 17. SETTINGS I. Enter the Settings procedures (a) Press “MENU” in hook‐on, LCD shows main menu list , Press “UP” or “DOWN” until you see “7: SETTINGS”. 7: SETTINGS 8: IMEI‐VERSION 9: CHANGE USER PIN j (b) Press “7”, the LCD shows "ENTER OWNER PIN", Input 8‐digit Password (the Initial Password for factory leaving is sets up as 30459086) and Press “OK” ENTER OWNER PIN ******** (c) If the password is correct, the display shows set‐up menu List, otherwise it indicates “PIN ERROR” and returns to the status of main menu list; 1: LOCK SETTING 2: SMS CENTER 3: NMS CENTER j II. Set up the phone parameters (1) Modify Setup Information (a) Press “1” in Set‐up menu to select “LOCK SETTING”. (b) Input 8‐digit numbers WXYZCRIJ to set up locking card, locking phone, whether allowed to receive calls, whether locking keypad after finish call etc. (The default value is 00001111,i.e., no locking card, no locking phone, allow to receive calls). Press " BACK” to return to the set‐up menu; LOCK SETTING 00001111 W = 0: not locking card, W = 1: locking card;X = 0: not locking phone, X = 1: locking phone;I = 0: not allowed to receive calls, I = 1: allowed to receive calls;J = 0: not locking keypad after finish call J = 1: locking keypad after finish call Y, Z, C, R are backup digits. Notes: (i) When W is 1 and X is 1 at the same time, it will be locking phone and locking card concurrently. (ii) Remember to Reboot the Phone after setting the locking card or locking Phone. Card locking: Add password to SIM card to limit SIM card’s applications in other types of mobile phone; Phone locking: The phone only identify SIM card first set up, the phone cannot be used when other cards are applied; No allow to use other SIM card in this phone; Not allowed to receive calls: If there is an incoming call, the phone will not ring and cut off. (2) Short Message Centre set‐up In the settings menu, press “2” to select “SMS CENTRE”, LCD shows “SMS CENTRE”. Press “DELETE” to clear the input line. Press “123/ABC” to switch input numbers or characters or “+”. Press “1” to input “+” in “ABC” input status. Input SMS center number by pressing number keys in “123” input status. Press “OK” or “BACK” to return to the set‐up menu. 123 SMS CENTRE +60120000015 (3) Network Management System Centre set‐up (Optional Function) In the settings menu, press “3” to select “NMS CENTRE”, LCD shows “NMS CENTRE”. Press “DELETE” to clear the input line. Press “123/ABC” to switch input numbers or characters or “+”. Press “1” to input “+” in “ABC” input status. Input SMS center number by pressing number keys in “123” input status. Press “OK” or “BACK” to return to the set‐up menu. (4) Setup Prefix for Barred No. 4: PREFIXED NO. i 5: TARIFF TABLE 6: PASSWORD j (a) Press “4” in set‐up menu to select “PREFIXED NO.”. LCD shows GNP menu; (b) Press “1” to select “1: BARRED PREFIXES” to set up Barred No. Prefix; (c) Press the number from the Keypad to input the number for the Barred Prefixes. Press “OK” to input the next number after input of a certain number. Press “DELETE” to clear the whole Number. Press “CANCEL” to delete the last digit of number displayed. Press “OK” to erase a certain number after deleting it; add the number after viewing the last number. There are able to set 15 numbers at the maximum. Press “BACK” to return to GNP menu: BARRED PREFIXES 1: (d) 16 After set‐up for the Barred Prefixes Number, the phone will automatically barred the Number which starting with the barred prefix. (Example: Set 16 in the barred prefixes, when the user calls the number which starts with 16, the phone will show “BARRED NO.”) (5) Setup for IDD Prefix, DDD Prefix, LOCAL Prefix and Mobile Phone Prefix (a) Press “4” in set‐up menu to select “PREFIXED NO.”. LCD shows GNP menu; 1: BARRED PREFIXES 2: IDD PREFIXES 3: DDD PREFIXES j 4: MOBILE PREFIXES i 5: LOCAL PREFIXES BACK: BACK (b) Press “2”, “3”, “4”and “5” to enter respectively to set‐up for IDD prefixes, DDD prefixes, Mobile Phone Prefixes, Local Prefixes. (c) Press the number from the Keypad to input the number for the Prefixes. Press “OK” or “DOWN” to proceed input the next number after input of a certain number. Press “DELETE” to clear the whole Number. Press “CANCEL” to delete the last digit of number displayed. Press “UP” or “DOWN” to view the input prefixes. Press “BACK” to return to GNP menu. (d) There are able to set 15 numbers at the maximum. (Note: All the settings for the IDD Prefix, DDD Prefix, Mobile Phone Prefix and Local Prefixes will be used in the call charges calculation) (e) IDD Prefix Set up international long distance matching prefix such as “00”. After the set‐up of this prefix, IDD traffic can be calculated accordingly. IDD PREFIXES 1: 00 (e)DDD Prefix Set up domestic long distance matching prefix, such as “02, 03…09”. After the set‐up of this prefix, DDD traffic can be calculated accordingly. DDD PREFIXES 1: 02 (f) Mobile phone prefix Set up the mobile phone matching prefix, after the set‐up, the mobile phone traffic can be calculated accordingly. MOBILE PREFIXES 1: 01 (g)Local fixed phone prefix Set up local fixed phone prefix, after the set‐up, the local fixed phone traffic can be calculated accordingly. After the set‐up, press “BACK”to return to GNP menu, where you press “BACK”to return to set‐up menu. LOCALPREFIXES 1: 26 (6) Setup for Tariff and GNP (Optional Function) Note: (i) Tariff and GNP will be parallelism. Each tariff will be parallelism with one GNP. When phone calculating bill, to search until matching the tariff, Press Tariff (ii) 01 until Tariff 230. So, if the starting number for the tariff having a number of another GNP, then it will give first preference from another. Example: The number which starting with “0” will include 00, 01, 02 etc., but the starting number of 00 is IDD Prefix, so the IDD Prefix will be in first preference before the DDD prefix. (iii) When changing the parameter or set‐up the tariff, Press “OK” to save and “BACK” to return to last menu. (iv) Barred Prefix and the number not set in the Tariff Table will be barred. (v) Must set up allowed receiving incoming calls to enable tariff set‐up. If it is set up as not allow receiving calls, the phone will reject all incoming calls. (a) Press “5” in set‐up menu to select “TARIFF TABLE”, LCD shows tariff menu; (b) Press “0” to set‐up for Tariff 01 4: PREFIXED NO. 5: TARIFF TABLE i
j 6: PASSWORD TARIFF 01 .T: 00 0 0 0 0 0 F: 0 0 0 0 0 0 0 0 NUM: When you enter the tariff set‐up, the display shows “T: 0000000 F: 00000000 NUM: ” T: stands for whether go through Gateway and Billing unit time duration set up. The format is fT0T1. f confirms whether the number go through Gateway (1 Digit). “1” = automatically go through Gateway. “0” = not go through Gateway. “T0” = first time billing time duration [3 digits: 000‐250 (unit: second)]. “T1” = billing duration after the first time [3 digits: 000‐250 (unit: second)]. “T0” = phone will barred from calling out the number in the tariff. Press “DELETE” to clear the input row. Press the Keypad to enter the number. Press “CANCEL” to delete the last digit of number displayed. Press “OK” to save and next step to set‐up “F”. F: stands for time duration for call charges. The format is F0F1. F0 is the first time charge rate for n time section (4 digits: 0000‐9999). F1 is the first time charge rate for n time section (4 digits: 0000‐9999) after the first time. Press “DELETE” to clear the input row. Press the Keypad to enter the number. Press “CANCEL” to delete the last digit of number displayed. Note:If the time charge rate not enough 4 digits, just add “0” in front of the time charge rate. Example: The number starting with 123456 will be charge 250 units is for the first 30 second, then 240 units is charged for the following 30 seconds. TARIFF 01 .T: 1 0 3 0 0 3 0 F: 0 2 5 0 0 2 4 0 NUM: 123456 NUM:Press the Keypad to enter number. Press “CANCEL” to delete the last digit of number displayed. Press “OK” to save and next step to set‐up the Tariff. Note: Able to set‐up 230 Tariff & Number. Press “BACK” to return to tariff menu. (c) Press “1” to Add Tariff and Number; 0: TARIFF 01 1: ADD TARIFF 2: GO TO TARIFF NO. j After Press “1”, the phone will automatically search the Tariff Table until find a Tariff “N” which not yet enters the Tariff. Example: From the LCD below show Tariff 15 as not yet enter number. TARIFF 01 .T:0 0 0 0 0 0 0 F:0 0 0 0 0 0 0 0 NUM: (d) Press “2” to go to certain Tariff in the Tariff Table. 0: TARIFF 01 1: ADD TARIFF 2: GO TO TARIFF NO. j After Press “2”, LCD show; GO TO TARIFF NO. ( 1 ‐230 ) 30 Press the Keypad to enter the Tariff Number that needed. Press “OK” to directly to that Tariff. Press “BACK” to return to last menu. (e) Set‐up Incoming Call Tariff Press “3” to set‐up Incoming Call Tariff; 3: RECEIVED CALL i 4: SMS TARIFF #: ERASE ALL TARIFF j After Press “3”, LCD show; TARIFF – RECEIVED .T: 0 0 0 0 0 0 0 F: 0 0 0 0 0 0 0 0 The setting for the Incoming Call Tariff and Outgoing Call Tariff is similar. Note: (i) In Incoming Call Tariff, f does not have any function. (ii) Must set up allowed receiving incoming calls to enable tariff set‐up. If it is set up as not allow receiving calls, the phone will reject all the incoming calls. (iii) In the Incoming Call Tariff does not need to set‐up for the Number that received. (f) Set‐up SMS Tariff Press “4” to set‐up SMS Tariff; 3: RECEIVED CALL i 4: SMS TARIFF #: ERASE ALL TARIFF j
LCD show; SMS TARIFF 0 0 0 0 Tariff. Press “CANCEL” to delete the last digit of number displayed. Press “OK” to save and return to last menu. Press “BACK” to return to last menu. (g) Erase All Tariff and Number Press “3” to delete the Tariff from the Tariff Table. LCD show; ERASE ALL TARIFF ? 0:NO 1:YES Press “1” to delete all tariffs. Press “0” to return to last menu. (7) Change Owner Pin In Settings, press “6” to select “CHANGE OWNER PIN”, screen shows “NEW OWNER PIN”, press “OK” after input new password, the display shows “REENTER OWNER PIN”, input again the new password and press “OK”. If the twice password input is in compliance, it saves successful, the display shows “CHANGED” to return to the set‐up menu, otherwise the LCD shows “FAILED” and returns to the set‐up menu. CHANGE OWNER PIN ******** Note: This Password is used to enter into Settings Menu. (8) Setup Currency Types (Optional Function) Press “7” to select “CURRENCY SETTINGS”. LCD show “CURRENCY NAME‐SYMBOL” and currently used currency name, currency standard symbol. CURRENCY NAME‐SYMBOL 2: MALAYSIAN RINGGIT MYR Press “UP”or “DOWN” to select one currency type. Press “OK” to save and return. The currency types are as follows; No. Currency name Symbol Billing display format 0 INDIAN RUPEE INR XX.XX 1 PAKISTAN RUPEE PRK XX.XX 2 MALAYSIAN RINGGIT MYR XX.XX 3 BANGLADESH TAKA BDT XX.XX 4 U.S. DOLLAR USD XX.XX 5 EURO EUR XX.XX 6 CAF FRANC FCFA XXX.X 7 AFC FRANC XOF XXX.X 8 NIGERIAN NAIRA NGN XXX.X 9 MAURITANIA OUGUIYA MRO XXX.X 10 EGYPTIAN POUND EGP XXX.X 11 KENYAN SHILLING KES XXX.X 12 ALGERIAN DINAR DZD XXX.X 13 JORDANIAN DINAR JOD XXX.X 14 RUSSIAN RUBLE SUR XXX.X 15 INDONESIAN RUPIAH IDR XXX.X (9) Setup Date and Time (a) Press “8” to select “8: DATE AND TIME”. LCD show “(YYYYMMDD)(hhmm)” (b) Input the correct date and time: Year (4digits), Month, Day, Hour and Minute. Example: 2005/5/10, 12:30, you should input “200505101230”; DATE AND TIME (YYYYMMDD)(hhmm) 200505101230 (c) Press “OK” to save and return to the set‐up menu. (10) Set up the Gateway Number and parameter (a) Press “#” in set‐up menu to select “GATEWAY SETTINGS” (b) Setup Gateway and parameter: Can be set up to 4 Gateway Number. LCD shows; 4: GATEWAY 4 i#: ERASE ALL GATEWAY BACK: BACK (c) Press “1 – 4” to setup Gateway Number 1 – 4. LCD shows; No.1 1: GATEWAY NO. i 2: LANGUAGE SELECT 3: PASSWORD j (d) Set‐up Gateway Number: Press “1”, the LCD will show “GATEWAY NO.” No.1 GATEWAY NO. 1234567890 Press “DELETE” to delete the Number, and then press the Number in the keypad to enter the Gateway Number. Press “CANCEL” to cancel the last digit number entered. Press “OK” to save and return to the last menu. Press “BACK” to return to the last menu without saving. (e) Setup Language: Press “2”, the LCD shows; No.1 LANGUAGE SELECT ( 0 ‐99 ) 1 Press the Keypad to choose Language Select for the Gateway. Press “CANCEL” to cancel. Press “OK” to save and return to last menu. Press “BACK” to return to the last menu without saving. Note: Language Select can be set 0 – 99. The number will be as same as the Language Select from the Gateway. If the Language Select is Blank, it means the Gateway do not have Language Select. (f) Setup Password: Press “3”, LCD shows; No.1 PASSWORD 1234567890# Press the Keypad to enter the Password for the Gateway. Press “CANCEL” to cancel. Press “OK” to save and return to last menu. Press “BACK” to return to the last menu without saving. Note:If the Gateway needs to enter # key after the Password to confirm, then after the Password enter “#” (g) Setup Time Delay for Language Select, Password and the Destination Number after connect to the Gateway: Press “4”, LCD shows; No.1 DELAY TIME FOR NLP ( 0 – 9 ) 3 Press Keypad to enter the Time Delay. 0 means no time delay (sent out the Language Select, Password and Destination Number straight away after connect to the Gateway). 1 – 9 mean wait for 1 – 9 second after connect to the Gateway, then only sent the following information. Press “CANCEL” to cancel. Press “OK” to save and return to last menu. Press “BACK” to return to the last menu without saving. (h) Set‐up whether adding “#” key after Destination Number: Press “6”, LCD shows; No.1 SEND ‘#’ SELECT 0: NO 1:YES 0 Press “1” to select adding ‘#’ key. Press “0” for not adding ‘#’ key. Press “CANCEL” to cancel. Press “OK” to save and return to last menu. Press “BACK” to return to the last menu without saving. Note:This set‐up is whether adding ‘#’ key after the Destination Number. If need to add ‘#’ key, then press “1”. If no need to add ‘#’ key, then Press “0”. (i) Set‐up Time Delay for # key after Destination Number: Press “5”, LCD shows; No.1 DELAY TIME FOR ‘#’ ( 0 – 9 ) 2 Press Keypad to enter the Time Delay. 0 means no time delay (sent out the # key straight away after the Destination Number). 1 – 9 mean wait for 1 – 9 second after the Destination Number then only sent out the “#”. Press “CANCEL” to cancel. Press “OK” to save and return to last menu. Press “BACK” to return to the last menu without saving. Note:This Application only will effective if set‐up for adding ‘#’ key after Destination Number. (j) Setup the Method for the Gateway if Busy: Press “7”, LCD shows; No.1BUSY MODE0: TONE 1: AUTO0 Press “1” to select not going through Gateway if busy. Press “0” to select give busy tone. (k) Setup for Dialing Speed: Press “8”, LCD shows; No.1DIALING SPEED ( 1 – 4 ) 2 Press “1 – 4” to enter the Dialing Speed for Password and Destination Number. 1 is the slowest, 4 are the fastest, and 2 is the default. Press “CANCEL” to cancel. Press “OK” to save and return to last menu. Press “BACK” to return to the last menu without saving. Note:Dialing Speed should not be set to too fast, if not it will appear sending wrong information (sending wrong number) after connect to the Gateway. (l) Erase the Gateway: Press “#”, LCD shows; No.1ERASE GATEWAY 1? 0:NO 1:YES Press “1” will Erase the Gateway 1 (All information in Gateway 1). Press “0” to return to the last menu without saving. Note: Setting for Erasing the Gateway will be the same for 4 Gateway. 18. Inquire IMEI code and software version and hardware version Enter menu “8. IMEI‐VERSION” to inquire corresponding information. IMEI: 351249000337442 2006/02/20 GS13.00E WT2000‐SS TC35_1 a) Enter menu “9: CHANGE USER PIN” 7:SETTINGS i8:IMEI ‐ VERSION 9:CHANGE USER PIN j b)Input an 8‐digit user’s password (the initial user password is sets up as 64139025). Press “OK”. If the password is error, LCD will display “PIN ERROR” and returns to the up‐level menu. If the password is correct, the LCD shows “NEW USER PIN” ENTER USER PIN ******** c) Press “OK” after input your new password, the LCD shows "NEW USER PIN", input the new password again and press “OK”. If the twice input password is the same, the setting will be successful, the LCD display “CHANGED”, otherwise the LCD will display “FAILED” and return to up‐level menu. NEW USER PIN******** Note: User’s password is used to erase call lists, erase call statistic and Inquire/Reset Accumulated charges. 20. Lock keyboard for charging from the customers (optional function) When a charge call is end, the keyboard will be locked and the phone will ring to indicate the owner to charge. The owner can press “LOCK” to halt the ring and unlock the keyboard. 21. Setup local phone number. Local phone number will be printed as TEL. ID when print call bill. Enter menu “#: LOCAL PHONE NO.” 0:MENU‐LOCK ENABLE i * :PRINT OPTION #: LOCAL PHONE NO. Input the SIM card number of the phone. LOCAL PHONE NO. 12345678 Press to “OK” to save it. VIII.Appendix 1. Technical specification a) Working condition Environment temperature: 0 ~ +50 ゜C Relative humidity: 10%~95%Air pressure: 86~106kPa Environment yawp: ≤60dB(A) b) Working frequency: GSM900MHz/GSM1800 MHz c) Stability of frequency: better then 2.5PPM d) Delicacy of signal: ‐94dBM e) Emission power: <2w f) 220v AC power supply g) Continuous call time duration when using battery: 2‐3 hours h) Continuous standby time duration when using battery: 48‐72 hours (related to network condition) 2. Troubleshooting Phenomena Trouble shootings Can’t make calls or be called in 1. The Voltage of battery is low, please recharge. 2. The battery isn’t connected well. No dial tone when handset is lifted or couldn’t hear voice. During a call. 1. Check the joint of handset and telephone. Please connect them for another time. 2. Matters on handset, replace it with a good one. Voice is too loud and noise exists Can’t work Can’t login the network Echo during call 1. Network signal is weak or is interfered. Move the telephone to a place where signal is better. 2. Voice is too loud. Press “Down” to adjust voice to be lower. 1. Press “ON/OFF” to restart the telephone. 2. Power supply doesn’t connect well. Connect it again. . 3. Power switch is broken. Contact the provider of the telephone. 1. SIM card isn’t fixed well. 2. SIM card is locked, take SIM card out and set it’s PIN to 1234 and disabled. 3. Network signal is unstable. 1. Press “UP” or “DOWN” to adjust volume to be smaller. 2. Network malfunction
;


