1
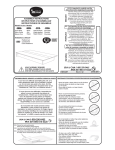
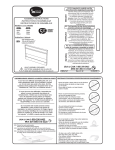
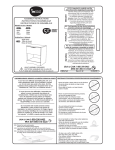
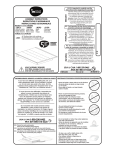
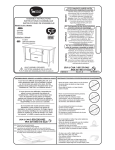
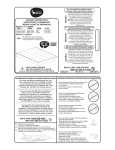
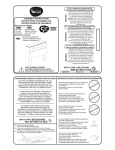
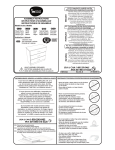
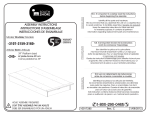
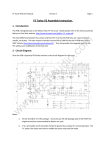
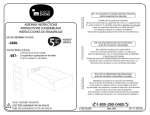
Model/Modèle/ Modelo
-3370-
-3379-
Black
Noir
Negro
Moka
Moka
Moka
Article/ Item / Articulo
60" Platform Bed with moldings
Lit plate-forme et moulures 152 cm
Cama plataforma y molduras 60”
ENGLISH
ESPAÑOL
-215-
FRANÇAIS
ASSEMBLY INSTRUCTIONS
INSTRUCTIONS D’ASSEMBLAGE
INSTRUCCIONES DE ENSAMBLAJE
N.B. It is important to carefully read the
instructions before beginning the assembly.
Identify all the parts and hardware. We
recommend that you assemble the unit
on a carpeted floor to avoid scratches.
To facilitate assembly 2 people are
required. Keep the assembly instructions
for future use and for warranty purposes.
It contains all pertinent information
regarding replacement parts and
maintenance.
N.B. Il est important de bien lire les instructions
avant de commencer l’assemblage.
Bien identifier les pièces et la quincaillerie.
Il est recommandé d’assembler l’unité sur
un tapis pour éviter les égratignures. Pour
un assemblage facile et agréable ; 2
personnes sont requises. Gardez les
instructions d’assemblage pour utilisation
future et pour la garantie. Elles
contiennent toutes les informations pour
un remplacement de pièce ou pour
l’entretien périodique.
N.B. lea con detenimiento las instrucciones
antes de comenzar a ensamblar su mueble.
Identifique las piezas y los articulos de
ferretería. Se recomienda ensamblar la
unidad sobre una alfombra, para evitar
los rasguños. Para un ensamble mas fácil
se necesitan dos personas. Guarde el
instructivo de ensamble para un futuro
uso y para usos de garantía. Este
instructivo contiene toda la informacion
necesaria para una sustitución de pieza o
mantenimiento periodico.
ADULT ASSEMBLY REQUIRED
DOIT ÊTRE ASSEMBLÉ PAR UN ADULTE
DEBE SER ENSAMBLADO POR UN ADULTO
CUSTOMERS SERVICE / SERVICE À LA CLIENTÈLE / SERVICIO AL CLIENTE
if you have any difficulty assembling this unit, or to
order replacement parts, do not hesitate to contact
us. Do not return any parts to the store, find the
number(s) of the part(s) in the “Exploded view” or the
“Hardware list”, and CALL our customer service !
USA & CAN: 1-800-290-0465
MEX: 001-800-514-5320
10016765
Rev.:B1 JZ
MAINTENANCE TIPS/CONSEILS D’ENTRETIEN/CONSEJOS DE MANTENIMIENTO
- Never let liquids or damp cloths sit on this furniture.
- Ne jamais laisser de liquide ou linge humide
sur le meuble.
- Nunca deje un líquido o un trapo húmedo
sobre el mueble.
Si vous éprouvez des difficultés à assembler les
pièces, ou pour commander des pièces de
remplacement, n’hésitez pas à communiquer avec
nous. Ne rapporter aucune pièces au magasin,
repérez le(s) numéro(s) de(s) pièce(s) en question,
dansla “Vue explosée” ou “la liste de quincaillerie”, et
TÉLÉPHONEZ à notre service à la clientèle.
- Never use ammonia-based cleaning products,
as they will damage the finish.
- Ne jamais utiliser de nettoyeur à base
d'ammoniaque, cela va endommager le fini.
- Nunca utilice un producto de limpieza a base
de amoníaco, esto dañará el acabado.
Si el ensamble del mueble presenta ciertas
dificultades o para enviarle unas piezas de
reemplazo, no dude en llamarnos. No traiga ninguna
pieza a la tienda. Identifique el o los numeros de las
piezas en cuestión en “la lista de herraje” o la “visión
de conjunto” y LLAME a nuestro servicio al cliente.
- To avoid dulling of the finish, do not place
furniture in direct sunlight.
- Ne pas placer le meuble directement au soleil
pour prévenir le ternissement.
- No exponga el mueble directamente al sol para
prevenir empañamiento.
USA & CAN:1-800-290-0465
MEX: 001-800-514-5320
N.B.: Discard two end packing parts.
These are for protection during shipping.
N.B.: Les pièces aux extrémités de la boîte ne vous sont d’aucune
utilité pour l’assemblage du meuble. Ce ne sont que des protecteurs.
N.B.: Las piezas en las extremidades de la caja son inútiles para ensamblar
el mueble. Sirven únicamente para protejerlo.
28/04/2011
- Do not put plastic or rubber rings under appliances.
Use cloth of felt protectors.
- Évitez de déposer des appareils avec des rondelles
de plastique ou de caoutchouc. Utilisez un
protecteur en tissu ou en feutre.
- Evite apoyar aparatos con redondeles de plástico
o de goma. Utilizar un protector de tela o de fieltro.
- To clean, use a soft or slightly damp cloth,
then wipe with a clean, dry cloth.
- Pour nettoyer, utilisez un linge doux ou
légèrement humecté.
Essuyez par la suite avec un linge propre et sec.
- Para limpiar, utilice un trapo suave o ligeramente
humedecido. Seque luego con un trapo limpio y seco.
HOW TO USE THE DOWEL(-144-) AND THE ECCENTRIC NUT(-158-)
EXEMPLE D'UTILISATION (GOUJON(-144-) ET ECROU(-158-))
EJEMPLO DE UTILIZACIÓN (CLAVIJA(-144-) Y TUERCA EXCÉNTRICA(-158-)
FRANÇAIS
ENGLISH
A. Fully insertthe “quick fit dowel -144-”
B. To withdraw the “quick fit dowel -144-",
do not use any tool , unscrew it with the hand.
A. Introduzca el “clavija -144-” hasta el fondo
A. Insérer jusqu’au fond le «goujon à
en todos los agujeros mencionados.
B. Pour retirer le «goujon à enfoncer -144-»,
B. Para retirar el “clavija -144-”, no utilizar
n’utiliser aucun outil, dévisser le à la main.
herramientas, desatornillar el a la mano.
C. With your thumb, insert the “eccentric-nut -158-” C. Avec le pouce, insérer
into the specified holes with the arrow pointing
towards the insertion hole.
D. Insert the pieces into one another and make
sure they are completely united .
E. To lock the pieces together, turn (tighten)
the “eccentric-nut -158-” to the right for
slightly more than half a turn.
-158-
ESPAÑOL
enfoncer -144-» dans les trous mentionnés.
into the specified holes.
C. Introduzca con el pulgar la “tuerca excéntrica
«l’écrou excentrique
-158-» dans les trous mentionnés,
la flèche vers le trou d’insertion.
-158-” en los agujeros mencionados, con la
flecha apuntando hacia el agujero de inserción.
D. Joindre les pièces l’une dans l’autre et s’assurer D . Una las piezas entre sí. Asegúrese
de que se encuentren bien unidas.
qu’elles sont bien unies l’une contre l’autre .
E. Haga girar hacia la derecha y ajuste la “tuerca
E. Tourner (serrer) «l’écrou excentrique -158-»
excéntrica -158-” dando algo más que una
media vuelta para que las piezas queden
atrancadas.
vers la droite, un peu plus d’un demi tour ,
pour bloquer les pièces ensemble.
C
B
A
-144-
D
E
-144-
-144-
or
ou
o
-158-158-158-
-158-
*** THINGS TO REMEMBER FOR ASSEMBLING/À RETENIR LORS DE L'ASSEMBLAGE / A RECORDAR DURANTE EL ENSAMBLAJE***
FOR YOUR INFORMATION ONLY
POUR INFORMATION SEULEMENT
A TÍTULO INFORMATIVO
-EXPLODED VIEW (Piece numbers for reference)FACING THE UNIT
-VUE EXPLOSÉE (Numéros des pièces pour références)FACE AU MEUBLE
-VISIÓN DE CONJUNTO (Número de las piezas para referencia)FRENTE AL MUEBLE
33XX-215
B-1
B
B
B-2
P
L-1
H
H-1
LEFT SIDE
CÔTÉ GAUCHE
LADO IZQUIERDO
L-2
H-1
H
L-2
RIGHT SIDE
CÔTÉ DROIT
LADO DERECHO
L
N
S-1
L
T
U
S
- All parts are marked out or labelled on one side.
- Toutes les pièces sont repérées par marquage sur
un des côtés, ou par étiquetege sur une des faces.
- Todas las piezas están identificadas con una marca
en los dos lados o con etiquetas en una de las caras.
R
CODE
CODE
CODIGO
QTY
HARDWARE DESCRIPTION
QTE
DESCRIPTION DE LA QUINCAILLERIE
CANTIDAD DESCRIPCION DE LA FERRETERÍA
CODE
CODE
CODIGO
QTY
HARDWARE DESCRIPTION
QTE
DESCRIPTION DE LA QUINCAILLERIE
CANTIDAD DESCRIPCION DE LA FERRETERÍA
6
10
FELT
FEUTRE
FIELTRO
231
37
87
8
1" HANDLE SCREW
VIS 1" POUR POIGNÉE
TORNILLO 1" PARA MANIJA
257
Pair
X1 Pair
Par
DRAWER SLIDE FULL EXTENSION
COULISSE PLEINE EXTENSION
CORREDERA DE EXTENSION TOTAL
92
8
10 MM EURO SCREW
VIS EURO 10 MM
TORNILLO EURO 10 MM
258
Pair
X1 Pair
Par
ATTACHING DRAWER SLIDE
FIXATION TIROIR COULISSE
CORREDERA DE SUJECION PARA CAJON
101
6
13,3mm FLAT HEAD SCREW
VIS 13,3mm TÊTE PLATE
TORNILLO 13,3mm CABEZA PLANA
278
2
14 MM EURO SCREW
VIS EURO 14 MM
TORNILLO EURO 14 MM
106
6
CRENELATED NAIL
CLOU CRÉNELÉ
CLAVO DENTADO
299
28
6 x 36 FLAT HEAD SCREW
VIS 6 x 36 TÊTE PLATE
TORNILLO 6 X 36 CABEZA PLANA
111
2
1 1/4" FLAT HEAD SCREW
VIS 1 1/4" TÊTE PLATE
TORNILLO 1 1/4" CABEZA PLANA
393
8
8/32 x 10 INSERTION
INSERTION 8/32 x 10
INSERCION 8/32 x 10
131
1
HEXAGONAL KEY
CLÉ HEXAGONALE
LLAVE HEXAGONAL
Z-01
2
WOODEN PIECE (156mm)
BLOC DE BOIS (156mm)
BLOQUE DE MADERA (156mm)
144
2
QUICK FIT DOWEL
GOUJON À ENFONCER
CLAVIJA DE FIJACIÓN
158
2
15 X 12 MM CAM KLIX
ÉCROU KLIX 15 X 12 MM
TUERCA KLIX 15 X 12 MM
160
20
ASSEMBLING SCREW 50 mm
VIS D'ASSEMBLAGE 50mm
TORNILLO DE ENSAMBLE 50mm
170
15
PLASTIC CAP
CAPUCHON DE PLASTIQUE
CAPUCHÓN PLÁSTICO
184
2
FIXING BRACKET
ÉQUERRE DE FIXATION
ESCUADRA DE FIJACIÓN
* TOOLS REQUIRED/OUTILS REQUIS /HERRAMIENTAS REQUERIDAS:
PLASTIC DOWEL
GOUJON DE PLASTIQUE
TARUGO DE PLASTICO
* In the hardware package, you have spare parts -170- and -231-.
* Dans la quincaillerie, vous avez les pièces de remplacement -170- et -231-.
* En la ferretería, tenemos las piezas de remplazo -170- y -231-.
-231-
-170-
Required/Requis/Requerido
1
-6X8
H-1(2)
-231X34
- 2 PEOPLE/2 PERSONNES /2 PERSONAS
N
S-1
- HAMMER/MARTEAU/MARTILLO
H(2)
S
- PHILLIPS/ÉTOILE /ESTRELLA
-6-
Or/Ou/O
L-2(2)
- ROBERTSON/CARRÉ /CUADRADO
Pull the paper off.
Enlever le papier.
Quitar el papel.
T
- Insert -231-(34) into H(2), H-1(2), L-2(2), N, S, S-1 and T.
- Stick -6-(8) under H(2) and H-1(2).
- Insérer -231-(34) dans H(2), H-1(2), L-2(2), N, S, S-1 et T.
- Coller -6-(8) sous H(2) et H-1(2).
- Insertar -231-(34) en H(2), H-1(2), L-2(2), N, S, S-1 y T.
- Pegar -6-(8) debajo H(2) y H-1(2).
O/OW TOWARD
S
R
-158-
-144-
/FL
VERS LE TREC
HE
2
Required/Requis/Requerido
E HOLE/FLÈ
C
TH
X2
3
Required/Requis/Requerido
-92-
-92-
-92-
-92-
-92-
X8
Pair
X1 Pair
Par
-158-
IA EL H
UE
HAC
AR C
HAU
O
X2
1
2
H-1
H-1
H-1
H-1
N
- With thumb, insert -158-(2) into N.
(Make sure the little arrow is towards the insertion hole)
- Insert -144-(2) into H-1(2).
- Avec le pouce, insérer -158-(2) dans N.
(Assurez-vous que la flèche pointe vers le trou d'insertion)
- Insérer -144-(2) dans H-1(2).
- Con el pulgar, insertar -158-(2) en N.
(Asegurarse que la flecha esté orientada hacia el hueco de inserción.)
- Insertar -144-(2) en H-1(2).
Required/Requis/Requerido
4
-131X1
- With -92-(8), screw -257- on H-1(2).
- Avec -92-(8), visser -257- sur H-1(2).
- Con -92-(8), atornillar -257- en H-1(2).
5
-393X8
S
S-1
P
R
- With -131- screw -393-(8) in P.
- Insert S and S-1 into R.
- Avec -131- visser -393-(8) dans P.
- Insérer S et S-1 dans R.
- Con -131- atornillar -393-(8) en P.
- Insertar S y S-1 en R.
-257-
Required/Requis/Requerido
6
-184X2
7
-278X2
-184-
U
S
S-1
S-1
S
R
- Insert -184-(2) tilted in S and S-1 then swivel.
- Screw -278-(2) through -184-(2) into R.
- Slide U (not printed) into the grooves of S, S-1 and R.
- Insérer -184-(2) incliné dans S et S-1 puis pivoter.
- Visser -278-(2) à travers -184-(2) dans R.
- Glisser U (non inscrit) dans les rainures de S, S-1 et R.
- Insertar -184- (2) inclinados en S y S-1 luego, girar.
- Atornillar -278-(2) a través -184-(2) en R.
- Deslizar U (no escrito) en las ranuras de S, S-1 y R.
Required/Requis/Requerido
8
-111X2
Required/Requis/Requerido
9
-106X6
With care
Avec précaution
Con precaución
T
T
m
m
110
U
Each side
Chaque côté
Cada lado
S
T
U
S-1
- Insert T between S and S-1.
- Screw -111-(2) through S and S-1 into T.
- Align U with T.
- Nail U to T with -106-(6).
- Insérer T entre S et S-1.
- Visser -111-(2) à travers de S et S-1 dans T.
- Aligner U avec T.
- Clouer U à T avec -106-(6).
- Insertar T entre S y S-1.
- Atornillar -111(2) a través de S y S-1 en T.
- Alinear U con T.
- Clavar U a T con -106-(6).
Required/Requis/Requerido
10
-101X6
Pair
X1 Pair
Par
11
-158-
-258-
correct/
correcto
incorrect/
incorrecto
-258-
U
R
H-1
S-1
H-1
N
S
- Insert H-1(2) into N.
- Tighten right -158-(2)little more than a half turn
on N to lock pieces together.
S-1
- Screw -101-(6) through -258-(2) into S and S-1.
- Insérer H-1(2) dans B suivi C dans B.
- Tourner -158-(2) un peu plus qu'un demi tour à droite
sur N pour barrer les pièces ensemble.
- Visser -101-(6) à travers de -258-(2) dans S et S-1.
- Insertar H-1(2) en N.
- Girar -158-(2)un poco màs que una média vuelta
hacia la derecha sobre N para trancar las piezas juntas.
- Atornillar -101-(6) a través de -258-(2) en S y S-1.
Required/Requis/Requerido
12
-160X4
Required/Requis/Requerido
13
-160X4
-170X4
-170-160-
Example/Exemple/Ejemplo
H-1
H-1
L-2
H
H
H
L-2
- Visser -160-(4) à travers H dans H-1(2).
- Insert L-2(2) into H-1(2).
- Screw -160-(4) through L-2(2) in H(2).
- Cover -160-(4) with -170-(4) in the sides of the bed.
- Insérer L-2(2) dans H-1(2).
- Visser -160-(4) à travers L-2(2) dans H(2).
- Couvrir -160-(4) avec -170-(4) sur les côtés du lit.
- Atornillar -160-(4) a través de H en H-1(2).
- Insertar L-2(2) en H-1(2).
- Atornillar -160-(4) a través L-2(2) en H(2).
- Cubrir -160-(4) con -170-(4) a los costados de la cama.
- Screw -160-(4) through H in H-1(2).
Required/Requis/Requerido
14
-160X8
-170-
Required/Requis/Requerido
15
-6X2
-170-
-160-
-160X4
X8
Example/Exemple/Ejemplo
L-2
L-2
H-1
L-2
L-2
H-1
L-1
L
L
- Screw -160-(8) through L(2) in H-1(2) and L-2(2).
- Cover -160-(8) with -170-(8) in the front of the bed.
- Screw -160-(4) through L-1 in L-2(2).
- Stick -6-(2) under L-1.
- Visser -160-(8) à travers L(2) dans H-1(2) et L-2(2).
- Couvrir -160-(8) avec -170-(8) à l'avant du lit.
- Visser -160-(4) à travers L-1 dans L-2(2).
- Coller -6-(2) sous L-1.
- Atornillar -160-(8) a través L(2) en H-1(2) y L-2(2).
- Cubrir -160-(8) con -170-(8) delante de la cama.
- Atornillar -160-(4) a través de L-1 en L-2(2).
- Pegar -6-(2) debajo L-1.
Required/Requis/Requerido
16
-299X11
Required/Requis/Requerido
17
-299X6
-Z-01X2
L-1
H
H
-Z-01-
B
B-1
H-1
L-1
B
H
-Z-01-
H
-Z-01-
L-2
B-1
156mm
L
L-2
L
- Lay down B-1 panel fits on L-1.
- The edge of B-1 should overhang L-2 by the with of -Z-01-(2),
at each end.
- Screw B-1 with -299-(11) to H(2), H-1, L, L-1 and L-2.
- Déposer le panneau B-1 à égalité avec L-1.
- Faire excéder B-1 de L-2, de la longueur de -Z-01-(2),
à chaque bout.
- Visser B-1 avec -299-(11) dans H(2), H-1, L, L-1 et L-2.
- Colocar el panel B-1 alineado con L-1.
- Hacer exceder B-1 de L-2, el tamaño de -Z-01-(2) a cada
extremidad.
- Atornillar B-1 con -299-(11) en H(2), H-1, L, L-1 y L-2.
- Lay down B(2) panels fit on L-1.
- Screw B(2) with -299-(6) to H(2) and L-1.
- Déposer les panneaux B(2) à égalité avec L-1.
- Visser B(2) avec -299-(6) dans H(2) et L-1.
- Colocar el panel B(2) alineado con L-1.
- Atornillar B(2) con -299-(6) en H(2) y L-1.
Required/Requis/Requerido
18
-299X11
L-1
Required/Requis/Requerido
19
-87X8
B-2
H
B-1
H
B
B
B-2
L-2
L
H-1
- Lay down B-2 panel fit on L-1.
- Screw B-2 with -299-(11) to H(2), H-1, L, L-1 and L-2.
- Screw P with -87-(8) to B(2), B-1 and B-2.
- Déposer les panneaux B-2 à égalité avec L-1.
- Visser B-2 avec -299-(11) dans H(2), H-1, L, L-1 et L-2.
- Visser P avec -87-(8) dans B(2), B-1 et B-2.
- Colocar el panel B-2 alineado con L-1.
- Atornillar B-2 con -299-(11) en H(2), H-1, L, L-1 y L-2.
- Atornillar P con -87-(8) en B(2), B-1 y B-2.
20
- Insert the drawer.
- Insérer de tiroir.
- Insertar el cajon.
P