1
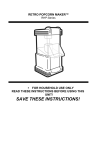
All products are trademarks of Nostalgia Products Group, LLC.
Worldwide design & utility patented or patents pending.
© 2011 Nostalgia Products Group, LLC.
www.nostalgia electrics.com
(rev. 04/08/11)
MDF200
Automatic Mini Donut Factory
Instructions and Recipes
CONTENTS
IMPORTANT SAFEGUARDS . . . . . . . . . . . . . . . . . . . 3
INTRODUCTION . . . . . . . . . . . . . . . . . . . . . . . . . 5
PARTS & ASSEMBLY . . . . . . . . . . . . . . . . . . . . . . . 5
HOW TO OPERATE . . . . . . . . . . . . . . . . . . . . . . . . 7
HELPFUL TIPS . . . . . . . . . . . . . . . . . . . . . . . . . . 8
CLEANING & MAINTENANCE . . . . . . . . . . . . . . . . . . 9
RECIPES . . . . . . . . . . . . . . . . . . . . . . . . . . . . 10
RETURNS & WARRANTY . . . . . . . . . . . . . . . . . . . . 13
SAFETY
Your safety and the safety of others are very important.
We have provided many important safety messages in this manual and
on your appliance. Always read and obey all safety messages.
This is the safety alert symbol.
This symbol alerts you to potential hazards
that can kill or hurt you and others.
All safety messages will follow the safety alert symbol.
All safety messages will tell you what the potential hazard
is, tell you how to reduce the chance of injury, and tell you
what can happen if the instructions are not followed.
Appliance Specifications:
120 Volts, 60 Hertz
560 Watts, ETL Approved
2
ENGLISH
IMPORTANT PRECAUTIONS . . . . . . . . . . . . . . . . . . 3
ENGLISH
IMPORTANT PRECAUTIONS
1.
NEVER immerse Base or cord in water.
2.
NEVER use near water.
3.
NEVER use an abrasive sponge, cloth or scouring pad on the unit.
4.
NEVER leave unit unattended while in use.
5.
NEVER place anything other than what is being cooked in the unit.
6.
NEVER use this unit for anything other than its originally intended use.
7.
Unplug unit from outlet when not in use and during cleaning.
8.
Avoid contact with moving parts.
9.
DO NOT operate this appliance with a damaged cord or
plug, nor if the appliance ever malfunctions.
10. DO NOT let the cord hang over the edge of a table
or countertop, nor touch hot surfaces.
11. DO NOT place Base in a dishwasher.
12. Keep out of reach of children.
13. This appliance is NOT A TOY.
14. Unsupervised young children and cognitively challenged
individuals should never operate this appliance.
15. Young children should be supervised while in proximity of the
appliance to ensure that they do not play with it.
IMPORTANT SAFEGUARDS
Basic safety precautions should always be followed when
using electrical appliances, including the following:
1.
Read all instructions before operating this appliance.
2.
Unit must be level, balanced and securely assembled to operate properly.
3.
The cord should be arranged so that it will not drape over the edge
of a table or countertop. This should also reduce the risk of cord
entanglement, tripping or cord being pulled on by children.
4.
Avoid contact with moving parts.
5.
To protect against electrical shock do not immerse cord, plug
or any part of this appliance in water or other liquids.
6.
Close supervision is necessary when any appliance is used near children.
7.
Unplug from outlet when not in use, before removing parts and before cleaning.
8.
This appliance has a Magnetic Safety Cord. It is meant to connect and
disconnect easily; DO NOT force plug to connect. Insert the plug with
“This End Up” at the top. DO NOT modify the plug in any way.
9.
Always attach plug to appliance first, then plug cord into the wall outlet. To
disconnect, turn all control knobs to OFF, then remove plug from wall outlet.
3
ENGLISH
10. DO NOT operate any appliance with a damaged cord or plug,
nor if the appliance has been damaged in any manner. Return the
appliance to the nearest repair shop for examination or repair.
11. The manufacturer does not recommend the use of accessory
attachments. Use of accessory attachments may cause injuries.
12. DO NOT use outdoors.
13. Position the appliance as close to the outlet as possible
to prevent injury due to tripping over cord.
14. DO NOT place on or near a hot gas or electric burner, nor in a heated oven.
15. DO NOT move the appliance when in use.
16.
Boiling oil can cause SEVERE burns. During use, the appliance is very hot
and remains hot for some time after being turned off. DO NOT touch hot
surfaces like the Oil Fill Pan.
17.
Hot oil can splash and cause SEVERE burns. Keep face and hands away
from the open window at top of AUTOMATIC MINI DONUT FACTORY™
.
18. Keep hands and utensils out of the unit while operating to reduce the risk
of severe injury or damage to the AUTOMATIC MINI DONUT FACTORY™
.
A spoon or tongs may be used to manually flip or remove a trapped
donut out of the oil, but only when the donut maker is not running.
19. DO NOT use the appliance for other than its intended use.
20. An appliance that is plugged into an outlet should
not be left unattended while in operation.
21. Check inside of Oil Fill Pan and Conveyor Belt for
presence of foreign objects prior to use.
22. Make sure that the Donut Slide, Donut Bin, Drainage Tray and Oil Bin
Drainage Pan are attached and in place before turning on the unit.
23. A short power supply cord is provided to reduce the risk resulting
from becoming entangled or tripping over a long cord.
24. Longer detachable power supply cords can be used if care is exercised in their use.
25. The marked electrical rating of an extension cord should be at
least as great as the electrical rating of the appliance.
26. This appliance has a polarized plug (one blade is wider than the other).
To reduce the risk of electrical shock, this plug is intended to fit into
a polarized outlet only one way. If the plug does not fit fully into the
outlet, reverse the plug. If it still does not fit, contact a qualified
electrician. Do not attempt to modify the plug in any way.
27. Unplug the AUTOMATIC MINI DONUT FACTORY™ from electrical outlet
when not in use and before cleaning. Remove plug by gripping the plug body
and pulling out of the outlet. Never yank or twist cord to unplug the unit.
28. Do not attempt to service this appliance yourself, as opening or
removing covers may expose you to dangerous voltage or other
hazards. Refer all servicing to qualified service personnel.
SAVE THESE INSTRUCTIONS!
4
ENGLISH
INTRODUCTION
Thank you for purchasing the AUTOMATIC MINI DONUT FACTORY™
from Nostalgia Electrics! Now you can cook hot and tasty mini donuts
in your own kitchen! Your family and friends will enjoy watching
the donuts form, cook and travel down the donut slide. Have fun
and enjoy your AUTOMATIC MINI DONUT FACTORY™!
Fresh mini donuts are perfect for:
•
Breakfast or Brunch
•
Bake Sales
•
Dessert
•
Sleepovers
•
Party Treats
PARTS & ASSEMBLY
ASSEMBLY
Your AUTOMATIC MINI DONUT FACTORY™ comes fully assembled
when removed from the box. The Donut Bin, Drainage Tray, Power
Cord and Measuring Cup, will be the only loose parts included.
Prepare for first use by thoroughly washing the Dough Dispenser, Donut Slide,
Donut Bin and Drainage Tray in warm, sudsy water and dry thoroughly. DO
NOT put the Base in water. To clean the Base when needed, use a damp cloth
to wipe the exterior, and then dry off with a clean, non-abrasive towel.
Follow these steps to remove parts for cleaning:
1.
Unlatch and rotate the motor dispenser head counter clockwise,
exposing the Dough Dispenser. Remove the Dough Dispenser for
washing by lifting up and out of the notched receptor hole it sits in.
2.
Remove the Donut Slide located on end of the AUTOMATIC MINI DONUT
FACTORY™ for washing. To remove the Donut Slide, place thumb and first
finger on either side of the slide and pull out and away from the unit.
5
PARTS
Motor Dispenser Head
Dough
Dispenser
Donut
Slide
Heat/
Conveyor
Switch
Oil Drainage
Control Box
Measuring
Cup
Magnetic
Safety Cord
Donut
Bin
Drainage Tray
Oil Bin Drainage
Pan
INTERNAL PARTS
Oil Fill Pan Spatula Fingers
CONTROL KNOBS
TOP: DOUGH DISPENSER
(LEFT = ON / CENTER = OFF / RIGHT = ON)
BOTTOM: CONVEYOR/HEAT
(LEFT = ON / CENTER = OFF / RIGHT = PRE-HEAT)
6
ENGLISH
Safety
Windows
Oil Fill Pan
(inside unit)
Dough
Dispenser
Switch
ENGLISH
HOW TO OPERATE
Now that you have cleaned and reassembled your AUTOMATIC
MINI DONUT FACTORY™
, making donuts is both easy and fun!
You will need:
•
Cooking oil such as Canola, Peanut, Sunflower Oil or
Soybean Oil. (Never use butter, margarine or lard)
•
Paper towels and a brown paper bag for absorbing excess oil from hot donuts.
HOW YOUR DONUT MAKER WORKS
Your AUTOMATIC MINI DONUT FACTORY™ will release a measured amount
of dough from the Dough Dispenser into the hot oil. The donut will be held for
seconds in a frying area before advancing to the flipping mechanism. The flipping
mechanism flips the donut over onto the Spatula Fingers. The Spatula Fingers
slowly transport the donut along to the end of the Oil Fill Pan. The Spatula Fingers
carefully rise up and out of the oil pushing the donut over a drainage ramp, which
allows the donut to slide onto the Donut Slide, where it slides down into the
Donut Bin. The entire cooking cycle for one donut takes a little over one minute
to complete. As soon as the first donut has completed cooking, the cycle will
repeat. The cycle is continuous, so make sure to turn off your AUTOMATIC MINI
DONUT FACTORY™ when you have cooked your desired amount of donuts.
MAKING DONUTS
It is essential for you to follow the included recipes EXACTLY. This unit
works best with AUTOMATIC MINI DONUT FACTORY™ packaged mix
or other drop donut mix especially created for donut machines.
Follow these instructions to make delicious mini donuts:
•
Before filling the Oil Fill Pan, make sure the oil drain is closed by
turning switch in Oil Drainage Control Box to a horizontal position
(Drain Closed). Also confirm the Donut Bin is in place before
you turn on the AUTOMATIC MINI DONUT FACTORY™
.
•
You may want to place a cookie sheet or tin foil under the AUTOMATIC MINI
DONUT FACTORY™ to collect any oil that may drop while making donuts.
•
Plug your AUTOMATIC MINI DONUT FACTORY™ into a nearby outlet.
Note there is an instruction on the plug head that reads “this side up.”
•
Pour oil into the Oil Fill Pan located directly under the clear door to
the MAX fill line indicated. The oil fill pan will hold approximately 1½
cups of oil to maximum fill line. (DO NOT overfill or underfill)
•
Continue to check the oil level periodically while cooking
donuts. Maintaining proper oil level is critical for proper frying,
flipping and maintaining the shape of the donuts.
7
Keep clear window at top of machine open while cooking to
maintain proper oil temperature. If oil is too hot, donuts will not
cook properly. (Temperature should remain around 375˚ F)
•
Turn the Conveyor/Heat switch to the right (PRE-HEAT).
The light positioned above the dials will turn red.
•
Open and pull down the Donut Slide.
•
Put the Drainage Tray inside of the Donut Bin and position
the Donut Bin directly underneath the Donut Slide.
•
When the light turns from red to green, the oil has reached the correct
temperature for cooking donuts. Turn the Conveyor/Heat switch to the left (ON).
•
Fill the Dough Dispenser with your favorite donut batter
to max fill line or to within 1 inch of the top.
•
Periodically stir the batter and keep the Dough Dispenser full
of dough while cooking donuts for best performance.
•
Before making donuts, check consistency of batter (SEE BELOW). When
you are ready to make donuts, turn the Dough Dispenser switch ON.
•
When Dough Dispenser switch is ON, the machine will be activated
and the conveyor will begin moving the Spatula Fingers.
•
Note that the conveyor moves slowly and a fresh
donut will be dispensed every 90 seconds.
ENGLISH
•
DO NOT touch moving parts or hot oil, as SEVERE injury
and burns can occur. Keep hands and face away from
machine while in operation. Donuts are VERY HOT.
CHECKING CONSISTENCY OF BATTER & DONUT SHAPE
Before making donuts with the AUTOMATIC MINI DONUT FACTORY™
,
you will need to test the shape and consistency of the donuts.
•
To test the shape of the donuts, after filling the Dough Dispenser, push
trigger down for 3. 5 seconds, gently releasing dough onto a plate.
•
Observe the dough release as it drops down and then goes
back up. (You are bringing dough down to the bottom and
checking the dough discharge with this step.)
•
After the release is closed, wipe clean any dough from the
bottom of the Dough Dispenser, around the trigger area.
HELPFUL TIPS
DONUT SHAPE
The AUTOMATIC MINI DONUT FACTORY™ uses a "drop" process for
forming and cooking the donuts. It does not cut donut shapes. Therefore,
each mini donut will be unique. You should also expect a small amount
of excess batter or misshaped donuts when using the machine.
DISPENSING DOUGH
If the dough is not dispensing properly, check consistency of donut batter. Dough
should be slightly thicker than pancake batter. Also check the bottom of the Dough
Dispenser. Clean between cooking cycles to avoid dough build up and clogging.
8
ENGLISH
DONUT FLIPPING
Occasionally a donut will not get turned over at the flipping segment of
the cycle. Check the oil level in the unit. You may have too much oil or too
little oil. Additionally, the donut may have gotten off-center. You may use a
pair of tongs, fork or wooden skewer to flip the donut over. Make sure that
you first stop the cooking cycle by turning the Dough Dispenser switch to
OFF and the Heat/Conveyor switch to PRE-HEAT. Also, wear oven mitts
for added safety. DO NOT touch the donut or oil with your fingers.
CLEANING & MAINTENANCE
1.
Unplug the unit from the electrical outlet and wait one hour for oil to cool
completely before cleaning. Move all switches to the OFF position.
2.
Turn the Oil Drainage Control Box switch to the
vertical position to allow the oil to drain.
NOTE: It is recommended that you use a pair
of tweezers to remove donut particles from the
drain hole. The oil drain has an L shaped tube
(attached to the hole) underneath the Oil Fill Pan.
This empties into the Oil Bin Drainage Pan. If
you attempt to poke or probe with a sharp object
such as a toothpick to clear the hold of donut
particles, you risk puncturing the tube. This tube cannot be replaced.
3.
Clean Oil Fill Pan using a non-abrasive cloth or sponge. You can remove the
Oil Bin Drainage Pan under the Dough Dispenser once the Motor Dispenser
Head has been moved and the Dough Dispenser has been removed.
4.
When the oil has drained completely, remove the Oil Bin Drainage
Pan by pulling out from the unit. Pour the used oil and dough
particles into a can and dispose of in a safe manner.
5.
To remove the Safety Windows for cleaning, open the window nearest the
motor dispenser and gently unsnap and remove from the back hinges. The
second Safety Window may be slightly tighter to unsnap and remove, but
with gentle pressure, this window removes for cleaning in the same way.
6.
To replace both Safety Windows after cleaning, fit the back hinge of the curved
window into the slot and lower the front gently adding pressure until it snaps
into place. Return the remaining Safety Window in place the same way.
7.
Unlatch and rotate the Motor Dispenser Head counter clockwise. Remove the
Dough Dispenser. Empty any remaining dough and wash the Dough Dispenser
with hot soapy water. (See Donut Dispenser Breakdown for cleaning below)
8.
The Dough Dispenser, Oil Bin Drainage Pan, Donut Slide,
Donut Bin and Drainage Tray can all be submerged in hot,
soapy water to clean. Dry with a clean cloth or towel.
9.
Hold and tilt the AUTOMATIC MINI DONUT FACTORY™ over
the trash receptacle to empty and clean out the remaining dough
particles that have fallen inside the bottom of the unit using a gentle
shake. CAUTION: Vigorous shaking could damage the unit.
10. Wipe the exterior clean using a non-abrasive dry cloth or sponge.
9
11. Reassemble your AUTOMATIC MINI DONUT FACTORY™
.
To prolong the life of your AUTOMATIC MINI DONUT FACTORY™
, be sure
to follow the cleaning instructions above after each and every use.
BREAKDOWN OF DOUGH DISPENSER FOR CLEANING:
1. Put your finger on the plunger as you turn the donut hopper over. You should
notice the Dough Release is extended. Unscrew this part. See illustration below.
Dough Release
2.
Using your thumb and first finger, firmly pull up on
one end of the ‘wings’, releasing it from the outer
edge. Now, release the second ‘wing’ the same way.
3.
Now you can remove the plunger and stem assembly.
Plunger
Wing
Outer Edge
4.
Turn the Dough Dispenser over and press in to
release inside peice from inside mixer.
5.
You should now have all four parts to the Dough Dispenser released
for cleaning. Wash in warm, soapy water. You may need to push the
plunger down exposing the lower threaded stem and confirm that
the stem portion above the threads is clean and smooth.
6.
Reassemble after cleaning and drying.
NOTE: You may find it
necessary to use a small,
fine brush to clean the
hardened and caked
donut batter from cracks,
crevices and the spring
on the trigger stem.
10
ENGLISH
By following these simple instructions, your AUTOMATIC
MINI DONUT FACTORY™ will be a fun and special treat
for your family, friends and kids of all ages!
ENGLISH
RECIPES
Take a brown paper or muslin bag and add toppings (see below). Empty
warm, fresh donuts from the Donut Bin into the bag and shake.
Topping Ideas:
•
Granulated White Sugar and Cinnamon (3 parts white sugar to 1 part cinnamon)
•
Brown Sugar and Table Sugar (equal parts) •
Powdered Sugar
DONUT DELIGHTS
•
2½ Cups AllPurpose Flour
Using a bowl, sift together the flour, baking
soda, nutmeg, and salt and set aside.
•
½ Tsp. Baking Soda
•
1½ Tsp. Baking
Powder
In a second (larger) bowl, cream the shortening;
gradually add sugar, beating until light and fluffy.
•
¹/8 Tsp. Nutmeg
•
¼ Tsp. Salt
•
2 Tbsps.
Shortening
•
½ Cup Sugar
•
1 Egg
•
½ Tsp. Vanilla
Extract
•
2 Tbsps. Vinegar
It takes about 90 seconds for each donut to cook.
•
1½ Cup Whole Milk
Yeild: This recipe fills the Dough Dispenser
3½ times, yeilding 30 mini donuts per batch
- a total of approximately 100 donuts.
11
Add egg; beat well. Stir in the vanilla.
Add the vinegar to the milk.
Alternately pour the milk mixture and
the dry ingredients into the shortening
mixture stirring just until blended.
NOTE: If you reach the desired consistency before
you have used all the liquid, do not add the remaining
liquid. The batter should be stiff enough to form
soft peaks when stirred and lifted with a spoon.
BUTTERMILK DONUTS
3½ Cups AllPurpose Flour
Beat eggs, sugar, spices and oil.
•
½ Tsp. Baking
Powder
•
2 Tsp. Baking Soda
Mix the dry ingredients together and
alternately add the flour mixture to the wet
ingredients together with the buttermilk,
slowly mixing together well in a large bowl.
•
1 Tsp. Salt
It takes about 90 seconds for each donut to cook.
•
¼ Tsp. Ground
Nutmeg
•
1 Cup Sugar
Yeild: This recipe fills the Dough Dispenser
3½ times, yeilding 30 mini donuts per batch
- a total of approximately 100 donuts.
•
3 Eggs (Beaten)
•
½ Tsp. Vanilla
Extract
•
5 Tbsps.
Vegetable Oil
•
1 Cup Buttermilk
ENGLISH
•
APPLESAUCE CAKE DONUTS
•
4½ Cups AllPurpose Flour
Cream together the butter and
sugar in a large mixing bowl.
•
2 Tsp. Baking
Powder
Add the eggs, one at a time beating
well after each is added.
•
¾ Cup Sugar
Beat in the applesauce and vanilla.
•
1 Tsp. Salt
•
½ Tsp. Ground
Cinnamon
In another bowl, combine the flour, baking powder,
salt, cinnamon and nutmeg; alternately pour the dry
ingredients and the milk into the creamed mixture.
•
¼ Tsp. Ground
Nutmeg
The batter should be like pancake batter
and sheet off of your spoon.
•
1 Tsp. Vanilla
Extract
•
3 Tbsps. Butter
or Margarine
(softened)
•
3 Eggs
•
1¼ Cup Whole Milk
•
1½ Cup
Applesauce
NOTE: If you obtain the desired
consistency before you have added all the
milk, do not add the remaining milk.
It takes about 90 seconds for each donut to cook.
This recipe fills the Dough Dispenser 3½
times, yeilding 30 mini donuts per batch - a
total of approximately 100 donuts.
12
ENGLISH
RETURNS & WARRANTY
SHOULD YOUR UNIT NOT WORK OR IS DAMAGED WHEN
YOU FIRST TAKE IT OUT OF THE BOX, PLEASE RETURN
IT TO THE PLACE OF PURCHASE IMMEDIATELY.
AUTOMATIC MINI DONUT FACTORY™ / MDF200
Should you have any questions, please contact us via email or at the
customer service number listed below between the hours of 8:00 AM
and 5:00 PM, Monday through Friday, Central Standard Time.
Distributed by:
Nostalgia Products Group LLC
1471 Partnership Dr.
Green Bay, WI 54304-5685
Customer Service
Phone: (920) 347-9122
Web: www.nostalgiaelectrics.com
Customer Service Inquiry
To submit a Customer Service inquiry, go to www.nostalgiaelectrics.com and
fill out the Customer Service Inquiry form and click the Submit button.
A representative will contact you as soon as possible.
This appliance is designed and built to provide many years of satisfactory
performance under normal household use. The distributor pledges to the
original owner that should there be any defects in material or workmanship
during the first 90 days of purchase, we will repair or replace the unit at
our option. Our pledge does not apply to damages caused by shipping,
mishandling or unit being dropped. A product deemed defective either from
manufacturing or being mishandled is up to the distributor’s discretion.
In order to obtain service under this warranty, please contact Nostalgia
Products Group, LLC at the telephone number listed above or by filling out
the Customer Service Inquiry Form located at www.nostalgiaelectrics.com.
This warranty does not apply to re-manufactured merchandise.
Please read these instructions carefully. Failure to comply with these instructions,
damages caused by improper replacement parts, abuse or misuse will void this
pledge to you and is being made in place of all other expressed warranties.
13