1
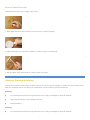
How to Install Accents
Hardwood accents are easy to apply. Here’s how:
1. Mark application area with a pencil to ensure accent is properly aligned.
2. Apply wood glue or a contractor’s adhesive to back of accent. Use sparingly.
3. Nail into place using small brads or clamp in place over night.
Finishing: Staining & Painting
Several factors affect how and when to apply finish to your House of Fara mouldings. Usually, it’s best to apply finish
after the mouldings are cut but before you install them. Use the following general procedures:
Staining:
Lay mouldings flat and sand rough areas with 150 to 220 grit sandpaper. Wipe off sawdust.
Apply stain according to the package directions.
Install moulding.
Painting:
Lay mouldings flat and sand rough areas with 150 to 220 grit sandpaper. Wipe off sawdust.
Apply a coat of primer and then a first coat of paint.
Install moulding.
Putty the nail holes and sand putty when dried.
Mask with tape around edges of moulding to protect walls, floor and other moulding or use a paint shield.
Apply another coat of paint. Remove masking tape before paint dries completely (if the position of the
moulding makes masking difficult or makes the moulding hard to reach, you may wish to apply the final coat of
paint before installing).
Staining works well for House of Fara solid oak mouldings to bring out the wood’s natural beauty. If you wish to paint
your mouldings to match room décor, try using House of Fara white hardwood mouldings.