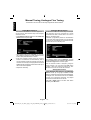
1
English
User Manual
DIGITAL Series
“Register your TV online at: www.toshiba.co.uk/registration”
English - 1 -
19DV501B_DVD_A01_MB60_[GB]_(01-TV)_(IB_INTERNET)_DVB-T_(1900UK)_10072930.indd 1
03.10.2011 18:33:40
Digital Switchover
English
8IFOEPFTTXJUDIPWFSIBQQFO
$PQFMBOETXJUDIFTPO0DUPCFS
,FFQUIJTJNQPSUBOU
JOGPSNBUJPOBCPVU
IPXUPSFUVOF
ZPVS57EVSJOHUIF
EJHJUBM57TXJUDIPWFS
5IFFYBDUEBUFZPV
TXJUDIEFQFOETPOUIF
USBOTNJUUFSZPVBSF
TFSWFECZ5PDIFDL
XIFOZPVTXJUDI
HPUP%JHJUBM6,µT
QPTUDPEFDIFDLFSPO
XXXEJHJUBMVLDPVL
IFDLZPVS*57OFXT
$
TFSWJDFPSMPPLBU5FMFUFYU
QBHFUPTFFXIBU57
SFHJPOZPVµSFJO
Television in the UK is going digital, bringing us all
more choice and new services. Starting in late 2007
and ending in 2012, television services in the UK will
go completely digital, TV region by TV region.
switchover, and you won’t need to re-tune. Keep this
important information about how to re-tune your TV
during the digitalTV switchover
Please see above to find out when your area switches
to digital. Digital UK is the independent, non-profit
organisation leading the process of digital TV
switchover in the UK.
As new services are broadcast it will be necessary to
re-tune the television in order to view them. Auto tuning
will completely retune the television and can be used
to update the channel list.
Digital UK provides impartial information on what
people need to do to prepare for the move to digital,
and when they need to do it.
• Press MENU button on the remote control unit.
How the switchover affects your TV equipment:
Your new TV has a digital tuner built in, which means
it is ready to receive the Freeview signal by simply
plugging it into your aerial socket (check if you can
get digital TV through your aerial now, or whether
you’ll have to wait until switchover, at www.digitaluk.
co.uk).
When the TV switchover happens in your area, there
are at least two occasions when you will need to
re-tune your TV in order to continue receiving your
existing TV channels, and also to pick up new ones,
Digital UK, the body leading the digital TV switchover,
will advise you when you need to re-tune during the
switchover.
How to re-tune:
• Select Install and Retune option and then select
Automatic channel scan (Retune).
• A screen will appear warning that previous digital
programmes and settings will be deleted.
• You must allow the television to complete the
search...
• When the search is complete the Auto tuning screen
will display the total number of service found.
NOTE: Further detailed instructions on Auto tuning
can be found in the TV owners manual.
If you are missing channels, it may be that they are
not available in your area, or that your aerial needs
upgrading.
If you have any further questions, please contact your
equipment supplier or call Digital UK on 08456 50 50
50 or visit www.digitaluk.co.uk
If you choose to connect your TV to satellite or
cable with a digital box then it will not be affected by
English - 2 -
19DV501B_DVD_A01_MB60_[GB]_(01-TV)_(IB_INTERNET)_DVB-T_(1900UK)_10072930.indd 2
03.10.2011 18:33:42
Re-tuning: TOSHIBA Freeview Products
Toshiba Digital TV
Make sure your TV is on and press 80 for the BBC News channel
INFO
SLEEP
SCREEN
SOURCE
PRESETS
English
This guide can be used to help you re-tune the following product with the remote control below.
1 ) Press MENU and press ◄ or ► to select Install and Retune and press OK. Press
▲ or ▼ to select Automatic channel scan (Retune) to start the process.
MENU
RETURN
FAV
MENU
LANG.
SUBTITLE
EPG
/
RC-1900
2 ) Select the desired search mode using ► and press OK button.
3 ) Whenever you select an automatic search type and press OK button, a confirmation
screen will appear on the screen. To start installation process, select Yes by using ◄
or ► and OK button.
4 ) After auto channel scan type is set and selected and confirmed, installation process
will start and progress bar will move along. The television will start to search for all
available stations. You must allow the television to complete the search.
* This process may affect any saved information stored on your product. Please consult your
instruction manual or contact the manufacturer using the details above.
TOSHIBA Customer Helpline: 0844 856 0730 TOSHIBA Online Support: www.toshiba.co.uk/tv-dvd-support
English - 3 -
19DV501B_DVD_A01_MB60_[GB]_(01-TV)_(IB_INTERNET)_DVB-T_(1900UK)_10072930.indd 3
03.10.2011 18:33:42
Manual Re-tuning
English
If your Freeview TV or box picks up a different regional service to your preferred service (e.g. BBC England
instead of BBC Scotland, or ITV Central instead of ITV Anglia), you can use this manual re-tune If you are missing
some services you may find they have moved to channel 800 or above, this guide will help you put them in your
preferred position. If you find manual re-tuning too difficult, contact your local electrical retailer or installer. This is
a guide only, Freeview models operate slightly differently. Some early models do not oer a manual re-tune facility
– check your instruction book. Please note: Every time you re-tune, you will need to go through this process.
1 ) Go to the Postcode Checker at digitaluk.co.uk Enter your postcode on the right hand side of the web page.
Remember to include your house number or name. If you do not have internet access, contact the Digital UK
helpline on 08456 50 50 50* and ask for manual re-tune guide support.
2 ) Once you have entered your address details, the next page gives you an indication of which TV services
you should receive, based on your most likely transmitter. You may be able to receive television services
from more than one transmitter and you can check alternatives, where available. On the results page click
on the pink button to see your full reception forecast and channel information for switchover.
3 ) Click on the How do I re-tune? pink banner. Scroll down to the manual re-tune table where you will see
the relevant “RF Channel” numbers for the digital services that can be received at your home.**
*Calls are free for BT customers within inclusive calling plans. Call charges from other providers may vary. The standard business hours for Digital
UK’s contact centre are 9am to 7pm Monday to Friday and 10am to 4pm on a Saturday. Opening hours will be extended during switchover in each
area. Digital UK, PO Box 26833, Kirkcaldy,KY2 9AG . **Please note that the Freeview channel line-up is subject to change.
English - 4 -
19DV501B_DVD_A01_MB60_[GB]_(01-TV)_(IB_INTERNET)_DVB-T_(1900UK)_10072930.indd 4
03.10.2011 18:33:46
4 ) Write down the “RF Channel” numbers for your transmitter using the Group boxes here:
English
5 ) Press MENU and use ◄ or ► to select Install and Retune.
6 ) Select Manual Channel Scan from the Installation menu and press OK.
MENU
7 ) Select Search Type as Digital by using ◄ or ►.
8 ) Select Channel and use ◄ or ► to change the channel number.
9 ) Press OK to start search.
10 ) Press MENU button. You should find that you now have your preferred service installed.
English - 5 -
19DV501B_DVD_A01_MB60_[GB]_(01-TV)_(IB_INTERNET)_DVB-T_(1900UK)_10072930.indd 5
03.10.2011 18:33:46
Contents
English
Digital Switchover ................................................... 2
Electronic Programme Guide............................ 23
Re-tuning: TOSHIBA Freeview Products ................ 3 Language Selection .............................................. 24
Language Settings ............................................ 24
Manual Re-tuning ................................................... 4
Safety Precautions ................................................. 8 Digital Settings - Parental Control, Menu Lock, Set
PIN........................................................................ 25
Air Circulation ..................................................... 8
Viewing Parental Control Menu ........................ 25
Heat Damage...................................................... 8
Menu Lock ........................................................ 25
Mains Supply ...................................................... 8
Maturity Lock (*)................................................ 25
Warning ............................................................. 8
Child Lock ......................................................... 25
Do ....................................................................... 8
Set PIN ............................................................. 25
Do not ................................................................. 8
Configuring Picture Settings ................................. 26
Installation and Important Information .................... 9
Configuring Picture Settings ............................. 26
EXCLUSION CLAUSE........................................ 9
Picture Mode..................................................... 26
Important safety information ................................ 10
Contrast ............................................................ 26
Removing the pedestal stand ........................... 12
Brightness ......................................................... 26
The Remote Control ............................................. 13
Sharpness......................................................... 26
Inserting Batteries and Effective Range of the
Colour ............................................................... 26
Remote Control................................................. 13
Colour Shift ....................................................... 26
Connecting External Equipment ........................... 14
Colour Temp ..................................................... 26
Connecting an HDMI® or DVI Device to the HDMI
Noise Reduction ............................................... 27
Input...................................................................... 15
Picture Zoom .................................................... 27
To Connect an HDMI Device ............................ 15
Reset ................................................................ 27
To Connect a DVI Device.................................. 15 Changing Picture Format...................................... 28
Connecting a Computer........................................ 16 Configuring PC Picture Settings ........................... 29
To Connect a Computer .................................... 16
PC Picture Settings (*) ...................................... 29
Connecting a USB Memory .................................. 16
PC Position ....................................................... 29
Connect a USB Memory ................................... 16
Autoposition ...................................................... 29
USB Memory Connection ................................. 16
H Position ......................................................... 29
Controlling the TV ................................................. 17
V Position.......................................................... 29
Switching on ..................................................... 17
Dot Clock .......................................................... 29
Using the Remote Control ................................ 17
Phase................................................................ 29
Using the Controls and Connections on the TV 17 Configuring Sound Settings .................................. 30
Initial Installation .................................................. 18
Configuring Sound Settings .............................. 30
Auto Tuning....................................................... 19
Operating Sound Settings Menu Items ............. 30
Auto Tuning .......................................................... 19
Volume .............................................................. 30
Equalizer (Only for speaker) ............................. 30
Manual Tuning, Analogue Fine Tuning ................. 20
Balance (Only for speaker) ............................... 30
Digital Manual Search....................................... 20
Headphone ....................................................... 30
Analogue Manual Search ................................. 20
AVL ................................................................... 30
Analogue Fine Tune.......................................... 20
Dynamic Bass ................................................... 30
General Operation ................................................ 21
Digital Out ......................................................... 30
Stereo and Bilingual Transmissions.................. 21
Displaying Subtitles .......................................... 21 Settings Menu Operation, Conditional Access ..... 31
Configuring Your TV’s Settings ......................... 31
Viewing Main Menu .......................................... 21
Viewing Settings Menu ..................................... 31
Controlling Volume and Muting Sound ............. 21
Conditional Access ........................................... 31
Selecting Programme Positions........................ 21
Language .......................................................... 31
Channel List, Sorting Programmes, Programme
Locking ................................................................. 22
Parental ............................................................ 31
Timers ............................................................... 31
Viewing Channel List ........................................ 22
Date/Time Settings ........................................... 31
Moving a Channel ............................................. 22
Sources............................................................. 31
Deleting a Channel ........................................... 22
Other Settings ................................................... 31
Renaming a Channel ........................................ 22
Using a Conditional Access Module ................. 31
Locking a Channel ............................................ 22
Setting Timers, Setting Date/Time ........................ 32
Viewing Info Banner, Electronic Programme
Guide .................................................................... 23
Timers ............................................................... 32
Viewing Info Banner.......................................... 23
Setting Sleep Timer .......................................... 32
English - 6 -
19DV501B_DVD_A01_MB60_[GB]_(01-TV)_(IB_INTERNET)_DVB-T_(1900UK)_10072930.indd 6
03.10.2011 18:33:48
English
Setting Programme Timers ............................... 32
Configuring Date/Time Settings ........................ 32
Source Settings, Other Controls ........................... 33
Configuring Source Settings ............................. 33
Input Selection .................................................. 33
Configuring Other Settings - General ............... 33
Operation .......................................................... 33
Menu Timeout ................................................... 33
Scan Encrypted ............................................... 33
Other Controls ...................................................... 34
Backlight ........................................................... 34
Blue Background .............................................. 34
Software Upgrade ............................................. 34
Hard of Hearing ................................................ 34
Audio Description.............................................. 34
Auto TV Off ....................................................... 34
Standby Search (*) .......................................... 34
Full Mode (optional) .......................................... 34
Teletext language.............................................. 35
HDMI True Black............................................... 35
USB Media Browser ............................................. 36
Manual Start ..................................................... 36
Auto Start .......................................................... 36
Playing MP3 Files ............................................. 36
Viewing JPEG Files .......................................... 37
Slideshow Feature ............................................ 37
Video Playback ................................................. 38
Media Browser Settings .................................... 38
To Close the Media Player ................................ 38
Analogue Text Services ........................................ 39
Analogue Text Services .................................... 39
Using Text Button -TEXT .................................. 39
Acessing Sub-Pages ........................................ 39
Revealing Concealed Text ................................ 39
Holding a Page ................................................. 39
To display an initial page................................... 39
Appendix A: PC Input Typical Display Modes....... 40
Appendix B: AV and HDMI Signal Compatibility
(Input Signal Types).............................................. 41
Appendix C: Supported File Formats for USB
Mode..................................................................... 42
Appendix D: PIN Information ............................... 42
Specifications and Accessories ............................ 43
License Information .............................................. 44
Questions and Answers ........................................ 45
Toshiba One (1) Year Limited Warranty For TV’s
(the “Products”)..................................................... 47
English - 7 -
19DV501B_DVD_A01_MB60_[GB]_(01-TV)_(IB_INTERNET)_DVB-T_(1900UK)_10072930.indd 7
03.10.2011 18:33:48
Safety Precautions
English
This equipment has been designed and manufactured to meet international safety standards but, like any electrical equipment, care must be taken to obtain the best results and for safety to be assured. Please read the points below for your own
safety. They are of a general nature, intended to help with all electronic consumer products and some points may not apply
to the goods you have just purchased.
Air Circulation
Do not
Leave more than 10cm clearance around the television to
allow adequate ventilation. This will prevent overheating
and possible damage to the television. Dusty places should
also be avoided.
DON’T remove any fixed cover as this may expose dangerous voltages.
Heat Damage
Damage may occur if the television is left in direct sunlight
or near a heater. Avoid places subject to extremely high
temperatures or humidity, or locations where the temperature
is likely to fall below 5°C (41°F).
Mains Supply
The set should be operated only from a 220-240 V AC 50 Hz
outlet. DO ensure that the television is not standing on the
mains lead. DO NOT cut off the mains plug from this equipment, this incorporates a special Radio Interference Filter, the
removal of which will impair its performance. It should only be
replaced by a correctly rated and approved type and the fuse
cover must be refitted. IF IN DOUBT PLEASE CONSULT A
COMPETENT ELECTRICIAN.
Warning
To prevent the spread of fire, keep candles or other open
flames away from this product at all times.
DON’T obstruct the ventilation openings of the equipment
with items such as newspapers, tablecloths, curtains, etc.
Overheating will cause damage and shorten the life of the
equipment.
DON’T allow electrical equipment to be exposed to dripping
or splashing or objects filled with liquids, such as vases, to
be placed on the equipment.
DON’T place hot objects or naked flame sources, such as
lighted candles or nightlights on, or close to equipment. High
temperatures can melt plastic and lead to fires.
DON’T use makeshift stands and NEVER fix legs with wood
screws. To ensure complete safety, always fit the manufacturers’ approved stand, bracket or legs with the fixings provided
according to the instructions.
DON’T leave equipment switched on when it is unattended,
unless it is specifically stated that it is designed for unattended operation or has a standby mode. Switch off by
withdrawing the plug, make sure your family know how to do
this. Special arrangements may need to be made for people
with disabilities.
DON’T continue to operate the equipment if you are in any
doubt about it working normally, or it is damaged in any way switch off, withdraw the mains plug and consult your dealer.
WARNING - excessive sound pressure from earphones or
headphones can cause hearing loss.
ABOVE ALL - NEVER let anyone, especially children,
push or hit the screen, push anything into holes, slots
or any other openings in the case.
NEVER guess or take chances with electrical equipment
of any kind - it is better to be safe than sorry.
Do
DO read the operating instructions before you attempt to
use the equipment.
DO ensure that all electrical connections (including the mains
plug, extension leads and interconnections between pieces
of equipment) are properly made and in accordance with the
manufacturers’ instructions. Switch off and withdraw the mains
plug before making or changing connections.
THE MAINS PLUG IS USED AS A DISCONNECTING
DEVICE AND THEREFORE SHOULD BE READILY OPERABLE.
Note : Interactive video games that involve shooting
a “gun” type of joystick at the on-screen target may
not work with this TV.
DO consult your dealer if you are ever in doubt about the
installation, operation or safety of your equipment.
DO be careful with glass panels or doors on equipment.
English - 8 -
19DV501B_DVD_A01_MB60_[GB]_(01-TV)_(IB_INTERNET)_DVB-T_(1900UK)_10072930.indd 8
03.10.2011 18:33:48
Installation and Important Information
Where to install
English
P Clip
Fixing
Strap
Fixing
Strap
Sturdy tie
(as short
as possible)
''P' Clip position on TV is dependent on model
* Button and stand style is dependent on model.
Locate the television away from direct sunlight and strong
lights. Soft, indirect lighting is recommended for comfortable
viewing. Use curtains or blinds to prevent direct sunlight
falling on the screen.
Place the TV on a stable, level surface that can support the
weight of the TV. In order to maintain stability and prevent
it falling over, secure the TV to a wall using a sturdy tie to
the clip on TV. Install the P clip under the stand as shown in
the above illustration.
The LCD display panels are manufactured using an extremely high level of precision technology; however, sometimes
some parts of the screen may be missing picture elements or
have luminous spots. This is not a sign of a malfunction.
Make sure the television is located in a position where it cannot
be pushed or hit by objects, as pressure will break or damage
the screen. Also, please be certain that small items cannot be
inserted into slots or openings in the case.
Cleaning the screen and cabinet…
Turn off the power, and clean the screen and cabinet with a
soft, dry cloth. We recommend that you do not use any proprietary polishes or solvents on the screen or cabinet as this
may cause damage.
Please take note
The digital reception function of this television is only effective in the countries listed in the “Country” section
during the first time installation menu. Depending on country/area, some of this television’s functions may not
be available. Reception of future additional or modified services can not be guaranteed with this television.
If stationary images generated by 4:3 broadcasts, text services, channel identification logos, computer displays,
video games, on screen menus, etc. are left on the television screen for any length of time, they could become
conspicuous. It is always advisable to reduce both the brightness and contrast settings.
Very long, continuous use of the 4:3 picture on a 16:9 screen may result in some retention of the image at
the 4:3 outlines. This is not a defect of the LCD TV and is not covered under the manufacturer’s warranty.
Regular use of other size modes will prevent permanent retention.
EXCLUSION CLAUSE
Toshiba shall under no circumstances be liable for loss and/or damage to the product caused by:
i)
fire;
ii)
earthquake;
iii)
accidental damage;
iv)
intentional misuse of the product;
v)
use of the product in improper conditions;
vi)
loss and/or damage caused to the product whilst in the possession of a third party;
vii)
any damage or loss caused as a result of the owner’s failure and/or neglect to follow the instructions set out in the
owner’s manual;
viii) any loss or damage caused directly as a result of misuse or malfunction of the product when used simultaneously with
associated equipment;
Furthermore, under no circumstances shall Toshiba be liable for any consequential loss and/or damage including but not
limited to the following, loss of profit, interruption of business, the loss of recorded data whether caused during normal operation or misuse of the product.
Note: A Toshiba wall bracket or stand, where available, must be used.
English - 9 -
19DV501B_DVD_A01_MB60_[GB]_(01-TV)_(IB_INTERNET)_DVB-T_(1900UK)_10072930.indd 9
03.10.2011 18:33:48
Important safety information
English
WHEN THIS UNIT IS PLUGGED INTO THE WALL OUTLET, DO NOT PLACE YOUR EYES CLOSE TO
THE OPENINGS TO LOOK INTO THE INSIDE OF THIS UNIT.
USE OF CONTROLS OR ADJUSTMENTS OR PERFORMANCE OF PROCEDURES OTHER THAN THOSE
SPECIFIED HEREIN MAY RESULT IN HAZARDOUS RADIATION EXPOSURE.
DO NOT OPEN COVERS AND DO NOT REPAIR YOURSELF. REFER SERVICING TO QUALIFIED
PERSONNEL.
Headphone Warning
Loud music can damage your hearing irreversibly. Do not set the volume to a high level when listening through
headphones, particularly for extended listening periods.
Information for the DVB-T function
• Any function relative to the digital television (with the DVB logo) is available only within the country or area
where such signals are transmitted. Verify with the salesperson if it is possible to receive a DVB-T signal in
the zone where you live.
• Even if the television conforms to the DVB-T specifications, the compatibility to future digital DVB-T
transmissions is not guaranteed.
• Some digital television functions may not be available in some countries.
• The DVB-T system present in this device is FTA (Free to air).
• DVB is a registered trademark of the DVB Project. This logo indicates that the product is compliant with
European Digital Broadcasting.
Possible Adverse Effects on LCD Screen
If a fixed (non-moving) pattern remains on the LCD screen for long periods of time, the image can become
permanently retained on the LCD TV panel and cause subtle but permanent ghost images. This type of
damage is NOT COVERED BY YOUR WARRANTY. Never leave your TV on for long periods of time while it
is displaying the following formats or images:
• Fixed Images, such as stock tickers, video game patterns, TV station logos, and websites.
• Special Formats that do not use the entire screen. For example, viewing letterbox style (16:9) media on
a normal (4:3) display (Black bars at top and bottom of screen); or viewing normal style (4:3) media on a
widescreen (16:9) display (Black bars on left and right sides of screen).
IMPORTANT INFORMATION
TV Installation
If a television is not positioned in a sufficiently stable location, it can be potentially hazardous due to falling.
Many injuries, particularly to children, can be avoided by taking simple precautions such as:
• Using stands recommended by the manufacturer of the television.
• Only using furniture that can safely support the television.
• Ensuring the television is not overhanging the edge of the supporting furniture.
• Not placing the television on tall furniture (for example, cupboards or bookcases) without anchoring both the
furniture and the television to a suitable support.
• Not standing the television on cloth or other materials placed between the television and supporting
furniture.
• Educating children about the dangers of climbing on furniture to reach the television or its controls.
Place the TV on a stable, level surface that can support the weight of the TV. In order to maintain stability
and prevent it from falling over, secure the TV to a wall using a sturdy tie to the clip on the back of the table
top stand.
This unit has been produced according to all current safety regulations. The following safety tips should safeguard users
against careless use and the dangers related to such use.
• Although this unit has been carefully manufactured and rigorously checked prior to leaving the factory as with all electrical
appliances, it is possible for problems to develop. If you notice smoke, an excessive build-up of heat or any other unexpected
phenomena, you should disconnect the plug from the mains power socket immediately.
English - 10 -
19DV501B_DVD_A01_MB60_[GB]_(01-TV)_(IB_INTERNET)_DVB-T_(1900UK)_10072930.indd 10
03.10.2011 18:33:50
Important safety information (continued)
• This set should only be connected to a 220-240V AC 50Hz
mains power supply. Do not attempt to connect it to any other
type of supply.
• The unit becomes warm when in operation. Do not place
any covers or blankets on the unit in order to prevent
overheating.
The ventilation holes should not be blocked. Do not set up
near radiators. Do not place in direct sunshine.
• The socket outlet must be installed near the equipment and
is easily accessible.
• When placing on a shelf, allow at least 10 cm clearance
space around the whole unit.
• Do not open this unit. An attempt to repair the unit by a
non-expert could be dangerous and potentially cause a fire
hazard. All repairs must be carried out by qualified service
personnel only.
• The unit shall not be exposed to dripping or splashing, and
no objects filled with liquids, such as vases, shall be placed
on the apparatus.
• Keep away from rodents. Rodents (and also cockatiels)
enjoy biting electric flexes. They can cause a short circuit
(fire hazard!) and receive a fatal electric shock.
• Always hold the plug when disconnecting the unit from
the socket outlet. Do not pull on flex. The flex can become
overloaded and cause a short circuit.
• Use a soft, dry cloth to clean the unit.
• Set up unit so that no one will trip over the flex.
• This unit is recommended to be installed on shock-free
benches in order to avoid any danger from falling.
• Take note that toddlers can pull the unit down from a table or
cupboard by means of its flex. Children can hurt themselves
when doing this.
• Liquids spilled into the unit can cause serious damage.
Switch the set off and disconnect the mains power supply,
then consult a qualified service person before attempting to
use the unit again.
• Moisture condensation occurs, for example, when you pour
a cold drink into a glass on a warm day and drops of water
form on the outside of the glass. In the same way, moisture
may condense on this unit’s internal optical pick-up lens, one
of the most crucial internal parts of the unit.
• Moisture condensation occurs in the following situations:
- When you move the unit from a cold place to a warm
place.
- When you use the unit in a room where the heater was
just turned on.
• Do not use the unit near heat sources. The casing and flex
could be damaged by the intensity of the heat.
- When you use the unit in an area where cold air from an air
conditioner directly hits the unit.
• The screen is made of glass and can break if damage is done
to it. Be careful when collecting sharp edged glass splitters.
- When you use the unit in a humid place.
• If you intend to wall mount the unit, contact the shop where
you purchased the unit for advice, and leave the installation
work to professionals. Improper installation can cause
damage and/or injuries.
• When installing the set on a wall, allow at least 10 cm
clearance between the rear of the set and the wall. Clearance
of less than 10 cm will obstruct the vents and cause
overheating to the interior of the set, resulting in faults or
damage to the set.
• Taking fall-prevention measures
- If these measures are not taken, the unit can fall and cause
damage and/or injuries.
English
• Ensure that the unit is sufficiently ventilated! Never place it
next to or underneath curtains!
• Never use the unit when moisture condensation may
occur.
• Using the unit when moisture condensation exists may
damage its own internal parts and discs. Connect the power
cord of the unit to the wall outlet, turn on the unit, remove the
disc, and leave it for two or three hours. After two or three
hours, the unit will warm up and moisture will be evaporated.
Leaving the TV connected to the wall outlet will help prevent
moisture condensation in the unit.
• Never place hot objects or open flame sources, such as
lighted candles or night lights, on or close to the TV. High
temperatures can melt plastic and lead to fires.
- Contact the shop where you purchased the unit to obtain
full details of the measures.
• When a TV stand is used,
- Ensure the unit is fully on the stand and placed in the
centre.
- Do not leave the stand doors open. You could be hurt as
a result of the unit falling or breaking, or your fingers being
caught or jammed. Take extra precautions if you have
children.
• Avoid placing the unit on any surfaces that may be subject
to vibrations or shocks.
• To protect the unit during a thunder storm, unplug the AC
power cord and disconnect the aerial.
Caution: Do not touch the aerial connector.
• When you leave your home for a long period of time, unplug
the AC power cord for safety.
English - 11 -
19DV501B_DVD_A01_MB60_[GB]_(01-TV)_(IB_INTERNET)_DVB-T_(1900UK)_10072930.indd 11
03.10.2011 18:33:50
Removing the pedestal stand
English
(1) Carefully lay the front of the TV face down on a flat, cushioned surface such as a quilt or blanket. Leave
the stand protruding over the edge of the surface.
Note: Extreme care should always be taken when removing the pedestal stand to avoid damage to
the LCD panel.
(2) Remove the four screws on the stand. This will allow removal of the pedestal stand.
(3) Once you have removed four screws holding the pedestal stand in place, remove the pedestal stand from
the TV by removing away from the TV.
* For 19DV501B model
English - 12 -
19DV501B_DVD_A01_MB60_[GB]_(01-TV)_(IB_INTERNET)_DVB-T_(1900UK)_10072930.indd 12
03.10.2011 18:33:50
The Remote Control
No function
Info
AV/Source
Picture mode selection
INFO
Standby/On mode
Change image size
Sleep timer
SLEEP
SCREEN
SOURCE
English
Simple at-a-glance reference of your remote control.
PRESETS
Red button
Green button
To select TV
programme number
Yellow button
RETURN
Return to previous menu
Cursor up
OK/Select
Blue button
MENU
Menu on/off
Cursor right
Cursor left
Cursor down
To alter the volume
To change channels
Mono-Stereo/Dual I-II
No function
Previous programme
Subtitle on/off
FAV
LANG.
SUBTITLE
EPG
/
To mute the sound
Teletext / Mix
Programme guide (EPG)
DVD Mode Control buttons
Media Browser Controls
RC-1900
Note:Buttonsthatarenotindicated
ontheremotecontrolillustrationare
notfunctionalin TV mode.
Inserting Batteries and Effective Range of the Remote Control
Remove the back cover to reveal the battery compartment and make sure
the batteries are inserted the right way round. Suitable battery types for this
remote are AAA, IEC R03 1.5V.
Do not combine a used, old battery with a new one or mix battery types.
Remove dead batteries immediately to prevent acid from leaking into the
battery compartment. Dispose of them in a designated disposal area.
Warning: Batteries must not be exposed to excessive heat such as sunshine,
fire or the like.
The performance of the remote control will deteriorate beyond a distance of
five metres or outside an angle of 30 degrees from the centre of the television.
If the operating range becomes reduced the batteries may need replacing.
English - 13 -
19DV501B_DVD_A01_MB60_[GB]_(01-TV)_(IB_INTERNET)_DVB-T_(1900UK)_10072930.indd 13
03.10.2011 18:33:52
Connecting External Equipment
English
Before connecting any external equipment, remove the mains plug from the wall socket.
Side View
HDMI 1
COMMON INTERFACE
The Common Interface is
for a Conditional Access
Module (CAM).
DIGITAL AUDIO
Socket
HDMI Input
Socket
RGB/PC
Input
Aerial
Input
SPDIF
Coax.OUT
USB Input
+/- Controls
P/V-AV Button
Standby/On Button
SIDE AV
Headphone
SCART
Socket
* a decoder
could be Digital
Satellite, Free to
Air or any other
compatible
decoder.
decoder*
TV
Aerial cable:...........................................................
Connect the aerial to the ANT. socket on the rear of the TV.
SCART lead:..........................................................
If you use a decoder* or a media recorder, it is essential
that the scart cable is connected to the TV.
Before running first time installation, any connected devices
need to be set to standby mode.
The DIGITAL AUDIO socket enables the connection of a
suitable surround sound system.
A wide variety of external equipment can be connected to the
TV; therefore, the relevant owner’s manuals for all additional
equipment must be referred to for exact instructions.
If the TV automatically switches over to monitor external
equipment, return to normal TV by pressing the desired programme position button. To recall external equipment, press
SOURCE button repeatedly to switch between sources.
Regardless of source’s property, audio output from the DIGITAL AUDIO socket cannot be copied.
HDMI® (High-Definition Multimedia Interface) is for using
with a DVD decoder or other equipment with digital audio and
video output. It is designed for best performance with 1080i
and 1080p high-definition video signals but will also accept
and display VGA, 480i, 480p, 576i, 576p and 720p signals.
PC format signals will also be displayed.
NOTE: Although this TV is able to connect to HDMI equipment,
it is possible that some equipment may not operate correctly.
English - 14 -
19DV501B_DVD_A01_MB60_[GB]_(01-TV)_(IB_INTERNET)_DVB-T_(1900UK)_10072930.indd 14
03.10.2011 18:33:54
Connecting an HDMI® or DVI Device to the HDMI Input
English
NOTE:
• Some early HDMI equipment may not work properly with
your latest HDMI TV.
• Supported Audio format: Linear PCM, sampling rate
32/44.1/48kHz.
• The recommended HDMI-to-DVI adaptor cable length is
6.6 ft (2m).
• An HDMI-to-DVI adaptor cable transfers video only.
Separate analogue audio cables are required.
SIDE AV Input
To Connect an HDMI Device
Connect an HDMI cable (type A connector) to the HDMI terminal. For proper operation, it is recommended that you use
).
an HDMI cable with the HDMI Logo (
Side Audio/Video
Connection Cable
(Supplied)
• If your HDMI connection is capable of 1080p and/or
your TV is capable of refresh rates greater than 50Hz, you
will need a Category 2 cable. Conventional HDMI/DVI cable
may not work properly with this mode.
HDMI Input
Sockets
HDMI 1
This input is designed to accept HDCP (High-Bandwidth
Digital-Content Protection) programme material in digital
form from EIA/CEA-861-D–compliant [1] consumer electronic
devices (such as a set-top box or DVD player with HDMI or
DVI output).
To Connect a DVI Device
Connect an HDMI-to-DVI adaptor cable (HDMI type A connector) to the HDMI input socket and audio cables to the SIDE AV
socket, using the supplied Side AV connection cable’s RED
and WHITE inputs (see illustration).
SIDE AV
The HDMI input on your TV receives digital audio and
uncompressed digital video from an HDMI source device
or uncompressed digital video from a DVI (Digital Visual
Interface) source device.
• HDMI cable transfers both video and audio. Separate
analogue audio cables are not required (see illustration).
HDMI 1
• To view the HDMI device video, press SOURCE button to
select HDMI1 or HDMI2.
Audio Cable
(Not supplied)
HDMI to DVI
Adapter Cable
(not supplied)
NOTE:
To ensure that the HDMI or DVI device is reset properly, it is
recommended that you follow these procedures:
HDMI Input
Socket
(Back)
• When turning on your electronic components, turn on the
TV first, and then the HDMI or DVI device.
• When turning off your electronic components, turn off the
HDMI or DVI device first, and then the TV.
HDMI device
English - 15 -
19DV501B_DVD_A01_MB60_[GB]_(01-TV)_(IB_INTERNET)_DVB-T_(1900UK)_10072930.indd 15
03.10.2011 18:33:58
Connecting a Computer
Connecting a USB Memory
English
To Connect a Computer
Connect a USB Memory
With either an RGB/PC or an HDMI connection, you can watch
your computer’s display on the TV and hear the sound from
the TV’s speakers.
• You can connect a USB memory to your TV by using
the USB input of the TV. This feature allows you to
display/play music, photo or video files stored in a
USB memory.
When connecting a PC to the RGB/PC input on TV, use an
analogue RGB (15-pin) computer cable and use the SIDE
AV socket with a PC audio cable (not supplied) for audio
connection, using the supplied Side AV connection cable’s
RED and WHITE inputs (see illustration).
PC VGA Cable
(Not supplied)
Or
CAUTION: Quickly plugging and unplugging USB
devices, is a very hazardous operation. Especially,
do not repeatedly quickly plug and unplug the drive.
This may cause physical damage to the USB player
and especially the USB device itself.
Side Audio/Video
Connection Cable
(Supplied)
SIDE AV
• You may back up your files before making any
connections to the TV set in order to avoid any
possible data loss. Note that manufacturer will not
be responsible for any file damage or data loss.
• Do not pull out USB memory while playing a file.
RGB/PC Input
(back)
SIDE AV Input
• It is possible that certain types of USB devices (e.g.
MP3 Players) may not be compatible with this TV.
PC Audio Cable
(Not supplied)
USB Memory Connection
To use a PC, set the monitor output resolution on the PC
before connecting it to the TV. To display the optimum picture,
use the PC setting feature.
• Plug your USB memory to the USB input of the
TV.
NOTE:
SIDE VIEW
• Some PC models cannot be connected to this TV.
An adaptor is not needed for computers with a
compatible mini D-sub15-pin terminal.
USB
• Depending on the DVD’s title and the specifications
of the PC on which you are playing the DVD-Video,
some scenes may be skipped or you may not be
able to pause during multiangle scenes.
USB memory
English - 16 -
19DV501B_DVD_A01_MB60_[GB]_(01-TV)_(IB_INTERNET)_DVB-T_(1900UK)_10072930.indd 16
03.10.2011 18:34:02
Controlling the TV
English
A wide variety of external equipment can be connected via the sockets located on the side and back of the
TV. Whilst all the necessary adjustments and controls for the TV are made using the remote control, the
buttons on the left side of the TV may be used for some functions.
IR receiver
White Standby LED
+/- control/volume buttons
Programme / Volume / AV Function
Standby / On button
Switching on
Using the Remote Control
If the standby LED is unlit, check that the mains plug is conbutton on the left side of
nected to the power and press
the TV to switch the television on. Then the LED lights up in
button on the
white. If the picture does not appear, press
remote control; it may take a few moments.
Press MENU button on the remote control to see the
menus.
To put the television into Standby, press
button on the
button again.
remote control. To view the television, press
The picture may take a few seconds to appear.
Note: The active Standby LED may appear for a few moments
when the TV is switched off.
In sub menu screen mode the menu appears as a list. Press
Up or Down button to select a topic, and press OK button.
For energy saving:
Turning the TV off at its mains supply, or un-plugging it, will
cut energy use to nearly zero for all TV’s. This is recommended when the TV is not being used for a long time, e.g.
when on holiday.
Reducing the brightness of the screen will reduce energy use.
Energy efficiency cuts energy consumption and thus saves
money by reducing electricity bills.
NOTE: Putting the TV into standby mode, will reduce energy
consumption, but will still draw some power.
The main menu appears as a group of icons each for a
menu option. Press Left or Right button to select a topic,
and press OK button.
To use the options press Up or Down button on the remote
control to move up and down through them and OK button,
Left or Right button to select the required choice. Follow
the on screen instructions. The functions of each menu are
described in the manual.
Using the Controls and Connections on the TV
Using the control buttons on the side of the TV:
• To alter the volume, press “P/V/AV” button once and then
use “+/-” buttons to increase or decrease volume, so a
volume level scale (slider) will be displayed on the screen.
While Tv is on, +/- button can use as volume + or volume
- as default.
• To alter the programme press “P/V/AV” button once and then
use “+/-” buttons to change channel. By pressing “+/-” button,
you can select the next or previous programme.
• To select an external input, Hold the “P/V/AV” button, source
OSD will be displayed in a few second. Use “+/-” buttons to
change source.
NOTE: The USB socket has limited functionality, and Toshiba
can take no responsibility for damage to other connected
equipment.
Please always refer to the owner’s manual of the equipment
to be connected for full details.
English - 17 -
19DV501B_DVD_A01_MB60_[GB]_(01-TV)_(IB_INTERNET)_DVB-T_(1900UK)_10072930.indd 17
03.10.2011 18:34:02
Initial Installation
English
Before switching on the TV, put your decoder and media recorder to Standby if they are connected and
ensure the aerial is connected to your TV. To set up the TV, use the buttons on the remote control as
detailed on page 13.
IMPORTANT: Ensure that the aerial is connected and
a Common Interface module is not inserted before
switching on the TV for the first time installation.
1. Connect the mains plug and switch the TV to on
using the side standby switch. If the TV does not
button on
switch on, press any numbered or
the remote control, then the language selection
menu will be displayed. This screen will appear
the first time that the TV is switched on and each
time the TV is reset.
6. Select Yes button by using Left or Right button
and press OK button to continue.
7. The Auto tuning screen will appear and the
television will start to search for available stations.
The progress bar will move along the line. You
must allow the television to complete the search.
The following OSD will be displayed on the
screen and the television will search for digital
and analogue TV broadcasts:
2. By pressing Up or Down button, highlight the
language you want to set and press OK button.
The following message will be displayed next:
Note: You can press MENU button to cancel.
• After the available stations are stored, Channel List
will be displayed on the screen. If you like the sort
channels, according to the LCN, please select Yes
and then press OK button (if available).
3. By pressing Left or Right button, select the
country you want to set and press Down button
to highlight Teletext Language option. Use
Left or Right button to select desired Teletext
Language.
4. Press Down button after setting Teletext Language
option. Scan Encrypted will be then highlighted.
You can set Scan Encrypted as Yes if you want
to scan coded stations.
5. Press OK button on the remote control to continue
and the following message will be displayed on
the screen:
• Press OK button to quit channel list and watch TV.
Note:
Do not turn off the TV while initializing first time
installation.
English - 18 -
19DV501B_DVD_A01_MB60_[GB]_(01-TV)_(IB_INTERNET)_DVB-T_(1900UK)_10072930.indd 18
03.10.2011 18:34:07
Auto Tuning
English
Auto Tuning
As new services are broadcast, it will be necessary to
retune the television in order to view them.
• Auto Tuning will completely retune the television
and can be used to update the channel list. It is
recommended that Auto Tuning is run periodically
to ensure that all new services are added. All current
channels and settings, i.e. locked channels, will
be lost.
• Press MENU button on the remote control and select
Install and Retune by using Left or Right button.
Press OK button and the following menu screen
will be displayed.
• Select Automatic Channel Scan (Retune) by using
Up or Down button and press OK button. Automatic
Channel Scan options will be displayed. You can select
options by using Up or Down and OK buttons.
Auto Channel Scan Menu Operation
Digital: Searches and stores aerial DVB stations.
Analogue: Searches and stores analogue stations.
Full: Searches and stores both analogue and aerial
DVB stations
• Whenever you select an automatic search type and
press OK button, a confirmation screen will appear
on the screen. To start installation process, select
Yes, to cancel select No by using Left or Right
and OK button.
• After auto channel scan type is set and selected
and confirmed, installation process will start and
progress bar will move along. Press MENU button
to cancel process. In such a case, located channels
are not stored. The television will start to search for
all available stations. You must allow the television
to complete the search.
English - 19 -
19DV501B_DVD_A01_MB60_[GB]_(01-TV)_(IB_INTERNET)_DVB-T_(1900UK)_10072930.indd 19
03.10.2011 18:34:07
Manual Tuning, Analogue Fine Tuning
The television can be tuned-in manually using Manual Search feature.
English
Digital Manual Search
Analogue Manual Search
The feature is available for service engineers or
can be used for direct channel entry if the multiplex
channel is known.
The television can be tuned-in manually. For example:
if the television cannot be connected to a media
recorder/decoder with a SCART lead or to tune-in a
station on another System.
• Select Manual channel scan from the Install and
Retune menu and press OK.
To allocate a programme position on the television
for a decoder and media recorder: turn the decoder
on, insert a pre-recorded film into the media recorder
and press PLAY, then manually tune.
• After selecting search type as Digital, you can enter
the multiplex or frequency number using the numeric
buttons and press OK button to search.
• Enter the multiplex number using the numeric
buttons. The television will automatically search
for that multiplex. When the multiplex is found any
channels not currently on the programme list will be
added and the programme information at the top of
the screen will be updated.
• Repeat as necessary.
After selecting search type as Analogue, you can
use Up or Down button to highlight an item and then
press Left or Right button to set an option.
Enter the channel number or frequency using the
numeric buttons. You can then press OK button
to search. When the channel is located, any new
channels that are not on the list will be stored.
Analogue Fine Tune
• Select Analogue Fine Tune from the Install and
Retune menu by using Up or Down and OK
buttons. Analogue fine tune screen will be displayed.
Analogue Fine Tune feature will not be available
if there are no analogue channels, only digital
channels and external sources stored.
• Use Left or Right button to set Fine Tune. When
finished, press OK button.
English - 20 -
19DV501B_DVD_A01_MB60_[GB]_(01-TV)_(IB_INTERNET)_DVB-T_(1900UK)_10072930.indd 20
03.10.2011 18:34:08
General Operation
English
Stereo and Bilingual Transmissions
Viewing Main Menu
If stereo or dual language broadcasts are transmitted, the
word Stereo or Dual will appear on the screen each time positions are changed, disappearing after a few seconds. If the
broadcast is not in stereo, the word Mono will appear.
• Press MENU button on the remote control to view
main menu.
Stereo… Press LANG. to select Stereo or Mono.
Volume
Bilingual… Bilingual transmissions are rare. If they are
transmitted, the word Dual will be displayed. Choose the
required programme number, and if the word Dual appears,
press LANG. to select Dual 1, Dual 2 or Mono.
Press V+ or V- button to adjust the volume.
For DTV broadcasts
To view current language and for changing to an
alternative language (if available), press LANG. button.
Available options will be listed.
Controlling Volume and Muting Sound
Sound Mute
Press “ ” button once to turn the sound off and
again to cancel.
Selecting Programme Positions
Displaying Subtitles
To select a programme position use the numeric
buttons on the remote control. Programme positions
can also be selected using P+ or P- button.
In digital broadcasts, this feature will show subtitles
on the screen in the selected language provided they
are being broadcast.
Press INFO button to display the on-screen information
i.e. programme position, stereo/mono signal and
picture format.
• Press SUBTITLE button to activate available
subtitles. Press SUBTITLE button again to turn off
subtitles.
English - 21 -
19DV501B_DVD_A01_MB60_[GB]_(01-TV)_(IB_INTERNET)_DVB-T_(1900UK)_10072930.indd 21
03.10.2011 18:34:08
Channel List, Sorting Programmes, Programme Locking
English
You can view stored channels and sort them by using the Channel List feature.
Viewing Channel List
Deleting a Channel
The channel order may be changed to suit your personal
preference.
You can press GREEN button to tag/untag all
channels; YELLOW button to tag/untag channel.
• Select Channel List from the main menu and press
OK button. The following menu will be displayed:
• Select the channel that you want to delete and select
Delete option. Press OK button to continue.
• A warning screen will appear. Select Yes to delete,
select No to cancel. Press OK button to continue.
Renaming a Channel
• Select Edit Channel List to manage all stored
channels. Use Up or Down and OK buttons to select
Edit Channel List.
• Select the channel that you want to rename and
select Edit Name option. Press OK button to
continue.
• Pressing Left or Right button moves to the previous/
next character. Pressing Up or Down button
changes the current character. Pressing the numeric
buttons ‘0...9’ replaces the highlighted character with
the characters printed above the button one by one
as the button is pressed.
• When finished, press OK button to save. Press
MENU to cancel.
Locking a Channel
You can press GREEN button to tag/untag all
channels; YELLOW button to tag/untag a single
channel.
• Press Up or Down button for selecting a channel.
You can press P+ or P- button to move page up or
page down.
• To watch a specific channel, highlight it by using Up
or Down button. Afterwards press OK button.
• Select the channel that you want to lock by using
Up or Down button.
• Select Lock option by using Left or Right button.
Press OK button to continue.
• Press BLUE button to view filtering options.
• You will be asked to enter parental control PIN. Enter
the PIN number.
• Press MENU button to exit.
Note: Default PIN is set to 0000.
Moving a Channel
• Highlight the desired channel by using Up or Down
button.
• Press OK button when the desired channel is
highlighted to lock/unlock the channel. Lock symbol
will be displayed next to the selected channel.
• Select Move option in the channel list and press
OK button.
• Edit Number screen will be displayed. Enter the
desired channel number by using the numeric
buttons on the remote control. If there is a previously
stored channel on that number, a warning screen
will be displayed. Select Yes if you want to move the
channel and press OK.
• Selected channel is now moved.
English - 22 -
19DV501B_DVD_A01_MB60_[GB]_(01-TV)_(IB_INTERNET)_DVB-T_(1900UK)_10072930.indd 22
03.10.2011 18:34:08
Viewing Info Banner, Electronic Programme Guide
English
Viewing Info Banner
• Press GREEN button to list the schedule.
• Press INFO button. The information screen will
appear giving details of the channel and programme
currently being viewed.
• Press BLUE button to display filtering options.
Note: There are alternative views of EPG screen.
Button functions will be displayed at the bottom of
the menu screen.
• Whenever you change channel, the TV displays the
broadcast picture along with an information banner at
the bottom of the screen (available only in DTV mode).
This will remain on the screen for a few seconds.
• If the selected channel is locked, you must enter the
correct four numeric code to view the channel. “Enter
PIN” will be displayed on the screen in such a case:
• Enter the 4-digit PIN number to continue.
Electronic Programme Guide
• • Select the on-screen guide by pressing EPG
button, the guide screen will appear highlighting
details of the channel and programme currently
being viewed. This may take a few moments to
appear.
• For information on a highlighted programme, press
INFO button.
• For details of other programmes currently available,
press navigation buttons to scroll up and down
or scroll left/right through the list. As channels are
selected, details of the programme currently being
broadcast will appear.
• To set the timer for a selected programme, press
OK button to select Timers menu.
• Press YELLOW button to switch to timeline view.
English - 23 -
19DV501B_DVD_A01_MB60_[GB]_(01-TV)_(IB_INTERNET)_DVB-T_(1900UK)_10072930.indd 23
03.10.2011 18:34:08
Language Selection
English
Language Settings
Using this menu you can adjust the preferred language
settings.
• Press MENU button and select Settings by using
Left or Right button.
• Select Language from setup menu and press OK to
view this menu. Press the RETURN button on the
remote control to exit.
Preferred
These settings will be used if available. Otherwise the
current settings will be used.
Audio: by pressing Left or Right button change the
audio language.
Subtitle: alter the subtitle language with Left or
Right button. The chosen language will be seen in
subtitles.
Teletext: changes the preferred teletext language.
Guide: By pressing Left or Right button change the
guide language.
Current
Audio: if audio language is supported, change the
audio language by pressing Left or Right button.
Subtitle: if subtitle is backed up, alter the subtitle
language with Left or Right button. The chosen
language will be seen in subtitles.
English - 24 -
19DV501B_DVD_A01_MB60_[GB]_(01-TV)_(IB_INTERNET)_DVB-T_(1900UK)_10072930.indd 24
03.10.2011 18:34:09
Digital Settings - Parental Control, Menu Lock, Set PIN
English
You can view or set parental preferences of your TV.
Viewing Parental Control Menu
Maturity Lock (*)
Press MENU button and select the Settings by using
Left or Right button. Press OK button to view Settings
menu. Use Up or Down button to highlight Parental
and press OK to continue:
When set, this option gets the maturity information
from the broadcast and if this maturity level is disabled,
disables access to the broadcast. Press MENU button
and select Settings by using Left or Right button.
Press OK button to continue. Use Up or Down
button to select Parental and then press OK button
to continue. Enter the pin number.
(*) Not available for UK.
• A dialogue box asking for the lock key will be
displayed. The default key is set to 0000. Enter
the PIN.
• If it is incorrect, “Wrong PIN” OSD will be displayed.
If it is correct, the Parental Control menu will be
displayed:
Child Lock
Child Lock disables the buttons on the TV except
/
and
/ buttons. All buttons on the remote
control can still be used. Press MENU button and
select Settings by using Left or Right button. Press
OK button to continue. Use Up or Down button to
select Parental and then press OK button to continue.
Enter the pin number.
Set PIN
• Use Up or Down buttons to select Set PIN option.
Press OK to display the Set PIN window.
• Use numeric buttons to enter new pin number. You
will need to input your new pin a second time for
verification purposes.
• After typing correct PIN numbers, PIN number will
be changed.
Menu Lock
In Menu lock you can set locking for All menus, or the
Installation menu to restrict access to these menus.
If the menu lock is disabled, there will be free access
to the menu system.
Note: The factory default pin number is 0000, if you
change the pin number make sure you write it down
and keep it safe.
• Use Up or Down buttons to go to Menu Lock
option. Use Left or Right buttons to choose Menu
Lock Mode.
OFF : All menus are unlocked.
ALL MENUS : All Menus are accessible only with
the correct lock key. So the user cannot add, delete,
rename, channels, cannot set timers.
INSTALLATION MENU: Installation menu is locked.
So the user can’t add channels.
English - 25 -
19DV501B_DVD_A01_MB60_[GB]_(01-TV)_(IB_INTERNET)_DVB-T_(1900UK)_10072930.indd 25
03.10.2011 18:34:09
Configuring Picture Settings
English
You can configure picture settings of your TV by using Picture Settings menu.
Configuring Picture Settings
Brightness
You can use different picture settings in detail. You
can customize current picture mode settings as
desired. For example, you can change items such as,
Brightness, Contrast, Colour, Sharpness and Hue.
Sets the brightness value for the screen. Press
MENU button and select Picture by using Left or
Right button. Press Up or Down button to select
Brightness.
Press MENU button and select Picture by using Left
or Right button. Press OK button to view Picture
Settings menu.
Sharpness
Sets the sharpness value for the objects displayed on
the screen. Press MENU button and select Picture by
using Left or Right button. Press Up or Down button
to select Sharpness.
Colour
Sets the colour value, adjusting the colours. Press
MENU button and select Picture by using Left or
Right button. Press Up or Down button to select
Colour.
Colour Shift
Adjust the desired colour tone. Press MENU button
and select Picture by using Left or Right button.
Press Up or Down button to select Colour Shift.
Colour Temp
Operating Picture Settings Menu Items
Colour Temperature increases the ‘warmth’ or
‘coolness’ of the picture by increasing the red or
blue tint.
• Press Up or Down button to highlight a menu
item.
• In the PICTURE menu, press Up or Down to select
Colour Temp.
• Use Left or Right button to set an item.
• Press Left or Right to choose from one of these
options: Cool, Normal and Warm.
• Press MENU button to exit.
Note:
Picture Mode
This TV offers the choice of personalising the picture
style. Cinema, Game, Dynamic and Natural are preset
options and affect settings within the TV. Press MENU
button and select Picture by using Left or Right
button. Press Up or Down button to select Mode.
• Setting Cool option gives white colours a slight
blue stress.
• Setting Warm option gives white colours a slight
red stress.
• For normal colours, select Normal option.
• In the Picture Settings menu, press Up or Down
button to select Mode. Press Left or Right button to
select the picture mode you prefer.
Contrast
Sets the lightness and darkness values of the screen.
Press MENU button and select Picture by using Left
or Right button. Press Up or Down button to select
Contrast.
English - 26 -
19DV501B_DVD_A01_MB60_[GB]_(01-TV)_(IB_INTERNET)_DVB-T_(1900UK)_10072930.indd 26
03.10.2011 18:34:09
Configuring Picture Settings - continued
English
Noise Reduction
Sometimes some words or picture elements may
become distorted or pixelated. Using the Noise
Reduction feature reduces this effect by smoothing out
the edges. Press MENU button and select Picture by
using Left or Right button. Press Up or Down button
to select Noise Reduction.
Picture Zoom
Sets the picture size to auto,16:9, subtitle,14:9, 14:9
zoom, 4:3, panoramic or cinema. Press MENU button
and select Picture by using Left or Right button.
Press Up or Down button to select Picture Zoom.
Reset
This feature allows you to reset the current Picture
Settings to the default values. Press MENU button
and select Picture by using Left or Right button.
Press Up or Down button to select Reset and press
OK button.
Note: The reset function does not reset the settings for
Mode, Colour Temp, Noise Reduction, Picture Zoom
and HDMI True Black.
English - 27 -
19DV501B_DVD_A01_MB60_[GB]_(01-TV)_(IB_INTERNET)_DVB-T_(1900UK)_10072930.indd 27
03.10.2011 18:34:09
Changing Picture Format
English
Depending on the type of broadcast being transmitted, programmes can be viewed in a number of formats.
Press SCREEN button repeatedly to select between Auto, 16:9, Subtitle, 14:9, 14:9 Zoom, 4:3, Panoramic or
Cinema. When auto is selected the format being displayed is determined by the picture being broadcast.
Note: Using the special functions to change the size of the displayed image (i.e. changing the height/width
ratio) for the purposes of public display or commercial gain may infringe on copyright laws.
16:9
subtitle
Use this setting when watching a
widescreen DVD, widescreen video
tape or a 16:9 broadcast (when
available). Due to the range of
widescreen formats (16:9, 14:9 etc.)
black bars may be visible on the top
and bottom of the screen.
When subtitles are included on a
letterbox format broadcast, this
setting will raise the picture to ensure
that all the text is displayed.
14:9
This zooms up the wide picture (14:9
aspect ratio) to the upper and lower
limits of the screen
14:9 zoom
This option zooms to the 14:9 picture.
4:3
panoramic
cinema
Use this setting to view a true 4:3
broadcast.
This stretches the left and right sides
of a normal picture (4:3 aspect ratio)
to fill the screen, without making the
picture appear unnatural.
The top and bottom of the picture are
slightly cut off.
This zooms up the wide picture
(16:9 aspect ratio) to the full
screen.
English - 28 -
19DV501B_DVD_A01_MB60_[GB]_(01-TV)_(IB_INTERNET)_DVB-T_(1900UK)_10072930.indd 28
03.10.2011 18:34:09
Configuring PC Picture Settings
English
You can set PC Mode picture settings when using the TV as a PC monitor.
PC Picture Settings (*)
H Position
(*) While in VGA/PC mode, some items in Picture
menu will be unavailable. Instead, VGA mode settings
will be added to the Picture Settings while in VGA/
PC mode.
H (Horizontal) Position shifts the image horizontally to
right hand side or left hand side of the screen.
PC Picture controls
• Press the Left or Right button to adjust the value.
Contrast, Brightness and Colour Temperature
adjustments in this menu are identical to adjustments
defined in TV picture menu.
Select Reset and press OK button to reset the
adjustments.
Note:
For switching to VGA/PC source, press SOURCE
button on your remote control and select VGA/PC
input.
Note that VGA/PC mode menu settings are available
only while the TV is in PC source.
PC Position
Select this to display PC position menu items.
• In the PC Position menu press the Down button
until H Position is highlighted.
V Position
V (Vertical) Position shifts the image vertically towards
the top or bottom of the screen.
In the PC Position menu press the Down button until
V Position is highlighted.
Press the Left or Right button to adjust the value.
Dot Clock
Dot Clock adjustment corrects the interference
that appear as vertical banding in dot intensive
presentations like spreadsheets or paragraphs or
text in smaller fonts.
• In the PC Position menu press the Down button
until Dot Clock is highlighted.
• Press the Left or Right button to adjust the value.
Phase
Depending on the resolution and scan frequency that
you input to the TV Set, you may see a hazy or noisy
picture on the screen. In such a case you can use this
item to get a clear picture by trial and error method.
• In the PC Position menu press the Down button
until Phase is highlighted.
• Press the Left or Right button to adjust the value.
Autoposition
If you shift the picture horizontally or vertically to an
unwanted position, use this item to put the picture into
correct place automatically.
• Select the PC Position option from the main menu.
Press OK to display the PC Position submenu.
• Press the Down button to highlight Autoposition
and then press the OK button.
English - 29 -
19DV501B_DVD_A01_MB60_[GB]_(01-TV)_(IB_INTERNET)_DVB-T_(1900UK)_10072930.indd 29
03.10.2011 18:34:10
Configuring Sound Settings
English
You can configure sound settings of your TV by using Sound Settings menu.
Configuring Sound Settings
Sound settings can be configured according to your
personal preferences.
Press MENU button and select Sound by using Left
or Right button. Press OK button to view Sound
Settings menu.
In equalizer menu, the preset can be changed to
Music, Movie, Speech, Flat, Classic and User.
Press the MENU button to return to the previous
menu.
Note: Equalizer menu settings can be changed
manually only when the Equalizer Mode is in User.
Balance (Only for speaker)
This setting is used for emphasizing left or right
speaker balance.
• Press Left or Right button to change the level of
the balance. Balance level can be adjusted between
-31 and +31.
Headphone
This setting is used to set the sound output when
headphones are connected.
• Press Up or Down button to select Headphone.
Operating Sound Settings Menu Items
• Press Up or Down button to highlight a menu
item.
• Use Left or Right button to set an item.
• Press MENU button to exit.
Volume
Press MENU button and select Sound by using Left
or Right button. Press OK button to continue.
Select Volume using Up or Down button and then use
Left or Right button to set volume level.
• Press Left or Right button to select Volume. Press
Right button to increase headphone volume level.
Press Left button to decrease headphone volume
level. Headphone volume level can be adjusted
between 0 and 63.
AVL
Sometimes there can be large changes in volume
when switching from a DTV 5.1ch to a DTV 2ch, an
ATV channel, or an external input. Using the AVL
feature reduces these volume differences.
• In the Sound menu, press Up or Down to highlight
AVL. Press Left or Right button to set AVL as On
or Off.
Dynamic Bass
Equalizer (Only for speaker)
Dynamic Bass is used to increase bass effect of the
TV set.
You can customize current sound mode settings. Select
the appropriate mode in accordance with the installation
location of the TV and adjust the equalizer on-screen as
desired. Press OK button to view equalizer submenu.
Press MENU button and select Sound by using Left
or Right button. Press OK button to continue. Select
Dynamic Bass using Up or Down buttons and press
Left or Right button to set.
Digital Out
This setting enables you to set Digital Out preference
as Compressed or PCM. You should set this feaure in
accordance with the received broadcast’s content.
Press MENU button and select Sound by using Left
or Right button. Press OK button to continue.
Select Digital Out using Up or Down button and then
use Left or Right button.
English - 30 -
19DV501B_DVD_A01_MB60_[GB]_(01-TV)_(IB_INTERNET)_DVB-T_(1900UK)_10072930.indd 30
03.10.2011 18:34:10
Settings Menu Operation, Conditional Access
English
Configuring Your TV’s Settings
Other Settings
Detailed settings can be configured to suit your
personal preferences.
Viewing Settings Menu
Press MENU button and select Settings by using Left
or Right button. Press OK button to view Settings
menu.
Displays other setting options of the TV set.
Using a Conditional Access Module
The Common Interface Slot, situated on the side of the
television, enables the insertion of a CAM (Conditional
Access Module) and card. These are purchased from
a service provider and allow additional subscription
broadcasts to be viewed. For more information, see
a service provider.
IMPORTANT: Insert or remove the CI module only
when the TV is SWITCHED OFF.
• In order to watch certain digital channels, a
conditional access module (CAM) is necessary. This
module must be inserted in the CI slot of your TV.
• Obtain the Conditional Access Module (CAM) and
the viewing card by subscribing to a pay channel
company, then insert those to the TV using the
following procedure.
• Insert the CAM and then the viewing card to the
slot that is located in the terminal cover at the rear
side of the TV.
Operating Settings Menu Items
• Press Up or Down button to highlight a menu item.
• Press OK button to select an item.
• Press MENU button to exit.
Conditional Access
This setting controls conditional access modules
when available. Select Settings from the main menu
by using Left or Right button and press OK button.
Afterwards, use Up or Down button to set Conditional
Access. Press OK button to continue.
• The CAM should be correctly inserted, it is
impossible to insert fully if reversed. The CAM or
the TV terminal may be damaged if the CAM is
forcefully inserted.
Connect the TV to the mains supply, switch on and then
wait for few moments until the card is activated.
• When no module is inserted, “No Common Interface
module detected” message appears on the screen.
• Refer to the module instruction manual for details
of the settings.
Language
Viewing Conditional Access Menu (*)
Configures language settings. See page 24.
(*) These menu settings may change depending on
the service provider.
Parental
Configures parental settings. See page 25.
Timers
Sets timers for selected programmes. See page 32.
Date/Time Settings
Press MENU button and select Settings by using
Left or Right button. Press OK button to view
Settings menu. Use Up or Down button to highlight
Conditional Access and press OK to view menu
items.
You can configure date/time preferences by using this
menu screen. See page 32.
Sources
Enables or disables selected source options. See
page 33.
English - 31 -
19DV501B_DVD_A01_MB60_[GB]_(01-TV)_(IB_INTERNET)_DVB-T_(1900UK)_10072930.indd 31
03.10.2011 18:34:10
Setting Timers, Setting Date/Time
English
Timers
Editing a Timer
To view Timers menu, press MENU button and select
Settings by using Left or Right button. Press OK
button to view Settings menu. Use Up or Down button
to highlight Timers and press OK to continue:
• Select the timer you want to edit by pressing Up or
Down button.
• When finished with editing, press GREEN button to
save. You can press MENU button to cancel.
Setting Sleep Timer
Deleting a Timer
The television can be set to turn itself Off after a
certain length of time.
• Select the timer you want to delete by pressing Up
or Down button.
• Highlight Sleep Timer by using Up or Down
button.
• Press RED button.
• Use Left or Right button to set. The timer can be
programmed between Off and 2.00 hours (120
minutes) in steps of 30 minutes.
Setting Programme Timers
This feature will set the television to go to a specific
channel at a certain time. It can be used to view
a particular programme, or by setting the mode
to daily or weekly, can be used to view a series of
programmes.
• Select Yes by using Left or Right button to delete
the timer. Select No to cancel.
Configuring Date/Time Settings
You can configure date/time preferences by using
this menu screen.
• Select Date/Time in the Settings menu to configure
Date/Time settings. Press OK button.
Press Down button to set timers on an event.
Programme timer function buttons will be displayed
on the screen.
Note: That this feature will be available only when a
timer has been programmed.
Adding a Timer
• Press YELLOW button on the remote control to
add a timer. The following menu appears on the
screen:
Channel: Changes channel by using Left or Right.
Timer/Record Type: This feature is unavailable to
be set.
Date: Enter a date using the numeric buttons.
Start: Enter a starting time using the numeric
buttons.
End: Enter an ending time using the numeric
buttons.
Duration: Displays duration between the starting and
ending time.
Repeat: Sets a timer to be repeated as Once, Daily
or Weekly. Use Left or Right button to select an
option.
Use
or
button to highlight the Time Settings
Mode. Time Settings Mode is set using or button.
It can be set to AUTO or MANUAL.
When AUTO is selected, Date/Time and Time Zone
options will not be available to be set. If MANUAL
option is selected as the Time Zone can be altered:
• By pressing
or
button select Time Zone.
Use or button to change the Time Zone between
GMT-12 or GMT+13. Date/Time on the top of the
menu list will then change according to the selected
Time Zone.
Note: For countries without Digital channels, only the
Date and Time option will be displayed.
Change/Delete: Controls parental settings on timers.
• Press GREEN button to save the timer. Press RED
button to cancel.
English - 32 -
19DV501B_DVD_A01_MB60_[GB]_(01-TV)_(IB_INTERNET)_DVB-T_(1900UK)_10072930.indd 32
03.10.2011 18:34:10
Source Settings, Other Controls
English
Configuring Source Settings
Configuring Other Settings - General
You can enables or disable selected source options.
The TV will not switch to the disabled source options
when SOURCE button is pressed.
You can configure the settings of your TV. Select
Settings from main menu and press OK to view the
Settings menu. Press the MENU button on the remote
control to exit.
To view general configuration preferences, select
Other Settings in the Settings menu and press OK
button.
• Select Sources in the Settings menu and press
OK button.
• Press Up or Down buttons to select a source.
• Use Left or Right button to enable or disable the
selected source. Changes are automatically stored.
Input Selection
Use the Input Selection window if the television
does not switch over to a connected source
automatically.
• Press SOURCE button on your remote control
for directly changing sources. Use the Up or Down
button to highlight an input and press Right button
to select.
Operation
• Press Up or Down button to select an item.
• Use Left or Right button to set an option.
• Press OK button to view a sub-menu.
Menu Timeout
To set a specific display timeout for menu screens,
set a value for this option.
In the Other Settings menu, select Menu Timeout
and choose 15 sec, 30 sec or 60 sec using Left or
Right button.
Scan Encrypted
When this setting is on, search process will locate
the encrypted channels as well. If it is set as OFF
manually, encrypted channels will not be located
while in automatic search or manual search. Scan
Encrypted Channel feature will always be ON after
performing first time installation.
• In the Other Settings menu, use Up or Down button
to select Scan Encrypted.
• Press Left or Right button to set this function as
Yes or No.
English - 33 -
19DV501B_DVD_A01_MB60_[GB]_(01-TV)_(IB_INTERNET)_DVB-T_(1900UK)_10072930.indd 33
03.10.2011 18:34:11
Other Controls
English
Backlight
Audio Description
This setting controls the backlight level.
Select Backlight by pressing Up or Down button.
Press Left or Right button to set Backlight to Auto,
Medium, Maximum or Minimum.
Blue Background
If the signal is weak or absent, the TV will automatically
change to a blue screen. To enable this, set Blue
Background to On.
• In the Other Settings menu, select Blue
Background and choose On or Off using Left or
Right button.
Software Upgrade
Audio description refers to an additional narration
track for blind and visually impaired viewers of
visual media, including television and movies. The
description narrator talks through the presentation,
describing what is happening on the screen during the
natural pauses in the audio (and sometimes during
dialogue, if deemed necessary). You can use this
feature, only if the broadcaster supports that additional
narration track.
• Highlight Audio Description by pressing Up or
Down button.
• Press OK button to enter Audio Description
submenu.
This feature helps to keep your TV updated. It works
automatically and searches for new information
when available. Note that this setting is inactive to
be modified.
• Use Up or Down button to select Audio Description
setup and then press Left or Right button to set
this setting.
To ensure that your TV always has the most updated
information, you can use this setting. In order for the
proper operation, please ensure that the TV is set to
standby mode.
You can set the timeout value of auto off feature.
After the timeout value is reached and the TV is not
operated for selected time, the TV will go off. Press
MENU button and select Settings by using Left or
Right button. Press OK button to continue. Use Up
or Down button to select Other Settings and then
press OK button. Select Auto TV Off using Up or
Down button.
You can enable or disable automatic upgrade by
setting Automatic Scanning option.
(*) This setting is visible only when the Country option
is set to Denmark, Sweden, Norway or Finland.
Auto TV Off
Standby Search (*)
You can manually search for new software by
selecting Scan for upgrade.
Hard of Hearing
If the broadcaster enables any special signal
concerning the audio, you can set this setting as On
to receive such signals.
• Use Up or Down button to select Hard of Hearing
and then press Left or Right button to set this setting
as On or Off.
If the Standby Search is set to On and the TV is in
standby mode, the TV will look for any changes in
the saved channels. Press MENU button and select
Settings by using Left or Right button. Press OK
button to continue. Use Up or Down button to select
Other Settings and then press OK button. Select
Standby Search using Up or Down button and use
Left or Right button to set.
Full Mode (optional)
If you connect a device via HDMI or YPbPr connectors
and set 1080i/1080p resolutions, Full Mode item will
be visible.
English - 34 -
19DV501B_DVD_A01_MB60_[GB]_(01-TV)_(IB_INTERNET)_DVB-T_(1900UK)_10072930.indd 34
03.10.2011 18:34:11
Other Controls - continued
English
Teletext language
Use this setting to set a preferred Teletext language.
Press MENU button and select Settings by using Left
or Right button. Press OK button to continue. Use Up
or Down button to select Language and then press
OK button. Select Teletext language using Up or
Down button and use Left or Right button to set.
HDMI True Black
While watching from HDMI source, this feature will be
visible in the Picture Settings menu.
You can use this feature to enhance blackness in the
picture. You can set this feature as “On” for activating
HDMI True Black mode. Press MENU button and
select Picture by using Left or Right button. Press OK
button to continue. Select HDMI True Black using Up
or Down button and use Left or Right button to set.
Note: HDMI True Black On/Off feature functions only
when the HDMI device output is set to RGB.
English - 35 -
19DV501B_DVD_A01_MB60_[GB]_(01-TV)_(IB_INTERNET)_DVB-T_(1900UK)_10072930.indd 35
03.10.2011 18:34:11
USB Media Browser
English
This TV allows you to enjoy photo, video or music files stored on a USB memory.
Manual Start
• To display Media Browser window, you can press
MENU button on the remote control and then select
Media Browser by pressing Left or Right button.
• Press OK button to continue. Media Browser menu
contents (depending on the contents of your USB
memory) will be displayed.
Auto Start
• When you plug a USB memory, the following menu
will be displayed.
• You can play music, picture and video files from a
USB memory.
• To display All files in a list, select SETTINGS tab
and change View Style to Folder. Then go back to
main media browser screen and you will see that
now All tab will be available. Select All tab and press
OK button.
Note:
Some USB compliant devices may not be supported.
If the USB memory is not recognized after power off/
on or First Time Installation, plug the USB memory
out and power off/on the TV set. Then plug the USB
memory in again.
• Do not use a USB Hub.
• You must obtain any required permission from
copyright owners to use copyright content.
• Non-supported characters will be replaced with a
square (□).
Playing MP3 Files
To play mp3 files from a USB memory, you can use
this menu screen.
When you select Music from Media Browser, available
music files will be filtered and listed on this screen.
If you select View Style as Folder from the Media
Browser Settings menu, you can display files in
accordance with the folder path. However, only the
selected file types will be visible.
• Use Up or Down button to highlight a file.
• 0..9 (Numeric buttons): The TV will jump to the
file starting with the letter you input via the numeric
buttons on your remote control.
• Use
button to stop playback.
• Press button to play all media files in the folder
starting with the selected one.
• Press
button to pause a playing file.
• Use BLUE button to play the selected file repeatedly
or in shuffle mode.
• Press FAV button to sort files by Title, Artist or
Album.
• Press OK button to play the selected file.
Toshiba cannot and does not grant such permission.
• Depending on the file size and amount in your USB
memory, it may take some time for loading to view.
A message will display on-screen when loading files
from the USB memory.
• Only limited types of U3 USB device are supported.
Therefore, it is suggested not to use U3 USB for
playing Media Player.
English - 36 -
19DV501B_DVD_A01_MB60_[GB]_(01-TV)_(IB_INTERNET)_DVB-T_(1900UK)_10072930.indd 36
03.10.2011 18:34:12
USB Media Browser - continued
This TV allows you to enjoy photo, video or music files stored on a USB memory.
English
Viewing JPEG Files
Slideshow Feature
To view photo files from a USB memory, you can use
this menu screen. When you select Photos from
Media Browser, available image files will be filtered
and listed on this screen.
You can use this feature to display photos on your
TV.
If you select View Style as Folder from the Media
Browser Settings menu, you can display files in
accordance with the folder path. However, only the
selected file types will be visible.
• Press
button to continue with the slideshow.
• Press
button to pause a playing file.
• Press GREEN button to activate loop/shuffle
mode.
• Press Left or Right button to jump to previous or
next file of slideshow.
• Use Up or Down button to rotate the picture.
(Then it will become paused mode.)
• Press INFO button to activate the operations bar.
• Press RETURN button to go back.
• Use Numeric Buttons to jump to the previous or
next file. Press OK button to play.
• Press OK button to view the selected picture in
full screen.
Press
button to start a slideshow.
Press RED button to sort files by date.
Press GREEN button to view thumbnails.
Press YELLOW button to change the viewing style.
Press BLUE button to change media type.
English - 37 -
19DV501B_DVD_A01_MB60_[GB]_(01-TV)_(IB_INTERNET)_DVB-T_(1900UK)_10072930.indd 37
03.10.2011 18:34:12
USB Media Browser - continued
This TV allows you to enjoy photo, video or music files stored on a USB memory.
English
Video Playback
Note:
When you select Videos from Media Browser,
available video files will be filtered and listed on this
screen. You can use Up or Down button to select a
video file and press OK button to play a video.
You can set subtitles by using OK button before
starting the playback or by using LANG button during
the playback. Selected subtitles may not be displayed
correctly in some cases.
Note: If you set View Style from Media Browser
Settings menu as ‘Folder’, media browser main
selection screen will include All tab as well.
In order to display movie subtitles correctly, you should
set a “Movie Subtitle” language. You should display
Language Settings menu for setting a Movie Subtitle
languge. See the section, “Language Settings” on
page 24 for displaying Language Settings menu.
• Press RETURN button to switch back to previous
menu.
Media Browser Settings
Subtitle Selection: If you select a subtitle file and
press OK button, you can select or deselect that
subtitle file. You can turn the subtitle on or off by using
the SUBTITLE button.
• Use Up or Down button to highlight a file.
• Press OK button to start the video playback and play
the selected file. Press button to play all.
The following menu will be displayed while playing
a video file:
You can set your Media Browser preferences by
using the Settings dialogue. Press Up or Down
button to highlight an item and use Left or Right
button to set.
View Style: Sets default browsing mode.
Slideshow Interval: Sets slide show interval time.
Show Subtitle: Sets subtitle enabling preference.
• Press
button to stop the video playback.
• Press
button to pause the video playback.
• Press
button to go backward.
• Press
button to go forward.
Subtitle Language: Sets supported subtitle
language.
Subtitle Position: Sets subtitle position as up or
down.
• Use LANG button to set subtitle/Audio.
• Use GREEN button to jump to a time.
Subtitle Font Size: Sets subtitle font size (max.
54pt).
• Use YELLOW button to open subtitle time correction
menu.
• Press MENU button on the remote control.
To Close the Media Player
English - 38 -
19DV501B_DVD_A01_MB60_[GB]_(01-TV)_(IB_INTERNET)_DVB-T_(1900UK)_10072930.indd 38
03.10.2011 18:34:12
Analogue Text Services
Analogue Text Services
Revealing Concealed Text
Before using the text services, the required language
region must be chosen.
To discover the solutions on quiz and joke pages press
the INFO button.
• Select Language from the Settings menu.
Holding a Page
• Press the Left or Right button to choose the required
language region.
• After the Teletext language is selected, press MENU
button to exit.
At times it is convenient to hold a page of text. Press
OK and HOLD will appear in the top left of the screen.
The page will be held on screen until the button is
pressed again.
To display an initial page
Using Text Button -TEXT
• To view text services press
. Press
again to
superimpose text over a normal broadcast picture.
• Press
English
This television has a multi-page text memory, which takes a few moments to load.
Press RETURN to access an initial page. The one
displayed is dependant on the broadcaster.
again to return to normal viewing.
• Programmes cannot be changed until text is
cancelled.
• The first text page shown will be the initial page.
• Any text page can be accessed by entering the 3
digit page number using the numbered buttons,
pressing the coloured buttons or pressing to
advance to the next page and to go back to the
previous page.
• Four coloured titles will appear at the base of the
screen. To access one of the four given subjects,
press the relevant coloured button on the remote
control.
• For further information on your particular text
system(s), see the broadcast text index page or,
consult your local Toshiba dealer.
Below is a guide to the functions of the remote control
text buttons.
Acessing Sub-Pages
If a text page has sub-pages, press and enter the subpage numbers 01,02,03 etc. which can be selected
using Left/ Right buttons at the bottom of the text page
under the coloured links.
English - 39 -
19DV501B_DVD_A01_MB60_[GB]_(01-TV)_(IB_INTERNET)_DVB-T_(1900UK)_10072930.indd 39
03.10.2011 18:34:13
Appendix A: PC Input Typical Display Modes
English
The display has a maximum resolution of 1360 x 768. The following table is an illustration of some of the
typical video display modes.
Your TV may not support different resolutions. Supported resolution modes are listed below.
If you switch your PC to an unsupported mode, a warning OSD will appear on the screen.
Index
Resolution
Frequency
1
640x400
70 Hz
2
640x480
60 Hz
3
640x480
75 Hz
4
800x600
60 Hz
5
800x600
75 Hz
6
1024x768
60 Hz
7
1024x768
70 Hz
8
1024x768
75 Hz
75 Hz
9
1152x864
10
1280x768
60 Hz
11
1280x1024
60 Hz
12
1360x768
60 Hz
English - 40 -
19DV501B_DVD_A01_MB60_[GB]_(01-TV)_(IB_INTERNET)_DVB-T_(1900UK)_10072930.indd 40
03.10.2011 18:34:13
Appendix B: AV and HDMI Signal Compatibility (Input Signal Types)
EXT
(SCART)
SIDE AV
YPbPr
HDMI1
Supported Signals
Available
PAL 50/60
O
NTSC 60
O
RGB 50
O
RGB 60
O
PAL 50/60
O
NTSC 60
English
Source
O
480i
60Hz
O
480p
60Hz
O
576i
50Hz
O
576p
50Hz
O
720p
50Hz
O
720p
60Hz
O
1080i
50Hz
O
1080i
60Hz
O
1080p
50Hz
O
1080p
60Hz
O
480i
60Hz
O
480p
60Hz
O
576i
50Hz
O
576p
50Hz
O
720p
50Hz
O
720p
60Hz
O
1080i
50Hz
O
1080i
60Hz
O
1080p
50Hz
O
1080p
60Hz
O
1080p
24Hz
O
(X: Not Available, O: Available)
Note: In some cases a signal on the LCD TV may not be displayed properly. The problem may be an
inconsistency with standards from the source equipment (DVD, Set-top box, etc.). If you do experience such
a problem please contact your dealer and also the manufacturer of the source equipment.
English - 41 -
19DV501B_DVD_A01_MB60_[GB]_(01-TV)_(IB_INTERNET)_DVB-T_(1900UK)_10072930.indd 41
03.10.2011 18:34:13
Appendix C: Supported File Formats for USB Mode
English
file extension
.mpg
containers
.mpeg
PS
Video Decoder
Audio codec
MPEG
MPEG 1
.mpe
MPEG2
.avi
MPEG 1
MPEG2
XviD
AVI
PCM
MP3
MPEG
PCM
MP3
Appendix D: PIN Information
Before connecting any external equipment, turn off all main power switches. If there is no switch, remove the
mains plug from the wall socket.
Signal information for Mini D-sub 15 pin connector
Pin No.
Signal name
Pin No.
Signal name
Pin No.
Signal name
1
R
6
Ground
11
NC
2
G
7
Ground
12
NC
3
B
8
Ground
13
H-sync
4
NC*
9
NC
14
V-sync
5
NC
10
Ground
15
NC
* NC = not connected
English - 42 -
19DV501B_DVD_A01_MB60_[GB]_(01-TV)_(IB_INTERNET)_DVB-T_(1900UK)_10072930.indd 42
03.10.2011 18:34:13
Specifications and Accessories
Broadcast Systems/Channels
English
DVB-T, MPEG2
Video Input
PAL, SECAM, NTSC 4.43
Stereo
Nicam
External Connections
1-SCART 1
Input
21-pin SCART
RGB, A/V
2-SCART-S (via SCART 1)
Input
21-pin SCART
S-Video
3-YPbPr (via VGA)
Input
Mini D-Sub 15-Pin Analogue
4-SIDE AV
Input
RCA Sockets
5-HDMI 1/2
Input
Type A
6-PC
Input
Mini D-Sub 15-Pin Analogue
RGB Signal
7-Digital Audio
Output
S/PDIF
(Coaxial)
8-YPbPr
Input
YPbPr Connection Jack
USB Port
Video + Audio L + R
Media Browser Interface Version: USB 2.0
USB Class: Mass Storage
File System: FAT32
Headphone Socket
3.5mm stereo
Operating Conditions
Temperature 5°C - 35°C (41°F - 94°F)
Supplied Accessories
Remote Control
Humidity 20 - 80% (non-condensing)
2 batteries (AAA,IEC R03 1.5V)
Four screws
Side AV cable
P Clip
19DV501B
47cm / 19”
Visible Screen Size (approx.)
Display
16:9
Sound Output (at 10% distortion)
2 x 2,5
Annual Power Consumption (approx.)
40 kWh
Power Consumption Model (approx.)
45W
Standby Power Consumption (approx.)
Weight
< 0.50 W
TV with stand
4.5 kg
Gross weight
6.5 kg
TV without stand
4.4 kg
Unit Dimensions (Approximate)
19DV501B
A (mm)
B (mm)
C (mm)
D (mm)
E (mm)
462.9
313.2
115.3
63.5
343.6
English - 43 -
19DV501B_DVD_A01_MB60_[GB]_(01-TV)_(IB_INTERNET)_DVB-T_(1900UK)_10072930.indd 43
03.10.2011 18:34:13
License Information
English
• • HDMI, the HDMI logo, and High-Definition Multimedia Interface are trademarks or registered trademarks
of HDMI Licensing LLC in the United States and other countries.
• • DVB is a registered trademark of the DVB Project.
• • [1] EIA/CEA-861-D compliance covers the transmission of uncompressed digital video with high-bandwidth
digital content protection, which is being standardized for reception of high-definition video signals.
Because this is an evolving technology, it is possible that some devices may not operate properly with the
television.
MP3 licence letter
MPEG Layer-3 audio coding technology licensed from Fraunhofer LLS and Thomson.
AVC licence letter
THIS PRODUCT IS LICENSED UNDER THE AVC PATENT PORTFORIO LICENSE FOR THE PERSONAL
AND NON-COMMERCIAL USE OF A CONSUMER TO (I)ENCODE VIDEO IN COMPLIANCE WITH THE AVC
STANDARD (“AVC VIDEO”) AND/OR (II)DECODE AVC VIDEO THAT WAS ENCODED BY A CONSUMER
ENGAGED IN A PERSONAL AND NON-COMMERCIAL ACTIVITY AND/OR WAS OBTAINED FROM A VIDEO
PROVIDER LICENSED TO PROVIDE AVC VIDEO. NO LICENSE IS GRANTED OR SHALL BE IMPLIED
FOR ANY OTHER USE. ADDITIONAL INFORMATION MAY BE OBTAINED FROM MPEG LA,L.L.C. SEE
HTTP//WWW.MPEGLA.COM
Manufactured under license from Dolby Laboratories. Dolby and the double-D symbol are trademarks of
Dolby Laboratories.
Cleaning the screen and cabinet...
Turn off the power, clean the screen and cabinet with a soft, dry cloth. We recommend that you do not use any proprietary
polishes or solvents on the screen or cabinet as this maycause damage.
Disposal...
The following information is only for EU-member states:
Disposal of products
The crossed out wheeIed dust bin symbol indicates that products must be collected and disposed of separately from
household waste. Integrated batteries and accumulators can be disposed of with the product. They will be separated
at the recycling centres.
The black bar indicates that the product was placed on the market after August 13, 2005.
By participating in separate collection of products and batteries, you will help to assure the proper disposal of
products and batteries and thus help to prevent potential negative consequences for the environment and human
health.
For more detailed information about the collection and recycling programmes available in your country, please
contact your local city office or the shop where you purchased the product.
Disposal of batteries and/or accumulators
EU
The crossed out wheeled dust bin symboI indicates that batteries and/or accumulators must be collected and
disposed of separately from household waste.
If the battery or accumulator contains more than the specified values of lead (Pb), mercury (Hg), and/or
cadmium (Cd) defined in the Battery Directive (2006/66/EC), then the chemical symbols for lead (Pb), mercury (Hg)
and/or cadmium (Cd) will appear below the crossed out wheeled dust bin symbol.
Hg Cd Pb
By participating in separate collection of batteries, you will help to assure the proper disposal of products and
batteries and thus help to prevent potential negative consequences for the environment and human health. For more
detailed information about the coIIection and recycling programmes available in your country, please contact your
local city office or the shop where you purchased the product.
In conformity with the EEE Regulation.
English - 44 -
19DV501B_DVD_A01_MB60_[GB]_(01-TV)_(IB_INTERNET)_DVB-T_(1900UK)_10072930.indd 44
03.10.2011 18:34:14
Questions and Answers
Questions
Q
A
Q
A
Q
A
Q
A
Q
A
Q
A
Q
A
Why is there no sound or picture?
Check the TV is not in standby mode.
Check the mains plug and all mains connections.
Why is there a picture but no sound?
Check the volume has not been turned down or
that sound mute has not been selected.
What can cause a poor picture?
Interference or a weak signal. Try a different TV
station.
Why doesn't the video/DVD being played show
on screen?
Make sure the VCR or DVD player is connected to
the TV as illustrated in the beginning chapters, then
select the correct input by pressing
.
Why is the VCR/DVD picture in black and white?
Check the correct input has been chosen.
Why is there a good video picture but no sound?
Check the SCART lead connection.
Answers
Q
A
Why is the sound only coming from one speaker
when stereo sound is selected?
Q
A
Why are there problems with analogue text
service?
Q
A
Q
A
Q
Q
Check the batteries aren't dead or inserted
incorrectly.
Check that CHILD LOCK is not selected.
Q
A
A
Why doesn't the remote control work?
Why don't the controls of the TV work?
A
English
Q
A
and
Check that the balance in the SOUND menu hasn't
been set to one side.
Good performance of the analogue text depends
on a good strong broadcast signal. This normally
requires a roof or loft aerial. If the text is
unreadable or garbled, check the aerial. Go to the
main index page of the analogue text service and
look for the User Guide.
What is DVB-T?
Digital Video Broadcast via an aerial/antenna.
How are radio channels selected?
You can select them via the Channel List.
What can be done if the PIN number has been
forgotten?
Incase of password is forgotten, Please press
1,2,7,6 or 4,7,2,5 buttons from remote control
respectively in order to enter parental setting
menu. Define a new pin number in Set PIN section.
You will need to enter your new PIN a second time
for verification purposes.
Why are there horizontal stripes and/or blurred
images on the screen when in PC mode?
The Phase may need adjustment. Select PC
Settings and highlight Phase and adjust until the
picture is clear.
Why doesn't the TV OSD settings saved?
Ensure to turn off the power first before attempting
to unplug the AC cord. Otherwise, the settings may
not be saved.
English - 45 -
19DV501B_DVD_A01_MB60_[GB]_(01-TV)_(IB_INTERNET)_DVB-T_(1900UK)_10072930.indd 45
03.10.2011 18:34:15
Questions
English
Q
A
Q
A
Why doesn't the Media Browser feature operate?
Make sure that USB memory is connected correctly.
Incorrect behaviour may occur with a USB Hub
connection.
Why is the digital channel locked?
Parental control is activated. Check parental settings.
and
Answers
Q
A
Why when digital subtitles have been selected
are they not showing on screen?
Q
A
Why is the soundtrack in English when a
different audio language has been selected?
Q
Why are some encrypted digital channels
unavailable?
Q
A
Your subscription needs upgrading. Contact your
service provider.
A
Subtitles are not currently being transmitted by the
broadcaster.
The programme is currently being broadcast with
an English soundtrack only.
Why does the active standby LED sometimes
take longer to go out?
When put into standby, the TV's active
standby will automatically search all available
channels for downloads, provided Automatic
Download is enabled. The time taken to do this
may vary.
English - 46 -
19DV501B_DVD_A01_MB60_[GB]_(01-TV)_(IB_INTERNET)_DVB-T_(1900UK)_10072930.indd 46
03.10.2011 18:34:15
Toshiba One (1) Year Limited Warranty For TV’s (the “Products”)
2. Your Product is warranted to be free from defects in material and workmanship arising under normal use and service, for
one (1) year from the date of original purchase when brand new (“Warranty Period”).
3. If a failure or defect covered by the warranty arises and a valid claim is received by Toshiba within the Warranty Period,
Toshiba shall at its option and to the extent permitted by law, repair or replace the machine or any components free of charge
or refund the purchase price of the Product.
English
1. THE TERMS OF THIS WARRANTY DO NOT AFFECT YOUR STATUTORY RIGHTS.
4. This warranty is valid ONLY in relation to the Product for which your warranty has been registered. It is the Product that
is warranted rather than the owner.
5. Toshiba, its authorised resellers (“Authorised Resellers”) and authorised service providers (“Authorised Service Providers”)
reserve the right to request proof of purchase (e.g. a paid and dated invoice) showing model and serial number before
providing any warranty confirmation.
6. Any Product or component repaired or replaced under the warranty shall be subject to the balance of the original Warranty
Period applying to the Product or component, or three months from the date of replacement or repair, whichever is the greater.
All Products and components replaced under warranty shall become Toshiba’s property. Where a refund is given, the Product
for which the refund is provided must be returned to Toshiba and becomes Toshiba’s property.
7. This warranty shall not apply: a) to extrinsic cause or cosmetic damage, including but not limited to scratches and dents;
b) to damage caused by use with non-Toshiba products; c) to damage caused by accident, abuse, misuse, liquid spill or
submersion, flood, fire, earthquake or other external causes; d) to damage caused by operating the product outside the permitted
or intended uses described by Toshiba; e) to a product or part that has been modified to alter functionality or capability without
the written permission of Toshiba or f) to any failure or defect attributable to any neglect or wear and tear. This also applies
to the hardware casing. Should you claim a repair that is not covered under the warranty terms, any of Toshiba, Authorised
Reseller or the Authorised Service Provider may charge you the costs of the repair.
8. This warranty shall be inapplicable if failure of the Product or component has resulted from service, maintenance or repair
other than by Toshiba, an Authorised Reseller or Authorised Service Provider, or if the Product or component labels/serial
numbers have been altered or obscured.
9. Toshiba shall not be liable for any transport/delivery costs incurred in returning the Product or components to an Authorised
Reseller or Authorised Service Provider in support of a warranty claim.
10. Except for the express warranty provided, Toshiba, its Authorised Resellers or Authorised Service Provider do not issue
any warranty or guarantee for your Product.
11. Toshiba expressly disclaims and excludes all conditions, warranties and other terms with regard to the Product, including,
but not limited to, in every case whether express or implied by statute, common law, custom, collaterally or otherwise, to
the fullest extent permitted by applicable law. In particular, but without limit to the generality of the foregoing exclusion, any
conditions, warranties and other terms as to merchantability, satisfactory quality, fitness for a particular purpose, hidden or
latent defects, ownership of any software, as to price and / or non-infringement of third party rights are excluded whether in
contract or tort. Any implied warranties that may be imposed by applicable law are limited in duration, subject to such applicable
law, to the term of the express limited warranty given by Toshiba. No Toshiba reseller, agent or employee is authorised to
make any modification, extension or addition to this warranty. If any term is held to be illegal or unenforceable, the legality
or enforceability of the remaining terms shall not be affected or implied.
12. Also, Toshiba does not warrant that operation of the Product will be uninterrupted or error free. You must read and follow
all set-up and usage instructions in the Product safety instruction and user’s manuals, as provided. If you fail to do so, the
Product may not function properly. Even if you follow the instructions, Toshiba does not warrant that compliance with the
instructions in the above manuals will ensure that the Product will function properly in all circumstances.
13. To the maximum extent permitted by applicable law, and except as provided herein in no event shall Toshiba, Authorised
Resellers, Authorised Service Providers or Toshiba’s supplier be liable for any direct, special, incidental or consequential
damages resulting from any breach of warranty, condition, strict liability or tort or under any other legal theory, including but
not limited to loss of use; loss of revenue; loss of actual or anticipated profits (including loss of profits on contracts); loss of
the use of money; loss of anticipated savings; loss of business; loss of opportunity; loss of goodwill; loss of reputation; loss of,
damage to or corruption of data; or any indirect or consequential loss or damage howsoever caused including the replacement
of equipment and property. The foregoing limitation applies even if Toshiba, Authorised Resellers, Authorised Service Providers
or Toshiba’s supplier, have been advised of the possibility of such damages or of any claim by any third party. In any event,
any liability of Toshiba Authorised Resellers, Authorised Service Providers or Toshiba’s supplier which is not excluded shall
be limited to the purchase price of the Product. However, Toshiba shall accept liability for personal injury or death caused by
or arising from its negligence or from fraudulent misrepresentation and as otherwise required by applicable law.
14. This warranty shall be governed by and construed in accordance with the laws of England and Wales. You agree to submit
to the exclusive jurisdiction of the courts of England over any claim, matter or dispute arising under or in connection with this
warranty (including as to its validity) or the legal relationships established by this warranty.
NOTE - Toshiba reserves the right to alter or cancel this program at any time without prior notice.
English - 47 -
19DV501B_DVD_A01_MB60_[GB]_(01-TV)_(IB_INTERNET)_DVB-T_(1900UK)_10072930.indd 47
03.10.2011 18:34:15
Features
Contents
English
Features ............................................................... 48
General Properties............................................ 48
Safety Information ................................................ 49
Notes on Discs ..................................................... 49
On handling discs ............................................. 49
On cleaning....................................................... 49
Notes on moisture condensation .......................... 49
Licence Notification .............................................. 50
How to Watch a DVD ............................................ 50
DVD Control Panel Buttons .................................. 51
Overview of the Remote Control .......................... 51
General Operation ................................................ 52
General Playback ................................................. 53
Basic Play ......................................................... 53
For your reference ........................................ 53
Notes on Playback ............................................ 53
Setup Menu Items ................................................ 53
Video Setup Page ............................................. 53
Tv Type ......................................................... 53
Language Setup Page ...................................... 53
Osd Lang ...................................................... 53
Audio ............................................................. 53
Disc Menu ..................................................... 53
Subtitle .......................................................... 53
Preference Setup Page .................................... 54
Default .......................................................... 54
Downmix ....................................................... 54
Parental (Parental Level) .............................. 54
Password (Change Password) ..................... 54
Spdif Output .................................................. 54
Troubleshooting .................................................... 54
The picture quality is poor (DVD)...................... 54
Disc does not play ............................................ 54
Wrong OSD language....................................... 54
The language for the sound or subtitles on a DVD
cannot be changed ........................................... 54
Some functions (Angle, Zoom, etc.) do not work... 55
No picture ......................................................... 55
No sound .......................................................... 55
Distorted sound................................................. 55
No response from remote control ..................... 55
If nothing works................................................. 55
Definition of Terms ................................................ 55
Disc Types Compatible with This Unit .................. 56
Supported File Formats ........................................ 57
Specifications ....................................................... 57
General Properties
• DVD / CD / CD-R / CD-RW / MP3 / JPEG / MPEG.
• NTSC/PAL playback (according to disc content)
• LPCM audio via coaxial digital audio output.
(optional)
• Multi-Audio (up to 8) support (According to disc
content)
• Multi-Subtitle (up to 32) support (According to disc
content)
• Multi-Angle (up to 9) support (According to disc
content)
• 8 level parental control
• Fast forward and rewind in 5 different speeds.
(2x, 4x, 8x, 16x, 32x)
• Slow motion playback in 4 different speeds.
(1/2x, 1/4x, 1/8x, 1/16x forward)
• Frame by frame forward playback.
• Search Mode
• Repeat
• Coaxial audio output (optional)
• Copied discs may be incompatible.
Note
• This product may not support some MP3 recordings
due to differences in recording formats or disc
type.
• Please read the owner’s manual about MP3
playback.
• CD-R/CD-RW discs recorded by CD-DA method
can be played. Some CD-R/CD-RW discs may be
incompatible due to laser pick-up and disc design.
• DVD-R/RW discs recorded by DVD-Video method
can be played. Some DVD-R/RW discs may be
incompatible due to laser pick-up and disc design.
• Some discs may be incompatible with JPEG Viewer
function due to different recording format or condition
of the discs.
English - 48 -
19DV501B_DVD_A01_MB60_[GB]_(02-DVD)_(WODIVX)_(IB_INTERNET)_(1900UK)_10072930.indd 48
03.10.2011 18:34:53
On cleaning
Safety Information
DVD Player is a class 1 laser product. However this
product uses a visible laser beam which could cause
hazardous radiation exposure. Be sure to operate the
player correctly as instructed.
• Before playing, clean the disc with a cleaning cloth.
Wipe the disc from the center out.
English
CAUTION
CLASS 1
LASER PRODUCT
• Do not use solvents such as benzine, thinner,
commercially available cleaners or anti-static spray
intended for vinyl LPs.
RISK OF ELECTRIC SHOCK
The lightning flash with arrowhead
symbol, within an equilateral triangle, is
intended to alert the user to the presence
of uninsulated “dangerous voltage” within
the product’s enclosure that may be of
sufficient magnitude to constitute a risk
of electric shock to people.
Notes on moisture
condensation
Moisture condensation damages the DVD video
player. Please read the following carefully.
The exclamation point within an equilateral
triangle is intended to alert the user to the
presence of important operating and
maintenance (servicing) instructions
in the literature accompanying the
appliance.
Moisture condensation occurs, for example, when you
pour a cold drink into a glass on a warm day. Drops
of water form on the outside of the glass. In the same
way, moisture may condense on the optical pick-up
lens inside this unit, one of the most crucial internal
parts of the DVD video player.
Notes on Discs
Moisture condensation occurs during the
following cases:
On handling discs
• To keep the disc clean, handle the disc by its edge.
Do not touch the surface.
• Do not stick paper or tape on the disc.
• If the disc is contaminated with any substance like
glue remove before using it.
• When you bring the unit directly from a cold place
to a warm place.
• When you use the unit in a room where you just
turned on the heater, or a place where the cold wind
from the air conditioner directly hits the unit.
• In summer, when you use the unit in a hot and
humid place just after you move the unit from an air
conditioned room.
• When you use the unit in a humid place.
Do not use the unit when moisture condensation
may occur.
• Do not expose the disc to direct sunlight or heat
sources such as hot air ducts, or leave it in a car
parked in direct sunlight as the temperature can rise
quickly and damage the disc.
• After playing, store the disc in its case.
If you use the unit in such a situation, it may damage
discs and internal parts. Remove the disc, connect
the power cord of the unit to the wall outlet, turn on
the unit, and leave it for two or three hours. After two
or three hours, the unit will have warmed up and
evaporated any moisture. Keep the unit connected
to the wall outlet and moisture condensation will
seldom occur.
English - 49 -
19DV501B_DVD_A01_MB60_[GB]_(02-DVD)_(WODIVX)_(IB_INTERNET)_(1900UK)_10072930.indd 49
03.10.2011 18:34:55
Licence Notification
English
• This product incorporates copyright protection
technology that is protected by U.S. patents
and other intellectual property rights. Use of
this copyright protection technology must be
authorized by Rovi Corporation, and is intended for
home and other limited viewing uses only unless
otherwise authorized by Rovi Corporation. Reverse
engineering and disassembly are prohibited.
How to Watch a DVD
When placing a disc into the loader, labelled side of
the disc should be on the front:
When TV set is turned on, first switch to DVD source
by using the SOURCE button on the remote control.
Press
on the remote control, or directly press
button at the side panel. If there is no disc inside the
loader, place a DVD first and then press .
English - 50 -
19DV501B_DVD_A01_MB60_[GB]_(02-DVD)_(WODIVX)_(IB_INTERNET)_(1900UK)_10072930.indd 50
03.10.2011 18:34:55
DVD Control Panel Buttons
B.
English
A. Disc loader
/
Plays/pauses the disc. When DVD menu (root menu) is active, this button functions as
“button select” (selects the highlighted item in menu) if this is not prohibited by the disc.
C.
/
Stops playing disc / Ejects the disc.
Note:
/
• While playing a file, you should press
button three times to eject.
Overview of the Remote Control
No function
INFO
AV / SOURCE
INFO
Standby/ On mode
SLEEP
SCREEN
SOURCE
PRESETS
ZOOM
REPEAT
Numeric buttons
ROOT
RETURN
RETURN
TITLE
MENU
MENU on/off
Cursor up
OK / SELECT
Cursor right
Cursor left
Cursor down
To alter the volume
Subtitle on/off
Audio language of disc
No function
DISPLAY Time / DVD Menu
Clear
Stop
No function
Rapid reverse
Rapid advance
FAV
LANG.
SUBTITLE
EPG
/
To mute the sound
ANGLE
SEARCH MODE
Play
Pause
Skip next
Skip previous
RC-1900
Note: Buttons that are not indicated
on the remote control illustration are
not functional in DVD mode.
English - 51 -
19DV501B_DVD_A01_MB60_[GB]_(02-DVD)_(WODIVX)_(IB_INTERNET)_(1900UK)_10072930.indd 51
03.10.2011 18:34:56
General Operation
English
You can operate DVD, movie CD, music or picture CD’s content by using the proper buttons on your remote
control. Below are main functions of commonly used remote control buttons.
Buttons on the
Remote Control
Movie
Playback
Picture
Playback
Music
Playback
Play
Play
Play
Play
Pause
Pause
Pause
Pause
Stop
Stop
Stop
Stop
/ e/f
/
/
ANGLE
DISPLAY
INFO
LANG
MENU
OK
REPEAT
RETURN
ROOT
SEARCH MODE
SUBTITLE
TITLE
ZOOM
+
+
+
+
+
DVD
Playback
Skip
Skip
Previous / Next
backward/forward
backward/forward
Highlights a menu item. /
Shifts the zoomed picture left or right (if available).
Previous / Next
X
Highlights a menu item. / Shifts the zoomed picture up or down (if available).
Rapid reverse / Rapid advance
X
Rapid reverse /
Rapid advance
Views the scene
from different
X
X
X
angles
(if available).
Displays disc information / Displays DVD setup menu during stop mode.
Displays disc information.
Audio language
X
Displays main menu.
X
X
Enter / View / Play
Displays repeat options.
Returns back to the previous menu (if available).
Goes back to the root folder (if available).
Direct selection of scenes, time or file (track) number.
Subtitle on-off. Press repeatedly to switch
X
between subtitle options (if available).
Displays disc menu (if available).
X
Zooms picture. Press repeatedly to switch between zoom
options.
X
X
X
X
Other Functions – Button Combinations
(During playback)
Slow forward.
Sets rapid advance speed.
Sets rapid reverse speed.
Confirms stop command.
Press repeatedly to advance manually.
(*) You can switch to title by pressing numeric keys directly. You need to press 0 and then digit key to
switch one digit titles (example: to select 5, press 0 and 5).
English - 52 -
19DV501B_DVD_A01_MB60_[GB]_(02-DVD)_(WODIVX)_(IB_INTERNET)_(1900UK)_10072930.indd 52
03.10.2011 18:34:58
11. For your convenience:
General Playback
1. Press the
button.
2. Insert a disc to the loader.
The disc will be automatically loaded and play
commences if the disc does not have any menus
recorded on it.
A menu may appear on the TV screen after a few
moments or the film may start immediately after the
introduction of the Film Company. This behaviour
depends on the disc content and may change.
12. Slide Show is disabled when the ZOOM mode
is on.
English
If you attempt to enter a number greater than the total
time of the current title, the time search box disappears
and “
Input Invalid” message appears on up-left
corner of screen.
Basic Play
Setup Menu Items
Video Setup Page
Note: Steps 3 and 4 are available only when a menu
is recorded on the disc.
3. Press navigation buttons or the numeric
button(s) to select the preferred title.
4. Press OK button.
Play of the selected items now starts.The played item
may be a motion picture, a still picture or another
submenu depending on the disc.
For your reference:
If an action corresponding to a button is prohibited,
” symbol will appear.
the “
Notes on Playback
Tv Type
TV Type is only available as ‘PAL’. The TV set also
supports NTSC signal; however, the signal will be
converted to PAL when it appears on the screen.
Language Setup Page
1. No sound will be heard during Rapid advance
or Rapid reverse.
2. No sound will be heard during Slow motion play.
3. In some cases, the subtitle language is not
changed immediately to the selected one.
4. When the preferred language is not selected even
after pressing the button several times, it means
that the language is not available on the disc.
5. When the player is restarted or the disc is
changed, the subtitle selection is automatically
changed back to the initial settings.
6. If a language is selected, not supported by the
disc, the subtitle language will automatically be
set to the disc’s priority language.
7. Usually a circulation will happen while switching
to another language, that is you can cancel
the subtitle by pressing SUBTITLE button a
number of times until “Subtitle Off” appears on
the screen.
8. When the power is turned on or the disc is
removed, the language heard is the one
selected at the initial settings. If this language
is not recorded on the disc, only the available
language on the disc will be heard.
Osd Lang
You can select the default OSD language of the
player menus.
Audio
You can select the default audio language if supported
by the DVD disc.
Disc Menu
You can select the DVD’s disc menu language among
these languages. Disc menu appears in the selected
language, if supported by the DVD disc.
Subtitle
You can select the default subtitle language if
supported by the DVD disc.
9. Some DVDs may not contain root and/or title
menus.
10. Reverse stepping is not available.
English - 53 -
19DV501B_DVD_A01_MB60_[GB]_(02-DVD)_(WODIVX)_(IB_INTERNET)_(1900UK)_10072930.indd 53
03.10.2011 18:34:58
Spdif Output
Default
You can set Spdif Output as RAW or PCM. If you
select PCM from Spdif Output in DVD menu and
play DVD with Dolby audio, you can get audio output
with two channels via the speakers and the DIGITAL
AUDIO socket. If you select RAW from Spdif Output
in DVD menu and play DVD with Dolby audio,
speakers will be muted and you can get 5+1 Dolby
audio via the DIGITAL AUDIO socket.
English
Preference Setup Page
If you choose Reset and press OK button, the
factory-presets are loaded. Parental level and parental
password does not change.
Downmix
This mode can be selected when the DIGITAL AUDIO
socket of the TV is used.
Troubleshooting
Surround: Surround sound output.
Stereo: Two channels stereo.
The picture quality is poor (DVD)
Parental (Parental Level)
• Make sure the DVD disc surface is not damaged.
(Scratch, fingerprint, etc.)
• Clean the DVD disc and try again.
See instructions described in “Notes on Discs” to clean
your disc properly.
• Ensure that the DVD disc is in the loader with the
label facing front.
Playing some DVDs can be limited depending on the
age of users. The “Parental Control” function allows
playback limitation level to be set by the parent.
Parental Level can be adjusted to one of the eight
levels. Level “8 Adult” adjustment let you watch all of
the DVD titles ignoring the DVD disc’s parental level.
You can watch the DVD discs, which has the same or
lower parental level than the player’s level only.
Password (Change Password):
Using this item you can change the current
password.
To change the password you will be prompted to
enter your old password. After you have entered
your old password, you can now enter the new 4-digit
password.
Note: Factory preset of the password is “0000”. You
have to enter XXXX digital password every time you
want to change the parental level. If you forget your
password please contact technical service.
• A damp DVD disc or condensation may effect the
equipment. Wait for 1 to 2 hours in Standby to dry
the equipment.
Disc does not play
• No disc in the machine.
Place a disc into the loader.
• Disc incorrectly loaded.
Ensure that the DVD disc is in the loader with the
label facing front.
• Wrong type of disc. The machine cannot play CDROMS etc.
• The region code of the DVD must match the
player.
Wrong OSD language
• Select the language in the set-up menu.
The language for the sound or
subtitles on a DVD cannot be changed
• Multilingual sound and/or subtitles not recorded on
the DVD.
• Try to change the sound or subtitles using DVD’s title
menu. Some DVD’s do not allow the user to change
these settings without using the disc’s menu.
English - 54 -
19DV501B_DVD_A01_MB60_[GB]_(02-DVD)_(WODIVX)_(IB_INTERNET)_(1900UK)_10072930.indd 54
03.10.2011 18:34:59
Some functions (Angle, Zoom, etc.) do
not work
• Angle can only be changed when the angle symbol
is displayed.
No picture
• Have you pressed the correct buttons on the remote
control? Try once more.
English
• These functions are not available on the DVD.
DVD has a structure consisting of two 0.6-mm thin
discs, which are adhered to each other. Since the
thinner the disc, the higher the density at which the
information can be recorded, a DVD disc has a greater
capacity than a single 1.2 mm thick disc. Since the
two thin discs are adhered to each other, there is the
potential to achieve double-sided play sometime in
the future for even longer duration play.
Subtitles
These are printed lines appearing at the bottom of
the screen, which translate or transcribe the dialogue.
They are recorded on the DVD discs.
No sound
• Check the volume is set to an audible level.
• Make sure you have not switched the sound off
accidentally.
Distorted sound
• Check that the appropriate listening mode setting
is correct.
No response from remote control
• Make sure the remote control is in the correct
mode.
• Check batteries are fitted correctly.
• Change the batteries.
Time Number
This indicates the playtime, which has elapsed from
the start of a disc or a title. It can be used to find a
specific scene quickly. (Not all discs permit the time
search feature to be used. Availability is determined
by the disc’s manufacturer.)
Title Number
These numbers are recorded on DVD discs. When a
disc contains two or more movies, these movies are
numbered as title 1, title 2, etc.
Track Number
If nothing works
If you have tried the above solutions and none seem
to work, try switching your TV off and on again. If this
does not work, contact your supplier or TV repair
technician. Never attempt to repair a defective TV
yourself.
Definition of Terms
These numbers are assigned to the tracks, which are
recorded on Audio CDs. They enable specific tracks
to be located quickly.
LPCM
LPCM stands for Linear Pulse Code Modulation and
is digital audio.
MPEG
Angle
Recorded onto some DVD discs are scenes, which
have been simultaneously shot from a number of
different angles (the same scene is shot from the
front, from the left side, from the right side, etc.). With
such discs, the ANGLE button can be used to view
the scene from different angles.
Short for Moving Picture Experts Group. This is an
international standard for compression of moving
images. On some DVDs digital audio has been
compressed and recorded in this format.
Chapter Number
These numbers are recorded on DVD discs. A title
is subdivided into many sections, each of which are
numbered, and specific parts of video presentations
can be searched quickly using these numbers.
DVD
This refers to a high-density optical disc on which
high-quality pictures and sound have been recorded
by means of digital signals. Incorporating a new video
compression technology (MPEG2) and high-density
recording technology. DVD enables aesthetically
pleasing full-motion video to be recorded over long
periods of time (for instance, a whole movie can be
recorded).
English - 55 -
19DV501B_DVD_A01_MB60_[GB]_(02-DVD)_(WODIVX)_(IB_INTERNET)_(1900UK)_10072930.indd 55
03.10.2011 18:34:59
Disc Types Compatible with This Unit
English
D is c Ty p e s
(L o g o s )
R e c o r d in g
Ty p e s
D is c S iz e
DVD
12 cm
A u d io
+
V id e o
8 cm
C h a r a c t e r is tic s
•
D V D c o n ta in s e x c e lle n t s o u n d a n d v id e o
•
V a r io u s s c r e e n a n d a u d io fu n c t io n s c a n b e
d u e to D o lb y D ig i ta l a n d M P E G2 S y s te m .
e a s ily s e l e c t e d t h r o u g h th e o n s c r e e n
m e nu .
A U D IO -C D
12 cm
• A n L P is r e c o r d e d a s a n a n a lo g s ig n a l w ith
m o r e d is t o rtio n . C D is r e c o r d e d a s a
A u d io
D ig ita l S ig n a l w ith b e t te r a u d i o q u a lity,
le s s d is t o r t io n a n d le s s d e t e rio ra t io n o f
8 cm
D I G IT A L A U D I O
M P 3 -C D
READABLE
12 cm
A u d io
(x x x x .m p 3 )
a u d io q u a lit y o v e r t im e .
•
M P 3 is r e c o r d e d a s a D ig ita l S ig n a l w it h
b e tt e r a u d io q u a lity, le s s d is to rt i on a n d
le s s d e t e rio ra t io n o f a u d io q u a lity
8 cm
o v e r tim e .
P IC T U R E -C D
12 cm
JR EPA DE
G
ABLE
V id e o
(s t ill p ic tu r e )
•
J P E G is r e c o rd e d a s a D ig it a l S ig n a l w ith
b e tt e r p ic tu re q u a lity o v e r t im e .
8 cm
English - 56 -
19DV501B_DVD_A01_MB60_[GB]_(02-DVD)_(WODIVX)_(IB_INTERNET)_(1900UK)_10072930.indd 56
03.10.2011 18:34:59
Supported File Formats
Movie
File
Extension
.mpg/ .dat/
.vob
Remarks
Audio
MPEG1
MPEG Layer
1/2/3
(Maximum resolution/Bitrate etc.)
MPEG2
MPEG2
MPEG4
PCM/MP3
.avi
MS ISO
MPEG4
PCM/MP3
Support SP and ASP
-
-
PCM
Sample Rate: 8k ~ 48kHz
(optional)
Music
Format
Video
MPEG 1/2
.mp3
-
Sample Rate: 8k ~ 48kHz,
Layer 1/2/3
(MP3)
Bitrate: 64k~320kbps
WxH = 8902x8902 up to 77Mega-pixel
Baseline JPEG
Photo
English
Media
Support format: 444/ 440/ 422/ 420/ Grayscale
.jpg
Progressive JPEG
Up to 4 Mega-pixel
Support format: 444/ 440/ 422/ 420/ Grayscale
.srt
Support Text File Format, but do not support
Picture File Format
.smi
External
Subtitles
.sub
(optional)
.ssa
This unit can only display a maximum of 14
Subtitles.
.ass
Specifications
DVD: SS/SL 12cm (DVD-5)
SS/DL 12cm (DVD-9)
CD-DA
DS/SL 12cm (DVD-10)
Types of Discs
Supported
CD-R
DS/DL 12cm (DVD-18)
miniDVD: SS/SL 8cm (1.4GB)
SS/DL 8cm (2.66GB)
DS/SL 8cm (2.8GB)
DS/DL 8cm (5.2GB)
CD-RW
MP3/JPEG
MPEG2 Video Standard Decoding (MPEG1 supported)
Full-Screen Video Display of 720 x 576 (PAL) & 720 x 480 (NTSC) pixels
Video Type
50 and 60 Hz frame refresh rates (PAL & NTSC)
Digital bitstream processing rate up to 108Mbits/sec
Line resolution more than 500 lines
Audio Type
Audio Output
MPEG Multichannel Decoding
LPCM
Analogue Outputs:
24 bit /48, 44.1kHz down-sampling DAC
English - 57 -
19DV501B_DVD_A01_MB60_[GB]_(02-DVD)_(WODIVX)_(IB_INTERNET)_(1900UK)_10072930.indd 57
03.10.2011 18:34:59