1
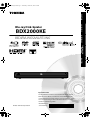
E5RJ2ED_EN.book Page 1 Thursday, October 29, 2009 3:30 PM
INTRODUCTION
CONNECTIONS
Blu-ray Disc Player
BDX2000KE
PLAYBACK
OWNER’S MANUAL
FUNCTION SETUP
OTHERS
Owner’s Record
The model number and serial number are on the back
of this unit. Record these numbers in the spaces
below. Refer to these numbers whenever you communicate
with your Toshiba dealer about this unit.
© 2009 Toshiba Corporation
E8EB6CD_SD-V398KC_EN_v1.indd 1
Model number :
Serial number :
2009/01/29 17:04:54
E5RJ2ED_EN.book Page 2 Thursday, October 29, 2009 3:30 PM
INTRODUCTION
Safety Instructions
WARNING: TO REDUCE THE RISK OF FIRE OR ELECTRIC SHOCK, DO NOT EXPOSE THIS
APPARATUS TO RAIN OR MOISTURE.
CAUTION
RISK OF ELECTRIC SHOCK
DO NOT OPEN
CAUTION:
TO REDUCE THE RISK OF ELECTRIC SHOCK, DO NOT
REMOVE COVER (OR BACK). NO USER SERVICEABLE
PARTS INSIDE. REFER SERVICING TO QUALIFIED
SERVICE PERSONNEL.
The important note is located on the rear or bottom of
the cabinet.
Caution
1.
2.
3.
4.
5.
6.
7.
8.
9.
10.
11.
12.
13.
14.
15.
2
Do not attempt to open the cabinet. There are no
parts inside you can service. Refer all servicing to
qualified service personnel.
Slots and openings in the cabinet at the sides and
underneath are provided for ventilation. To ensure
reliable operation and to protect the unit from
overheating, these openings must not be blocked or
covered.
Avoid installation in enclosed spaces such as
bookcases unless suitable ventilation is provided.
Keep the unit away from radiators and other heat
sources.
Avoid use near strong magnetic fields.
Do not push objects of any kind into the unit through
the cabinet slots or openings as they could touch
electrically live parts or short circuit parts resulting in
a fire or electric shock.
To prevent fire or shock hazard, do not expose this
apparatus to dripping or splashing, no objects filled
with liquids, such as vases, should be placed on the
apparatus.
Do not stand the unit vertically. Use the unit in a
horizontal (flat) position only.
This product is in Stand-by mode when turned off
while the mains cable is connected.
Do not place a flaming object such as a burning
candle on the apparatus.
Before moving the unit, be sure to remove any media
and unplug the mains cable from the AC outlet.
Disconnect the mains plug to shut off the unit, if you
suspect a fault has developed, or if it will not be used
for an extended period.
The mains plug shall remain readily operable and
accessible.
Read both instruction manuals to ensure correct and
safe installation and interconnection of the unit in
multimedia systems.
Keep a distance of 20 cm around the ventilation
openings of the apparatus.
Do not overload wall outlets; extension cords, or
integral convenience receptacles as this can result in a
risk of fire or electric shock.
The lightning flash with arrowhead symbol, within an
equilateral triangle, is intended to alert the user to the
presence of uninsulated“dangerous voltage”within the
product’s enclosure that may be of sufficient magnitude
to constitute a risk of electric shock to persons.
The exclamation point within an equilateral triangle is
intended to alert the user to the presence of important
operating and maintenance (servicing) instructions in
the literature accompanying the appliance.
The symbol for CLASS ll (Double Insulation)
16. Do not use a cracked , deformed, or repaired disc.
These discs are easily broken and may cause serious
personal injury and apparatus malfunction.
17. If the apparatus should smoke or smell, immediately
disconnect the power cord from the wall outlet.Wait
until the smoke or smell stops, then ask your dealer
for a check and repair. Neglecting to do so may cause
fire.
18. While it is thundering, do not touch the connecting
cables or the apparatus.
Laser Safety
This unit employs a laser. Only a qualified service person should
remove the cover or attempt to service this device, due to
possible eye injury.
CAUTION:
USE OF CONTROLS OR ADJUSTMENTS OR PERFORMANCE OF
PROCEDURES OTHER THAN THOSE SPECIFIED HEREIN MAY
RESULT IN HAZARDOUS RADIATION EXPOSURE.
CAUTION:
CLASS 2 LASER RADIATION WHEN OPEN
DO NOT STARE INTO THE BEAM
LOCATION:
• INSIDE, NEAR THE BD
MECHANISM
Avoid the Hazards of Electrical Shock and Fire
• Do not handle the mains cable with wet hands.
• Do not pull on the mains cable to disconnect it from AC outlet.
Grasp it by the plug.
• If, by accident, water is spilled on the unit, unplug the mains
cable immediately and take the unit to an authorised service
centre for servicing.
Moisture Condensation Warning
Moisture condensation may occur inside the unit when it is
moved from a cold place to a warm place, after heating a cold
room, or under conditions of high humidity. Do not use the unit
for at least 2 hours to allow the inside to dry.
EN
E5RJ2ED_EN.book Page 3 Thursday, October 29, 2009 3:30 PM
INTRODUCTION
INTRODUCTION
Connection to Power
EU Conformity Statement
Before Switching on make sure that the voltage of your electricity
supply is the same as that indicated on the rating plate.
Power Supply
WARNING:
LIVE PARTS INSIDE.
DO NOT REMOVE ANY SCREWS.
Installation Location
PLAYBACK
FUNCTION SETUP
For safety and optimum performance of this unit:
• Install the unit in a horizontal and stable position.
• Keep the unit away from electronic equipment such as an
amplifier, TV, etc. to prevent warping, damage, fire and
malfunction.
• Do not place anything directly on top of the unit.
• Shield the unit from direct sunlight and keep away from sources
of intense heat. Avoid dusty or humid locations. Avoid locations
with insufficient ventilation for suitable heat dissipation. Do not
block the ventilation holes on the sides of the unit. Avoid
locations subject to strong vibration or strong magnetic fields.
• Do not locate near water.
“This product is marked with “CE” and complies therefore with the
applicable harmonised European standards listed under the Low
Voltage Directive 2006/95/EC and the EMC Directive 2004/108/EC.”
Responsible for CE-marking is
TOSHIBA INFORMATION SYSTEMS (U.K.) LTD, Toshiba Court,
Weybridge Business Park, Addlestone Road, Weybridge, Surrey,
KT15 2UL, United Kingdom
CONNECTIONS
The power supply is connected and the unit is live when the
mains cable is plugged into a 220 - 240 V~, 50 Hz AC outlet.
To operate the unit, press [ON/STANDBY Q].
Do not place the unit on the furniture that is capable of being
tilted by a child and an adult leaning, pulling, standing or
climbing on it. A falling unit can cause serious injury or even
death.
Other Precautions
A NOTE ABOUT RECYCLING
This product’s packaging materials are recyclable and can be
reused. Please dispose of any materials in accordance with your
local recycling regulations.
This product consists of materials which can be recycled and
reused if disassembled by a specialised company.
Following information is only for EU-member states:
The use of the symbol indicates that this product may not be
treated as household waste. By ensuring this product is
disposed of correctly, you will help prevent
potential negative consequences for the
environment and human health, which could
otherwise be caused by inappropriate waste
handling of this product. For more detailed
information about recycling of this product,
please contact your local city office, your
household waste disposal service or the shop
where you purchased the product.
EN
Following information is only valid EU-member States:
Disposal of batteries and/or accumulators
The crossed out wheeled dust bin symbol indicates that
batteries and/or accumulators must be collected and disposed
of separately from household waste. If the battery or
accumulator contains more than the specified values of lead
(Pb), mercury (Hg), and/or cadmium (Cd) defined in the Battery
Directive (2006/66/EC), then the chemical symbols for lead (Pb),
mercury (Hg) and/or cadmium (Cd) will appear below the
crossed out wheeled dust bin symbol. By participating in
separate collection of batteries, you will help to assure the
proper disposal of products and batteries and
thus help to prevent potential negative
consequences for the environment and human
health. For more detailed information about the
collection and recycling programmes available in
your country, please contact your local city office
or the shop where you purchased the product.
Pb, Hg, Cd
Make your contribution to the environment!!!
• Exhausted batteries do not belong in the dustbin.
• You can dispose of them at a collection point for
exhausted batteries or special waste.
• Contact your council for details.
3
OTHERS
About Recycle
E5RJ2ED_EN.book Page 4 Thursday, October 29, 2009 3:30 PM
INTRODUCTION
About Copyright
Unauthorised copying, broadcasting, public performance and
lending of discs are prohibited. This product incorporates
copyright protection technology that is protected by U.S. patents
and other intellectual property rights. Use of this copyright
protection technology must be authorised by Macrovision, and is
intended for home and other limited viewing uses only unless
otherwise authorised by Macrovision. Reverse engineering or
disassembly is prohibited.
About Remote Control
Installing the Batteries in the Remote Control
Install 2 R6 (1.5V) batteries matching the polarity indicated
inside battery compartment of the remote control.
1)
2)
3)
About Maintenance
Cleaning the Unit
Use a soft cloth slightly moistened with a mild detergent solution.
Do not use solutions containing alcohol, spirits, ammonia or
abrasive.
Cleaning Discs
If a disc becomes dirty, clean it with a cleaning cloth. Wipe the disc
from the centre out. Do not wipe in a circular motion.
Do not use solvents such as benzine, thinner, commercially
available cleaners, detergent, abrasive cleaning agents or
antistatic spray intended for analogue records.
Disc Handling
Handle the discs so that fingerprints and dust do not adhere to
the disc surfaces.
Always store the disc in its protective case when it is not in use.
Servicing
If the unit becomes inoperative, do not try to correct the problem
by yourself. There are no user serviceable parts inside. Turn the
unit off, unplug the mains cable, and consult your dealer or an
authorised service centre.
Cleaning the Disc Lens
If the unit does not perform correctly even though you have
referred to “Troubleshooting” and the relevant sections in the
Owner’s Manual, the laser optical pickup unit may be dirty.
Consult your dealer or an authorised service centre for inspection
and cleaning of the laser optical pickup unit.
IR Signal Check
• If the remote control is not working properly, you can use
a digital camera (including a cellular phone with built-in
camera) to see if it is sending out an infrared signal.
With a digital camera
(including built-in cell phone cameras):
Point a digital camera towards the
remote control. Push any button on the
remote control and look through the
digital camera. If the infrared light
appears through the camera, the remote
control is working.
Make sure to match + and - on the batteries to the marks
indicated in the battery compartment.
Caution
Incorrect use of batteries can result in hazards such
as leakage and bursting. Please observe the
following:
• Do not mix new and old batteries together.
• Do not use different kinds of batteries together.
Although they may look similar, different batteries
may have different voltages.
• Make sure that the + and - ends of each battery
match the indications in the battery compartment.
• Remove batteries from battery compartment that
are not going to be used for a month or more.
• When disposing of used batteries, please comply
with governmental regulations or environmental
public rules that apply in your country or area. (Refer
to page 3.)
• Do not recharge, short-circuit, heat, burn or
disassemble batteries.
Using a Remote Control
Keep in mind the following when using the remote
control:
• Make sure that there are no obstacles between the
remote control and the infrared sensor window on the
unit.
• Remote operation may become unreliable if strong
sunlight or fluorescent light is shining on the infrared
sensor window of the unit.
• Remote control for different devices can interfere with
each other. Avoid using remote control for other device
located close to the unit.
• Replace the batteries when you notice a fall off in the
operating range of the remote control.
• The maximum operable ranges from the unit are as
follows.
- Line of sight: approx. 7 m
- Either side of the centre: approx. 5 m within 30°
- Above: approx. 5 m within 15°
- Below: approx. 3 m within 30°
ON/STANDBY
Because of problems and errors that can occur during
the creation of DVD and CD software and/or the
manufacture of DVD and CD discs, Toshiba cannot
assure that this Blu-ray Disc Player will successfully play
every disc or every feature of every disc bearing the
DVD logo and/or every CD bearing the CD logo. As one
of the creators of DVD technology, Toshiba DVD players
are manufactured using the highest standards of
quality, and as a result, such incompatibilities are rare.
4
PAUSE
STOP
PLAY
OPEN/CLOSE
30˚
5m
30˚
7m
5m
EN
E5RJ2ED_EN.book Page 5 Thursday, October 29, 2009 3:30 PM
INTRODUCTION
INTRODUCTION
Supplied Accessories
• Remote control with R6 (1.5V) battery x 2
• Composite audio / video cables
• Owner’s manual
• Quick start guide
INTRODUCTION
PLAYBACK
Information on Playback.......................................................... 13
Playable Media ...................................................................... 13
Unplayable Media ................................................................ 14
Colour Systems...................................................................... 14
Region Codes......................................................................... 14
Structure of Media Contents............................................ 14
On-Screen Display................................................................ 14
Preparing to Play Back.............................................................. 16
How to Insert a Disc............................................................. 16
How to Insert an SD Card .................................................. 16
Selecting the Media............................................................. 16
Basic playback ............................................................................. 16
Playing Back (BD, DVD or a Disc with
AVCHD files) ........................................................................... 16
Playing Back (Audio CD or a Media with DivX®/
MP3/Windows Media™ Audio/JPEG Files)................... 17
Reading an SD Card............................................................. 18
Kodak Picture CD.................................................................. 18
EN
How to Navigate through the Setup Menus.....................27
List of Setup Menus....................................................................27
TV Aspect .......................................................................................32
HDMI Audio Out ..........................................................................33
Digital Out .....................................................................................34
Parental...........................................................................................35
HDMI CEC (REGZA - LINK).........................................................35
One Touch Play......................................................................35
Standby ....................................................................................35
System Information..............................................................35
Network Connection .................................................................36
Connection Test ....................................................................36
Enable(Easy)............................................................................36
Enable(Custom) .....................................................................36
Disable ......................................................................................38
Software Update .........................................................................39
Current Version......................................................................39
Disc Update.............................................................................39
Initialise...........................................................................................39
OTHERS
Language Code List....................................................................40
Troubleshooting..........................................................................41
Specifications ...............................................................................42
5
OTHERS
Connection to the TV ................................................................ 10
Connection to an Audio System ........................................... 12
Network Connection with LAN ............................................. 12
Finding the Video Channel on Your TV .............................. 12
FUNCTION SETUP
FUNCTION SETUP
CONNECTIONS
Special Playback ..........................................................................19
About DivX® and DivX® VOD.............................................19
Playing Back a DivX® with DivX® External
Subtitle .....................................................................................19
Fast Forward / Fast Reverse...............................................20
Slow Motion Playback.........................................................20
Step by Step Playback.........................................................20
Repeat Playback ....................................................................20
A-B Repeat...............................................................................21
Programme Playback ..........................................................21
Random Playback .................................................................22
Rapid Playback.......................................................................22
Useful Function............................................................................22
Noise Reduction ....................................................................22
Virtual Surround ....................................................................23
PIP (BONUSVIEW) Setting...................................................23
Camera Angle.........................................................................23
Enjoying BD-Live Discs with Online Content..............23
Search........................................................................................24
Switching Subtitles ..............................................................25
Switching Audio Soundtrack............................................25
Setting the BD Audio Mode ..............................................26
PLAYBACK
Safety Instructions ........................................................................2
Caution........................................................................................2
Laser Safety................................................................................2
Avoid the Hazards of Electrical Shock and Fire ............2
Moisture Condensation Warning ......................................2
Connection to Power.............................................................3
Installation Location...............................................................3
EU Conformity Statement ....................................................3
Other Precautions .........................................................................3
About Recycle...........................................................................3
About Copyright......................................................................4
About Maintenance................................................................4
About Remote Control ..........................................................4
Supplied Accessories ...................................................................5
Trademark Information ...............................................................6
Features ............................................................................................7
Functional Overview ....................................................................8
Front Panel.................................................................................8
Rear Panel ..................................................................................8
Remote Control........................................................................8
Front Panel Display.................................................................9
Symbols Used in this Manual..............................................9
CONNECTIONS
Content
E5RJ2ED_EN.book Page 6 Thursday, October 29, 2009 3:30 PM
INTRODUCTION
Trademark Information
HDMI, the HDMI logo
and High-Definition
Multimedia Interface are
trademarks or registered
trademarks of HDMI
Licensing LLC.
Manufactured under
license from Dolby
Laboratories. Dolby and
the double-D symbol are
trademarks of Dolby
Laboratories.
Manufactured under license
under U.S. Patent #’s:
5,451,942; 5,956,674;
5,974,380; 5,978,762;
6,226,616; 6,487,535;
7,392,195; 7,272,567;
7,333,929; 7,212,872 & other
U.S. and worldwide patents
issued & pending. DTS is a
registered trademark and
the DTS logos, Symbol, DTSHD and DTS-HD Master
Audio | Essential are
trademarks of DTS, Inc.
©1996-2008 DTS, Inc. All
Rights Reserved.
“x.v.Color” and
“x.v.Color” logo are
trademarks of Sony
Corporation.
“Blu-ray Disc” and
are trademarks.
is a trademark of DVD Format/Logo Licensing
Corporation.
“AVCHD” and the
“AVCHD” logo are
trademarks of Panasonic
Corporation and Sony
Corporation.
“BONUSVIEW” is
trademark of Blu-ray Disc
Association.
“BD-LIVE” logo is
trademark of Blu-ray Disc
Association.
Java and all other Java
trademarks and logos are
trademarks or registered
trademarks of Sun
Microsystems, Inc. in the
United States and/or
other countries.
DivX®, DivX Certified®,
and associated logos are
trademarks of DivX, Inc.
and are used under
license.
Windows Media and the
Windows logo are
trademarks or registered
trademarks of Microsoft
Corporation in the
United States and/or
other countries.
is trademark of Eastman Kodak Company.
MPEG Layer-3 audio coding technology licensed from
Fraunhofer IIS and Thomson.
6
THIS PRODUCT IS LICENSED UNDER THE MPEG-4 VISUAL
PATENT PORTFOLIO LICENSE FOR THE PERSONAL AND
NON-COMMERCIAL USE OF A CONSUMER FOR (i)
ENCODING VIDEO IN COMPLIANCE WITH THE MPEG-4
VISUAL STANDARD (“MPEG-4 VIDEO”) AND/OR (ii)
DECODING MPEG-4 VIDEO THAT WAS ENCODED BY A
CONSUMER ENGAGED IN A PERSONAL AND NONCOMMERCIAL ACTIVITY AND/OR WAS OBTAINED FROM
A VIDEO PROVIDER LICENSED BY MPEG LA TO PROVIDE
MPEG-4 VIDEO. NO LICENSE IS GRANTED OR SHALL BE
IMPLIED FOR ANY OTHER USE. ADDITIONAL
INFORMATION INCLUDING THAT RELATING TO
PROMOTIONAL, INTERNAL AND COMMERCIAL USES AND
LICENSING MAY BE OBTAINED FROM MPEG LA, L. L. C.
SEE HTTP://WWW.MPEGLA.COM
EN
E5RJ2ED_EN.book Page 7 Thursday, October 29, 2009 3:30 PM
INTRODUCTION
BD-Java
With some BDs which support Java applications, you can
enjoy the interactive functions such as games or interactive
menus.
Enjoy Your Content on Different Kinds of Media
Full backwards compatibility with BD, DVD, CD and SD card
ensures that you can continue to enjoy your current audiovideo collection. Additionally, you can enjoy AVCHD/DivX®/
MP3/WMA/JPEG files.
PIP (BONUSVIEW)
Some BD-video have the PIP function which enables you to
display the secondary video in the primary video. You can call
up the secondary video by pressing [PIP] whenever the scene
contains the secondary video.
Pop-up Menu
Some BD-videos have pop-up menu which is a navigation
menu that can be called up and be operated on the TV screen
without interrupting the playback. You can call up the pop-up
menu by pressing [POP MENU / MENU]. Contents in the
pop-up menu vary depending on the disc.
HDMI CEC (Consumer Electronics Control) (REGZA - LINK)
This unit supports HDMI CEC, which allows integrated system
control over HDMI and is part of the HDMI standard.
This function may not work properly on some devices.
HDMI 1080p24 Output (BD Only)
This unit is equipped with a feature which can provide the
smooth movement in the playback of film originated material
with the frame rate of 24 frames per second with progressive
scan. (Available only when the TV is connected by an HDMI
cable and compatible with 1080p24 frame input.)
Refer to “HDMI Video Resolution” in “FUNCTION SETUP” on
page 28.
HDCP Compatible
To play back the digital video images of a BD / DVD via an
HDMI connection, it is necessary that both the unit and the TV
(or an AV amplifier) support a copyright protection system
called HDCP (high-bandwidth digital content protection
system). HDCP is copy protection technology that comprises
data encryption and authentication of the connected AV
device. This unit supports HDCP. Please read the operating
instructions of your TV (or AV amplifier) for more information.
Rapid Playback
Playback in slightly faster speed while keeping the sound
output.
Rapid playback is available only on discs recorded in the
Dolby Digital format.
Playback of Content from an SD Card
You can play back AVCHD/MP3/WMA/JPEG stored in an SD
card.
You can store picture-in-picture commentary, subtitles or
other extras for BD-ROM ver. 2 (Profile 2.0 / Profile 1.1) files in
an SD card and play them back with the BD-video.
Playing Back AVCHD Files
This unit supports playback of AVCHD format files (new
format for high definition video camcorders) recorded on
disc/SD card. Your high definition personal archive is playable
in HD quality.
EN
7
OTHERS
Experience Rich Multi-Channel Surround Sound
Multi-channel surround sound, which recognises real-to-life
sound and makes you feel like you are really there.
HDMI Deep Colour
Deep Colour reduces the posterisation effect of the playback
image. Refer to “HDMI Deep Color” in “FUNCTION SETUP” on
page 28.
FUNCTION SETUP
DVD Upconversion for Enhanced Picture Quality
Your current DVD will look even better than before thanks to
video upconversion. Upconversion will increase the
resolution of standard definition DVD to high definition up to
1080p over an HDMI connection. The picture will be less
jagged and more realistic for a near high-definition
experience.
PLAYBACK
Full High-Definition Video Playback
Watch movies in the highest picture quality available for your
HDTV. This unit offers full high-definition video playback up to
1080p resolution for an amazing viewing experience. A highly
detailed picture and increased sharpness delivers a more trueto-life picture.
Easy and Simple Connection to Your HDTV via HDMI
You can connect this unit to your HDTV with one single HDMI
(High-Definition Multimedia Interface) cable. It is
recommended to use a High Speed HDMI Cable for optimal
compatibility. The high definition video output signal will be
transferred to your HDTV without conversion to analogue
signals, so you will get excellent picture and sound quality,
completely free from noise.
CONNECTIONS
BD-Live
BD-Live (BD-ROM version 2 Profile 2.0) that allows interactive
functions to be used when this unit is connected to the
Internet in addition to the BONUSVIEW function. The various
functions differ depending on the disc.
x.v.Color
This unit supports playback of video contents on discs
recorded with “x.v.Color” technology. To watch this video
content with the “x.v.Color”, a TV or other display device
supporting both video image reproduction using the
“x.v.Color” standard and capable of manually switching it’s
colour setting is required. Please refer to the owner’s manual
of your display device for further information.
INTRODUCTION
Features
E5RJ2ED_EN.book Page 8 Thursday, October 29, 2009 3:30 PM
INTRODUCTION
Functional Overview
Front Panel
1
2 3 4 5* 6*
ON/STANDBY
PAUSE
STOP
7
8
OPEN/CLOSE
PLAY
(*) The unit can also be turned on by pressing these buttons.
1.
9
2.
3.
4.
5.
6.
ON/STANDBY Q button
• Press to turn on the unit, or to
turn the unit into the standby
mode. (To completely turn off
the unit, you must unplug the
mains cable.)
ON/STANDBY Q indicator
PAUSE F button
STOP C button
PLAY B button*
OPEN/CLOSE A button*
10
7.
8.
9.
10.
Disc tray
Display
Infrared sensor window
SD card slot
Rear Panel
1 2
L
LAN
1.
2.
3.
4.
5.
HDMI
OUT
OPTICAL
COAXIAL
DIGITAL OUT
PCM/BITSTREAM
6
5
4
3
Y
PR /CR
PB /CB
R
AUDIO
VIDEO
OUT
7
COMPONENT
VIDEO OUT
LAN terminal
HDMI OUT jack
AUDIO OUT jacks
COMPONENT VIDEO OUT jacks
Mains cable
6.
7.
DIGITAL OUT (OPTICAL /
COAXIAL) jacks
VIDEO OUT jack
Caution
• Do not touch the inner pins of
the jacks on the rear panel.
Electrostatic discharge may
cause permanent damage to the
unit.
Remote Control
1
14
2*
15
16
3
17
4
19
20
18
5
6
21
7
22
8
9
10
23
24
25
11*
8
12
26
27
13
28
(*) The unit can also be turned on by pressing
these buttons.
1.
2.
3.
4.
5.
6.
7.
8.
9.
10.
11.
12.
13.
14.
15.
HDMI button
OPEN/CLOSE A button*
Number buttons
SEARCH button
Red / Green / Yellow / Blue
buttons
TOP MENU button
K / L / s / B buttons
SETUP button
REV E button
SKIP H button
PLAY B button*
MODE button
REPEAT button
PIP button
ON/STANDBY Q button
• Press to turn on the unit, or to
turn the unit into the standby
mode. (To completely turn off
the unit, you must unplug the
mains cable.)
16.
17.
18.
19.
20.
21.
22.
23.
24.
25.
26.
27.
28.
ANGLE button
AUDIO button
SUBTITLE button
DISPLAY button
CLEAR button
POP MENU / MENU button
ENTER button
RETURN button
FWD D button
SKIP G button
STOP C button
PAUSE F button
A-B button
EN
E5RJ2ED_EN.book Page 9 Thursday, October 29, 2009 3:30 PM
INTRODUCTION
Symbols Used in this Manual
1
2
To specify for which media type each function is, we put the
following symbols at the beginning of each item to operate.
Symbol
4
Playback status icon
Mode
Stop mode
Pause mode
Description refers to DVD-RW/-R and SD card
with AVCHD files
Description refers to BD-RE/-R, DVD-RW/-R
and CD-RW/-R with DivX® files
Description refers to BD-RE/-R, DVD-RW/-R,
CD-RW/-R and SD card with MP3 files
Description refers to BD-RE/-R, DVD-RW/-R,
CD-RW/-R and SD card with Windows Media™
Audio files
Description refers to BD-RE/-R, DVD-RW/-R,
CD-RW/-R and SD card with JPEG files
If you do not find any of the symbols listed above under the
function heading, the operation is applicable to all media.
FUNCTION SETUP
Playback is in progress
Description refers to audio CD / DTS-CD
PLAYBACK
1. Displays repeat icon. (Appears during repeat
playback.)
2. Displays media icon (disc mode or SD card mode).
3. Displays playback status icon. Refer to the table
below.
4. Displays various kinds of information such as title
number, elapsed playing time, repeat type, menu
type, etc.
CONNECTIONS
3
* Brightness of the display can be adjusted. Refer to “Panel Display” in
“FUNCTION SETUP” on page 30.
Description
Description refers to BD-video and BD-RE
(ver.2.1) / BD-R (ver.1.1/1.2/1.3) recorded in
BDMV format
Description refers to DVD-video
INTRODUCTION
Front Panel Display
Fast forward mode
OTHERS
Fast reverse mode
Slow motion mode
Example of Display Message
Title is being played
back.
Indicating the current
title number and the
elapsed time.
Current chapter is in
chapter repeat mode.
Loading a disc.
Dolby Digital audio is
being played back.
DTS audio is being
played back.
EN
9
E5RJ2ED_EN.book Page 10 Thursday, October 29, 2009 3:30 PM
CONNECTIONS
• When you change the connections, all devices should be turned off.
• Refer also to the manual of the devices to be connected.
Connection to the TV
1
Choose the appropriate connection, then proceed to the corresponding instruction (A, B
or C) on the next page.
Best (Supports up to 1080i / 1080p, 1080p24 resolution.)
Your TV
Video
Audio
HDMI cable
HDMI IN
High
Definition
TV
Go To
A
No analogue audio connection required.
HDMI cable NOT INCLUDED
High Speed HDMI Cable (also known as HDMI category 2 cable) is recommended for optimal compatibility.
Better (Supports up to 1080i resolution.)
COMPONENT
VIDEO IN
Y
Video
component video cable
PB/CB
PR/CR
+
Your TV
High
Definition
TV
Go To
B
L
Audio
composite audio cable
AUDIO IN
R
Component video cable NOT INCLUDED
Composite audio cable included
Basic (Supports only 480i/576i resolution.)
Video
+
Audio
composite video cable
VIDEO IN
L
composite audio cable
AUDIO IN
R
Your TV
Standard
Definition
TV
Go To
C
• Connect this unit directly to the TV. If the composite audio / video cables are connected to a VCR, pictures may be
distorted due to the copy right protection system.
Composite audio / video cables included
10
EN
E5RJ2ED_EN.book Page 11 Thursday, October 29, 2009 3:30 PM
CONNECTIONS
INTRODUCTION
2
Connect the cables by following the descriptions below.
HDMI Video / Audio Connection
,
,!.
($-)
/54
/04)#!,
#/!8)!,
$)')4!, /54
0#-")4342%!-
9
CONNECTIONS
A
Your TV
02 #2
0" #"
2
!5$)/
6)$%/
/54
#/-0/.%.4
6)$%/ /54
HDMI IN
HDMI cable
PLAYBACK
($-)
/54
FUNCTION SETUP
Note
• Do not tilt the connector when inserting it into the HDMI jack, and make sure the shapes of the jack and the
connector are matched.
• When using non-HDCP compatible TV, the image may not be displayed properly.
Component Video + Standard Audio Connection
,!.
($-)
/54
/04)#!,
#/!8)!,
$)')4!, /54
0#-")4342%!-
9
Your TV
02 #2
0" #"
2
!5$)/
6)$%/
/54
#/-0/.%.4
6)$%/ /54
component
video cable
OTHERS
B
,
COMPONENT
VIDEO IN
Y
,
9
02 #2
PR/CR
PB/CB
2
!5$)/
/54
L
AUDIO IN
R
0" #"
#/-0/.%.4
6)$%/ /54
composite audio cable
Standard Video + Standard Audio Connection
C
Your TV
,
,!.
($-)
/54
/04)#!,
#/!8)!,
$)')4!, /54
0#-")4342%!-
9
2
!5$)/
6)$%/
/54
02 #2
0" #"
#/-0/.%.4
6)$%/ /54
,
L
composite video cable
VIDEO IN
AUDIO IN
R
2
!5$)/
6)$%/
/54
EN
composite audio cable
11
E5RJ2ED_EN.book Page 12 Thursday, October 29, 2009 3:30 PM
CONNECTIONS
Connection to an Audio System
2-Channel Analogue Audio
Connection
Digital Audio Connection
Stereo system
HDMI Audio Connection
AV receiver / amplifier with an
HDMI input jack
AV receiver / amplifier
AUDIO IN
R
L
DIGITAL AUDIO INPUT
OPTICAL
HDMI IN
DIGITAL AUDIO INPUT
COAXIAL
digital audio optical
cable
digital audio
coaxial cable
composite audio cable
HDMI cable
L
L
LAN
HDMI
OUT
OPTICAL
COAXIAL
DIGITAL OUT
PCM/BITSTREAM
Y
R
AUDIO
VIDEO
OUT
L
PR /CR
PB /CB
R
COMPONENT
VIDEO OUT
LAN
HDMI
OUT
OPTICAL
COAXIAL
DIGITAL OUT
PCM/BITSTREAM
Y
L
PR /CR
PB /CB
R
AUDIO
VIDEO
OUT
COMPONENT
VIDEO OUT
LAN
OPTICAL
AUDIO
OUT
COAXIAL
DIGITAL OUT
PCM/BITSTREAM
• Refer to page 34 for digital audio setting.
HDMI
OUT
OPTICAL
COAXIAL
DIGITAL OUT
PCM/BITSTREAM
Y
R
AUDIO
VIDEO
OUT
PR /CR
PB /CB
COMPONENT
VIDEO OUT
HDMI
OUT
• Refer to page 33 for HDMI audio setting.
Digital audio optical / coaxial cable and HDMI cable NOT INCLUDED
Composite audio cable included
Network Connection with LAN
Finding the Video Channel on Your TV
After you have completed all the connections, you must
find the correct video channel (external input channel) on
your TV.
• You can use a disc which offers BD-Live function by
connecting the unit to the Internet.
(For BD-Live information, please refer to page 23.)
Hub or broadband router
Networking equipment
(modem, etc.)
WAN
LAN
LAN
5
LAN cable
4
3
2
1
LAN cable
Internet
1
After you have made all the necessary
connections, turn on the unit and your TV.
2
Press the button on the TV’s remote
control that accesses the external input
channel repeatedly until you see the
opening screen. It may be labelled
“F (for TOSHIBA TV)”, “SOURCE”, “AV”
or “INPUT” (refer to your TV’s user
manual).
LAN
L
LAN
HDMI
OUT
OPTICAL
COAXIAL
DIGITAL OUT
PCM/BITSTREAM
Y
R
AUDIO
VIDEO
OUT
PR /CR
PB /CB
COMPONENT
VIDEO OUT
Networking equipment, hub or broadband router and
cables NOT INCLUDED
Caution
• Do not insert any cable other than a LAN cable to the
LAN terminal to avoid damaging the unit.
Note
• After connecting a LAN cable, set up necessary
network settings.
• If your network equipment (modem, etc.) does not
have broadband router functions, connect a
broadband router.
• If your network equipment (modem, etc.) has
broadband router functions but there is no vacant
port, use a hub.
• For a broadband router, use a router which supports
10BASE-T/100BASE-TX.
• Do not connect your PC directly to the LAN terminal
of this unit.
• For the network setup, refer to “Network Connection”
on pages 36-38.
12
Note
• If the TV is connected by an HDMI cable, please allow
a few minutes for the opening screen to display.
EN
E5RJ2ED_EN.book Page 13 Thursday, October 29, 2009 3:30 PM
PLAYBACK
Before you start playing back a disc, read the following information.
Playable Media
Playable discs
Logos
DVD-RW
DVD-R
MP3/Windows Media™ Audio
• Sampling frequency
: 32 kHz, 44.1 kHz or 48 kHz
• Constant bit rate
: 112 kbps - 320 kbps (MP3),
48 kbps - 192 kbps
(Windows Media™ Audio)
CD-DA (audio CD)
CD-RW
JPEG
• Upper limit
CD-R
• Lower limit
• File size of image
maximum
Kodak Picture CD
-
DTS-CD
Playable files
AVCHD
DivX®
BD-RE/-R, DVD-RW/-R, CD-RW/-R
Windows Media™ Audio
JPEG
EN
Readable cards
Playable files / data
SD Memory Card (8 MB - 2 GB)
SDHC Memory Card (4 GB - 8 GB)
miniSD Card (8 MB - 2 GB)
AVCHD, MP3, Windows
Media™ Audio, JPEG,
picture-in-picture
commentary, subtitles or
other extras for BD-ROM
ver. 2 (Profile 2.0 / Profile 1.1)
microSD Card (8 MB - 2 GB)
Media
DVD-RW/-R, SD Memory Card
(including SDHC), miniSD Card,
microSD Card
MP3
: 2,560 x 1,900 dots (sub
sampling is 4:4:4)
5,120 x 3,840 dots (sub
sampling is up to 4:2:2)
: 32 x 32 dots
: 12 MB
BD-RE/-R, DVD-RW/-R, CD-RW/-R,
SD Memory Card (including SDHC),
miniSD Card, microSD Card
13
OTHERS
DivX®
Official DivX Certified® product
• Playable codec of AVI files : DivX® 3.x, DivX® 4.x,
DivX® 5.x, DivX® 6.x
• Maximum size of a video : 1920 x 1080 @ 60 fps
• Sampling frequency of
: 16 kHz - 48 kHz
audio
• Audio type
: MPEG1 audio layer 3
(MP3), MPEG1 audio layer
2, Dolby Digital
FUNCTION SETUP
DVD-video
PLAYBACK
Blu-ray Disc
- BD-video (single / dual layer)
- BD-RE ver. 2.1 (single / dual layer)
(Recorded in BDMV format)
- BD-R ver. 1.1 / 1.2 / 1.3 (single / dual layer)
(Recorded in BDMV format) (Unclosed
discs may not be played back.)
CONNECTIONS
This unit is compatible to play back the following discs / files.
To play back a disc / file, make sure that it meets the
requirements for region codes and colour systems as
described below. You can play back discs that have the
following logos.
Other disc types are not guaranteed to play back.
• ABOUT DIVX VIDEO: DivX® is a digital video format
created by DivX, Inc. This is an official DivX Certified
device that plays DivX video. Visit www.divx.com for
more information and software tools to convert your files
into DivX video.
• ABOUT DIVX VIDEO-ON-DEMAND: This DivX Certified®
device must be registered in order to play DivX Video-onDemand (VOD) content. To generate the registration
code, locate the DivX VOD section in the device setup
menu. Go to vod.divx.com with this code to complete the
registration process and learn more about DivX VOD.
• Official DivX® Certified product; Plays all versions of
DivX® video (including DivX® 6/DivX® HD) with standard
playback of DivX® media files.
• Discs containing the DivX® files with the DivX® GMC
(Global Motion Compensation) playback feature, which is
DivX® supplemental function, cannot be played back on
this unit.
It is recommended that files to be played back in this
unit are recorded under the following specifications:
INTRODUCTION
Information on Playback
E5RJ2ED_EN.book Page 14 Thursday, October 29, 2009 3:30 PM
PLAYBACK
Region Codes
Note for SD cards
• This unit supports SD Memory Card with FAT12/
FAT16 file system, and SDHC Memory Card with FAT32
file system.
• This unit does not support NTFS file system.
• This unit may not read the SD cards formatted on a
computer. If that is the case, please reformat the SD
cards in this unit and try again.
• This unit does not support miniSDHC and microSDHC
Memory Card.
• For miniSD Card and microSD Card, the adapter is
necessary.
miniSD Card
adapter
miniSD Card
microSD Card
adapter
microSD
Card
• Portions of this unit are protected under copyright
law and are provided under license by ARIS / SOLANA
/ 4C.
• Please keep the SD cards in their cases when you are
not using them.
• Do not try to open or modify the card.
• Do not touch the terminal surface with your fingers or
any metals.
• Do not attach additional labels or stickers to cards.
• Do not remove the label of the SD cards.
• This unit recognises up to 8 characters of file name in
the SD card. Characters after 8th will not be displayed.
Unplayable Media
The following discs will not be played back in this unit.
• CD-ROM
• CD-I (compact disc-interactive)
• DVD-RAM
• VSD (video single disc)
• DVD-audio
• Video CD
• HD DVD
• SVCD
• Unfinalised disc
• BD-RE (ver.1.0)
• BD-RE (ver.2.1) (Recorded in BDAV format)
• SD card contains DivX® files.
• BD / DVD hybrid disc (played back as a BD-video only)
• BD that contains AVCHD files
• BD-R (ver.1.1 / 1.2 / 1.3) (Recorded in BDAV format)
• DVD-RW/-R recorded in non compatible recording
format.
• Super Audio CD - Only the sound on the CD layer can be
heard. The sound on the high-density Super Audio CD
layer cannot be heard.
• Playability of dual discs are not guaranteed.
• This unit cannot play back the disc contents protected by
Windows Media™ Digital Rights Management (DRM).
Colour Systems
BD and DVD are recorded in different colour systems
throughout the world. The most common colour system,
used primarily in the U.K. and other EU countries, is PAL.
This unit uses the PAL system. However, it is also possible
to play back BD and DVD using other colour systems, such
as NTSC.
This unit has been designed to play back
BD-video with region “B” and DVD-video
with region “2” or “ALL”. You cannot play
back BD-video or DVD-video that are
labelled for other regions. Look for the
symbols on the right on your BD-video or
DVD-video. If these region symbols do
not appear on your BD-video or DVDvideo, you cannot play back the disc in
this unit. The letter or number inside the
globe refers to region of the world. A BDvideo or DVD-video labelled for a specific
region can only play back on the unit with
the same region code.
BD-video
DVD-video
Structure of Media Contents
The contents of BD / DVD / AVCHD are generally divided
into titles. Titles may be further subdivided into chapters.
BD / DVD / AVCHD
title 1
chapter 1 chapter 2
chapter 1
Audio CD is divided into tracks.
audio CD
track 1
track 2
track 3
title 2
chapter 2
chapter 3
track 4
track 5
Data discs or SD cards containing DivX® / MP3 / WMA /
JPEG are divided into folders, and the folders are
subdivided into files.
DivX® / MP3 / WMA / JPEG
folder (group) 1
file 1
file 2
file 3
folder (group) 2
file 4
file 5
On-Screen Display
You can check information about the current disc by
pressing [DISPLAY].
To call the on-screen display menu, press [DISPLAY]
during playback. Every time you press [DISPLAY], the
information changes. Depending on the media, available
information varies.
OFF A Title / Chapter information
A Title information (elapsed time)
A Title information (remaining time)
A Decoding format information A OFF
14
EN
E5RJ2ED_EN.book Page 15 Thursday, October 29, 2009 3:30 PM
PLAYBACK
OFF A Chapter information (elapsed time)
A Chapter information (remaining time)
A Title information (elapsed time)
A Title information (remaining time)
A Decoding format information A OFF
1 / 14
G
1
2
3 4
1. Current track (file) number / Total number of track
(file)
2. Elapsed time (or Remaining time) of the current
track / file (except for JPEG files)
3. Indication of SD card playback
4. Current repeat setting
(Only when repeat setting is active)
(T: Track repeat, G: Group repeat,
A: All repeat, AB: A-B repeat)
<Disc information (CD)>
0 : 00: 51
T
1
2
1. Current track number / Total number of tracks
2. Elapsed time (or Remaining time) of the current disc
FUNCTION SETUP
<File name information (MP3 / WMA)>
OFF (File information (elapsed time))
A File name information
A OFF (File information (elapsed time))
File_name_001
1
1. Media icon and file name
OFF A File information A File name information A OFF
<Title / Chapter information (BD / AVCHD)>
1
1/10
1
2
4
5
0 : 01 : 02
2
6
1. Current title number
2. Current chapter number / Total number of chapters
3. Current repeat setting (Only when repeat setting is
active)
(C: Chapter repeat, T: Title repeat, AB: A-B repeat)
4. Indicates that the multi camera angle images are
available on the scene
5. Current playback status
6. Elapsed time (or Remaining time) of the current chapter
<Title information (BD / DVD / AVCHD)>
3/5
0 : 01 : 02
1
2
: WMA files
: JPEG files
<Tag information (WMA)>
TITLE
<Chapter information (DVD)>
1 / 10
: MP3 files
Title name information
T
3
: DivX® files
OTHERS
OFF (File information (elapsed time))
A File name information
A Tag information (title name)
A Tag information (artist name)
A OFF (File information (elapsed time))
1
Artist name information
ARTIST NAME
2
1. Title name based on tag information of current
Windows Media™ Audio file
2. Artist name based on tag information of current
Windows Media™ Audio file
<Decoding format information>
Dolby Digital
1
1. Decoding format
1. Current title number / Total number of titles
2. Elapsed time (or Remaining time) of the current title
EN
PLAYBACK
1 / 14
OFF A File information (elapsed time)
A File information (remaining time)
A File name information A OFF
SD
CONNECTIONS
OFF (Track information(elapsed time))
A Track information (remaining time)
A Disc information* (elapsed time)
A Disc information* (remaining time)
A OFF (Track information(elapsed time))
(* not available during programme / random playback)
0 : 00: 51
INTRODUCTION
<Track (File) information (CD / DivX® / MP3 / WMA / JPEG)>
15
E5RJ2ED_EN.book Page 16 Thursday, October 29, 2009 3:30 PM
PLAYBACK
Preparing to Play Back
Basic playback
How to Insert a Disc
Playing Back
(BD, DVD or a Disc with AVCHD files)
1
Press [OPEN/CLOSE A] to open the disc
tray.
2
Place the disc on the disc tray with its
label side facing up.
1
2
Align the disc to the
disc tray guide.
• Make sure the disc is compatible with this unit.
(Refer to page 13 for the list of compatible discs.)
3
Press [OPEN/CLOSE A] to close the disc
tray.
Please allow time for the disc to load.
Gently push in the SD card, with its label
side facing up, into the SD card slot until it
clicks.
PAUSE
STOP
PLAY
OPEN/CLOSE
SD card
To remove the SD card:
In stop mode, gently push in the SD card, then pull it
out slowly.
M
edi Selecting the Media
When an SD card is inserted, the correct media should be
selected in advance. You can switch the media by
following the steps below. “Media Select” is available
only when an SD card is inserted.
1
2
In stop mode, press [SETUP].
Use [K / L] to select
[ENTER] .
If not, press [PLAY B].
• Some discs may show a title or a disc menu.
In such case, refer to “Using the Title / Disc / Pop-up
Menu” on page 17.
To pause playback:
Press [PAUSE F].
To return to the normal playback:
Press [PLAY B].
To stop playback:
Press [STOP C].
Playback will be in Resume-On-Stop mode.
Resume-On-Stop mode
Note
How to Insert an SD Card
ON/STANDBY
Playback may start automatically.
If a playback is in Resume-On-Stop mode, when you press
[PLAY B] next time, the playback will start from the point
where it has been stopped.
To eject the disc:
Press [OPEN/CLOSE A].
1
Insert a disc.
, then press
3
4
Use [K / L] to select “Media Select”.
5
Press [SETUP] to exit.
• Resume playback may not be available for the BD that
supports Java applications (BD-Java).
• In “Disc” mode, the resume information will be cleared
when;
- [STOP C] is pressed while in the Resume-On-Stop
mode.
- the parental level is changed.
- the disc tray is opened.
• In “SD Card” mode, the resume information will be
cleared when;
- [STOP C] is pressed while in the Resume-On-Stop
mode.
- the SD card is removed.
- the unit is turned into the standby mode.
Note
•
may appear at the top-right on the TV screen
when the operation is prohibited by the disc or this
unit.
• During the playback of 2-layered disc, pictures may
stop for a moment. This happens when the 1st layer
switches to the 2nd layer. This is not a malfunction.
• The operation may vary when you play back BDvideo and DVD-video with disc menu. Refer to the
manual accompanying the disc for details.
• Set “Still Mode” setting to “Field” in “Video” menu if
pictures in the pause mode are blurred. Refer to “Still
Mode” on page 28.
Press [ENTER] repeatedly to select the
desired media.
Even if you turn the unit to the standby mode in “SD Card”
mode, it will be in “Disc” mode the next time you turn it on.
16
EN
E5RJ2ED_EN.book Page 17 Thursday, October 29, 2009 3:30 PM
PLAYBACK
1 Press [TOP MENU].
2 Use [K / L / s / B] to select an item, then press
[ENTER].
Press [TOP MENU] to exit.
1 Press [POP MENU / MENU].
2 Use [K / L / s / B] to select an item, then press
[ENTER].
1 During the playback of BD-video, press
Note
• Contents of menus and corresponding menu
operations may vary among discs. Refer to the
manual accompanying the disc for details.
• Title menu is also available for SD card with AVCHD
files.
Playing Back (Audio CD or a Media with DivX®/
MP3/Windows Media™ Audio/JPEG Files)
1
Insert an audio CD or a media with DivX
(not available for SD card), MP3, WMA or
JPEG files.
6
- - / 20
Folder_1
Folder_2
Folder_3
JPEG_A
JPEG_B
JPEG_C
JPEG_D
Page Down
Media Mode
7
1. Audio CD
Track information
DivX® / MP3 / WMA / JPEG
File information
2. Audio CD
“CD-DA” will be displayed
DivX® / MP3 / WMA / JPEG
Current Disc, SD card, or folder name will be displayed
3. Audio CD
List of the track number and time
DivX® / MP3 / WMA / JPEG
List of the folder or file names in the current disc or
folder
4. Operation guide
Press [Red] to go to the previous page
Press [Green] to go to the next page
Press [Yellow] to call up the subtitle list
Press [Blue] to select “Media Mode”
5. Current page / Total page number
6. Playback status
7. Media icon
: Folder
: audio CD tracks
: DivX® files
: MP3 files
: WMA files
: JPEG files
®
• Media filter screen will appear.
• For audio CD and a disc contains only one type of file,
skip to step 3.
2
5
Select the type of the file you want to play
back in the media filter screen. Then press
[ENTER] to display the file list.
EN
To stop playback:
Press [STOP C].
17
OTHERS
3
[POP MENU / MENU].
Use [K / L / s / B] to select an item, then press
[ENTER].
Press [POP MENU / MENU] to exit.
4
FUNCTION SETUP
Pop-up menu (BD-video)
• This is a special feature available for some BD-videos.
When you press [POP MENU / MENU], a menu pops
out on the TV screen during the playback.
3
File List
JPEG_DISC
Page Up
3 Press [POP MENU / MENU] to exit.
2
PLAYBACK
Disc menu (DVD-video)
2
e.g.) JPEG
1
Title menu (BD-video / DVD-video / AVCHD)
3
• If you press [ENTER] on the desired track / file,
playback will start.
CONNECTIONS
Many of BD-video and DVD-video discs contain title menu
(BD-video / DVD-video / AVCHD), disc menu (DVD-video)
or pop-up menu (BD-video) which guides you through the
available functions in the disc. The contents of the menus
may differ depending on the discs.
Use [K / L] to select a desired track, folder
or file, then press [ENTER].
Use [s / B] to go in and out of folders.
(only for DivX® / MP3 / WMA / JPEG files).
INTRODUCTION
3
Using the Title / Disc / Pop-up Menu
E5RJ2ED_EN.book Page 18 Thursday, October 29, 2009 3:30 PM
PLAYBACK
4
Note
• Unrecognisable characters will be replaced with
asterisks.
• Some unplayable folders or files may be listed due to
the recording status.
• High-resolution JPEG files take longer to be displayed.
• Progressive JPEG files (JPEG files saved in progressive
format) cannot be played back in this unit.
• The system can recognise up to 255 folders / 999 files
for CD, 999 folders / 9,999 files for BD, DVD and SD
card.
• The 9th and deeper hierarchies cannot be displayed
for CD. The 10th and deeper hierarchies cannot be
displayed for DVD and SD card.
• For the SD card playback, refer to “Reading an SD
Card” on page 18.
• Extensions other than listed below cannot be
recognised.
- DivX® : .avi / .AVI / .divx / .DivX
- MP3 : .mp3
- WMA : .wma
- JPEG : . jpg / jpeg*
* The extension “.jpeg” is not available for SD card.
• If a disc contains AVCHD files, the playback of other
files which are in the same disc is not available.
• With regard to the multi-border BD-RE/-R, additionally
recorded sections cannot be recognised.
• With regard to the multi-border DVD-RW/-R,
additionally recorded sections may not be recognised.
Reading an SD Card
With SD card, you can enjoy the following functions in
addition to playing back AVCHD / MP3 / WMA / JPEG files
stored in the card.
- Special additional contents for BD-ROM Profile 1 ver.1.1.
(For more information about the special additional
contents, refer to the instruction book that came with
the disc.)
- BD-Live function (BD-ROM ver. 2 Profile 2.0).
(For more information about BD-Live, refer to page 23.)
1
• If you press [ENTER] on the desired file, playback will
start.
Caution
• Do not remove the SD card or turn the unit to the
standby mode while the contents of the card are in
playback. It may result in malfunction or loss of the
card’s data.
Note
• “Media Select” screen will disappear under the
conditions listed below:
- when the screen saver is activated.
- when [RETURN] is pressed.
- when the setup menu is called up.
• If “Media Select” screen disappears before you make
the selection, refer to “Selecting the Media” on page
16.
• Do not delete the folders or files in the SD card with
your computer. This unit may not read the SD cards
formatted on a computer.
• If a folder or file name includes one of the following
unrecognisable characters, the folder or file name
may not be displayed correctly.
- Unrecognisable characters : . , " = + [ ] ; / \ : | ¥
Kodak Picture CD
This unit can also run JPEG files stored on Kodak Picture
CD. You can enjoy picture images on the TV set by playing
back the Kodak Picture CD. This unit conforms to ver.7.0 of
Kodak Picture CD. For details of Kodak Picture CD, contact
a shop that provides developing service of Kodak Inc.
1
Insert a Kodak Picture CD. Kodak Picture
CD menu will appear automatically on the
TV screen.
Insert an SD card (refer to page 16 on how
to insert a disc).
If no disc is in operation, “Media Select” screen will
appear on the TV screen.
2
Use [K / L] to select a desired folder or
file, then press [ENTER].
Use [s / B] to go in and out of folders.
Use [K / L] to select “SD Card”, then press
[ENTER].
1
TR
4
- - / 16
Thumbnail
Pictures
• When the SD card contains only one type of file, skip
to step 4.
3
Select the type of the file you want to play
back. Then press [ENTER] to display the
file list.
Please select the media to play back.
Video
Audio
Picture
• For AVCHD files, the playback will start right after you
select “Video”. (The file list is not available for AVCHD
files.)
18
㪉㩷 㩷 㪆㩷 㩷 㪊
Page Prev
Page Next
2
3
1. File information
2. Current page / Total page number
3. Operation guide
Press [Yellow] to go to the previous page
Press [Blue] to go to the next page
4. Playback status
EN
E5RJ2ED_EN.book Page 19 Thursday, October 29, 2009 3:30 PM
PLAYBACK
Use [K / L / s / B] to select a desired file
to be played back, then press [PLAY B] or
[ENTER].
To return to the file played back last:
Press [POP MENU / MENU].
Tips for JPEG / Kodak Picture CD Playback
FUNCTION SETUP
Special Playback
• A file with an extension of “.avi” and “.DivX” is called
as a DivX® file. All files with “.avi” extension are
recognised as MPEG4.
• For CD-RW/-R, maximum of 255 group (folder) or 999
files may be recognised.
• For BD-RE/-R and DVD-RW/-R, maximum of 999
group (folder) or 9,999 files may be recognised.
• The 10th and deeper hierarchies cannot be
displayed.
• Unrecognisable characters will be replaced with “*”.
• When playing back the files recorded in high bit
rates, the images can be interrupted in some
occasions.
• Although DivX® logo has been obtained for this unit,
it may not be able to play back some data,
depending on the characteristics, bit rates, or audio
format settings, etc.
• If a large-sized DivX® file is selected, please allow
time for the file to start the playback (over 20
seconds sometimes).
• If DivX® files written on a CD-RW/-R cannot be played
back, rewrite them on a BD-RE/-R or DVD-RW/-R, and
try playing it back again.
• For more information for DivX®, please visit
http://www.divx.com.
PLAYBACK
• Every press on [ANGLE] will turn the image
clockwise by 90 degrees when an image is displayed.
• To change the visual effect for switching the
playback image, press [MODE] once, then use
[s / B] or [ENTER] to switch between “Cut In/Out”
and “Fade In/Out”.
• During JPEG / Kodak Picture CD playback, press
[MODE] twice to change the size of the playback
image, then use [s / B] or [ENTER] to switch
between “Normal” (100 %) and “Small” (95 %).
The size change may have no effect on some files
(e.g. files with a small picture size).
Note
CONNECTIONS
• An image will be played back from the selected file
and go to the next one in turn.
To stop playback:
Press [STOP C].
To return to the first item:
Press [TOP MENU].
INTRODUCTION
2
Playing Back a DivX® with DivX® External
Subtitle
About DivX® and DivX® VOD
Hint for the purchased or rented official DivX® Certified
product
• When you purchase or rent a DivX® file through the
official site of DivX® video which is called DivX® Video OnDemand (VOD) services, a registration code is required
every time you get the new file from the DivX® VOD
services. Refer to “DivX® VOD” in “FUNCTION SETUP” on
page 30.
Possible Errors
“This rental has c views left. Do you want to use one of
your c views now?”
Some DivX® VOD files are restricted with the limited
playable times. You cannot play them back beyond the
limit.
“This player is not authorized to play this video.”
You cannot play back the DivX® VOD files obtained with
different registration codes on this unit.
“This rental is expired.”
You cannot play back the DivX® VOD files with the expired
rental period.
“This player does not support this video format.”
You cannot play back the DivX® files whose image size
exceeds 1920 x 1080.
“This player does not support this audio format.”
For DivX® files with audio format other than MPEG1 audio
layer 3 (MP3), MPEG1 audio layer 2 and Dolby Digital,
audio will not be output and only the video will be output.
EN
1 Follow steps 1 to 3 in “Playing Back (Audio CD
2
or a Media with DivX®/MP3/Windows Media™
Audio/JPEG Files)” on page 17.
Select a file you want to play back, then press
[Yellow].
Subtitle list will appear.
TR
-/9
Subtitle List
DivX_File
[Off]
[ASS]
[SMI]
[SRT]
[SSA]
[SUB]
[TXT]
File List
• “DivX Subtitle” appears next to “Yellow” icon only when
DivX® subtitle is available for the selected file.
• If you press [PLAY B] or [ENTER] instead of [Yellow],
playback without subtitle will start.
3 Select the desired subtitle file, then press
[PLAY B] or [ENTER].
Playback of the DivX® file with DivX® subtitle will start.
19
OTHERS
Subtitles created by the user can be displayed during
DivX® playback.
E5RJ2ED_EN.book Page 20 Thursday, October 29, 2009 3:30 PM
PLAYBACK
Note
• To utilise this function, the following conditions
must meet.
- Playback file and the subtitle file must have the
same name.
- Playback file and the subtitle file must locate in the
same folder.
- Only the subtitle files with the following extensions
are supported; .smi (.SMI), .srt (.SRT), .sub (.SUB),
.ass (.ASS), .ssa (.SSA), .txt (.TXT). (.sub (.SUB) and .txt
(.TXT) may not be recognised.)
- The subtitles that exceeds the playback time of the
DivX® file will not be displayed.
Fast Forward / Fast Reverse
Step by Step Playback
1 In pause mode, press [PAUSE F] repeatedly.
2
Every time you press [PAUSE F], playback will
advance one step at a time.
Press [PLAY B] to return to normal playback.
Note
• Only step by step forward is available.
• Set “Still Mode” setting to “Field” in “Video” menu if
pictures in step by step playback mode are blurred.
Refer to “Still Mode” on page 28.
Repeat Playback
1 During playback, press [FWD D] repeatedly
for fast forward.
During playback, press [REV E] repeatedly for fast
reverse.
Every time you press [FWD D] or [REV E], the
playback speed will change.
2 Press [PLAY B] to return to normal playback.
Note
• For BD, DVD and AVCHD, speed changes in 5
different levels.
• For audio CD, DivX®, MP3 and Windows Media™
Audio, speed changes in 3 different levels.
• For audio CD, fast forward / fast reverse search
between different tracks are not available during
programme and random playback.
• For DivX®, MP3 and Windows Media™ Audio, fast
forward / fast reverse search between different files
are not available.
• For some DivX® files, fast forward/fast reverse may
not function.
Slow Motion Playback
Available repeat functions vary depending the discs.
1 During playback, press [REPEAT] repeatedly to
select the desired repeat mode.
Repeat mode
Chapter repeat
The current chapter will be played
back repeatedly.
Available media
Title repeat
The current title will be played back
repeatedly.
Track repeat
The current track will be played back
repeatedly.
Group repeat
The current folder will be played
back repeatedly.
All repeat
All tracks or files in the media will be
played back repeatedly.
1 During playback, press [PAUSE F], then press
[FWD D].
Every time you press [FWD D], playback speed will
change.
2 Press [PLAY B] to return to normal playback.
Note
• Slow motion speed changes in 3 different levels.
• Only slow forward is available.
• Set “Still Mode” setting to “Field” in “Video” menu if
pictures in the slow motion playback mode are
blurred. Refer to “Still Mode” on page 28.
• For some DivX® files, slow forward may not function.
20
Note
• The repeat setting will be cancelled when you stop
playback.
• The chapter, title, track or group repeat will be
cleared when moving to another chapter, title, track /
file or folder.
• Repeat playback does not function during A-B repeat
playback.
• Chapter and title repeat are not available with some
scenes.
• When the repeat setting is set for a MP3 or WMA
folder (file), the repeat setting will be cancelled if you
select other MP3 or WMA folder (file) to play back.
EN
E5RJ2ED_EN.book Page 21 Thursday, October 29, 2009 3:30 PM
PLAYBACK
Before
you
begin
You can play back the specific part (between point A and
point B) repeatedly.
1 During playback, press [A-B] at the desired
ending point B.
As soon as you set the point B, the part between point
A and point B will start playback repeatedly.
• To cancel the A-B repeat, press [A-B] again.
You can play back the disc/card in your desired order.
press [ENTER].
4
5
6
- - / 16
Total
Program
CD-DA
8
9
10
11
12
13
14
Page Up
0:36
1:14
0:45
0:50
0:53
0:20
0:54
Page Down
2
4
9
11
12
14
8
0 : 26 : 24
1:14
0:50
1:14
0:50
0:53
0:54
0:36
Page Prev
Page Next
7
8
1. Audio CD
Track information
DivX® / MP3 / WMA / JPEG
File information
2. Audio CD
“CD-DA” will be displayed
DivX® / MP3 / WMA / JPEG
Current disc, SD card, or folder name will be displayed
3. Track / Folder / File list
Track / Folder / File list in the original order
4. Programmed list
Track / File list in the programmed order
5. Cumulative playback time of all tracks in the
programmed list (audio CD only)
EN
Note
• During programme playback, press [STOP C] once
to set the resume point, and then press [PLAY B] to
resume programme playback from where [STOP C]
was pressed (audio CD) or from beginning of the file
where [STOP C] was pressed (MP3 / WMA / JPEG).
• During programme playback, press [STOP C] twice
to display the programme screen. To go back to the
normal programme playback, press [RETURN] to exit
from the programme screen, then press [PLAY B].
• Up to 99 tracks