1
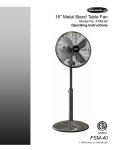
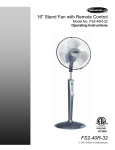
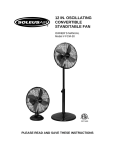
16” Stand Fan with Remote Control
Model No: FS2-40R-32
Operating Instructions
3072986
FS2-40R-32
© 2006 Soleus Air International
Thank you for choosing a Soleus Air 16” Stand Fan. This owner’s manual will provide you
with valuable information necessary for the proper care and maintenance of your new product.
Please take a few moments to thoroughly read the instructions and familiarize yourself with all
the operational aspects of your new fan.
For your own records, please attach a copy of your sales receipt to this manual. Also, write the
store name/location, date purchased, and serial number below:
Store Name: ____________________________________________________
Location: ______________________________________________________
Date Purchased: _________________________________________________
Serial Number (located on back of unit): ______________________________
IMPORTANT INSTRUCTIONS
1. When using this electric unit, basic safety precautions should always be followed to reduce the risk of fire,
electric shock, and injury to persons, including the following:
2. Read ALL instructions before using this unit.
3. Use only for intended household use as described in this manual.
4. Plug the fan directly into a 120 V A/C electrical outlet.
5. Never insert your fingers, pencils, or other objects through the fan grill during operation.
6. The fan should be used on a stable and level surface.
7. Do not expose the fan to excessive heat or humidity. This could cause damage to the electrical components.
8. Do not immerse in any type of liquid. Do not use near water.
9. The fan should be kept out of the reach of children. Close supervision is necessary when the fan is used by
or near children.
10. To reduce the risk of fire or explosion, do not store or use gasoline or other flammable vapors or liquids in
the vicinity of the fan.
11. Do not operate this or any appliance with a damaged cord, if the unit malfunctions, or if it has been
dropped or damaged in any manner. Connect to properly polarized outlets only.
12. Do not cover the cord or place near heat sources. Keep the cord away from high traffic areas, and do not
submerge in water.
13. Unplug the fan before moving, cleaning or making repairs. NOTE: If for any reason this unit requires service, return appliance to manufacturer or a similarly qualified service agent to ensure safety.
14. To reduce the risk of fire or electric shock, do not use this fan with any solid-state speed control device.
15. To disconnect, grip plug and pull from wall outlet. Never pull on the cord to unplug.
16. For indoor use only.
2
WARNING: This fan is equipped with a polarized plug (one blade is wider than the other). The plug is intended to fit into a power outlet only one way, with the wide blade in the wide slot. This is a safety feature; if
you are unable to insert the plug fully into the outlet, try reversing the plug. If the plug still does not fit, contact
a qualified electrician.
DO NOT DEFEAT THE SAFETY PURPOSE OF THE POLARIZED PLUG.
TECHNICAL SPECIFICATIONS
Voltage Rating
115V, 60Hz
Power Consumption
55W
Unit Size
17.5 in. (W) x 17 in. (D) x 53 in. (H)
Unit Weight
14 lbs
3
ASSEMBLY
WARNING: DO NOT plug in fan before assembly.
Tools required: Phillips screwdriver (not included)
Base Assembly:
1. Unscrew the two screws from the neck of the fan head. Slide the neck of the fan head over the pole of the
stand, aligning the screw holes. Secure the pole by inserting and tightening the two screws.
2. Turn the stand upside down and place the base over the bottom of the stand. Align the pre-drilled holes
on the bottom of the base with the stand. Use the 4 included screws to secure the stand to the base.
Fan Head Assembly:
Unscrew the mounting nut counter clockwise from the motor shaft.
Position the back grill over the motor shaft, fitting the holes in the
back grill over the knobs that protrude from the front of the motor. Make sure the rear grill fits securely against the motor housing.
Secure the back grill by screwing on the mounting nut. Turn clockwise
and tighten firmly.
Slide the fan blade onto the motor shaft with the fan blade’s shaft
sleeve facing the motor. Make sure the groove in the shaft sleeve
fits over the spring bolt on the motor shaft.
Attach the fan blade by screwing the securing knob onto the motor
shaft counter clockwise.
Position front grill so logo is horizontal. Attach the grills together by
positioning the top tab of the front grill over the back grill. Firmly
press the black ring of the front grill onto the back grill, snapping
into place. This completes the assembly.
4
OPERATING INSTRUCTIONS
Using Fan Controls
1. Set the fan on a stable, level surface.
2. Turn the fan on by pressing the POWER/SPEED button on the Control Panel or Remote Control.
3. Adjust the speed setting by pressing the POWER/SPEED on the Control Panel or remote control.
4. Pressing the MODE button on either the fan or the remote will choose the desired wind mode: Standard,
Sleep, & Natural. In standard mode the fan operates at a steady speed. In Sleep mode the fan decreases
speed in the middle of the oscillation pattern. Natural mode simulates the wind by randomly alternating the
fan speed.
5. To oscillate the fan head, press the OSCILLATION button located on the fan or the SWING button on the
remote. Each press of the oscillation button will change the oscillation pattern. You can choose between
side-to-side, up and down, and figure 8 oscillation patterns
6. This fan includes a 12 hour auto shut-off timer. To operate the timer, press the TIMER button (located on
the fan or on the remote) until the desired time is visible on the LCD Display. Each button press will
increase the time by 1 hour increments. Once the timer is set the you will see “HR” and a clock icon light
up on the display. Once set, the timer will count down to zero and turn off the fan.
7. To turn the fan off, press the POWER/SPEED button on the Control Panel or remote control until the unit
turns off.
Using the Auto-on Feature
1. First turn the fan on by pressing the POWER/SPEED button on the Control Panel or Remote Control. You
will see the current room temperature flashing on and off on the LCD display.
2. Once the fan is on, press the AUTO button located on the remote control or the control panel.
3. “AUTO” should now be displayed on the LCD display and the current room temperature will stop flashing
on the display. When the fan is in auto mode, it will vary speeds according to the room temperature. When
the room temperature is below 68° the fan will be in standby mode (off). When the temperature is between
68° F and 74° F the fan will operate at low speed (1). When the temperature is between 75° F and 81° F the
speed will increase to medium (2). The fan will operate at high speed (3) once the room temperature is
equal to or greater than 82° F.
Adjusting Height and Fan Head Tilt
1. To adjust the height of the fan, turn the Adjustable Height Knob (L) counter-clockwise to loosen the
stand. Adjust the fan to the desired height, then firmly tighten to secure into place.
2. To adjust the tilt on the Fan Head, loosen the knob below the Motor Housing and tilt the fan
forward/back by pulling or pushing the top of the Fan Grill. The fan will make a clicking noise while
being adjusted. Once the Fan Head is set to the desired tilt, tighten the knob to secure into place.
5
CLEANING & MAINTENANCE
1. Turn the fan off and unplug the unit.
2. Wipe the fan down with a damp cloth for most efficient operation.
3. Air dry the fan completely before use.
4. Never use abrasive cleaning agents or solvents. This may cause damage or deterioration to the surface of
the unit.
5. Do not immerse the fan in any form of liquid. Do not allow water to drip on or into the fan motor
housing.
Fan Blade Cleaning:
•
Make certain the fan is unplugged. Unlock the metal clips on the front grill and remove the front grill. Use
a Phillips screwdriver to loosen the securing screw and remove the fan blade.
•
The fan blade and grill may be cleaned with a damp cloth and mild detergent.
•
Reassemble the fan after the parts have dried completely. To do so, replace the fan blade, tighten the
securing screw, and secure the front grill. Do not plug the fan into an electrical outlet until it is fully
reassembled.
STORAGE
If the fan will not be used for a long period of time, store it in a cool, dry location when not in use. To
prevent dust and dirt build-up, use the original packaging to repack the unit.
OVERHEAT PROTECTION
A thermostat is built-in to the motor to prevent overheating. If the fan temperature exceeds the limit on the
thermostat, the fan will automatically shut-off to prevent overheating and protect the fan components from
damage.
REMOTE CONTROL
The supplied remote uses 2 “AAA” batteries. The remote will work at a distance of roughly 25 feet, and an
angle of 60°.
6
WARRANTY
One Year Limited Warranty
Soleus International Inc. warrants the accompanying Soleus Air FS2-40R-32 16” Stand Fan to be free of defects in material and workmanship for the applications specified in its operation instruction for a period of ONE (1) year from the
date of original retail purchase in the United States.
If the unit exhibits a defect in normal use, Soleus International Inc. will, at its option, either repair or replace it, free of
charge within a reasonable time after the unit is returned during the warranty period.
As a condition to any warranty service obligation, the consumer must present this Warranty Certificate along with a
copy of the original purchase invoice.
THIS WARRANTY DOES NOT COVER:
• Damage, accidental or otherwise, to the unit while in the possession of a consumer not caused by a defect in
material or workmanship.
• Damage caused by consumer misuse, tampering, or failure to follow the care and special handling provisions
in the instructions. This includes dents, accidental or otherwise, to the base and head of the unit.
• Damage to the finish of the case, or other appearance parts caused by wear.
• Damage caused by repairs or alterations of the unit by anyone other than those authorized by Soleus
International Inc.
• Freight and Insurance cost for the warranty service.
ALL WARRANTIES, INCLUDING ANY IMPLIED WARRANTY OF MERCHANT ABILITY ARE LIMITED TO
ONE-YEAR DURATION OF THIS EXPRESS LIMITED WARRANTY. SOLEUS INTERNATIONAL INC.
DISCLAIMS ANY LIABILITY FOR CONSEQUENTIAL OR INCIDENTAL DAMAGES AND IN NO EVENT
SHALL SOLEUS INTERNATIONAL INC’S LIABILITY EXCEED THE RETAIL VALUE OF THE UNIT FOR
BREACH OF ANY WRITTEN OR IMPLIED WARRANTY WITH RESPECT TO THIS UNIT.
This warranty covers only new products purchased from our authorized dealers or retailers. It does not cover used, salvaged, or refurbished products.
As some states do not allow the limitation or exclusion of incidental or consequential damages, or do not allow
limitation on implied warranties, the above limitations and exclusions may not apply to you. This warranty gives you
specific legal rights, and you may also have other rights that vary from state to state.
For Technical Support & Warranty Service
Please Call (888) 876-5387
Or Write To:
Soleus International Inc.
9451 Telstar Ave.
El Monte, CA 91731 USA
www.soleusair.com
7