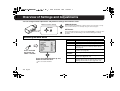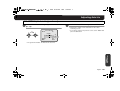
1
!""#$%&!'
)*'
+,-.-/0
INSTRUCTION MANUAL
BEDIENUNGSANLEITUNG
MANUEL D’INSTRUCTIONS
Getting Started
VCC-WD8575P
About this manual
À propos de ce manuel
Before installing and using the camera, please read this manual
carefully. Be sure to keep it handy for later reference.
Avant d’installer et d’utiliser la caméra, veuillez lire ce manuel
attentivement. Gardez-le à portée de main pour toute référence
ultérieure.
Über diese Bedienungsanleitung
Lesen Sie bitte vor der Montage und dem Inbetriebnehmen der
Kamera zuerst diese Bedienungsanleitung sorgfältig durch und
bewahren Sie sie zum späteren Nachschlagen auf.
Settings/
Adjustments
Connection
Color CCD Camera
CCD-Farbkamera
Caméra CCD couleurs
CCD
!""#$%&!'
)*'
+,-.-/0
Contents
Precautions . . . . . . . . . . . . . . . . . . . . . . . . . . . . . . . . . . . . . . . . . . . .
3
Dimensions . . . . . . . . . . . . . . . . . . . . . . . . . . . . . . . . . . . . . . . . . . . .
4
Getting Started
Connection Examples and Peripheral Devices
(Sold separately). . . . . . . . . . . . . . . . . . . . . . . . . . . . . . . . . . . . . . . .
5
Part Names . . . . . . . . . . . . . . . . . . . . . . . . . . . . . . . . . . . . . . . . . . . .
6
Connections
Installing Lens. . . . . . . . . . . . . . . . . . . . . . . . . . . . . . . . . . . . . . . . . .
Steps for Installing Lens . . . . . . . . . . . . . . . . . . . . . . . . . . . . . . . . .
Switching Over Type of Auto Iris Lens
(DC type is selected by default.) . . . . . . . . . . . . . . . . . . . . . . . . . .
8
8
8
Connecting Devices . . . . . . . . . . . . . . . . . . . . . . . . . . . . . . . . . . . . . 9
Basic Connection and Power Connection . . . . . . . . . . . . . . . . . . . 9
Connecting Alarm Devices . . . . . . . . . . . . . . . . . . . . . . . . . . . . . . . 10
Installing Camera . . . . . . . . . . . . . . . . . . . . . . . . . . . . . . . . . . . . . . 11
Adjusting Flange Back . . . . . . . . . . . . . . . . . . . . . . . . . . . . . . . . . . 12
Settings/Adjustments
Overview of Settings and Adjustments . . . . . . . . . . . . . . . . . . . . . 13
Accessing the MAIN MENU . . . . . . . . . . . . . . . . . . . . . . . . . . . . . . 13
Basic Operation for Settings and Adjustments . . . . . . . . . . . . . . . 14
An Example for Basic Operation for
Settings and Adjustments . . . . . . . . . . . . . . . . . . . . . . . . . . . . . . . 14
Selecting Display Language . . . . . . . . . . . . . . . . . . . . . . . . . . . . . . 15
LANGUAGE (Language Selection) . . . . . . . . . . . . . . . . . . . . . . . . 15
Naming Cameras . . . . . . . . . . . . . . . . . . . . . . . . . . . . . . . . . . . . . . . 16
TITLE (Title Setting) . . . . . . . . . . . . . . . . . . . . . . . . . . . . . . . . . . . . 16
1
English
Adjusting Synchronization Error. . . . . . . . . . . . . . . . . . . . . . . . . .
L-L SETTING (Line Lock) . . . . . . . . . . . . . . . . . . . . . . . . . . . . . . .
18
18
Adjusting Auto Iris . . . . . . . . . . . . . . . . . . . . . . . . . . . . . . . . . . . . .
IRIS SETTING (AI: Auto Iris) . . . . . . . . . . . . . . . . . . . . . . . . . . . .
19
19
Adjusting Electronic Iris (For Manual or Fixed Iris Lens) . . . . . .
IRIS SETTING (EI: Electronic Iris) . . . . . . . . . . . . . . . . . . . . . . . .
21
21
Correcting Backlight . . . . . . . . . . . . . . . . . . . . . . . . . . . . . . . . . . . .
Selecting Correction Method . . . . . . . . . . . . . . . . . . . . . . . . . . . .
CENT (BLC SETTING) (Center-weighted Metering) . . . . . . . . . .
MULT (BLC SETTING) (Multi-spot Metering) . . . . . . . . . . . . . . . .
22
22
23
25
Setting Wide Dynamic Range . . . . . . . . . . . . . . . . . . . . . . . . . . . .
WIDE-D SETTING (Wide Dynamic Range Setting) . . . . . . . . . . .
26
26
Increasing Electronic Sensitivity. . . . . . . . . . . . . . . . . . . . . . . . . .
SENSE UP (Increasing Electronic Sensitivity) . . . . . . . . . . . . . . .
28
28
Specifying Shutter Speed. . . . . . . . . . . . . . . . . . . . . . . . . . . . . . . .
SHUTTER (Electronic Shutter) . . . . . . . . . . . . . . . . . . . . . . . . . . .
29
29
Adjusting DAY/NIGHT Function. . . . . . . . . . . . . . . . . . . . . . . . . . .
Selecting DAY/NIGHT Mode . . . . . . . . . . . . . . . . . . . . . . . . . . . .
D/N SETTING-AUTO . . . . . . . . . . . . . . . . . . . . . . . . . . . . . . . . . .
D/N SETTING-COLOR . . . . . . . . . . . . . . . . . . . . . . . . . . . . . . . . .
D/N SETTING-B/W (Black and white) . . . . . . . . . . . . . . . . . . . . .
30
30
31
32
33
Adjusting White Balance . . . . . . . . . . . . . . . . . . . . . . . . . . . . . . . .
Selecting White Balance Mode. . . . . . . . . . . . . . . . . . . . . . . . . . .
ATW MASKING (Masking for ATW) . . . . . . . . . . . . . . . . . . . . . . .
AWC SETTING (One-Push Adjustment) . . . . . . . . . . . . . . . . . . .
MWB SETTING (Manual White Balance) . . . . . . . . . . . . . . . . . . .
34
34
35
36
37
!""#$%&!'
)*'
+,-.-/0
Contents
Specifying Alarm Input. . . . . . . . . . . . . . . . . . . . . . . . . . . . . . . . . . . 38
ALARM IN SETTING . . . . . . . . . . . . . . . . . . . . . . . . . . . . . . . . . . . 38
Using Alarm Input Terminal as DAY/NIGHT Switching . . . . . . . . . 43
Specifying Alarm Output . . . . . . . . . . . . . . . . . . . . . . . . . . . . . . . . . 44
ALARM OUT SETTING (Alarm output) . . . . . . . . . . . . . . . . . . . . . 44
ALARM SIGN (Alarm display) . . . . . . . . . . . . . . . . . . . . . . . . . . . . 45
■ Characteristics
• Built-in Wide Dynamic Range Capability
• Day/Night Automatic Switching
• Configurable Preference Settings with View on Screen
Correcting Gamma Characteristic . . . . . . . . . . . . . . . . . . . . . . . . . 46
GAMMA setting . . . . . . . . . . . . . . . . . . . . . . . . . . . . . . . . . . . . . . . 46
Accentuating Subject Outline . . . . . . . . . . . . . . . . . . . . . . . . . . . . . 47
APERTURE SETTING . . . . . . . . . . . . . . . . . . . . . . . . . . . . . . . . . . 47
Inverting Images (horizontal/vertical) . . . . . . . . . . . . . . . . . . . . . . . 48
MIRROR setting (Image Inversion) . . . . . . . . . . . . . . . . . . . . . . . . 48
Inverting Images (Brightness/Hue) . . . . . . . . . . . . . . . . . . . . . . . . . 49
NEGA/POSI setting . . . . . . . . . . . . . . . . . . . . . . . . . . . . . . . . . . . . 49
Hiding Partial Image (Privacy Protection) . . . . . . . . . . . . . . . . . . . 50
PRIVACY MASK SETTING . . . . . . . . . . . . . . . . . . . . . . . . . . . . . . 50
Multiplying Magnitude of Electronic Zoom . . . . . . . . . . . . . . . . . . 54
EL ZOOM (Electronic Zoom) . . . . . . . . . . . . . . . . . . . . . . . . . . . . . 54
Settings Screens List . . . . . . . . . . . . . . . . . . . . . . . . . . . . . . . . . . . . 55
Troubleshooting . . . . . . . . . . . . . . . . . . . . . . . . . . . . . . . . . . . . . . . . 57
Specifications . . . . . . . . . . . . . . . . . . . . . . . . . . . . . . . . . . . . . . . . . . 58
English
2
1 !""#$%&!'
)*'
+,-.-/0
Precautions
■ In case of problem
■ Protect from high temperatures
Do not use the unit if smoke or a strange odor comes from the unit, or if it
seems not to function correctly. Turn off the power immediately and
disconnect the power cord, and then consult your dealer or an Authorized
Sanyo Service Center.
Do not install close to stoves, or other heat sources, such as spotlights,
etc., or where it could be subject to direct sunlight, as this could cause
deformation, discoloration or other damages.
Be careful when installing close to the ceiling, in a kitchen or boiler room,
as the temperature may rise to high levels.
■ Do not open or modify
Do not open the cabinet, as it may be dangerous and cause damage to
the unit. For repairs, consult your dealer or an Authorized Sanyo Service
Center.
■ Do not put objects inside the unit
Make sure that no metal objects or flammable substance get inside the
unit. If used with a foreign object inside, it could cause a fire, a short-circuit
or damage. Be careful to protect the unit from rain, sea water, etc. If water
or liquid gets inside the unit, turn off the power immediately and disconnect
the power cord, and then consult your dealer or an Authorized Sanyo
Service Center.
■ Be careful when handling the unit
To prevent damage, do not drop the unit or subject it to strong shock or
vibration.
■ Do not install this unit close to magnetic fields
The magnetic fields may result in unstable operation.
■ Protect from humidity and dust
To prevent damage, do not install the unit where there is greasy smoke or
steam, where the humidity may get too high, or where there is a lot of dust.
3
English
■ Cleaning
• Dirt can be removed from the cabinet by wiping it with a soft cloth. To
remove stains, wipe with a soft cloth moistened with a soft detergent
solution and wrung dry, then dry by wiping with a soft cloth.
• Do not use benzine, thinner or other chemical products on the cabinet,
as this may cause deformation and paint peeling. Before using a
chemical cloth, make sure to read all accompanying instructions. Make
sure that no plastic or rubber material comes into contact with the
cabinet for a long period of time, as this may cause damage or paint
peeling.
2 !""#$%&!'
)*'
+,-.-/0
Dimensions
136
67
1
127
54
11
28
15.4
24.4
1/4”-20 UNC
(Unit: mm)
English
4
!""#$%&!'
)*'
+,-.-/0
Connection Examples and Peripheral Devices
(Sold separately)
■ For Camera Setup Only
Monitor
Digital Video Recorder
Records Images
Camera
Monitor
Camera
Camera Control Unit
Monitor
Camera Control Unit (VAC-70)
Monitors images from the camera.
Also available as settings screen.
Digital Video Recorder
Records images on a hard disk. Highly
recommended for use in your monitoring
system; images can be recorded over an
extended time period and are free from
degradation.
5
English
Simplified remote controller for camera
settings.
Note:
• Make sure to disconnect the unit after
settings are completed.
3 !""#$%&!'
)*'
+,-.-/0
Part Names
Getting Started
Rear Panel
Video Output Terminal (VIDEO OUT)
Power Indicator (POWER)
Illuminates red when power is supplied.
Connects to the Video Input Terminal
(VIDEO IN) of the monitor or the recorder. See page 9.
VIDEO OUT
ALARM
Alarm I/O Terminal
(ALARM IN, OUT, COM)
POWER
COM
COM
OUT
IN
GND
DC12V
AC24V
Connects with an external alarm
device. (Push Lock)
• See page 10 for connection.
• See pages 38 and 44 for settings.
CLASS 2 WIRING
Power Input Terminal (AC 24V, DC 12V, GND)
Connects to the power supply. See page 9.
English
6
!""#$%&!'
)*'
+,-.-/0
Part Names
Side Panel
CURSOR
Lens Iris Output Terminal (LENS)
SET
Connects with the lens plug of the
auto iris type lens (sold separately).
(See next page)
Bracket
CURSOR Button
Moves the cursor during each
setting. (See page 13)
SET Button
Used for viewing, switching over and
determining screen for each setting.
(See page 13)
Top Panel
Flange Back Lock Screw
Locks the flange back adjusting lever.
(See page 12)
Lens Mounting Cap
7
English
Flange Back Adjusting Lever
!""#$%&!'
)*'
+,-.-/0
Installing Lens
You are recommended to use any DC type and CS mounting lens equipped with an auto iris.
Note:
• Apply adapter ring (sold separately) when you use any C mounting lens.
• Use any lens of which length (L: see the figure to the right) of the mounting screw is within 5 mm; otherwise you may fail to
install or damage the lens.
L
Steps for Installing Lens
Install the lens.
1 1 Carefully align the lens mount with
the camera opening, then turn the
lens slowly to install it.
2
Plug
2 Connect the plug to the Lens Iris
Output Terminal (LENS).
If the plug does
not fit into the
terminal, replace
it with the proper
type.
Connection
Remove the lens mounting cap.
Switching Over Type of Auto Iris Lens (DC type is selected by default.)
Remove the side cover.
Select a lens type by using the
switch (A.I. LENS).
Attach the side cover.
For VIDEO type lens
DC type
A. I.
LENS
Cover
DC
VIDEO
Loosen screw with a
Phillips screwdriver.
Any lens without amplifier
circuit (also referred to as
“Coil lens” or “Without built-in
EE amplifier”).
Adjust the iris by using LEVEL dial on
the lens side.
(This unit has fixed ALC. Adjusting the
ALC on the lens does not take effect.)
VIDEO type
Inside the cover
Any lens with amplifier circuit
(also referred to as “Built-in
EE amplifier”).
English
8
4 !""#$%&!'
)*'
+,-.-/0
Connecting Devices
Note: • All the power supplied to the system should be turned off when you connect devices.
• Incorrect connections may cause failure and/or smoking; carefully read this and other instruction manuals for each device for proper connections.
Basic Connection and Power Connection
1 Connect the Video Output Terminal (VIDEO OUT)
and the Video Input Terminal of the monitor or
the digital video recorder using coaxial cable.
2 Connect the power cord and insert the plug of
the cord into a wall outlet.
Power Indicator
For AC 24 V
Monitor
Coaxial cable type and maximum length
Cable type RG-59U, 250 m maximum
Cable type RG-6U, 500 m maximum
Cable type RG-11U, 600 m maximum
GND
AC24V
VIDEO OUT
Note:
Digital Video Recorder, etc.
Camera Control Unit
(VAC-70)
• Make sure to connect a grounding wire to a grounding terminal (GND).
• Use a UL standard, VW-1 compliant cable to avoid fire risk.
RThe power indicator illuminates red while power is being supplied.
GND
DC12V
+
Note:
• If you use a type of cable other than listed above, images and synchronizing
signals may not be transferred properly due to attenuation.
• Do not use coaxial cable RG-59U (3C-2V) for piping or overhead wiring.
9
English
Power Indicator
For DC 12 V
• Camera can be controlled
remotely during setting or
adjustment.
Note: Make sure to disconnect
the unit after setting or
adjustment is completed.
-
Note:
• Confirm the polarity of the plug: + (positive) and - (negative).
• If long distance is necessary, be sure to use the proper cable so that the voltage
at the power supply terminals falls in the operating range of this unit. A cable of
improper length and/or thickness may cause a significant voltage drop.
RThe power indicator illuminates red while power is being supplied.
5 !""#$%&!'
)*'
+,-.-/0
Connecting Devices
Connecting Alarm Devices
Connect the unit with External Alarm or Beeper.
External Beeper or Indicator
External Alarm Switch or IR Sensor
ALARM
Connection
COM
COM
IN
OUT
Note: For alarm device connection, configure an alarm setting for this unit.
See pages 38 and 44.
English
10
!""#$%&!'
)*'
+,-.-/0
Connecting Devices
Installing Camera
Install the camera in a correct location so that the intended object can be monitored properly. You should also adjust on the monitor side.
• You can change the bracket topside down, depending on the installation spot for the camera (see below).
Note:
• If you want to use a commercially available platform for the camera, select an appropriate type, taking into consideration the gross weight of the
camera and platform, and secure it on a firm place.
• Images may blur under extremely bright lighting; adjust the lighting angle to get clear images.
■ Changing the Bracket for Mounting the Camera
a
b
a
b
Note: Make sure to use the longer screws a to secure the bracket.
11
English
!""#$%&!'
)*'
+,-.-/0
Connecting Devices
Adjusting Flange Back
Flange back adjustment may be required to correct a focal distance error generated due to attachment thickness of the installed lens.
Normally you do not have to make any adjustment, however, you can adjust focus of the installed lens with auto iris, when it provides images out of focus
at the maximum telephoto position. To adjust the flange back, follow the steps below.
maximum telephoto position
and then adjust focus by
turning the focus ring of the
lens.
2
3 Set the zoom lens to the
maximum wide-angle position
and then adjust focus by using
the flange back adjusting lever.
4 Repeat steps 2 and 3 until
the image stays in-focus when
changing from a wide-angle
position to a telephoto
position. When the setting is
complete, tighten the flange
back lock screw.
Note: The flange back lock screw is tightened
completely when its tip hits the invisible
bottom, even though the screw head
may seem still up in the air. Do not screw
down any further beyond this normal
position as illustrated in Fig. 1.
Flange back lock screw
Connection
1 Loosen the lock screw. (M2: +)
2 Set the zoom lens to the
Fig. 1
1
3
4
English
12
1 !""#$%&!'
)*'
+,-.-/0
Overview of Settings and Adjustments
You can configure various adjustments and preference settings on the monitor screen.
CURSOR Button
Buttons used for settings
Press the button up and down or side to side to select an item or set up.
• Press and hold the button to continually change the items that appear.
CURSOR
SET Button
SET
SET
Press and hold the button to enter into the MAIN MENU, or perform other
operations such as determining a selected value during the settings
operation.
Accessing the MAIN MENU
MAIN MENU
SET
Press and hold
the button for
about 1 second.
LANGUAGE
TITLE
SYNC
EXPOSURE
DAY/NIGHT
WHITE BALANCE
ALARM
OPTION
PRESET
MENU
SET
OFF
INT
SET
AUTO
ATW
SET
SET
OFF
END
LANGUAGE
TITLE
SYNC
EXPOSURE
DAY/NIGHT
WHITE
BALANCE
ALARM
Press the CURSOR button up and
down to select the item.
The selected item blinks.
OPTION
Setting for User's Language. (See page 15)
Setting for Camera Name. (See page 16)
Adjusting Synchronization. (See page 18)
Setting for Iris, Wide Dynamic Range, Backlight
Correction, Electronic Sensitivity, Shutter Speed.
(See page 19)
Setting for Day/Night (Color/Black and White/Auto)
Function. (See page 30)
Adjusting White Balance. (See page 34)
Settings for Input/Output of Alarm Signal and Motion
Sensor. (See pages 38 – 45)
Setting or Adjustment for Gamma Characteristic,
Aperture, Mirror Image, Negative/Positive, Privacy
Masking, Electronic Zoom. (See pages 46 – 54)
MEMO: For the Settings Screen List, see page 55.
13
English
2 !""#$%&!'
)*'
+,-.-/0
Basic Operation for Settings and Adjustments
An Example for Basic Operation for Settings and Adjustments
Indicates to press the
CURSOR button up and
down to select an item.
Indicates to press the
CURSOR button side to
side to switch over to
other values.
Selecting item (blinking)
EXPOSURE SETTING
EXPOSURE SETTING
IRIS
WIDE-D
BLC
SENSE UP
SHUTTER
SET
OFF
INT
SET
AUTO
ATW
SET
SET
OFF
END
SET
Specifying values
MAIN MENU
AI
OFF
OFF
OFF
50
IRIS
WIDE-D
BLC
SENSE UP
SHUTTER
EI
OFF
OFF
OFF
-----
SET
When y mark
appears at the right
end of the item.
Next Screen
SET
Note: After the expiration of a predetermined time interval (3 minutes) without any
operation, the settings screen goes off automatically and returns to normal
monitoring screen.
■ To Reset Settings (Factory Default Settings)
Once the settings are complete, set
“MENU” to “END” and press the SET
button. (Closing the setting screen.)
PRESET
MENU
PRESET
PRESET
MENU
OFF
END
SET
MENU
END
• If you press the SET button while “BACK” is selected, the
previous screen will reappear.
ON
BACK
Settings/
Adjustments
LANGUAGE
TITLE
SYNC
EXPOSURE
DAY/NIGHT
WHITE BALANCE
ALARM
OPTION
PRESET
MENU
Indicates to press the SET
button for decision.
SET
ON
Select “PRESET” and choose “ON” instead of
“OFF”, and press the SET button.
• To reset all the settings, set “PRESET” to “ON” in the MAIN
MENU and press the SET button. (The PRIVACY MASK
SETTING will not be intialized.)
English
14
!""#$%&!'
)*'
+,-.-/0
Selecting Display Language
For accessing the MAIN MENU, see page 13 – 14.
You can change the language displayed on the settings and adjusting screens. (Default setting: ENGLISH)
LANGUAGE
MAIN MENU
LANGUAGE
(SET)
LANGUAGE
TITLE
SYNC
EXPOSURE
DAY/NIGHT
WHITE BALANCE
ALARM
OPTION
PRESET
MENU
SET
OFF
INT
SET
AUTO
ATW
SET
SET
OFF
END
LANGUAGE
LANGUE
SPRACHE
ENGLISH
FRENCH
GERMAN
SET
MENU
BACK
LANGUAGE (Language Selection)
■ In case French is selected
1 Select a language and press the SET button.
2 Set “MENU” to “FIN” (end) and press the SET
button.
LANGUAGE
LANGUAGE
LANGUE
SPRACHE
ENGLISH
FRENCH
GERMAN
LANGUE
LANGUAGE
LANGUE
SPRACHE
ANGLAIS
FRANCAIS
ALLEMAND
SET
SET
MENU
BACK
MENU
RPressing the SET button will immediately change the screen
title and the language on the right.
15
English
FIN
RFinishes the setting screen.
• If you press the SET button while “RETOUR” (back) is selected,
the previous screen will reappear.
3 !""#$%&!'
)*'
+,-.-/0
Naming Cameras
For accessing the MAIN MENU, see page 13 – 14.
You can give a name (title) to each camera. The specified names are displayed on the monitor
so that you can easily distinguish the monitoring images when you use multiple cameras.
TITLE
ON
ROOM2
TITLE SETTING
MAIN MENU
LANGUAGE
TITLE
SYNC
EXPOSURE
DAY/NIGHT
WHITE BALANCE
ALARM
OPTION
PRESET
MENU
ROOM1
ABCDEFGHIJKLM
NOPQRSTUVWXYZ
0123456789 :-
SET
ON
INT
SET
AUTO
ATW
SET
SET
OFF
END
ID
SET
ROOM1
ROOM2
????????????????
POSITION
SET
PRESET
MENU
OFF
BACK
TITLE (Title Setting)
1 Choose a character(s) from the “Character
Selecting Field”.
2 Repeat step 1 to complete the title.
Example: CAM1
Character Selecting Field
ID
CAM1????????????
ID String
ABCDEFGHIJKLM
NOPQRSTUVWXYZ
0123456789 :ID
ID string
????????????????
POSITION
SET
PRESET
MENU
OFF
BACK
SET
RThe characters are displayed starting from the left in the ID
string.
• You can enter up to 16 characters.
• The letters “???....” do not appear on the monitoring screen, but
if you select “ON” for the “TITLE” and then enter no letter at all,
the monitor will show you “???....”.
MEMO: • If you want to overwrite the character, move the cursor onto it
in the ID string and choose any new letter.
• If you want the name to be displayed on the monitor in two
lines, insert the line feed mark (y) in the ID string wherever you
want to start a new line. On the monitor screen, the name will
be displayed in two lines. You can enter up to 16 characters
including the line feed mark.
English
16
Settings/
Adjustments
TITLE SETTING
!""#$%&!'
)*'
+,-.-/0
Naming Cameras
3 Select “POSITION” – “SET” and press the SET
button.
TITLE SETTING
4 On the monitor screen, determine the location
where the name should be displayed by pressing
the button up-down or side to side; and then
press the SET button.
ABCDEFGHIJKLM
NOPQRSTUVWXYZ
0123456789 :ID
CAM1
CAM1????????????
POSITION
SET
PRESET
MENU
OFF
BACK
SET
SET
RReturns to the settings screen.
ROn the normal monitoring screen, the name blinks.
5 Set “MENU”
to “END” and press the SET button.
RFinishes the settings screen and display the name on the
normal monitoring screen.
• If you want to return to the previous screen, select “BACK” and
press the SET button.
■ To delete the name specified:
Set “PRESET” to “ON“, and press the SET button.
PRESET
MENU
ON
BACK
SET
RAll the characters will be displayed with “?”.
You will see “OFF” in place of “ON”.
17
English
!""#$%&!'
)*'
+,-.-/0
Adjusting Synchronization Error
For accessing the MAIN MENU, see page 13 – 14.
By default, the synchronization adjustment for the camera is performed internally (INT). However, you must make adjustments
in the Line Lock (L-L) Setting screen, if the monitor screen seems out of sync after switching over among multiple cameras
using AC 24 V.
• If using this camera as the second or subsequent camera, adjust the roll using this setting.
• If using this camera as the first camera, adjust the roll using the phase adjusters on the second and subsequent cameras.
Note: The Line Lock setting is not available for DC 12 V operation.
MAIN MENU
SYNC
LANGUAGE
TITLE
SYNC
EXPOSURE
DAY/NIGHT
WHITE BALANCE
ALARM
OPTION
PRESET
MENU
L-L
L-L SETTING
SET
OFF
L-L
SET
AUTO
ATW
SET
SET
OFF
END
[V SYNC PHASE]
0
SET
PRESET
MENU
OFF
BACK
L-L SETTING (Line Lock)
1 Adjusting Synchronization (0 – 524).
[V SYNC PHASE]
0
RFinishes the setting screen and returns to the normal
monitoring screen.
• If you want to return to the previous screen, select “BACK” and
press the SET button.
OFF
BACK
English
18
Settings/
Adjustments
2 Set “MENU” to “END” and press the SET button.
L-L SETTING
PRESET
MENU
• Make adjustments so that the vertical synchronization of the
monitor screen does not move up or down.
4 !""#$%&!'
)*'
+,-.-/0
Adjusting Auto Iris
For accessing the MAIN MENU, see page 13 – 14.
This unit is designed to accept the DC type auto iris lens (sold separately) and is factory-configured to be ready-for-use with
the optional lens. However, you can configure and/or make adjustments for preferred brightness depending on the
environment, condition or other optional lens you use.
EXPOSURE SETTING
MAIN MENU
EXPOSURE
(SET)
LANGUAGE
TITLE
SYNC
EXPOSURE
DAY/NIGHT
WHITE BALANCE
ALARM
OPTION
PRESET
MENU
IRIS
WIDE-D
BLC
SENSE UP
SHUTTER
SET
OFF
INT
SET
AUTO
ATW
SET
SET
OFF
END
AI
OFF
OFF
OFF
50
SET
SET
IRIS
AI
PRESET
MENU
OFF
BACK
IRIS SETTING (AI: Auto Iris)
1 Verify the lens type which is displayed on the
right side of the “DRIVE”.
2 Select “LEVEL” and adjust the brightness (iris)
(0 – 100).
IRIS SETTING
IRIS SETTING
DRIVE
Lens type
DC
DC
DRIVE
[LEVEL]
[LEVEL]
40
40
[IRIS STOP]
5
[IRIS STOP]
5
DC
: DC type (Coil lens or Without built-in EE amplifier)
(Default setting)
PRESET
MENU
OFF
BACK
VIDEO : VIDEO type (Built-in EE amplifier)
Note: The screen shows the status of A.I. LENS switch inside the
cover. If the displayed type is different from your lens,
switch to the proper type. Otherwise the iris will not work.
(See page 8)
19
English
RThe greater the number, the brighter the image.
5 !""#$%&!'
)*'
+,-.-/0
Adjusting Auto Iris
IRIS SETTING (AI: Auto Iris) (continued)
3 Select “IRIS STOP” and specify an iris value
(0 – 17).
RFinishes the settings screen and returns to the normal
monitoring screen.
• If you want to return to the previous screen, select “BACK” and
press the SET button.
IRIS SETTING
DC
DRIVE
4 Set “MENU” to “END” and press the SET button.
[LEVEL]
40
[IRIS STOP]
5
PRESET
MENU
OFF
BACK
Settings/
Adjustments
• The greater the number, the wider the iris becomes.
English
20
!""#$%&!'
)*'
+,-.-/0
Adjusting Electronic Iris (For Manual or Fixed Iris Lens)
For accessing the MAIN MENU, see page 13 – 14.
If you need to adjust the brightness for using manual iris lens or fixed iris lens, follow the steps below.
• Adjust the iris manually.
MAIN MENU
EXPOSURE
(SET)
LANGUAGE
TITLE
SYNC
EXPOSURE
DAY/NIGHT
WHITE BALANCE
ALARM
OPTION
PRESET
MENU
EXPOSURE SETTING
SET
OFF
INT
SET
AUTO
ATW
SET
SET
OFF
END
IRIS
WIDE-D
BLC
SENSE UP
SHUTTER
EI
OFF
OFF
OFF
-----
SET
SET
IRIS
EI
PRESET
MENU
OFF
BACK
IRIS SETTING (EI: Electronic Iris)
1 Adjust the brightness (iris) (1 – 100).
IRIS SETTING
[LEVEL]
40
2 Set “MENU” to “END” and press the SET button.
RFinishes the settings screen and returns to the normal
monitoring screen.
• If you want to return to the previous screen, select “BACK” and
press the SET button.
MEMO: A manual iris lens or a fixed iris lens is recommended for indoor
monitoring.
Note: • Under extremely bright lighting, unfavorable phenomena may occur
PRESET
MENU
OFF
BACK
• The greater the number, the brighter it gets.
21
English
such as swaths of smear on the screen, because light intensity
entering the lens is too high to be controlled. Reduce the intensity by
changing the angle of the lighting source or by other means.
• If the images of subjects under fluorescent lighting are flickering,
replace fluorescent lighting with incandescent lighting.
• The shutter speed set in the AI mode will be overridden.
(See page 29)
• Setting “WIDE-D” to “ON” will force the iris setting from “EI” to “AI”.
This setting will remain “AI” after setting “WIDE-D” to “OFF”.
(See page 26)
!""#$%&!'
)*'
+,-.-/0
Correcting Backlight
For accessing the MAIN MENU, see page 13 – 14.
If the images of subjects are not clear because of backlight, correct it by adjusting conditions or changing correction method.
EXPOSURE SETTING
MAIN MENU
EXPOSURE
(SET)
LANGUAGE
TITLE
SYNC
EXPOSURE
DAY/NIGHT
WHITE BALANCE
ALARM
OPTION
PRESET
MENU
SET
OFF
INT
SET
AUTO
ATW
SET
SET
OFF
END
IRIS
WIDE-D
BLC
SENSE UP
SHUTTER
AI
OFF
OFF
OFF
50
PRESET
MENU
OFF
BACK
SET
BLC
Selecting Correction Method
1 Select a correction method.
■ CENT (Center-weighted metering): (See page 23)
IRIS
WIDE-D
BLC
SENSE UP
SHUTTER
AI
OFF
OFF
OFF
50
2 For advanced settings (when a method other
than “OFF” is selected), press the SET button.
REach corresponding settings screen will appear.
Correction is made based on the optical measurement that is
focused on the central area of the screen. (The image of subject to
be corrected is located in the center of the screen.)
■ MULT (Multi-spot metering): (See page 25)
Correction is made based on the optical measurement and
assessment of the entire screen. (The image of subject to be
corrected is not limited to a center of the screen location.)
■ OFF
No correction is performed for backlight.
Settings/
Adjustments
EXPOSURE SETTING
Note: Setting “WIDE-D” to “ON” will switch “BLC” to “OFF”.
(See page 26)
English
22
1 !""#$%&!'
)*'
+,-.-/0
Correcting Backlight
CENT (BLC SETTING) (Center-weighted Metering)
1 Locate the upper left corner of an area for which
you want to correct backlight, and then press the
SET button.
2 Specify the correction area size, and press the
SET button.
BLC SETTING
BLC SETTING
[SIZE]
[POSITION]
SET
SET
RThe “SIZE” screen appears.
MEMO: Here, determine the upper left position of the correction
area.
Pressing the button further when the right end or the
bottom end of the displayed area hits an edge will scale
down the area size, but you can set your preferred size in
step 2.
Note: • If “BLC” is set to “CENT”, “ZOOM” and “EL ZOOM” do
not function. (See pages 42, 54)
Also note that no adjustment is possible for “BLC” –
“CENT” if “ZOOM” is set to “ON”. (See page 42)
23
English
• From the datum point at the upper left corner of the area you
set in step 1, the size can be scaled up or down, as well as
side to side. Make the area size fit in with the subject size.
RThe “BLC WINDOW WEIGHTING” screen appears.
2 !""#$%&!'
)*'
+,-.-/0
Correcting Backlight
CENT (BLC SETTING) (Center-weighted Metering) (continued)
3 To correct areas other than center, select from
the options.
4 Specify a metering level (0 – 15).
BLC WINDOW WEIGHTING
BLC WINDOW WEIGHTING
0
0
0
0
15
PRESET
MENU
OFF
BACK
(When TOP is selected)
TOP
BOTTOM
LEFT
RIGHT
CENTER
: Upper
: Lower
: Left
: Right
: Area set in step 2.
TOP
BOTTOM
LEFT
RIGHT
CENTER[FIX]
0
0
0
0
15
PRESET
MENU
OFF
BACK
(When TOP is selected)
• The “CENTER” is fixed to 15 (max).
• The light intensity for the area specified in “15” will be
recognized as the same level as that of the “CENTER”.
• The light intensity specified with 0 (zero) will not be metered.
• Repeat steps 3 and 4 as required.
• Selected area will be highlighted.
• The respective area varies depending on the setting (position
and size of CENTER) you configured in steps 1 and 2 .
5 Set “MENU” to “END” and press the SET button.
Note: The position and size specified for each area are common
to those used for MOTION MASKING setting. (See page
38)
RFinishes the settings screen and returns to the normal
monitoring screen.
• If you want to return to the previous screen, select “BACK” and
press the SET button.
English
24
Settings/
Adjustments
TOP
BOTTOM
LEFT
RIGHT
CENTER[FIX]
!""#$%&!'
)*'
+,-.-/0
Correcting Backlight
MULT (BLC SETTING) (Multi-spot Metering)
1 Select an item and specify each level (0 – 15).
BLC SETTING
[BLC WEIGHT]
7
[BRIGHT]
7
PRESET
MENU
OFF
BACK
BLC WEIGHT : Effectiveness of backlight correction
BRIGHT
: Brightness of the portion to which backlight
correction is applied
• The greater the number, the greater the effect becomes.
25
English
2 Set “MENU” to “END” and press the SET button.
RFinishes the settings screen and returns to the normal
monitoring screen.
• If you want to return to the previous screen, select “BACK” and
press the SET button.
MEMO: When the background of the subject is extremely dark,
the central portion of the subject may become too bright
after being corrected. In such cases, switch to “CENT”.
3 !""#$%&!'
)*'
+,-.-/0
Setting Wide Dynamic Range
For accessing the MAIN MENU, see page 13 – 14.
Correction is made for simultaneous monitoring of subjects which are different in brightness, one in a dark room and another
in bright outdoor environment, for example.
EXPOSURE SETTING
MAIN MENU
EXPOSURE
(SET)
LANGUAGE
TITLE
SYNC
EXPOSURE
DAY/NIGHT
WHITE BALANCE
ALARM
OPTION
PRESET
MENU
SET
OFF
INT
SET
AUTO
ATW
SET
SET
OFF
END
IRIS
WIDE-D
BLC
SENSE UP
SHUTTER
AI
ON
OFF
OFF
50
PRESET
MENU
OFF
BACK
SET
WIDE-D
ON
Note: The setting is for use with the auto iris lens only. You cannot specify any value when the IRIS is set to EI.
WIDE-D SETTING (Wide Dynamic Range Setting)
1 Select an item and specify each level (0 – 17).
[LEVEL]
8
[LEVEL-HIGH]
8
PRESET
MENU
OFF
BACK
• The greater the number, the brighter the screen
becomes.
LEVEL-HIGH : Effectiveness for bright subject including
those out of doors.
• The greater the number, the clearer the bright subject
becomes.
English
26
Settings/
Adjustments
LEVEL : Brightness of whole screen
WIDE-D SETTING
!""#$%&!'
)*'
+,-.-/0
Setting Wide Dynamic Range
2 Set “MENU” to “END” and press the SET button.
RFinishes the settings screen and returns to the normal
monitoring screen.
• If you want to return to the previous screen, select “BACK” and
press the SET button.
Note: • Setting “WIDE-D” to “ON” will switch “BLC” to “OFF”.
(See page 22)
• Afterimages may occur around contours of a moving
object.
• Setting “WIDE-D” to “ON” will switch both of “EL ZOOM”
(see page 54) and “ZOOM” (see page 42) to “OFF”.
• If “WIDE-D” is “ON”, the value specified with “SHUTTER”
does not take effect.
Setting “WIDE-D” to “OFF” will enable the shutter speed
with the specified value. (See page 29)
• If “IRIS” is set to “EI”, setting “WIDE-D” to “ON” will force
the iris setting from “EI” to “AI”. This setting will remain
“AI” after setting “WIDE-D” to “OFF”. (See page 21)
27
English
About Wide Dynamic Range
Brighter parts of an image are white-saturated, while darker
parts black-saturated, when the difference between
brightness and darkness within a screen (dynamic range) is
extremely great: such unfavorable conditions can be imposed
when the camera is installed in a room where sunlight or
strong afternoon sunshine pours through the window or the
entrance on the back. However, you can obtain clear images
even under such harsh conditions of great difference of
brightness and darkness by using the Wide Dynamic Range
mode: it can synthesize a picture in a moment of time based
on both the images taken with high shutter speed (bright
subject getting clearer) and with low shutter speed (dark
subject getting clearer).
!""#$%&!'
)*'
+,-.-/0
Increasing Electronic Sensitivity
For accessing the MAIN MENU, see page 13 – 14.
If subject images are not very clear due to ambient darkness, you can increase the camera sensitivity by specifying the
“SENSE UP” (increasing electronic sensitivity) option.
Note: If you specify this option, the exposure time of CCD will be extended as it grows dark. Thus, for moving subjects, the images may be associated
with obtrusive residual vision or blurring.
EXPOSURE SETTING
MAIN MENU
EXPOSURE
(SET)
LANGUAGE
TITLE
SYNC
EXPOSURE
DAY/NIGHT
WHITE BALANCE
ALARM
OPTION
PRESET
MENU
SET
OFF
INT
SET
AUTO
ATW
SET
SET
OFF
END
IRIS
WIDE-D
BLC
SENSE UP
SHUTTER
AI
OFF
OFF
OFF
50
PRESET
MENU
OFF
BACK
SET
SENSE UP
SENSE UP (Increasing Electronic Sensitivity)
1 Specify the magnitude of sensitivity to increase.
EXPOSURE SETTING
IRIS
WIDE-D
BLC
SENSE UP
SHUTTER
AI
OFF
OFF
X2
-----
2 Set “MENU” to “END” and
press the SET button.
RFinishes the settings screen and returns to the normal
monitoring screen.
• If you want to return to the previous screen, select “BACK” and
press the SET button.
Settings/
Adjustments
You can select from: OFF, x 2, x 4, x 8, x 16, and x 40.
Note: • If you select an option other than “OFF” the “–” symbol will be
displayed for the “SHUTTER” and the shutter function will not
work. Setting “SENSE UP” to “OFF” will display the shutter speed
that was previously specified. (See page 29)
• This function does not work unless the “AGC” is operational, even
when the setting value (magnitude) is shown. (See page 31)
• If you previously specified “MOTION” to either “OR” or “AND”,
this function does not work. (See page 41 L)
English
28
4 !""#$%&!'
)*'
+,-.-/0
Specifying Shutter Speed
For accessing the MAIN MENU, see page 13 – 14.
You can specify the electronic shutter speed to capture fast-moving subjects.
Note: With the increase in shutter speed number, faster movement can be captured, though the image becomes darker.
EXPOSURE SETTING
MAIN MENU
EXPOSURE
(SET)
LANGUAGE
TITLE
SYNC
EXPOSURE
DAY/NIGHT
WHITE BALANCE
ALARM
OPTION
PRESET
MENU
SET
OFF
INT
SET
AUTO
ATW
SET
SET
OFF
END
IRIS
WIDE-D
BLC
SENSE UP
SHUTTER
AI
OFF
OFF
OFF
50
PRESET
MENU
OFF
BACK
SET
SHUTTER
SHUTTER (Electronic Shutter)
1 Select a shutter speed.
EXPOSURE SETTING
IRIS
WIDE-D
BLC
SENSE UP
SHUTTER
AI
OFF
OFF
OFF
50
You can select from: 50, 120, 250, 500, 1000, 2000, 4000, and
10000. (e.g., 50 refers to 1/50 second)
2 Set “MENU” to “END” and press the SET button.
RFinishes the settings screen and returns to the normal
monitoring screen.
• If you want to return to the previous screen, select the “BACK”
and press the SET button.
29
English
Note: • If “SENSE UP” is selected for use, “–” symbol is
displayed in the option field and you cannot specify any
shutter speed. Setting “SENSE UP” to “OFF” will display
the shutter speed that was previously specified.
(See page 28)
• If “EI” is specified for the “IRIS”, “–” symbol is displayed
in the option field and you cannot specify any shutter
speed. Setting “IRIS” to “AI” will display the shutter speed
that was previously specified. (See page 21)
• Setting “WIDE-D” to “ON” will disable the specified
shutter speed, leaving the display of shutter speed.
Setting “WIDE-D” to “OFF” will enable the shutter speed
with the displayed value. (See page 26)
15 !""#$%&!'
)*'
+,-.-/0
Adjusting DAY/NIGHT Function
For accessing the MAIN MENU, see page 13 – 14.
The DAY/NIGHT function automatically switches over between COLOR and B/W mode depending on the ambient brightness;
for example, choosing COLOR mode during daytime, and B/W mode for nighttime monitoring with its increased sensitivity in a
darker environment. “AUTO” is preselected by default, which provides an automatic switch feature to detect the ambient
darkness. As appropriate for any specific environment, you can fix the mode to either COLOR or B/W, and adjust the way the
switching function works.
MAIN MENU
DAY/NIGHT
LANGUAGE
TITLE
SYNC
EXPOSURE
DAY/NIGHT
WHITE BALANCE
ALARM
OPTION
PRESET
MENU
SET
OFF
INT
SET
AUTO
ATW
SET
SET
OFF
END
Selecting DAY/NIGHT Mode
1 Select a mode.
■ AUTO: See page 31.
LANGUAGE
TITLE
SYNC
EXPOSURE
DAY/NIGHT
WHITE BALANCE
ALARM
OPTION
PRESET
MENU
SET
OFF
INT
SET
AUTO
ATW
SET
SET
OFF
END
Automatically switches between COLOR and B/W mode depending
on the ambient brightness. (DAY/NIGHT function)
■ COLOR: See page 32.
Color image on a steady basis; suitable for always bright location or
conditions.
• If you specify this mode, you can forcibly switch between COLOR
and B/W by means of alarm input. (See page 43)
■ B/W (Black and White): See page 33.
RImage switches immediately after the selection is made.
2
For advanced settings, press the SET button.
B/W image on a steady basis; suitable when sensitivity is
prioritized.
REach corresponding settings screen will appear.
English
30
Settings/
Adjustments
MAIN MENU
1 !""#$%&!'
)*'
+,-.-/0
Adjusting DAY/NIGHT Function
D/N SETTING-AUTO
1 Select “AGC MAX GAIN” and specify the
maximum value of gain for AGC*1.
D/N SETTING - AUTO
AGC MAX GAIN
BURST
LEVEL
NORM
OFF
MID
NORM : Normal setting
MID
: Setting with which a bright image is obtained in a lower
illuminance than the NORM setting.
HIGH : Setting with which a bright image is obtained in a lower
illuminance than the MID setting.
• For a dark subject, select MID or HIGH.
*1 AGC (Auto Gain Control) is a funciton to adjust
automatically the gain of the Video signal from the camera
so that an optimum signal level is obtained accroding to
brightness of the object.
2 Set “BURST” to “ON” or “OFF” for the burst
signal*2.
*2 The burst signals are color synchronization signals
required for reproducing color. You should select “ON” in
case where you observe any disturbance of picture caused
by switching from color to black and white mode of a
monitor, in particular when peripheral devices such as a
switcher unit are connected.
31
English
3 Select “LEVEL” and specify a level for DAY/
NIGHT switching.
LOW
MID
HIGH
: Switches in darker conditions; i.e., color shot is preferred
so that it does not switch form COLOR to B/W until it gets
very dark.
: Moderate darkness
: Switches in brighter conditions; i.e., black and white shot
is preferred so that switching from COLOR to B/W can
easily occur when it gets a little bit dark.
4 Set “MENU” to “END” and press the SET button.
RFinishes the settings screen and returns to the normal
monitoring screen.
• If you want to return to the previous screen, select “BACK” and
press the SET button.
Note: • During the switching operation, you may hear switch-over noise
inside the camera or see a distorted picture, but these are not
signs of trouble.
• If an infrared lighting system is used, the B/W mode may switch
to COLOR when a subject reflects the light intensely. Set the
infrared system in an appropriate location that does not affect the
shot.
• The motion sensor detection will be interrupted during switching
over from B/W to COLOR mode and from COLOR to B/W mode.
1 !""#$%&!'
)*'
+,-.-/0
Adjusting DAY/NIGHT Function
D/N SETTING-COLOR
1 Select “AGC MAX GAIN” and specify the
maximum value of gain for AGC*.
D/N SETTING - COLOR
AGC MAX GAIN
■ GAIN SETTING
Select “OFF” and press the SET button, and you can specify a value
for the fixed gain. (0 – 7)
GAIN SETTING
NORM
7
OFF
BACK
OFF
: Fixed gain setting
NORM : Normal setting
MID
: Setting with which a bright image is obtained in a lower
illuminance than the NORM setting.
HIGH : Setting with which a bright image is obtained in a lower
illuminance than the MID setting.
• For a dark subject, select MID or HIGH.
* AGC (Auto Gain Control) is a funciton to adjust
automatically the gain of the Video signal from the camera
so that an optimum signal level is obtained accroding to
brightness of the object.
• The greater the number, the higher the sensitivity becomes in dark
places.
Note: Selecting the “OFF” option invalidates the “SENSE UP”
settings. (See page 28)
2 Set “MENU” to “END” and press the SET button.
RFinishes the settings screen and returns to the normal
monitoring screen.
• If you want to return to the previous screen, select “BACK” and
press the SET button.
MEMO: Once you have specified this mode, you can change
mode through the alarm input. (See page 43)
English
Settings/
Adjustments
PRESET
MENU
32
11 !""#$%&!'
)*'
+,-.-/0
Adjusting DAY/NIGHT Function
D/N SETTING-B/W (Black and white)
1 Select “AGC MAX GAIN” and specify the
maximum value of gain for AGC*1.
■ GAIN SETTING
Select “OFF” and press the SET button, and you can specify a value
for the fixed gain. (0 – 7)
D/N SETTING - B/W
AGC MAX GAIN
BURST
GAIN SETTING
NORM
OFF
7
• The greater the number, the higher the sensitivity becomes in dark places.
PRESET
MENU
OFF
BACK
OFF
: Fixed gain setting
NORM : Normal setting
MID
: Setting with which a bright image is obtained in a lower
illuminance than the NORM setting.
HIGH : Setting with which a bright image is obtained in a lower
illuminance than the MID setting.
• For a dark subject, select MID or HIGH.
*1 AGC (Auto Gain Control) is a funciton to adjust
automatically the gain of the Video signal from the camera
so that an optimum signal level is obtained accroding to
brightness of the object.
Note: Selecting the “OFF” option invalidates the “SENSE UP”
settings. (See page 28)
2 Set “BURST” to “ON” or “OFF” for the burst
signal*2.
*2 The burst signals are color synchronization signals
required for reproducing color. You should select “ON” in
case where you observe any disturbance of picture caused
by switching from color to black and white mode of a
monitor, in particular when peripheral devices such as a
switcher unit are connected.
3 Set “MENU” to “END” and press the SET button.
RFinishes the settings screen and returns to the normal
monitoring screen.
• If you want to return to the previous screen, select “BACK” and
press the SET button.
33
English
12 !""#$%&!'
Adjusting White Balance
WHITE
BALANCE
+,-.-/0
For accessing the MAIN MENU, see page 13 – 14.
With its default Auto-tracing White Balance (ATW) setting, this unit is able to
obtain natural colors even when the light source is changed. However, you may
manually change the white balance settings or its mode to obtain better tone,
especially when the screen color does not match actual objects.
MAIN MENU
LANGUAGE
TITLE
SYNC
EXPOSURE
DAY/NIGHT
WHITE BALANCE
ALARM
OPTION
PRESET
MENU
)*'
SET
OFF
INT
SET
AUTO
ATW
SET
SET
OFF
END
Selecting White Balance Mode
1 Select a mode.
■ ATW (Auto-Tracing White balance): (See page 35)
Automatic setting for white balance.
• Used to mask an extremely bright light source on the screen.
MAIN MENU
LANGUAGE
TITLE
SYNC
EXPOSURE
DAY/NIGHT
WHITE BALANCE
ALARM
OPTION
PRESET
MENU
SET
OFF
INT
SET
AUTO
ATW
SET
SET
OFF
END
■ ATW-A (Auto-Tracing White balance All) (Fixed):
Automatic setting for white balance, covering wider range of color
temperature than with “ATW”.
• May result in an excessively and unnaturally effected image,
depending on the condition.
■ AWC (One-Push Adjustment): (See page 36)
Adjusts white balance by shooting white paper or wall.
■ 3200 (Indoor) (Fixed):
Suitable for indoor use (targeted at around 3200 K of color temperature).
REach corresponding setting screen will appear.
• Except for ATW-A, 3200, 5600 and FLUE.
Settings/
Adjustments
2 For advanced settings, press the SET button.
■ 5600 (Outdoor) (Fixed):
Suitable for daytime outdoor use (targeted at around 5600 K of color
temperature).
■ FLUE (Fluorescent Light) (Fixed):
Suitable for fluorescent light source (targeted at around 4200 K of color
temperature).
■ MWB (Manual White Balance): (See page 37)
Fine-adjusts red and blue manually.
English
34
1 !""#$%&!'
)*'
+,-.-/0
Adjusting White Balance
ATW MASKING (Masking for ATW)
1 Select an area to be masked and specify “ON”.
ATW MASKING
TOP
BOTTOM
LEFT
RIGHT
CENTER
OFF
OFF
OFF
OFF
OFF
PRESET
MENU
OFF
BACK
CENTER
RFinishes the settings screen and returns to the normal
monitoring screen.
• If you want to return to the previous screen, select “BACK” and
press the SET button.
MEMO: • You can get an appropriate white balance by masking
an extremely bright light source or dark location.
TOP
LEFT
2 Set “MENU” to “END” and press the SET button.
RIGHT
[Settings Screen]
[Monitor Screen]
BOTTOM
RMasking will be applied for the area specified with “ON”.
• You can specify multiple masks. Repeat the above steps as
required.
• To disable the mask, select the area and specify “OFF”.
35
English
• While setting the area, the masking is shown but is not
visible on the monitor screen.
13 !""#$%&!'
)*'
+,-.-/0
Adjusting White Balance
AWC SETTING (One-Push Adjustment)
1 Select “AWC LOCK” – “SET”.
■ To perform fine adjustment of color
In the “AWC SETTING” screen, select “GO TO MWB” – “SET”, and
press the SET button.
R The “MWB SETTING” screen appears. Specify values manually.
(See page 37)
AWC SETTING
AWC LOCK
SET
GO TO MWB
SET
MEMO: Transferring to the “MWB SETTING” through “GO TO
MWB”, white balance mode (see page 34) will be changed to
“MWB”.
R“SET” blinks.
2 Point a camera to a white paper or wall to project
an image on the whole screen, and press the SET
button.
3 Set “MENU” to “END” and press the SET button.
RFinishes the settings screen and returns to the normal
monitoring screen.
• If you want to return to the previous screen, select “BACK” and
press the SET button.
White paper or wall
Settings/
Adjustments
SET
RThe blinking of “SET” stops and illuminates, and white balance
adjustment will start. The adjustment will end after about 2
seconds when the blinking of “SET” restarts.
• If the adjustment does not yield a satisfactory result, press the
SET button again.
English
36
1 !""#$%&!'
)*'
+,-.-/0
Adjusting White Balance
MWB SETTING (Manual White Balance)
1 Select “R” or “B” to adjust tint (0 – 255).
MWB SETTING
[OFFSET]
R
ú
70
B
ú
70
PRESET
MENU
OFF
BACK
R : Adjusting Red
B : Adjusting Blue
• The greater the number, the deeper the tint becomes.
37
English
2 Set “MENU” to “END” and press the SET button.
RFinishes the settings screen and returns to the normal
monitoring screen.
• If you want to return to the previous screen, select “BACK” and
press the SET button.
1 !""#$%&!'
)*'
+,-.-/0
Specifying Alarm Input
For accessing the MAIN MENU, see page 13 – 14.
If you have connected an external door switch or an infrared sensor to the alarm input terminal (ALARM IN) on the rear panel,
specify the following settings. (For connecting alarm devices, see page 10; for the “Alarm Output” settings, see page 44).
This unit has a built-in motion sensor, which outputs alarm signals when any moving subject, such as would be intruder, is
detected. You should adjust the mask settings or detection sensitivity using “MOTION SET”, especially when false alarms
occur very frequently.
ALARM SETTING
MAIN MENU
ALARM
(SET)
LANGUAGE
TITLE
SYNC
EXPOSURE
DAY/NIGHT
WHITE BALANCE
ALARM
OPTION
PRESET
MENU
SET
OFF
INT
SET
AUTO
ATW
SET
SET
OFF
END
ALARM IN
ALARM OUT
ALARM SIGN
SET
OFF
OFF
PRESET
MENU
OFF
BACK
SET
SET
ALARM IN
(SET)
ALARM IN SETTING
1 Set “MODE” to “ALM” or “COLOR”.
2 Select “MOTION SET” – “SET” and press the SET
button.
ALARM IN SETTING
ALM
NO
OFF
SET
OFF
5S
5S
ALM
: Alarm Input Mode (Normal usage)
COLOR : Mode in which you can switch between COLOR and
B/W externally by using the ALARM IN terminal.
(See page 43)
ALARM IN SETTING
MODE
POLARITY
MOTION
MOTION SET
ZOOM
ZOOM TIME
DURATION
ALM
NO
OFF
SET
OFF
5S
5S
SET
RThe “MOTION SETTING” screen appears.
English
38
Settings/
Adjustments
MODE
POLARITY
MOTION
MOTION SET
ZOOM
ZOOM TIME
DURATION
14 !""#$%&!'
)*'
+,-.-/0
Specifying Alarm Input
3 Select “MASKING” and specify “ON” and press
the SET button.
4 Select a masking area and specify “ON”.
MOTION MASKING
MOTION SETTING
MASKING
SENSITIVITY
DURATION
ON
SET
5S
TOP
BOTTOM
LEFT
RIGHT
CENTER
ON
OFF
OFF
OFF
OFF
PRESET
MENU
OFF
BACK
SET
SET
PRESET
MENU
OFF
BACK
RThe “MOTION MASKING” screen appears.
MEMO: Apply masking to what should not be motion-detected;
e.g., frequently moving objects such as trees swaying in
the wind as well as flickering.
RMasking will be applied for the area specified with “ON”.
• You can specify multiple masks. Repeat this step as required.
• To disable the mask, select the area and specify “OFF”.
• The position and size for each area are common to those used
for “CENT” (BLC SETTEING). (See page 23)
5 Set “MENU” to “BACK” and press the SET
button.
RReturns to the “MOTION SETTING” screen.
39
English
25 !""#$%&!'
)*'
+,-.-/0
Specifying Alarm Input
6 Select “SENSITIVITY” – “SET” and press the SET
button.
OFF
SET
5S
9 Select “Y-LEVEL” and specify a luminance level
(1 – 10).
SET
PRESET
MENU
difference level (1 – 10).
• The greater the number, the lower the responsiveness to the
brightness variation, such as lighting on or off conditions.
MOTION SETTING
MASKING
SENSITIVITY
DURATION
8 Select “Y-DIFFER” and specify a luminance
• If false alarms occur very frequently because of noise in dark
screens, increase the value.
OFF
BACK
F Select “TIME” and specify a detection time of
RThe “SENSITIVITY” screen appears.
duration (1 – 60).
7 Select “MOVE” and specify a sensitivity level
(1 – 10).
G Set “TEST” to “ON”.
SENSITIVITY
5
5
5
1
ú
ú
ú
ú
TEST
OFF
PRESET
MENU
OFF
BACK
RThe greater the number, the lower the responsiveness to
movement becomes.
• You can test the sensitivity of the motion detection. When any
motion is detected, the character color will turn into red on the
screen.
SET
Settings/
Adjustments
MOVE
Y-DIFFER
Y-LEVEL
TIME
• The greater the number, the lower the detectability against
fast-moving subjects.
H Set “MENU” to “BACK” and press the SET
button.
RReturns to the “MOTION SETTING” screen.
English
40
2 !""#$%&!'
)*'
+,-.-/0
Specifying Alarm Input
I Select “DURATION” and specify a time until the
next alarm input becomes enabled.
MOTION SETTING
MASKING
SENSITIVITY
DURATION
OFF
SET
5S
PRESET
MENU
OFF
BACK
• Select from: 5S, 10S, 15S, 20S, 30S, 1M, 2M, 3M, 4M or 5M
(S = second, M = minute)
Note: A new detection or an alarm output cannot be performed
until the specified time of duration elapses.
J Set “MENU” to “BACK” and press the SET
button.
RReturns to the “ALARM IN SETTING” screen.
K Select “POLARITY” and specify a polarity for the
signal.
ALARM IN SETTING
MODE
POLARITY
MOTION
MOTION SET
ZOOM
ZOOM TIME
DURATION
ALM
NO
OFF
SET
OFF
5S
5S
NO : Normal Open (When closed, alarm input is detected.)
NC : Normal Close (When opened, alarm input is detected.)
L Select “MOTION” and specify the detection logic
of the motion sensor and the alarm input.
OFF : The motion sensor is unused: Detects when an external
sensor responded.
AND : Detects when both the motion sensor and an external
sensor responded. (You cannot select this option when the
“MODE” is specified with “COLOR”.)
OR : Detects when either the motion sensor or an external
sensor responded. (During the “COLOR” mode, detection
is solely dependent on the responsiveness of the motion
sensor.)
Note: While the “SENSE UP” capability is enabled, the motion
sensor does not work. If “SENSE UP” has been set to other
than “OFF”, this setting is not available. (See page 28)
41
English
2 !""#$%&!'
)*'
+,-.-/0
Specifying Alarm Input
alarm detection.
ALARM IN SETTING
MODE
POLARITY
MOTION
MOTION SET
ZOOM
ZOOM TIME
DURATION
ALM
NO
OFF
SET
OFF
5S
5S
PRESET
MENU
OFF
BACK
• Select from: OFF (no zoom), x 1.4, x 2.0, x 2.5.
Note: • If you specify the “ZOOM” function, the center of the
screen will be electronically zoomed in automatically
when an alarm signal is supplied from external devices
such as door switch or infrared sensor, etc.
• Even though the “EL ZOOM” is already specified, the
“ZOOM” settings you configure here will override it. Then
“EL ZOOM” will be set to “OFF”. (See page 54)
• When “ZOOM” is set to “ON”, the detection zone of the
motion sensor is limited to CENTER (initial position and
size). When switching “ZOOM” back to “OFF”, the above
setting will revert to those specified before “ZOOM” was
set to “ON”. Also note that no adjustment is possible for
“BLC” – “CENT” if “ZOOM” is set to “ON”. (See page 23)
• If “BLC” has been set to “CENT”, the “ZOOM” function
will not work. (See page 22)
N Select “ZOOM TIME” and specify duration time
for zooming (if you specified “ZOOM” to other
than “OFF” in step M).
• Select from: 5S, 10S, 15S, 20S, 30S, 1M, 2M, 3M, 4M or 5M
(S = second, M = minute)
O Select “DURATION” and specify a time until the
next alarm input becomes enabled.
• Select from: 5S, 10S, 15S, 20S, 30S, 1M, 2M, 3M, 4M or 5M
(S = second, M = minute)
Note:
• When the “MODE” is specified with “COLOR”, this
setting will not appear.
• When the alarm output starts, a new detection or an
alarm output cannot be performed until the specified
time of duration elapses.
P Set “MENU” to “END” and press the SET button.
RFinishes the settings screen and returns to the normal
monitoring screen.
• If you want to return to the previous screen, select “BACK” and
press the SET button.
MEMO: You can blink the camera name on the screen when an
alarm signal is supplied. (See page 45)
English
42
Settings/
Adjustments
M Select “ZOOM” and specify the zoom factor for
21 !""#$%&!'
)*'
+,-.-/0
Specifying Alarm Input
Using Alarm Input Terminal as DAY/NIGHT Switching
1 Set “MODE” to “COLOR”.
2 Select “POLARITY” and specify a polarity for the
signal.
ALARM IN SETTING
MODE
POLARITY
MOTION
MOTION SET
ZOOM
ZOOM TIME
COLOR
NO
OFF
SET
OFF
5S
PRESET
MENU
OFF
BACK
MEMO: Specify this option when you want the switching between
COLOR and B/W mode to be made by any external
sensor or switch through the alarm input, independent on
the ambient brightness.
Note:
43
English
• You must specify “COLOR” for the “DAY/NIGHT” mode
to enable this setting. (See page 32)
• The setting will take effect after you exit the settings
screen.
• You can select either “OFF” or “OR” alone for
“MOTION” setting. (See page 41)
POLARITY
Setting
NO
NC
Between ALARM
IN and COM
Terminals
Open
Close
Open
Close
Mode
COLOR
B/W
B/W
COLOR
NO : Normal Open (When closed, switches from COLOR to B/W.)
NC : Normal Close (When opened, switches from COLOR to B/W.)
MEMO: For other settings, see pages 38 – 43.
3 Set “MENU” to “END” and press the SET button.
RFinishes the settings screen and returns to the normal
monitoring screen.
• If you want to return to the previous screen, select “BACK” and
press the SET button.
22 !""#$%&!'
)*'
+,-.-/0
Specifying Alarm Output
For accessing the MAIN MENU, see page 13 – 14.
If you have connected an external beeper or indicator to the alarm output terminal (ALARM OUT) on the rear
panel, specify the following settings. You can also obtain a notification on the screen while an alarm occurs.
(For connecting alarm devices, see page 10.)
ALARM SETTING
MAIN MENU
ALARM
(SET)
LANGUAGE
TITLE
SYNC
EXPOSURE
DAY/NIGHT
WHITE BALANCE
ALARM
OPTION
PRESET
MENU
SET
OFF
INT
SET
AUTO
ATW
SET
SET
OFF
END
ALARM IN
ALARM OUT
ALARM SIGN
SET
ON
OFF
PRESET
MENU
OFF
BACK
SET
SET
ALARM
OUT
ON
ALARM OUT SETTING (Alarm output)
signal.
ALARM OUT SETTING
POLARITY
ALARM TIME
NO
5S
NO : Normal Open (Closes when alarm input is detected).
NC : Normal Close (Opens when alarm input is detected).
MEMO: For the electrical characteristics of alarm output, the
nominal output of the open collector (grounded emitter) is
18 V 25 mA.
2 Select “ALARM TIME” and specify duration time
to output alarm.
• Select from: 5S, 10S, 15S, 20S, 30S, 1M, 2M, 3M, 4M or 5M
(S = second, M = minute)
MEMO: You can display alarm on the monitor screen.
(See page 45)
3 Set “MENU” to “END” and press the SET button.
RFinishes the settings screen and returns to the normal
monitoring screen.
• If you want to return to the previous screen, select “BACK” and
press the SET button.
English
44
Settings/
Adjustments
1 Select “POLARITY” and specify a polarity for the
2 !""#$%&!'
)*'
+,-.-/0
Specifying Alarm Output
ALARM SIGN (Alarm display)
1 Select “ALARM SIGN” on the “ALARM SETTING”
screen and specify a displaying time.
ALARM SETTING
ALARM IN
ALARM OUT
ALARM SIGN
SET
OFF
OFF
PRESET
MENU
OFF
BACK
• Select from: OFF (not display), 5S, 10S, 15S, 20S, 30S, 1M,
2M, 3M, 4M or 5M (S = second, M = minute)
RIf you specify any value other than “OFF”, the camera name on
the screen will blink for the specified time of duration when an
alarm occurs.
Alarm occurred
CAM1
MEMO: • If the camera name is not given, “??...” will blink on the
screen.
• Even if the “TITLE” is specified as “OFF”, the camera
name will blink when an alarm occurs.
(See page 16)
45
English
2 Set “MENU” to “END” and press the SET button.
RFinishes the settings screen and returns to the normal
monitoring screen.
• If you want to return to the previous screen, select “BACK” and
press the SET button.
23 !""#$%&!'
)*'
+,-.-/0
Correcting Gamma Characteristic
For accessing the MAIN MENU, see page 13 – 14.
If the contrast or brightness of the monitor screen does not seem appropriate, change the mode for Gamma correction*.
OPTION
MAIN MENU
OPTION
(SET)
LANGUAGE
TITLE
SYNC
EXPOSURE
DAY/NIGHT
WHITE BALANCE
ALARM
OPTION
PRESET
MENU
SET
OFF
INT
SET
AUTO
ATW
SET
SET
OFF
END
SET
GAMMA
GAMMA
APERTURE
MIRROR
NEGA/POSI
PRIVACY MASK
EL ZOOM
0.45
ON
OFF
OFF
SET
OFF
PRESET
MENU
OFF
BACK
GAMMA setting
OPTION
GAMMA
APERTURE
MIRROR
NEGA/POSI
PRIVACY MASK
EL ZOOM
0.45
ON
OFF
OFF
SET
OFF
PRESET
MENU
OFF
BACK
0.45
: Gamma value of γ = 0.45
1
: Gamma value of γ = 1
MODE1 : Brighten dark spots.
MODE2 : Highlight the contrast of whole screen.
2 Set “MENU” to “END” and press the SET button.
RFinishes the setting screen and returns to the normal
monitoring screen.
• If you want to return to the previous screen, select “BACK” and
press the SET button.
Note: If you specify MODE1 or MODE2, the effect may vary
depending on the subjects: Verify the effect before use.
MEMO: The gamma setting is possible individually for each of
“OFF” and “ON” of “WIDE-D”. (Initial setting is
“OFF” : 0.45, “ON” : MODE2.)
* About Gamma correction
Gamma (γ) is a value representing a responsiveness
characteristic of image contrast. Every input and output device
of image data has its own Gamma value; the overall Gamma
value must be corrected to be equal to 1. If a monitor has a
Gamma value of 2.2, for example, the value for this unit must
be corrected to 0.45 (2.2 x 0.45 ≈ 1).
English
46
Settings/
Adjustments
1 Select a mode for Gamma.
2 !""#$%&!'
)*'
+,-.-/0
Accentuating Subject Outline
For accessing the MAIN MENU, see page 13 – 14.
By specifying the APERTURE* setting, you can accentuate the outline of the subject when its image is blurred and
unidentifiable.
MAIN MENU
OPTION
(SET)
LANGUAGE
TITLE
SYNC
EXPOSURE
DAY/NIGHT
WHITE BALANCE
ALARM
OPTION
PRESET
MENU
OPTION
SET
OFF
INT
SET
AUTO
ATW
SET
SET
OFF
END
SET
APERTURE
ON
GAMMA
APERTURE
MIRROR
NEGA/POSI
PRIVACY MASK
EL ZOOM
0.45
ON
OFF
OFF
SET
OFF
PRESET
MENU
OFF
BACK
SET
APERTURE SETTING
1 Adjust the outline (1 – 17).
2 Set “MENU” to “END” and press the SET button.
APERTURE SETTING
9
ú
PRESET
MENU
OFF
BACK
• The greater the number, the crisper the outline becomes.
47
English
RFinishes the setting screen and returns to the normal
monitoring screen.
• If you want to return to the previous screen, select the “BACK”
and press the SET button.
* Aperture means outline correction. The more the outline is
highlighted, the higher the apparent resolution looks.
2 !""#$%&!'
)*'
+,-.-/0
Inverting Images (horizontal/vertical)
For accessing the MAIN MENU, see page 13 – 14.
If a camera is installed upside down, or monitoring subjects in a mirror or viewing backward from vehicle, you can invert the
images vertically and/or horizontally.
MAIN MENU
OPTION
(SET)
LANGUAGE
TITLE
SYNC
EXPOSURE
DAY/NIGHT
WHITE BALANCE
ALARM
OPTION
PRESET
MENU
OPTION
SET
OFF
INT
SET
AUTO
ATW
SET
SET
OFF
END
SET
MIRROR
GAMMA
APERTURE
MIRROR
NEGA/POSI
PRIVACY MASK
EL ZOOM
0.45
ON
OFF
OFF
SET
OFF
PRESET
MENU
OFF
BACK
MIRROR setting (Image Inversion)
1 Select an inversion mode.
V
: Vertical inversion
OPTION
0.45
ON
OFF
OFF
SET
OFF
HV : Horizontal and vertical
inversion
2 Set “MENU” to “END” and press the SET button.
OFF : Normal
H
: Horizontal inversion
RFinishes the settings screen and returns to the normal
monitoring screen.
• If you want to return to the previous screen, select “BACK” and
press the SET button.
English
48
Settings/
Adjustments
GAMMA
APERTURE
MIRROR
NEGA/POSI
PRIVACY MASK
EL ZOOM
24 !""#$%&!'
)*'
+,-.-/0
Inverting Images (Brightness/Hue)
For accessing the MAIN MENU, see page 13 – 14.
You can record negative images of color film as positive images by reflecting the brightness and hue of the video signal.
OPTION
MAIN MENU
OPTION
(SET)
LANGUAGE
TITLE
SYNC
EXPOSURE
DAY/NIGHT
WHITE BALANCE
ALARM
OPTION
PRESET
MENU
SET
OFF
INT
SET
AUTO
ATW
SET
SET
OFF
END
SET
NEGA/POSI
GAMMA
APERTURE
MIRROR
NEGA/POSI
PRIVACY MASK
EL ZOOM
0.45
ON
OFF
OFF
SET
OFF
PRESET
MENU
OFF
BACK
NEGA/POSI setting
1 Set “NEGA/POSI” to “ON” or “OFF”.
OPTION
GAMMA
APERTURE
MIRROR
NEGA/POSI
PRIVACY MASK
EL ZOOM
0.45
ON
OFF
OFF
SET
OFF
PRESET
MENU
OFF
BACK
OFF : Normal image
ON : Negatively/positively inverted image
49
English
2 Set “MENU” to “END” and press the SET button.
RFinishes the settings screen and returns to the normal
monitoring screen.
• If you want to return to the previous screen, select “BACK” and
press the SET button.
MEMO: If the inverted image is not easily viewable, make the
following settings:
GAMMA
: 1 (See page 46)
APERTURE : OFF (See page 47)
IRIS
: Optimum value (See pages 19, 21)
BLC
: CENT (See page 22)
AGC
: OFF (See page 32)
5 !""#$%&!'
)*'
+,-.-/0
Hiding Partial Image (Privacy Protection)
For accessing the MAIN MENU, see page 13 – 14.
If privacy protection is required for any shot, apply the masking feature for any position to be prevented from being presented.
You can also lock the setting and its cancellation by specifying a password.
MAIN MENU
OPTION
(SET)
LANGUAGE
TITLE
SYNC
EXPOSURE
DAY/NIGHT
WHITE BALANCE
ALARM
OPTION
PRESET
MENU
OPTION
SET
OFF
INT
SET
AUTO
ATW
SET
SET
OFF
END
SET
PRIVACY MASK
(SET)
GAMMA
APERTURE
MIRROR
NEGA/POSI
PRIVACY MASK
EL ZOOM
0.45
ON
OFF
OFF
SET
OFF
PRESET
MENU
OFF
BACK
SET
PRIVACY MASK SETTING
button.
2 Set “MASK 1” to “SET” and press the SET
button.
PRIVACY MASK SETTING
PASSWORD LOCK
PASSWORD CHANGE
MASK SET
OFF
SET
SET
SET
MENU
BACK
RThe “MASK NO. SELECT” screen appears.
Note: If “PASSWORD LOCK” is specified with “ON”, you must
enter the password. (See page 52)
MASK
MASK
MASK
MASK
MASK
MASK
MASK
MASK
MASK NO. SELECT
1
SET
2
OFF
3
OFF
4
OFF
5
OFF
6
OFF
7
OFF
8
OFF
PRESET
MENU
SET
OFF
BACK
RThe “POSITION” screen appears.
• You can specify only “OFF” or “SET” for the first time setting.
However, once the masking setting is made, then you can
select any from “OFF”, “SET” or “ON” option.
English
50
Settings/
Adjustments
1 Select “MASK SET” – “SET” and press the SET
!""#$%&!'
)*'
+,-.-/0
Hiding Partial Image (Privacy Protection)
PRIVACY MASK SETTING (continued)
3 Locate the upper left corner of an area for which
you want to mask, and then press the SET
button.
MASK 1 SET
[POSITION]
SET
SET
RThe “SIZE” screen appears.
• From the datum point at the upper left corner of the area, the
size can be scaled up or down, as well as side to side.
RThe “PRESET” and “MENU” appear on the screen.
To repeat a masking setting, select “MENU” and “BACK” and
press the SET button, and then repeat steps from 2 to 4.
MEMO: If you return to the masking setting screen using “BACK”,
the specified mask number will be specified with “ON”. If
you want to change the setting, specify “OFF”. And if you
want to change the previously specified masking position
and size, select “SET” and then press the SET button to
establish a new setting.
MEMO: You can specify up to 8 maskings on the screen.
MEMO: Here, determine the upper left position of the masking
area.
Pressing the button further when the right end or the
bottom end of the displayed area hits an edge will scale
down the area size, but you can set your preferred size in
step 4.
(Example: 4 maskings)
MASK 1
2
4 Specify the masking size and press the SET
button.
MASK 1 SET
3
4
[SIZE]
5 Set “MENU” to “END” and press the SET button.
SET
SET
51
English
RFinishes the settings screen and returns to the normal
monitoring screen.
• If you want to return to the previous screen, select “BACK” and
press the SET button.
!""#$%&!'
)*'
+,-.-/0
Hiding Partial Image (Privacy Protection)
■ To lock (protect) the settings:
1 Select “PASSWORD LOCK” – “OFF” and press
2 Enter the password (4 numerical values) and
press the SET button.
the SET button.
PASSWORD
PRIVACY MASK SETTING
PASSWORD LOCK
OFF
PASSWORD CHANGE SET
MASK SET
SET
1234
SET
SET
SET
Move
cursor.
MENU
BACK
BACK
RThe “PASSWORD” screen appears.
MEMO: • You must enter the valid password before you can lock
the settings using a password.
• “1234” is a factory-preset password; you are
recommended to change it to your own password.
(See page 53)
• Enter “1234”.
RIf you enter a valid password, you will see the “OK” message
and the “BACK” blinks.
Note:
If you enter an incorrect password, you will see the “NG”
message. If you fail to enter the valid password three
times successively, the prompt display will disappear and
“BACK” will blink. Press the SET button to return to the
“PRIVACY MASK SETTING” screen.
3 Press the SET button.
RReturns to the “PRIVACY MASK SETTING” screen, and “ON”
will blink next to “PASSWORD LOCK”.
MEMO: To disable the password lock, select “ON” and press the
SET button, and then enter the password.
English
52
Settings/
Adjustments
MENU
Select
number.
1 !""#$%&!'
)*'
+,-.-/0
Hiding Partial Image (Privacy Protection)
■ To change password:
1 Select “PASSWORD CHANGE” – “SET” and
2 Enter the current password and press the SET
button.
press the SET button.
PASSWORD
PRIVACY MASK SETTING
[NOW PASSWORD]
PASSWORD LOCK
ON
PASSWORD CHANGE SET
MASK SET
SET
1234
SET
SET
SET
MENU
MENU
BACK
BACK
RThe “NEW PASSWORD” screen appears.
RThe “NOW PASSWORD” screen appears.
Note: If you enter an incorrect password, you will see the “NG”
message. If you fail to enter the valid password three
times successively, the prompt display will disappear and
“BACK” will blink. Press the SET button to return to the
“PRIVACY MASK SETTING” screen.
3 Enter a new password (4 numerical values) and
press the SET button.
Note: Write down the password before you forget it.
RYou will see the “OK” message and the “BACK” will blink.
4 Press the SET button.
RReturns to the “PRIVACY MASK SETTING” screen.
53
English
2 !""#$%&!'
)*'
+,-.-/0
Multiplying Magnitude of Electronic Zoom
For accessing the MAIN MENU, see page 13 – 14.
In addition to zooming on the lens side, you can obtain further zooming by magnifying an electronic
zoom factor.
MAIN MENU
OPTION
(SET)
LANGUAGE
TITLE
SYNC
EXPOSURE
DAY/NIGHT
WHITE BALANCE
ALARM
OPTION
PRESET
MENU
OPTION
SET
OFF
INT
SET
AUTO
ATW
SET
SET
OFF
END
SET
EL ZOOM
GAMMA
APERTURE
MIRROR
NEGA/POSI
PRIVACY MASK
EL ZOOM
0.45
ON
OFF
OFF
SET
OFF
PRESET
MENU
OFF
BACK
EL ZOOM (Electronic Zoom)
2 Set “MENU” to “END” and press the SET button.
OPTION
GAMMA
APERTURE
MIRROR
NEGA/POSI
PRIVACY MASK
EL ZOOM
0.45
ON
OFF
OFF
SET
OFF
PRESET
MENU
OFF
BACK
• Select from: OFF (no zoom), x 1.4, x 2.0, x 2.5, and MANU.
• If you select “MANU”, you can manually zoom in and out by
pressing the CURSOR button vertically. (OFF – 2.5)
Pressing up the CURSOR button allows you to zoom in, while
pressing down allows you to zoom out.
RFinishes the settings screen and returns to the normal
monitoring screen.
• If you want to return to the previous screen, select “BACK” and
press the SET button.
Note: “EL ZOOM” is not available under the following
conditions:
• The zoom factor is specified for the alarm detection in
the alarm setting. (See page 42)
• The WIDE-D (wide dynamic range) is set to “ON”.
(See page 26)
• “BLC” is set to “CENT”. (See page 22)
• “MOTION” is set to other than “OFF”. (See page 41)
English
Settings/
Adjustments
1 Specify a zoom factor.
54
!""#$%&!'
Settings Screens List
[LANGUAGE]
LANGUAGE : Switches display language among English, German and
French. (See page 15)
[TITLE]
TITLE SETTING : Names camera. (See page 16)
[SYNC] (INT/L-L)
L-L SETTING (L-L) : Adjusts line lock phase. (See page 18)
[EXPOSURE]
EXPOSURE SETTING
IRIS (AI/EI)
IRIS SETTING (AI) : Adjusts for auto iris lens. (See page 19)
IRIS SETTING (EI) : Adjusts for manual iris lens. (See page 21)
WIDE-D SETTING (ON/OFF) : Adjusts wide dynamic functions.
(See page 26)
BLC (OFF/CENT/MULT) : Selects backlight correction mode.
(See page 22)
BLC SETTING (CENT/MULT) : Adjusts backlight correction.
(See pages 23, 25)
SENSE UP (OFF/x2/x4/x8/x16/x40) : Increases electronic sensitivity in
dark place, etc. (See page 28)
SHUTTER (50/120/250/500/1000/2000/4000/10000) :
Specifies shutter speed. (See page 29)
[DAY/NIGHT]
(AUTO/COLOR/B/W) : Selects DAY/NIGHT mode. (See page 30)
D/N SETTING : Adjusts for each mode. (See page 31 - 33)
55
English
)*'
+,-.-/0
For accessing the MAIN MENU, see page 13 – 14.
[WHITE BALANCE]
(ATW/ATW-A/AWC/3200/5600/FLUE/MWB) : Selects mode for white
balance. (See page 34)
ATW MASKING : Specifies mask for auto mode. (See page 35)
AWC SETTING : Adjusts through one-touch by focusing on white
paper, etc. (See page 36)
MWB SETTING : Adjusts fine color manually. (See page 37)
[ALARM]
ALARM IN
ALARM IN SETTING : Used when external alarm devices are
connected to the alarm input terminal.
(See page 38)
MOTION SET : Specifies settings for motion sensor. (See page 38)
ALARM OUT (OFF/ON)
ALARM OUT SETTING (ON) : Used when external alarm devices
are connected to the alarm output
terminal. (See page 44)
ALARM SIGN (OFF/5S/10S/15S/20S/30S/1M/2M/3M/4M/5M) :
Displays alarm on the monitor screen when the alarm
comes on. (See page 45)
[OPTION]
GAMMA (0.45/1/MODE1/MODE2) : Corrects contrast or brightness.
(See page 46)
APERTURE (OFF/ON) : Accentuates subject outline. (See page 47)
MIRROR (OFF/H/V/HV) : Inverts subject horizontally and/or vertically.
(See page 48)
NEGA/POSI (OFF/ON) : Invert brightness and hue of images.
(See page 49)
3 !""#$%&!'
)*'
+,-.-/0
Settings Screens List
MASK SET : Specifies masking on the screen for privacy
protection. (See page 50)
EL ZOOM (OFF/x1.4/x2.0/x2.5/MANU) : Specifies electronic zoom
factor. (See page 54)
■ Useful Operations
• Putting titles to camera images:
→ TITLE SETTING (See page 16).
• Capturing clear image of fast-moving subject by increasing shutter
speed:
→ SHUTTER (See page 29).
• Connecting to an external door switch or infrared sensor:
→ ALARM IN SETTING (See page 38).
• Switching between color and monochrome mode of DAY/NIGHT
function using external switch, etc.:
→ ALARM IN SETTING (See page 43).
• Controlling external beeper or indicator connected to camera by
using alarm detection function:
→ ALARM OUT SETTING (See page 44).
• Inverting image horizontally and/or vertically:
→ MIRROR (See page 48).
• Inverting brightness and hue of images to record negative images of
color shot as positive images:
→ NEGA/POSI (OFF/ON) (See page 49).
• Hiding partial image for privacy protection:
→ PRIVACY MASK SETTING (See page 50).
Settings/
Adjustments
PRIVACY MASK
PRIVACY MASK SETTING
PASSWORD LOCK : Locks the mask settings by password.
(See page 52)
PASSWORD CHANGE : Specifies a new password. (See page 53)
• Changing electronic zoom factor:
→ EL ZOOM (See page 54).
English
56
!""#$%&!'
)*'
+,-.-/0
Troubleshooting
Before seeking repair service, please review the following points first. If the trouble persists, contact your local sales agent or
installer.
Symptom
Items to Be Checked
•
•
•
•
No images
available:
Is the coaxial cable connected securely?
Is lighting appropriate?
Did you uncap the lens?
Is the setting for the Auto Iris switching correct?
(See page 8)
• Is power supplied? (See page 9)
• Are power supply and voltage appropriate?
(See page 9)
• Are switch settings for DC and VIDEO correct?
(See page 8)
Distorted
images:
• Is sync adjusted by the line lock? (See page 18)
Unclear
images:
• Is the focus of the lens adjusted?
• Is the flange back adjusted? (See page 12)
• Is the lens transparent without blur? (Use
commercial cleaning paper and liquid to wipe
out.)
• Is the iris adjusted? (For AI or EI, see page 19 or
21 respectively.)
• Is sensitivity increased to adapt dark
environment? (See page 28)
Unrecognizable
subject in the
backlight:
• Is backlight correction specified? (See page 22)
Poor color
images:
• Is white balance adjusted? (See page 34)
57
English
Symptom
Items to Be Checked
Distorted
picture after
switching from
color to
monochrome
mode of DAY/
NIGHT:
• Is “ON” specified for “BURST”?
(See pages 31, 33)
Inappropriate
contrast or
outline of
images:
• Did you try Gamma value adjustment?
(See page 46)
• Is the aperture adjusted? (See page 47)
Frequent false
detection by
Motion Sensor:
• Is detection sensitivity adjusted? (See page 38)
!""#$%&!'
)*'
+,-.-/0
Specifications
Pickup device
1/3” CCD
Effective pixels
752 (H) x 582 (V), PAL
Privacy masking
OFF/ON, Up to 8 spots, Lockable with password
Horizontal resolution
More than 480 TV lines
DAY/NIGHT
AUTO / COLOR / B/W, specifiable COLOR / B/W
switching sensitivity for AUTO mode, switchable
COLOR / B/W mode working with external terminal
(during COLOR mode), switchable ON/OFF for color
burst for B/W mode.
Electronic zoom
x2.5 (with Alarm Zoom Function)
Synchronization
method
Internal synchronization/Line lock, V phase
adjustment possible
1.0 lx (F1.2, COLOR mode, Normal Gain)
0.5 lx (F1.2, COLOR mode, High Gain)
0.025 lx (F1.2, COLOR mode, x40 electronic
sensitivity increased, Normal Gain)
0.05 lx (F1.2, B/W mode, Normal Gain)
0.025 lx (F1.2, B/W mode, High Gain)
0.002 lx (F1.2, B/W mode, x40 electronic sensitivity
increased, Normal Gain)
ALARM INPUT &
OUTPUT
External x 1, Output x 1, NO/NC switch
Alarm output: Open Collector, Grounded Emitter with
18 V/25 mA
Lowest image
illumination
Motion sensor
Detectable area frame x 5 spot, specifiable location,
Masking and Area ON/OFF
Camera title
OFF/ON, up to 16 characters, adjustable title position
NEGA/POSI inversion
OFF/ON
Communications
Simplified controller (VAC-70) supported
More than 50 dB (with AGC OFF)
Power indicator
LED-red
Backlight
compensation
OFF/Center-weighted metering/ Multi-spot metering
Operational
temperature/humidity
–10 ~ +50°C/below 90% RH (Non-condensing)
WIDE-D
OFF/ON (For auto iris only)
Power source
24 V ±10% AC, 50 Hz, 12 - 15 V DC
Power consumption
6W
Electronic shutter
1/50, 1/120, 1/250, 1/500, 1/1000, 1/2000, 1/4000,
1/10000
Weight
420 g
Iris function
AI/EI
67 x 54 x 128
Electronic sensitivity
boosting
AUTO/OFF, works with auto iris
Up to x40 setting possible
Dimensions
(W x H x D mm)
White balance
Auto Tracing White balance (ATW),
Auto Tracing White balance-All (ATW-A),
One-push (AWC), Manual White Balance (MWB),
Indoor (3200), Outdoor (5600),
Fluorescent lighting (FLUE)
AGC gain
HIGH/MID/NORM/Manual
Gamma
0.45/1/MODE1/MODE2
Mirror image effect
OFF/Horizontally/Vertically/Horizontally and Vertically
Aperture
ON/OFF specifiable
S/N
• The appearance and specifications of the product are subject to
change without notice.
English
58
Printed on recycled paper
Gedruckt auf recyceltem Papier
PapierImprimé sur du papier recyclé
SANYO Electric Co., Ltd.
1AC6P1P2918-L5BC2/XE (0305KP-SY)
Pri nt ed in Japan