1
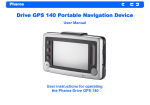
Pharos
Drive GPS 135 Portable Navigation Device
User’s Manual
User Instructions for Operating
the Pharos Drive GPS 135
Pharos
Legal Notices
Copyright
Pharos Drive GPS 135 User’s Manual
NOTE: Record the device ID, serial number, purchase date, and place of purchase information in the space provided below. The serial number is indicated
on the label affixed to your Pharos device. All correspondence concerning
your unit should include the serial number, device ID, and purchase information.
Pharos and the Pharos logo are registered trademarks of Pharos Science &
Applications, Inc. Other products or system names appearing in this document
are trademarks or registered trademarks of their respective owners.
Changes may be made periodically to the information in this publication without obligation to notify any person of such revision or changes. Such changes
will be incorporated in new editions of this User’s Manual or supplementary
documents and publications.
NOTE: Information in this manual is subject to change without notice.
No part of this publication may be reproduced, stored in a retrieval system, or
transmitted, in any form or by any means, electronic, mechanical, photocopy,
recording, or otherwise, without the prior written permission of Pharos Science
& Applications, Inc.
Revision: 1.00
October 2006
DISCLAIMER AND LIMITATION OF LIABILITY
Pharos and its subsidiaries makes no representations or warranties, either
expressed or implied, with respect to the contents hereof and specifically disclaims the implied warranties of merchantability or fitness for a particular purpose. Pharos and its subsidiaries assume no responsibility for any damage or
loss resulting from the use of the Pharos Drive GPS 135.
Pharos Drive GPS 135
2
Introduction
Pharos
Warnings and Notices
For your safety, do not operate the controls of the product while driving.
WARNING: Try not to expose the Drive GPS 135 to extreme temperatures
for long periods of time.
GPS satellite signals cannot typically pass through solid materials (except
glass). GPS location information is not typically available inside buildings, tunnels, or underground parking lots.
FCC Warning
The Drive GPS 135 PND has been tested and found to comply with the limits
for a Class B digital device in accordance with the specifications in Part 15 of
FCC rules.
A minimum of four GPS satellite signals are needed to calculate your GPS
position. Signal reception can be affected by weather events or overhead obstacles (e.g. dense foliage and tall buildings).
Operation is subject to the following two conditions: (1) this device may not
cause harmful interference, and (2) this device must accept any interference
received, including interference that may cause undesired operation. This
device generates, uses, and can radiate radio-frequency energy. If it is not
installed and used properly, it may cause interference with radio and television
reception.
Other wireless devices in the vehicle may interfere with the reception of satellite signals and cause the reception to be unstable.
Adapter
Do not attempt to service the unit. There are no serviceable parts inside.
Replace the unit if it is damaged or exposed to excess moisture.
Do not use the adapter if the cord becomes damaged.
Connect the adapter to the proper power source. The voltage requirements are
found on the product case and/or packaging.
Battery
This unit contains a non-replaceable internal battery. The battery can burst or
explode, releasing hazardous chemicals. To reduce the risk of fire or burns, do
not disassemble, crush, puncture, or dispose of in fire or water.
Use only the specified charger approved by the manufacturer.
WARNING: The battery in the device must be recycled or disposed of properly.
Pharos Drive GPS 135
3
Introduction
Pharos
Table of Contents
Chapter 1 Drive GPS 135 PND Features and Specifications ........ 5
1.1 Pharos Drive GPS 135 PND features ................................................5
1.2 Drive GPS 135 Specifications ...........................................................5
Chapter 2 Getting Started ................................................................ 7
2.1 Hardware overview ............................................................................7
2.1.1 Packing list ................................................................................7
2.1.2 Front Panel ................................................................................7
2.2 Mounting the Drive GPS 135 in your vehicle ...................................9
2.2.1 To set up the device on your vehicle: .......................................9
2.3 Using the mounting bracket. ..............................................................9
Chapter 3 Using the Drive GPS 135 .............................................. 11
3.1 Drive GPS 135 Operating Basics ....................................................11
3.2 To turn on and calibrate the device: ................................................11
3.3 To configure system settings: ..........................................................12
3.4 Additional System settings ..............................................................14
3.5 Backlight ..........................................................................................14
3.6 Volume ............................................................................................15
3.7 Battery ..............................................................................................15
3.8 System Information .........................................................................16
Chapter 4 Synchronization with a PC ........................................... 17
4.1 Exchanging data between the Drive GPS 135 and your PC ............17
4.1.1 Using the SD slot ....................................................................17
4.1.2 To insert a storage card: ..........................................................17
4.1.3 To remove a storage card: .......................................................17
4.1.4 Establishing device-PC connection .........................................17
4.2 Installing Microsoft ActiveSync ......................................................18
4.2.1 Minimum installation requirements: .......................................18
4.2.2 To install Microsoft ActiveSync on your computer: ..............18
Chapter 5 Entertainment ................................................................ 20
5.1 Drive GPS 135 Player ......................................................................20
5.2 Using the different media players ....................................................20
Pharos Drive GPS 135
5.3 MP3 .................................................................................................20
5.3.1 Using the MP3 player. ............................................................20
5.3.2 To enter into the different media players. ...............................20
5.4 Photo Viewer ...................................................................................22
5.4.1 Viewing files in Slide Show mode ..........................................22
5.4.2 Using the Photo Viewer ..........................................................22
Chapter 6 Troubleshooting and Maintenance ..............................24
6.1 General troubleshooting ...................................................................24
6.1.1 System stops responding; is “frozen” or “locked up.” ............24
6.1.2 Users can also perform a “system reset.” ................................24
6.1.3 Screen responds slowly ...........................................................24
6.1.4 Inaccurate response to taps. ....................................................24
6.1.5 Connection Problems with PC. ...............................................24
6.1.6 No GPS connection .................................................................24
6.1.7 No sound coming from the device. .........................................24
6.1.8 I can’t see my photos. .............................................................24
6.1.9 Takes longer than normal time to get a GPS fix. ....................24
6.1.10 Factory reset does not mean a GPS reset. .............................24
6.2 Maintenance .....................................................................................25
6.2.1 Storage precautions .................................................................25
6.2.2 Accessories and repair precautions .........................................25
4
Table of Contents
Pharos
Chapter 1 Drive GPS 135 PND Features and Specifications
1.1
Pharos Drive GPS 135 PND features
Table 1: Drive GPS 135 dimensions and specifications
The Pharos Drive GPS 135 Portable Navigation device is a powerful multifunction GPS navigation and entertainment device.
•
•
•
•
•
•
1.2
Compact size and lightweight
Integrated GPS receiver for GPS navigation
Embedded SD card slot ensuring ample data storage for mapping and
application software
Incorporates high-performance GPS antenna
High-resolution color LCD
3.5” touch screen
Drive GPS 135 Specifications
Category
Item
Memory Extension
SD Memory Slot
Display
3.5" Touchscreen, 320 x 240 pixel, TFT, 16.7M
colors
Connectors
MiniUSB, external GPS-antenna, external TMC
antenna, SD slot
USB Interface
USB v1.1
Software
Table 1: Drive GPS 135 dimensions and specifications
Functions
Image viewer, audio playback, navigation, RDSTMC (optional)
Category
Item
OS
Windows CE 4.2
Overall Dimensions (w/o
antenna)
77 x 134 x 27 mm
Main Battery
Weight (incl. battery)
215g
Type
Rechargeable Li-Polymer
Voltage/Capacity
3.7V, 2000mAh
Runtime (GPS on, Backlight on)
About 4h (typical)
Hardware Main Unit
CPU
Samsung S3C2410, 266 MHz, ARM compatible
NAND Flash
32MB, Up to 1GB
RAM
64MB
Control
4 Touch keys
Navigation Pad
Touch screen
Indicators
Green/red for power
Headphone Jack
3.5 mm, stereo
Pharos Drive GPS 135
Charge Time
4.5 hours
First Time Charging
8 hours
GPS
5
Chipset
SiRF GSC3
Antenna Type
Patch antenna
Chapter 1 Features and Specifications
Pharos
Table 1: Drive GPS 135 dimensions and specifications
Category
Item
Cold Start (very first start
time)
45 sec (typical)
Warm Start (after fix and
power-off >= 4hrs)
35 sec (typical)
Hot Start (after fix and
power-off < 4hrs)
1 sec (typical)
Car Adapter
Input Rating
12-24V
Output Rating
5.0V, 2A
Power Indicator
Blue, non-blinking
Certificates
eMark
AC Adapter
(Optional)
AC-Rating
110-240V, 50-60Hz
DC-Rating
5.0V, 2A
Certificates
CE, FCC, TUV
Protection Class
II, LPS
USB Activesync Cable
Extras
Pharos Drive GPS 135
Capable of charging via USB
6
Chapter 1 Features and Specifications
Pharos
Chapter 2 Getting Started
2.1.2
This chapter describes the hardware interface of the Pharos Drive GPS 135 and
its peripherals. Instructions for setting up the device and some basic system
operations are also discussed.
Front Panel
Figure 1: Front Panel View
NOTE: Although the Drive GPS 135 Li-Polymer rechargeable battery comes
approximately 30% charged, before using, it is best to connect the AC adapter
and plug to power socket and fully charge the battery 8 hours.
2.1
Hardware overview
1
6
This section introduces the Drive GPS 135 external features and hardware components.
2.1.1
4
Packing list
5
The Pharos Drive GPS 135 box contains all of the items listed below:
•
•
•
•
•
•
•
•
•
Drive GPS 135 Portable Navigation Device
Car mount kit
Car charger
USB cable
User documentation
Drive GPS 135 Portable Navigation Device Companion CD
Drive GPS 135 Portable Navigation Device Quick Start Guide
Drive GPS 135 Portable Navigation Device Warranty Booklet
Carrying bag
Pharos Drive GPS 135
2
3
Table 2: Front panel controls
No. Function
7
Description
1 Navigation Software
Shortcut to navigation
2 SD slot
SD slot
3 To Main Menu
Shortcut to main menu home
4 Zoom in Navigation
Zooms in view in navigation mode
5 Zoom out Navigation
Zooms out view in navigation mode
6 Speaker
Speaker
Chapter 2 Getting Started
Pharos
Figure 2: Top and Bottom view
Figure 3: Left and Right side view
3
1
1
2
2
5
4
Table 3: Top and Bottom controls
Table 4: Left and Right panel controls
No. Function
No. Function
1
On/Off
The main power/battery on/off switch.
1 Earphone
Standard 3.5” earphone jack.
2
Reset
Restarts your device with a soft reset.
2 USB input
Connects to the USB cable.
3 DC Power input For Adapter or car charger
4
FM/TMC
antenna
5 SD slot
For FM/TMC reception (applicable depending on SKU)
Accepts a SD (Secure Digital) card for data storage.
WARNING: Make sure the SD card is properly inserted and DO NOT
remove the SD card during operation of the device.
Pharos Drive GPS 135
8
Chapter 2 Getting Started
Pharos
2.2
Mounting the Drive GPS 135 in your vehicle
Figure 4: Drive GPS 135 mounting cradle with slots for car mount
The Drive GPS 135 comes with a car mount kit and a car charger to help install
your device in your vehicle. The car mount kit uses a suction cup on the windshield to offer flexible mounting options for the Drive GPS 135
WARNING: Some countries prohibit the mounting of any electronic device
on the vehicle dashboard. Be sure to check your local laws for acceptable
mounting areas before installing the car mount bracket. Please check all local
laws before setting up the navigation device in any vehicle.
Occassionally, GPS signal reception is obstructed when the device is mounted
in the car. In this case, an external GPS antenna is needed to connect to the
device. The antenna connector is located at the top back part of the Drive GPS
135.
2.2.1
2.3
To set up the device on your vehicle:
1.
2.
This section shows how to install the car mount kit in your vehicle’s windshield
using the suction cup. The Drive GPS 135 uses a snap on mounting cradle to
use when the device attaches to the car mount. Below is the backside view of
the Drive GPS 135 in the cradle.
3.
4.
5.
6.
7.
Pharos Drive GPS 135
9
Using the mounting bracket.
Clean the mounting surface with a glass cleaner and a clean cotton cloth.
If the ambient temperature is below +15°C (60°F), you can warm the
mounting area and the suction cup (e.g. with a hair dryer) to ensure a
strong suction bond.
Install the car mount on the selected area.
a. Fix the suction cup to the selected area with the locking lever facing up
for easier access.
b. Flip the locking lever away from you to create a vacuum between the
suction cup and the window surface.
Make sure that the suction is strong and stable before proceeding to the
next step.
Slide the Drive GPS 135 cradle bracket onto the device connector mount.
After you are sure the mounting bracket is safe and secure, attach the Drive
GPS 135 into its cradle bracket. It snaps in easily with the quick release
connectors.
Adjust the car mount for the best viewing angle.
Connect the car charger into the cigarette lighter receptacle.
Chapter 2 Getting Started
Pharos
8.
9.
The car charger LED indicator will glow blue when powered.
Plug the car charger into the side of the Drive GPS 135 and position the
cord to an appropriate location.
NOTE: The car mount included may look different than the ones shown in
this user’s manual. However, the operation is similar.
NOTE: Your car may be required to switch the vehicle ignition into the
accessories position to power the cigarette lighter. Your Drive GPS 135 will
not charge with the ignition off.
WARNING: Try not to expose the Drive GPS 135 to extreme temperatures
for long periods of time.
Figure 5: Power cord plugs into lighter
Pharos Drive GPS 135
10
Chapter 2 Getting Started
Pharos
Chapter 3 Using the Drive GPS 135
3.1
Drive GPS 135 Operating Basics
2.
Tap the center of the target as it moves around the screen.
After fully charging the Drive GPS 135, it is ready to be used. You can now
turn it on to calibrate the screen. After screen calibration, proceed to system settings configuration.
3.2
1.
To turn on and calibrate the device:
Turn on your device the first time by turning on the main on/off switch on
the top of the device. You will use this power button for daily use.
Figure 6: Main on/off switch and power button
After calibrating the screen, the Main Menu panel displays.
NOTE: When you first turn on your device, you will be asked to calibrate the
screen. This process ensures the accuracy of the touchscreen when used.
Pharos Drive GPS 135
11
Chapter 3 Using the Drive GPS 135
Pharos
3.3
To configure system settings:
4.
Tap the Up Arrow in the top left to set the language and return to the System Menu.
5.
To set the system date and time, tap on the Date arrow, Time arrow and
Time Zone arrow in the Date & Time System Menu.
If you intend to start using your Drive GPS 135 at once, we recommend that
you configure the language and date/time settings first. The rest of the user
preferences can be set up later.
1.
2.
Tap “System” in the Main menu.
Tap “Language” on the System Menu panel.
NOTE: The controls are easy to use when configuring your device.
1. Tap the “Arrow” tab to select an item.
2. Tap the +/- tab to increase or decrease values.
3. Tap on the return Arrow in the top left corner to:
a. Return to the previous screen.
b. Save the settings just input.
3.
To set the system language settings, tap the forward or backward arrow
until the language you want appears.
Pharos Drive GPS 135
12
Chapter 3 Using the Drive GPS 135
Pharos
6.
7.
Tap the correct Year, Month and Day by tapping on the + or -.
Tap the Up Arrow in the top left to set the Date and return to the “Date &
Time” Menu.
8.
Tap the “Time” in the “Date & Time” Menu. You will see the window
below. Select the correct time by tapping on the + or -.
9.
Tap the Up Arrow in the top left to set the Time and return to the “Date &
Time” Menu.
Pharos Drive GPS 135
10. Next, tap “Time Zone” in the “Date & Time” Menu. Select the correct
Time Zone by tapping on the left and right arrows.
11. Tap the Up Arrow in the top left to set the Time Zone and return to the
“Date & Time” Menu.
12. Tap the Up Arrow in the top left of the “Date & Time” Menu to return to
the System Menu.
13
Chapter 3 Using the Drive GPS 135
Pharos
3.4
Additional System settings
Other System setting can be used to view and adjust your device current preferences. Navigate from the System Menu.
3.5
1.
2.
3.
4.
5.
Backlight
Tap the Backlight icon in the System Menu.
Adjust the Backlight brightness.
Adjust how long you want to wait before Backlight goes into power savings mode while using battery power source.
Adjust how long you want to wait before the Backlight goes into power
savings mode while using an external power source (AC adapter/Car
adapter).
Tap the Up arrow to return to the System Menu.
Pharos Drive GPS 135
14
Chapter 3 Using the Drive GPS 135
Pharos
3.6
1.
2.
3.
Volume
3.7
Tap the Volume icon in the System Menu.
Tap + or - to set default system sound volume.
Tap the Up arrow to save and return to the System Menu.
1.
2.
3.
Battery
Tap the Battery icon in the System Menu.
You can view the remaining batter power in the top bar.
Adjust how long you want to wait before the Hot Key LEDs turn off automatically.
NOTE: Check Hot Keys backlight (LED) turn on when pressed. To conserve
battery power, these settings should be set to lowest values.
Pharos Drive GPS 135
15
Chapter 3 Using the Drive GPS 135
Pharos
3.8
1.
2.
3.
System Information
4.
You can calibrate the device from this screen.
5.
For Factory reset, a screen will appear confirming you want to reset your
device.
Tap the System Info. icon in the System Menu.
You can view the OS version, GPS firmware version and other system
information.
Tap the “Calibration” icon in the System Info.
NOTE: Why perform a GPS reset?
If the previous GPS fix position was more than 500 km or 12 hours apart from
your current position and time, it will take significantly longer than the standard TTFF time to get a GPS fix. This is due to the nature of the GPS algorithm and rotational velocity between the satellites and planet Earth, and
deemed normal. Perform a GPS reset in the main menu to get a faster GPS
fix.
Pharos Drive GPS 135
16
Chapter 3 Using the Drive GPS 135
Pharos
Chapter 4 Synchronization with a PC
4.1
4.1.1
Exchanging data between the Drive GPS 135 and your
PC
4.1.2
To insert a storage card:
Hold the device securely, then push the card into the slot until you hear an audible system sound; this will signal that the card is already properly seated within
the slot. The card is secure when it is not protruding from the slot.
Using the SD slot
The Drive GPS 135 has an SD slot compatible with a range of SD storage cards
that you can use to back up or transfer files and data.
Along with photos, music and videos, the GPS navigation system program is
also stored on the storage card. To install and use maps, the program requires
that users load the digital maps available in the GPS Navigation SD card that
supports the device.
4.1.3
1.
2.
Figure 7: SD card slot
To remove a storage card:
Hold the device securely, then push against the top of the card, as if you
were pushing it further into the slot, letting the card spring out. An audible
system sound will signal that the card has been released.
Gently remove the card from the slot.
4.1.4
Establishing device-PC connection
The USB cable that comes with your device enables you to connect the device
to your computer. File Explorer displays the Drive GPS 135 device, with the
SD card shown as a sub-folder. Once connected, you can use File Explorer to
copy digital music and image files into your device’s SD card and access them
when in Entertainment mode.
Pharos Drive GPS 135
17
•
It is advisable to organize files into subfolders. These subfolders will
become play lists and help you to manage and better access the files on
your device.
•
To enable access of multimedia files from your device, the files should
be located on the SD card.
Chapter 4 Synchronization with PC
Pharos
4.2
Installing Microsoft ActiveSync
Use Microsoft ActiveSync to exchange information between your Drive GPS
135 and a computer running on the Microsoft Windows platform.
If you have a previous version of the Microsoft ActiveSync installed in your
computer, uninstall it first before installing the Microsoft ActiveSync from the
Drive GPS 135 Companion CD.
4.2.1
•
•
•
•
•
•
4.2.2
1.
2.
3.
Minimum installation requirements:
Microsoft Windows XP, 2000, ME, and 98 SE
Microsoft Internet Explorer 5.0 or later
Hard disk drive with 12 to 65 MB of available hard disk space
Available USB port
CD-ROM drive
VGA graphics card or compatible video graphics adapter at 256 color
or higher
4.
Click Install ActiveSync on the Please select your task screen.
To install Microsoft ActiveSync on your computer:
Close any open programs, including those that run at startup, and disable
any virus-scanning software.
Insert the Pharos Drive GPS 135 Companion CD into your computer’s
CD-ROM drive. The CD's welcome page should appear.
Click the installation language of your choice.
The installation wizard will automatically begin.
Pharos Drive GPS 135
18
Chapter 4 Synchronization with PC
Pharos
Once ActiveSync is installed on your computer, you can use it to transfer files
(i.e. MP3 files/photos) between your device and your computer.
For more detailed information on how to use ActiveSync on your computer,
start ActiveSync on your computer, click Help, then Microsoft ActiveSync
Help.
5. Follow the on-screen instructions.
After installation, the ActiveSync icon will appear on your computer’s system
tray (on the lower right-hand corner of the screen).
You can also use Explore in Activesync to look at all the content on your device
(as shown below).
Pharos Drive GPS 135
19
Chapter 4 Synchronization with PC
Pharos
Chapter 5 Entertainment
5.1
Drive GPS 135 Player
5.2
5.3
The Drive GPS 135 is a fully capable multimedia player that can enhance your
portable entertainment. In addition to its navigating function, the Drive GPS
135 is also a mobile entertainment tool that lets you enjoy digital music, and
view photos. These functions make the Drive GPS 135 a true multimedia
device.
Enjoy your favorite music on the road. The program features:
• Support for MP3, WMA, and WAV files
• Auto-scanning of supported files in the device’s SD card
• Hot key function for volume control
• Playlist support based on sub-directory contents
Each sub directory containing compatible music files is treated as an individual
playlist. For a more organized file search, it is advisable to named sub directories based on genre or listening preferences.
To enable access of multimedia files from your device, the files should stored
on the SD card. To transfer these files, do either of the following:
• Using the USB cable to connect the device, with the SD card inside, to
your computer, then use File Explorer to copy digital music and image
files into the device’s SD card folder. The Drive GPS 135 should be
recognized with the SD card shown as a sub-folder.
• Using a compatible card reader, directly copy digital music and image
files to the SD card.
It is recommended to organize files into subfolders. These folders will makes
files easier to find and play.
Pharos Drive GPS 135
Using the different media players
MP3
5.3.1
Using the MP3 player.
5.3.2 To enter into the different media players.
1. Tap the MP3 icon in the Main Menu.
20
Chapter 5 Entertainment
Pharos
2.
4.
Tap “MP3 Player” in the Entertainment menu.
File collection menu.
NOTE: You can also enter the MP3/music player by pressing the music hot
key on the front panel.
3.
The MP3 player window below controls playback.
1
2
3
4
5
Table 5: MP3 player functions
No. Function
Description
1 Repeat
Repeats the selection
2 Random play
Plays files random order
3 File collection/playlist
Goes back to main file/folder view
4 Skip backwards/forwards
Advances one song forward or backward
5 Pause/Stop
Stops play
Pharos Drive GPS 135
21
Chapter 5 Entertainment
Pharos
5.4
Photo Viewer
5.4.2
Using the Photo Viewer
The Drive GPS 135 has a great photo viewing option that makes it easy to share
and view digital photos anywhere on the go. The program features:
•
•
•
•
Support for JPEG and BMP (1, 4, 8, and 24-bit) files
Auto-scanning of supported files in the device’s SD card.
Three viewing modes: Thumbnail, Full Screen, and Slide Show
Album support based on sub-directory contents
1
2
3
Each subdirectory can hold multiple images and be used as an individual
album. For a more organized file search, it is advisable to sort image files into
sub directories based on meaningful name or date. An example could be “summer vacation pictures” or “New baby” or “2005 Best.”
4
5.4.1 Viewing files in Slide Show mode
You have the option to view images in a slide show much like viewing a Power
Point presentation in your computer. Images are adjusted to fit the entire display area and are shown in a 3-second interval.
Table 6: Photo Viewer Menu
No. Function
1 Slideshow viewer
22
Starts slideshow
2 Go up to Folder level
Goes up one folder level
3 Move selection up
Moves selection up
4 Move selection down
Moves selection down
5.
Pharos Drive GPS 135
Description
To enable the Slide Show mode: In Thumbnail or Full Screen mode, tap
Slide Show. #1 above
Chapter 5 Entertainment
Pharos
1
2
3
4
5
Table 7: Photo Viewer functions
No. Function
1 Slideshow viewer
2 Rotate photo
3 Zoom in
4 Zoom out
5 Moves to the next photo or back one
Pharos Drive GPS 135
23
Chapter 5 Entertainment
Pharos
Chapter 6 Troubleshooting and Maintenance
6.1
General troubleshooting
6.1.1
•
System stops responding; is “frozen” or “locked up.”
To reset the Drive GPS 135, take a sharp object like a pen or paper click
and depress the reset button on the bottom of the device. This is called a
“soft reset.”
6.1.2
•
Users can also perform a “system reset.”
To do a “system reset,” in the Main Menu, tap System, then tap System
Info. This will allow you to do a factory reset (restore to default settings), reset the GPS and recalibrate the touchscreen interface.
6.1.3
•
Screen responds slowly
Make sure you have enough battery power.
6.1.4
•
Inaccurate response to taps.
Recalibrate the touch screen.
6.1.5
•
Connection Problems with PC.
Make sure that the cable is securely plugged into the USB port on your
computer and on the device. Connect the USB cable directly to your
computer—do not run the cable through a USB hub.
Reset your device before connecting the cable. Always disconnect your
device before you restart your computer.
•
Pharos Drive GPS 135
6.1.6
•
No GPS connection
Make sure that the GPS antenna has a clear view of the sky. Note that
the GPS reception can be affected by:
• Bad weather
• Dense overhead obstacles (e.g. trees and tall buildings)
• Other wireless devices in the car
6.1.7
•
No sound coming from the device.
Make sure mute is not selected for Volume in system settings. The
built-in speaker turns off when the headphone jack is being used.
6.1.8
•
I can’t see my photos.
Make sure you are using supported image formats, JPG and BMP.
6.1.9
•
Takes longer than normal time to get a GPS fix.
If the previous GPS fix position was more than 500 km or 12 hours
apart from your current position and time, it will take significantly
longer than the standard TTFF time to get a GPS fix. This is due to the
nature of the GPS algorithm and rotational velocity between the satellites and planet Earth, and deemed normal.
Perform a GPS reset in the System Info to get a faster GPS fix.
•
6.1.10 Factory reset does not mean a GPS reset.
• The Factory Reset function only resets the OS settings to their default
factory values; it will not reset the GPS settings.
24
Chapter 6 Troubleshooting and Maintenance
Pharos
6.2
Maintenance
•
Keep your device away from excessive moisture and extreme temperatures.
•
Avoid exposing your device to direct sunlight or strong ultraviolet light
for extended periods of time.
•
Do not drop your device or subject it to severe shock.
•
Do not subject your device to sudden and severe temperature changes.
This could cause moisture condensation inside the unit, which could
damage your device. In the event of moisture condensation, allow the
device to dry out completely before use.
•
The screen surface can be easily scratched. Sharp objects may scratch
the screen. You may use non-adhesive generic screen protectors
designed specifically for use on portable devices with LCD panels to
help protect the screen from minor scratches.
•
Never clean your device when it is powered on.
•
Never use organic solvents such as benzene or paint thinner to clean
your device. Use of these solvents can cause deformation or discoloration.
•
Use a soft, clean, lint-free cloth to clean the display screen. Moistened
LCD screen wipes could also be used as required.
•
Never attempt to disassemble, repair or make any modifications to your
device. Disassembly, modification or any attempt at repair could cause
damage to your device and even bodily injury or property damage and
will void any warranty.
Pharos Drive GPS 135
6.2.1
•
•
6.2.2
•
25
Storage precautions
Do not store your device anywhere it may be exposed to water or in
conditions of high humidity.
When the device is not in use for an extended period of time, bring it
indoors and store it in cool dry area.
Accessories and repair precautions
Only authorized accessories should be use with the device. The use of
incompatible accessories could result in bodily injury and/or damage to
the device.
•
The use of unauthorized accessories will also void your warranty.
•
Never attempt to disassemble, repair or make any modification to your
device.
Chapter 6 Troubleshooting and Maintenance
Pharos
Index
A
AC adapter 7
AC-Rating 6
ActiveSync 3.8 18
ARM 5
B
Backlight 14
Battery Level 15
Battery Voltage 5
BMP 22
Bottom 8
C
Calibration 11
Car charger 9
CE 6
Charge 5
Chipset 5
CPU 5
D
Date 13
Day 13
DC-Rating 6
Dimensions 5
E
Earphone 8
F
Features 5
File Explorer 20
FM antenna 8
Front Panel View 7, 8
Full Screen 22
H
Headphone 5
Hot Keys 15
I
Input 6
J
JPEG 22
L
Language 12
Li-Polymer 5
Month 13
Mounting cradle 9
MP3 20
N
NAND 5
P
Packing list 7
R
RAM 5
RDS-TMC 5
Recalibrate 24
Reset 8
Revision 2
Runtime 5
S
Samsung 5
SiRF 5
Slide Show 22
Soft reset 24
Specifications 5
Synchronization 17
System Information 16
T
TFT 5
Thumbnail 22
Time 13
Time Zone 13
Troubleshooting 24
U
USB cable 17
USB v1.1 5
V
Volume 15
W
Warranty 7
WAV 20
Weight 5
Windows CE 4.2 5
WMA 20
Y
Year 13
M
Microsoft ActiveSync 18
Pharos Drive GPS 135
26
Index