1
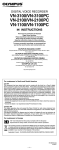
hInserting Batteries
Built-in speaker
DIGITAL VOICE RECORDER
EN
1Press down on the arrow and slide the
battery cover open.
2Press the + or – button to
select [TIME].
3Press the PLAY ( ` ) button.
Vision House 19 Colonial Way Watford Hertfordshire WD24 4JL. Tel. +44 (0)1923 831000
http://www.olympus.co.uk
• Time and date display appears.
• The “Hour” indicator flashes, indicating the start
of the time and date setup process. (See “Setting
Time and Date [TIME]” for details).
• The “Minute” indicator flashes.
• Pressing the 0 button enables
the “Hour” setting again.
Replacing Batteries:
• The contents of this document may be changed in the future without advanced
notice. Contact our Customer Support Center for the latest information relating to
product names and model numbers.
• The utmost care has been taken to ensure the integrity of the contents of this
document. In the unlikely event that a questionable item, error, or omission is
found, please contact our Customer Support Center.
• Any liability for passive damages or damage of any kind occurred due to data loss
incurred by a defect of the product, repair performed by the third party other
than Olympus or an Olympus authorized service station, or any other reason is
excluded.
Converting
plug adapter
of KA333
When [N] appears on the display, replace the batteries as soon aspossible. Size-AAA alkaline
batteries are recommended. When the batteries are depleted, [O] appears on the display, and
the recorder shuts off. It is recommended to set the HOLD switch to the [HOLD] position before
you replace batteries to maintain the current settings (Time and date, etc.). For your convenience,
the recorder also logs the current settings in nonvolatile memory at hourly intervals.
6Press the + or – button to
set the “Minute”.
If the recorder is stopped or paused for 60 minutes
or longer during recording or play back, it goes into
Standby (power-save) mode, and the display shuts off.
To exit Standby mode and turn on the display, press
any button.
Getting Started
hIdentification of Parts
!
@
#
$
%
^
&
4
5
6
7
8
-1-
9 EAR (Earphone) jack
0 Display (LCD panel)
! Record/play indicator
light
@ REC (s) button
# + button
$ 9 (Fast Forward)
button
% – button
^ DISP/MENU button
& ERASE (s) button
hHold
Set the HOLD switch to the [HOLD] position. All operation buttons are disabled. This feature is useful when the
recorder has to be carried in a handbag or pocket.
Remember to reset the HOLD switch before attempting
to use the recorder.
Notes:
• The alarm will sound at the scheduled time even if the
recorder is set to [HOLD] position. The recorder will
then begin to play the file associated with the alarm
once you press any button.
• The recorder functions as follows with the HOLD switch
set to the [HOLD] position:
–If the recorder is playing, the display goes dark when
playback of the current file has completed.
–If the recorder is recording, the display goes dark
when the recorder stops recording automatically
upon running out of free memory.
hHow to Use the
Strap
hLCD Display Information
• Strap is not supplied.
hNotes on the Folders
Current folder
-2-
You can select an option for the display of the recorder. This will help review and confirm different
recorder settings and file information.
Notes:
• You can switch the time indication between the 12-hour system and the 24-hour system by
pressing the DISP/MENU button while you are setting the hour or minute.
• You can change the order of the date indication by pressing the DISP/MENU button while you
are setting the year, month, or day.
Example: July 14, 2008
Recording
Press the STOP (4) button.
2Press the REC (s) button
to start recording.
• The record/play indicator light
turns red, and recording starts.
cC
urrent recording mode
dC
urrent file number
eR
ecording level meter
fR
ecording time
c
d
e
f
Operation
Display
While in stop mode
Press and hold the STOP
(4) button
The total number of files recorded in the
folder and remaining recording time appears
on the display.
While in record mode
Press the DISP/MENU
button
The display switches between current
recording time and remaining recording
time.
While in stop mode or
playback mode
Press the DISP/MENU
button
Playing time ➔ Remaining playing time
➔ Recording date of the file ➔ Recording
time of the file ➔ Playing time …
Playback
1Press the FOLDER/INDEX
button to select the desired folder.
Press the PLAY ( `) button again.
• Playback will resume at the point of interruption.
hForwarding and Rewinding
Fast Forward:
While the recorder is during playback mode, press and
hold the 9 button.
• When you release the 9 button, the recorder will resume
normal playback.
Rewind:
While the recorder is during playback mode, press and
hold the 0 button.
• When you release the 0 button, the recorder will resume
normal playback.
Notes:
• The end of the file is located by pressing and holding the 9 button during fast forwarding.
The recorder will pause at the end of the file. If you do not release the 9 button, the recorder
will continue to fast forward.
• The beginning of the file is located by pressing and holding the 0 button during rewinding.
The recorder will pause at the beginning of the file. If you do not release the 0 button, the
recorder will continue to rewinding.
• When the index mark is shown in the middle of a file, it will stop temporarily in the position of the
index mark.
hLocating the Beginning of the File:
While the recorder is during playback mode (playback
or playback in slow/fast mode), press the 9 or 0
button forwards or rewinds to the beginning of the
next file or the file being played respectively.
Notes
• If an index mark is encountered midway, playback begins at that
point. (See “Index Marks” for details)
hChanging Playback Speed:
While the recorder is during playback mode, press the
PLAY ( `) button.
• New recordings are saved as the
last file in the folder.
gR
emaining recording time
g
a
Slow Playback
(-25%)
Fast Playback
(+50%)
Notes:
• When the slow playback mode is selected, the [J] appears and, for the fast playback mode, [K]
appears on the display while the recorder is playback.
• The recorder stops playback when you press the STOP (4) button while playback in the slow/fast
mode, or when it reaches to the end of the file. If you once press the STOP (4) button and start
playback again, the recorder will playback files in normal speed as well.
a Current folder
hListening with Earphone
2Press the 9 or 0 button to select the file
to playback.
3Press the PLAY (`) button
to start playback.
3Press the STOP (4) button
to stop recording.
-3-
State of the recorder
To Resume Playback:
Normal speed
a
b
aC
urrent microphone sensitivity
bC
urrent folder
The recorder provides four folders, [F], [G], [H] and [I]. To change the
folder selection, press the FOLDER/INDEX button while the recorder is
stopped. Each recorded file is stored in a folder.
Note:
• Using folders to classify files makes it convenient to find files you want
to access later. Up to a total of 100 files can be recorded in each folder.
U1-BS0120-02
AP0904
• This completes the time and date
setup procedure.
1Press the FOLDER/INDEX
button to select the desired
folder.
Strap hole
The external microphone and other devices can be connected
and the sound can be recorded.
• When using an external microphone, select adequate
microphone, such as a Noise-Cancellation microphone or
Electret condenser microphone (optional).
• To connect the recorder to an external device, use the
connecting cord KA333 (optional), and the stereo/monaural
converting plug adapter supplied with KA333.
• The input level cannot be adjusted on this recorder. When
you connect the recorder to an external device, execute a test
recording and adjust the output level of the external device.
7After setting the “Date”,
press the PLAY (`) or 9
button.
Power on: Reset the HOLD switch.
Power off: Set the HOLD switch to the [HOLD]
position.
Standby Mode and Display Shut Off:
A audio input
terminal of
other devices
• Repeat steps 5 and 6 to continue to set the “Year”, “Month”
and “Date” in the same way.
The HOLD switch functions as a power button. When you do not use the recorder, set the HOLD
switch to the [HOLD] position while the recorder is stopped. This will power off the recorder and
minimize the battery drain.
hSafe and Proper Usage
Before using your new recorder, read this manual carefully to ensure that you know how to operate
it safely and correctly. Keep this manual in an easily accessible location for future reference.
• The warning symbols indicate important safety related information. To protect yourself and others from
personal injury or damage to property, it is essential that you always read the warnings and information
provided.
hRecording from external Microphone or other Devices
An optional Ni-MH Rechargeable Battery (BR401)
from Olympus can be used for the recorder.
hPower Supply
Introduction
• If [FULL] appears on the display, you cannot record in the selected folder. In such a case, erase
unnecessary files.
• If the recorder is placed directly on a table when recording a meeting, it tends to pick up table
vibrations. Put a notebook or other item between the table and the recorder so that the vibration
is not easily transmitted for clearer recording.
• Even if you press the DISP/MENU button, the display will not change to current recording time
if the remaining recording time is 5 minutes or less.
• When remaining recording time is less than 60 seconds, the record/play indicator light starts
flashing in red. When the recording time is decreased to 30 or 10 seconds, the light flashes
faster.
• The recorder will enter Stop mode if it has been left paused for 60 minutes or longer.
• In case of difficult acoustic conditions or low speaker’s voice, recording in [HQ] is recommended.
Also, usage of an external microphone (sold separately) could improve the quality of
recordings.
4Press the + or – button to
set the “Hour”.
5Press the PL AY ( ` ) or
9 button to accept the
“Minute”.
3500 Corporate Parkway, P.O. Box 610, Center Valley, PA 18034-0610, U.S.A. Tel. 1-888-553-4448
http://www.olympusamerica.com
(Premises/Goods delivery) Wendenstrasse 14-18, 20097 Hamburg, Germany. Tel. 040-237730
(Letters) Postfach 10 49 08. 20034 Hamburg, Germany.
http://www.olympus-europa.com
To Stop:
hNotes for Recording
• The “Hour” indicator flashes.
Shinjuku Monolith, 3-1 Nishi-Shinjuku 2-chome, Shinjyuku-ku, Tokyo 163-0914, Japan. Tel. 03-3340-2111
http://www.olympus.com
0
hCanceling Playback
Press the REC (s) button again.
• The recorder stops in the middle of the file being played.
3Close the battery cover completely.
3
To Resume Recording:
2Insert two size-AAA alkaline batteries,
observing the correct polarity.
To ensure successful recordings, we recommend that
you test the record function and volume before use.
9
• [PAUSE] appears on the display and the record/play indicator
light flashes.
• Recording will resume at the point of interruption.
Thank you for purchasing an Olympus Digital Voice Recorder.
Please read these instructions for information about using the product correctly and safely.
Keep the instructions handy for future reference.
1
2
• The display shows the volume level. You can choose
between [00] to [30].
While the recorder is during recording mode, press
the REC (s) button
1Press and hold the DISP/MENU button for 1
second or longer.
INSTRUCTIONS
1 Built-in Microphone
2 MIC (Microphone) jack
3 HOLD switch
4 STOP (4) button
5 PLAY (`) button
6 0 (Rewind) button
7 Battery cover
8 FOLDER/INDEX
button
To Pause:
If you have set the time and date, information as to when a sound file was recorded is stored
automatically with that file.
When you install batteries for the first time or each time you replace the batteries, the
“Hour” indication will flash. In such a case, be sure to set the time and date by following
steps 4 through 7 described below.
VN-6500
VN-6000
VN-5500
VN-5000
4Press the + or – button to select the proper
sound volume.
hTo Pause Recording
hSetting Time and Date [TIME]
• The record/play indicator light
turns green, and the elapsed
playing time is indicated on the
display.
b Current file number
c Playing time
-4-
b
c
You can listen to files by connecting earphones to the earphone
jack. If an earphone is connected, the speaker doesn’t emit sound.
Sound will be played back monaurally.
Notes:
• To avoid irritation to the ear, insert the earphone after you turn
down the volume level.
• When you listen with the earphone during playback, do not raise
the volume too much. It may cause hearing impairment and loss
in hearing ability.
• Earphones are not supplied. You can use any standard 3.5mm
monaural earphone or headphone.
-5-
2Press the + or – button to
select what you would like
to set up.
Erase
You can easily erase unnecessary files. Sequential file numbers are reassigned automatically.
hAlarm Playback Function [k]:
You can use the alarm playback function to sound the alarm tone for
5 minutes at the scheduled time. Within this 5 minutes, pressing any
button other than the HOLD switch starts the recorder to playback the
preselected file.
• The selected menu item flashes.
hErasing One File at a Time
1Press the FOLDER/INDEX button to select
folder.
hErase All Files from a Folder
5Press the STOP (4 ) button to close the
menu.
hRecording Modes [HQ SP LP]
1Press the FOLDER/INDEX button to select
the folder to be erased.
2Press the ERASE (s) button twice.
Current recording mode
In Menu mode selection...[HQ], [SP], [LP]
HQ
SP
LP
VN-6500
VN-6000
Approx. 40 h.
30 min.
Approx. 107 h.
55 min.
Approx. 604 h.
15 min.
VN-5500
VN-5000
Approx. 20 h.
5 min.
Approx. 53 h.
40 min.
Approx. 300 h.
30 min.
3Press the 9 or 0 button to select [YES].
a Folder to be erased
hMicrophone Sensitivity [h]
For [k] in the menu mode, select [OFF] and press the PLAY (`) button.
Notes:
• Regardless of the selected folder, once the alarm playback is set, it operates every day unless the
setting is canceled.
• To view the current setting, select [On], and press the PLAY ( `) button.
• The alarm tone stops automatically if no button is pressed within 5 minutes after the alarm starts.
The file is not played back in this case.
• If the recorder has no recorded file in the selected folder, the alarm playback function is not
available.
• Alarm playback occurs every day unless it is set to [OFF].
hTimer Recording [TIMER]:
In Menu mode selection...[g], [i]
Notes:
• An erased file cannot be restored.
• If operation is not executed for 8 seconds during the setting, it will return to the stop status.
• Completion of erasing may take several seconds. Do not attempt to remove, replace battery
or attempt any other functions on the voice recorder during this period because data may be
corrupted.
g
i
High-sensitivity mode that records
sounds in all directions.
Low-sensitivity mode suited for
dictation.
Using the menu function, you can change various settings according to your preference.
Menu setting screen
Move the selection one position up/increase the number
When the microphone senses that sound has reached a preset volume,
the built-in Variable Control Voice Actuator (VCVA) starts recording
automatically, and stops it when the volume drops. Particularly helpful for
extended recording, the VCVA not only conserves memory by turning off
recording during silent periods, but also makes playback more efficient
and convenient.
Notes:
• To view the current setting, select [On], and press the PLAY ( `) button.
• With this function, you can set only the start and the end time of recording. The current settings of
the recording mode, microphone sensitivity, VCVA and folder are applied for the settings before
you set timer-controlled recording.
• The setting exceeding the remaining recording time is not allowed.
• You can record at any time even if it is not within the specified recording duration. However, if that
makes the remaining recording time insufficient for the timer-controlled recording, the recording
will not complete.
• If any operation is ongoing, the timer-controlled recording is overridden.
hMoving File between Folders
You can move files recorded in folders [F], [G], [H] and [I] to other folders. The moved file is
added to the end of the destination folder.
1Select the file you want to transfer, and press
the PLAY (`) button to play it.
VCVA indicator
2While the recorder is during playback mode,
press and hold the DISP/MENU button for 1
second or longer.
In Menu mode selection...[On], [OFF]
Move the
selection one
position to
the left
Move the
selection one
position to the
right
Confirm the
setting
Move the selection one position down/decrease the
number
1While the recorder is during
stop mode, press and hold
the DISP/MENU button for
1 second or longer.
-6-
Notes:
• During recording, press the + and – buttons to adjust the VCVA level in
15 levels.
• The Record/Play indicator light is lit during recording. When the recorder
is in Standby mode, the Record/Play indicator light flashes and [VCVA]
flashes on the display.
3Press the 9 or 0 button to select a destination
folder.
4Press the PLAY ( `) button.
a
b
aD
estination folder
bD
estination number of the file
hSystem Sounds [BEEP]
Informs a button operation or a wrong operation of the recorder by sound.
System sounds may be turned off.
In Menu mode selection...[On], [OFF]
Note:
• If the alarm playback function has been set, the alarm will sound at the
scheduled time even if the system sounds are disabled.
-7-
This function resets the current time and other settings to their initial status. It is useful if you are
having problems with the recorder, or if you want to erase the entire memory of the recorder.
1Press and hold the STOP ( 4) button and the
ERASE (s) button for 3 seconds or longer.
2Press the 9 or 0 button to select [YES].
3Press the PLAY ( ` ) button.
Other Functions
Notes:
• To ensure successful recording, make a test recording to select
appropriate microphone sensitivity before recording.
• If you select [g], we recommend setting the recording mode to [HQ]
to best take advantage of the higher sensitivity.
• If you select [g], background noise may be high depending on the
recording conditions.
hUsing the Variable Control Voice
Actuator [VCVA]
hResetting the Recorder [CLEAR]
You can schedule for automatic recording, specifying the start time and
end time of recording. When the timer-controlled recording completes,
the setting is released.
Menu
hBasic Operation of the Menu Mode
Notes:
• Up to 10 index marks can be set in a file.
• Sequential index marks numbers are reassigned automatically.
• If you leave the recorder untouched for 8 seconds or longer
before you press the PLAY ( ` )
button in Step 3, Clear mode will
be canceled, and the recorder will
enter Stop mode.
To cancel the timer setting:
For the timer in the menu mode, select [OFF], and press the
PLAY (`) button.
Current microphone
sensitivity
Notes:
• The destination folder and the number of the moved file appear on the display, and moving is
completed.
• If the destination folder is full (100 files), [FULL] appears on the display, and you cannot move the
file to that folder.
-8-
• An index number appears on the
display.
While the index number appears on the display, press the ERASE (s) button.
Timer indicator
Microphone sensitivity is adjustable to meet your recording needs.
4Press the PLAY ( ` ) button.
Clearing an Index Mark:
In Menu mode selection...[SET], [On], [OFF]
After selecting [SET], press the PLAY (`) button to set the
time.
The recording mode can be chosen from [HQ] (high quality sound recording), [SP] (standard recording) and [LP] (long-term recording).
Notes:
• The recording time shown above is for one continuous file. The available recording time may be
shorter than specified if several files are recorded. (Use the remaining time and recorded time
only as references.)
a
1While the recorder is during recording (pause recording) mode or playback
mode, press and hold the
FOLDER/INDEX button to
set an index mark.
To cancel an alarm playback:
Notes:
• The recorder will stop if you leave it idle for 3 minutes during a menu setup operation, when a
selected item is not applied.
• If you press the STOP (4) button during a menu setup operation, the recorder will stop and
apply the items that were set to that point.
5Press the PLAY ( ` ) button.
Index marks can be placed in a file during recording or playback to provide a quick and easy way
of keeping track of important sections in the file.
Note:
• With the alarm playback function, only one file can be played back. Select
a file for the function before setting the time.
a
a File to be erased
hIndex Marks
In Menu mode selection...[SET], [On], [OFF]
After selecting [SET], press the PLAY (`) button to set the
time.
3Press the
or 0 button to change the setting.
4Press the PLAY (`) button
to confirm the setting.
2Press the 9 or 0 button to select the
file to be erased.
3Press the ERASE (s) button.
4Press the 9 or 0 button to select [YES].
Alarm indicator
General Precautions
Read this manual carefully to ensure that you know how to operate it safely and correctly. Keep this
manual in an easily accessible location for future reference.
• The warning symbols indicate important safety related information. To protect yourself and others
from personal injury or damage to property, it is essential that you always read the warnings and
information provided.
Warning regarding data loss:
• Recorded content in memory may be destroyed or erased by operating mistakes, unit malfunction,
or during repair work.
• For important recorded content, we recommend you to write it down some where.
• Any liability for passive damages or damage of any kind occurred due to data loss incurred by a defect
of the product, repair performed by the third party other than Olympus or an Olympus authorized
service station, or any other reasons is excluded from Olympus’s liability.
For safe and correct Usage
• Be sure to stop the recorder before replacing the battery.
• Do not leave the recorder in hot, humid locations such as inside a closed automobile under direct
sunlight or on the beach in the summer.
• Do not store the recorder in places exposed to excessive moisture or dust.
• Do not use organic solvents such as alcohol and lacquer thinner to clean the unit.
• Do not place the recorder on top of or near electric appliances such as TVs or refrigerators.
• Avoid sand or dirt. These can cause irreparable damage.
• Avoid strong vibrations or shocks.
• Do not disassemble, repair or modify the unit yourself.
• Do not operate the unit while operating a vehicle (such as a bicycle, motorcycle, or go-cart).
• Keep the unit out of the reach of children.
Batteries:
V Warning:
• Batteries should never be exposed to flame, heated, short-circuited or disassembled.
• Do not attempt to recharge alkaline, lithium or any other non-rechargeable batteries.
• Never use any battery with a torn or cracked outer cover.
• Keep batteries out of the reach of children.
• If you notice anything unusual when using this product such as abnormal noise, heat, smoke, or a
burning odor:
1 remove the batteries immediately while being careful not to burn yourself, and;
2 call your dealer or local Olympus representative for servicing.
Troubleshooting
Q1:
A1:
Q2:
A2:
othing happens when a button is pressed.
N
The HOLD switch may be set to [HOLD] position.
The batteries may be depleted.
The batteries may be inserted incorrectly.
No sound or quiet sound is heard from the speaker while playing back.
The earphone plug may be plugged into the recorder.
The volume may be set to the minimum level.
-9-
Q3: Recording is not possible.
A3: By pressing the STOP (4) button repeatedly while the recorder stops, check if
the display shows:
• The remaining recording time in the selected folder may have reached [00:00].
• The number of files is 100.
Check if the display shows [FULL] by pressing the REC ( s ) button.
Q4: The playback speed is too fast (slow).
A4: The recorder may be set to fast (slow) Playback.
Specifications
Recording medium:
Built-in flash memory
Overall frequency:
HQ mode: 200 to 7,900 Hz
SP mode: 300 to 4,700 Hz
LP mode: 300 to 2,900 Hz
Recording time:
VN-6500/VN-6000: 1 GB
HQ mode: Approx. 40 h. 30 min.
SP mode: Approx. 107 h. 55 min.
LP mode: Approx. 604 h. 15 min.
VN-5500/VN-5000: 512 MB
HQ mode: Approx. 20 h. 5 min.
SP mode: Approx. 53 h. 40 min.
LP mode: Approx. 300 h. 30 min.
Microphone:
Electret Condenser Microphone (monaural)
Speaker:
Built-in ø 28 mm round dynamic speaker
Maximum power:
120 mW
Earphone jack (monaural):
ø 3.5 mm diameter, impedance 8 Ω
Microphone jack (monaural):
ø 3.5 mm diameter, impedance 2 kΩ
Power supply:
Two AAA (LR03) batteries or Two Ni-MH
rechargeable batteries
Continuous battery:
Alkaline batteries: Approx. 39 h.
Ni-MH rechargeable batteries: Approx. 22 h.
Dimensions:
102 (L) mm x 36 (W) mm x 20.5 (T) mm
(without protrusions)
Weight:
63 g (including battery)
• Battery life is measured by Olympus. It varies greatly according to the type of batteries used and the
conditions of use.
• Your recorded contents are for your personal use or pleasure only. It is prohibited to record copyrighted
material without permission of the copyright holders according to copyright law.
• Specifications and design are subject to change without notice for improvement of performance.
Accessories (Optional)
Ni-MH Rechargeable Battery Charger: BU-400 (Europe only)
Ni-MH Rechargeable Battery: BR401
Connecting cord (Earphone jack ↔ Microphone jack): KA333
Noise-Cancellation microphone:ME52
Electret condenser microphone: ME15
Telephone pickup: TP7
For customers in North and South America
USA RFI:
This equipment has been tested and found to comply with the limits for a Class B digital device,
pursuant to part 15 of the FCC Rules. These limits are designed to provide reasonable protection against harmful interference in a residential installation. This equipment generates, uses
and can radiate radio frequency energy and, if not installed and used in accordance with the
instructions, may cause harmful interference to radio communications. However, there is no
guarantee that interference will not occur in a particular installation. If this equipment does cause
harmful interference to radio or television reception, which can be determined by turning the
equipment off and on, the user is encouraged to try to correct the interference by one or more
of the following measures:
• Reorient or relocate the receiving antenna.
• Increase the separation between the equipment and receiver.
• Connect the equipment into an outlet on a circuit different from that to which the receiver is
connected.
• Consult the dealer or an experienced radio/TV technician for help.
Canadian RFI:
This digital apparatus does not exceed the Class B limits for radio noise emissions from digital
apparatus as set out in the Radio Interference Regulations of the Canadian Department of
Communications.
Cet appareil numérique ne dépasse pas les limites de Catégorie B pour les émissions de bruit radio
émanant d’appareils numériques, tel que prévu dans les Règlements sur l’Interférence Radio du
Département Canadien des Communications.
For customers in Europe
“CE” mark indicates that this product complies with the European requirements for
safety, health, environment and customer protection.
This symbol [crossed-out wheeled bin WEEE Annex IV] indicates separate collection
of waste electrical and electronic equipment in the EU countries. Please do not throw
the equipment into the domestic refuse. Please use the return and collection systems
available in your country for the disposal of this product.
Applicable Product : VN-6500, VN-6000, VN-5500, VN-5000
This symbol [crossed-out wheeled bin Directive 2006/66/EC Annex II] indicates separate
collection of waste batteries in the EU countries.
Please do not throw the batteries into the domestic refuse. Please use the return and
collection systems available in your country for the disposal of the waste batteries.
- 10 -