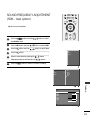
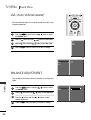
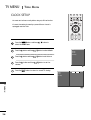
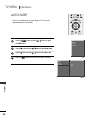
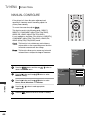
1
ENGLISH
DEUTSCH
FRANÇAIS
LCD TV MODELS PLASMA TV MODELS
37LC2R*
42LC2R*
P l e a s e r e a d I n f o r m a t i o n Ma n u a l i n c l u d e d
t o g e t h e r b e f o r e r e a d i n g t h i s m a n u a l a n d o p e r a ting your set.
Model number
Serial number
:
:
PORTUGUÊS
Retain it for future reference.
Record model number and serial number of the set.
See the label attached on the back cover and quote
this information to your dealer when you require service.
ESPAÑOL
42PC1R*
42PC3R*
50PC1R*
ITALIANO
LCD TV PLASMA TV
OWNER’S MANUAL
NEDERLANDS
∂ÏÏËÓÈο
P/NO: 38289U0025B (0603-REV00)
Printed in Korea
SOUND FREQUENCY ADJUSTMENT
(SSM - User option)
LIST
MENU
I/II
EXIT
SLEEP
Adjust the sound equalizer.
OK
Q.VIEW
VOL
1
Press the M E N U button and then D /
the SOUND menu.
2
Press the G button and then D /
E
button to select SSM.
3
Press the G button and then D /
E
button to select User.
4
Press the G button.
E
PR
MUTE
button to select
SSM
AVL
Balance
Speaker
5
Select a sound band by pressing the D /
E
Make appropriate sound level with the F /
6
button.
G
button.
Press the E X I T button to return to normal TV viewing.
1
SSM
G
AVL
Balance
Speaker
0
Surround MAX
Flat
Music
Movie
Sports
User
~
4
User
120Hz
200Hz
500Hz
1.2KHz
3KHz
7.5KHz
12KHz
F
TV MENU
2
G
5
51
TV MENU
Sound Menu
AVL (Auto Volume Leveler)
LIST
MENU
EXIT
I/II
SLEEP
AVL automatically keeps on an equal volume level even if you
change programmes.
OK
Q.VIEW
1
Press the M E N U button and then D /
the SOUND menu.
2
Press the G button and then D /
3
Press the G button and then D /
E
E
VOL
button to select
button to select AVL.
PR
SSM
AVL
E button to select On or Off.
Balance
Speaker
4
Press the E X I T button to return to normal TV viewing.
1
SSM
AVL
G
Balance
0
On
Off
Speaker
BALANCE ADJUSTMENT
2 3
You can adjust the sound balance of speaker to the levels you
prefer.
TV MENU
52
SSM
1
Press the M E N U button and then D /
the SOUND menu.
E
button to select
2
Press the G button and then D /
3
Press the G button and then F /
desired adjustment.
4
Press the E X I T button to return to normal TV viewing.
AVL
Balance
0G
L
R
2 3
Speaker
E button to select Balance.
G
button to make
2 3
2 3
SPEAKER
LIST
You can adjust the internal speaker status.
In AV1, AV2, AV2, AV3, AV4(Option), COMPONENT, RGB
and HDMI1/DVI with HDMI to DVI cable, TV speaker and/or
variable audio can be outputted even though there is no video
signal.
If you want to use your external hi-fi stereo system, turn off
the internal speakers of the set.
MENU
EXIT
I/II
SLEEP
OK
Q.VIEW
VOL
PR
MUTE
1
Press the M E N U button and then D /
the SOUND menu.
2
Press the G button and then D /
E
button to select
E button to select Speaker.
SSM
AVL
Balance
3
Press the G button and then D /
E
button to select
Speaker
On or Off.
4
Press the E X I T button to return to normal TV viewing.
1
SSM
AVL
Balance
Speaker
G
On
Off
TV MENU
2 3
53
TV MENU
Sound Menu
STEREO/DUAL RECEPTION
LIST
MENU
EXIT
When a programme is selected, the sound information for the
station appears after the programme number and station name
disappear.
DUAL I
DUAL II
DUAL I+II
Q.VIEW
VOL
TV MENU
54
A
Language selection for dual language broadcast
If a programme received two languages (dual language), you can
switch to DUAL I, DUAL II or DUAL I+II by pressing the I / I I
button repeatedly.
PR
MUTE
Broadcast
Mono
Stereo
Dual
Mono sound selection
If the stereo signal is weak in stereo reception, you can switch to
mono by pressing the I / I I button twice. In mono reception, the
depth of sound is improved. To switch back to stereo, press the
I / I I button twice again.
SLEEP
OK
Sends the primary broadcast language to the
loudspeakers.
Sends the secondary broadcast language to the
loudspeakers.
Sends a separate language to each loudspeaker.dark
areas of the picture. The lower the level, the softer the image.
A
I/II
On Screen Display
MONO
STEREO
DUAL I
NICAM RECEPTION
If the set is equipped with the receiver for NICAM reception, the high quality NICAM
(Near Instantaneous Companding Audio Multiplex) digital sound can be received.
Sound output can be selected according to the type of received broadcast as follows by pressing the I / I I button repeatedly.
When NICAM mono is received, you can select NICAM MONO or FM MONO.
When NICAM stereo is received, you can select NICAM STEREO or FM MONO.
If the stereo signal is weak, switch to FM mono.
When NICAM dual is received, you can select N I C A M DUAL I, NICAM DUAL II or
NICAM DUAL I+II or MONO.
SPEAKER SOUND OUTPUT SELECTION
In AV1, AV2, S-Video2, AV3, AV4(Option), Component, RGB, HDMI1/DVI or HDMI 2 mode, you
can select output sound for the left and right loudspeakers.
TV MENU
Repeatedly press the I / I I button to select the sound output.
L+R: Audio signal from audio L input is sent to the left loud speaker and audio signal from audio R
input is sent to the right loud speaker.
L+L: Audio signal from audio L input is sent to left and right loud speakers.
R+R: Audio signal from audio R input is sent to left and right loud speakers.
55
TV MENU
Time Menu
CLOCK SETUP
You must set the time correctly before using on/off time function.
LIST
I/II
MENU
EXIT
If current time setting is erased by a power failure or the set is
unplugged, reset the clock.
SLEEP
OK
Q.VIEW
VOL
PR
MUTE
Press the M E N U button and then D /
select the TIME menu.
Press the G button and then D /
E
E button
button to
Clock
to select Clock.
Off time
On time
Auto sleep
Press the G button and then D /
E button
Press the G button and then D /
minutes.
E
to set the hour.
button to set the
Press the E X I T button to return to normal TV viewing.
1
Clock
G
--
:
--
Off time
On time
Auto sleep
TV MENU
56
2 3
ON/OFF TIME
LIST
The Off time automatically switches the set to standby at the
preset time.
I/II
MENU
EXIT
SLEEP
OK
Two hours after the set is switched on by the on time function
it will automatically switch back to standby mode unless a
button has been pressed.
Q.VIEW
Once the on time/off time is set, these functions operate daily
at the preset time.
VOL
PR
MUTE
Off time function overrides On timer function if they are set
both to the same time.
1
2
3
The set must be in standby mode for the On timer to work.
Clock
Off time
Press the M E N U button and then D /
select the TIME menu.
Press the G button and then D /
Off time/On time.
E
E
On time
button to
Auto sleep
button to select
1
Press the G button and then D / E button to select On.
• To cancel On/Off timer function, select Off.
Clock
Off time
G
On time
--
Auto sleep
Press the G button and then D /
On
Off
:
--
E button to set the hour.
Press the G button and then D /
minutes.
E
button to set the
For only On timer function
• P r o g r a m m e: Press the G button and then D / E button to select the programme.
• V o l u m e: Press the G button and then D / E button to
adjust volume level at turn-on.
Clock
Off time
On time
Auto sleep
G
On
Off
18
Volume
Programme
:
TV MENU
2 3
00
30
0
Press the E X I T button to return to normal TV viewing.
4 5 6
57
TV MENU
Time Menu
AUTO SLEEP
LIST
If set to on and there is no input signal, the TV turns off
automatically after 10 minutes.
MENU
EXIT
I/II
SLEEP
OK
Q.VIEW
VOL
1
Press the M E N U button and then D /
E
button to select
PR
Clock
Off time
the TIME menu.
On time
Auto sleep
2
Press the G button and then D /
E button to select Auto sleep.
3
Press the G button and then D /
E button to select On or Off..
4
Press the E X I T button to return to normal TV viewing.
1
Clock
Off time
On time
Auto sleep
G
On
Off
2 3
TV MENU
58
SLEEP TIMER
You don’t have to remember to switch the set off before you go
to sleep.
LIST
MENU
EXIT
The sleep timer automatically switches the set to standby after
the preset time has elapsed.
I/II
SLEEP
OK
Q.VIEW
VOL
PR
MUTE
1
Press the S L E E P button repeatedly to select the number of minutes.
The display ‘ - - - ’ will appear on the screen, followed by
10, 20, 30, 60, 90, 120, 180 and 240.
- When the number of minutes you want is displayed on the screen,
the timer begins to count down from the number of minutes selected.
- To view the remaining sleep time, press the S L E E P button once.
- To cancel the sleep time, repeatedly press the S L E E P button until
the display ‘ - - - ’ appears.
- When you switch the set off, the set releases the preset sleep time.
------ Min
TV MENU
zz
59
TV MENU
Special Menu
CHILD LOCK
The TV can be set so that the remote control is needed to
control it.
This feature can be used to prevent unauthorized viewing.
This set is programmed to remember which option it was last
set to even if you turn the set off.
LIST
MENU
EXIT
I/II
SLEEP
OK
Q.VIEW
VOL
PR
MUTE
1
2
Press the M E N U button and then D /
the SPECIAL menu.
Press the G button and then D /
E
E
button to select
button to select
Language
Child lock.
Child lock
ISM Method
3
4
Low Power
Press the G button and then D /
On or Off.
E
button to select
Set ID
Demo
Press the E X I T button to return to normal TV viewing.
1
Language
Child lock
ISM Method
G
On
Off
Low Power
Set ID
Demo
TV MENU
2 3
! NOTE
- In C h i l d l o c k ‘O n’, if the set is turned off, press the r/I, I N P U T, P R D / E button on the set or P O W E R,
I N P U T, T V, P R + / - or NUMBER buttons on the remote control.
- With the C h i l d l o c k O n, the display ‘ Child lock on’ appears on the screen if any button on the
front panel is pressed while viewing the set.
60
ISM (Image Sticking Minimization)
METHOD (Option)
PIP PR-
A frozen of still picture from a PC/video game displayed on the
screen for prolonged periods will result in a ghost image remaining even when you change the image. Avoid allowing a fixed
image to remain on the set's screen for a long period of time.
PIP PR+
LIST
PIP INPUT
SWAP
MENU
EXIT
I/II
SLEEP
OK
It’s not available to use this function in LCD TV models.
White wash
White wash removes permanent images from the screen.
N o t e : An excessive permanent image may be impossible to
clear entirely with White Wash.
Q.VIEW
VOL
PR
Orbiter
Orbiter may help prevent ghost images. However, it is best
not to allow any fixed image to remain on the screen. To
avoid a permanent image on the screen, the screen will move
every 2 minutes.
Inversion
This is the function to invert the panel color of the screen.
The panel color is automatically inverted every 30 minutes.
Language
Child lock
ISM Method
Low Power
Set ID
1
Press the M E N U button and then D /
select the SPECIAL menu.
2
Press the G button and then D /
ISM Method.
E
E
button to
Demo
button to select
1
Language
3
Child lock
ISM Method
Low Power
Set ID
Demo
G
Normal
White wash
Orbiter
Inversion
TV MENU
4
Press the G button and then D / E button to select
either Normal, White wash, Orbiter or Inversion.
If you unnecessary to set this function, set Normal.
Press the E X I T button to return to normal TV viewing.
2 3
61
TV MENU
Special Menu
LOW POWER (Option)
LIST
MENU
I/II
EXIT
SLEEP
This is the function to reduce the power consumption of the set.
It’s not available to use this function in LCD TV models
OK
Q.VIEW
VOL
PR
Language
Child lock
1
Press the M E N U button and then D /
select the SPECIAL menu.
E
ISM Method
button to
Low Power
Set ID
Demo
2
Press the G button and then D /
E
button to select
E
button to select
Low power.
3
Press the G button and then D /
On or Off.
4
Press the E X I T button to return to normal TV viewing.
1
Language
Child lock
ISM Method
Low Power
G
Set ID
On
Off
Demo
X D DEMO
2 3
Use it to see the difference between XD Demo on and XD
Demo off.
It’s not available to use this function in RGB[PC], HDMI[PC]
mode.
Child lock
ISM Method
Low Power
TV MENU
Set ID
1
Press the M E N U button and then use D /
select the SPECIAL menu.
2
Press the G button and then use D /
XD Demo.
E
E
button to
3
Press the G button to begin XD Demo.
4
To stop XD Demo, press the M E N U button.
button on the set.
Demo
To start
G
button to select
* In ‘Child lock Off’, to stop ‘XD Demo’, press any
62
Language
2 3
• XD Demo
XD™ Off
XD™ On
Menu Exit
TV MENU
Screen Menu
AUTO CONFIGURE (RGB [PC] MODE ONLY)
Automatically adjusts picture position and minimizes image
shaking.
LIST
MENU
I/II
EXIT
Although the image is still not correct, your set is functioning
properly but needs further adjustment.
SLEEP
OK
The A u t o c o n f i g . functions don’t need to be run for HDMI
mode.
Auto configure
This function is for the automatic adjustment of the screen
position, clock, and phase. The displayed image will unstable
for a few seconds while the auto configuration is in progress.
Q.VIEW
VOL
PR
MUTE
Auto config.
Manual config.
XGA Mode
ARC
1
Press the M E N U button and then use D /
select the SCREEN menu.
2
Press the G button and then use D /
select Auto config..
E
PIP Transparency
E
button to
Reset
button to
1
Auto config.
Manual config.
3
Press the G button to start Auto config..
G
To Set
XGA Mode
ARC
PIP Transparency
4
Reset
2 3
TV MENU
• When Auto config. has finished, OK will be shown on
screen.
• If the position of the image is still not correct, try
Auto adjustment again.
If picture needs to be adjusted more after Auto
adjustment in RGB (PC), you can adjust the
Manual config. .
Press the E X I T button to return to normal TV viewing.
63
TV MENU
Screen Menu
MANUAL CONFIGURE
LIST
If the picture isn’t clear after auto adjustment and
especially if characters are still trembling, adjust the
picture phase manually.
MENU
I/II
EXIT
SLEEP
OK
To correct the screen size, adjust C l o c k.
This function works in the following mode : RGB[PC],
RGB[DTV], COMPONENT (480p/576p/720p/1080i),
HDMI1/DVI, HDMI2 (480p/576p/720p/1080i).
Q.VIEW
VOL
It’s not available to use Phase, Clock function in RGB[DTV],
COMPONENT (480p/576p/720p/1080i), HDMI1/DVI,
HDMI2 (480p/576p/720p/1080i) mode.
Clock
PR
MUTE
1
2
3
This function is to minimize any vertical bars or
stripes visible on the screen background. And the
horizontal screen size will also change.
Auto config.
Manual config.
P h a s e This function allows you to remove any horizontal
noise and clear or sharpen the image of characters.
XGA Mode
ARC
PIP Transparency
Reset
1
1
2
TV MENU
64
Press the M E N U button and then use D /
select the SCREEN menu.
Press the G button and then D /
Manual config..
E
E
button to
button to select
3
Press the G button and then D / E button to select
Phase, Clock, H-Position or V-Position.
4
Press the F /
adjustments.
5
Press the E X I T button to return to normal TV viewing.
G
button to make appropriate
Auto config.
Manual config.
Phase
0
XGA Mode
Clock
0
ARC
H-Position
0
PIP Transparency
V-Position
0
G
Reset
2 3 4
SETTING THE PICTURE FORMAT
ARC
VCR
PIP
SIZE
POSTION
PIP PR+
SWAP
PIP INPUT
TEXT
PIP PR-
You can watch the screen in various picture formats; S p e c t a c l e,
F u l l ( o p t i o n ), O r i g i n a l, 4 : 3, 1 6 : 9 (Wide), 1 4 : 9 and Z o o m 1
or Z o o m 2.
If a fixed image is displayed on the screen for a long time, that fixed
image may become imprinted on the screen and remain visible.
LIST
MENU
I/II
EXIT
SLEEP
There might be uncomfortable in full mode. Then change into other
mode.
You can adjust the enlarge proportion using D / E button.
OK
This function works in the following signal.
1
Press the M E N U button and then use D /
select the SCREEN menu.
2
Press the G button and then use D /
3
Press the G button and then use D / E button to select
Spectacle, Full(option), Original, 4:3, 16:9, 14:9,
E
E
button to
button to select ARC.
Auto config.
Manual config.
XGA Mode
Zoom1 or Zoom2.
ARC
PIP Transparency
• Spectacle
When your TV receives the wide screen signal, when
selected it will adjust the picture horizontally, in non-linear
proportion, to fill the entire screen.
• F u l l(option)
When your TV receives the wide screen signal, when
selected it will adjust the picture horizontally or vertically,
in a linear proportion, to fill the entire screen fully.
Reset
1
Auto config.
Manual config.
XGA Mode
• Original
When your TV receives the wide screen signal, it will be
automatically changed to the picture format to be sent.
• 1 6 : 9 (Wide)
Following selection will lead you to adjust the picture hor
izontally, in a linear proportion, to fill the entire screen
(useful for viewing 4:3 formatted DVDs).
PIP Transparency
Reset
G
Spectacle
Full
Original
4:3
16:9
14:9
Zoom1
Zoom2
2 3
TV MENU
• 4:3
Following selection will lead you to view a picture with an
original 4:3 aspect ratio, with bars appearing at both
the left and right sides.
ARC
• 14:9
You can enjoy the picture format of 14:9 or general TV
programme through the 14:9 mode. The screen 14:9 is viewed
just like that the screen 4:3 is magnified to the left / right.
65
TV MENU
Screen Menu
SETTING THE PICTURE FORMAT
• Zoom1
Following selection will lead you to view the picture without any
alternation, while filling the entire screen. However, the top and
bottom portions of the picture will be cropped.
• Zoom2
Choose Z o o m 2 when you want the picture to be altered,
both horizontally extended and vertically cropped. The pic
ture taking a halfway trade off between alteration and screen
coverage.
4
A
Press the E X I T button to return to normal TV viewing.
S c r o l l f u n c t i o n (Option)
Press the A R C button and then use
screen.
Spectacle
TV MENU
66
D
E
D
/
E
button to move
! NOTE
G
G
You can only select 4 : 3, 1 6 : 9
(Wide) in RGB[PC], HDMI[PC]
mode only.
You can only select 4 : 3, 1 6 : 9
(Wide) and Z o o m 1, Z o o m 2 in
RGB[DTV], HDMI1/DVI[DTV],
HDMI2[DTV], Component
mode only.
SELECTING WIDE VGA/XGA MODE
LIST
MENU
I/II
EXIT
SLEEP
To see a normal picture, match the resolution of RGB mode
and selection of VGA/XGA mode.
OK
This function works in the following mode: RGB[PC] mode
Q.VIEW
VOL
1
Press the M E N U button and then use D /
select the SCREEN menu.
E
PR
Auto config.
Manual config.
button to
XGA Mode
ARC
PIP Transparency
2
Press the G button and then use D /
XGA Mode (or VGA Mode).
E
button to select
3
Press the G button and then use D /
the desired VGA/XGA resolution.
E
button to select
4
Reset
1
Press the E X I T button to return to normal TV viewing.
Auto config.
Manual config.
XGA Mode
G
ARC
PIP Transparency
Reset
1024x768
1280x768
1360x768
1366x768
INITIALIZING (Reset to original factory settings)
2 3
This function operates in current mode.
To initialize the adjusted value
1
Press the M E N U button and then D /
the SCREEN menu.
E
button to select
XGA Mode
ARC
PIP Transparency
Reset
2
Press the G button and then D /
Reset.
3
Press the G button.
Ebutton
TV MENU
Auto config.
Manual config.
G
To set
to select
2 3
• You can initialize Auto config, Manual config, Position, PIP
size, PIP position, PIP Transparency.
67
APPENDIX
PROGRAMMING THE REMOTE
The remote is a multi-brand or a universal remote. It can be programmed to operate most remote-controllable devices of other manufacturers.
Note that the remote may not control all models of other brands.
Programming a code into a remote mode
APPENDIX
68
1
Test your remote control.
To find out whether your remote control can operate the component without programming, turn on the
component such as a VCR and press the corresponding mode button (such as a D V D or V C R) on the
remote control, while pointing at the component. Test the P O W E R and PR +/- buttons to see if the component responds properly. If not, the remote requires programming to operate the device.
2
Turn on the component to be programmed, then press the corresponding mode button (such as a D V D or
V C R) on the remote control. The remote control button of desired device is lighted.
3
Press the M E N U and M U T E buttons simultaneously, the remote control is ready to be programmed for the
code.
4
Enter a code number using the N U M B E R buttons on the remote control. Programming code numbers for
the corresponding component can be found on the following pages. Again, if the code is correct, the device
will turn off.
5
Press the M E N U button to store the code.
6
Test the remote control functions to see if the component responds properly. If not, repeat from step 2.
PROGRAMMING CODE
VCRs
Brand
AIWA
AKAI
Codes
Codes
Brand
MAGNAVOX
031
067
012
069
101
027
031
003
033
101
045
013
013
049
151
034
024
012
048
043
053
066
133
SAMSUNG
043 046 124
146
MARANTZ
033
023
037
031
103
039 043
129
033
MARTA
MATSUI
MEI
MEMOREX
040
033
007
108
116
135
041
010 064
110 111
117 119
MGA
MINOLTA
MITSUBISHI
023 039 043
053
017
031
037
131
008
025
034
046
138
009
033
109
136
012
018
063
033
033
013
066
063 072
144 147
031
050
150
034
048
012
106
027
035
101
153
010
045
026 034
137 150
015 033
101
033 043
055 060
152
039 043
MTC
MULTITECH
NEC
NORDMENDE
OPTONICA
PANASONIC
PENTAX
PHILCO
PHILIPS
PILOT
PIONEER
PORTLAND
PULSAR
QUARTZ
QUASAR
RCA
REALISTIC
013 020
114 123
009 013 014
034 101 106
RICO
RUNCO
SALORA
013
063
031
031
067
101
013
108
072
011
033
013
040
107
145
003
031
053
058
148
014
033 034 041
068
031 033 067
030
033
010
034
102
046
020
020
051
014 031
053 072
134 139
059
045 046
059 061
040
034
023 039 043
054
070 074 083
140 145
020 031 033
034 067
033 034 054
071 101
021 048
014
066
020
041
109
147
008
033
054
075
033
062
140
145
034
063
144
010 014
034 040
101
Codes
032
105
113
125
SANSUI
022
SANYO
003
102
SCOTT
017
131
SEARS
003
013
031
101
SHARP
031
SHINTOM
024
SONY
003
056
077
SOUNDESIGN
034
STS
013
SYLVANIA
031
067
SYMPHONIC
034
TANDY
010
TATUNG
039
TEAC
034
TECHNICS
031
TEKNIKA
019
101
THOMAS
034
TMK
006
TOSHIBA
008
059
TOTEVISION
040
UNITECH
040
VECTOR RESEARCH 012
VICTOR
048
VIDEO CONCEPTS 012
VIDEOSONIC
040
WARDS
003
031
053
YAMAHA
012
ZENITH
034
058
040 102 104
107 109 112
115 120 122
043 048 135
007 010 014
134
037 112 129
008 009 010
014 017 020
042 073 081
054 149
009 031 052
057 058 076
078 149
033 034 059
034
043
039 043
033 070
031 033 034
013 042 047
082 112 131
101
034 046
013
033
054
034
048
072
017
034
131
039
056
080
024
040
043
APPENDIX
034
016
125
AMPRO
072
ANAM
031
AUDIO DYNAMICS 012
BROKSONIC
035
CANON
028
CAPEHART
108
CRAIG
003
CURTIS MATHES 031
DAEWOO
005
065
112
DAYTRON
108
DBX
012
DYNATECH
034
ELECTROHOME 059
EMERSON
006
029
036
129
FISHER
003
FUNAI
034
GE
031
107
GO VIDEO
132
HARMAN KARDON
HITACHI
004
043
INSTANTREPLAY 031
JCL
031
JCPENNY
012
040
JENSEN
043
JVC
012
048
130
KENWOOD
014
047
LG (GOLDSTAR) 001
101
LLOYD
034
LXI
003
017
MAGIN
040
Brand
101
69
APPENDIX
PROGRAMMING CODE
DVD
Brand
Codes
APEX DIGITAL
022
DENON
020
GE
005
HARMAN KARDON
JVC
012
LG
001
MAGNAVOX
013
MARANTZ
024
APPENDIX
70
014
006
027
010 016 025
Brand
Codes
Brand
Codes
MITSUBISHI
NAD
ONKYO
PANASONIC
PHILIPS
PIONEER
PROCEED
PROSCAN
002
023
008
003
013
004
021
005
RCA
SAMSUNG
SONY
THOMPSON
TOSHIBA
YAMAHA
ZENITH
005
011
007
005
019
009
010
017
009
026
006
006
015
006
008
018
016 025
TROUBLESHOOTING CHECKLIST
The operation does not work normally.
Check to see if there is any object between the product and the remote control
causing obstruction.
■ Are batteries installed with correct polarity (+ to +, - to -)?
■ Correct remote operating mode set: TV, VCR etc.?
■ Install new batteries.
■
The remote control
doesn’t work
Is the sleep timer set?
Check the power control settings. Power interrupted
■ No broadcast on station tuned with Auto off activated.
■
Power is suddenly
turned off
■
The video function does not work.
Check whether the product is turned on.
Try another channel. The problem may be with the broadcast.
■ Is the power cord inserted into wall power outlet?
■ Check your antenna direction and/or location.
■ Test the wall power outlet, plug another product’s power cord into the outlet
where the product’s power cord was plugged in.
■
■
No picture &
No sound
P i c t u r e a p p e a r s s l o wly after switching on
■
This is normal, the image is muted during the product startup process. Please
contact your service center, if the picture has not appeared after five minutes.
Adjust Color in menu option.
■ Keep a sufficient distance between the product and the VCR.
■ Try another channel. The problem may be with the broadcast.
■ Are the video cables installed properly?
■ Activate any function to restore the brightness of the picture.
■
No or poor color
or poor picture
Horizontal/vertical
bars or picture shaking
■
Check for local interference such as an electrical appliance or power tool.
Station or cable product experiencing problems, tune to another station.
Station signal is weak, reorient antenna to receive weaker station.
■ Check for sources of possible interference.
■
Poor reception on
some channels
■
Check antenna (Change the direction of the antenna).
APPENDIX
Lines or streaks in
pictures
■
71
APPENDIX
TROUBLESHOOTING CHECKLIST
The audio function does not work.
Press the V O L + / - button.
■ Sound muted? Press M U T E button.
■ Try another channel. The problem may be with the broadcast.
■ Are the audio cables installed properly?
■
Picture OK &
No sound
No output from one
of the speakers
■
Adjust Balance in menu option.
■
A change in ambient humidity or temperature may result in an unusual noise
when the product is turned on or off and does not indicate a fault with the
product.
Unusual sound from
inside the product
There is a problem in PC mode. (Only PC mode applied)
The signal is out of
range.
Vertical bar or
s t r i p e o n b a c kground & Horizontal
Noise & Incorrect
position
Screen colour is
unstable or single
colour
APPENDIX
72
■
Adjust resolution, horizontal frequency, or vertical frequency.
■
Check the input source.
■
Work the Auto configure or adjust clock, phase, or H/V position.
Check the signal cable.
■ Reinstall the PC video card.
■
APPENDIX
MAINTENANCE
Early malfunctions can be prevented. Careful and regular cleaning can extend the amount of time you will
have your new TV. Be sure to turn the power off and unplug the power cord before you begin any cleaning.
Cleaning the Screen
1
Here’s a great way to keep the dust off your screen for a while. Wet a soft cloth in a mixture of lukewarm
water and a little fabric softener or dish washing detergent. Wring the cloth until it’s almost dry, and then
use it to wipe the screen.
2
Make sure the excess water is off the screen, and then let it air-dry before you turn on your TV.
Cleaning the Cabinet
■
■
To remove dirt or dust, wipe the cabinet with a soft, dry, lint-free cloth.
Please be sure not to use a wet cloth.
Extended Absence
CAUTION
If you expect to leave your TV dormant for a long time (such as a vacation), it’s a good idea to unplug
the power cord to protect against possible damage from lightning or power surges.
APPENDIX
73
APPENDIX
PRODUCT SPECIFICATIONS
MODELS
with stand
Dimensions
(Width x Height x Depth)
without stand
Weight
including stand
excluding stand
Power requirement
Television System
Program Coverage
External Antenna Impedance
Environment condition
42LC2R*
37LC2R-ZH
37LC2RA-ZH
37LC2RB-ZH
42LC2R-ZH
42LC2R*
42LC2RA-ZH
42LC2RB-ZH
42LC2R-ZH
944.0 x 729 x 286 mm
37.1 x 28.7 x 11.2 inches
1054 x 813 x286 mm
41.4 x 32x 11.2 inches
944.0 x 659.3 x 129.7 mm
37.1 x 26 x 5.1 inches
1054 x 746 x 136.8mm
41.4 x 29.3 x 5.3 inches
30.9 kg /68.1 lbs
35.5 kg/78.2 lbs
35.7kg/78.7 lbs
42.3kg/93.2 lbs
AC100-240V~ 50/60Hz
PAL/SECAM B/G/D/K, PAL I/II, SECAM L/L’
VHF: E2 ~ E12, UHF: E21 ~ E69, CATV: S1 ~ S20, HYPER: S21 ~ S47
75 Ω
Operating Temperature
Operating Humidity
Storage Temperature
Storage Humidity
APPENDIX
74
37LC2R*
0 ~ 40°C / 32 ~ 104°F
Less than 80%
-20 ~ 60°C / -4 ~ 140°F
Less than 85%
MODELS
with stand
Dimensions
(Width x Height x Depth)
without stand
Weight
including stand
excluding stand
Power requirement
Television System
Program Coverage
External Antenna Impedance
Environment condition
42PC3R*
50PC1R*
42PC1R-ZH
42PC3R-ZH
50PC1R-ZH
1129.0 x 748.5 x 380.0 mm
1129.0 x 748.5 x 333.6 mm
1302.6 x 872 x 355.8 mm
44.4 x 29.4 x 14.9 inches
44.4x 29.4 x 13.1inches
51.2 x 34.3 x 14 inches
1129.0 x 695.0 x 103.7 mm
1129.0 x 695.0 x 103.7 mm
1302.6 x 810x 107.7 mm
44.4 x 27.3 x 4 inches
44.4x 27.3 x 4 inches
51.2 x 31.8 x 4.2 inches
31.1 kg/68.6 lbs
36.9 kg/81.3 lbs
59.84kg/131.9 pounds
-
-
-
AC100-240V~ 50/60Hz
PAL/SECAM B/G/D/K, PAL I/II, SECAM L/L’
VHF: E2 ~ E12, UHF: E21 ~ E69, CATV: S1 ~ S20, HYPER: S21 ~ S47
75 Ω
Operating Temperature
Operating Humidity
Storage Temperature
Storage Humidity
■
42PC1R*
0 ~ 40°C / 32 ~ 104°F
Less than 80%
-20 ~ 60°C / -4 ~ 140°F
Less than 85%
The specifications shown above may be changed without prior notice for quality improvement.
APPENDIX
75