1
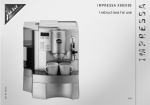
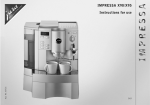
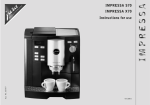
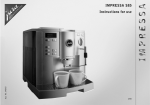
IMPRESSA S90/S95/S9
IMPRESSA X90/X95
IMPRESSA 601
Art. Nr. 61956
Instructions for use
12/2001
Jura Impressa S90/S95/S9 – X90/X95 – 601
English . . . . . . . . . . . . . . . . . . . . . . . . . . . . . . . . . . . . . . . . . . . . . . . . . . . . . . . . . . . . . . . . . . . . . . . . . . . . . . . . . . . . . . . . . . . . . . . . . . . . . . . . . . . . .
7 – 22
Legend:
DISPLAY: serves as information.
DISPLAY: please follow the instructions shown.
= Note
= Important
= Tip
Jura Elektroapparate AG, CH-4626 Niederbuchsiten,
Internet http://www.juraworld.com
Fig. 1
Fig. 2
Fig. 3
Fig. 4
Fig. 6
Fig. 7
Fig. 9
Fig. 10
Fig. 5
Fig. 8
A
2
1
3
B
12
13
14 15
16
11
17
10
9
8
7
6
5
4
18
20
C
F
B
G
A
H
21
22
23
1
E
19
3
2
D
Instructions for use
1
2
3
4
5
6
7
8
9
10
11
12
13
14
15
16
17
18
19
20
21
22
23
Drip tray / residual water container
Drip tray cover
Cover for programming keys
Coffee key for 2 large cups
Coffee key for 1 large cup
Coffee key for 2 small cups
Coffee key for 1 small cup
Key for special coffee
ON/OFF switch
Rinsing key
Display dialogue system
Water tank with carrying handle
Cover for bean container and aroma protection lid
Cover for pre-ground coffee filler funnel
Height-adjustable coffee-spout
Cup warming tray
Selector key for steam
Selector key for steam portion
Selector switch for coffee or hot water
Pivoting nozzle for hot water/steam
Auto-Cappuccino
Height-adjustable tea-spout
Container for coffee grounds
Programming keys
A
B
C
D
E
F
G
H
Change filter
Back-setting of criteria / changing of memory indications
downwards
Open program
Selector switch for pre-ground coffee
Key for cleaning program
Correction of program / close
Forward-setting of criteria / changing of memory indications
upwards
Key for decalcifying program
13.1
13.2
13.3
13.4
13.5
13.6
13.7
13.8
13.9
13.10
Table of contents
Jura Impressa
1. Description ......................................................page
2. Safety instructions ............................................page
2.1 Warnings ..................................................page
2.2 Safety precautions......................................page
3. Check before use ..............................................page
3.1 Checking mains voltage...............................page
3.2 Checking fuse............................................page
3.3 Adding coffee beans ...................................page
3.4 Adjusting grinder .......................................page
4. Preparing machine ............................................page
4.1 Fill system with water .................................page
4.2 Cup illumination (Impressa S9/601) ...............page
5. Rinsing the machine ..........................................page
6. Adjusting for water hardness ..............................page
7. Use of Claris filter cartridges..............................page
7.1 Placing filter .............................................page
7.2 Replacing of filter ......................................page
8. Drawing off coffee ............................................page
8.1 Drawing off powder coffee...........................page
9. Drawing off hot water........................................page
10. Drawing off steam Impressa S9...........................page
11. Frothing up milk with the Auto-Cappuccino ..........page
11.1 Frothing up a portion of milk ....................page
11.2 Constant frothing up of milk ....................page
11.3 Drawing off hot milk using
the Auto-Cappuccinatore S9......................page
11.4 Drawing off cappuccino using
the Auto-Cappuccinatore S9......................page
11.5 Controlling the temperature using
the Auto-Cappuccinatore S9......................page
11.6 Cleaning of the Auto-Cappuccinatore..........page
12. Switching off machine .......................................page
13. Programming ...................................................page
6
7
7
7
7
8
8
8
8
8
8
8
8
9
9
9
9
10
10
11
11
11
11
11
11
12
12
12
12
12
12
14.
15.
16.
17.
18.
19.
20.
21.
22.
Programming powder quantity...................page
Programming coffee temperature...............page
Programming water quantity .....................page
Programming steam portion ......................page
Programming tea portion ..........................page
Programming filter ..................................page
Programming water hardness ....................page
Programming economy mode.....................page
Programming timer clock .........................page
Programming automatic switch
on time..................................................page
13.11 Programming automatic switch
off time .................................................page
13.12 Cup counter ...........................................page
13.13 Programming language selection................page
13.14 Program key N .....................................page
Care and maintenance .......................................page
14.1 Fill water ...............................................page
14.2 Empty grounds container..........................page
14.3 Empty drip tray ......................................page
14.4 Fill beans ...............................................page
14.5 Removing foreign objects .........................page
14.6 Clean machine ........................................page
14.7 Unit calcified..........................................page
14.8 Cleaning metal contacts ...........................page
14.9 General cleaning instructions.....................page
14.10 Regular servicing.....................................page
14.11 Empty system .........................................page
Cleaning ..........................................................page
Decalcifying .....................................................page
Disposal...........................................................page
Tips for a perfect coffee ....................................page
Messages .........................................................page
Problems .........................................................page
Legal information..............................................page
Technical specifications .....................................page
13
13
13
13
13
14
14
14
14
15
15
15
15
15
15
15
16
16
16
16
16
16
16
17
17
17
17
17
19
19
20
21
22
22
Important information for the user
2. Safety instructions
Thank you for choosing this Jura product.
2.1 Warnings
Please study these instructions carefully before using your new
machine and keep them in a safe place for easy reference in the
future.
Should you require further information or should particular problems occur that are not dealt with in these operating instructions
in sufficient detail for you, then please ask your local dealer for
the information you require or contact Jura Elektroapparate AG
directly.
Children are unaware of the dangers that electrical machines represent. Therefore children should never be left unsupervised
around electrical machines.
This machine should only be used by people who have read and
understood the operating instructions.
Never use a faulty machine or one with a damaged power cable.
Never immerse the machine in water.
2.2 Safety precautions
1. Description
This fully-automatic espresso/coffee machine impresses because of
its user-friendly operational mode and its ingenious technology. In
just one brewing-process it can prepare 1 or 2 cups of excellent,
professional-quality espresso/coffee with guaranteed froth. Originating from professional sectors and having been refined and
further developed by Jura, the Intelligent Pre Brew Aroma System
(I.P.B.A.S „) ensures full coffee aroma.
The Auto-Cappuccino, for example, automatically takes charge of
frothing the milk perfectly for your cappuccino. It sucks milk from
a tetra-pack or a jug, heats and froths it up. Just choose the programmable steam quantity or the continuous steam function. Preparing a cup of tea with your machine is as simple as can be as
well. The water quantity can be programmed and you can put your
teacup under the coffee-spout. Now the selected water quantity
flows into your cup through a separate spout.
The machine works fully-automatically at the press of a key. A
decoded text-display shows messages and simplifies the operation
considerably. Because of the integrated rinsing, cleaning and
decalcifying programs care and maintenance is quick and easy.
Never expose the machine to the effects of rain, snow or frost
and never operate it with wet hands.
Place your machine on a solid level surface. Never leave it on a
surface that is warm or hot (hob etc.). Choose a location that is
inaccessible for children or pets.
Remove plug from power socket if an absence for a longer
period of time (holidays etc.) is planned.
Always remove plug from power socket before cleaning.
When removing plug from power socket, never tug on the cord
or on the machine itself.
Never repair or open the machine yourself. All repairs should be
performed by authorised service centres only using original Jura
spare parts and accessories.
The machine is connected to the mains power socket via an
electric cable. Ensure that no-one trips over this cable and pulls
down the machine. Keep children and animals at a distance to
the machine.
Never put the machine or even parts of it in the dishwasher.
To prevent overheating place the machine in an airy place.
7
E
If using acidic decalcifying agents be sure to immediately remove any splashes and drops from delicate surfaces, especially
natural stone and wooden surfaces, or take corresponding precautions.
3. Check before use
3.1 Checking mains voltage
The machine is set for the correct voltage before leaving our
factory. Ensure that your mains voltage corresponds to the details
quoted on the rating plate attached to the bottom of the machine.
3.2 Checking fuse
The machine is designed for a current of 10 amps. Check that an
appropriate fuse is fitted.
3.3 Adding coffee beans
Lift up cover of the bean container (13) and remove aroma protection lid.
Clean out any dirt or foreign object from the bean container.
Fill the grinder container with coffee beans, replace aroma protection lid and close the cover.
3.4 Adjusting grinder
You can adjust the grinder to the roast of your coffee. We recommend the following:
for a light roast a finer adjustment
for a dark roast a coarser adjustment
Open the cover of the bean container (13).
To adjust grinding turn selector switch (Fig. 1) to the desired
position.
8
You have the following possibilities:
the smaller the dots, the finer the grinding
the bigger the dots, the coarser the grinding
The grinding grade should only be adjusted while the grinder
is working.
4. Preparing machine
4.1 Fill system with water
Switch your machine on by pressing ON/OFF key
. The
machine adjusts fully-automatically to the starting position.
PLEASE WAIT
FILL SYSTEM / PRESS STEAM
Press key .
FILL WATER
Remove water tank and rinse well with clear tap-water.
Fill water tank and replace. Make sure that tank engages well.
FILL SYSTEM / PRESS STEAM
Place a container under the pivoting nozzle (20) and press key
.
PLEASE WAIT
RINSE UNIT
Place a container under the coffee-spout (15) and press rinsing
key
.
UNIT RINSING
COFFEE READY
4.2 Cup illumination (Impressa S9/601)
The cup illumination puts your coffee in a good light, making it a
treat for the eyes.
When you switch on the machine or press any key, the cup illumination is activated for 3 minutes. To switch on the cup illumination, with the machine switched off, press any key.
HARDNESS
LEVEL 3:
HARDNESS
LEVEL 4:
German water hardness 16 – 23°
French water hardness 28.64 – 41.14°
German water hardness 24 – 30°
French water hardness 42.96 – 53.7°
5. Rinsing the machine
RINSE UNIT
Place an empty cup under the coffee-spout (15).
Press rinsing key
.
If the machine has been switched off and has already cooled
down it will be necessary to carry out this rinsing function
when the machine is switched on again.
After switching off the machine, the rinsing sets off automatically.
6. Adjusting for water hardness
The water is heated inside the machine. With use, this leads to
calcium deposits (furring) forming on the machine. This will be
automatically indicated on the display.
For this reason, it is necessary to adjust the machine to the
hardness of your local water before you use it for the first time.
Use the enclosed test-sticks for this purpose.
1° water hardness on the German scale represents 1.79° on
the French scale.
The machine has got 5 hardness settings to choose from. While
adjusting, the chosen grade is shown on the display.
The symbols on the display mean:
HARDNESS
LEVEL—:
water hardness function is switched off
HARDNESS
German water hardness 1 – 7°
LEVEL 1:
French water hardness 1.79 – 12.53°
HARDNESS
German water hardness 8 – 15°
LEVEL 2:
French water hardness 14.32 – 26.85°
The machine is adjusted to hardness level 3 before it leaves the
factory. You can alter this setting by following the instructions
below:
Switch the machine on by pressing ON/OFF key
. The
machine adjusts fully-automatically to the starting position.
PLEASE WAIT
Open cover (3) and press key P , until you hear an acoustic signal.
PRESS KEY / POWDER QUANTITY
Press key + several times until the following message appears:
HARDNESS LEVEL 3
By pressing key P you can hear an acoustic signal, the set
hardness level flashes.
You can alter the hardness level by pressing key - or + . After
setting, press key P once again to confirm. An
acoustic signal can be heard.
Press key N to return to stand-by-status.
7. Use of Claris filter cartridges
Under proper implementation of Claris filter cartridges,
decalcifying of the machine becomes unnecessary. For
further information, please read the brochure “Claris. Tough
to calcium deposits, gentle to your coffee machine“.
7.1 Placing filter
Pull up cartridge mounting. Pressing lightly, place the filter cartridge in the water tank (Fig. 2).
9
E
Pull down cartridge mounting, until it engages audibly.
Fill water tank with cold, fresh tap-water and replace it.
Switch the machine on by pressing key
ON/OFF.
P
Open front cover (3) and press key
until you hear an acoustic
signal.
PRESS KEY / POWDER QUANTITY
Press key + several times until the following message appears:
FILTER NO
By pressing key P you can hear an acoustic signal.
NO flashes
You can alter the setting by pressing key - or + .
YES flashes
To confirm press key P . An acoustic signal can be heard.
RINSE FILTER / PRESS STEAM
Place a sufficiently large container (approx. 1 litre) under the
pivoting nozzle (20) and press coffee key .
PLEASE WAIT / FILTER RINSING. The drawing
off of water will stop automatically.
FILTER YES
Press key N .
COFFEE READY
The water might be slightly discoloured (this is not damaging to the health).
7.2 Replacing of filter
After drawing off 50 litres the filter loses its effect.
REPLACE FILTER
If only a little water is drawn off the filter should be changed every
2 months. However no message will appear on the display. You
will find a special turntable on the cartridge mounting to set the
replacement date.
10
Empty water tank and pull up cartridge mounting. Pressing
lightly, place the filter cartridge in the water tank (Fig. 2).
Pull down cartridge mounting, until it engages audibly.
Fill water tank with cold, fresh tap-water and replace it.
Switch the machine on by pressing key ON/OFF
.
Open front cover (3) and press key , until you hear an acoustic
signal.
RINSE FILTER / PRESS STEAM
Place a sufficiently large container (approx. 1 litre) under the
pivoting nozzle (20) and press coffee key .
PLEASE WAIT / FILTER RINSING
COFFEE READY
The water might be slightly discoloured (this is not damaging to the health).
8. Drawing off coffee
Switch the machine on by pressing key ON/OFF
.
PLEASE WAIT
RINSE UNIT
Put an empty cup under the coffee-spout (15) and press rinsing
key
.
UNIT RINSING
COFFEE READY
Put 1, respectively 2 cups under the coffee-spout and press the
required key. The pre-brew system (I.P.B.A.S.©) moistens the
coffee powder, briefly interrupts the flow and then starts the real
brewing process.
You can interrupt the flow of coffee at any time by simply
pressing any of the coffee keys.
To obtain a perfect layer of froth adjust the coffee-spout (15)
to the size of your cups.
8.1 Drawing off powder coffee
Open cover (3)
Press selector key for pre-ground powder coffee
.
FILL POWDER
Now put 1 or 2 level measuring spoons of pre-ground coffee into
the pre-ground powder funnel (14).
Put 1, respectively 2 cups under the coffee-spout (15) and press
the required key.
Never use soluble instant coffee or quick coffee. Only use
coffee powder from freshly ground beans or pre-ground
vacuum-packed coffee. Never fill the funnel with more
than 2 portions coffee powder at a time. The powder funnel is not intended as a storage container.
If selector key
is pressed by mistake this can be corrected by pressing one of the coffee keys. The rinsing program is then activated.
9. Drawing off hot water
Put a cup under the height-adjustable coffee spout (22) and turn
selector switch for hot water (19) to the symbol . The machine
will now deliver hot water.
TEA PORTION
The drawing off of hot water will stop automatically.
CLOSE TAP
Turn selector switch for hot water back to the symbol
.
To stop this process turn selector switch for hot water (19)
back to the symbol
.
10. Drawing off steam Impressa S9
Steam can be used for heating liquids. Make sure that the
steam/frothing nozzle is pushed upwards when liquids are
heated. Push down the frothing aid to froth liquids.
11. Frothing up milk with the Auto-Cappuccino
Your machine is ready for frothing up milk as soon as both selector key warning lamps
and glow constantly. If the lamps do
not glow, then press either steam-key
.
11.1 Frothing up a portion of milk
Pour milk into a jug and immerse the intake-tube in the milk.
Put a cup under the pivoting nozzle (20) and press key .
STEAM PORTION
The drawing off of steam will stop automatically
COFFEE READY
E
If the Auto-Cappuccino has not been used for a longer period
of time, press selector key
first, until the milk is taken in,
then selector key
. In this way you will obtain a regular
steam portion.
11.2 Constant frothing up of milk
Pour milk into a jug and immerse the intake-tube in the milk.
Put a cup under the pivoting nozzle (20) and press key . Your
milk froths up.
STEAM INTAKE
When the required amount of froth has been attained push selector key
anew.
COFFEE READY
11
With the flow-adjustment you can set the optimum frothing.
Turn the handle slightly to the right or to the left until you
obtain the required result.
11.3 Drawing off hot milk using
the Auto-Cappuccinatore S9
12. Switching off machine
The Auto-Cappuccinatore of the S9 can be used to draw off hot
milk. Adjust the selector lever (1) (Fig. 10) to position (3) to draw
off hot milk.
Install the Auto-Cappuccino. This is included in your
Welcome Pack.
11.4 Drawing off cappuccino using
the Auto-Cappuccintore S9
The Auto-Cappuccinatore of the S9 can be used to draw off capuccino. Adjust the selector lever (1) (Fig. 10) to position (2) to draw
off capuccino.
11.5 Controlling the temperature using
the Auto-Cappuccinatore S9
-
Adjust the selector lever (1) to + for hot milk/cappuccino or for
less hot milk/cappuccino. Individual fine adjustment is possible.
11.6 Cleaning the Auto-Cappuccinatore
Remove Auto-Cappuccinatore (21). If you do not achieve
optimum results, disassemble the flow controller and the
selector lever (Fig. 10 for S9). Thoroughly rinse these parts
with water.
As soon as you have frothed enough milk, it is important to clean
the Auto-Cappuccino.
12
Fill water in a jug and immerse the intake-tube in the water. Now
draw off steam until the water/steam mixture flowing into your cup
is completely clean. Your Auto-Cappuccino is clean again.
When the machine is switched off, the rinsing program is automatically run again. Therefore place an empty container under
the coffee-spout (15) and press ON/OFF key
. When the rinsing
water has run into the container, the machine powers down. Discard the water.
13. Programming
Before leaving our factory, the machine is adjusted to enable you
to obtain coffee without any additional programming. In order to
adapt the result to your personal taste, various settings can be programmed individually. The programming keys are located behind
the front cover (3).
The following settings can be programmed:
Powder quantity
Coffee temperature
Water quantity
Steam portion
Tea portion
Filter
Water hardness
Economy mode
Timer clock
Automatic switch on time
Automatic switch off time
Supplies and cup counter
Language selection
13.1 Programming powder quantity
Switch the machine on by pressing ON/OFF key
.
Press key P until you can hear an acoustic signal.
POWDER QUANTITY / SELECT KEY
Now press the key that you want to programme. Use the key for
1 cup only. The corresponding quantity for 2 cups is adjusted
automatically by the machine after programming is finished.
POWDER
- ·········· II ·········· +
The powder quantity can be selected by pressing keys + or briefly.
To store the new powder quantity in memory briefly press key P .
POWDER QUANTITY / SELECT KEY.
By pressing the + button, you can select the next phase, or
press the N button in order to leave the programming.
13.2 Programming coffee temperature
TEMPERATURE COFFEE / SELECT KEY
Now press the key that you want to programme.
Select the required temperature (high or normal) by activating
key + or - .
To store the new coffee temperature in memory briefly press key
P .
TEMPERATURE COFFEE / SELECT KEY
By pressing the + button, you can select the next phase, or
press the N button in order to leave the programming.
13.3 Programming water quantity
WATER QUANTITY / SELECT KEY
Put a cup under the coffee-spout (15) and then press the key that
you want to programme.
The selected value is confirmed
Now your machine prepares a coffee.
ENOUGH COFFEE? / PRESS KEY P
OK? P - ·········· II ·········· +
When the required water quantity is reached press key P . You
can call up the next setting by pressing key + .
There is an additional possibility to alter the water quantity
anew. Press key + or - for this purpose.
If you wish to draw another coffee to control the water quantity,
press key again otherwise press key P briefly to store water
quantity in memory.
By pressing the + button, you can select the next phase, or
press the N button in order to leave the programming.
13.4 Programming steam portion
STEAM PORTION
P
Press key
.
PORTION /....20 SEC.
By pressing key + or - you can programme time in seconds
(drawing off time of 3 – 250 sec.)
Press key P .
STEAM PORTION
By pressing the + button, you can select the next phase, or
press the N button in order to leave the programming.
13.5 Programming tea portion
Place a cup under the height-adjustable tea-spout (22).
Press key P .
OPEN TAP
ENOUGH TEA? / CLOSE TAP
TEA PORTION
13
E
The required portion of tea-water is programmed now.
By pressing the + button, you can select the next phase, or
press the N button in order to leave the programming.
13.6 Programming Filter
Please read chapter 7.1 “Placing filter“.
13.7 Programming water hardness
(only with setting Filter no)
HARDNESS LEVEL 3
Press key P
By pressing key + or - briefly you can programme the water
hardness level.
Then press key P briefly to store the water hardness level in
memory.
By pressing the + button, you can select the next phase, or
press the N button in order to leave the programming.
To determine the water hardness level please read chapter 6.
“Adjusting for water hardness“.
13.8 Programming economy mode
ECONOMY MODE OFF
Press key P
By briefly pressing key + or - you can programme the mode
you would like.
Then press key P briefly to store mode in memory
By pressing the + button, you can select the next phase, or
press the N button in order to leave the programming.
14
You can programme your machine to “economy mode“. In the setting ECONOMY MODE ON the steam heating-system is switched
off. The heating for the cup warming tray is switched off too. If
you want to draw off steam you need to press the steam key ,
warning lamps flash and your machine heats up.
After 10 minutes the steam heating-system switches off
automatically. The warning lamps go out. By pressing the
steam key anew, you return to stand-by-status for drawing
off steam.
ECONOMY MODE OFF means that the stand-by-status for steam
is set to 20 minutes and the heating for the cup warming tray is on.
After 10 minutes the warning lamp goes out. By pressing the steam
key anew, the machine returns to stand-by-status for drawing off
steam.
13.9 Programming timer clock
A programming of the timer clock is necessary if an automatic switch on time is required.
TIME —.—
P
Press key
.
By briefly pressing key + or - you can set the hours and then
confirm by pressing key P .
By briefly pressing key + or - you can set the minutes and
then confirm by pressing key P .
By pressing the + button, you can select the next phase, or
press the N button in order to leave the programming.
13.10 Programming automatic switch on time
A programming of the timer clock is necessary if an automatic
switch on is needed.
UNIT ON —.—
Press key P .
By briefly pressing key + or - you can set the hours and then
confirm by pressing key P .
By briefly pressing key + or - you can set the minutes and
then confirm by pressing key P .
By pressing the + button, you can select the next phase, or
press the N button in order to leave the programming.
To switch off the automatic timer proceed as follows:
Press key P
Press key N
UNIT ON —:—
13.11 Programming automatic switch off time
OFF AFTER 5.0 HOURS
P
Press key
By briefly pressing key + or - you can set the hours and then
confirm by pressing key P (0.5 to 9.0 hours).
By pressing the + button, you can select the next phase, or
press the N button in order to leave the programming.
13.12 Cup counter
200 SUPPLIED (TOTAL SUPPLIED)
To obtain the information press the required key. The display
will show you the number of times the function has been chosen.
By pressing the + button, you can select the next phase, or
press the N button in order to leave the programming.
It is not possible to call up hot water and steam supplies.
13.13 Programming language selection
Press key P
By briefly pressing key + or - call up the language desired
and then confirm by pressing key P .
By pressing the + button, you can select the next phase, or
press the N button in order to leave the programming.
13.14 Program key
N
By using key N you can set back the following settings (powder
quantity, coffee temperature, water quantity, steam portion, tea
portion) to their original standard settings.
COFFEE READY
Press key N until you can hear an acoustic signal.
If a mistake occurs while programming one of the above
settings, just press key N and the chosen setting moves back
to its original standard setting.
14. Care and maintenance
14.1 Fill water
FILL WATER
If this message shows on the display no more coffee can be
drawn off. Top up water.
The water tank should be rinsed and filled with fresh water
daily. Only use fresh, cold water. Never top up with milk,
mineral water or any other liquids. You can top up water
without removing tank.
15
E
14.2 Empty grounds container
Coffee grounds are collected in the grounds container.
EMPTY GROUNDS
If this message shows on the display no more coffee can be
drawn off. It is necessary to empty the grounds container.
Remove drip tray carefully as there is water in it.
Do not disconnect the machine from power socket while
you empty grounds.
Remove any remaining beans with a vacuum cleaner.
Put the spanner on (Fig.7).
Now turn spanner anticlockwise until the foreign object loosens.
Remove remaining powder with a vacuum cleaner.
Replace bean container and fasten screws.
14.6 Clean machine
EMPTY TRAY
If this message shows on the display no more coffee can be
drawn off. It is necessary to empty the drip tray.
Remove drip tray carefully as there is water in it.
CLEAN UNIT
After coffee, etc., has been drawn off 220 times or after 180 rinsing
programs have been run, the machine must be cleaned. You can
continue to draw off coffee and hot water / steam. However we
recommend that you clean the machine (as described in chapter 14)
within the next few days.
CLEAN NOW
An acoustic signal indicates the need of an immediate cleaning.
14.4 Fill beans
14.7 Unit calcified
FILL BEANS
Fill beans as described in chapter 3.3.
14.3 Empty drip tray
The message FILL BEANS will only disappear after drawing
off a coffee. We recommend cleaning the bean container
from time to time with a dry cloth before you refill beans.
Switch off the machine for this purpose.
UNIT CALCED
The machine signals when decalcifying becomes necessary.
Under the correct implementation of Claris filter cartridges,
decalcifying of the machine becomes unnecessary. For
further indications read Chapter 7 “Use of Claris filter cartridges“.
14.5 Removing foreign objects
14.8 Cleaning metal contacts
Switch off your machine by pressing ON/OFF key
.
Remove plug from power socket.
Open bean container (13) and remove the beans. The remaining
beans can be removed with a vacuum cleaner.
Loosen both screws in the bean container and then remove
container (Fig.5 + 6)
EMPTY TRAY / CLEAN CONTACTS
The remnants of the calcified deposits in the area of the metal
contacts must be removed. Proceed as follows:
Rinse fastenings in groove (B) as well as the metal contacts (A)
with hot water and some washing-up liquid. Then clean the
fastenings in groove (B) as well with a brush (Fig. 8).
16
14.9 General cleaning instructions
15. Cleaning
Never use abrasive articles or corrosive chemicals to clean your
machine.
Wipe down the casing inside and out using a soft, damp cloth.
Clean the pivoting nozzle after every use.
After warming milk, draw off some hot water to clean the
pivoting nozzle inside.
You can take off the Auto-cappuccino for a thorough cleaning.
The water tank should be rinsed and filled with clean water
daily.
The machine has an integrated cleaning program. The procedure
lasts about 15 minutes.
Please use Jura cleaning tablets only. These are available from your
Jura dealer.
If you notice any furring in the water tank, this can be decalcified separately with a customary decalcifying agent.
Remove the tank from the machine for this purpose.
If a Claris filter cartridge is used, remove it beforehand.
14.10 Regular servicing
Regular Jura services ensure your machine‘s reliability and longer
life. Keep the original packaging to protect the machine while
being transported.
14.11 Empty system
This procedure is necessary to prevent your machine from
frost damage while being transported.
Put a container under the pivoting nozzle (20).
Press selector key
and remove water tank
STEAM INTAKE
PRESS STEAM / FILL SYSTEM
Switch off machine by pressing ON/OFF key
It is essential not to interrupt the process once it has been
started.
Switch on your machine by pressing ON/OFF
key
Press key
until you can hear an acoustic signal.
EMPTY TRAY (FILL WATER might show as well)
Put a sufficiently large container under the coffee-spout (15)
in order to prevent cleaning liquid from running into the drip
tray.
ADD TABLET (Fig. 9) / PRESS CLEANING
UNIT CLEANING / PLEASE WAIT
EMPTY TRAY
PLEASE WAIT
RINSE UNIT
COFFEE READY
The powder funnel for pre-ground coffee should be cleaned
after each cleaning process. Remove it from the machine,
rinse it with hot tap water and replace it after drying.
16. Decalcifying
Your machine has an integrated decalcifying program. It lasts
approx. 50 minutes.
Please use Jura decalcifying tablets only. These are available from
your Jura dealer.
.
17
E
Run the decalcifying program only after the machine has
been switched off for at least 5 hours and has cooled down
completely. The running decalcifying program must not be
interrupted.
If using acidic decalcifying agents be sure to immediately remove any splashes and drops from delicate surfaces, especially natural stone and wooden surfaces, or take corresponding precautions.
In any case please wait until the filled decalcifying agent is
used up and the tank is empty. Never top up the decalcifying
agent.
Remove and empty water tank.
Replace empty water tank.
Switch off your machine by pressing ON/OFF
key and let it
cool down for approx. 5 hours.
Open cover (3).
Press key until you can hear an acoustic signal.
EMPTY TRAY
AGENT IN TANK
Pour 0.6 litres of water into a container and completely dissolve the contents of a blister pack (2 tablets). Then fill the
mixture into the water tank.
AGENT IN TANK / OPEN TAP / PRESS CALC
Place a sufficiently large container under the pivoting nozzle
(20). Remove the Auto-Cappuccino.
Turn selector switch for coffee (19) to the symbol
and press
key .
UNIT DECALCIFYING / PLEASE WAIT
When an acoustic signal is heard place a container under the
height-adjustable tea-spout (22).
18
PRESS CALC
UNIT DECALCIFYING / PLEASE WAIT
CLOSE TAP
UNIT DECALCIFYING / PLEASE WAIT
Inside the machine the decalcifying agent is conducted to the
drip tray.
EMPTY TRAY
FILL WATER
Place a container under the pivoting nozzle (20).
OPEN TAP
PRESS CALC
UNIT DECALCIFIYING / PLEASE WAIT
Place a container under the height-adjustable tea-spout (22).
PRESS CALC
UNIT DECALCIFIYING / PLEASE WAIT
CLOSE TAP
UNIT DECALCIFIYING / PLEASE WAIT
Inside the machine the water is conducted to the drip tray.
CLEAN CONTACTS / EMPTY TRAY
(please refer to chapter 13.8)
PLEASE WAIT
RINSE UNIT
UNIT RINSING
COFFEE READY
17. Disposal
For correct disposal, you should return your coffee machine to your
dealer, Jura service centre or Jura Elektroapparate AG.
18. Tips for a perfect coffee
Height adjustable coffee-spout
You can adjust the height of the coffee-spout to the size of your
cups.
Grinding
Please refer to chapter 3.4 “Adjusting grinder“.
Pre-warm cups
You should warm cups in advance with hot water or steam. The
smaller the quantity of coffee, the more important warming the
cups is.
Sugar and cream
Warmth is lost by stirring the contents of the cup. Adding milk or
cream from the refrigerator considerably lowers the temperature of
the coffee.
E
19
19. Messages
Cause
Action
FILL WATER
Water tank is empty
Water level indicator in tank is jammed
Tank is calcified, water level indicator is stuck
Top up with water
Empty tank, rinse out, fill up and replace
Remove tank, decalcify, rinse well, fill up with water
and replace
FILL BEANS
Bean container is empty
Message still displayed, although beans filled
Top up with beans
Draw off cup of coffee. FILL BEANS message only
disappears after coffee is drawn off
Remove foreign object as described in chapter 13.5
“Removing foreign objects“
A foreign object is stuck in the grinder
EMPTY GROUNDS
Coffee grounds container is full
Message still displayed although grounds
container emptied.
The message appears after only a few cups have
been drawn off
Remove drip tray, empty grounds container, replace
tray
The tray was out of the machine for less than 8 sec
for emptying. Take tray out again for approx. 10 sec
and replace
Leave the machine switched on while the grounds
container is being emptied. The counter is only reset
to zero if the machine is left switched on
TRAY MISSING
Tray has not been replaced correctly
Grounds have fallen under tray and are preventing
it from being correctly inserted
Insert tray correctly
Remove tray, clean inside of machine, replace tray
EMPTY TRAY
The residual water container is full
Remove container carefully, empty, rinse out and
replace
Remove container, clean metal contacts
(please refer to chapter 13.8)
Message still displayed, although container
emptied
20
Cause
Action
You have drawn off coffee 220 times or run
the rinsing program 180 times
Message still displayed, although machine
cleaned
Clean as described in chapter 14
Run cleaning program again; this time do not
add cleaning tablet
UNIT CALCED
The espresso/coffee machine sector needs
decalcifying
Message still displayed, although machine
decalcified
Run decalcifying program as described in
chapter 15
Run cleaning program again; this time using water
only and without decalcifying agent
FAULT 2
Temperature too low
– Switch device off
– Leave device for approx. 2 hours at room
temperature
– Switch device on
FAULT 8
Initialisation problem
Switch device off, disconnect from mains,
switch on
Cause
Action
CLEAN UNIT
E
20. Problems
Problem
Coffee only flows in dribs
– Powder too fine
and drabs while drawing off
– Adjust grinder to a coarser grinding
– Run the rinsing programme once or twice.
– If the problem persists, run cleaning programme
Coffee flow is stopped
after pre-brewing
– Not enough coffee powder in the system
– Draw off one cup of coffee
Grinder is extremely noisy
– Foreign element in grinder
– Proceed as described in chapter 13.5
21
Problem
Cause
Action
Not enough froth while
frothing up milk
– Unsuitable milk-type
– Frothing nozzle blocked
– Clean Auto-Cappuccino
–
–
–
–
Use full cream milk
Clean frothing nozzle
Clean Auto-Cappuccino as described in chapter
10.3
If the above mentioned problems and/or messages still persist, please contact your dealer or get in touch directly with Jura Elektroapparate
AG.
21. Legal information
22. Technical specifications
These operating instructions contain all the information necessary
for the correct use, operation and maintenance of your espresso/
coffee machine.
Understanding and complying with the directions contained in
these operating instructions are essential to ensure that the machine
is utilised without risk and to ensure safety during operation and
maintenance.
These operating instructions cannot cover all the possible ways in
which this machine may be used. This machine has been designed
for private use in households.
We would like to further point out that the contents of these operating instructions in no way constitute a part of, or alter, any previous or existing contract, agreement or legal relationship. All obligations on the part of Jura Elektroapparate AG result solely from
the relevant sales agreement which also contains full details of
the only warranty terms valid in respect of this machine. The contractual terms of this warranty are neither extended nor limited in
any form by the information in these operating instructions.
These operating instructions contain information that is protected
by copyright. The photocopying or translation into any other
language of these instructions without prior written authorisation
from Jura Elektroapparate AG is strictly prohibited.
Impressa S90/S95/S9
Voltage:
Output:
Fuse:
Safety check:
Energy consumption standby:
Energy consumption ready to
make coffee:
22
230 V AC
1350 W
10 A
approx. 4,4 Wh
Pump pressure:
Water tank:
Capacity, bean container:
Capacity, grounds container:
Cable length:
Weight:
Dimensions (B x H x D):
approx. 31 Wh, Economy Mode on
approx. 41 Wh, Economy Mode off
max. 15 bar
2,7 litres
280 gr.
max. 16 port.
approx. 1,1 m
11,7 kg
34,5 x 35 x 39 cm
Impressa X90/X95
Water tank:
Capacity, grounds container:
Weight:
Dimensions (B x H x D):
5,7 litres
max. 40 port.
15 kg
41 x 47 x 39 cm