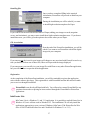
1
Model FB750
ImageReader PowerScan
User’s Guide
Version 980605
Info Peripherals 1998
1
Trademarks
Microsoft is a U.S. registered trademark of Microsoft Corporation.
Windows and MS-DOS are trademarks of Microsoft Corporation.
IBM, PC, AT, XT are registered trademarks of International Business Machines Corp.
Other brands and product names herein are trademarks or registered trademarks of their respective holders.
Copyright
All rights reserved. No part of this publication may be reproduced, transmitted, transcribed, stored in a retrieval
system, or translated into any language or computer language, in any form or by any means, electronic, mechanical,
magnetic, optical, chemical, manual, or otherwise, without the prior written permission of Info Peripherals.
Material scanned by this product may be protected by governmental laws and other regulations, such as copyright
laws, the customer is solely responsible for complying with all such laws and regulations.
Document Warranty
The information contained in this document is subject to change without notice.
Info Peripherals makes no warranty of any kind with regard to this material, including, but not limited to, the
implied warranties of fitness for a particular purpose.
Info Peripherals shall not be liable for errors contained herein or for incidental or consequential damages in
connection with the furnishing, performance, or use of this material.
Product Warranty
Product warranty information can be found on the last page of this document.
Introduction
2
Table of Contents
Introduction ........................................................................................................................................ 5
Welcome .............................................................................................................................................................. 5
The User’s Guide ................................................................................................................................................. 5
Assistance ............................................................................................................................................................ 7
What is TWAIN? ................................................................................................................................................. 7
A note about application software ....................................................................................................................... 7
Scanner Setup ..................................................................................................................................... 9
System Requirements .......................................................................................................................................... 9
Package Contents ............................................................................................................................................... 10
Unlocking the Scanner ...................................................................................................................................... 10
Connecting the Scanner to the Computer .......................................................................................................... 10
Connecting the Power Adapter to a Power Supply ........................................................................................... 11
Connecting a Printer to the Scanner .................................................................................................................. 11
Scanner Driver and Application Software Installation ................................................................ 12
Starting the Installation Program ............................................................................................................................... 12
Installation Program .......................................................................................................................................... 12
Scanner Driver ................................................................................................................................................... 13
InfoCenter 32 (Windows 95, 98, or NT only) ................................................................................................... 14
PictureMall PictureFun! (Windows 95, 98 or NT only).................................................................................... 16
InfoCenter Lite .................................................................................................................................................. 17
Adobe Acrobat Reader ...................................................................................................................................... 20
Installation Paths ............................................................................................................................................... 20
Uninstalling ....................................................................................................................................................... 21
Scanner Operation ............................................................................................................................ 22
TWAIN .............................................................................................................................................................. 22
Selecting a Source in Scanning Applications .................................................................................................... 22
Document Placement ......................................................................................................................................... 23
Starting the Scan ................................................................................................................................................ 23
TWAIN User Interface, scanning controls ........................................................................................................ 23
Image Types and Scanning Modes .................................................................................................................... 24
Image Type ..................................................................................................................................................................
Color Photo ..........................................................................................................................................................
Gray Photo ...........................................................................................................................................................
B/W Line Art .........................................................................................................................................................
B/W Halftone ........................................................................................................................................................
Original .......................................................................................................................................................................
Scan Mode ...................................................................................................................................................................
24
24
24
25
25
25
25
Image Control .................................................................................................................................................... 25
Resolution .................................................................................................................................................................... 25
Recommended Scanning Resolution and Mode by Task ............................................................................................. 26
Scale ............................................................................................................................................................................ 27
Special Controls ................................................................................................................................................ 27
3
Descreen ...................................................................................................................................................................... 27
Color Wizard ............................................................................................................................................................... 28
Tool Bar ............................................................................................................................................................. 28
Invert ...........................................................................................................................................................................
Mirror ..........................................................................................................................................................................
Brightness/Contrast .....................................................................................................................................................
Color Adjustment .........................................................................................................................................................
Histogram/Tone Map ...................................................................................................................................................
28
28
28
28
29
Menu Bar ........................................................................................................................................................... 29
File ..............................................................................................................................................................................
Settings ........................................................................................................................................................................
Image ...........................................................................................................................................................................
Help .............................................................................................................................................................................
29
29
29
30
Scanning Buttons ............................................................................................................................................... 30
Preview ........................................................................................................................................................................ 30
Zoom ............................................................................................................................................................................ 30
Scan ............................................................................................................................................................................. 31
Preview Window ............................................................................................................................................... 31
Included Applications and Reading the Software Manuals ......................................................... 32
Adobe Acrobat Reader ...................................................................................................................................... 32
InfoCenter 32 and InfoCenter Lite .................................................................................................................... 32
PictureFun! (Windows 95, 98, or NT) ............................................................................................................... 33
InfoCenter Lite Applications (Windows 3.1 or 3.11) ........................................................................................ 35
When to Use Which Application ....................................................................................................................... 35
Maintenance ...................................................................................................................................... 37
Precautions ........................................................................................................................................................ 37
Cleaning the Glass: ............................................................................................................................................ 37
Troubleshooting ................................................................................................................................ 38
Frequently Asked Questions (FAQ) .................................................................................................................. 38
Setup & Installation ..................................................................................................................................................... 38
Scanner Operation ...................................................................................................................................................... 40
Printer Setup and Operation ....................................................................................................................................... 43
Technical Support .............................................................................................................................................. 44
Specifications ..................................................................................................................................... 46
FCC Radio Frequency Interference Statement .................................................................................................. 46
EC Declaration of Conformity .......................................................................................................................... 47
Appendix ........................................................................................................................................... 48
Tips & Hints for Using Your Scanner ............................................................................................................... 48
Scanning ...............................................................................................................................................................
Printing ................................................................................................................................................................
Saving ...................................................................................................................................................................
OCR, Changing a scanned document into text you can use in a word-processor ...............................................
Saving to Floppy Diskettes or for Email ..............................................................................................................
Emailing Images ..................................................................................................................................................
48
48
49
49
50
50
Glossary of Imaging Terms ............................................................................................................................... 51
File Formats ....................................................................................................................................................... 64
Limited Warranty ............................................................................................................................. 66
4
Introduction
Welcome
Thank you for purchasing an Info ImageReader scanner. This product is the result of Info’s efforts to
develop high technology computer peripherals that are easy to use, affordably priced, and will enhance your computing experience.
The ImageReader PwerScan (FB750) is designed as a CCD scanner with an exact A4 scanning bed.
Care has been taken to save the most space possible on your desktop while maintaining the highest
quality scanning results with an optical resolution of 600x600 dpi (9600dpi through interpolation).
The User’s Guide
This User’s Guide includes complete and detailed instructions for the ImageReader PowerScan
installation, use, and maintenance. Note that use in this context, refers to scanner operation independent of the task performed with the application software. Most portions of this guide is organized in
a do as you read format. For best results, perform the tasks as they are presented. This Guide
supplements the printed Quick Start Guide that came with your scanner with more detailed, step-bystep instructions for items covered in the Quick Start Guide as well as presenting new information to
help you get the most from your scanner.
Both the Quick Start Guide and this User’s Guide assume that you have a basic understanding of the
Windows operating system. If you need assistance with basic Windows commands and procedures,
there are many published instruction books that can help you.
Note: At times there are changes made to the hardware or software made after the documents
have been written. Therefore, there may be some differences in what you see on your computer screen and what is depicted in this document.
Layout
Italics
Sections or chapters of this User’s Guide. When you read this
manual on your computer, these are linked to the appropriate parts of the
User’s Guide. Click on a link to go to the section.
Bold
Text that you must entered exactly as it appears (unless there is a
note specifying some possible change).
Underline/Bold
Items that you will click on with your mouse pointer.
5
Bold/Italics
Special notes.
This icon is for tips or helpful information.
This icon is for important information you should not miss.
This icon is for warnings.
Note: Other icons represent the icons you will see on your own computer.
The Table of Contents is linked to the rest of the document. You can click on an item in the table of
contents and be instantly taken to that section of the User’s Guide. The Contents in the side panel (if
you have the Acrobat Reader set to show this panel) also will take you to the correct part of the
document for the listed item.
Scanner Setup will acquaint you with the scanner hardware and assist you with connecting the
scanner to your computer and, if you have one, to a printer.
Scanner Driver and Application Software Installation will lead you through installing the scanner
driver and the application software on the installation CD-ROM disc. Note: If you purchased your
scanner as part of a camera and scanner package, you only need to install the application software
once. You do, however, need to install both the camera driver and the scanner driver to be able to
use both devices.
Scanner Operation will guide you through the steps of using your scanner. This section will acquaint you with the TWAIN interface and all the ways you can configure a scan.
The chapter on Included Applications and Reading the Software Manuals explains the differences in
the application software that comes with your scanner and when and where to use which application
to help you maximize your use of the scanner.
Maintenance provides information on how to take care of your scanner.
If you experience difficulties with the installation or operation of your scanner, there are many
solutions in the Troubleshooting section of this manual, including how to get in touch with our
Technical Support staff when all other attempts to solve your problem fail.
Specifications includes technical information for your scanner.
In the Appendix section of this manual, you will find Tips and Hints for Using Your Scanner, a
Glossary of Imaging and Computer Terms, and an explanation of File Formats. This information
will help you get better results with your scanner and give you a springboard to understanding how
digital imaging works.
The last page of this document has the product Warranty information.
6
Assistance
If you experience difficulties with the installation or operation of your scanner, there are many
solutions in the Troubleshooting section of this User’s Guide, including how to get in touch with our
Technical Support staff when all other attempts to solve your problem fail.
What is TWAIN?
TWAIN is the interface that links the scanner with scanning software applications. It is an industry
standard that enables you to use the ImageReader PowerScan with any TWAIN-compliant software
application. The scanning applications included in your scanner package are all TWAIN-compliant
and will work not only with your ImageReader PowerScan but will also work with any other
TWAIN-compliant device (i.e. digital cameras and image capturing devices).
With the introduction of Windows 95, the TWAIN specification has been overhauled to take advantage of the 32-bit architecture. Your scanner installation software contains a TWAIN source for using
your scanner with 32-bit applications (i.e. InfoCenter 32 and PictureFun! or other applications such
as Microsoft Picture Editor or Adobe Photoshop).
32-bit applications are programs specifically designed for Windows 95/98 and NT to take advantage
of performance enhancements provided by the new architecture.
If you are running Windows 95/98, you may have some older applications installed that were originally written for Windows 3.1 or 3.11 (16-bit programs). These are called Legacy applications. Not
all Legacy applications will work with your 32-bit driver.
See Scanner Operation in this manual for specific information on what source to select and when.
If you have Windows 95/98 or NT, the installation program (detailed in Installing the Scanner Driver
and Application Software) will install native 32-bit Windows application software onto your computer for use with your scanner. If you have Windows 3.1 or 3.11, appropriate software and drivers
will be in stalled for your version of Windows.
A note about application software
The scanner hardware by itself is not very useful and will perform no tasks by itself. It takes a combination of the scanner hardware, scanner driver, and application software to perform any task. More
information about the scanning applications that came with your scanner can be found in the Included Applications section of this manual. Task, in this context, is anything you want the scanner to
do, scan pictures, scan objects, or scan text.
Before scanning, you need to choose the appropriate application(s) to use for your desired use of the
scanned item. Scanning software generally falls into two primary groups, Graphics (image editing),
or OCR (Optical Character Recognition of scanned text). Some applications have elements of both
Graphics and OCR.
7
Graphics: If your desired use is to edit or digitize (convert into a computer file) a photo or other
picture or 3-dimensional object, you will want to use a graphics application (i.e. PictureFun!,
Microsoft Photo Editor, Adobe Photoshop, etc). These types of applications provide image-editing
tools for performing modifications to art, photographs, or other continuous tone images. Graphics
applications will see any text as part of the image and will not recognize individual letters or characters. It not possible to edit (like a word-processor) text in a scanned image with a graphics application. An image scanned using a graphics program can only be saved in a graphics file format (BMP,
GIF, JPG, etc). It cannot be saved as an editable text file.
Your scanner installation CD includes image-editing software, PictureFun (Windows 95/98/NT) ans
ColorDesk (Windows 3.1 or 3.11), to facilitate your image editing requirements.
Note: InfoCenter 32 (Windows 95/98/NT) and InfoCenter Lite (Windows 3.1 or 3.11) also
include some image editing tools, and images scanned with InfoCenter 32 or InfoCenter Lite
can be saved in several graphics file formats. However, for more advanced image editing
capabilities, you should use a graphics only application.
OCR: If your desired use is to edit text in a document you scan with a word-processing application,
you will first want to convert the text using Optical Character Recognition (OCR). OCR applications are designed to recognize alphanumeric characters in preparation for export to word processing
and desktop publishing applications. In other words, the OCR conversion will go through the
scanned document looking for characteristics that resemble known letters, number and other symbols
and put the results into either a text file or place it on the clipboard so you can paste it into a text file.
OCR applications do not provide image-editing capabilities. If you have no intention of editing a
given piece of text (with or without graphics), it may be simpler to scan and save it as a graphic.
Your scanner installation CD includes basic OCR software incorporated into the primary scanning
application, InfoCenter 32 (Windows 95/98/NT) and InfoCenter Lite (Windows 3.1 or 3.11).
Advanced Functions: Additional types of applications are available that offer solutions for special
or unique tasks (including applications that expand on the features of the included application software). These tasks may include document storage, form scanning, fax utilities, copy utilities, custom
screen saver creation, photo album creation, and so on. If applications are intended to link directly to
the scanning device, look for the TWAIN-compliant specification. Since the drivers for your scanner
are TWAIN-compliant, your scanner should work with any TWAIN-compliant software. Most
software vendors sell a variety of TWAIN-compliant scanning applications, such as Caere OmniPage
Pro, Xerox TextBridge, and many others. There are even some TWAIN-compliant scanning applications available through the Internet as shareware and freeware.
Info does not directly support any third party software (software you purchased separate
from the scanner). Included in this manual are general guidelines for using your scanner with
applications other than those that came with your scanner. This is for your use only and does
not imply support for those applications.
8
Scanner Setup
System Requirements
R
R
R
R
R
R
R
R
R
Minimum and recommended system requirements are:
IBM compatible PC with a 486 or Pentium Processor
Microsoft Windows 3.1 or 3.11, Windows 95/98 or NT
(Windows 95/98 or NT recommended)
16 Megabytes of RAM (32 Megabytes or higher recommended)
EPP, ECP, or SPP parallel port (EPP recommended)
VGA, SVGA color monitor and video card supporting at least 256 colors
(24-bit True Color recommended)
25 Megabytes of available hard disk space for scanner driver installation,
additional space is required for the scanning applications.*
A Microsoft Windows-compatible pointing device (such as a mouse)
A CD-ROM drive
Recommended: A surge-protected power strip or power center
*Available disk space needed for installation varies with which software applications are installed.
25Mb is the minimum required for the scanner driver only. The scanner driver and scanning application software may take up to 100Mb.
Additional available hard disk space is recommended and may be required for scanning purposes,
requirements vary with the work performed. Work refers to the task or operation performed using
the scanner in conjunction with application software. Factors that will influence the amount of
available hard disk space required include resolution, scanning mode, and scanning area.
Because scanners are capable of inputting large amounts of data in relatively short periods of time,
they commonly push computer systems to the limits of their capabilities. Before beginning any
scanning task or operation, carefully consider your system processing capabilities, especially processor speed, RAM, and available hard disk space. The processing of simple black & white graphics is
the least demanding. High resolution scanning of large images in full color creates an extreme
demand for processor time and memory.
For specific information on how to set image controls while scanning, refer to the Scanner Operation
section of this User’s Guide.
9
Package Contents
Scanner
12-Volt Power Adapter
D25P Parallel Cable
Quick Start Guide
CD-ROM disc with Scanner Driver, Application Software, User’s Guide and Software Manuals
InfoCenter 32/ImageDock Quick Reference Guide
InfoCenter Lite Quick Reference Guide
Technical Support Card
Unlocking the Scanner
The scanner is locked at the factory. This is done to prevent the
scan head from moving a possibly damaging the scanner. Before
you connect the scanner to power, you will need to unlock the
scanner. There is a small plastic switch under the front of the
scanner. You will need to slide it into the unlock position. On
most scanners there will be small lock and unlock symbols.
If you do not unlock the scanner before plugging it in, it can cause
damage to the internal mechanism and render the scanner inoperable.
Connecting the Scanner to the Computer
Caution: Always turn off your computer when you are connecting any item to its ports such
as the scanner cable. This will prevent the possibility of any electical discharge damaging
either the computer or the item being attached (such as your scanner).
Connect the D25P Parallel Cable (the scanner cable) to the port on the scanner labeled PC and to the
parallel port computer. If there is another device (such as a printer) already connected to the
computer’s parallel port, disconnect it and refer to the section below. The cable can only be connected one way, do not force the connection. The female end of the cable (with small holes) connects to the scanner. The male end (with small pins) connects to the computer. Screw down the
connectors to ensure a good, tight connection.
To connect the scanner to your computer, you should use the cable that came in the scanner
package. The ImageReader PowerScan uses a specific type of cable characterized by a
“choke” around the cable close to the point where it plugs into the scanner. The cable filters
the signal going to the scanner in a way that is not supported by a normal cable. In addition,
parallel port signal is generally relatively weak and degenerates the further it travels. With a
longer cable, there may not be enough signal getting to the scanner to enable it to scan successfully.
10
1. Scanner
2. Power Supply
3. D25P Cable
4. PC Parallel Port
5. Printer Cable
Connecting the Power Adapter to a Power Supply
The Power Adapter should be plugged into an AC power supply that is 110 Volts and 60 Hertz.
It is highly recommended that you use a surge-protected power strip or power center for your computer and all computer peripherals such as the scanner.
The round connector plugs into the back of the scanner (refer to the diagram above).
Caution: While plugging the scanner power adapter in to the scanenr and an active power
supply, it is best to have the scanner turned off to prevent electrical mishap.
To be able to scan or to use the scanner’s pass-through port for your printer, the scanner’s
power must be turned on. There is an On/Off switch on the side of your scanner.
Connecting a Printer to the Scanner
If you previously had a printer connected to your computer’s parallel port or if you later purchase a
printer, you can use the pass-through port on the scanner to enable the printer to use the same parallel
port on your computer.
Connect one end the printer cable to the port on the scanner labeled Printer and the other end to
your printer. The cable can only connected one way. Do not force the connection. On the scanner,
screw down the connectors to ensure a good, tight connection.
1. Be sure to have the scanner plugged into an active power supply if you want to do pass- through
printing.
2. Do not attempt to scan and print at the same time.
3. Do not use an overly long cable to connect the printer to the scanner. Parallel port signal can be
weak and degenerates the further it travels. A total cable length exceeding twelve feet (12’) could
cause problems with your printing.
4. If you are having problems with pass-through printing, refer to the Troubleshooting section of this
User’s Guide.
11
Scanner Driver and Application
Software Installation
Starting the Installation Program
Most Windows 95/98 and Windows NT computers have Autorun enabled. With a computer with
Autorun enabled, as soon as you insert the ImageReader PowerScan Installation CD-ROM disc in
the computer, the installation program will start.
If you have Autorun enabled (if the Installation screen opened on its own), start at Installation Program, below.
If you have Windows 3.1 or 3.11 or if you do not have Autorun enabled, you will have to start the
installation yourself.
1. Click File (Windows 3.1 or 3.11) or Start (Windows 95/98/NT)
2. Click Run
3. Type D:\Setup.exe or D:\Autorun.exe
(If your CD-ROM drive letter is not D, please substitute the appropriate letter.)
4. Click OK
Installation Program
The first screen you will see at the start of the Installation will give you a number of options, including Install Scanner Drivers, Install Scanning Software (InfoCenter 32 or InfoCenter Lite &
ColorDesk), Install PictureFun! (Windows 95/98/NT only), Install Adobe Acrobat Reader, Browse
Manuals (Windows 95/98/NT only), and Exit. You can use this installation screen later to gain easy
access to the Camera User’s Guide and the software manuals. You will need to install each component that you want. To operate the scanner you will need, at minimum, to install the scanner driver
and a scanning application (such as InfoCenter 32 or PictureFun!).
To go to any portion of the Installation program, all you need to do is click on the appropriate
words. Reading the Manuals and User’s Guide will be covered later in this User’s Guide (see
Included Software Applications).
Due to changes made in the installation program or the installation of individual applications
after the publication of this User’s Guide, the images below may not match exactly what you
see on the screen.
12
Note: If your scanner came as part of a scanner and camera package, some of the following
information will be repeated in your Camera User’s Guide. If you have already installed the
software applications (InfoCenter 32, PictureFun, and Adobe Acrobat Reader), you do not
need to do so again as part of your scanner installation. You will only need to pay attention to
the Scanner Driver section, below.
The order you install the following items is not important. You can initially install only one
or two items and then return to the installation program later by following the directions
above.
Scanner Driver
The scanner driver must be installed to your
Windows directory. You will need approximately 25 Mb for the driver and support
files. You will likely need additional free
disk space while you are scanning at any
resolution.
As you go through the installation, there are
some points where you will be asked to
provide information.
Each section here is a separate installation
screen. To go from one screen during the
installation to another click Next, Back, or
as applicable.
Scanner Model
The ImageReader PowerScan (FB750) is a parallel
port scanner. Select Parallel Port Scanner as your
scanner model before you click Next.
Destination Directory
The scanner driver needs to be installed to a directory
of its own on your hard drive. The driver should be
installed as a sub-directory of your Windows directory: Twain_32.
Setup Type
Typical will install all of the necessary components of the
scanner driver to your hard drive. If you want to install less
than the complete driver, select compact or custom. You
should select typical installation, unless you instructed by an
Info Tech Support person do to otherwise.
13
Installing files
The scanner driver will take a few moments to write the
appropriate files to your hard drive.
PC Compatibility Information
When the driver is installed you will be shown a reminder
about the parallel port settings required for optimal performance of your scanner.
Restart Windows
When the driver installation is complete, you will be
prompted to restart Windows. It is necessary to restart Windows for the driver to be fully installed and initialized.
To start the Installation Program and install the other
applications, you can either open & close your CDROM drive to trigger the Autorun or follow the directions in the first section of this chapter.
InfoCenter 32 (Windows 95, 98, or NT only)
As you go through the installation, there are
some points where you will be asked to fill
in information.
Each section here is a separate installation
screen. Many of the screen-shots below only
show a portion of the screen (the portion
that changes or has important information).
To go from one screen during the installation to another click Next, Back, or as
applicable.
User Information
Some of this information may already be entered from information in your Windows configuration
(name & company).
14
If you want to change the information that was
pre-entered by your computer, you will have to
clear the line (click your mouse on the line and
either delete or backspace or highlight the existing text and overwrite).
If you have no company name or the Camera and software is for your personal use, type –
none- in the company field.
You will need to type in the software serial number on the appropriate line.
The serial number for InfoCenter 32 is on the on the envelope for the CD-ROM disc. The
serial number is not written anywhere on the camera (or scanner) or the box. The installation
is looking for a software serial number not a hardware serial number.
Note: If any of the blanks are empty, the installation will not proceed and you will be prompted to fill
in the missing information by the cursor remaining on the empty field.
Destination Directory
InfoCenter 32 needs to be installed to a directory of its own on your hard drive. You will need to
decide where you want it to be installed. InfoCenter 32 does not need to be on your C: drive, and it
can be in a sub-directory (such as e. C:\Program Files\InfoCenter 32).
The default directory for InfoCenter 32 is
C:\Info32. If you want to change the directory
where InfoCenter 32 will install, you will need
to type in a drive and directory of your choice.
InfoCenter 32 needs approximately 40 Megabytes of free disk space to install, but you will likely
need additional space as you use the application. Keep this in mind when you choose where to
install.
Installing files
Once you have completed filling in the required
information, InfoCenter 32 will proceed to install
on your computer.
InfoCenter 32 Complete, installing Headliner
When the InfoCenter 32 installation is complete, you will be asked if you have an Internet Connection. This information is not for InfoCenter 32. There is a bonus application from Onset included in
15
your installation called Headliner.
Headliner is a news and information retrieval service that is
designed to display the news and information in an easy to
read and access format.
If you do not have an Internet connection or you do not want to install Headliner, click No. This will
end the installation without installing Headliner. Headliner is not necessary to the camera (or scanner, if part of a scanner and camera package) operation.
If you decide to install Headliner, the installation will lead you through several steps and ask you to
provide information for its configuration.
Headliner is a bonus application included by Onset. Headliner is not affiliated with Info.
Info does not provide support for Headliner. Headliner is not needed to operate the scanner.
PictureMall PictureFun! (Windows 95, 98 or NT only)
The PictureMall PictureFun! suite of applications are Windows 95/98 or NT only
applications. You cannot run these applications in Windows 3.1 or 3.11, attempting to
do so may cause problems with your Windows.
Each section here is a separate installation
screen. Many of the screen-shots below only
show a portion of the screen (the portion
that changes or has important information).
To go from one screen during the installation to another click Next, Back, or as
applicable.
Destination Directory
PictureFun needs to be installed to a directory of its own on your hard drive. You will need to decide
where you want it to be installed. PictureFun does not need to be on your C: drive, and it can be in a
sub-directory (such as e. C:\Program Files\PictureFun).
The default directory for PictureFun is C:\Program
Files\PictureMall. If you want to change the directory for
PictureFun, you will need to click Browse.
PictureFun needs approximately 40 Megabytes of free disk space to install, but you will likely need
additional space as you use the application. Keep this in mind when you choose where to install.
16
Installing files
Once you have completed filling in the required
information, PictureFun will proceed to install on your
computer.
During the installation you will be asked if you want
to install high-resolution templates for Paper.
If you want to use the more advanced features of Paper (adding your images to cards, magazine
covers, and invitations), you may want to install these high-resolution templates now. If you do not
install these now, you will be given the option to do so later when you use Paper.
File Associations
Near the end of the PictureFun installation, you will be
asked if you want to use PictureFun with all the digital
images on your computer.
If you answer yes, the icons for your images will change to one associated with PictureFun and every
time you double-click on one of these files, Photo will open with the image displayed.
If you answer no, you can still view your image files with Photo or any other PictureFun application,
but you will first have to open the desired application.
Registration
At the completion of the PictureFun installation, you will be reminded to register the application
suite with the software developer. This registration is with PictureMall and not Info and will entitle
you to services through PictureMall.
PictureMall is not directly affiliated with Info. You will need to contact PictureMall for any
questions about orders or pricing for items ordered through the PictureMall or PictureFun
applications.
InfoCenter Lite
InfoCenter Lite is a Windows 3.1 and 3.11 application. It is possible to run InfoCenter Lite in
Windows 95, but it will not work in Windows NT. The installation CD will only install the
applications appropriate to your version of Windows (InfoCenter 32 & PictureFun for Windows 95/98/NT and InfoCenter Lite and ColorDesk for Windows 3.1 or 3.11).
17
As you go through the installation, there are some points
where you will be asked to fill in information.
Each section here is a separate installation screen.
Many of the screen-shots below only show a portion of
the screen (the portion that changes or has important
information). To go from one screen during the installation to another click Next, Back, or as applicable.
User Information
The installation may get some of this information from your
Windows configuration.
If you want to change the information that was pre-entered by your computer, you will have to clear
the line (click your mouse on the line and either delete or backspace or highlight the existing text and
overwrite).
If you have no company name or the scanner and software is for your personal use, type
–none- in the company field.
You will need to type in the software serial number on the appropriate line.
The serial number for InfoCenter Lite is on the envelope for the CD-ROM disc. The serial
number is not on the back of the scanner. The installation is looking for a software serial
number not a hardware serial number.
Note: If any of the blanks are empty, the installation will not proceed and you will be prompted to fill
in the missing information by the cursor remaining on the empty field.
Destination Directory
InfoCenter Lite needs to be installed to a directory of its own on your hard drive. You will need to
decide where you want it to be installed. InfoCenter Lite does not need to be on your C: drive, and it
can be in a sub-directory (such as e. D:\Graphics\InfoLite).
InfoCenter Lite needs approximately 40 Megabytes of free disk space to install, but you will likely
need additional space as you use the application. Keep this in mind when you choose where to
install.
18
The default directory for InfoCenter Lite is C:\InfoLite. There are two methods to change the
destination directory if you want to install to a different location. For either method, first click
Browse.
Type in the complete new path instead of the default (either block and overwrite or clear the default
directory with backspace or delete and then type in the new directory). The destination directory
name cannot be longer than 8 characters.
Use your mouse to click on the change the information in the graphical window fields.
a) To change the hard drive, click on the down arrow and select the drive of your choice.
(InfoCenter Lite must be installed to a hard drive, you cannot install it to A: or B:).
b) To change the directory, click on the folders shown to open the folder of your choice.
If after you have installed InfoCenter Lite and try to reinstall it to the same directory, you will get a
warning message that the directory already exists. If you want to overwrite your existing installation,
click Yes.
Installation Options
You need to choose if you want to just install the
application software or if you want to install the
scanner drivers as well. The default is to install both.
If you do not want to install the scanner driver, for example, click on the check to remove it.
Program Group
InfoCenter Lite allows quick access to its desktop program
with the inclusion of icons on your Windows desktop. You
can choose where you want these icons to be, either in a
program group (the icons that open windows of other icons
that launch applications) already on your desktop or one that
this installation will create.
You can change the default Program group by clicking any of
the Program Groups listed in the bottom box or type in a new
name.
All of the instructions given for how to operate your scanner and InfoCenter Lite use the program
group InfoCenter Lite. If you change the program group in this step, you will not have an InfoCenter
Lite program group and will have to remember where you told the installation to install the icons.
Installing files
Once you have completed filling in the required information, InfoCenter Lite will proceed to install
on your computer.
19
InfoCenter Lite Installation Complete
When the InfoCenter Lite installation is
finished copying files onto your hard drive
and setting up the applications you chose, it
will create two program groups, open them
and put in the new icons which are links to
launch the applications.
Adobe Acrobat Reader
Adobe Acrobat Reader is the application necessary to read PDF files. Most of the application software manuals and the Camera User’s Guide are in PDF format. This format allows you to view a
document as if it is a printed book. You can Zoom in on a view to have larger print. You can search
on a specific word. You can jump to a particular page. You can print one or several pages. And
more features.
If you already have a copy of Adobe Acrobat Reader, version 2.11 or better, installed on your
computer, you do not need to install this option.
Installation Paths
If for some reason the installation above doesn’t proceed, as it should, or you want to install only a
single component of the total installation without using the Installation program, the following are
the direct paths to each of the components. If your CD-ROM drive letter is not D, please substitute
the appropriate letter. You can run any of these from a command prompt within Windows (Start >
Run; Win3.x: > File > Run). These are Windows applications and cannot be run from a DOS
prompt.
20
InfoCenter 32
D:\Setup32\Set32.exe
PictureFun!
D:\Setup32\ColorDesk\Setup.exe
Adobe Acrobat Reader
D:\Adobe\Acroread.exe
Scanner Driver (Windows 95/98/NT)
D:\Driver\32\Setup.exe
Scanner Driver (Windows 3.1 or 3.11)
D:\Driver\16\Setup.exe
Uninstalling
If you just delete the directory where the application or driver resides, you will leave configuration
information and shared files that can cause problems with your computer later. Use the Uninstall
program(s) if you need to uninstall the scanning applications.
Scanner Drivers
Windows 95/98/NT: > Start > Programs > PowerScan> Uninstall.
Windows 3.1 or 3.11: There is an Uninstall program in the PowerScan Program Group.
Applications
In the Windows 95/98 or NT Control Panel (> Start > Setting > Control Panel), use Add/Remove
Programs (double-click on the icon) to uninstall the application(s).
In Windows 3.1 or 3.11, there is an Uninstall program in the InfoCenter Lite Program Group.
21
Scanner Operation
The following directions specify using your scanner with InfoCenter 32 or InfoCenter Lite. However, most TWAIN compliant applications have similar controls and menu choices with regard to
TWAIN. For any application other than InfoCenter 32 or InfoCenter Lite, consult the software
manual for specific information.
Due to changes made in the installation program or the installation of individual applications
after the publication of this User’s Guide, the images below may not match exactly what you
see on the screen.
TWAIN
TWAIN is the interface that links the scanner with scanning software applications. It is an industry
standard that enables you to use the ImageReader PowerScan with any TWAIN-compliant software
application. The scanning applications included in your scanner package are all TWAIN-compliant
and will work not only with your ImageReader PowerScan but will also work with any other
TWAIN-compliant device (i.e. digital cameras and image capturing devices).
Info does not directly support any third party software (software you purchased separate from
the scanner). Information given on how to use the scanner with other applications is for your
use only and does not imply support for those applications.
Selecting a Source in Scanning Applications
In any TWAIN compliant application, the first thing you will want to do before you scan is select
your TWAIN or scanning source.
In InfoCenter 32 or InfoCenter Lite, you need to choose Select Source from
the File menu. Some programs may require you to select your source from a
different drop down menu.
Some applications, not included with your scanner, may require you to
select a scanner type in addition to selecting a source. If you need to
select a type, choose Generic, or TWAIN.
For your scanning source you will need to choose your new scanner, PowerScan 2.23 (the version
number maybe different).
If you select the wrong scanner source, you will get an “cannot access TWAIN driver” error or you
will open a different TWAIN device installed on your computer. Try selecting your source again.
22
If there is nothing listed in the source selection window, the scanner driver is not installed.
See the Troubleshooting section for information on what may have interfered with the driver
installation.
Document Placement
Your original should be placed into the scanner face down against the glass. The top left edge of the document should be aligned with the arrow on the outside edge of the scanning bed (the glass).
If you are scanning something small, like a photograph, you can put anywhere in the scanning bed.
However, unless you place the edges parallel with the sides of the scanning bed your image will be
crooked. And, unless you align the top of your original with the top edge of the scanner (marked
with the arrow as described above) your image will not be upright.
How the document is placed in the scanning bed and scanned is crucial to most image editing
functions and OCR conversion.
Starting the Scan
In most applications there is an Acquire or New Scan command that you will have to use to start the
scanning process. For many programs, you will want to choose Acquire from the File menu.
In InfoCenter 32 or InfoCenter Lite, select New Scan from the File menu or click on
the scanner icon on the tool bar.
TWAIN User Interface, scanning controls
After you start the scanning process, the TWAIN User Interface will appear on your screen (there
may first be a warm-up period). This is your direct link to the scanner driver. It is here that you will
make changes to how the scanner is going to scan and process the image.
23
The PowerScan TWAIN interface is divided into two windows: the Control Window and the Preview
Window. The Control Window is further divided into sections to help guide you through all the
scanning settings. The main part of the Control Window has the controls you are most likely to
modify for your image and has drop down menus in three sections to configure your scan. The tool
and menu bars at the top of the Control Window give you further controls for the scanning process.
The buttons at the bottom of the Control Window are where you actually initiate the preview or scan.
To the left of the Control Window is the Preview Window that will display your previewed image.
Note: Set only those controls that are necessary for your current scanning task.
Image Types and Scanning Modes
The ImageReader PowerScan gives you flexibility to scan a variety of originals in a variety of ways.
You should choose the mode that best suits your original and your intended use.
Image Type
There are four Image Types for you to choose.
Color Photo
Color images are composed of three channels of a predefined bit depth: red, green, and blue (RGB).
The number of bits in a channel provided the number of color combinations or shades that are
possible. The ImageReader PowerScan scans (hardware) in 30-bit (3 channels of 10-bits each) color
providing for over 50 billion color combinations. This allows for more vivid color reproductions
with subtle gradations of hue. The output is 24-bit (3 channels of 8-bits each), producing over 16
million possible color combinations and providing for a relatively photo-realistic image. 24-bit
images are also called True Color.
Color pictures will turn out best if you scan them in Color.
Color scanning, of all the modes, uses the most resources and will create the largest image files.
Gray Photo
Grayscale images are characterized by 256 shades of gray. The ImageReader PowerScan scans your
image with 10 bits of gray (hardware) but outputs 8 bits (256 colors).
Grayscale is useful for converting color pictures into “black and white” or for retaining a
higher quality when scanning “black and white” photos.
Grayscale images take up more storage space than any of the single-bit images and require more
resources during the scan, but they are not nearly as heavy in resource use as is color
24
B/W Line Art
Line Art captures the image in black and white only (single-bit) with no intermediate shades of gray.
Because there is very little image information that has to be stored, a LineArt scanned item takes up
very storage space.
Many OCR programs require an image be scanned in Line Art. This mode is also useful for
scanning documents.
B/W Halftone
Halftone is single-bit (only black and white). Halftone uses variations in dot size to simulate
grayscale imaging. Some of the image detail is lost with Halftone, so it would not be as useful for
photos.
Halftone is better suited to pen and ink style drawings, the details of which would be lost
with a LineArt scan.
Original
Only one type of original is possible with the PowerScan: Reflective (Flatbed). The PowerScan
driver does not support a transparency adapter.
Scan Mode
You can specify if you want your image to be configured for a faster
scan or for a slower but higher quality scan. If the emphasis is on the
quality of the completed image, choose Quality mode. If speed is
more important, choose Speed.
Image Control
These features will set the size of the image as well as heavily influence the finished file size.
Resolution
The resolution of an image determines the number of dots or
pixels per square inch of in image (dpi). Generally, denser pixel
coverage per square inch (higher resolution) results in sharper
images.
There are two types of resolution: Optical and Interpolated. Optical is the resolution that is accomplished by the operation of the hardware; Interpolated is achieved through the software scanner
driver. The resolution setting in the TWAIN interface is the Interpolated resolution.
25
The ImageReader PowerScan is capable of a maximum resolution of 9600dpi (600x600
Optical). However, if you try to scan at 9600 dpi, be very aware the resulting file size will be
astronomically Huge.
You should match your scanning resolution to the purpose of your image or scanning task. Some
software has specific requirements for resolution for specific scanning tasks (refer to your software
manual for this information or below for some general guidelines). Avoid exceeding the recommended resolution settings for your scanning task.
You can adjust the resolution by selecting one of the predefined resolutions (75, 100, 150, 200,
300, etc, to 9600) from the drop down menu or by choosing custom.
Custom Resolution
After you select custom, a window will appear with 2 slide bars. You can adjust the resolution by
moving the slide bars. One slide bar governs the vertical and the other the horizontal resolution. If
you have Sync checked, the bars will move as one & give you a much more even image.
The resolution has a direct impact on the scanned image file size. Adjusting to a higher
resolution setting will result in an increasingly larger file size. Increased demands on your
computer resources due to high-resolution settings can also slow down the scanning process
exponentially.
Some scanning applications only support specific resolutions. Refer to your application User’s
Guide for supported resolutions.
Recommended Scanning Resolution and Mode by Task
Function
Scan for Faxing
OCR in InfoCenter 32
OCR in most other applications
Color Picture Viewing (Monitor)
Color Picture for Printing
Copier Function
Document Images
Scan to Clipboard
High Resolution Images
Color Image Editing
Scan Mode, Resolution
LineArt, 200 dpi
Grayscale, 300 dpi
LineArt, 300 dpi
Color, 72 to100 dpi
Color, 150 to 300 dpi*
Color, 200 to 300 dpi*
Color, Grayscale, LineArt, 72 dpi
Color, Grayscale, LineArt, 72 dpi
Color, Grayscale, max scanner dpi**
Color, max scanner dpi**
*Depends on the printer, specific printers have different requirements. Consult your printer documentation
for information specific to your printer.
**Or to a maximum of your available system resources. High Resolution images require large amounts of
free disk space and are very taxing on system resources.
26
Scale
You can resize your image before you scan it by setting the scale. If
you set the scale to 25%, your image will be reduced to one quarter of
its original size. If you set the scale to 200%, your image will be
doubled. The maximum scale is 1600%
You can adjust the scale by selecting one of the predefined scales (25%, 50%, 100%, 200%, 300%,
etc, to 1600%).
Custom Scale
After you select custom, a window will appear with 2 slide bars. You can adjust the resolution by
moving the slide bars. One slide bar governs the vertical and the other the horizontal scale. If you
have Sync checked, the bars will move as one & give you a much more even image.
The scale has a direct impact on the scanned image file size. Adjusting to a higher scale
setting will result in an increasingly larger file size. Increased demands on your computer
resources due to high-scale settings can also slow down the scanning process exponentially.
Special Controls
There are two special controls that will help you achieve a better image: Descreen and Color Wizard.
Descreen
Most printed material (such as magazine photos) commonly has a
Moiré pattern across the image. The moiré is caused by the printing
process and will often appear like a dirty screen has been placed across
the scanned image. The ImageReader PowerScan has a built in
Descreening process to eliminate the moiré.
If you are scanning a printed picture a not an original photography, it is best to set Descreen
to eliminate the moiré pattern.
The PowerScan gives you different Descreening settings, choose one from the drop down menu.
You will need to determine which is best for your image.
Moiré
Decreeened
27
Color Wizard
Color Enhance will automatically make adjustments to the
scanned output to achieve a closer match to the colors of your
original in the scanned image.
Tool Bar
There are six buttons on the button bar at the top of the TWAIN interface window. Only five of the
buttons are implemented in the current scanner driver.
Invert
Reverse the brightness and color in the image. For color images, each pixel will be
changed to its complementary color.
Mirror
Flip the scanned image so that it will be a mirror copy of the original.
Brightness/Contrast
Brightness adjusts the lightness or darkness of an image. The higher the brightness
value, the brighter the image. Adjusting the brightness before scanning is much like
adjusting the aperture of a camera.
Contrast adjusts the range between the darkest and the lightest shades in the image.
This range determines the number of shades in an image. An image with low contrast
can look dull and flat.
Unless you seem to be getting a dark image, you shouldn’t need to adjust the brightness. If
you do make adjustments to the brightness, it is best to do so in small increments so you can
increase the light without washing out the image.
If you make adjustments to the brightness, you may also need to adjust the contrast. Just as with
brightness, you will get better results if you make small adjustments only as needed.
You can adjust either brightness or contrast by moving the slide bars. Selecting Auto will allow
the scanner driver to make the adjustments for you.
Color Adjustment
Fine-tune the color values of the image: Hue, Saturation, Value, Red, Green, and
Blue.
Each item can be configured separately with its labeled slide bar. If you want to see how your
changes will affect your image, click the Preview button. The previewed image will be temporarily
altered. To make the changes permanent, you will need to click OK.
28
Histogram/Tone Map
With the Histogram/Tone Map, you can make adjustments to color values: brightest,
middle & darkest gray.
Each item can be configured separately with its labeled slide bar. If you want to see how your
changes will affect your image, click the Preview button. The previewed image will be temporarily
altered. To make the changes permanent, you will need to click OK.
Menu Bar
There are several controls, in addition to the ones above, that are accessible via the menu bar (the bar
that runs under the title).
File
You can save your scanning configurations to use at a later date. You can also
set up your own defaults.
Settings
Output Device: This can be set to the monitor or a device independent of any
other settings.
Document Size: The scanning area can be set to letter or A4. Scanning area
can also be manually set in the preview window, see below.
Preview Size: The view in the preview window can be changed: 100, 125,
and 150. The size of the preview has no bearing on the actual size of the
scanned image.
Scan Size: This window shows the size of the current scanning area (can be
set to show the size in pixels, inches or centimeters). The scanning area can
be changed from this window by entering a value in either box.
Automatic Preview: If this is checked, the scanner driver will preview the
image before scanning.
Image
Many of the Image menu items are also controls elsewhere in the TWAIN
interface and are explained in those areas. Only the controls unique to this
menu are detailed below.
Auto Density: This setting allows the scanner driver to set the optimal pixel
density for the image.
Text Threshold: The Windows 95 & Windows 3.1 or 3.11 default for text
threshold is 128. You can modify this by pressing the spinner button or
dragging the slide bar.
29
Halftone Patterns: Halftone mimics grayscale by varying the size of the dots. Use this screen to
choose how the dots will be varied to achieve the effect you desire.
Sharpness: Some images can be improved with adjustments to the Sharpness, which governs
how the differences between color edges and shapes are handled.
Monitor Gamma: Some monitors (computer screen) do not show color and grayscale correctly.
To find the optimal settings for your monitor, you can use this screen. You can adjust each
separately, or check sync for a more even adjustment. Default will reset all values to 2.2.
Info: A small window will be displayed showing current image information and the mouse
pointer position.
Help
The Help menu options will provide you basic information about the
scanner driver and controls.
Scanning Buttons
Preview
When you preview an image, it will appear in the preview window. The preview is a low resolution
scan (72dpi) that is designed to help you set the scanning controls and scanning area before beginning your actual scan.
You cannot edit or save a preview image. You must Scan before your image will be available
in any scanning application.
The last preview you completed will appear in the preview window until you preview another image.
Once your image has been previewed, you will need to set the scanning area. In the Preview Window, click & hold your mouse pointer on the upper right-hand corner of your image, then drag the
mouse pointer to the lower left-hand corner. This will create a dotted line around the image, blocking it and marking the are to be scanned.
Below the Preview Window, information about the size of your image will be displayed, including
how large the final file size will be at the current scanner settings.
Zoom
You can select a small area of the total scanning area to be blown up when you scan.
30
Scan
After you have made any necessary adjustments to the scanning control, this button will begin the actual scan.
Note: The Scan button will remain grayed (unavailable) until you have marked a scanning
area , see Preview above.
Your scanning progress will be noted at the bottom of the Preview Window. Click Cancel if you
need to halt the scanning process.
Scanning requires HUGE amounts of system resources. While you are scanning, most other
processes on your computer will likely slow down. If you have minimal resources on your
computer, it is best to scan without anything running in the background.
Preview Window
Once you preview your original (see below), an image will
appear in the Preview window. With an image in the preview
window, you can set the scanning area.
In the Preview Window, click & hold your mouse pointer on the
upper right-hand corner of your image, then drag the mouse
pointer to the lower left-hand corner. This will create a dotted
line around the image, blocking it and marking the are to be
scanned.
31
Included Applications and Reading
the Software Manuals
This section of the manual is intended as a quick reference to the applications that came with your
scanner. It is not intended to replace or to expand on the software manuals.
Adobe Acrobat Reader
The Acrobat Reader is the application you can use to read the software manuals for
the applications included with your scanner. It is also the application you are using to
read this manual.
The Acrobat reader allows anyone to view, navigate, and print documents in the Portable Document
Format (PDF).
Many software and hardware developers are going to manuals on a CD-ROM disc rather than in
paper form. This saves you money because the developers do not have to pay publishing costs and
this saving is passed on to you. This also provides a more dynamic manual. If there are software
changes, without having to worry about a large print run of documents, the manual can be changed
and included on the same CD.
The Acrobat Reader can also be used to view PDF files you might find on the Internet or
from other software or hardware developers.
The Adobe Acrobat Reader version 3.0 or 3.01 will allow you to read PDF documents on Web sites
while still online, as a plug in to your Web Browser (Internet Explorer or Netscape). This version
will also allow more navigation controls while reading PDF documents. The Acrobat Reader installation is freeware. It is part of your scanner applications installation or for download on the Internet,
http://www.adobe.com.
InfoCenter 32 and InfoCenter Lite
InfoCenter 32 is a native 32-bit document and image management program.
InfoCenter 32 has several features that will make your scanning experience easier and
enjoyable. You cannot use InfoCenter 32 in Windows 3.1 or 3.11.
InfoCenter Lite is the 16-bit version of InfoCenter 32. It has many similar functions
and works with Windows 3.1 or 3.11.
32
In InfoCenter 32 and InfoCenter Lite you can scan documents, images, and anything you want to
scan. InfoCenter 32 and InfoCenter Lite will display your completed scans as thumbnails on its
desktop. You can use the toolbar at the top of the desktop to do several different things to your
image. Below are just a few of the InfoCenter 32 and InfoCenter Lite features.
Save Text will start the OCR to convert the image into editable text and save it as a file you
can open with your word-processor.
Save Image will allow you to save the image in one of many graphics formats.
Print will send your image to the printer.
Send Fax will transfer your image to a fax program on your computer ready to be faxed out.
Send Mail will allow you to transfer your image to the email program on your computer in
one of three ways: OCR into a text file and the text written into the email, OCR and then
attached to the email as an RTF, and as an attached Bitmap.
In InfoCenter 32 and InfoCenter Lite, you can also drag and drop a thumbnail on any of the icons in
the Application Bar. Your image will then be transferred to the application represented by the icon.
If it is a word-processing application, the image will first be converted with OCR. If it is an imaging
application, your image will be transferred as a graphics file.
InfoCenter 32 and InfoCenter Lite will automatically put several icons on the Application Bar associated with applications installed on your computer. The Application Bar is divided into three types of
applications: Image, Text, and Advanced. Applications on your computer that are associated with
image file formats (such as the PictureFun applications, Microsoft Photo Editor, Adobe Photoshop,
or any other graphics application) will be available on the Image Applications section of the Application Bar. Applications that are associated with text formats (such as NotePad, Microsoft Word,
WordPerfect, or any other word-processing application) will be shown on the Text Applications
section. You can also add applications of your own with Application Bar Setup.
For more information on how to use the features of InfoCenter 32, you will find the user’s
guide for InfoCenter 32 on the CD. IC32.PDF is the manual for InfoCenter 32.
For more information on how to use the features of InfoCenter Lite, you will find the user’s
guide for InfoCenter Lite on the CD. ICLite.PDF is the manual for InfoCenter Lite.
PictureFun! (Windows 95, 98, or NT)
PictureFun! is a Windows 95/98 or NT suite of imaging applications. Each application in the suite has special abilities. You can scan an image and edit it in lots of
strange and fascinating ways or just adjust it to maximize the color and other effects.
33
If you are scanning pictures or objects, you can scan directly into any of the PictureFun suite (except
for the Setup and informational ones) or, in InfoCenter 32, you can drag your thumbnail onto the
Application Bar icon for the application. See below for a description of what each of the PictureFun
applications can do. You can also use PictureFun to save your image in one of several different
graphics file formats.
To find the applications of this suite, click Start, click Programs, click Picture Mall, and, for some
applications, click PictureFun!
PictureMall
Copy: Easily scan color images to either your printer, turning your computer, color printer,
and scanner or digital camera into a full-featured digital color photocopier.
PictureMall: Link to the PictureFun! Website where you can find out how to transform your
scanned image into a variety of things like tee shirts, mugs, and more.
PictureTalk: Add your images to custom designed items with PictureMall.
Setup: Configure your scanner, printer, and monitor for use with PictureFun!
Shop on Picture Mall: Add your images to custom designed items with PictureMall.
PictureFun!
Frame: Enhance your image with one of a variety of realistic looking frames.
Paper: Add your image to a card, invitations or magazine covers for fun ways to display
your image.
Photo: Enhance your image and save it in one of several popular graphics file formats.
Warp: Create new and interesting looks to your images by adding special effects.
For more information on how to use the features the PictureFun suite, you will find the Help
files on the CD (in the directory ClrDesk when you click Browse manuals or in the manuals
directory). You can also access these Help files while you are in any of the PictureFun
applications when you click on Help.
CDCopy.hlp is the manual for Copy.
CDPaper.hlp is the manual for Paper
CDWarp.hlp is the manual for Warp.
CDPhoto.hlp is the manual for Photo.
CDFrame.hlp is the manual for Frame.
PMCW.hlp is the manual for PictureMall Connection Wizard.
34
PictureMall is not directly affiliated with Info. You will need to contact PictureMall for any
questions about orders or pricing for items ordered through the PictureMall or PictureFun
applications.
InfoCenter Lite Applications (Windows 3.1 or 3.11)
The InfoCenter Lite Applications are the ColorDesk pair of imaging applications which has been
designed to work with Windows 3.1 or 3.11. Each application has special abilities.
ColorDesk Copy: Easily scan color images to either your printer, turning your computer,
color printer, and scanner or digital camera into a full-featured digital color photocopier.
ColorDesk Photo: Enhance your image and save it in one of several popular graphics file
formats.
When to Use Which Application
When you use a specific application depends on what you want to do with the item you have
scanned.
Do you want to scan an important document from work and need to make some
changes to the text before you print it? You will want to convert the image to editable
text using OCR, and open the converted document in your word-processor.
InfoCenter 32 and InfoCenter Lite has OCR built in.
Do you want to scan a picture and email it to a friend? You can use InfoCenter 32 or
InfoCenter Lite and use its special Send Mail feature to attach the picture to your
email (note: the attached file will be a bitmap).
Do you need to use your computer like a fax machine? You can use InfoCenter 32 or
InfoCenter Lite and use its special Send Fax feature to scan the image and send it
through the fax application on your computer.
Do you want to scan a picture of Aunt Lucy and retouch the picture, sharpening the
image, removing dust or scratches, and other effects? You will want to use an image
editing or graphics application such as Photo or ColorDesk Photo.
Do you want to scan a picture of Uncle Bob and get him to smile for the first time?
You will want to use an image editing or graphics application such as Warp (Windows 95/98/NT only).
Do you want to use your scanner and computer like a photocopier? You can use
InfoCenter 32 or InfoCenter Lite for documents and Copy or ColorDesk Copy for
color images.
35
Do you want to read the InfoCenter 32 or InfoCenter Lite manual? You will want to
use the Adobe Acrobat Reader.
Do you want to put your image onto a tee shirt or a mug or anything else? You will
want to use PictureMall and choose from a wide variety of items on which to put
your image. You can click on the Picture Mall icon from any of the PictureFun
applications.
Graphics: These types of applications provide image-editing tools for performing modifications to
art, photographs, or other continuous tone images. Graphics applications will see any text as part of
the image and will not recognize individual letters or characters. It is not possible to edit (like a
word-processor) text in a scanned image with a graphics application. An image scanned using a
graphics program can only be saved in a graphics file format (BMP, GIF, JPG, etc.). It cannot be
saved as an editable text file.
Photo, Paper, Frame, and Warp (Windows 95, 98 or NT)
ColorDesk Photo (Windows 3.1 or 3.11)
Note: InfoCenter 32 and InfoCenter Lite also includes some image editing tools, and
images scanned with InfoCenter 32 or InfoCenter Lite can be saved in several graphics file
formats. However, for more advanced image editing capabilities, you should use a graphics
only application.
OCR: OCR applications are designed to recognize alphanumeric characters in preparation for export
to word processing and desktop publishing applications. In other words, the OCR conversion will go
through the scanned document looking for characteristics that resemble known letters, number and
other symbols and put the results into either a text file or place it on the clipboard so you can paste it
into a text file.
InfoCenter 32 (Windows 95, 98, or NT) and InfoCenter Lite (Windows 3.1 or 3.11)
OCR is often not an exact conversion. If you have special fonts or formatting, it may not be translated exactly. Also, the condition of your original will make a major impact on the OCR results. If
your original is smudged, has a pronounced watermark, or has a background graphic it will decrease
the accuracy. How you scan your original will also affect the accuracy. If your scanned image is
upside-down, your results will be nil. If you scan in a mode not supported by the OCR software
(Grayscale or Color for InfoCenter 32, LineArt for InfoCenter Lite and most other OCR applications), you will likely get an error message that the OCR cannot be started or your results will be
marginal.
Advanced Application Software Features: The application software that came with your scanner is
fully functioning and includes many features. However, you may have need for different or more
advanced features. If the software applications that came with the ImageReader scanner don’t fit
your entire scanning, image editing, or OCR needs, there are many other Graphics and OCR applications available from most software vendors. Because the driver for your scanner is TWAIN-compliant, you are not limited to only the applications that came with your scanner.
Info does not directly support any third party software (software you purchased separate from
the scanner. Use the general guidelines in the Scanner Operation section of this manual to
use other software.
36
Maintenance
Precautions
Keep the scanner out of direct sunlight. Direct exposure to the sun or excessive heat may
cause damage to the unit.
Do not install the scanner in a humid or dusty place. Moisture or excessive dust can impair
the scanning mechanism and may cause damage to the unit.
Be sure to use the proper AC power source. A surge protector is highly recommended.
Place the scanner securely on an even, flat surface. Tilted or uneven surfaces may cause
technical problems.
Retain the scanner box and packing materials for possible future shipping purposes.
Remember to unlock the scanner before connecting to a power source (see Scanner Setup).
If you are going to be moving the scanner, it is best to lock the scanning mechanism in place,
failure to do so may cause damage to the unit.
Cleaning the Glass:
Wipe the scanner glass with a dry, soft, clean cloth to rid the glass of dust or other particles
(such as from toner on photocopied or printed documents).
DO NOT use any solvents or other liquids to clean the glass. Liquid can seep around the
edges of the glass.
It is best to wipe the glass in long even strokes. Be sure not to push any small particles into
the tiny gap between the glass and plastic.
37
Troubleshooting
Frequently Asked Questions (FAQ)
Frequently Asked Questions are a collection of problem solving questions and solutions. If you are
having problems, looking in the FAQ might help you solve it. The FAQ is created using both those
questions we think you might ask and questions others have asked (with this or other scanners) and
the best solutions from Technical Support.
The FAQ is presented in a Question and Answer format to answer questions you might be having
about your scanner, its installation, and possible problems.
Setup & Installation
Do I have to have a special kind of port (or plug) to connect my scanner to my
computer?
Situation & Solution: The ImageReader PowerScan uses a parallel port connection. On most
computers, there is at least one parallel port (if you have a printer, this is the port that it also uses).
The ImageReader Ultra works with most port modes (the way a port passes a signal or communication from the computer to any device attached to it): Standard (SPP), Bi-directional (BPP), Enhanced
(EPP), and Enhanced Centronics (ECP). EPP is recommended as the port mode you that use with
the ImageReader PowerScan since it is the fastest.
My scanner cable is too short; can I attach a different or longer cable to my
scanner than the one that came with it?
Situation & Solution: You should use the cable that came with the scanner. Use of any other
cable is not supported by Info. If any damage occurs with the use of a different cable or if the scanner will not operate with a different cable, it is not covered under warranty.
The ImageReader Ultra uses a specific type of cable characterized by a “choke” around the cable
close to the point where it plugs into the scanner. The cable filters the signal going to the scanner in
a way that is not supported by a normal cable.
In addition, parallel port signal is generally relatively weak and degenerates the further it travels.
With a longer cable, there may not be enough signal getting to the scanner to enable it to scan successfully. Also, if you have a printer connected to the pass-through port on the scanner, a longer
cable for the scanner could decrease the operating ability of your printer.
Why does my scanner have two plugs (or ports) on the back?
Situation & Solution: Since the ImageReader PowerScan is a parallel port device, a pass38
through port was included as part of its design that will allow you to connect your printer to the
scanner so they can share the same parallel port on your computer. In most cases, you will not need
to install a second parallel port to have both the scanner and printer work on the same computer. See
the last section of Scanner Setup for instructions on how to connect both your scanner and printer to
the same port on your computer.
I have a Zip drive (or parallel port device other than a printer); can I connect
the ImageReader PowerScan to it or it to the ImageReader PowerScan?
Situation & Solution: There are two problems here. The parallel port is not designed to
operate multiple devices. And, each parallel port device other than a printer (and some printers)
wants to be connected directly to the computer without any other device in-between, including the
scanner. If you want to operate several parallel port devices, you might want to consider installing an
additional parallel port into your computer.
Can I use the ImageReader PowerScan with an A/B switch (a switch that connects to the parallel port and redirects the signal to one of two devices)?
Situation & Solution: Info does not recommend or support the use of an A/B switch with any
of its parallel port scanners, the ImageReader PowerScan included.
Many A/B switches are not capable of the advanced communication the scanner requires. In addition, if the scanner is not connected to the computer when Windows starts, such as when another
device is in possession of the port through the turn of the switch, Windows may not ever recognize
the scanner in relation to that port.
Windows 95 did not find my scanner as a new device. Or My scanner is not
listed in the Windows 95 Device Manager.
Situation & Solution: Windows 95 does not have built in support for scanning devices. Thus,
no scanner will be plug and play in Windows 95. You should follow the Quick Start Guide or the
Scanner Driver and Application Software Installation in this manual to install your scanner onto your
computer system.
I get a scanner test fail error when I attempt to scan.
Situation & Solution: There could be four reasons why this has occurred.
1. Verify that you have selected the correct source in your scanning program.
2. Check that the scanner’s cable is connected and tightly screwed into the computer’s parallel port.
It is not recommended to run the scanner connected to any non-computer port, including A/B
switches and other pass-through ports on parallel port devices. If you have another parallel port
device, such as a Zip drive, you may need to get a second parallel port. It is also necessary to use the
cable that came with your scanner. A standard parallel port cable will not work with the scanner.
3. Check that the AC power cord is connected to the scanner and is plugged into a power outlet. It is
recommended to use a surge-protector.
4. Check to be sure that your parallel port is set to EPP, ECP or SPP. Changing the parallel port
39
mode is usually done in the CMOS/BIOS setup (usually accessed while your computer is booting
up). Consult the documentation that came with your computer for specific information on how to
access your CMOS/BIOS and how to change the parallel port mode. The following directions may
not apply directly to your CMOS/BIOS setup. Change ONLY the parallel port mode. Making other
changes in your CMOS/BIOS could render your computer inoperable.
a) Shut Down your computer and restart it. While it is beginning to start-up, press the Delete
key (may also be F1, F2, or some other key sequence depending on your comoputer,
consult your computer manual) to go to the Setup Menu. There may be a message on your
screen while your computer is starting that will tell you which key to press to go into the
CMOS/BIOS.
b) Locate the Parallel Port option. This may be in a section titled Peripherals or Advanced or
just on a second page. The parallel port option might also include things such as LPT1 or
LPT2 and the address and IRQ.
c) Consult the on screen directions and change the MODE to EPP or ECP (preferred) or SPP.
If there is a Standard or LPT mode, this is likely to equate to SPP. If you have no other
modes, set it to this.
d) Change ONLY the parallel port mode. Making other changes in your CMOS/BIOS could
render your computer inoperable.
e) Save changes and exit.
Scanner Operation
There is nothing in the selection box when I go to select source. Or I got an
error message when installing the scanner driver (or application software).
Situation & Solution: If there are other programs running while you are installing the driver, it
may not completely install, even though you got the message the installation was successful. You
need to ensure there are no programs running in the background when you install the CD.
Windows 95:
1. With your desktop clear, press the Ctrl, the Alt and the Delete keys at the same time
(Ctl+Alt+Del). This will bring up a Close Programs window. Everything listed in this window is a
running program. Explorer is the Windows 95 desktop, you cannot close this program. Systray is
the taskbar and time listing in generally in the lower right hand corner of your screen, you also
cannot close this program (some systems do not list this program in the Close Program window). All
other programs can be closed one at a time.
2. Highlight a program then click on End Task. The Close Program window will disappear, but
pressing Ctl+Alt+Del will bring it back up. This will only close these programs until the next time
you boot your computer. All of these programs are generally set up to run as soon as you start your
computer or boot up Windows.
3. When only Explorer and Systray are listed in the Close Programs window, click on Cancel.
4. Try to install the driver once more following the instructions found in the Quick Start Guide or in
this manual (Scanner Driver and Application Software Installation).
Note: In Windows 95, you can also install the driver in Safe Mode. Copy the installation files into a
temporary directory before shutdown and reboot into Safe Mode, then install from the temporary
directory.
40
Windows 3.1 or Windows 3.11:
1. With your desktop clear, press the Ctrl and Esc keys at the same time. This will bring up a Task
List window. Program Manager is the Windows 3.1 and Windows 3.11 desktop and cannot be
closed. All other programs listed are running applications that can be closed one at a time.
2. Highlight a program then click on End Task to close it. This will only close these programs until
the next time you boot your computer. All of these programs are generally set up to run as soon as
you start your computer or boot up Windows.
3. When Program Manager is the only program listed, click on Cancel.
4. Try to install the driver once more following the instructions found in the Quick Start Guide or in
this manual (Scanner Driver and Application Software Installation).
When I go to scan, I get a “cannot access TWAIN driver” error.
Situation & Solution: You have most likely selected the wrong source for your scanner application. Which version of your scanner source you select depends on what application you are using
to scan. If you have Windows 95, you can only use 32-bit applications with the ImageReader
PowerScan.
How can I change the scanning area? Or How can I crop my image before I
scan?
Situation & Solution: To reduce the size of an image or to have less blank area in your
scanned image, you can crop the size of the scanning area so it will match your original. There are
two ways to change the scanning area: use a predefined scanning area setting or create a custom
scanning area. There are 6 predefined scanning areas.
In the TWAIN user interface window, click Preview. This will scan an image at 72 dpi and display it
in the preview window. The preview is not your final scanned image. You cannot save or edit or
OCR a preview image.
After the previewed image is displayed in the preview window, you can change the scanning area by
moving the dashed lines to encompass just the area you want to scan.
To move a line: Move your mouse pointer over the line until it changes shape (generally to a
double arrow pointing in opposite directions). Click & hold your mouse button. Drag the line to
where you want it, and then release the mouse button. Tip: You can drag the corners diagonally.
To move the entire area: Move your mouse pointer to the inside the area defined by the red line
or until it changes into four arrows (pointing in four directions). Click & hold your mouse
button. Drag the box to the position you want, and then release the mouse button.
When I try to scan at less than 300 dpi in InfoCenter 32, I don’t get any image.
Situation & Solution: The image size needs to match the scanning field. You will need to
increase the default size.
1.
2.
3.
4.
Open the TWAIN interface (click the New Scan button in InfoCenter 32).
Click on Settings.
Click on Scan Size.
Change the Scan Size to Inch (instead of Pixel).
41
5. Click on Maximum.
6. Click on Ok.
Why do my scanning results seem dark?
Situation & solution: Every computer deals with images and graphics differently. You may
need to make adjustments to better suit your computer.
1. Try using the Color Matching setting in the TWAIN user interface window. Note: The scan could
take a bit longer than without the Color Matching setting.
2. Modify the Gamma setting to 1.8 for your monitor and, when printing, set the Gamma to 2.2 for
your printer (consult your printer and/or monitor documentation for instructions on performing
gamma adjustments).
3. Prior to scanning, increase the Brightness setting of the TWAIN interface.
Is there anyway to speed up the scanning speed?
Situation & solution: Set your parallel port mode to EPP (see above). EPP is the fastest mode
usable with the scanner. If you do not have an EPP mode for your parallel port, you may need to
purchase an EPP interface card. Most computer stores sell parallel port interface cards capable of
EPP mode, or contact Info Peripherals at 800-777-3208, ext. 2534.
If you are using extra settings while scanning (Descreen, Color Matching, Quality), the scan may
also take longer because the scanner is doing more work.
When I attempt to scan, I get an Image Transfer Failed, Out of Memory, or
Cannot Write File message.
Situation & Solution: Error messages while scanning, such as these, usually only occur if
there is not enough free disk space or enough free resources for the scanning software to process the
image. Even if you seem to have enough free disk space for the image, the virtual memory usage
during the image transfer will take up some of the free disk space making it not free for the image
transfer.
There are three things that influence the size of the file created when scanning an image: Resolution,
Mode, and Scanning area. A higher resolution (dpi) will yield a clearer picture, but it will also create
a larger file. A color mode (millions of billions of shades) will create a larger file than a grayscale
(256 shades) or black and white (LineArt, Half-tone, Bi-tone, only two shades) mode. A larger
scanning area will also create a larger file than a small scanning area. The following example is a
letter-sized image scanned with a 30-bit scanner (billions of shades in the color mode). All sizes are
approximate and may differ from your own results.
100dpi:
300dpi:
4800dpi:
color
2 ½ Mb
25 Mb
6 Gb
grayscale
1 Mb
8 Mb
2 Gb
42
black and white
120 Kb
1 Mb
260 Mb
Try reducing the resolution of your image, reduce the scanning area, change the mode, or free up
hard drive space. Information on how to change the resolution, mode and scanning area is in the
scanner User’s Guide. Freeing up hard drive space is a matter of deleting or otherwise removing
unneeded files or programs. Information on how to do delete files is in Windows documentation.
Which files you delete or remove is your decision (only you know what is important to you). Some
software has special uninstall programs to remove them from your computer. The alternative to
freeing up hard drive space is getting a larger hard drive.
How do I use the application software?
Situation & Solution: The manuals for the software are on the CD-ROM disc that came with
your scanner. They are in pdf format that can only be read with the Adobe Acrobat Reader. The
Reader installation is also on the CD (see Included Software Applicaitons in this manual). If you
want printed manuals, you can print from the Adobe Acrobat Reader (for pdf files). Info does not
offer any pre-printed or bound manuals.
Printer Setup and Operation
What is the function of the pass-through port?
Situation & solution: The pass-through port will allow you to connect your printer to the
scanner so they can share the same parallel port on your computer. In most cases, you will not need
to install a second parallel port to have both the scanner and printer work on the same computer.
Connect the scanner cable directly to the parallel port on the computer (the port where your printer
has been connected). Connect the scanner cable to the port on the scanner labeled To PC Parallel
Port. Connect the printer cable to the port on the scanner labeled To Printer. Make sure all connections are tightly connected and screwed into place.
Sometimes, while my printer is connected to the scanner, my printer does not
work.
Situation & solution: There are several things to check:
1. Your scanner may be off. Make sure the scanner is turned on when you want to print (indicated by
the power light on the front of the scanner).
2. Check the scanner cable connection. Be sure the printer cable is plugged into the port marked To
Printer on the back of the scanner.
3. Occasionally there may be a conflict between the ImageReader Ultra and specific printers. If you
get an error message “Printer not found” or “Printer not recognized”, you may need to adjust your
printer spooler to print direct to printer rather than print to spooler.
Windows 95:
a) Click Start
b) Click Settings
c) Click Printers
d) Right-click with your mouse on your printer icon.
e) Click Properties
43
f) Click the Details tab
g) Click Spooler Settings
h) Select Print Directly to the Printer
i) Click OK and OK again
j) If prompted to reboot, do so.
k) If the problem persists, you will need to disable the bi-directional properties of your printer (refer
to your printer documentation or consult your printer manufacturer).
Technical Support
If you experience difficulties and cannot find solutions within this, we have a comprehensive Technical Support Department ready to assist you in several different ways.
Technical Support is for hardware or software problems. They will not provide tutorials on the use
of the scanner or application software.
Website: http://www.infoconnection.com
Updated on a periodic basis with the latest FAQs and driver updates.
Fax on demand: (408) 538-2585
Updated on a periodic basis with the latest FAQs.
Bulletin Board Service (BBS): (408) 538-2580
Updated on a periodic basis with the latest FAQs and driver updates.
Email: [email protected]
Communicate with members of our Technical Support staff.
Fax: (408) 538-2577
Communicate with members of our Technical Support staff.
Voice: (800) 777-3280 or (408) 538-2510
Communicate with members of our Technical Support staff.
The Tech Support staff is available Monday through Friday, 8am to 4:30pm Pacific Time, excluding holidays.
The Website, Fax on Demand, BBS, Fax and Email are available 24 hours a day 7 days a week (fax
and email replies are made only during the hours of voice tech support, with of a goal of within one
working day of delivery).
Replies are generally returned in the same media in which they are received, i.e. an email communication will be replied to via email.
If you call the Tech Support and get voicemail, all the technicians are on other calls, please
leave some basic information and a technician will attempt to return your call at a later time
(the goal is within one working day of receipt). Calls are returned in the order they are
received.
44
NAME:
PHONE NUMBER:
FAX NUMBER:
ADDRESS:
E-MAIL ADDRESS:
COMPUTER MANUFACTURER: (what company built your computer or if it
is custom built)
COMPUTER TYPE: (486 or Pentium and what speed)
VERSION OF WINDOWS: (Windows 95 or Windows 3.1 or 3.11)
SCANNER MODEL NUMBER: (Commonly found on the front of the Quick
Start Guide)
SERIAL NUMBER: (Usually on the back or bottom of the scanner or on the
box)
WHEN YOU PURCHASED THE SCANNER:
WHERE YOU PURCHASED YOUR SCANNER:
PRINTER TYPE: (if your problem is related to your printer)
MODEM TYPE and FAX PROGRAM: (if your problem is related to faxing)
DESCRIPTION OF YOUR PROBLEM: (Please be as specific as possible,
including which program you were using to scan, what dpi & mode, etc.)
45
Specifications
All specifications are subject to change without notice.
Model: FB750
Scanner Type:
Optical Resolution:
Maximum Resolution:
Scanning Modes:
Document Size:
Interface:
Power Source:
Power Consumption:
Dimensions: (WxDxH)
Weight:
Flatbed Scanner
600 dpi * 600 dpi (H*V)
9600 dpi
Black & White Line Art mode
Halftone mode
10-bit gray scale (8-bit output)
30-bit color (8-bit output)
A4 and Letter
Parallel port (supports SPP/EPP for PC)
100Vac~240Vac, 50~60Hz, external
12 watts (12Vdc,1A)
12”x18”x5”
8 lbs
FCC Radio Frequency Interference Statement
This equipment has been tested and found to comply with the limits for a class B digital device,
pursuant to Part 15 of the FCC rules. These limits are designed to provide reasonable protection
against harmful interference in a residential installation. This equipment generates, uses, and can
radiate radio frequency energy and, if not installed and used in accordance with the instruction
manual, may cause harmful interference to radio communication. However, there is no guarantee that
interference will not occur in a particular installation. If this equipment does cause harmful interference to radio or television reception, which can be determined by turning the equipment off and on,
the user is encouraged to try to correct the interference by one or more of the following measures:
Reorient or relocate the receiving antenna.
Increase the separation between the equipment and receiver.
Connect the equipment into an outlet on a circuit different from that to which the
receiver is connected.
Consult the dealer or an experienced radio/TV technician for help.
CAUTION: Any changes or modifications not expressly approved by the manufacture of this
device could void the user’s authority to operate the equipment.
46
EC Declaration of Conformity
According to EN45014
Manufacturer’s Name:
Info Peripherals, Inc.
Model Number :
FB750
Conforms to the following Product Specifications:
Emission:
EN 50081-1 (1992)
EN 55022 (Class B) (Conducted Radiated) (1994)
EN 60555-2 (Harmonics) (1987)
EN 60555-3 (Flicker) (1987)
Immunity:
EN50082-1 (1992)
IEC 1000-4-2 (ESD) (1995)
IEC 1000-4-3 (RS) (1995)
IEC 1000-4-4 (EFT/Burst) (1995)
IEC 1000-4-5 (SURGE) (1995)
Date:
December 1995
47
Appendix
Here you will find information helpful for learning more about your scanner and digital imaging.
The information provided in this appendix is for your information and does not imply any warranty
or support for anything you do with this information.
Tips & Hints for Using Your Scanner
Scanning
To get the best possible scans, there are several factors other than the scanner that will influence how
you view the image.
1. Your graphics card will affect the way you see the image. The more colors you can display, the
better. If you can, set your video to 16-bit Hi Color or 24-bit color True Color. 16-bit color allows
the computer to use thousands of shades or variations of color. 24-bit allows millions of color.
Contrast this with 256 colors or, worse yet, 16 colors.
2. For visual part of the display, having an SVGA monitor is infinitely better than a VGA monitor
(capable of displaying better resolutions & colors).
3. On some computers and with some originals, you can get a better image if you adjust the gamma,
brightness, contrast and/or other effects.
4. The graphics program that you are using to scan can also effect the image, especially after you
have scanned it. Some more advanced graphics programs will allow you to adjust several effects
in your image: sharpening, auto-cropping, descreening and other image corrections. Whether you
need to use some of these effects will depend on your use for the image and the quality or source
of the original. The process of scanning will magnify any flaw in your image, even if that flaw is
not readily visible when you look at the image without any magnification. For example, scanning
magazine pictures will often reveal a moiré pattern because of the resolution of the original and
the process used in the printing (moiré will often look almost as if someone has a dirty screen laid
over the image). Moiré can, in some instances, be corrected through de-screening either during
the scanning process (refer to Scanner Operation) or in more advanced graphics programs after
the image is scanned (such as in Ulead Photo Impact).
Printing
If you are going to be printing your scanned image, there are some important things to keep in mind
for both your printer and while scanning.
1. A printer capable of higher resolutions and more colors (16-, 24-, or 30-bit color) will give you a
truer image.
2. A printer which is capable of higher resolution will also improve your printed output. You may
have to use special paper to get the best results or to achieve the higher resolution setting of your
printer.
3. Scan at the resolution of the printer (i.e. if the printer is 300dpi scan at 300dpi).
4. Make sure your scanned image does not exceed the available printing area of your printer (all
48
printers require margins & most will shrink the image to fit within those margins).
5. When scanning documents with the Copier function, it will be processed as an image not a text
document. If there are margins on the document but you scan at the full 8 ½ x 11 inches, the
printer will see that as an 8 ½ x 11 inch image and will shrink it to fit its margins.
6. When scanning documents, you can often get better results by scanning in Line Art or Bi-tone
(which mode depends on the available scanner driver setting).
7. You can only print color images with a color printer.
Saving
After you have scanned an image, you are likely to want to save the image as a file.
Click File
Click Save As or Save Image As
This will open a dialog box that will help you to save the file.
1. Type a file name. Don’t worry about a three-letter
extension, the program will add that for you based on
the file type you choose. In 16-bit programs, your file
name must be eight letters or less. In the file name,
you can also include some other characters such as
numbers, dash, underline, and many of the symbols
above the numbers. Your file name cannot include a
period or dot, a question mark, an asterisk or star, a
slash, a back-slash, a colon, a semi-colon, or a
comma.
2. Choose a file type. Click on the down arrow by Save File as Type or Save as Type. BMP is an
uncompressed format that can be viewed in Windows Paint and Paintbrush as well as most graphics programs. JPG and GIF are compressed formats that will create a file that will take up less
space but require a special graphics program to view. JPG and GIF are the preferred formats for
sending as email attached files.
3. Choose where to save the file. Remember where you save the file so you can find it later.
a) To change the drive (such as to the floppy drive, which is A:), click on the down arrow of
Save in.
b) To change the folder, double click on the folder icon.
4. Click on OK or Save.
OCR, Changing a scanned document into text you can use in a word-processor
When you want to do OCR, there are some important things to keep in mind.
1. In InfoCenter 32, the scan mode should be set to Grayscale. In most other OCR applications, the
scan mode should be set to Line Art (which is black and white only).
2. The resolution should be between 300-400dpi.
3. The original document to be scanned should be in clear, plain typewritten text (best results will
come from something printed on a laser printer).
4. Be sure the scanned image is right side up. OCR will not work on an image that is upside-down,
side-ways or tilted.
5. OCR in InfoCenter 32 will not work on handwriting of any type, on most decorative fonts, or on a
49
document with a background image (like a printed watermark).
6. Most error messages while doing OCR are the result of one of the above not being as it should be
(ie. too high of a resolution or an incorrect scan mode).
7. Most OCR applications cannot retain your page layout, but will only convert the word present.
Many OCR applications also do not handle fancy fonts or drastic font sizes accurately. If you have
images on your page or special fonts circumstances, your OCR results may be diminished.
Saving to Floppy Diskettes or for Email
When you are saving a file to a floppy diskette, the file MUST be smaller than 1.44 Mb (the maximum capacity of a floppy diskette). When you want to email an image, there is one very important
thing to keep in mind: the bigger the file the longer it will take to transfer (upload or download).
There are three things that influence the size of the file created when scanning an image: Resolution,
Mode, and Scanning area. A higher resolution (dpi) will yield a clearer picture, but it will also create
a larger file. A color mode (millions of billions of shades) will create a larger file than a grayscale
(256 shades) or black and white (LineArt, Half-tone, Bi-tone, only two shades) mode. A larger
scanning area will also create a larger file than a small scanning area. The following example is a
letter-sized image scanned with a 30-bit scanner (billions of shades in the color mode). All sizes are
approximate and may differ from your own results. Information on how to change the resolution,
mode and scanning area is in the Scanner Operation section.
100dpi:
300dpi:
4800dpi:
color
2 ½ Mb
25 Mb
6 Gb
grayscale
1 Mb
8 Mb
2 Gb
black and white
120 Kb
1 Mb
260 Mb
The way you save the file will also influence the final size. If you use an uncompressed format, such
as BMP, your saved file will be as large as the scanned image’s temporary file. For email or saving
to a diskette, you should use a compressed file format, such as JPG or GIF, which will reduce the
size of the saved file (when you email an image, be sure your receipiant has software capable of
viewing the file type you are sending). Most comercial imaging programs (such as the one that came
with your scanner) supports either the JPG or GIF format.
Emailing Images
When you want to email a JPG or GIF or any file, you will have to attach the saved file to your email
message. Different email programs have different methods of attaching a file, you will need to
consult the documentation that came with your email program for information on attaching files.
Some email programs have a button with a paperclip icon that will start the attachment process.
50
Glossary of Imaging Terms
Some of the terms here are not used in the scanner or camera driver or application software included
with your scanner or camera. The information here is for your information only and does not imply
support for any imaging task or application.
3rd-Party Software
Application software of many kinds is generally available from your computer store or other vendor. Any
application that was not supplied with your scanner is considered 3rd party. Info does not directly support 3rd
party software. There are many general guidelines to using all scanning applications (see Scanner Operation).
16-bit & 32-bit
This refers to the operating system or an application written for a specific operating system. Windows 3.x is
16-bit and Windows 95 is 32-bit (to be precise a 32-bit emulation over 16-bit). Programs that work in both
Windows 3.x and Windows 95 are 16-bit (also called Legacy programs). Programs written only for Windows
95 are 32-bit and will not work in Windows 3.x. When you are choosing a source, if you are using a 16-bit
application, you should choose (16). If you are using a 32-bit application, you should choose (32). 3rd party
software can be either 16-bit or 32-bit and an appropriate source should be chosen.
36-bit color, RGB
Color images composed of three 12-bit channels: red, green, and blue (RGB). Trillions of color combinations
are possible, providing for more vivid color reproductions with subtle gradations of hue. Even though a
picture is scanned with 36-bit hardware, the image output will be 24-bit due to limitations of digital imagery
once it is on your computer. 36-bit color has nothing to do with the operating system.
36-bit color, CMYK
Color images composed of four 9-bit channels: cyan, magenta, yellow, black (CMYK). Trillions of color
combinations are possible, providing for more vivid color reproductions with subtle gradations of hue. 36-bit
color has nothing to do with the operating system. At this time (May 98), none of the ImageReader scanners
or other imaging devices are CMYK enabled. There are many graphics programs that will convert RGB color
to CMYK.
32-bit color
Color images composed of four 8-bit channels: cyan, magenta, yellow, black (CMYK). Over 50 billion color
combinations are possible, providing for more vivid color reproductions with subtle gradations of hue. 32-bit
color has nothing to do with the operating system. At this time (May 98), none of the ImageReader scanners
or other imaging devices are CMYK enabled. There are many graphics programs that will convert RGB color
to CMYK.
30-bit color
Color images composed of three 10-bit channels: red, green, and blue (RGB). Over 50 billion color
combinations are possible, providing for more vivid color reproductions with subtle gradations of hue. Even
though a picture is scanned with 30-bit hardware, the image output will be 24-bit due to limitations of digital
imagery once it is on your computer.
24-bit color
Color images composed of three 8-bit channels: red, green, and blue (RGB). With 24-bit color, it is possible
to have over 16 million possible color combinations providing for a more photo-realistic image. Also called
True Color.
51
8-bit grayscale
Grayscale, in contrast, is scanned in 8 or 10 bits (output of 8 bits), a single channel of color, providing for 256
shades of gray.
1-bit black and white
Line-Art, Error Diffusion and Half-tone modes scan in single bit (either on or off) which is only black and
white, no shades or gradations of color. Error Diffusion and Half-tone use spacing of pixels to mimic
grayscale imaging.
Aliasing & Anti-aliasing
Jagged edges on objects or changes of colors within an image. Anti-alias is any software application which is
designed to eliminate aliasing in images.
Alpha Blending
Additional information is coded into each pixel for creating transparent materials.
Application Software for scanners
Applications are any software that manipulates scanned images or text in some manner. Different software
has different functions: some allow you to manipulate and modify an image (see Imaging Software) and some
allow you to convert a scanned document into editable text (see OCR).
ASCII text
Plain text without any fonts or formatting codes (including line breaks in most cases). Most word-processors
can import ASCII text.
Aspect Ratio
This is the ratio of the width compared to the height in a rectangle. 1.0 would be a square.
BBS
Bulletin Board Service. Computers setup so that other computers can connect (logon) directly to them. The
purpose of most BBSs is to allow the transfer of files, other data, and typed communication. The graphics
used on most BBSs is ANSI, a primitive form of graphics based on ASCII with color and shades codes added.
BIOS
Basic Input/Output System and a program code in the permanent memory (ROM) of a computer, which
performs the self-test and several other functions during system startup. By changing values in the CMOS
(see below), you can change how the computer deals with its peripherals, its hard drive(s), and many other
things.
Bit
The smallest unit of memory in the computer is called a bit. A bit can be set to either on or off (1 or 0).
Greater bit-depth (more bits per pixel being used) allows for more complex image information which can
render a clearer image. However, more bits per pixel do create a bigger file even when scanning at the same
resolution.
Bit-depth
The number of bits in pixel, the bit-depth is divided equally into the number of color channels.
52
Bitmap
The representation of a digital image in the computer’s memory.
BPP
Bi-directional Parallel Port mode. This less advanced port mode allows communication to pass in both
directions between the computer and parallel port devices.
Brightness
The balances of dark and light shades determine the intensity of an image.
Cast
Too much of one color in an image, such as too much red giving an image an all-over red appearance.
CCD, Charged Coupled Device
A special light-sensitive integrated circuit that is designed to capture digital images directly. CCD is found in
scanners, digital cameras, camcorders, and other imaging devices.
Chrominance
Color in Video, equivalent to hue and saturation.
CIS
Contact Image Sensor. A scanning method that combines the elements needed to digitize an image into a
single sensor. The CIS method provides for quick scanning.
Cloning
Free-hand retouching of an image by copying patches of one image or area and pasting them into another
image or area of the same image.
CMOS
The setup of the computer’s basic components stored in permanent memory (ROM). Some of the
components governed by the CMOS are IDE controllers (hard drives and CD-ROM drives), serial and parallel
ports, memory caching, etc.
CMYK or Cyan/Magenta/Yellow/Black
A color model for defining and representing colors consisting of four channels. Combining these four colors
in various proportions generates color. Most often found in 32-bit color (8-bit channels).
Color Channel
Color is made up of components that build up the image. Combinations of elements from the channels create
the shades. Each bit in a channel can be combined with a bit from another channel to create a different shade.
The more bits in each channel (the greater bit-depth), the more shades that can be produced. There are
different types of channels that build up an image differently: RGB uses three channels and CMYK uses four.
Complementary Color
The color that can be added to another color to get gray. The opposite color on the color wheel.
Red- Cyan
Green-Magenta
Blue-Yellow
Comport
Another name for a serial port.
53
Compression
Compression means the reduction of data needed to save information, especially image and sound data. There
are lossless methods, which only remove redundant data, and lossy methods, which achieve extremely high
compression rates at acceptable loss of information (such as JPEG and MPEG). A lossy format can alter an
image’s appearance.
Continuous Tone
This process uses dots of any color in a continuous range to represent the image. Contrast this with halftoning which is the clustering of dots to create an illusion of shading and different colors. Many high end
printers use continuous tone, but most printers and print processes use half-toning. A lower resolution with
continuous tone will allow photo-quality that requires a higher resolution with half-toning.
Contrast
The range between the darkest and the lightest shades determine the number of shades in an image. An image
with low contrast can look dull and flat.
CPU
Central Processing Unit, this is the main processor chip of a computer, for example a Pentium or a 486.
Crop
This term is used primarily with images and graphics applications. If you want to cut away a portion of an
image, such as trimming the sides or top and bottom, you can use an imaging application to Crop the image,
cut away the portions you don’t want to keep.
CRT
Cathode Ray Tube. The picture tube inside computer monitors and televisions.
D/A Converter
Digital/Analog converter, a signal converter which converts a digital input signal to an analog output signal,
for example the image data in the display memory of a graphics board to a video signal the monitor can
display.
Descreen
Most printed material (such as magazine photos) commonly has a moiré pattern across the image. The moiré
is caused by the printing process and will often appear like a dirty screen has been placed across the scanned
image. Descreen removes or reduces the moiré pattern in the image. Many scanners have built in
descreening to remove the moiré effect during the scan. If you have moiré in a completed scan, many
imaging applications also have a descreening feature.
Digital Camera
A camera designed to create digital images, usually with CCD, by converting light into electrical signals
which can then be stored in the camera memory or transferred (downloaded) to a computer. With present
technology, digital cameras are incapable of achieving the higher resolutions possible with film-based
cameras.
Digital Image
An image that is stored in a computer’s memory or in a way a computer can access. You can create a digital
image by scanning an item (picture, document or object) with a scanner, by taking a picture with a digital
camera, by capturing an image with any other type of imagining device, by receiving a fax, or by creating it
directly on the computer using an imaging or graphics application.
54
Direct Color
Generic term for TrueColor, RealColor and HiColor. In these modes, the color information saved in the
display memory is not translated by a look-up table, but passed directly to the D/A converter. This means that
the full color information has to be saved for each pixel.
Display Adapter or Video Card
A card installed inside the computer (or integrated into the motherboard) that generates video signal to create,
with the monitor, a screen image. Most current display adapters are capable of displaying multiple
resolutions at varied bit-depth. The higher the screen resolution, the finer the detail. More colors will
provide images closer to picture quality. Monitors with a higher refresh rate will have a reduced flicker.
Dithering
Creating a special shade of color with a lot of near together grouped pixels of different colors. May be
necessary at low color depth (e.g. 256 colors).
DMA
Direct Memory Access. This is a method of data transfer, where information is transferred directly between
system components without the help of the CPU. Enhanced Centronics Ports use a DMA address as do most
sound cards and some other peripherals.
DPI or Dots Per Inch
The resolution of images on the computer or from the printer is measured in how many dots (or pixels) there
are in each inch of the image. The higher the DPI, the more precise the image can be. DPI also directly
affects the size of the image file: the higher the DPI, the bigger the file.
Drag and Drop
This is a Windows and Mac term that refers to moving icons or item around on the screen by using the mouse.
Point the mouse cursor at the desired item and click and hold down the left mouse button with your index
finger. While holding the mouse button down, move the mouse in the direction you want the item to go. The
item “drag” across the screen. When you have the item over the area you want to put it, release the mouse
button to “drop” it.
Driver Software
The driver allows software to communicate with hardware; it allows the computer to “drive” the device (such
as a scanner). The scanners will only work with the computer if there is driver software installed.
Dynamic Range
The extent of the range of brightness levels in an image.
ECP
Enhanced Centronics Port mode. This mode will allow the computer to send an advanced parallel port signal
to installed parallel port device(s). ECP uses a DMA channel to increase its communications abilities.
Email
Electronic mail, text messages sent through a network, such as the Internet, to a specified individual or group.
Email messages can carry attached files, such as word-processing documents or graphics. Email is sent and
received with special software called an email client: Eudora, MS-Exchange, etc. Some ISPs’ log on program
and many Web Browsers have email clients built into them.
55
EPP
Enhanced Parallel Port mode. On some computers, you will have an EPP emulation, which is denoted by a
version number in the BIOS (ie. EPP 1.7). This mode will allow the computer to send an advanced parallel
port signal to installed parallel port device(s). The EPP mode also allows fast communications through the
parallel port and is the preferred mode for most parallel port devices.
Error Diffusion
A single-bit scanning mode that uses the size of pixels to mimic grayscale imaging with good detail.
FAQ or Frequently Asked Questions
This is a listing of questions that are often asked of tech support and their answers. If you are having
problems, if you look at the FAQs first, you might be able to solve your own problem without needing to
contact Tech Support. You can find Info’s FAQs on the Web site, the BBS, and through the fax-back system.
Fax or Facsimile
This is a method to send digitized information from a computer to another computer or Fax device through
the phone lines. Faxing requires the sending computer to have a fax-modem and faxing software installed and
the receiver to have either a computer with a fax-modem and fax software or a dedicated fax machine.
File Formats
Some programs allow you to save images or OCR text as a variety of file formats. Which formats are
available depend on the program you are using. Some file formats are specific to individual programs and
can only be used in that program. In which file format you save an image or OCR text file depend entirely
upon your uses for the file.
Free Disk Space
This is the amount of space you have FREE on your hard drive, not to the total hard drive space. If you have
a lot of programs and files on your hard drive, you may not have much free disk space.
Gamma
The gamma curve relates to the RGB component values of pixels in an image. Set the gamma curve to match
the eye (2.2).
Graphics Formats
There are several graphics formats in which you can save a scanned image. The major differences between
graphics formats is the way the image is stored (compressed vs. uncompressed), displayed (how you or
someone else can view the image), or commonly used (some formats were designed with specific uses in
mind). The appearance of any graphic differs from computer to computer based on the hardware and
software used to view it.
Grayscale
An image made up of shades of gray, like a black and white photo. Generally, grayscale is either 4-bit,
allowing 16 shades, or 8-bit, allowing 256 shades and providing a more photo-realistic quality.
Halftone
Halftone images are composed of a pattern of black dots that simulate grayscale, such as many newspaper
photos.
HiColor or RealColor
HiColor designates a 15-bit or 16-bit (bits per pixel) graphics mode, 32,768 or 65,536 colors.
56
Hue
Hue provides the contrast between colors, what distinguishes one color from another.
HSV
Hue Saturation Value. The characteristics of the image’s color based on the hue, saturation and brightness
(value).
Histogram
This graph of how many numbers of each possible brightness levels occur in an image is created by looking at
each pixel and computing its brightness and then counting the number of times each level occurs in the image.
The Histogram can be used to gauge the overall quality, brightness, contrast, and dynamic range of an image.
Image Editing
You can take any image, either scanned or from a file and manipulate the image in a variety of ways, limited
only by imagination and the limitations of the software. Many image editing software applications are also
scanning applications. There is a wealth of 3rd party TWAIN-compliant image editing software, much of it
available through the Internet as shareware and freeware: Print Shop Pro, Corel, Fractal Painter, Paint, Paint
Brush, etc. With imaging software, it is possible to save your image in a variety of file formats depending on
the software you are using, see Graphics Formats.
Inkjet Printer
An inkjet prints by spraying minute dots of ink on the paper. Most Inkjet printers print images by half-toning,
clustering dots to create an illusion of shading. Most inkjet printers also require special paper and/or inks to
achieve their highest resolutions or print qualities.
Internet
A global Transmission Control/Internet Protocol (TCP/IP) networks linking millions of computers for
communications purposes. The Internet originally was developed in 1969 for the US Military and later
encompassed educational and research facilities as well. The Internet grew from this to now encompass
commercial and individual use today. The most visual, and most popular, part of the Internet is the World
Wide Web. The Web is a system of graphical or text files linked by the Hypertext Transfer Protocol and
Hypertext Markup Language, allowing a person to simply click on one page and end up on another which
may reside on a completely different computer.
Interpolated Resolution
The software of the scanner driver (or the driver of other imaging devices) enhances the resolution of an
image. Optical resolution represents the true resolution of a scanning or imaging device. Interpolation takes
the optical resolution and converts it to a higher value buy computing the data between measured values.
Invert
Reversing the color values in an image. Inverting a color image will yield something that has the appearance
of a negative. Inverting a black and white image will reverse the black with the white.
Interlaced
A screen display is drawn in lines. In interlaced mode, in a first stage all the even lines are drawn, and in a
second stage all the odd lines. This allows a higher graphics resolution, but produces more flickering than
non-interlaced graphics modes.
Interpolation
A video image must be stretched or shrunk in order to fit into the display window. If pixels are simply
57
multiplied (for example, a block of four equally colored pixels represents the original pixel), aliasing effects
(“blocks” and “stairs”) will occur. This can be avoided by interpolation procedures (using average colors for
inserted pixels). Horizontal interpolation (x filter) is relatively easy to perform, since the pixels are drawn to
the screen in lines. Vertical interpolation (y filter) is more difficult and requires a complete pixel line to be
buffered.
I/O Address/Port
Input/Output addresses or I/O addresses are physical addresses of hardware subsystems such as those for
interface cards or parallel ports. The parallel port and the serial port(s) both use an I/O setting which is
configured in the BIOS.
IRQ
Interrupt ReQuest lines are hardware connections which can transmit interrupt signals from hardware
subsystems to the CPU to trigger certain procedures. The parallel port and the serial port(s) both use an IRQ
setting which is configured in the BIOS.
ISIS
Image and Scanner Interface Standard. A scanning standard developed by Pixel Translations. None of the
Info ImageReader scanners have ISIS drivers. ISIS is used primarily in scanners which a solely dedicated to
imaging for OCR purposes.
ISP
Internet Service Provider, these organizations or businesses allow individuals to log on to their computers for
the purpose of connecting to the Internet. There are primarily four types of ISPs. The direct connection to
the Internet allows the use of your own Internet software but will often provide basic Internet software (i.e. a
Web Browser and Email client) for free. The commercial online service, such as America Online (AOL) or
CompuServe, requires you to use a specific type of software (proprietary) to connect to their service and
browse the web or read and send email. Many colleges and universities allow their students and faculty to
connect to various parts of the Internet for such things as email and web browsing. And, there are several
companies that allow an individual to access email sending and receiving for free. These free email ventures
often use a proprietary email client and/or restrict the email in some way, such as not allowing file
attachments or allowing only a maximum number (or volume) of messages per day.
Laser Printer
A laser printer prints using a dry toner xerographic process which is the same process photocopiers use.
Line Art
Images that are purely black and white, such as black type writing on white paper or line drawings. Line Art
is a single-bit mode.
Lossy
When a file is compressed using JPG or another “lossy” format, to compress the file size some of the picture
elements are excluded or lost. With most degrees of compression, the changes to the image are usually only
apparent when you magnify the image. Using a lower compression rate (some applications will allow you to
configure this) will produce less loss.
Luminance
The perceived brightness, black and white value, of a pixel in video.
Memory Manager
A program for handling memory above the 640 K barrier of DOS. DOS comes with its own memory
58
manager, Memmaker, which can be run from a DOS-prompt (but not within Windows). Running a memory
manager can free up conventional (the first 640K) memory for use by programs.
MIME
Multipurpose Internet Mail Extensions, a standard format that allows the attachment of graphics and other
non-text files, such as programs, to text-based e-mail messages.
Moiré
Moiré is caused by the printing process of images in printed materials such as books or magazines. Moiré is
caused by the resolution the original picture was scanned or digitized at in combination with the resolution
the image was then printed. Descreening can often remove the moiré effect from an image.
Monitor
The visual output screen of the computer. It works with tiny clusters of tiny red, green and blue dots which
are struck by a beam of electrons sweeping across the screen in a raster pattern which causes their phosphors
to give off specific light which, in turn, reaches your eye as perceived color.
MPEG-1
Video compression standard for consumer applications, developed by the Motion Picture Experts Group (ISO
11172). Good resolution and speed, VHS quality. Normally requires hardware decompression (e.g.
ELSAmotion). It is designed for resolutions of 352 x 288 with 25 frames per second (PAL), or 352 x 240 with
30 or 24 frames per second (NTSC or motion picture) and for common CD-ROM transfer rates. Approx. 70
minutes of video can be saved on one CD.
MPEG-2
Broadcasting quality standard, for example for full CCIR 601 quality or HDTV (high-resolution 16:9
television). Requires considerably higher transfer rates and memory capacities than MPEG-1 and is therefore
not suitable for the consumer market.
MPEG-3
This is a relatively new standard that compresses the image or audio (or both) without loss of quality. While
MPEG-3 decoders/players are becoming more common, encoders/editors are not widely available.
NTSC
National Television Standard Committee. The standard video format of North America (including the United
States), Central America, and Japan.
OCR or Optical Character Recognition
The software will attempt to convert a scanned image of a document into editable text to be used in a wordprocessing program. If the software does not recognize a character shape, it will either make its best guess or
will insert a null type character (differs program to program). Good OCR software can be quite expensive.
Some OCR software is quite advanced & can convert a variety of fonts and page formats, including forms.
There are several different TWAIN-compliant OCR software packages that are available as 3rd-party
software, some even available from the Internet as shareware or freeware: Cuneiform, OmniPage, WOCAR,
TextBridge and others. OCR relies heavily on the clarity of the document scanned. Documents printed on an
inkjet or laser printer most easily converted with OCR. Documents that have been printed on a dot matrix
printer or come are carbon duplicates may be difficult to OCR. Some OCR programs can only convert to
ASCII, plain, or other forms of text, which usually will not retain format or fonts, found in the original. Most
OCR programs are incapable of converting any item that was not scanned in LineArt mode (single bit, black
and white).
59
OpenGL
3-D software interface (3-D API). Implemented, for example, in Windows NT and later releases of Windows
95. Based on Iris GL from Silicon Graphics and licensed by Microsoft.
Optical Resolution
The true resolution of the scanner determined by its hardware optics. The scanner driver yielding an
interpolated resolution often enhances optical resolution.
PAL
The standard video format of Europe, Australia, and New Zealand.
Palette
The palette is a limited set of colors that are present in a digital image.
Parallel Port
A 25-pin (generally female) port on the computer that transmits data in a parallel stream. The parallel port
signal is not very strong and degrades the further it goes. Even though there are now several different devices
designed to connect to a parallel port, the parallel port generally cannot support multiple devices (more than
one or two).
Parallel Port Device
Any device that is designed to be connected to a computer parallel port: Printers, Scanners, Zip drives, Image
Capture Devices, etc.
Parallel Port Mode
The parallel port mode is the mode that is set in the BIOS to tell the computer how to communicate with
devices connected to the parallel port, such as a printer, scanner, or other parallel port device. There are
different parallel port modes that are supported by most modern computers: SPP (standard), BPP (bidirectional), EPP (enhanced), and ECP (enhanced centronics).
Pass-through Port
A pass-through port will allow signal to be sent through it to another device connected to the item with the
pass-through port to allow more than one device to use the same computer port. Pass-through ports are
generally found on parallel port devices (other than most printers) and SCSI devices.
Photo CD
This file format was developed by Kodak for digitizing and storing 35mm negatives or slides on CD.
PMT
PhotoMultiplier Tube. A special light-sensitive vacuum tube that is used to convert films or prints into digital
images. PMT is used in expensive, professional-quality drum scanners. Most consumer-quality or
inexpensive scanners use CCD or CIS.
Pixel
An abbreviation of Picture Element, this is the smallest possible element of an image on the screen, or a
single dot of one color usually displayed in rows and columns.
Plug and Play
Windows 95 and some motherboards support Plug and Play devices. The Windows 95 detects these devices
or interface cards when it first boots after their installation. After Windows 95 detects a device, it will begin
60
installing support for the device. Only devices or interface cards that Windows 95 has direct support for can
be Plug and Play. Scanner, digital camera and other imaging device support is not built into Windows 95;
therefore, no scanner, digital camera or other imaging device can be truly Plug and Play. As of this writing
(May 98), support for imaging devices is reputed to be integrated in Windows 98, but since the full-release
has not yet been revealed, there is no way to verify this.
POP3
A communications protocol that directs email exchanges on TCP/IP networks. Most applications that have a
Send Mail feature require a Pop3 style email account and client. America Online (AOL) or other Online
Services are not Pop3 but use their own, proprietary formats for mail transfer within their service and convert
the proprietary format at the network level to Internet standards for sending outside their network.
Posterizing
Posterizing is cause by reproducing a continuous tone image using a limited palette of grays and colors. The
word posterizing refers to the creating of images for posters which generally only use a small number of
different inks in the printing process.
Preview or Prescan
In the TWAIN interface, or scanner driver window, there is generally a button labeled Preview or Prescan.
This will allow you to make a preliminary scan of an item so you can make changes to the way the scanner
will scan the item (i.e., changing the contrast, brightness, resolution, or scanning area). Preview images are
scanned at 72dpi (the resolution of your computer ‘s video). A preview image is not a final scan. You cannot
edit the preview image outside of the TWAIN interface nor is it possible to save a preview image.
RAM
Random Access Memory. Chip memory of a computer or expansion board that can be read from and written
to (unlike ROM = Read Only Memory).
Raster Graphics
A digital method for creating an image, using a complex series of dots. Most graphics formats are based on
raster graphics: BMP, GIF, JPG, TIF, etc.
Resampling
Increasing or decreasing the size of an image by increasing or decreasing the number of pixels present.
Resolution
Resolution governs the clarity of the image or the amount of detail an image can hold. It also determines how
closely the pixels of an image are packed. Resolution is measured in dots per inch (DPI). Computer screens
commonly display 60-80dpi. Continuous tone printers can achieve photo-quality with 200-300dpi while
conventional printers (using a half-tone process) require a much higher resolution, generally 1200 to 2400, to
achieve photo-quality.
Note: High resolution images especially color images, create HUGE files and consume large amounts of
resources to process. High Resolution images may also require the computer to have advanced Video
capabilities.
RGB or Red/Green/Blue
A color model for defining and representing colors consisting of three channels. Combining these three
colors in various proportions generates color. On most graphics boards, color information is saved in the Red/
Green/Blue color format. RGB is an additive process, any color can be created using red, green and/or blue
in the correct proportions.
61
ROM
Read Only Memory. Chip memory that cannot be written to, such as the BIOS of a computer or the firmware
of an expansion board.
Rotate
Change the perspective of an image with respect to the original. Rotate will turn the image to one direction or
the other, ¼ turn or even completely upside down.
Saturation
The amount of color or intensity that is in a single hue.
Scanner
Scanners are computer peripherals designed for digitizing images, generally from items that are already
printed in some form. Some advanced scanners are also capable of scanning three-dimensional objects.
To digitize a color image, the scanner measures the color of the original at each pixel location and stores the
information as numerical values representing the amounts of red, green and blue. When digitizing black and
white images (Line Art mode), only a gray value is recorded for each pixel.
The measurements are taken in a grid pattern. How tight the grid pattern is determines the resolution of the
image (dots or pixels per inch). The higher the resolution at which an original is scanned, the more pixels it
will contain in the grid pattern. Since each pixel has information that must be stored, the higher the
resolution, the more storage space required for the image.
There are primarily three types of scanners:
CIS: Contact Image Sensor, translates the image quickly and directly with its built-in sensor.
CCD: Charged Coupled Device, the most common scanning method uses a special light sensitive integrated circuit that is able to capture accurate images quickly.
PMT: PhotoMultiplier Tube, provides the highest quality scans (also, generally the slowest) and is
usually only found in expensive, professional-quality scanners.
The spacing between its light sensing elements determines the fixed optical resolution present in most
scanners. Interpolation increases the optical resolution by interpolating, or filling in image information
derived by mathematical methods.
Scanning
The process of creating a digital image with a scanner. The computer sees any item scanned as a digital
image, no matter if the original is a picture, a document or an object. A scanned image, just as any other
digital image, can be modified in an imaging application. Scanned documents can be converted from a digital
image into editable text (which can be used in a word-processing application) with special software which
includes OCR (optical character recognition).
Scroll
When a window is larger than the available screen display area (such as a large image), you can use the
scrollbars on the right side and/or bottom to move the viewing space.
SECAM
The standard video format of France, Iran, Poland, Russia, and Saudi Arabia.
62
Serial Device
A device that is designed to be connected to the serial port. Examples include external modems, digital
cameras, mice, digital notepads, etc.
Serial Port
Also called a Comport. This connection is often 9-pin or 25-pin and generally a male connector. The signal
from the computer is in a serial stream to the attached device. Generally only one serial device can be
attached to a serial port.
SMTP
Simple Mail Transfer Protocol, a communications protocol that directs email exchanges on TCP/IP networks.
SPP
Standard Parallel Port mode. This is the most basic of parallel port modes and is included on most older
computers. This is also the slowest of all the parallel port modes.
Swap File
The area used by virtual memory when the computer runs out of real memory. Heavy imaging work, such as
scanning high-resolution images, may require a large swap file in addition to large amounts of RAM (real
memory).
TrueColor
Graphics mode with 16.7 million colors (24 or 32 bits per pixel). In this mode, the color information saved in
the display memory is not translated by a look-up table, but passed directly to the D/A converter. This means
that the full color information has to be saved for each pixel.
TWAIN
Technology Without An Interesting Name. TWAIN refers to an industry standard that has been developed for
scanning or other external imaging devices to communicate with the computer. All Info ImageReader
scanners are TWAIN-compliant.
VGA
Abbreviation of IBM Video Graphics Adapter, a display adapter with a standard resolution of 640 x 480 with
16 colors.
Virtual Memory
Space on your hard drive that Windows can use as if it is RAM. Windows will “swap” information into and
out of a swap file to allow you to run more programs or tasks on your computer than you would be able to if
you were limited to the memory in your RAM. However, a large swap file does take up hard drive space that
you may need to store programs or data and using virtual memory is slower than using actual RAM.
VRAM
Video Random Access Memory, a fast type of RAM used as display memory on high-end graphics boards.
World Wide Web
An Internet protocol suite that allows the transmission of images, text, files, and multimedia elements that can
be viewed in real-time with a Web Browser (such as Microsoft InternetExplorer or Netscape Navigator).
YCbCr
A color coordinate system used in the JPEG and MPEG standards. The color information is saved in the
63
YCbCr format: Y contains the luminance (brightness) signal, Cb and Cr contain the chrominance (color)
information. See also YUV and RGB. YCbCr and YUV are linked via the following equations:
Y = 0.3 R + 0.59 G + 0.11 B
Cb = (U/2) + 0.5
Cr = (V/1.6) + 0.5
Zoom
Changing the view of an image without changing its actual size. Zoom is also the magnification factor for the
view.
File Formats
There are many different file formats both for graphics and for text. Each format has its own specific
qualities and can be viewed or edited only with software that supports it. Merely renaming a file and
changing its file extension (the three letters after the dot) won’t enable you to open the file as that type. The
formats included in this section are just a sampling of the many file formats available in different programs;
this is by no means a comprehensive listing.
AVI, Audio Video Interleaved
Full motion video format. File format developed by Microsoft for saving combined compressed video image
and sound information.
BMP, Bitmap
An uncompressed format, the bitmap can take up a large amount of disk space. Windows bitmaps are can be
used as Windows wallpaper if they are of the correct dimensions. Bitmaps can be edited and viewed with the
Windows Paint or Paintbrush application. This format is supported by all imaging software packaged with
your scanner.
CAD, Computer Aided Design
Designing and drawing, for example, machine parts or buildings with the help of computer graphics.
CUR, Cursor file format
Cursors are small image files that serve a specific function. These are the mouse pointers for Windows or
other operating systems. A cursor file from one operating system may not work on another.
DOC, Document format
Several programs use this as their file extension. This does not mean every DOC file is compatible with
every program that uses DOC. Some programs that use DOC include Microsoft Word, PageMaker,
WordPerfect, WordStar, Microsoft WordPad, and many others.
GIF, Graphic Image Format
This compressed format is commonly used to pass images from one person to another across the Internet.
Since the GIF format is not public domain and the owners of the format are beginning to charge royalties for
viewers and editors, it is losing ground as a “standard” format. A GIF can only support a certain range of
shades and so are not available for all images. GIF is available in many graphics programs.
ICO, Icon file format
Icons are small image files that serve a specific function. These images are commonly used to mark files and
64
folders in Windows and other operating systems. An icon file from one operating system may not work on
another.
JPG, JPEG
This compressed format is commonly used to pass images from one person to another across the Internet. All
of the imaging programs packaged with your scanner support this format. JPG is a lossy format, which means
to provide its highest degrees of compression, it removes some of the picture elements. These lost elements
are generally only apparent if the image is later magnified. Some applications allow you to configure the
degree of compression. The more the image is compressed, the more that will be lost from it. A lower
compression will yield a higher quality image (in relation to the original).
MOV, Quick Time video format
This is a full motion video format.
PCD, Kodak Photo CD
This file format was developed by Kodak for digitizing and storing 35mm negatives or slides on CD.
PCX, PC Paintbrush format
An uncompressed format widely available on most PCs and all PCs equipped with Windows. PCX is
generally more limited than BMP with regard to colors and resolution. Since it is an uncompressed format, it
also can use a large amount of space.
RTF, Rich Text Format
This is a basic text format that does include some fonts and some other formatting commands. Many word
processors support RTF and will allow you to migrate one RTF from program to program.
TIF or TIFF, Tagged Imaged File Format
Commonly supported for faxed images, this format can be used for a wide variety of images. Faxed images
are black and white or gray-scale. Some software supports different versions of TIFF, so a TIFF saved in one
program may not appear correctly in another program that supports TIFF.
TGA, Targa
One of the earliest PC graphics formats that was initially designed for a specific piece of hardware, support
for which is now found in modern SVGA adapters. Targa files are rarely compressed. Targa supports image
transparencies and overlays allowing the layering of images that can be seen through the various layers.
TXT, Text
This basic text format is generally available in any word processor program. This format does not allow fonts
or any other formatting commands. ASCII Text is the most basic of all the TXT formats.
WRI, Write
Microsoft Write supports this text format.
65
Info
Limited Warranty
Info warrants this scanner to be free of manufacturing defects, both materials and workmanship, for a period
of one year from the date of original purchase. This warranty applies only to the original purchaser. In the
event of a defect, Info will repair this product free of charge, including parts, labor, and return postage.
This warranty does not cover damage, loss, abuse, misuse, unauthorized repair, shipping damage, natural
phenomena, or effects of use other than intended. Info is not responsible for consequential damages, including
but not limited to, lost profits, lost sales, loss of use, or injury to property.
For scanner service, contact Info Technical Support at (408) 538-2510, and request a Return Merchandise
Authorization (RMA) number. Info Technical Support staff will be the final arbiter in determining if a RMA
is warranted or if any other solution is possible.
Repackage the product in its original packing container (for protection), and return postage prepaid to:
Info Service Center
580 Division Street
Campbell, CA 95008
Include an address, phone number, the RMA number (only as issued by an Info technician), and a description
of the scanner’s defect. Enclose a copy of the original purchase receipt to verify warranty eligibility Write the
RMA number legibly on the outside of the package.
66